Introduction
Have you recently purchased music from iTunes and want to download it onto your computer for offline listening? Look no further, as we will guide you through the simple steps to download your purchased music from iTunes to your computer.
iTunes provides users with a vast library of music, offering a seamless platform to purchase and store your favorite songs. However, sometimes you may prefer to have the songs downloaded onto your computer instead of streaming them online. This way, you can enjoy your music even when you don’t have internet access.
The process of downloading purchased music from iTunes to your computer is relatively easy, regardless of whether you are using a Windows PC or a Mac. You simply need to follow a few steps within the iTunes application, and in no time, your music will be safely stored on your computer, ready to be played whenever you desire.
In this guide, we will walk you through the process step by step, ensuring that you can download your purchased music without any hassle. So, let’s dive in and discover how you can access your iTunes library on your computer and download your favorite tracks.
Step 1: Open iTunes on your computer
To begin the process of downloading your purchased music from iTunes, the first step is to open the iTunes application on your computer. Whether you are using a Windows PC or a Mac, the steps to open iTunes are quite similar.
If you are using a Windows PC, simply click on the “Start” button located in the lower left corner of your screen. Then, search for “iTunes” in the search bar and click on the iTunes application to open it.
For Mac users, you can usually find the iTunes application in the Dock, which is located at the bottom of your screen. Alternatively, you can open the Finder window, locate the Applications folder, and then find and click on the iTunes application to open it.
Once you have successfully opened the iTunes application, you will be greeted with the familiar interface that allows you to access your music library, make purchases, and manage your music collection.
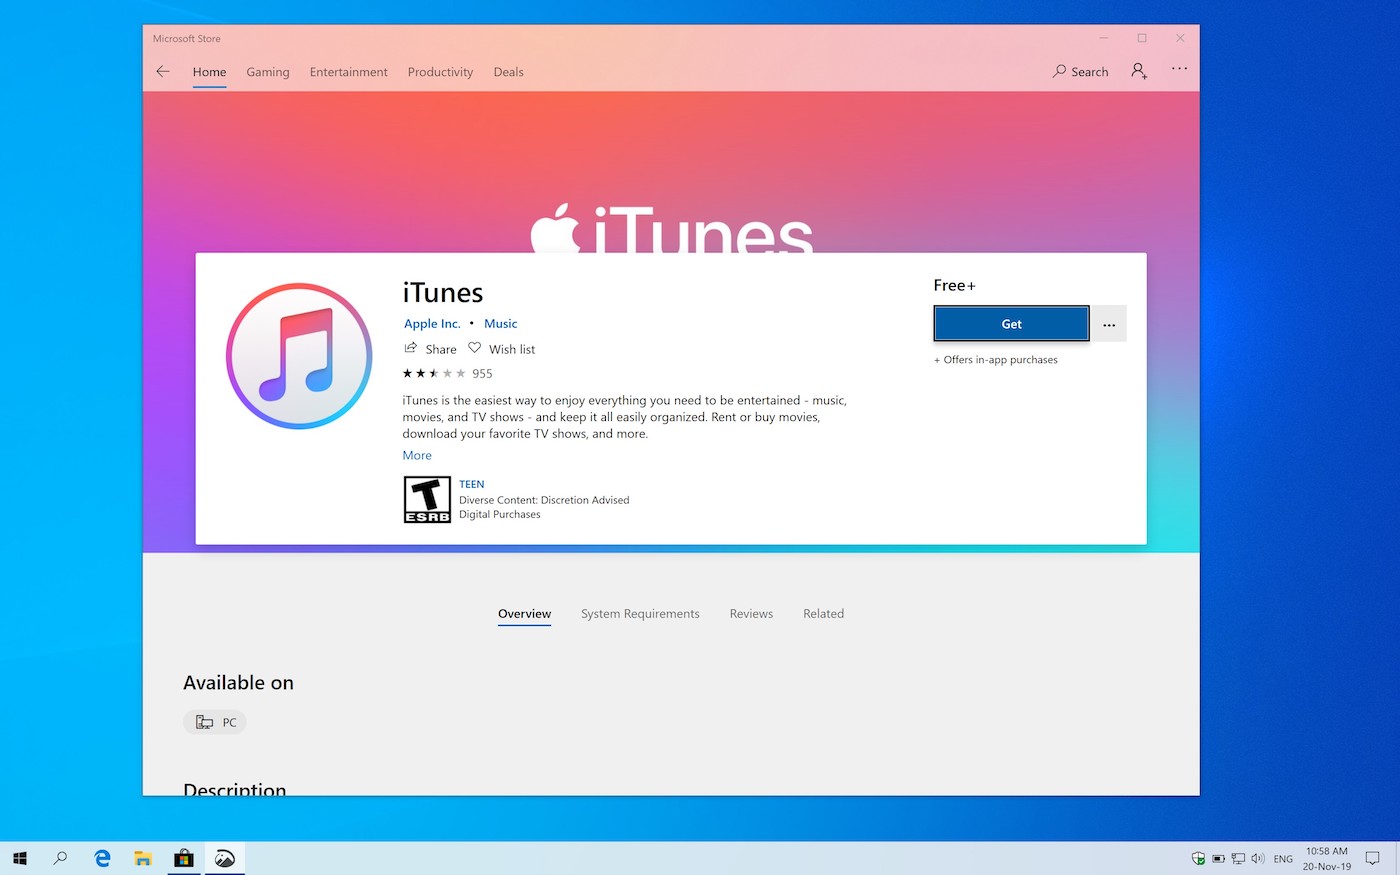
It’s important to note that if you do not have iTunes installed on your computer, you will need to download and install it from the official Apple website before proceeding with the steps mentioned above. This ensures that you have access to all the necessary features and functionalities required to download your purchased music from iTunes.
Now that you have successfully opened the iTunes application on your computer, you are one step closer to accessing your purchased music collection. Let’s move on to the next step and sign in to your iTunes account.
Step 2: Sign in with your Apple ID
Once you have opened the iTunes application on your computer, the next step is to sign in with your Apple ID. Your Apple ID is essential for accessing your purchased music and other content on iTunes. If you don’t have an Apple ID, you will need to create one before proceeding.
To sign in with your Apple ID, locate the “Sign In” option in the top right corner of the iTunes interface. Click on it, and a window will appear asking for your Apple ID and password.
If you have already entered your Apple ID details on your computer, the iTunes application may automatically sign you in. However, if you have not previously signed in or if you are using a different device, you will need to manually enter your Apple ID and password.
Enter your Apple ID and password in the appropriate fields, ensuring that you double-check for any spelling errors or typos. Once you have entered your credentials, click on the “Sign In” button to proceed.
If you have forgotten your Apple ID or password, you can click on the “Forgot Apple ID or password?” link and follow the prompts to recover or reset your login details.
It’s important to note that if you are using a shared computer, it’s recommended to uncheck the “Keep me signed in” option to ensure the privacy and security of your Apple ID.
Once you have successfully signed in with your Apple ID, you will have access to your iTunes account, where you can view and manage your purchased music, as well as explore other features such as playlists, podcasts, and more.
With your Apple ID signed in, you are ready to proceed to the next step and locate your purchased music within your iTunes library. Let’s move on to Step 3.
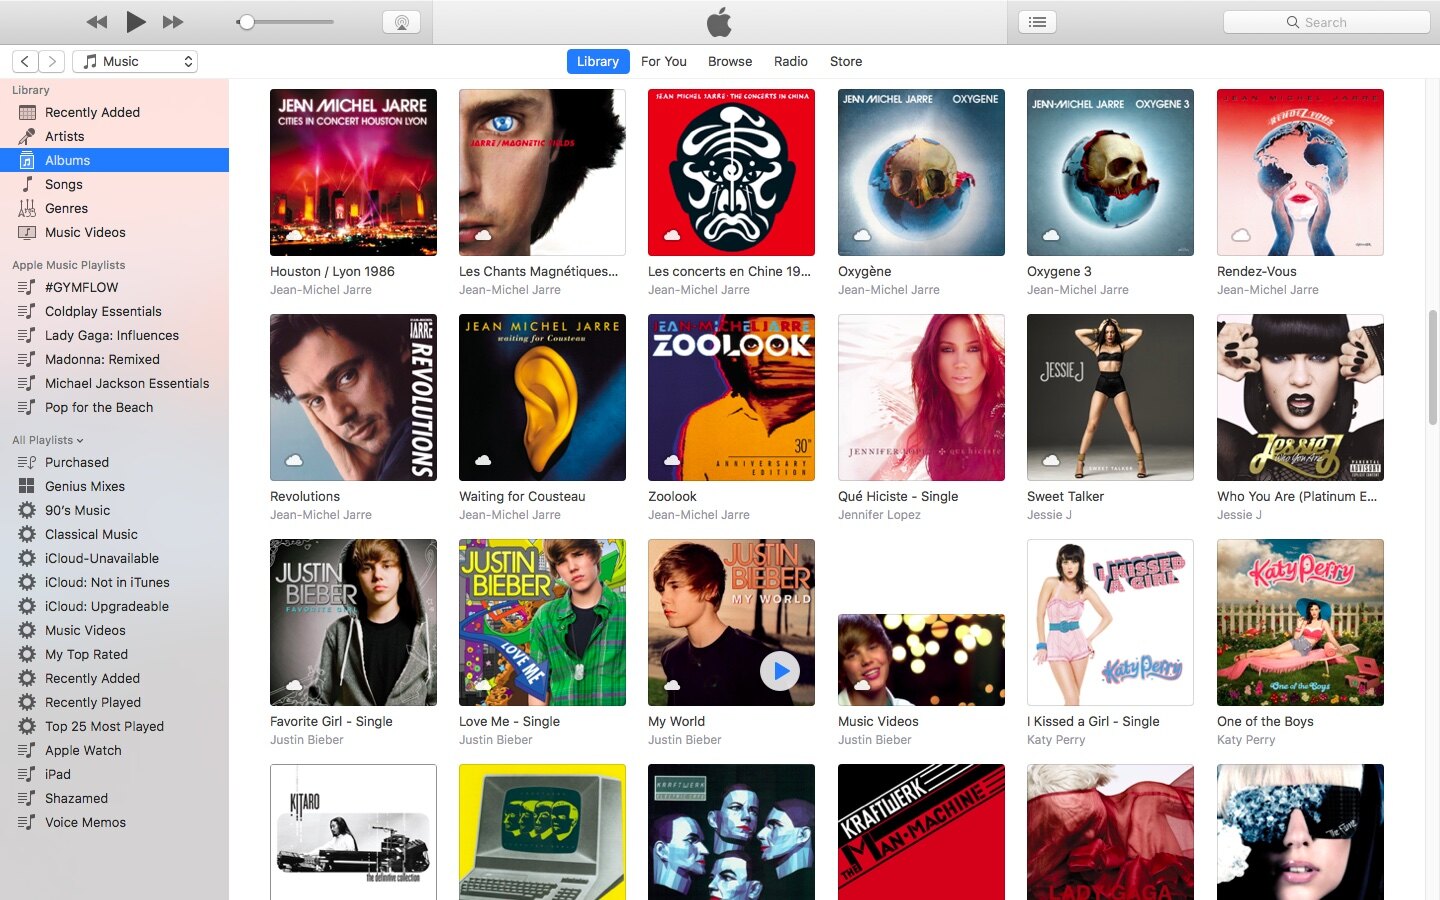
Step 3: Go to your iTunes library
Once you have signed in with your Apple ID, it’s time to navigate to your iTunes library. The iTunes library is where all of your purchased music and other media content is stored.
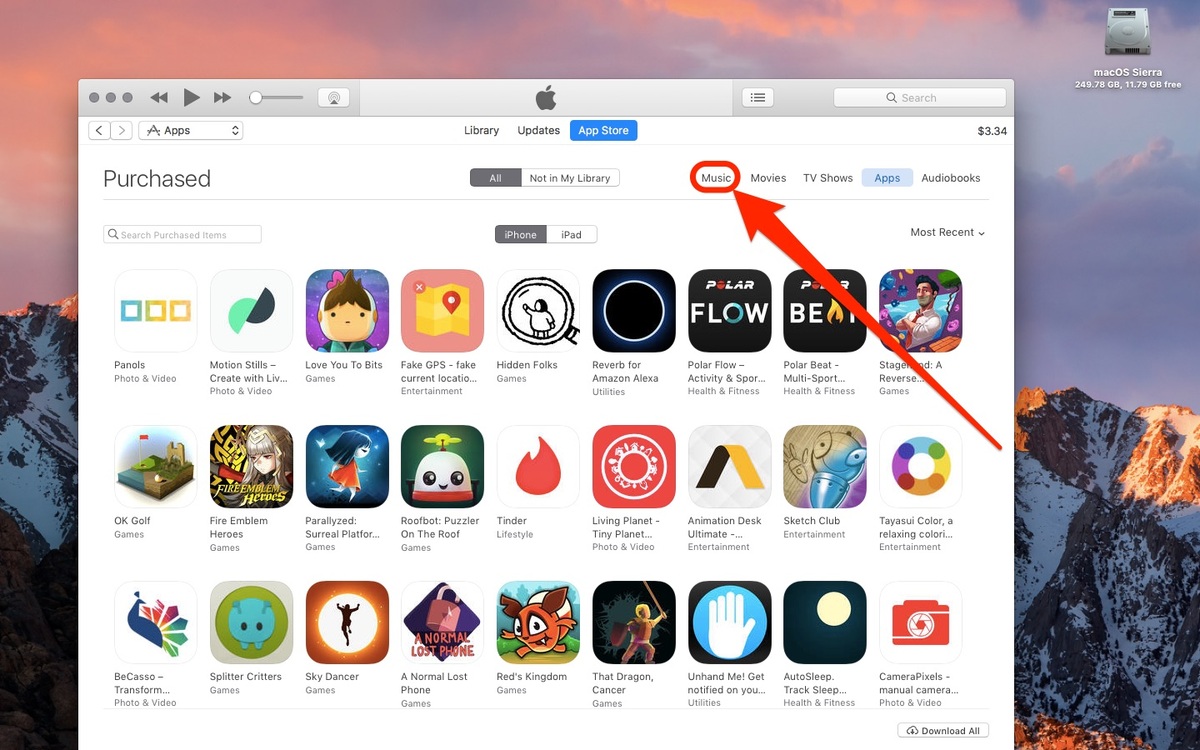
To access your iTunes library, look for the “Library” tab located at the top left corner of the iTunes interface. Click on it, and a menu will appear with different categories, such as Music, Movies, TV Shows, and more.
If you specifically want to access your purchased music, click on the “Music” tab to display all the songs you have bought from iTunes. This will take you to your music library, where you can browse and manage your collection.
Alternatively, you can also access your purchased music by clicking on “Purchased” in the right-hand sidebar of the iTunes interface. This will display a list of all the songs you have purchased, making it easy to find and download them.
Within your iTunes library, you will find various options to sort and organize your music. You can view your songs as a list or as album covers, and you can arrange them by artist, genre, or other criteria.
Additionally, you can create playlists to group your songs based on your preferences or create smart playlists that automatically update based on specific criteria such as recently added or most played songs.
Exploring your iTunes library not only allows you to locate your purchased music but also gives you the opportunity to discover and rediscover songs, albums, and artists that you may have forgotten about.
Now that you are in your iTunes library and ready to find your purchased music, let’s proceed to the next step and learn how to download your music to your computer.
Step 4: Find your purchased music
Now that you have accessed your iTunes library, it’s time to find and locate your purchased music. Whether you have recently made a purchase or have a large collection of previously bought songs, iTunes provides a straightforward method to find your music.
To find your purchased music, you can use the search bar located at the top right corner of the iTunes interface. Simply type in the name of the song, album, or artist you are looking for, and iTunes will display the relevant results.
If you prefer to browse your music collection, you can visually scan through your library by scrolling through the list of songs or albums. You can also sort your music by artist, album, or any other relevant criteria to make it easier to locate specific songs.
Another convenient way to find your purchased music is by using the “Purchased” section within your iTunes library. Click on the “Purchased” tab in the right-hand sidebar, and you will see a list of all the songs and albums you have purchased from iTunes.
Within the “Purchased” section, you can filter your music by selecting the options for “Music,” “TV Shows,” “Movies,” or “Books.” By choosing “Music,” you will be able to view and access your purchased songs.
If you have a large library of purchased music, you may want to further narrow down your search by using the “Sort By” or “Filter” options. You can sort your music by “Recently Added,” “Name,” “Artist,” or other categories, depending on your preference.
Additionally, iTunes allows you to create playlists and organize your music based on various criteria, such as genre or mood. This can be a helpful way to categorize and group your purchased music, making it easier to find specific songs.
Now that you have located your purchased music within your iTunes library, it’s time to move on to the next step and download your music to your computer. Let’s proceed to Step 5.
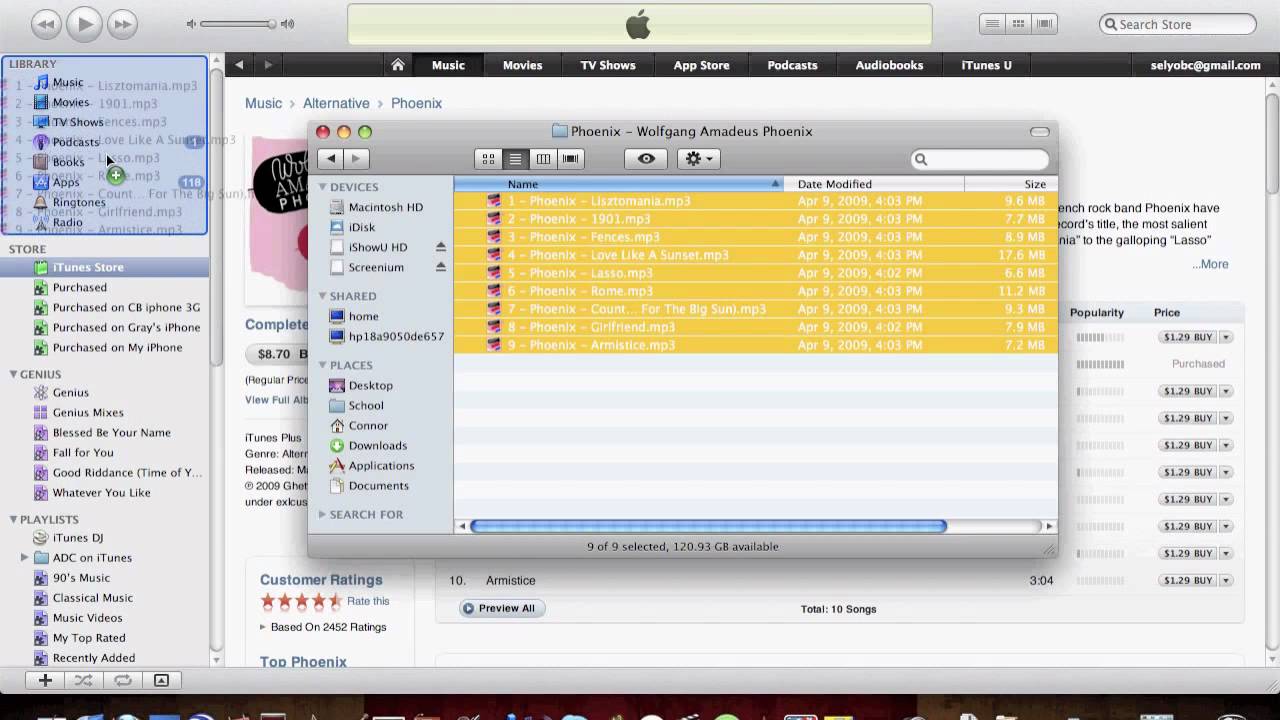
Step 5: Download your purchased music to your computer
Now that you have found your purchased music within your iTunes library, it’s time to download it to your computer. This will allow you to have your music files stored locally, enabling offline playback and giving you more control over your music collection.
To download your purchased music to your computer, follow these steps:
- Select the songs or albums you want to download: To do this, you can either click on the checkboxes next to each song or album, or you can use the keyboard shortcuts Ctrl + click (Windows) or Command + click (Mac) to select multiple items at once.
- Once you have made your selection, right-click on any of the selected songs or albums. A context menu will appear, displaying various options.
- From the context menu, choose the “Download” option. This will initiate the downloading process for the selected songs or albums.
- Depending on the file size and your internet connection speed, the download process may take some time to complete. You will see the progress of the downloads in the iTunes interface, and once the downloads are finished, the songs or albums will be available on your computer.
It’s important to note that the downloaded music files will typically be in the default iTunes format, such as AAC or MP3. If you prefer a different audio format, you can adjust the iTunes settings to convert the files to your desired format during the download process.
Downloading your purchased music to your computer gives you the flexibility to listen to your favorite songs without the need for an internet connection. Whether you’re traveling, in an area with limited connectivity, or simply prefer to have your music files stored locally, downloading your purchased music provides you with easy access to your music library at any time.
Now that you have successfully downloaded your purchased music to your computer, let’s proceed to the final step and learn how to locate the downloaded music files on your computer.
Step 6: Locate the downloaded music files on your computer
After downloading your purchased music from iTunes, you might be wondering where the files are stored on your computer. By default, iTunes saves the downloaded music files in a specific location, but you can also customize the location if desired.
To locate the downloaded music files on your computer, follow these steps:
- Open the iTunes application on your computer and ensure you are in the main library view.
- In the top left corner of the iTunes interface, click on the “Edit” menu. From the dropdown menu, select “Preferences.”
- A new window will appear with various tabs. Click on the “Advanced” tab.
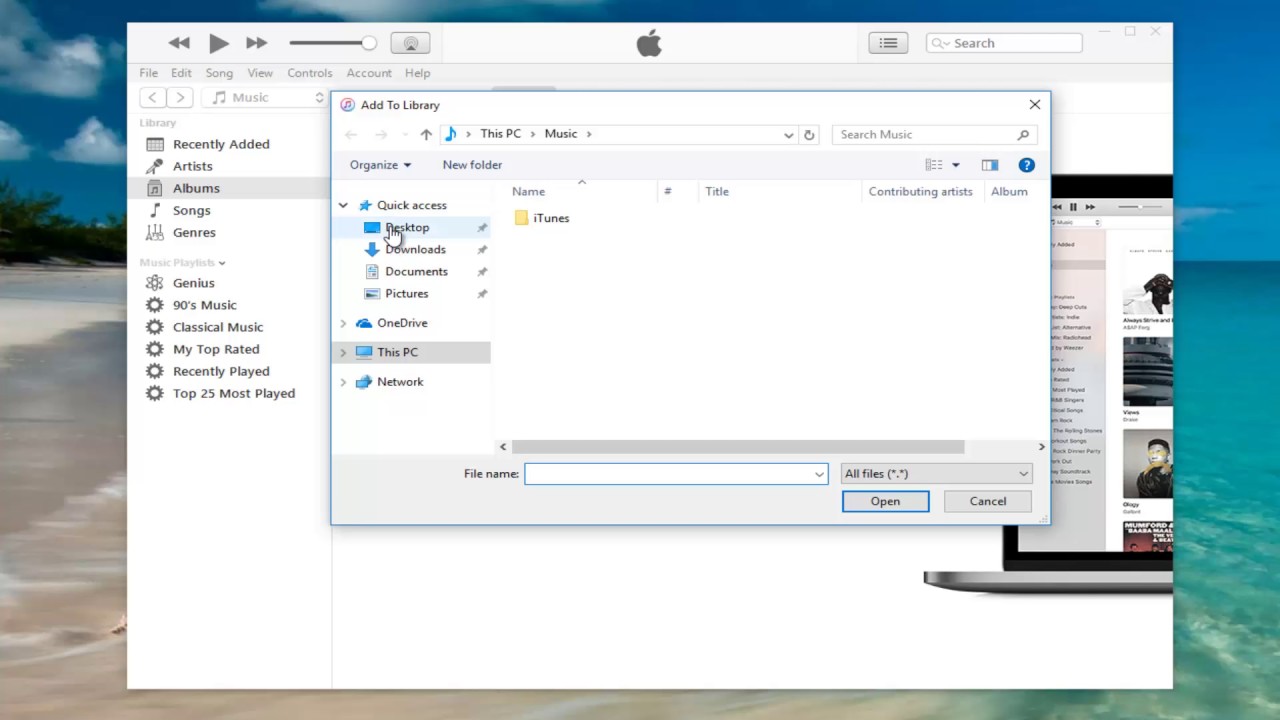
- Within the “Advanced” tab, you will see the “iTunes Media folder location” field. This indicates the default location where the downloaded music files are stored on your computer.
- To open the folder containing the downloaded music files, click on the “Change” button next to the iTunes Media folder location.
- A file explorer window will open, displaying the folder where your music files are saved. From here, you can navigate through the folder and access your downloaded music.
Alternatively, if you prefer to use a different location to store your downloaded music files, you can click on the “Change” button and select a new folder on your computer. This allows you to organize your music files according to your preference and easily locate them in the future.
Within the iTunes Media folder, you will find subfolders categorized by media type, such as “Music,” “Movies,” “TV Shows,” and more. Access the “Music” folder to find your downloaded music files.
It’s worth noting that depending on your iTunes settings, the downloaded music files may be organized within subfolders based on the artist, album, or other criteria. This can make it easier to locate specific songs or albums within your music collection.
Now that you have successfully located the downloaded music files on your computer, you can enjoy listening to your favorite songs offline or transfer them to other devices for playback.
Congratulations! You have now completed all the necessary steps to download and locate your purchased music from iTunes on your computer. Enjoy your music collection!
Conclusion
Downloading your purchased music from iTunes to your computer allows you to have your favorite songs readily available for offline listening. By following the steps outlined in this guide, you can easily access and download your music, giving you more control over your music library.
We started by opening the iTunes application on your computer and signing in with your Apple ID. Then, we explored your iTunes library, where you can find and organize your purchased music. From there, we proceeded to download your music to your computer, ensuring that you can enjoy your songs even without an internet connection.
Finally, we discussed how to locate the downloaded music files on your computer, allowing you to access and manage your music collection at your convenience.
By downloading your purchased music from iTunes, you can create personalized playlists, listen to your favorite tunes while offline, and ensure that your music is easily accessible across different devices.
Now that you have learned the step-by-step process of downloading purchased music from iTunes to your computer, embrace the joy of having your music library at your fingertips, anytime and anywhere.
Feel free to explore more of iTunes’ features and make the most out of your music collection. Whether you’re discovering new artists, creating custom playlists, or simply enjoying your favorite tunes, iTunes offers a seamless platform for music lovers.
So, get ready to dive into your music library and enhance your listening experience with your downloaded music from iTunes on your computer!