Introduction
Welcome to the wonderful world of music downloads on iTunes! Whether you are a music enthusiast looking to expand your collection or a casual listener who wants to have your favorite tunes at your fingertips, iTunes offers a vast library of songs from various genres, artists, and even exclusive releases. With iTunes, you can easily download and enjoy your favorite music on your computer, iPhone, iPad, or iPod.
Before we dive into the step-by-step guide on how to download music from iTunes, let’s take a moment to understand what iTunes is. iTunes is a media player, library, and online store developed by Apple Inc. It acts as the central hub for managing and organizing your music, movies, TV shows, podcasts, and more. With iTunes, you have access to a wide range of content, making it a one-stop destination for all your entertainment needs.
Downloading music from iTunes provides several benefits. First and foremost, you have the ability to legally purchase and support your favorite artists. By buying music on iTunes, you are directly contributing to the success and livelihood of musicians, enabling them to continue creating the music you love. Additionally, iTunes offers high-quality audio files, ensuring that you are getting the best possible sound experience.
Moreover, downloading music from iTunes allows you to build your personal music library. You can create playlists, organize your songs by genre, artist, or mood, and customize your listening experience. Plus, with iCloud synchronization, you can access your music library across multiple devices, ensuring that your favorite tunes are always within reach.
In this comprehensive guide, we will walk you through the process of downloading music from iTunes. Regardless of whether you are a beginner or a seasoned user, this step-by-step tutorial will help you navigate through the iTunes interface and make the most of this powerful music platform.
So, if you are ready to embark on a musical journey, let’s get started with the first step: installing iTunes!
Step 1: Install iTunes
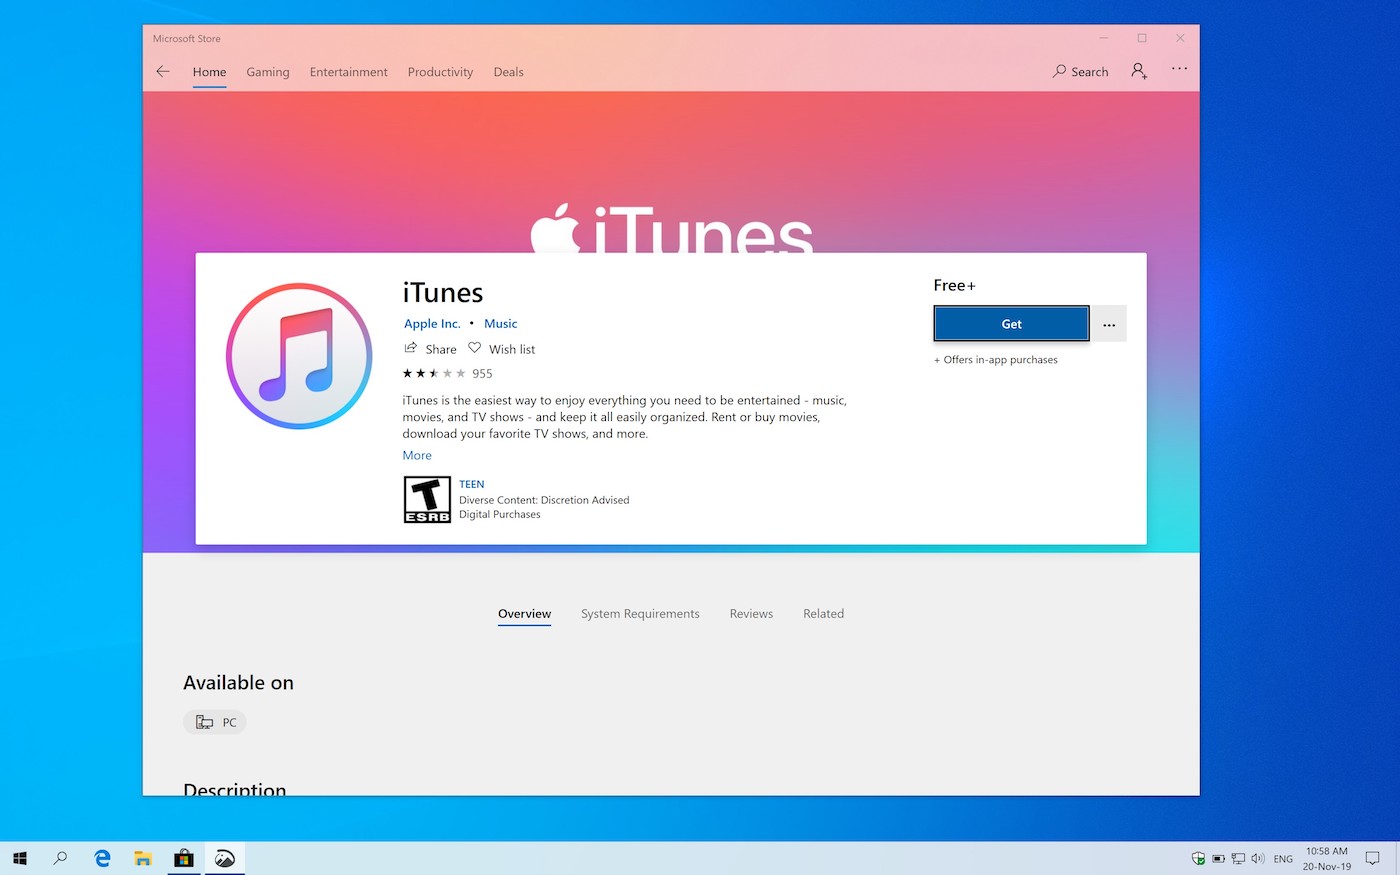
The first step to downloading music from iTunes is to install the application on your computer. iTunes is available for both Windows and Mac operating systems and can be downloaded for free from the Apple website. Follow these easy steps to get started:
- Open your web browser and visit the Apple website.
- Navigate to the iTunes download page.
- Click on the “Download” button to start downloading the iTunes installer.
- Once the download is complete, locate the installer file on your computer.
- Double-click on the installer file to initiate the installation process.
- Follow the on-screen prompts and instructions to complete the installation of iTunes.
During the installation process, you may be prompted to agree to the terms and conditions and choose the installation location. Make sure to read through the license agreement and select the appropriate options based on your preferences.
After the installation is complete, you will find the iTunes application in your programs or applications folder. Double-click on the iTunes icon to launch the program.
Once iTunes is up and running, you are ready to move on to the next step: creating an Apple ID.
Note: If you already have iTunes installed on your computer, make sure it is updated to the latest version. Updating iTunes ensures that you have access to the latest features and improvements.
Now that you have successfully installed iTunes, let’s proceed to the next step and create an Apple ID, which is required to access all the features and content on iTunes.
Step 2: Create an Apple ID
To fully access all the features of iTunes, including the ability to purchase and download music, you need to create an Apple ID. An Apple ID serves as your unique identifier and allows you to make purchases, sync your devices, and access various Apple services. Here’s how you can create an Apple ID:
- Open iTunes on your computer.
- In the iTunes menu, locate and click on “Account” or “Sign In”.
- In the pop-up window, click on the “Create New Apple ID” option.
- Read through the Terms and Conditions and click on “Agree” to proceed.
- Fill in your email address, password, security questions, and birthday on the provided form.
- Choose a suitable security question and provide an answer. This will help you recover your account in case you forget your password.
- Enter your billing information, including your name, address, and payment method. If you prefer not to provide payment details at this stage, you can select the “None” option.
- Complete the verification process by providing a verification code sent to your email address.
- Once you have filled in all the required information, click on “Continue” to create your Apple ID.
After creating your Apple ID, you can now sign in to iTunes using your newly created credentials. This will give you access to the full range of features and content available on iTunes.
Remember to keep your Apple ID and password secure and avoid sharing it with others. Your Apple ID is linked to your personal information and payment details, so it’s important to protect it from unauthorized access.
With your Apple ID in hand, you are now ready to explore the vast world of music available on iTunes. In the next step, we will guide you through the process of signing in to iTunes and discovering its wide range of music options.
Step 3: Sign in to iTunes
Now that you have created your Apple ID, it’s time to sign in to iTunes and start exploring the vast music library. Signing in to iTunes allows you to access your personalized content, make purchases, and enjoy a seamless music experience. Here’s how you can sign in to iTunes:
- Open the iTunes application on your computer.
- Click on the “Account” or “Sign In” option in the top menu bar.
- In the pop-up window, enter your Apple ID and password that you created in the previous step.
- Once you have entered your credentials, click on the “Sign In” button.
If you have successfully signed in, your Apple ID will be displayed on the top-right corner of the iTunes window. This indicates that you are now logged in and ready to explore the vast collection of music available on iTunes.
If you are using iTunes for the first time on your computer, you may be prompted to authorize the computer. Authorizing your computer allows you to play the purchased content on that specific device. To authorize your computer, follow these steps:
- Click on “Account” in the top menu bar.
- Select “Authorization” and then click on “Authorize This Computer”.
- Enter your Apple ID and password to complete the authorization process.
Now that you are signed in and your computer is authorized, you can take advantage of all the features and benefits iTunes has to offer. You are ready to dive into the world of music and start downloading your favorite tracks.
In the next step, we will guide you through the iTunes Store and show you how to explore the music options available.
Step 4: Explore the iTunes Store
Now that you are signed in to iTunes, it’s time to explore the iTunes Store. The iTunes Store is your gateway to a vast collection of music from various genres, artists, and albums. It’s a virtual marketplace where you can browse, discover, and purchase your favorite tracks. Here’s how you can explore the iTunes Store:
- In the iTunes application, click on the “iTunes Store” tab located at the top of the window.
- You will be taken to the iTunes Store homepage, where you can find featured music, new releases, top charts, and more.
- Navigate through the various sections of the iTunes Store, such as “Music”, “Genres”, “Top Charts”, and “New Music”.
- Use the search bar located at the top-right corner of the window to search for specific songs, albums, or artists.
- Apply filters and sorting options to refine your search results and find exactly what you’re looking for.
- Click on an album or song to view more details, including tracklist, artist information, and user ratings and reviews.
- Listen to song previews by clicking on the play button next to each track.
- Browse through recommended playlists, curated by iTunes editors, to discover new music and expand your horizons.
- Click on the “More” button (…) next to an album or song to access additional options, such as adding it to your wishlist or sharing it on social media.
Exploring the iTunes Store allows you to discover new artists, explore different genres, and stay updated on the latest releases. Take your time to browse through the vast collection of music, listen to song previews, and read user reviews to make informed purchasing decisions.
In the next step, we will guide you through the process of choosing music to download from the iTunes Store.
Step 5: Choose Music to Download
Now that you have explored the iTunes Store and found an album or song that catches your interest, it’s time to choose the music you want to download. With a wide variety of artists and genres available, you have the freedom to curate your own personalized collection. Here’s how you can choose music to download:
- Search for the specific album or song you want to download using the search bar or browse through the store’s different sections.
- Click on the album or song to view more details and check if it meets your preferences.
- Read through user reviews and ratings to get an idea of the quality and popularity of the music.
- Listen to song previews to make sure you enjoy the tracks before purchasing.
- Consider exploring related albums or recommendations based on your selected song or artist to discover new music.
- Check if the album or song is available for purchase as a whole or if you can buy individual songs.
- Take note of the album or song’s price, as well as any special offers or discounts that may be available.
- Consider adding the music to your wishlist if you want to keep track of it for future reference.
- Once you have made your decision, click on the “Buy” or “Download” button to initiate the purchase and download process.
By carefully selecting the music you want to download, you can create a collection that reflects your musical taste and provides you with hours of enjoyment. Take your time to explore different genres, listen to previews, and read reviews to ensure you are making the right choices.
In the next step, we will guide you through the process of previewing and selecting songs before making a purchase.
Step 6: Preview and Select Songs
Before making a purchase on iTunes, it’s essential to preview and select the songs you want to download. Previewing allows you to listen to a snippet of a song to ensure it meets your preferences and quality standards. Here’s how you can preview and select songs:
- In the iTunes Store, navigate to the album or song you are interested in.
- Click on the album cover or song title to access the detailed information page.
- On the song list, you will see a play button next to each track. Click on the play button to initiate the preview.
- The preview will play a short segment of the song, usually around 30 seconds, giving you a sense of the melody, vocals, and overall vibe.
- While the preview is playing, take note of your impression and whether you enjoy the song.
- If you like the song and want to include it in your Library, click on the “Buy” or “Download” button next to the song.
- If you don’t enjoy the song or it doesn’t meet your expectations, you can move on to the next track or explore other options.
- Repeat the process for each song you want to preview and ultimately select for purchase.
By previewing the songs, you can avoid any potential disappointment or regret after making a purchase. It allows you to assess the quality, style, and appeal of the music and ensure it aligns with your musical taste.
Don’t rush the previewing process. Take your time to listen to each segment, paying attention to musical elements like the melody, lyrics, and instrumentation. This way, you can make an informed decision and select the songs that resonate with you.
Once you have previewed and selected the songs you want to download, it’s time to move on to the next step: purchasing the music on iTunes.
Step 7: Purchase Music
Once you have previewed and made your final selection of songs to download from iTunes, the next step is to purchase the music. iTunes offers a secure and convenient platform for purchasing your favorite tracks, albums, and even music videos. Here’s how you can purchase music on iTunes:
- In the iTunes Store, navigate to the album or song you want to purchase.
- Make sure you are signed in to iTunes with your Apple ID.
- Click on the “Buy” or “Download” button next to the song or album you want to purchase.
- You may be prompted to enter your Apple ID password to confirm your purchase.
- If you have a gift card or promotional code, you can enter the code during the checkout process to apply the discount.
- Choose the payment method you want to use for the purchase. You can use a credit/debit card or the balance in your Apple ID account.
- Review your order summary, including the total price and the items you are purchasing, and proceed to checkout.
- Once the payment is processed, you will receive a confirmation that your purchase is successful.
- The purchased music will automatically begin downloading to your iTunes library.
It’s important to note that when purchasing music on iTunes, you are supporting the artists and the music industry. Your purchase provides vital revenue to musicians and labels, allowing them to continue creating and producing the music you love.
Take your time to review your order before finalizing the purchase to ensure accuracy. Also, make sure you have sufficient funds in your payment method or Apple ID account to complete the transaction.
Once your music purchase is complete, you’re almost ready to enjoy your newly acquired songs. The next step will guide you through downloading the music to your iTunes library.
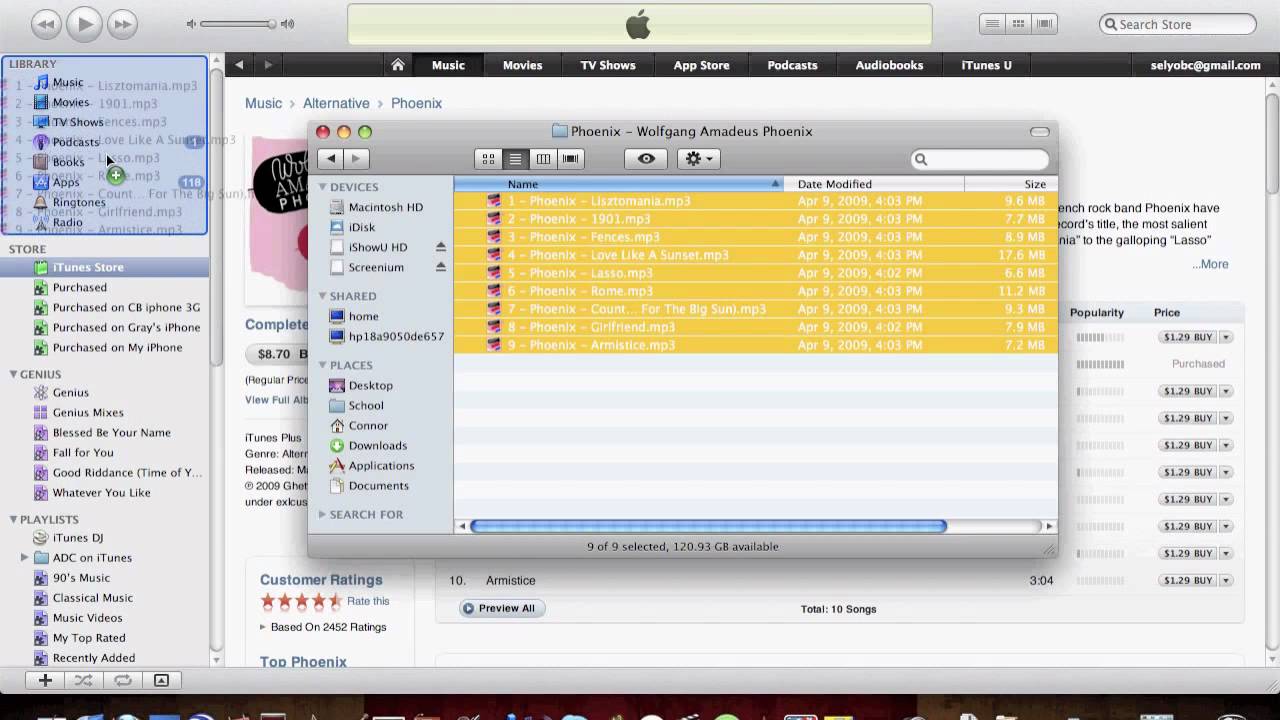
Step 8: Download Music to iTunes Library
After purchasing music on iTunes, the next step is to download it to your iTunes library. The iTunes library is where all your purchased and downloaded music is stored for easy access across your devices. Follow these steps to download music to your iTunes library:
- In your iTunes application, click on the “Library” tab located at the top of the window.
- From the drop-down menu, select “Music” to view your music library.
- On the left-hand sidebar, you will see the “Store” section. Click on it to access your purchased music.
- In the “Store” section, you will find all your purchased content. Locate the album or song you want to download and click on the cloud icon next to it.
- The download process will begin, and a progress bar will appear to track the downloading status. Wait for the download to complete.
- Once the download is finished, the album or song will appear in your music library.
It’s worth noting that if you have enabled automatic downloads in your iTunes settings, your purchased music will be automatically downloaded to your library without the need for manual intervention.
If you have multiple devices connected to the same Apple ID, the purchased music will be available for download on those devices as well. Simply sign in to iTunes on the respective devices and follow the same steps to download the music to their libraries.
Downloading your purchased music to your iTunes library ensures that you can access it offline and enjoy it whenever and wherever you want.
Now that you have successfully downloaded your music to your iTunes library, the next step will guide you on how to access and listen to your downloaded music.
Step 9: Access Downloaded Music
Now that you have downloaded your favorite music to your iTunes library, it’s time to access and enjoy your collection. Whether you want to listen on your computer or transfer the songs to your mobile device, accessing your downloaded music is a breeze. Here’s how you can access your downloaded music:
On Your Computer:
- Open iTunes on your computer.
- Click on the “Library” tab located at the top of the window.
- From the drop-down menu, select “Music” to view your music library.
- You will see a list of all the songs and albums in your library.
- Scroll through the library to find the downloaded music you want to access.
- Double-click on a song to start playing it or create playlists to organize your music.
On Your Mobile Device:
- If you want to access your downloaded music on your iPhone, iPad, or iPod, make sure you have the iTunes Store app installed.
- Open the iTunes Store app on your device.
- Tap on the “More” icon (three dots) located at the bottom of the screen.
- From the menu, select “Purchased” to view your purchased music.
- Tap on “Music” to access your downloaded songs.
- Scroll through the list to locate the music you want to listen to.
- Tap on a song to start playing it or create playlists to personalize your music experience.
With your downloaded music easily accessible, you can now enjoy your favorite songs anytime, anywhere. Whether you’re at home, on the go, or traveling, your music collection is just a few taps or clicks away.
Congratulations! You have successfully completed all the steps to download and access music from iTunes. Now it’s time to sit back, relax, and immerse yourself in the wonderful world of music.
Conclusion
Congratulations! You have reached the end of our comprehensive guide on how to download music from iTunes. You have learned the step-by-step process, from installing iTunes to accessing and enjoying your downloaded music. By following these steps, you can build a diverse music library and have the freedom to listen to your favorite songs whenever and wherever you like.
iTunes offers a vast collection of music, allowing you to explore different genres, discover new artists, and support your favorite musicians. It’s a platform that not only provides entertainment but also contributes to the thriving music industry.
Throughout this guide, we have walked you through essential steps such as creating an Apple ID, signing in to iTunes, exploring the iTunes Store, choosing and previewing music, making purchases, and downloading the music to your iTunes library. We hope that this guide has been informative and has made the process of downloading music from iTunes seamless for you.
Remember to keep your iTunes application updated to access the latest features and enhancements. Additionally, make sure to protect your Apple ID and password, as they grant access to your purchased content and personal information.
Now that you have the knowledge and tools to download music from iTunes, it’s time to embark on a musical journey, explore new artists, rediscover old favorites, and curate a collection that reflects your unique musical taste.
Thank you for choosing iTunes as your go-to platform for music downloads. We hope you enjoy your music library and have countless hours of listening pleasure!