Introduction
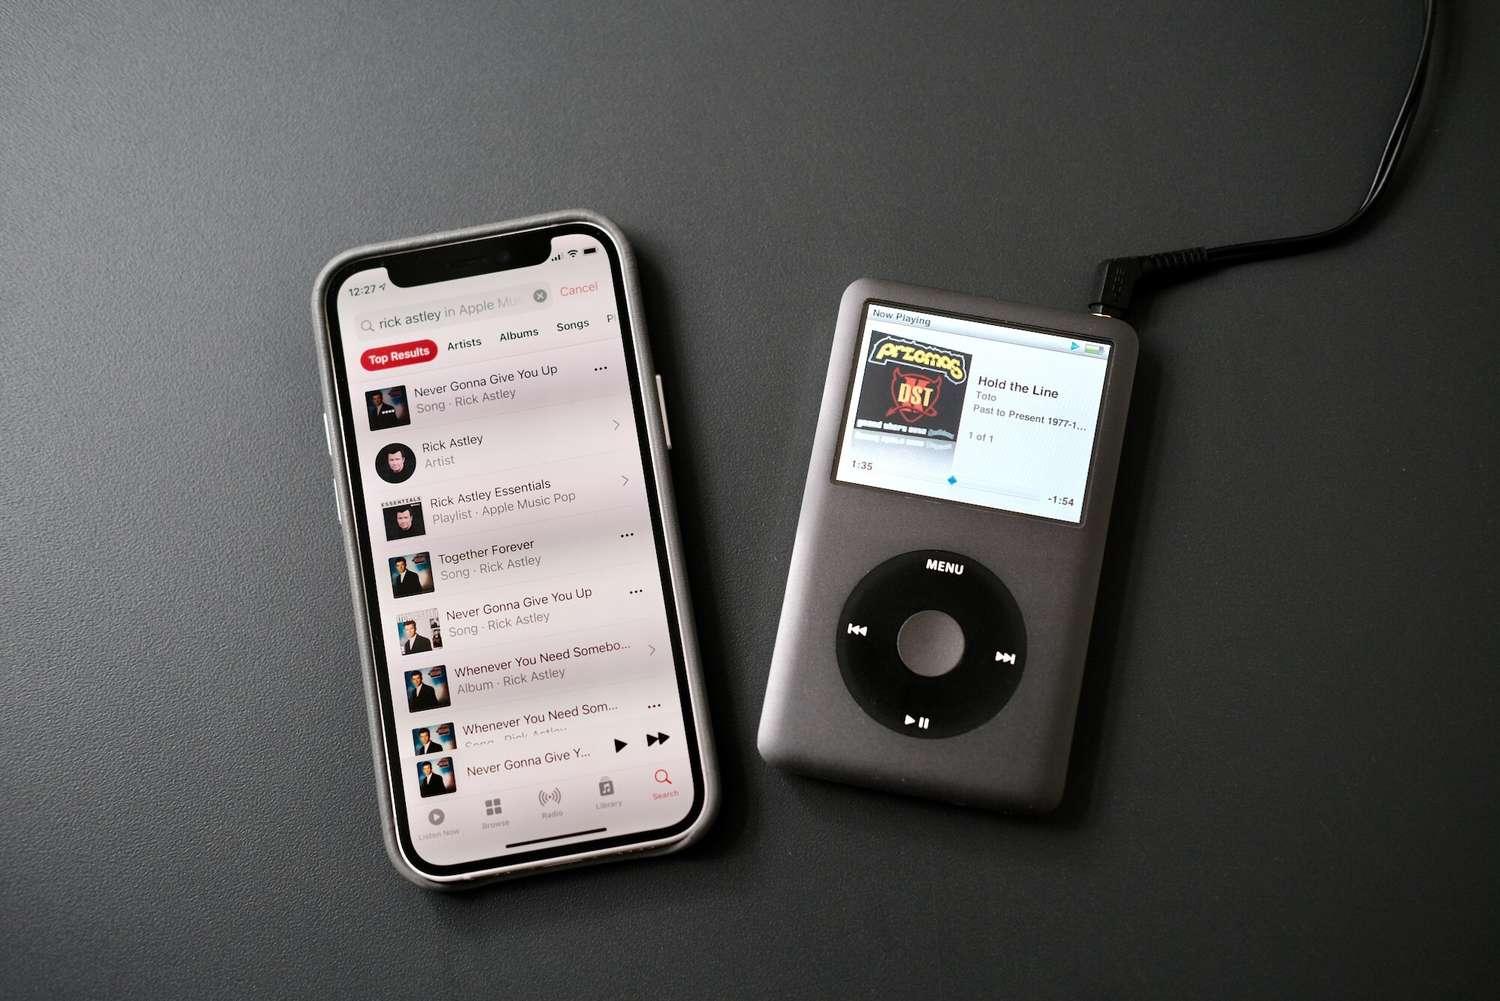
Welcome to the world of portable music! If you’re the proud owner of an iPod Classic, you may be wondering how to download your favorite tunes onto this iconic device. With its sleek design, ample storage space, and user-friendly interface, the iPod Classic remains a popular choice for music lovers. Whether you’re a long-time iPod user or a newbie, this guide will walk you through the steps of downloading music to your iPod Classic.
Gone are the days of carrying around stacks of CDs or cassette tapes. With digital music and portable devices like the iPod Classic, you can have your entire music library at your fingertips. Whether you want to listen to your favorite artists during your daily commute or create the perfect playlist for a road trip, the iPod Classic offers a convenient way to enjoy your music.
To download music to your iPod Classic, you’ll need to have a few things in place. First and foremost, you’ll need a computer with iTunes installed. iTunes is a free software developed by Apple that allows you to manage and sync your music collection. You’ll also need a USB cable to connect your iPod Classic to your computer. This cable typically comes included with your iPod Classic, but if you don’t have one, you can easily purchase it separately.
In the following steps, we’ll guide you through the process of connecting your iPod Classic to your computer, adding music to your iTunes library, creating a playlist, syncing your iPod Classic, and safely ejecting it from your computer. So, without further ado, let’s get started on your musical journey with your iPod Classic!
Required Software and Hardware
Before you can begin downloading music to your iPod Classic, there are a few essential software and hardware components you’ll need to have in place. Let’s take a closer look at what you’ll need:
-
A Computer:
To download music onto your iPod Classic, you’ll need access to a computer. This will serve as the hub for managing your music library and syncing it with your iPod Classic. Ensure that your computer meets the minimum system requirements for the version of iTunes you plan to use.
-
iTunes Software:
iTunes is a powerful and user-friendly software developed by Apple that allows you to manage your music collection, create playlists, and sync your iPod Classic. You can download iTunes for free from the Apple website or through the Microsoft Store for Windows users.
-
iPod Classic:
Of course, you’ll need the star of the show – an iPod Classic. This iconic portable music player offers generous storage capacity and a smooth, intuitive interface, making it a favorite among music enthusiasts. Ensure that your iPod Classic is fully functioning and has enough free storage space to accommodate the music you plan to download.
-
USB Cable:
To connect your iPod Classic to your computer, you’ll need a USB cable. This cable usually comes included with your iPod Classic. If you don’t have one or need a replacement, you can easily find compatible cables online or at electronics stores.
Now that you have all the necessary software and hardware, you’re ready to dive into the exciting world of music on your iPod Classic. In the next sections, we’ll guide you through the step-by-step process of connecting your iPod Classic to your computer, adding music to your iTunes library, creating a playlist, syncing your iPod Classic, and safely ejecting it. So, let’s get started on unleashing the full potential of your iPod Classic!
Step 1: Connect Your iPod Classic to Your Computer
Before you can start downloading music to your iPod Classic, you need to establish a connection between your iPod and your computer. Follow these simple steps to connect your iPod Classic:
-
Check the USB Cable:
Ensure that you have a functioning USB cable that is compatible with your iPod Classic. If you are using the original cable that came with your iPod, it should work seamlessly.
-
Plug in the USB Cable:
Connect one end of the USB cable to the charging port on your iPod Classic. The other end of the cable should be plugged into an available USB port on your computer. Make sure the connection is secure.
-
Turn on Your iPod Classic:
Once connected, turn on your iPod Classic by pressing the power button. You should see the Apple logo appear on the screen, indicating that the device is powering up.
-
Computer Recognition:
After a few seconds, your computer should recognize the iPod Classic and a prompt may appear on your screen. Follow any on-screen instructions, if necessary, to proceed.
Once your iPod Classic is successfully connected to your computer, you’re ready to move on to the next step of the music download process. Keep in mind that your iPod Classic will also start charging during this connectivity, ensuring that your device is ready for hours of music playback.
It’s worth mentioning that if you encounter any issues while connecting your iPod Classic to your computer, double-check the USB connection and the cable itself. Sometimes a loose or faulty connection can impede the establishment of the connection. If the problem persists, consider trying a different USB port on your computer or using a different USB cable to rule out any hardware issues.
Now that your iPod Classic is successfully connected to your computer, let’s move on to the next step of the process – opening and setting up iTunes.
Step 2: Open iTunes
Now that your iPod Classic is connected to your computer, it’s time to open iTunes, the software that will serve as your music library and syncing platform. Here’s how to open iTunes:
-
Launch iTunes:
On your computer, locate the iTunes icon either on your desktop or in the Start menu. Double-click the icon to launch the iTunes application. If you don’t have iTunes installed on your computer, you can download it for free from the Apple website or the Microsoft Store.
-
Wait for iTunes to Load:
After launching iTunes, wait a few seconds for the application to load. Depending on your computer’s speed and the size of your iTunes library, this process may take a moment.
-
Confirm iPod Classic Connection:
Once iTunes has loaded, look for the iPod Classic icon in the top left corner of the iTunes window. This icon indicates that your iPod Classic is successfully connected and recognized by iTunes. If you don’t see the iPod Classic icon, double-check the USB connection and ensure that your iPod Classic is turned on and unlocked.
Congratulations! You have successfully opened iTunes and established a connection between your iPod Classic and your computer. Now, it’s time to dive into setting up your iTunes library and adding music to it. In the next step, we will guide you through the process of adding your favorite songs to your iTunes library, so you can start building your ultimate music collection on your iPod Classic.
As you explore iTunes, you’ll also discover additional features and settings that can enhance your music listening experience. Take some time to familiarize yourself with the various menus and options available in iTunes, enabling you to personalize your library and playback preferences to suit your preferences.
Stay tuned for Step 3, where we will guide you through adding music to your iTunes library.
Step 3: Add Music to Your iTunes Library
With iTunes open and your iPod Classic connected, it’s time to start adding music to your iTunes library. This process enables you to organize your music and prepare it for syncing with your iPod Classic. Follow these steps to add music to your iTunes library:
-
Import Music Files:
To add music to your iTunes library, you have a few options. You can import music files that are already stored on your computer, or you can purchase and download music directly from the iTunes Store. To import music files from your computer, click on the “File” menu in iTunes and select “Add File to Library” or “Add Folder to Library.” Browse for the music files or folders you want to import and click “Open” to begin the import process. iTunes will automatically sort and organize the music based on the artist, album, and genre information included in the file’s metadata.
-
Purchase and Download from iTunes Store:
If you’re looking to add new music to your iTunes library, you can browse the vast collection available on the iTunes Store. To access the store, click on the “iTunes Store” tab in the top-right corner of the iTunes window. From there, you can search for specific songs, albums, or artists. Once you find the music you want to purchase, click on the “Buy” button next to the track or album. The downloaded music will automatically be added to your iTunes library.
-
Import CDs:
If you have a CD collection that you want to transfer to your iTunes library, you can easily import the tracks from your CDs. Insert the CD into your computer’s CD/DVD drive, and iTunes will automatically recognize it and display the track list. Click on the “Import CD” button in the top-right corner of the iTunes window to start importing the CD tracks into your library. Once the import is complete, the tracks will be available in your iTunes library.
Adding music to your iTunes library allows you to have all your favorite songs organized and easily accessible. Take some time to explore the various sorting and organizing options in iTunes, such as creating playlists, adding album artwork, and editing song information. These features will help you create a customized and personalized music library that suits your unique taste.
Once you have added music to your iTunes library, you are one step closer to enjoying it on your iPod Classic. In the next step, we will guide you through creating a playlist, which will allow you to curate a selection of songs that you can sync to your iPod Classic for on-the-go listening pleasure.
Step 4: Create a Playlist for Your iPod Classic
Now that you have added music to your iTunes library, it’s time to create a playlist specifically for your iPod Classic. A playlist allows you to curate a selection of songs that you can sync to your iPod Classic for easy access and enjoyment. Follow these steps to create a playlist in iTunes:
-
Click on the “Playlist” Tab:
In the top-left corner of the iTunes window, click on the “Music” dropdown menu and select “Playlists.” This will open the playlists section in your iTunes library, where you can view and manage your existing playlists.
-
Create a New Playlist:
To create a new playlist, click on the “+” button at the bottom-left corner of the iTunes window. A new playlist will appear in the sidebar with a default name, such as “Untitled Playlist.”
-
Name Your Playlist:
Right-click on the playlist’s name and select “Rename” from the dropdown menu. Enter a descriptive name for your playlist, such as “Workout Jams” or “Road Trip Vibes.”
-
Add Songs to Your Playlist:
To add songs to your newly created playlist, simply drag and drop them from your iTunes library into the playlist window. You can also right-click on a song and select “Add to Playlist” to choose the specific playlist you want to add it to. Continue adding songs until your playlist is complete.
Creating a playlist allows you to organize your music according to your preferences and specific occasions. You can create playlists for different moods, genres, or activities, making it easier to find the perfect soundtrack for any moment.
Aside from manually adding songs to your playlist, iTunes also offers automated playlist features. You can create a smart playlist that automatically includes songs based on specific criteria, such as the genre, artist, or mood. This feature is especially useful if you have a large music library and want to create dynamic playlists that update automatically.
Now that you have created a playlist suitable for your iPod Classic, it’s time to move on to the next step: syncing your iPod Classic with iTunes. By syncing your device, you will transfer the selected playlist and any other chosen content to your iPod Classic, ensuring that you can enjoy your favorite tunes wherever you go.
Step 5: Sync Your iPod Classic with iTunes
After creating your playlist and adding the desired songs, it’s time to sync your iPod Classic with iTunes. Syncing allows you to transfer the selected playlist and any other chosen content from your iTunes library to your iPod Classic. Follow these steps to sync your iPod Classic with iTunes:
-
Select Your iPod Classic:
In the top-left corner of the iTunes window, click on the iPod Classic icon to access the device settings.
-
Choose Sync Settings:
On the left sidebar, you will find various settings options for your iPod Classic. Choose the “Music” tab to access the music sync options.
-
Select Your Playlist:
Under the “Sync Music” option, check the box next to “Selected playlists, artists, albums, and genres.” Then, check the box next to your chosen playlist to include it in the syncing process. You can also choose to sync your entire music library if you prefer.
-
Apply Sync Settings:
Once you have selected your sync options, click on the “Apply” or “Sync” button in the bottom-right corner of the iTunes window. This will initiate the syncing process and transfer the selected music to your iPod Classic.
-
Wait for Sync to Complete:
During the syncing process, a progress bar will appear at the top of the iTunes window, indicating the status of the sync. It may take a few minutes for all the selected music to transfer to your iPod Classic, depending on the size of your playlist and music library.
It’s important to note that each time you sync your iPod Classic with iTunes, the content on your device will be updated to match the selected sync options. This means that any new songs added to your iTunes library or changes made to your chosen playlist will be reflected on your iPod Classic during the syncing process.
While syncing your iPod Classic, ensure that it remains connected to your computer via the USB cable. Also, refrain from disconnecting or interrupting the sync process to avoid potential data loss or errors.
Once the sync is complete, you can disconnect your iPod Classic from your computer and enjoy your music on the go. Your chosen playlist will be readily available on your iPod Classic, allowing you to enjoy your favorite songs at any time.
In the next step, we will guide you through the process of safely ejecting your iPod Classic from your computer to ensure the data transfer is complete and prevent any potential data corruption.
Step 6: Eject Your iPod Classic
After syncing your iPod Classic with iTunes and ensuring that all the selected content has been transferred successfully, it’s important to properly eject your device from your computer. Ejecting your iPod Classic ensures that all data has been written and saved correctly, preventing any potential data corruption. Follow these steps to safely eject your iPod Classic:
-
Ensure Sync is Complete:
Before ejecting your iPod Classic, make sure that the syncing process has finished. Look for the progress bar at the top of the iTunes window and ensure that it has reached 100% and that there are no further updates or transfers in progress.
-
Click on the Eject Icon:
In the top-right corner of the iTunes window, you will find an eject icon next to your iPod Classic’s name. Click on this icon to initiate the ejection process. Alternatively, you can right-click on your iPod Classic’s name in the left sidebar and select “Eject” from the dropdown menu.
-
Wait for Confirmation:
Once you have clicked on the eject icon, wait for a confirmation message to appear, stating that it is safe to disconnect your iPod Classic. This message ensures that all data has been finalized and written to your device. Do not disconnect your iPod Classic until you see this confirmation message.
-
Disconnect Your iPod Classic:
Once you have received the confirmation message, you can safely disconnect your iPod Classic from your computer. Gently unplug the USB cable from your iPod Classic and your computer, ensuring that no files or connections are interrupted.
By following these steps and safely ejecting your iPod Classic, you reduce the risk of data corruption and ensure that your device is ready to be used independently. Ejecting your device properly also allows you to safely recharge your iPod Classic and continue enjoying your music on the go.
Remember, it is important to always follow the proper ejection process before disconnecting any external device from your computer. This ensures that data transfer is complete and that no files or data are lost during the disconnection process.
Congratulations! You have successfully learned how to download music to your iPod Classic and safely eject it from your computer. Now, you can take your iPod Classic wherever you go and enjoy your favorite tunes whenever you want.
Conclusion
Congratulations! You have successfully learned how to download music to your iPod Classic and create a personalized music library. With the steps outlined in this guide, you can now enjoy your favorite tunes on the go with your iPod Classic.
We started by connecting your iPod Classic to your computer and opening iTunes. Then, we walked you through the process of adding music to your iTunes library, either by importing music files, purchasing from the iTunes Store, or importing CDs. Next, we guided you in creating a playlist, allowing you to curate a selection of songs tailored to your preferences.
After creating your playlist, we showed you how to sync your iPod Classic with iTunes, ensuring that the selected music was transferred to your device. Lastly, we emphasized the importance of safely ejecting your iPod Classic from your computer to prevent data corruption.
Now that you have the knowledge and skills to download music to your iPod Classic, feel free to explore iTunes, discover new artists, and expand your music collection. Remember, your iPod Classic is not limited to just music; it can also store podcasts, audiobooks, and other forms of media, allowing you to fully enjoy your device’s capabilities.
Additionally, always keep your iTunes library up to date with your latest music additions, and periodically revisit your playlist to refresh it with new and exciting songs.
Thank you for following this guide, and we hope you have many enjoyable music-filled moments with your iPod Classic!


