Introduction
As music enthusiasts, we are constantly looking for new ways to access and enjoy our favorite songs. With the rise of video-sharing platforms like YouTube, it has become easier than ever to discover and listen to a wide variety of music. However, sometimes we may want to take our favorite YouTube tunes offline and burn them onto a CD, allowing us to enjoy them in different settings such as our cars or home stereos.
In this article, we will explore the process of downloading music from YouTube and burning it onto a CD, providing you with a step-by-step guide to achieve this. We will also discuss the importance of understanding YouTube’s terms of service and choosing a reliable YouTube to MP3 converter. Additionally, we will provide an overview of CD burning software options and share some tips to ensure a successful CD burning process.
Before we dive into the details, it’s essential to note that downloading music from YouTube for personal use is allowed under YouTube’s terms of service, as long as you do not distribute or use the content for any commercial purposes. It’s crucial to respect copyright laws and use the downloaded content responsibly.
Now that we have covered the necessary disclaimers, let’s explore the process of downloading music from YouTube and burning it onto a CD. Whether you want to create a compilation of your favorite tracks or enjoy your favorite YouTube songs on the go, this guide will help you achieve your goal.
Understanding YouTube’s Terms of Service
Before downloading and using content from YouTube, it’s essential to understand and comply with YouTube’s terms of service. These terms outline the guidelines and restrictions for using YouTube’s platform and content. Understanding these terms will help ensure that you use YouTube and its content responsibly and legally.
First and foremost, it’s important to note that YouTube’s terms of service prohibit the downloading or copying of videos for purposes other than personal use. According to YouTube’s terms, users are not allowed to download, reproduce, distribute, or modify any content on the platform without explicit permission from the content creator or the appropriate rights holder.
However, YouTube does provide options for content creators to enable the download feature for their videos. In such cases, users are allowed to download those specific videos for offline viewing, provided that they comply with any additional terms or restrictions set by the content creators.
To ensure that you are using YouTube’s platform responsibly, always check the video’s description or consult the content creator’s channel for information on their permissions and restrictions regarding downloading their videos. It’s crucial to respect the rights and intentions of the content creators and refrain from using their content in any unauthorized or illegal manner.
Additionally, keep in mind that YouTube’s terms of service apply not only to downloading videos but also to any usage of the content available on the platform. This includes streaming, embedding, and sharing videos on other platforms or social media.
By familiarizing yourself with these terms and adhering to them, you can enjoy YouTube’s vast collection of music and other content while respecting the rights of content creators and ensuring that you are using the platform legally.
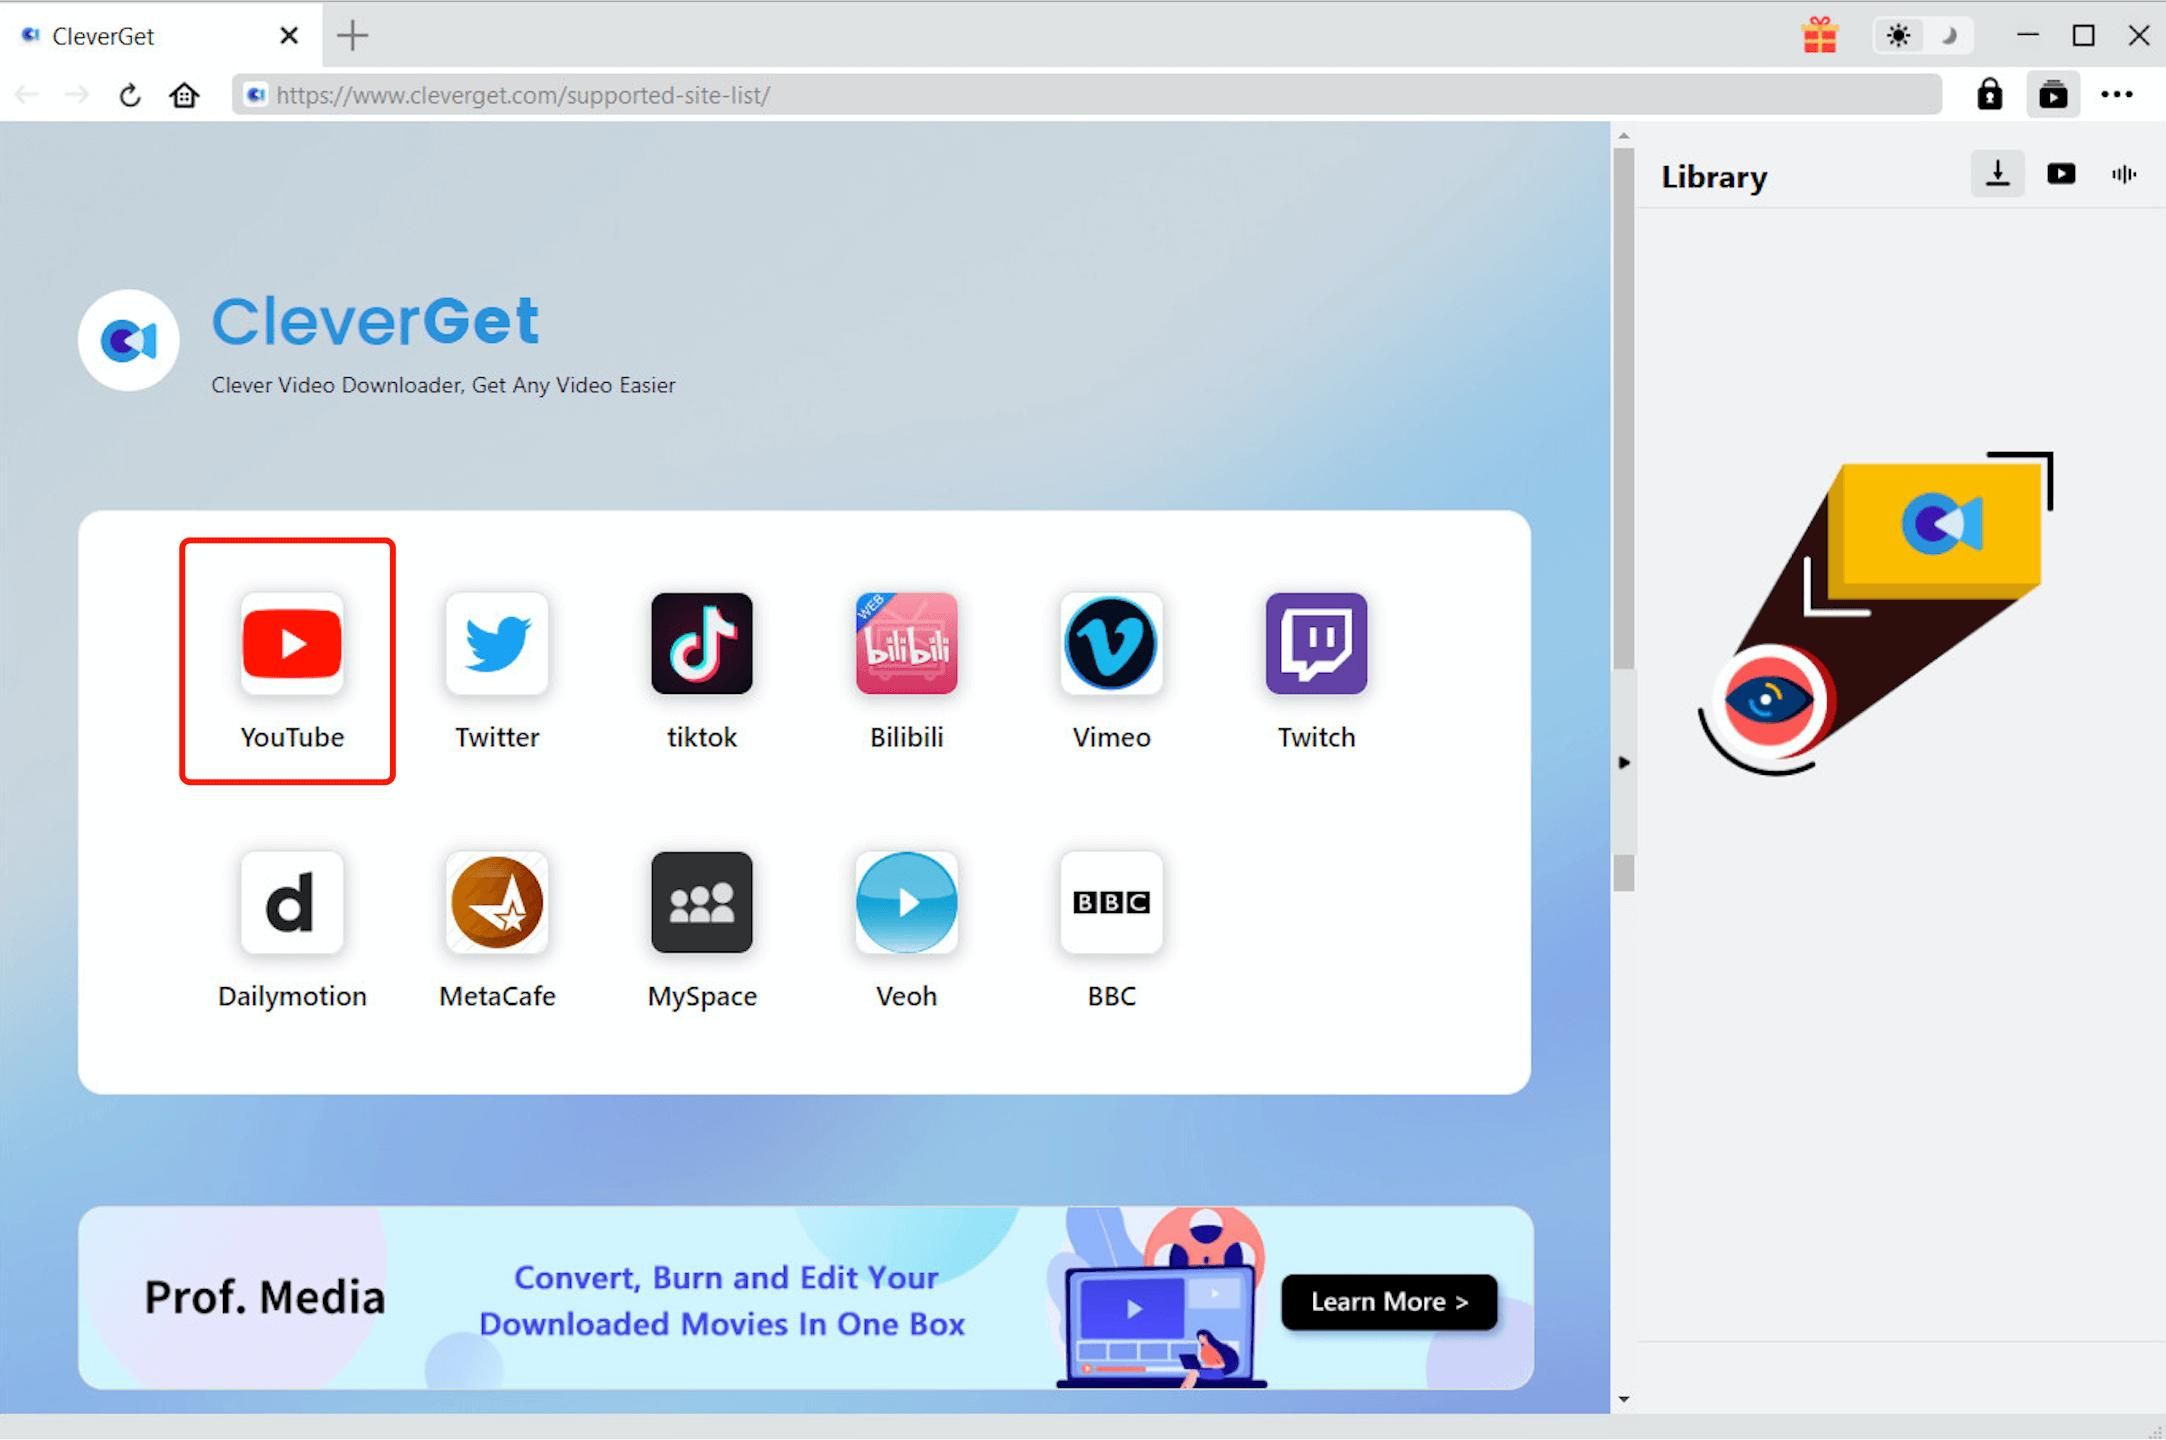
Choosing a YouTube to MP3 Converter
When it comes to converting YouTube videos to MP3 format, there are numerous online tools and software available. However, it’s crucial to choose a reliable and reputable converter to ensure the best quality audio and a smooth downloading process.
Here are a few factors to consider when selecting a YouTube to MP3 converter:
- Reputation and Reviews: Look for converters that have positive reviews and a good reputation among users. This will give you an indication of their reliability and performance.
- User-Friendliness: Opt for a converter that is easy to use, even for those who have little to no technical expertise. A straightforward interface and intuitive navigation will make the conversion process hassle-free.
- Conversion Speed: Consider converters that provide fast conversion speeds. Waiting too long for a video to convert can be frustrating, especially if you have multiple videos to download.
- Supported Formats and Quality: Ensure that the converter supports the MP3 format and offers various quality options. This will allow you to choose the audio quality that suits your needs.
- Additional Features: Some converters offer extra features such as batch downloading, ID3 tag editing, or even the ability to download entire playlists or channels. These features can enhance your downloading experience.
- Safety and Security: Prioritize converters that guarantee the safety and security of your personal information while using their service. Look for those that have HTTPS encryption and clear privacy policies.
It’s worth researching and comparing different converters before making a decision. Read user reviews and check for any potential issues or limitations mentioned by other users. This will help you choose a reliable converter that meets your specific requirements.
Remember, it’s important to use YouTube to MP3 converters responsibly and strictly for personal use. Be cautious of any converter that promotes or supports the downloading of copyrighted or protected content.
Now that you understand the factors to consider when choosing a YouTube to MP3 converter, let’s move on to the step-by-step guide for downloading music from YouTube.
Step-by-Step Guide: Downloading Music from YouTube with a Converter
Downloading music from YouTube requires the use of a reliable YouTube to MP3 converter. With the converter in place, follow these simple steps to download music from YouTube:
- Select the YouTube video: Start by finding the YouTube video containing the music you want to download. Copy the video’s URL from the address bar of your browser.
- Choose a YouTube to MP3 converter: Visit an online converter website or open the software you have downloaded. Look for a search bar or input field where you can paste the YouTube video URL.
- Paste the video URL: Paste the copied YouTube video URL into the converter’s input field. Ensure that you have pasted the complete and correct URL to avoid any errors.
- Select the desired format and quality: Choose the MP3 format as the output format for the music file. Most converters offer a selection of quality options, ranging from low to high bitrates. Select the quality that suits your preferences and requirements.
- Initiate the conversion: Once you have selected the desired format and quality, click on the “Convert” or “Start” button to begin the conversion process. The converter will extract the audio from the YouTube video and convert it into an MP3 file.
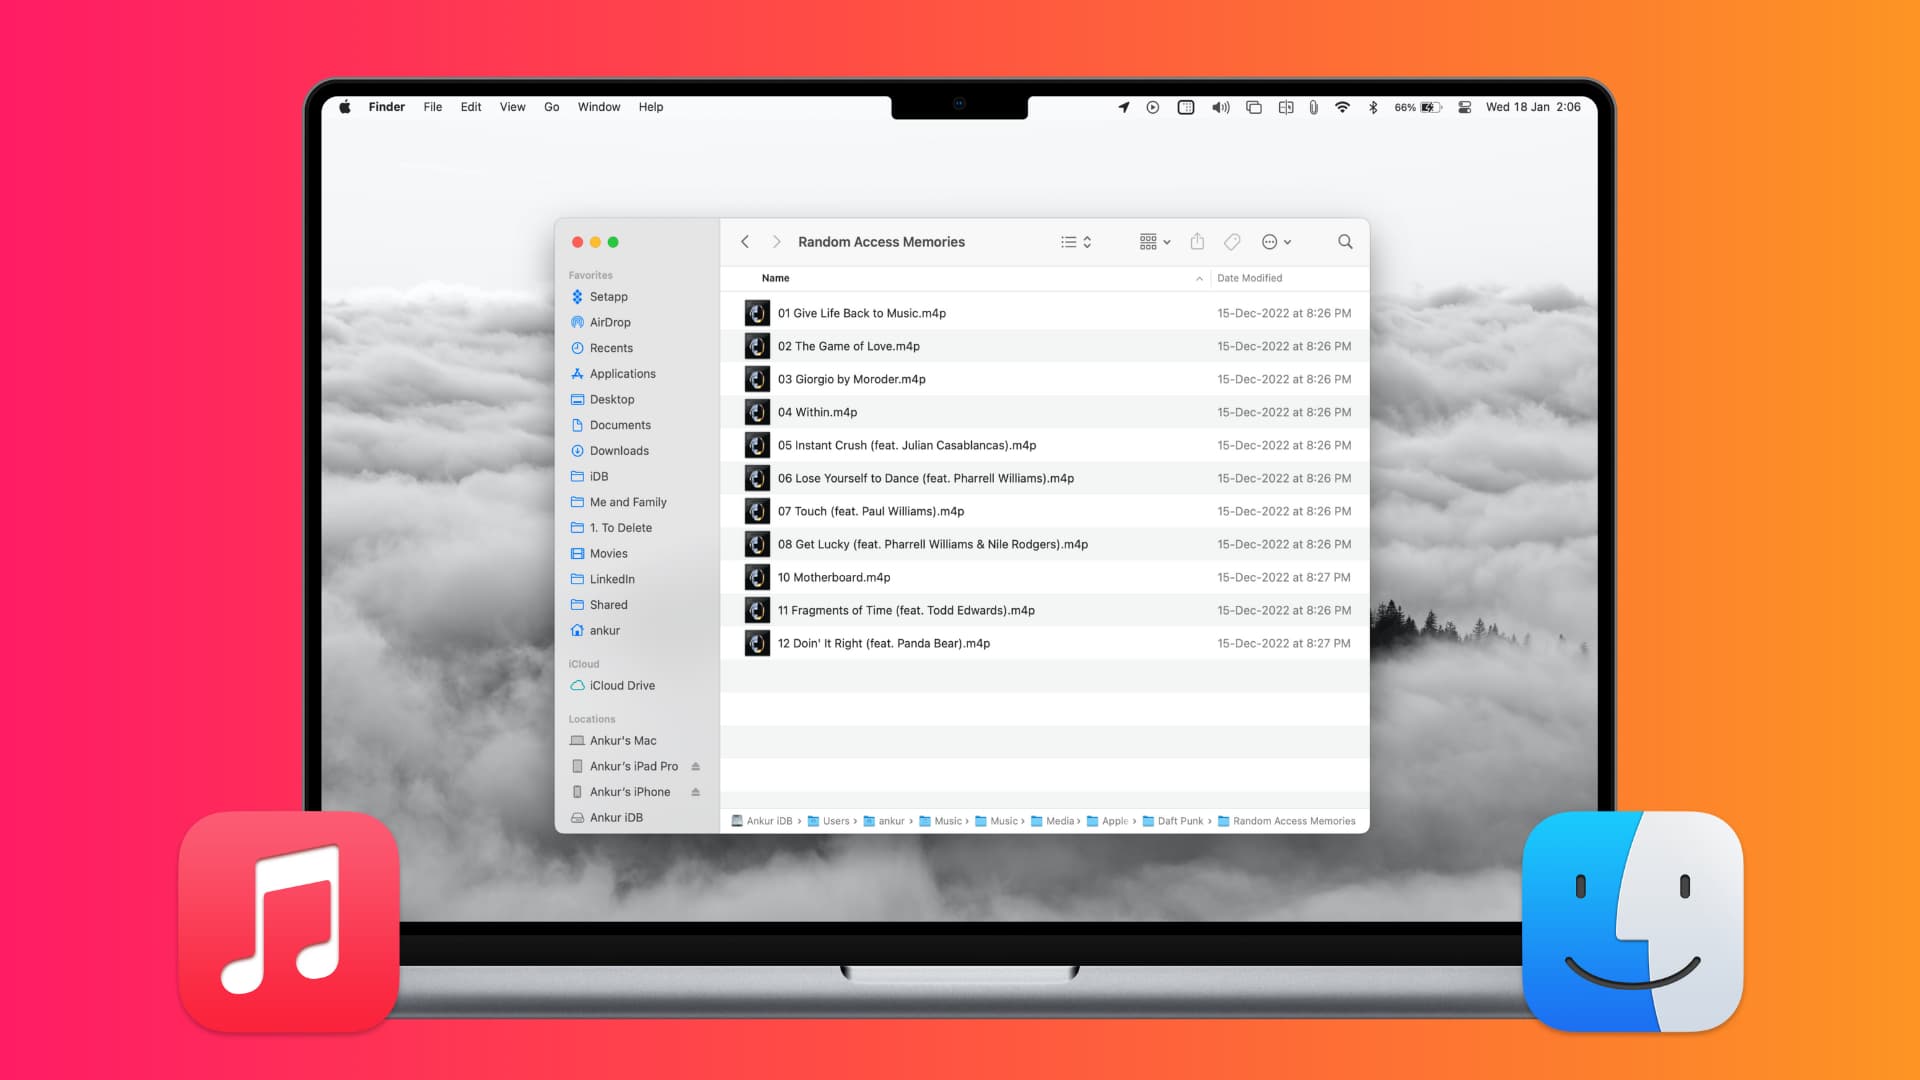
- Download the MP3 file: After the conversion is complete, the converter will provide a download link for the MP3 file. Click on the link to download the file to your computer or device. Some converters may also give you the option to save the file directly to specific cloud storage platforms.
- Verify the downloaded file: Before proceeding to burn the music onto a CD, it’s important to verify that the downloaded MP3 file plays correctly and is of the expected quality. Use a media player or audio software to play the file and ensure that it sounds as desired.
Once you have successfully downloaded the music from YouTube and ensured its quality, you are ready to proceed with burning the music onto a CD. In the next section, we will explore different CD burning software options and provide tips for a smooth CD burning process.
Overview of CD Burning Software Options
CD burning software allows you to transfer music files from your computer to a blank CD, making it playable on CD players or other devices that support CDs. There are various CD burning software options available, each with its own set of features and functionalities. Let’s take a look at some popular choices:
- Windows Media Player: Windows users have the advantage of having Windows Media Player pre-installed on their computers. This software offers basic CD burning capabilities, allowing you to create audio CDs from your downloaded music files.
- iTunes: iTunes is widely used by Apple users to manage their music library and is also capable of burning audio CDs. It supports various audio file formats and provides a simple and intuitive interface for CD burning.
- ImgBurn: ImgBurn is a free and lightweight CD burning software available for Windows users. It offers a wide range of features, including the ability to burn audio CDs, create ISO images, and verify the burned discs.
- Nero Burning ROM: Nero Burning ROM is a popular paid software known for its comprehensive range of CD burning features. It provides advanced options for creating audio CDs, data discs, and more.
- Ashampoo Burning Studio: Ashampoo Burning Studio is another paid CD burning software that caters to both beginner and advanced users. It offers an easy-to-use interface, various disc burning options, and additional features like CD labeling.
When selecting CD burning software, consider your specific needs and the level of functionality you require. If you only need basic CD burning capabilities, the built-in software on your operating system can suffice. However, if you want more advanced features and customization options, opting for third-party software like ImgBurn, Nero Burning ROM, or Ashampoo Burning Studio may be a better choice.
Explore the different software options, read user reviews, and consider the compatibility with your operating system before making your final decision. Once you have chosen the CD burning software that suits your needs, you are ready to proceed with burning the downloaded music onto a CD.
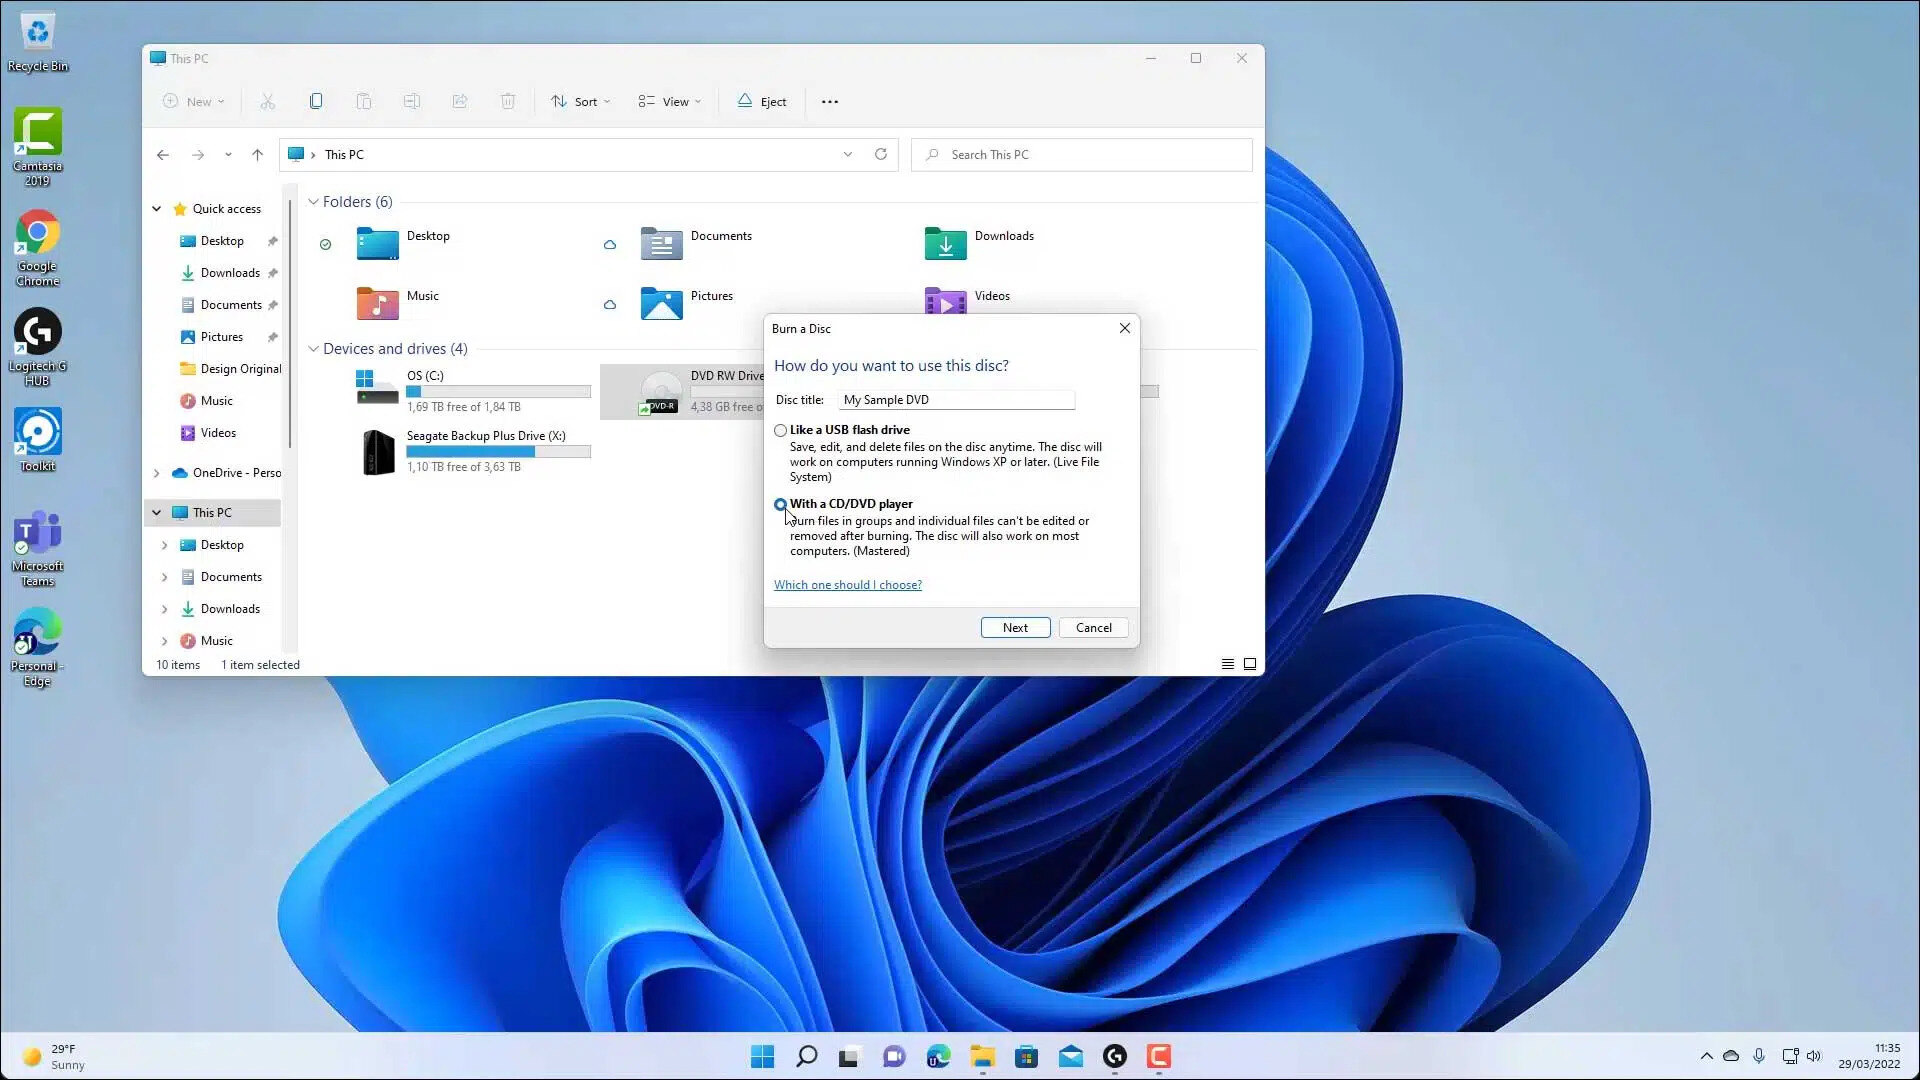
Burning the Downloaded Music onto a CD
Now that you have downloaded the music from YouTube and chosen the CD burning software, it’s time to transfer the downloaded music files to a blank CD. Follow these steps to burn the music onto a CD:
- Prepare a blank CD: Insert a blank CD into your computer’s CD drive. Ensure that the CD has enough storage capacity to hold the music files you want to burn.
- Open the CD burning software: Launch the CD burning software you have chosen. The software’s interface should provide options for creating a new CD or starting a new project.
- Add the music files: Locate the downloaded music files on your computer and select them within the CD burning software. Drag and drop the files into the software’s project area or use the software’s built-in file import feature.
- Arrange the order of the songs: Arrange the order of the songs as desired. Most CD burning software allows you to reorder the tracklist by dragging and dropping the files.
- Set the CD burning settings: Configure the burning settings, such as the writing speed and the disc format (audio CD format is usually the default option). These settings can be adjusted according to your preferences and the compatibility of the CD player you plan to use.
- Start the CD burning process: Once you have set the desired settings, click on the “Burn” or “Start” button within the CD burning software. The software will begin the process of burning the music files onto the CD.
- Monitor the progress: While the CD is being burned, monitor the progress to ensure that it completes successfully without any errors or interruptions. The CD burning software should provide a progress bar or status indicator.
- Eject the CD: Once the burning process is complete, the CD burning software will notify you. Eject the CD from your computer’s CD drive and label it appropriately with the tracklist or any relevant information.
After following these steps, you should have a freshly burned CD containing the downloaded music from YouTube. It’s a good practice to test the CD by playing it on a CD player or computer to verify the quality and ensure that the burnt tracks play correctly.
By successfully burning the downloaded music onto a CD, you can now enjoy your favorite songs on CD players, in your car, or anywhere else that supports CDs.
Tips for a Successful CD Burning Process
While burning music onto a CD may seem like a simple task, it’s important to take certain precautions and follow best practices to ensure a successful CD burning process. Here are some helpful tips:
- Use high-quality blank CDs: Invest in high-quality blank CDs from reputable brands. Low-quality discs may result in errors during the burning process and decrease the lifespan of the burned CD.
- Organize and prepare your music files: Before starting the CD burning process, organize the downloaded music files into a separate folder. This will make it easier to locate and select the desired songs within the CD burning software.
- Avoid multitasking: While burning a CD, avoid running CPU-intensive tasks or using resource-intensive applications on your computer. Multitasking can cause buffer underruns, resulting in errors during the burning process.
- Ensure sufficient free disk space: Make sure you have enough free disk space on your computer’s hard drive while burning a CD. Insufficient disk space can lead to issues during the burning process.
- Close unnecessary programs: Close any unnecessary programs and background processes running on your computer to free up system resources. This will help ensure a smoother and faster CD burning process.
- Verify the integrity of your downloaded music files: Before burning the downloaded music onto a CD, double-check that the files play correctly and are not corrupted. Test them using a media player or audio software to ensure their quality.
- Keep the computer free from dust and debris: Dust and debris can affect the performance of your computer’s CD drive. Regularly clean the CD drive to prevent any issues during the burning process.
- Monitor the burning process: While the CD is being burned, monitor the progress and stay alert for any error messages or notifications. This will allow you to address any issues promptly.
- Keep the CD burning software up to date: Check for updates for your CD burning software and ensure that you have the latest version installed. Software updates often include bug fixes and improvements that can enhance the CD burning process.
- Test the burned CD: After completing the CD burning process, test the burned CD by playing it on different CD players or computers. This will help ensure that the tracks play correctly and that the burned CD is of the desired quality.
Following these tips will increase the chances of a successful CD burning process, allowing you to create error-free CDs with your favorite music. Enjoy your newly burned CDs on various devices and share them with friends and family!
Conclusion
Downloading music from YouTube and burning it onto a CD can be a great way to enjoy your favorite songs offline and in different settings. By following the steps outlined in this article, you can successfully download music from YouTube, choose a reliable YouTube to MP3 converter, and burn the downloaded music onto a CD. It’s important to remember to respect YouTube’s terms of service, use converters responsibly, and comply with copyright laws.
When choosing a YouTube to MP3 converter, consider factors such as reputation, user-friendliness, conversion speed, supported formats and quality, additional features, and safety and security. There are various CD burning software options available, each with its own set of features and functionalities. Choose the software that best suits your needs and provides the necessary CD burning capabilities.
Throughout the CD burning process, it’s important to follow best practices and take necessary precautions. Use high-quality blank CDs, organize your music files, close unnecessary programs, and monitor the burning process for any errors or issues. Verification of the downloaded music files and testing of the burned CDs are essential to ensure the quality and integrity of the music.
By following the tips and guidelines provided in this article, you can successfully download music from YouTube, convert it to MP3 format, and burn it onto a CD. Enjoy your favorite songs on CDs and share them with others for a truly immersive and portable music experience.
Start exploring the world of YouTube music, choose your favorite songs, and embark on the journey of creating your personalized CD collection!