Introduction
Downloading YouTube videos and saving them on a CD can be a convenient way to enjoy your favorite videos offline, share them with friends or family, or even create a personalized collection. While YouTube itself does not provide an option to download videos directly, there are third-party tools available that make the process simple and straightforward. In this guide, we will take you through the step-by-step process of downloading YouTube videos and burning them onto a CD.
Before proceeding, it’s important to note that downloading YouTube videos may infringe upon the platform’s terms of service and copyright laws. It’s crucial to respect the content creators’ rights and use downloaded videos for personal purposes only. Additionally, ensure that you have the necessary permissions or rights to burn the downloaded videos onto a CD.
In the following sections, we will explain how to choose and download a YouTube video downloader, install it on your computer, copy and paste the video URL, select the desired format and quality, choose a destination folder, initiate the download, and finally, burn the downloaded video onto a CD. Whether you want to watch YouTube videos on the go or create a compilation of your favorite videos, follow these steps to successfully download and save YouTube videos to a CD.
Step 1: Choose and Download a YouTube Video Downloader
The first step in downloading YouTube videos to a CD is to choose a reliable and efficient YouTube video downloader tool. There are several options available on the internet, but it’s essential to select one that suits your needs and provides the necessary features.
When selecting a YouTube video downloader, consider factors such as user reviews, ratings, ease of use, download speed, supported video formats, and any additional features or functionalities offered. Look for a downloader that is regularly updated to ensure compatibility with YouTube’s latest changes.
Once you have chosen a suitable YouTube video downloader, visit the official website or a trusted software download platform to download the installation package. Ensure that you download the version compatible with your computer’s operating system (Windows, macOS, etc.).
Remember to exercise caution when downloading software from the internet. Stick to reputable sources to minimize the risk of downloading malware or other harmful programs. Additionally, scan the downloaded file with an antivirus program before proceeding with the installation.
After downloading the installation package, locate the file on your computer and double-click on it to initiate the installation process. Follow the on-screen instructions to install the YouTube video downloader tool on your computer.
Once the installation is complete, you are now ready to move on to the next step: launching the YouTube video downloader and preparing to download your desired YouTube videos.
Step 2: Install the YouTube Video Downloader on Your Computer
After choosing a suitable YouTube video downloader, the next step is to install the software on your computer. This step is crucial as it will allow you to access the downloader’s features and start downloading YouTube videos.
To install the YouTube video downloader, locate the installation package file that you downloaded in the previous step. Double-click on the file to begin the installation process. You may be prompted with a security warning; if so, click “Run” or “Allow” to proceed.
Follow the on-screen instructions provided by the installation wizard. Typically, you will be asked to accept the license agreement, choose the installation location on your computer, and select any additional components or settings you wish to include. Make sure to read each step carefully and choose the appropriate options.
Once you have successfully completed the installation process, the YouTube video downloader will be installed on your computer. You may be prompted to restart your computer to finalize the installation, so ensure that you have saved any unsaved work before proceeding.
After restarting your computer, locate the YouTube video downloader program on your computer. It may be in your desktop shortcuts or in the list of installed programs accessed through the Start menu or Launchpad (for macOS users).
Double-click on the YouTube video downloader icon to launch the program. If prompted, enter any required activation or registration information to unlock the full functionality of the software.
Now that you have successfully installed the YouTube video downloader on your computer, you are ready to move on to the next step: launching the program and preparing to download YouTube videos.
Step 3: Launch the YouTube Video Downloader
Once you have installed the YouTube video downloader on your computer, the next step is to launch the program. Launching the YouTube video downloader will allow you to access its features and begin the process of downloading YouTube videos.
To launch the YouTube video downloader, locate the program icon on your desktop or in the list of installed programs accessed through the Start menu or Launchpad (for macOS users). Double-click on the icon to open the application.
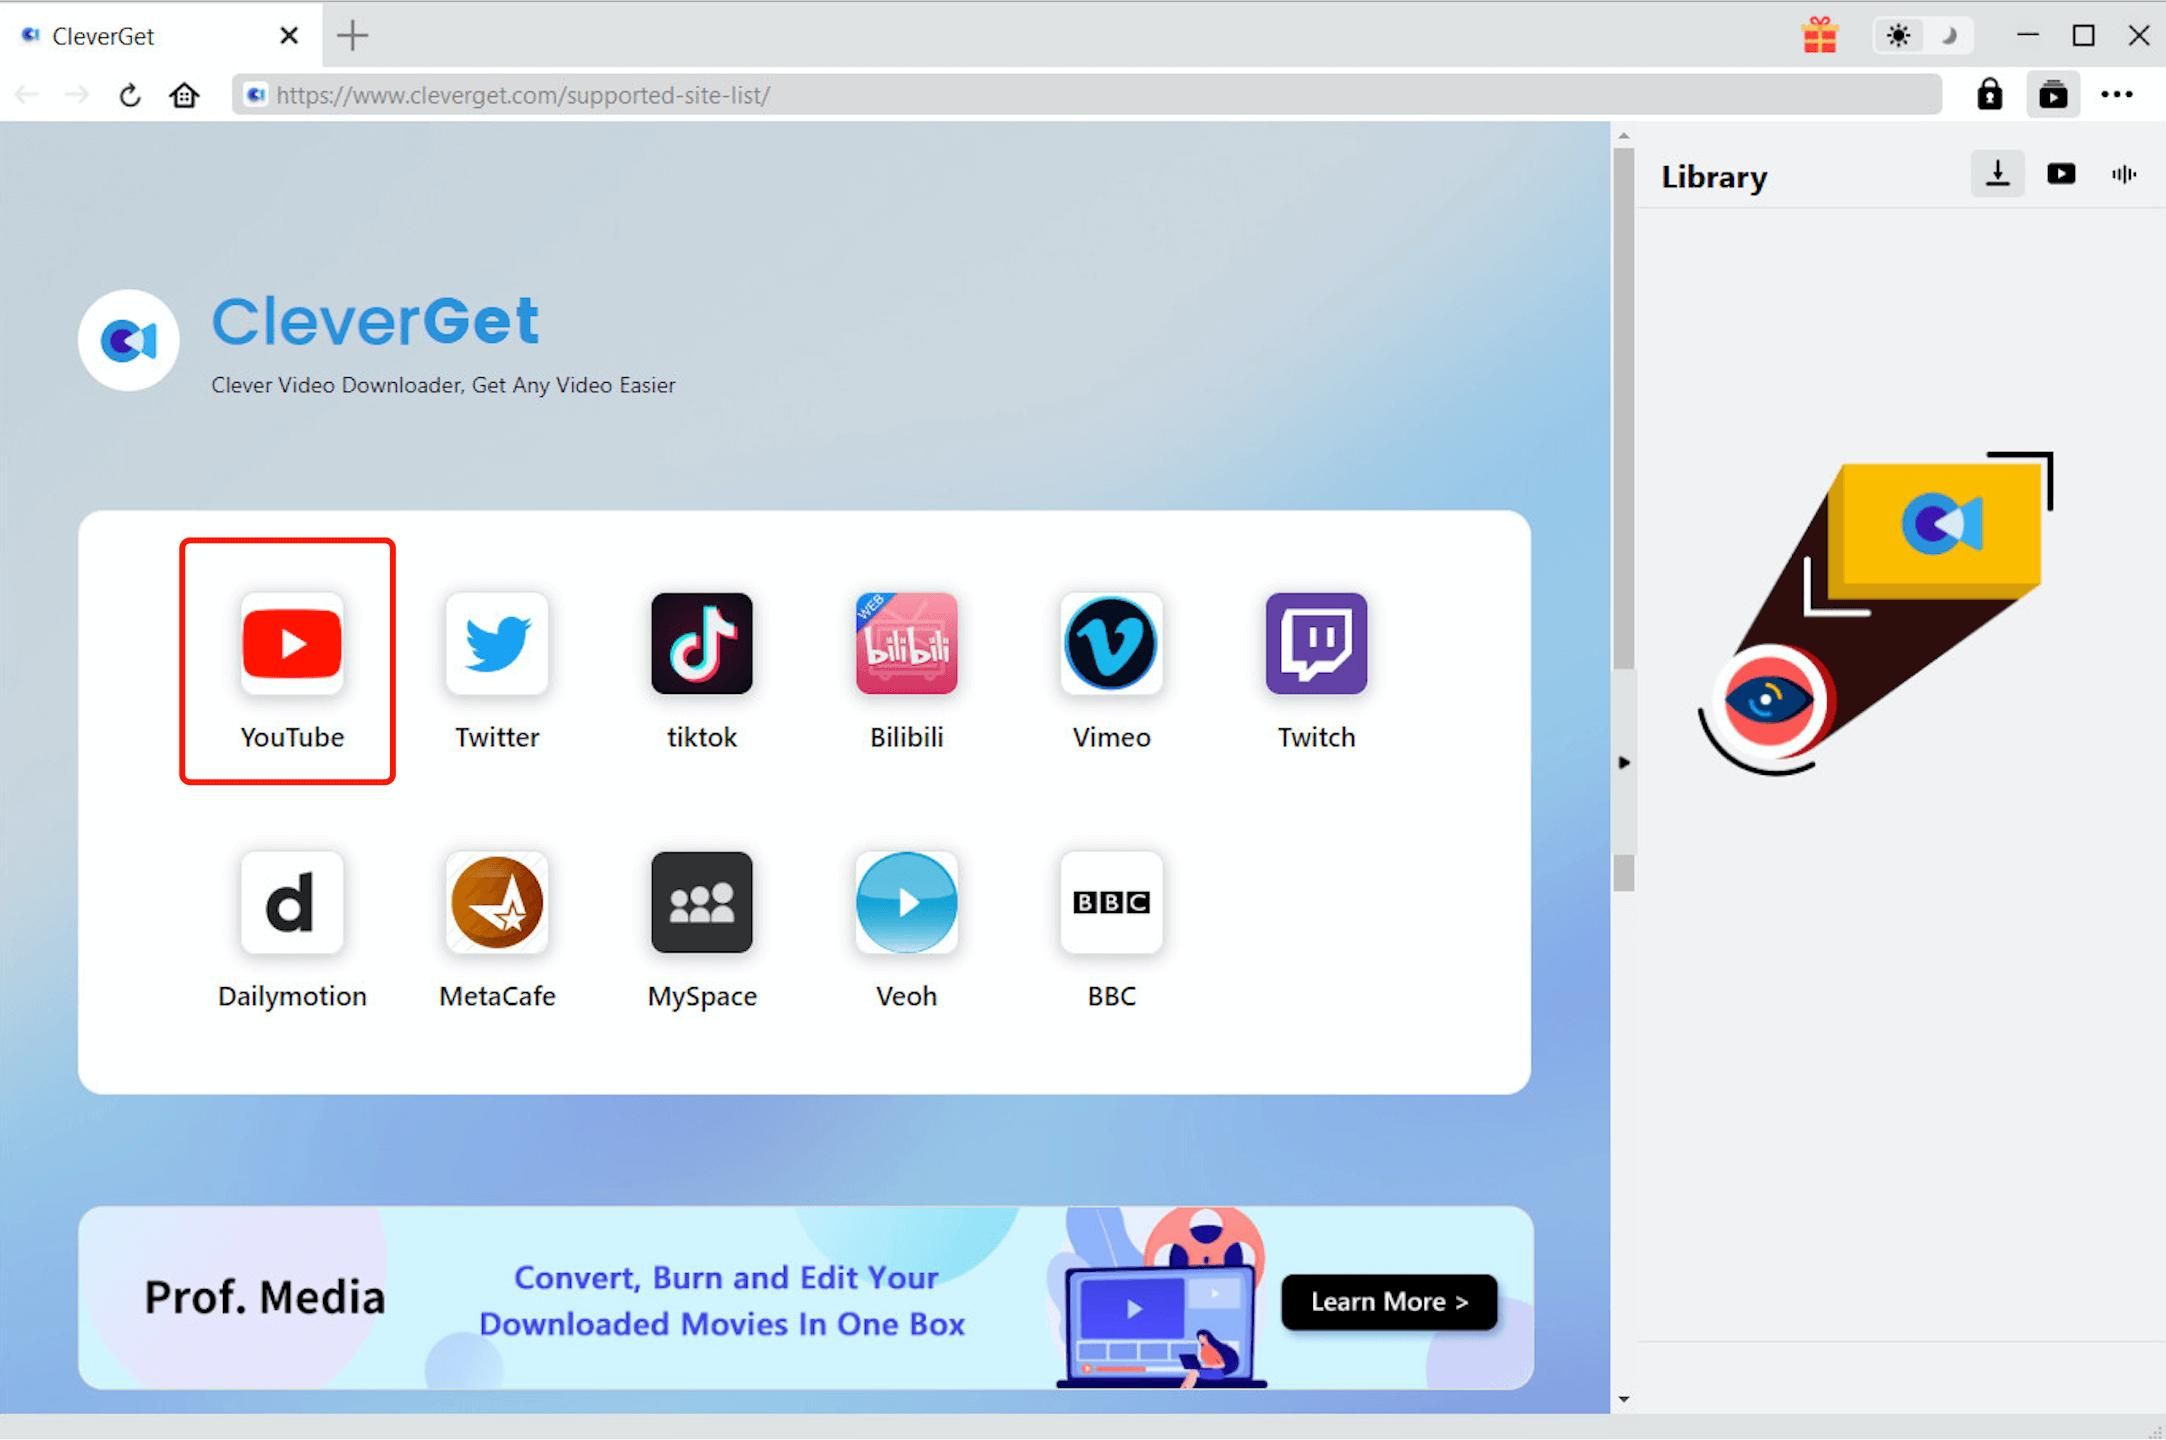
After launching the YouTube video downloader, you may be prompted to log in with your account credentials if the downloader requires user authentication. If you are using a free version of the downloader, you might be asked to dismiss any upgrade or premium offers before accessing the main interface.
Once you have logged in or dismissed any prompts, you will be presented with the main interface of the YouTube video downloader. This interface typically features a search bar or a URL input field where you can paste the link of the YouTube video you want to download.
Take a moment to familiarize yourself with the layout and options available in the YouTube video downloader. You might find features such as resolution selection, format conversion, or batch downloading functionalities. Explore the settings or preferences menu to customize the downloader according to your preferences.
At this point, you are now ready to proceed to the next step: copying the URL of the YouTube video you wish to download. By launching the YouTube video downloader and having it ready on your computer, you are one step closer to downloading YouTube videos and saving them to your CD.
Step 4: Copy the URL of the YouTube Video You Want to Download
Now that you have launched the YouTube video downloader, it’s time to copy the URL of the YouTube video you want to download. The URL (Uniform Resource Locator) is the web address of the video, which uniquely identifies it on the YouTube platform.
To copy the URL of the YouTube video, open a web browser (such as Google Chrome, Mozilla Firefox, or Microsoft Edge) and navigate to the YouTube website at “www.youtube.com”.
Search for the video you want to download by entering keywords or the title of the video in the search bar. Once you have located the desired video, click on it to open the video playback page.
On the video playback page, locate the browser’s address bar at the top of the window. The address bar displays the URL of the current webpage. Select the entire URL by clicking and dragging your cursor across it or by pressing “Ctrl+A” (Windows) or “Cmd+A” (Mac) to select the entire text.
After selecting the URL, right-click on the highlighted text and choose the “Copy” option from the context menu. Alternatively, you can also use the keyboard shortcut “Ctrl+C” (Windows) or “Cmd+C” (Mac) to copy the URL.
Once you have successfully copied the URL of the YouTube video, return to the interface of the YouTube video downloader. Locate the URL input field or the designated area where you can paste the URL.
Right-click in the URL input field and select the “Paste” option from the context menu. Alternatively, you can use the keyboard shortcut “Ctrl+V” (Windows) or “Cmd+V” (Mac) to paste the copied URL.
After pasting the URL in the YouTube video downloader, double-check that the URL is correct and complete. Make sure it corresponds to the video you want to download.
Now that you have successfully copied and pasted the URL of the YouTube video in the YouTube video downloader, you are ready to proceed to the next step: selecting the desired video format and quality for the download.
Step 5: Paste the URL into the YouTube Video Downloader
Having copied the URL of the YouTube video you want to download, the next step is to paste it into the YouTube video downloader. This step allows the downloader to process the URL and retrieve the video for downloading.
Open the YouTube video downloader on your computer and locate the designated area or URL input field where you need to paste the URL. It is usually found on the main interface or in a specific section dedicated to downloading videos.
Right-click in the input field and select the “Paste” option from the context menu to paste the URL. Alternatively, you can use the keyboard shortcut “Ctrl+V” (Windows) or “Cmd+V” (Mac) to paste the URL into the input field.
After pasting the URL, double-check that the entire URL is correctly displayed in the input field. Make sure no extra spaces or characters are added or missing in the URL.
Some YouTube video downloaders automatically detect the URL when it is copied to the clipboard, eliminating the need to manually paste it into the input field. In this case, simply copy the URL as explained in the previous step and the downloader should recognize it automatically.
Once you have pasted the URL into the YouTube video downloader and confirmed its accuracy, you are ready to move on to the next step: selecting the desired video format and quality for the download.
Remember to respect any copyright laws and terms of service when downloading videos from YouTube. Ensure that you have the necessary permissions or rights to download and save the video.
Now that you have successfully pasted the URL into the YouTube video downloader, you can proceed with selecting the desired format and quality for the video download.
Step 6: Select the Desired Video Format and Quality
After pasting the URL into the YouTube video downloader, it’s time to select the desired video format and quality for the download. The video format determines the file type of the downloaded video, while the quality determines the resolution and overall visual clarity of the video.
In the YouTube video downloader interface, you will typically find options to choose the video format and quality before initiating the download. The available formats may include MP4, AVI, WMV, FLV, and more. Select the format that is compatible with your requirements and the playback devices you intend to use.
When it comes to video quality, YouTube generally provides various options ranging from low to high definition (HD) resolutions. Common resolution options include 240p, 360p, 480p, 720p, 1080p, and even higher for some videos. Select the quality that suits your preferences and the capabilities of your playback device.
Consider factors such as the available storage space on your computer and the intended purpose of the downloaded video. For example, if you plan to watch the video on a mobile device with limited storage, selecting a lower quality may be more appropriate to conserve space.
Some YouTube video downloaders also offer additional features such as video conversion. This allows you to convert the downloaded video to different formats or compress it to reduce file size. If you require such functionalities, explore the options provided by the downloader and make the necessary selections.
Take a moment to ensure that you have made the appropriate selections for both the video format and quality. Double-check that the format and quality you have chosen fulfill your requirements and preferences.
Once you are satisfied with your selections, you are ready to proceed to the next step: choosing the destination folder where the downloaded video will be saved.
Note: Remember to respect copyright laws and terms of service when downloading YouTube videos. Ensure that you have the necessary permissions or rights to download and save the video.
Step 7: Choose the Destination Folder for the Downloaded Video
After selecting the desired video format and quality in the YouTube video downloader, it’s time to choose the destination folder where the downloaded video will be saved on your computer. This step allows you to specify the exact location where you want the video to be stored.
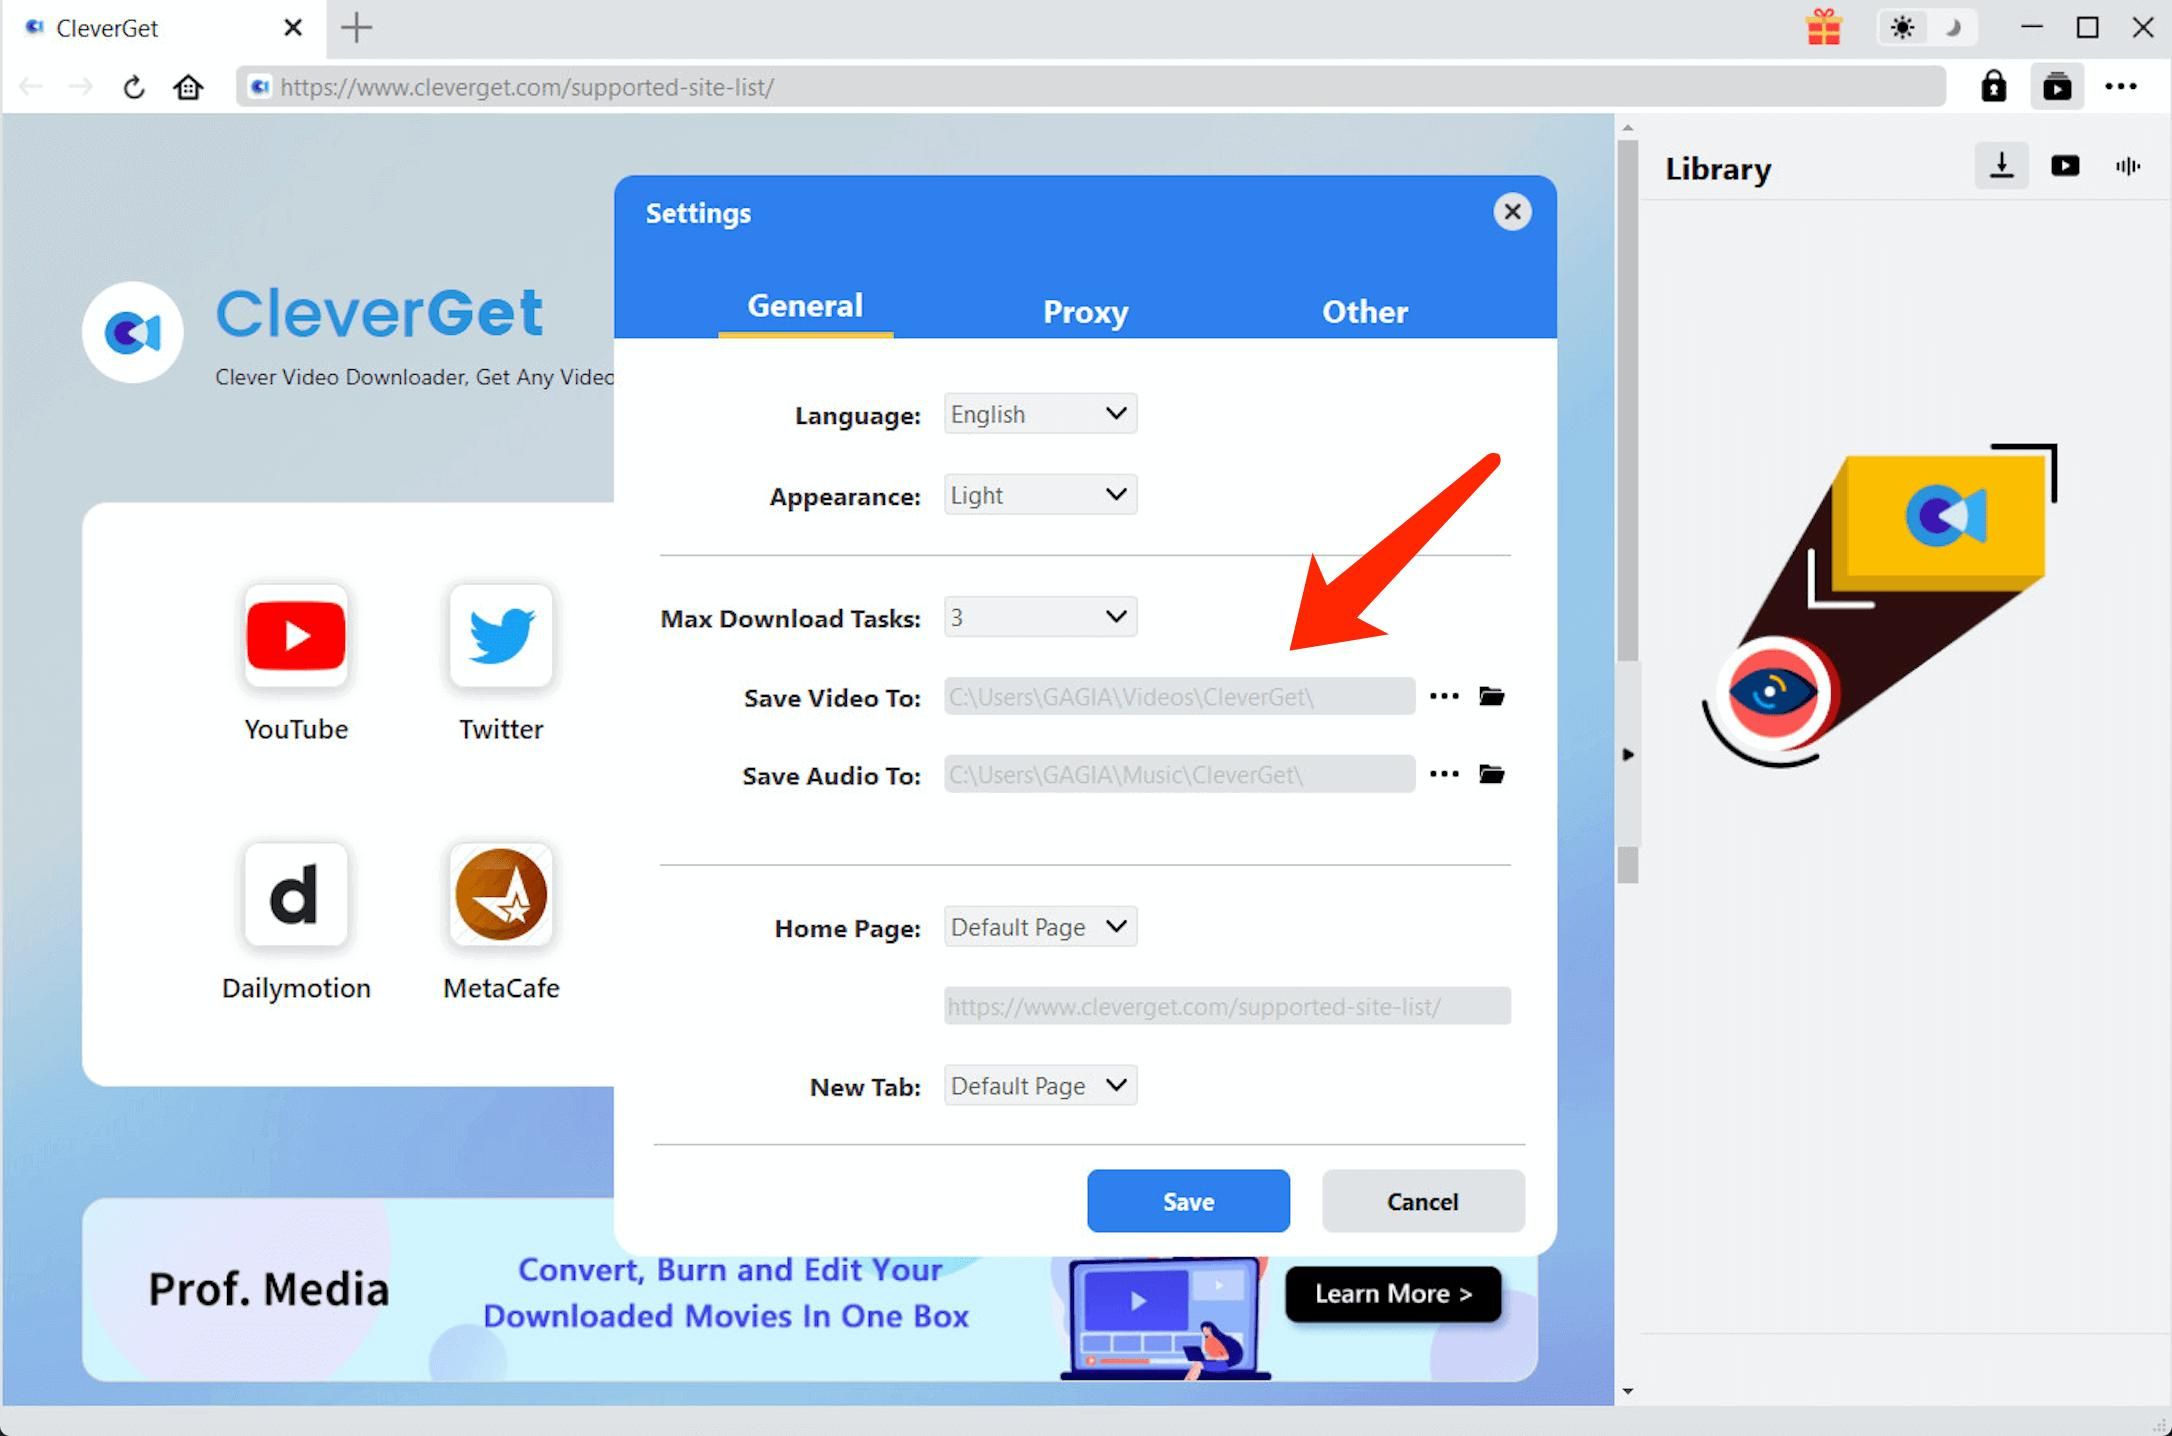
In the YouTube video downloader interface, there is typically an option or field dedicated to selecting the destination folder. By default, the downloader may suggest a default location, such as the Downloads folder on your computer. However, you have the freedom to choose a different folder if desired.
To choose a destination folder, click on the “Browse” or “Choose Folder” button next to the destination field in the downloader. This will open a file explorer window where you can navigate to the desired folder.
In the file explorer window, browse through your computer’s directory structure to find the folder where you want to save the video. You can choose an existing folder or create a new one specifically for storing your downloaded YouTube videos.
Once you have located the desired folder, click on it and then click the “Select” or “OK” button in the file explorer window. This will set the chosen folder as the destination for the downloaded video.
Make sure to take note of the selected destination folder or remember its location for future reference. You can also verify the chosen folder by checking the destination field in the YouTube video downloader interface.
Remember to select a destination folder with sufficient storage space to accommodate the downloaded video, especially if you plan on downloading multiple videos or videos of large file sizes.
Now that you have chosen the destination folder, you are ready to proceed to the next step: initiating the download process and saving the YouTube video to your computer.
Note: Ensure that you have the necessary permissions or rights to download and save the YouTube video in the chosen destination folder. Respect any copyright laws and terms of service associated with the video.
Step 8: Start the Download Process
With the YouTube video URL copied, the desired format and quality selected, and the destination folder chosen, you are now ready to initiate the download process and save the YouTube video to your computer.
In the YouTube video downloader interface, you will typically find a “Download” button or a similar option to start the download. Look for this button in the main interface, near the URL input field, or in the section where you made the format and quality selections.
Click on the “Download” button to initiate the download process. The YouTube video downloader will then start fetching the video from the provided URL and saving it to the specified destination folder on your computer. The time required for the download will depend on various factors, such as the video’s length, your internet connection speed, and the efficiency of the downloader.
During the download process, it’s important to refrain from interrupting or closing the YouTube video downloader application. Doing so might terminate the download and result in an incomplete or corrupted video file.
You may observe a progress bar, a percentage indicator, or other visual cues to indicate the download progress in the YouTube video downloader interface. Once the download is complete, you will receive a notification or see a confirmation message indicating that the video has been successfully downloaded and saved to the chosen destination folder.
After the download is finished, you can navigate to the destination folder to find the downloaded YouTube video file. The video should be saved in the format and quality you selected, allowing you to enjoy it offline or perform further actions with it, such as burning it onto a CD.
Now that you have successfully started the download process, you are ready to proceed to the final step: burning the downloaded video onto a CD. This step will allow you to create a physical copy of the YouTube video that can be played on CD/DVD players.
Note: Always ensure that you have the necessary permissions or rights to download and save the YouTube video. Respect any copyright laws and terms of service associated with the video content.
Step 9: Burn the Downloaded Video onto a CD
Now that you have successfully downloaded the YouTube video to your computer, the final step is to burn it onto a CD. Burning the video onto a CD allows you to create a physical copy that can be played on CD/DVD players or shared with others.
To start the CD burning process, you will need a CD/DVD writer drive on your computer and a blank CD-R or CD-RW disc. Make sure that the DVD writing software is installed on your computer; popular options include Nero, Roxio, or Windows Media Player.
Insert the blank CD-R or CD-RW disc into the CD/DVD writer drive on your computer. The DVD writing software should automatically detect the blank disc and open a new burning options window.
In the DVD writing software, locate the option to create a data disc or burn a video disc. This option may be labeled differently depending on the software you are using, but it should be related to burning video files onto a CD.
Click on the appropriate option to start the CD burning process. This will open a window where you can select the YouTube video file you downloaded and saved to your computer.
Browse to the location where the downloaded video file is stored, usually in the destination folder you chose in the earlier step. Select the video file and add it to the DVD writing software’s burning queue.
Before starting the burning process, you may have the opportunity to customize the disc’s title or adjust the settings related to the video format or quality. Review and make any desired changes to these settings.
Once you are satisfied with the settings, click on the “Burn” or “Start” button to begin the CD burning process. The software will start creating a copy of the downloaded YouTube video on the blank CD.
The time required for the CD burning process will vary depending on the speed of your CD/DVD writer drive and the size of the video file. You may see a progress bar or a percentage indicator to track the burning progress.
Once the CD burning process is complete, you will receive a notification or see a confirmation message indicating that the video has been successfully burned onto the CD. Eject the CD from the CD/DVD writer drive.
Now, you can play the burned CD on any CD/DVD player to enjoy the YouTube video offline or share it with others. Remember that CDs can be easily scratched or damaged, so handle them with care to ensure they remain playable.
Congratulations! You have successfully burned the downloaded YouTube video onto a CD, allowing you to enjoy the video on various CD/DVD players.
Note: Ensure that you have the necessary permissions or rights to burn and distribute the video. Respect any copyright laws and terms of service associated with the video content.