Introduction
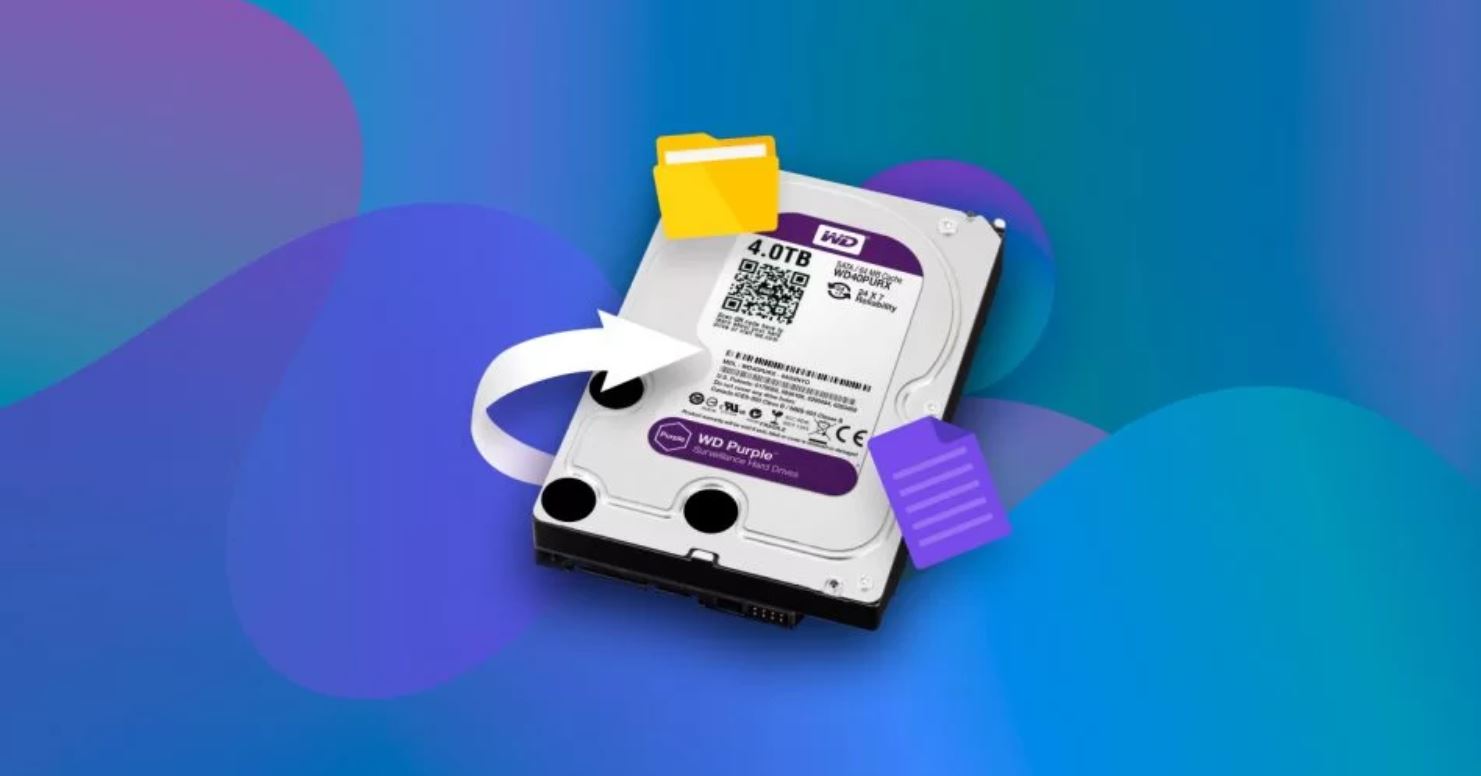
External hard drives have become an essential tool for storing and accessing large amounts of data. Whether you use it for backing up important files, storing media libraries, or transferring data between devices, these portable storage devices play a vital role in our digital lives. However, there may come a time when you need to reset an external hard drive, either to address a technical issue or to wipe the drive clean before repurposing it.
Before proceeding with a reset, it’s important to understand the implications and considerations involved. Resetting an external hard drive will erase all data stored on it, so it’s crucial to back up any important files before proceeding. Additionally, the reset process can vary depending on the operating system and the specific brand and model of the external hard drive.
This guide will provide you with a step-by-step overview of the process to reset an external hard drive, whether you’re using a Windows PC, a Mac, or a Linux-based system. We’ll also discuss the importance of backing up your data and provide troubleshooting tips for common issues that may arise during the reset process.
By following the instructions and precautions outlined in this guide, you’ll be able to reset your external hard drive confidently and effectively, ensuring that it functions optimally for your future data storage needs. Let’s dive in and explore the necessary steps and considerations for resetting an external hard drive.
Why Resetting an External Hard Drive is Necessary
There are several reasons why you may need to reset an external hard drive. One of the primary reasons is to address performance issues or technical glitches that may arise over time. Just like any other electronic device, external hard drives can encounter errors or become less responsive as they age. Resetting the drive can help to resolve these issues and restore its performance to optimal levels.
Another common reason for resetting an external hard drive is to repurpose it for a different use. Perhaps you want to use the drive with a different operating system, or you want to clear all the data to ensure a fresh start. In these cases, resetting the drive will wipe all existing data and allow you to configure it according to your specific requirements.
In some cases, you may also want to reset an external hard drive for security purposes. If you plan to sell or give away the drive, it’s essential to ensure that all previous data is completely erased. Resetting the drive not only removes all files but also enables you to restore the drive to its factory settings, ensuring that no personal or sensitive information remains.
Resetting an external hard drive can also resolve compatibility issues between the drive and your computer or operating system. Sometimes, an external hard drive may not work correctly with a particular device or may not be recognized at all. A reset can help to resolve these compatibility issues and allow the drive to work seamlessly with your system.
Overall, resetting an external hard drive serves various purposes, from resolving performance issues to repurposing the drive for different uses. It provides a fresh start, ensures compatibility, and helps to protect your data. Now that we understand why resetting is necessary, let’s explore the factors to consider before proceeding with a reset.
Things to Consider Before Resetting an External Hard Drive
Resetting an external hard drive is a significant step that requires careful consideration. Before proceeding with a reset, here are a few key factors to keep in mind:
1. Data Backup: First and foremost, it’s crucial to back up any important data stored on the external hard drive. Resetting the drive will erase all the data, so make sure to transfer any necessary files to another storage location, such as your computer’s internal storage or a cloud-based backup service.
2. Operating System Compatibility: Ensure that the external hard drive is compatible with your operating system. Some drives may be designed specifically for Windows, Mac, or Linux, while others offer cross-platform compatibility. Verify the supported operating systems and ensure that the drive is compatible with your intended system before proceeding with the reset.
3. Firmware and Software Updates: Check if there are any available firmware or software updates for your external hard drive. Updating the drive’s firmware can address any known issues and improve performance. It is advisable to install any available updates before resetting the drive.
4. Drive Partitioning: Consider whether you want to retain the existing drive partitions or opt for a clean slate with a single partition. If you have multiple partitions and wish to merge them into one, make sure to back up any data stored on those partitions before proceeding with the reset.
5. Drive Format: Depending on your requirements, decide on the file system format for the external hard drive. Common options include FAT32, exFAT, and NTFS. FAT32 provides basic compatibility across different operating systems but has limitations on file size. exFAT offers improved compatibility and supports larger file sizes, while NTFS is widely used in Windows environments for its advanced features.
6. External Power Source: Some external hard drives draw power solely from the USB port, while others require an external power source. Ensure that the drive is adequately powered during the reset process to prevent any interruptions or errors.
7. Manufacturer’s Instructions: Before resetting the external hard drive, refer to the manufacturer’s documentation or support website for specific instructions and recommendations. Different drives may have unique reset procedures, and it’s essential to follow the correct steps to avoid any potential issues or data loss.
By considering these factors and taking the necessary precautions, you can ensure a smooth and successful reset of your external hard drive. In the next section, we’ll provide a step-by-step guide to resetting the drive, tailored to different operating systems.
Step-by-Step Guide to Resetting an External Hard Drive
Resetting an external hard drive may vary depending on the operating system and the specific brand and model of the drive. In this section, we will provide a general step-by-step guide for resetting an external hard drive on different platforms:
On Windows:
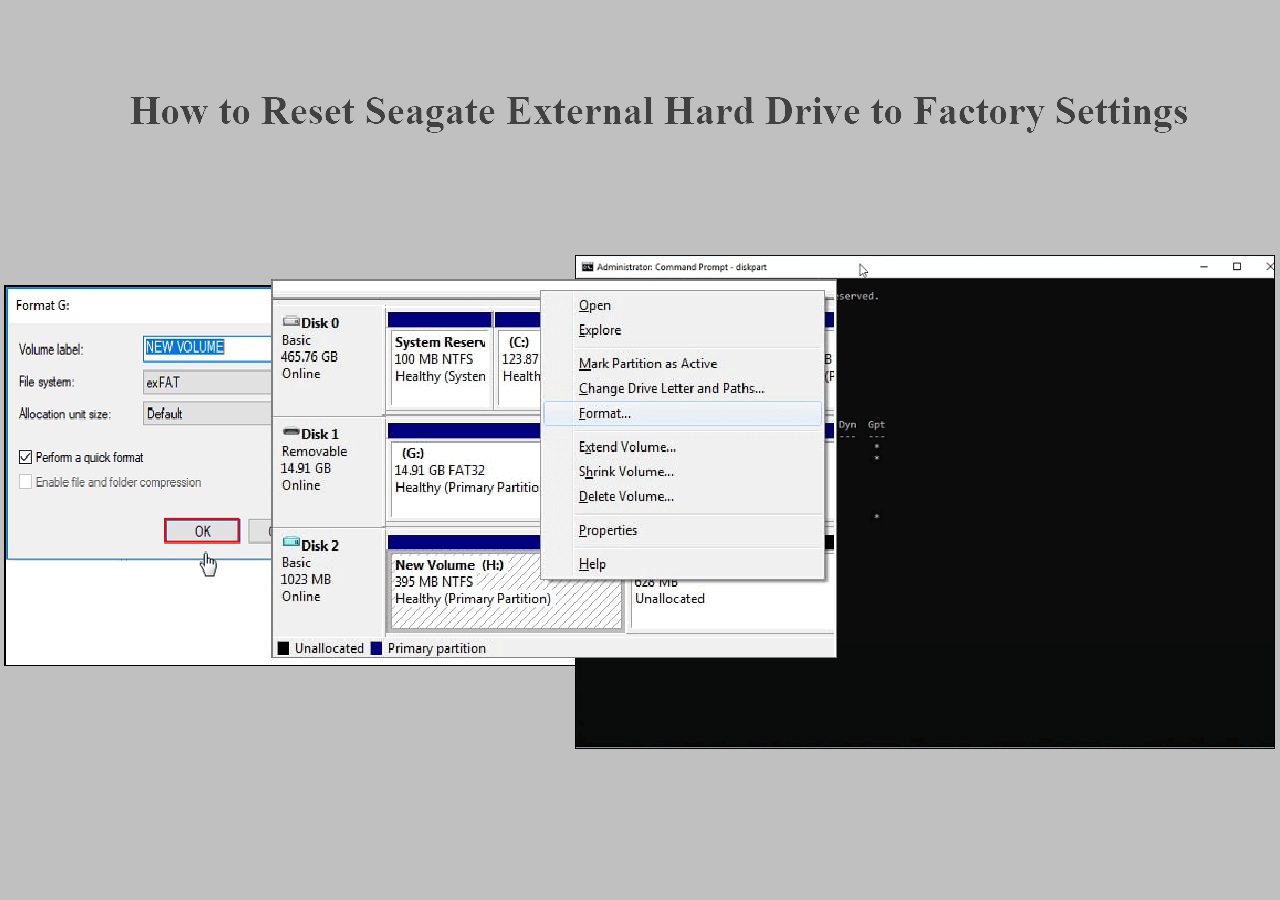
- Connect the external hard drive to your Windows computer via a USB cable.
- Open “File Explorer” by pressing the Windows key + E.
- Right-click on the external hard drive and select “Format” from the context menu.
- Choose the desired file system format (such as FAT32, exFAT, or NTFS) and provide a name for the new drive.
- Check the “Quick Format” option if you want to perform a quicker format, or leave it unchecked for a thorough format.
- Click “Start” to begin the formatting process, and confirm any warnings or prompts that appear.
- Once the format is complete, your external hard drive will be reset and ready to use.
On macOS:
- Connect the external hard drive to your Mac using a USB cable.
- Open “Finder” and navigate to “Applications” > “Utilities” > “Disk Utility.”
- Select the external hard drive from the list of available drives.
- Click on the “Erase” tab and choose the desired file system format (such as Mac OS Extended (Journaled) or exFAT).
- Provide a name for the new drive and click on the “Erase” button.
- Confirm the erase operation and enter your administrator password if prompted.
- Once the erase process is complete, your external hard drive will be reset and ready for use.
On Linux:
- Connect the external hard drive to your Linux system.
- Open a terminal window and type the command “lsblk” to list all available drives and their corresponding device names.
- Identify the device name associated with your external hard drive.
- Use the “fdisk” or “parted” command, followed by the device name, to partition and format the drive.
- Specify the desired file system format (such as ext4, exFAT, or NTFS) and create the partition.
- Format the partition using the appropriate command for the chosen file system.
- Once the format is complete, your external hard drive will be reset and ready to use.
Remember to take caution when resetting an external hard drive, as it will erase all data on the drive. Double-check that you have backed up any important files before proceeding. Additionally, refer to the manufacturer’s instructions or support resources for any specific reset procedures related to your external hard drive.
Now that you’ve successfully reset your external hard drive, let’s discuss the importance of backing up your data before the reset process in the next section.
How to Back Up Important Data Before Resetting
Before resetting an external hard drive, it’s crucial to back up any important data to avoid permanent loss. Here are some steps to help you back up your data effectively:
1. Identify Important Files: Take some time to identify the files and folders that contain critical data. This may include important documents, photos, videos, or any other files that you cannot afford to lose.
2. Create a Backup Plan: Determine the best backup method for your needs. You can choose to back up your data to an external storage device, like another external hard drive or a USB flash drive. Alternatively, you can use cloud-based backup services, such as Google Drive, Dropbox, or iCloud, to store your data securely.
3. Use File Copy Methods: Manually copy the important files from your external hard drive to the backup destination. You can achieve this by simply dragging and dropping the files from the external hard drive’s folder to the backup destination folder on your computer or external storage device.
4. Utilize Backup Software: Consider using backup software that provides more advanced features and options. Backup software can automate the process, allow for scheduled backups, and provide additional backup settings, such as incremental or differential backups.
5. Verify Data Integrity: After completing the backup process, it is crucial to verify the integrity of the backed-up files. Double-check that the files have been successfully copied and can be opened without any issues. This will ensure that your data is safe and accessible before proceeding with the reset.
6. Test Restoring Data: As an extra precautionary measure, try restoring a few files from the backup to ensure that the restoration process works smoothly. This will give you confidence that you can retrieve your backed-up data when needed.
By following these steps, you can effectively back up your important data before resetting your external hard drive. Remember to keep your backup files in a safe location, separate from the drive being reset. This way, you can easily restore your files after the reset process is complete.
In the next section, we’ll discuss some common issues that may arise when resetting an external hard drive and provide troubleshooting tips to help you overcome them.
Troubleshooting Common Issues When Resetting an External Hard Drive
While resetting an external hard drive is usually a straightforward process, you may encounter some common issues along the way. Here are a few troubleshooting tips to help you overcome these challenges:
1. Drive Not Recognized: If your computer or operating system is not detecting the external hard drive after resetting, try the following:
- Ensure that the drive is properly connected, with all cables securely plugged in.
- Try connecting the drive to a different USB port on your computer.
- Restart your computer and check if the drive is recognized upon startup.
- Check if device drivers or firmware updates are available for your drive and install them if necessary.
2. Slow Performance: If you notice slower performance after resetting the drive, consider these troubleshooting steps:
- Make sure your computer meets the system requirements for the drive and that it has enough available resources.
- Check for any background processes or applications that may be consuming excessive resources.
- Run disk cleanup or optimization tools to remove unnecessary files and fragments from the drive.
- Consider updating your antivirus software and performing a full system scan to check for any malware or viruses that may be affecting performance.
3. File System Incompatibility: If the reset external hard drive is not compatible with your desired file system, you may face issues accessing or storing files. In this case, you can:
- Reformat the drive using a different file system that is supported by your operating system.
- Convert the file system using third-party software, if applicable.
- Consider using cross-platform file systems like exFAT, which can be read and written by both Windows and macOS.
4. Data Loss: In rare cases, there may be a risk of data loss during the reset process. To minimize this risk:
- Always back up your important data before resetting the external hard drive.
- Double-check that you have copied all necessary files to a separate storage location.
- Follow the manufacturer’s instructions carefully to avoid any unintended data loss.
If you encounter persistent issues or have concerns about the reset process, it is advisable to seek assistance from the manufacturer’s customer support or consult with a professional technician.
With these troubleshooting tips in mind, you can overcome common challenges that may arise when resetting an external hard drive. In the final section, we’ll summarize the key points discussed in this guide.
Conclusion
Resetting an external hard drive can be a useful solution for addressing performance issues, repurposing the drive, improving compatibility, or ensuring data security. However, it’s crucial to approach the reset process with caution and consider important factors before proceeding.
In this guide, we explored the reasons why resetting an external hard drive may be necessary. We highlighted the importance of backing up important data before resetting and provided a step-by-step guide for resetting the drive on different operating systems.
We discussed the significance of factors such as data backup, operating system compatibility, firmware updates, drive partitioning, drive format, and external power source. Following these considerations will help ensure a successful reset and prevent any data loss or compatibility issues.
We also covered the steps to back up your data effectively before resetting the drive. It is crucial to identify important files, create a backup plan, copy files or use backup software, verify data integrity, and test restoring the data to ensure its accessibility.
Lastly, we provided troubleshooting tips for common issues that may occur during the reset process, including drive recognition problems, slow performance, file system incompatibility, and data loss. It’s important to address these issues promptly to ensure the optimal functionality of your external hard drive.
By following the guidelines, precautions, and troubleshooting tips outlined in this guide, you can confidently reset your external hard drive and make the most of its capabilities. Remember to consult the manufacturer’s instructions and seek professional assistance if needed.
Now it’s time to take control of your external hard drive and begin the process of resetting it to meet your specific needs. Enjoy a fresh start and enhanced performance as you navigate your digital world with a reset external hard drive.