Reasons for Not Finding External Hard Drive on Mac
It can be frustrating when you plug in your external hard drive to your Mac, only to find that it is not being recognized or detected. Before you panic, it’s important to understand the reasons why this may be happening. Here are some common reasons for not finding your external hard drive on a Mac:
- Loose or faulty connection: The first thing to check is the physical connection between your Mac and the external hard drive. Ensure that the USB or Thunderbolt cable is securely plugged in on both ends. Also, try using a different cable or port to rule out any issues with the connection.
- Damaged or incompatible file system: If your external hard drive is formatted with a file system that is not compatible with macOS, it may not show up on your Mac. Macs generally support the ExFAT or MacOS Extended (Journaled) file systems. If your hard drive is formatted with a different file system, you may need to reformat it to make it compatible.
- Drive not mounted: Sometimes, the external hard drive might be connected and recognized by the Mac, but it’s not mounted, meaning it’s not accessible to the user. To check if this is the case, open Finder and look for the external hard drive in the sidebar. If you see it listed, but with a grayed-out icon, it’s not mounted. Right-click on the drive and select “Mount” to make it accessible.
- Drive not recognized by Disk Utility: Disk Utility is a built-in tool on macOS that allows you to manage and troubleshoot storage devices. If your external hard drive is not showing up in Disk Utility, it could indicate a more serious issue with the drive or the Mac’s hardware. Try connecting the drive to another Mac or use a different external enclosure to determine if the problem lies with the drive or the Mac.
- Power issues: External hard drives require power to function, and if they are not receiving enough power, they may not be detected by the Mac. Ensure that the drive is properly connected to a power source if required, such as an external power adapter or a powered USB hub.
These are some of the common reasons why your external hard drive may not be showing up on your Mac. By checking the physical connection, verifying the file system compatibility, mounting the drive, and troubleshooting with Disk Utility, you can often resolve the issue. However, if none of these solutions work, it’s advisable to seek professional assistance to diagnose and resolve the problem.
Checking Physical Connection
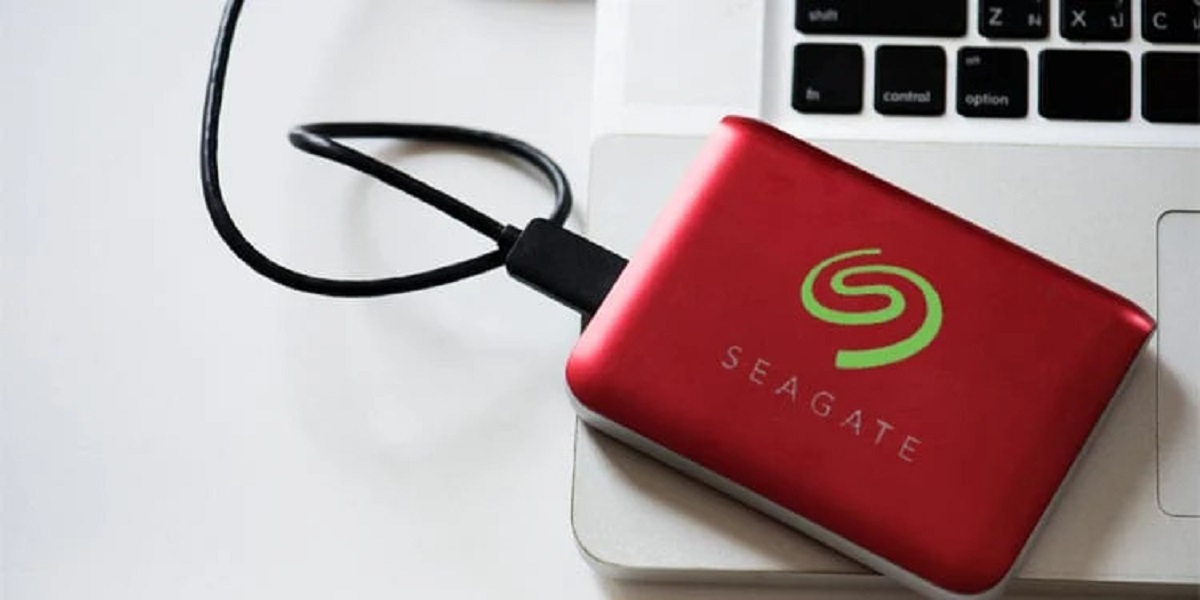
One of the first steps to take when your external hard drive is not being recognized on your Mac is to check the physical connection. Sometimes, the issue can be as simple as a loose or faulty connection. Here are some things to check:
- Ensure the cable is securely plugged in: Make sure that the USB or Thunderbolt cable is firmly plugged into both your Mac and the external hard drive. A loose connection can prevent the drive from being detected. Try disconnecting and reconnecting the cable to ensure a secure connection.
- Use a different cable or port: Sometimes, the cable itself may be damaged or faulty. Try using a different cable to see if that resolves the issue. Additionally, if you are using a USB port, try plugging the cable into a different port on your Mac. This will help rule out any problems with the specific port you were originally using.
- Check for physical damage: Inspect the cable and the ports on both your Mac and the external hard drive for any physical damage. Look for bent pins, frayed wires, or other signs of damage. If you notice any issues, replace the cable or contact the manufacturer for assistance.
- Restart your Mac: Sometimes, a simple restart can help resolve connectivity issues. Restart your Mac and try connecting the external hard drive again. This can refresh the system and potentially fix any temporary glitches that may have caused the drive to not be recognized.
If you have checked the physical connection and ensured that everything is properly connected, but the external hard drive is still not showing up on your Mac, you may need to explore other troubleshooting steps. Checking the physical connection is just the first step in the process of identifying and resolving the issue.
Remember, when handling the cable and the external hard drive, be gentle and avoid applying excessive force. Mishandling can lead to further damage or data loss. If you are unsure about any steps or are unable to resolve the issue on your own, it’s always a good idea to seek professional assistance or contact the manufacturer for specific troubleshooting guidance related to your external hard drive model.
Checking Disk Utility
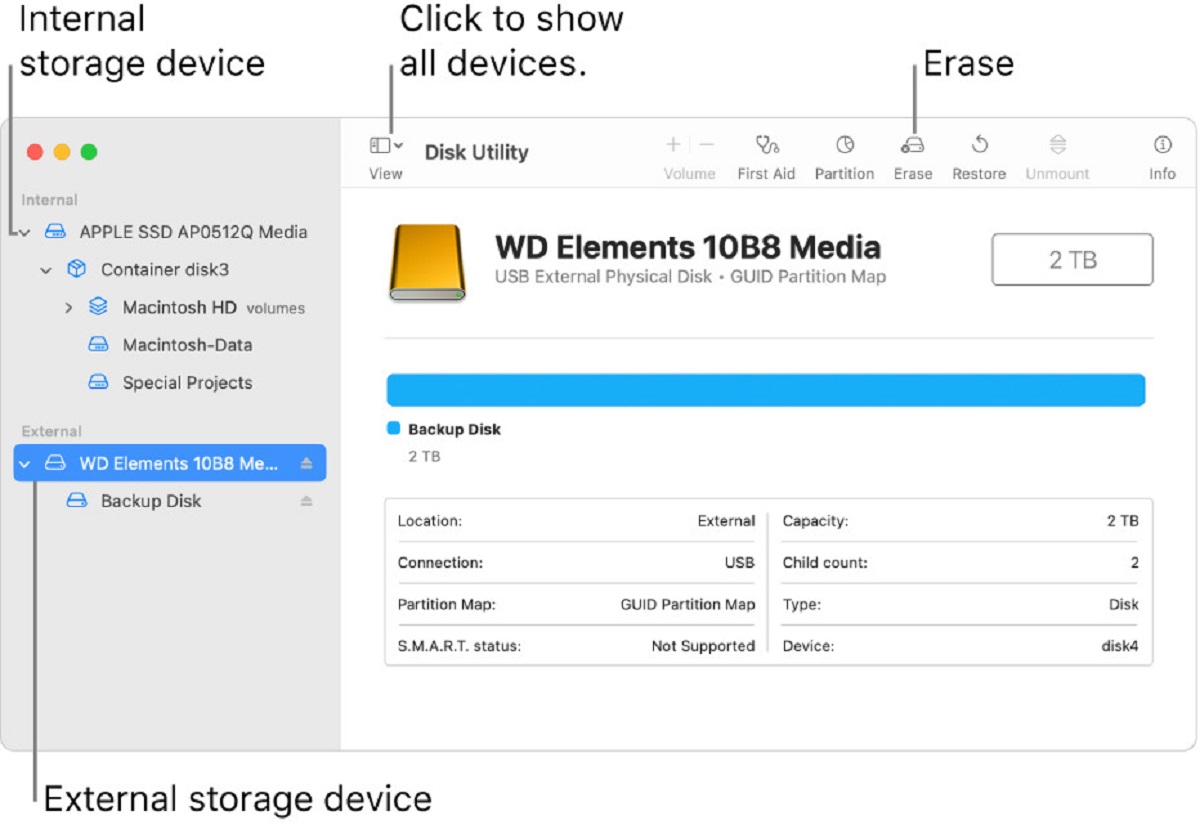
If your external hard drive is not being detected on your Mac, using Disk Utility is an essential step in troubleshooting the issue. Disk Utility is a built-in tool in macOS that allows you to manage and troubleshoot storage devices. Here’s how you can use Disk Utility to check for any potential problems:
- Open Disk Utility: Go to the Finder menu, click “Go,” and then select “Utilities.” In the Utilities folder, double-click on “Disk Utility” to launch the application.
- Check for the external hard drive: In Disk Utility, look for the external hard drive listed on the left-hand side of the window. It should appear under the “External” section. If you cannot find it, make sure that the drive is properly connected to your Mac and try clicking on the “View” button in the toolbar and selecting “Show All Devices.”
- Verify the external hard drive: Once you locate the external hard drive, select it and click on the “First Aid” button at the top of the Disk Utility window. This will initiate a verification process to check the drive for any errors.
- Repair disk permissions: If Disk Utility finds any errors, it will provide options to repair them. Click on the “Repair Disk” or “Repair Disk Permissions” button if available. Note that not all external hard drives support repairing disk permissions.
- Eject and remount the drive: After repairing any identified errors, eject the external hard drive from Disk Utility by clicking on the “Eject” button next to its name. Then disconnect and reconnect the drive to your Mac to see if it is now recognized.
If Disk Utility identifies and fixes any issues with the external hard drive, it should now be detected by your Mac. However, if Disk Utility is unable to repair the drive or does not recognize it at all, there may be a more significant problem with the drive or the Mac’s hardware. At this point, it is recommended to seek professional assistance or contact the manufacturer for further support.
Remember to regularly back up your data to prevent data loss. Running Disk Utility should not be considered a substitute for regular backups. External hard drives can experience physical damage or logical errors that can lead to data loss, so it’s crucial to have a reliable backup strategy in place.
Mounting the External Hard Drive
If your external hard drive is connected to your Mac but not showing up, it is possible that the drive is not mounted. Mounting refers to the process of making the drive accessible to the user. Here’s what you can do to mount your external hard drive:
- Open Finder: Go to the Dock on your Mac and click on the Finder icon to open a Finder window.
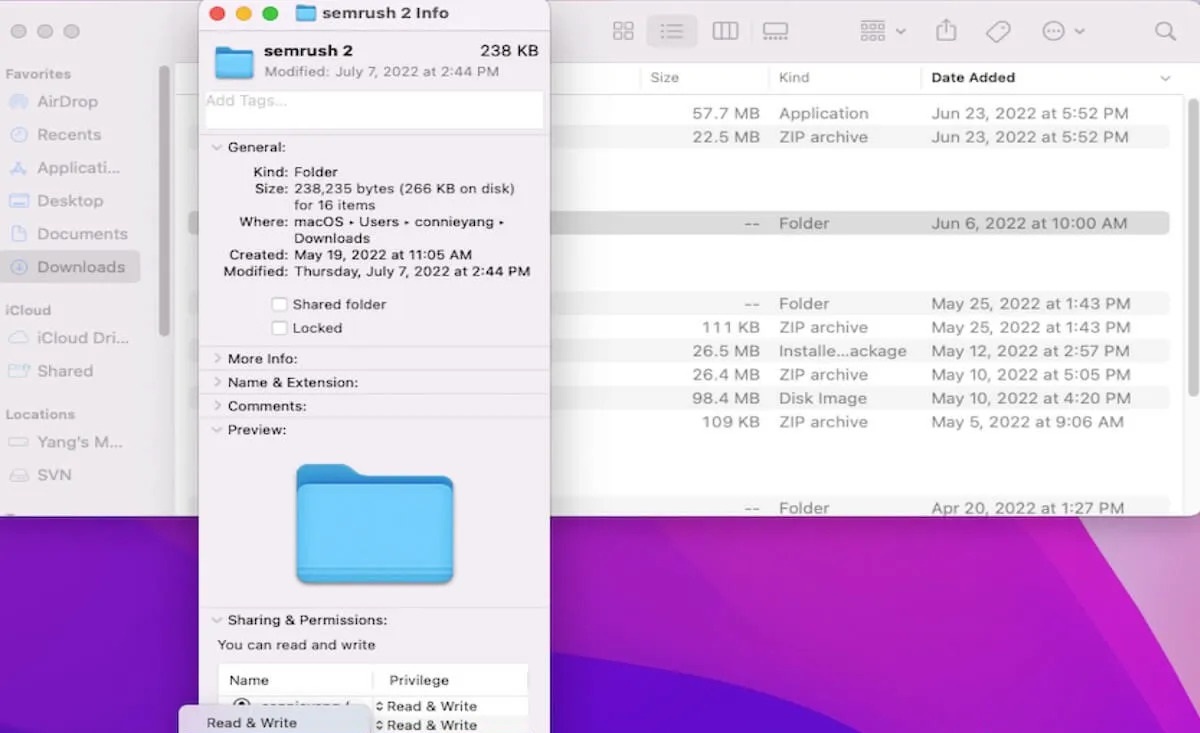
- Check the sidebar: In the Finder window, look for the external hard drive under the “Devices” section in the sidebar. If it is listed but has a grayed-out icon, it means that the drive is not currently mounted.
- Right-click and select “Mount”: To mount the drive, right-click on its name in the sidebar and select “Mount” from the drop-down menu. Alternatively, you can also click on the drive’s icon and then click on the “Mount” button in the toolbar at the top of the Finder window.
- Wait for the drive to mount: After selecting the “Mount” option, wait for a few moments while macOS attempts to mount the drive. Once mounted, the external hard drive should appear with a normal icon in the sidebar.
- Access the drive: Now that the external hard drive is mounted and accessible, you should be able to see and access its contents in the Finder window. Navigate to the drive in the sidebar and double-click on it to open and view the files.
If the above steps successfully mount your external hard drive, you can now use it as intended. However, if the drive still does not show up or cannot be mounted, there may be underlying issues that require further troubleshooting. It is recommended to try connecting the drive to another Mac or using a different external enclosure to determine if the problem lies with the drive or the Mac.
Remember to properly eject the external hard drive when you are finished using it to ensure data integrity. To eject, right-click on the drive in the Finder sidebar and select “Eject” from the drop-down menu. Alternatively, you can also drag the drive’s icon to the Trash bin, which will change to an eject symbol when you hover over it.
By successfully mounting your external hard drive, you can now utilize it for data storage, backups, or any other purpose intended. Keep in mind that regularly backing up your data is essential to protect against potential data loss.
Formatting the External Hard Drive
If your external hard drive is not being recognized on your Mac, it may be necessary to format the drive. Formatting involves erasing all the data on the drive and setting up a file system that is compatible with your Mac. Here are the steps to format your external hard drive:
- Open Disk Utility: Launch Disk Utility by going to the Finder menu, clicking “Go,” selecting “Utilities,” and then double-clicking on “Disk Utility.”
- Locate the external hard drive: In Disk Utility, find your external hard drive listed on the left-hand side of the window. Make sure you select the correct drive, as formatting will erase all data.
- Click on the “Erase” tab: Once you have selected the external hard drive, navigate to the “Erase” tab at the top of the Disk Utility window. This is where you can initiate the formatting process.
- Select a name and format: In the “Name” field, assign a name to your external hard drive. Choose a name that is descriptive and easy to remember. Then, from the “Format” drop-down menu, select the file system format that is compatible with macOS, such as ExFAT or MacOS Extended (Journaled).
- Choose a scheme: The “Scheme” option only applies if you plan to use the drive with multiple operating systems. If you intend to use it exclusively with your Mac, select “GUID Partition Map.”
- Confirm and format: Double-check your settings and make sure you have backed up any important data before proceeding. Once you are ready, click on the “Erase” button to start the formatting process. Disk Utility will warn you that this action will erase all data on the drive. Confirm your decision and allow Disk Utility to format the drive.
- Wait for formatting to complete: The time it takes to format the drive will depend on its size. Larger drives may take longer. During the process, do not disconnect the drive or shut down your Mac.
Once the formatting is complete, your external hard drive should now be recognized by your Mac. You can verify this by checking if the drive appears in the Finder sidebar or in Disk Utility with the new name you assigned to it. You can now start using the drive for data storage, backups, or any other purpose.
It is important to note that formatting will permanently erase all data from the drive. Make sure you have a backup of any important files before proceeding with the formatting process.
If the formatting process does not resolve the issue or if you encounter any errors during formatting, it is recommended to seek professional assistance or contact the manufacturer for further support. They can help you troubleshoot the problem or provide guidance specific to your external hard drive model.
Troubleshooting Other Issues
If you have followed the previous steps and your external hard drive is still not being detected on your Mac, there may be other underlying issues at play. Here are some additional troubleshooting steps to help resolve the problem:
- Update macOS: Make sure you are running the latest version of macOS on your Mac. Software updates often include bug fixes and improvements that can help resolve compatibility issues with external devices.
- Try a different USB or Thunderbolt port: Sometimes, specific ports on your Mac may not be functioning properly. Switch to a different USB or Thunderbolt port to see if the problem persists. Also, try connecting the external hard drive to another Mac to determine if the issue lies with your computer or the drive itself.
- Test the external hard drive on another computer: Connect the external hard drive to another computer, such as a Windows PC, to see if it is recognized. If it is detected on the other computer, the problem may be specific to your Mac. In this case, consider resetting the NVRAM or SMC on your Mac.
- Reset NVRAM or PRAM: NVRAM (Non-Volatile Random-Access Memory) or PRAM (Parameter Random-Access Memory) stores certain settings for your Mac, including hardware and startup-related configurations. Resetting it can clear any potential conflicts or corruptions. To reset NVRAM or PRAM, restart your Mac and hold down the Option, Command, P, and R keys simultaneously until you hear the startup chime for the second time.
- Reset SMC: The System Management Controller (SMC) controls various hardware functions on your Mac. Resetting it can help resolve power-related issues. To reset the SMC, shut down your Mac, then hold down the Shift, Control, and Option keys, and the Power button simultaneously for about 10 seconds. Release the keys, then turn on your Mac again.
- Check for device conflicts: Disconnect any other external devices connected to your Mac, except for essential peripherals like a keyboard or mouse. Sometimes, conflicts between devices can prevent the correct detection of the external hard drive.
If none of these troubleshooting steps resolve the issue, it is advisable to seek professional assistance or contact the manufacturer for specific support. They can help diagnose and fix any hardware or software-related problems with your external hard drive or Mac.
Remember to regularly back up your data to prevent data loss. It’s also important to handle your external hard drive with care, avoiding impacts or abrupt removals that can lead to physical damage. By implementing these troubleshooting techniques, you can increase your chances of resolving the issue and getting your external hard drive to work properly with your Mac again.