Introduction
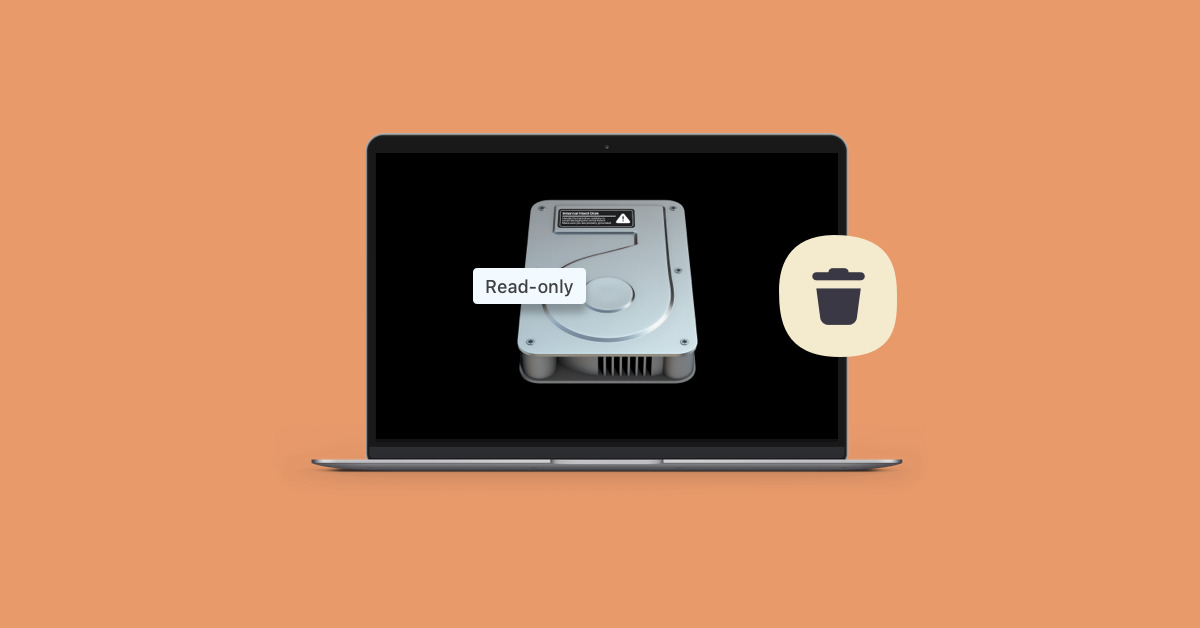
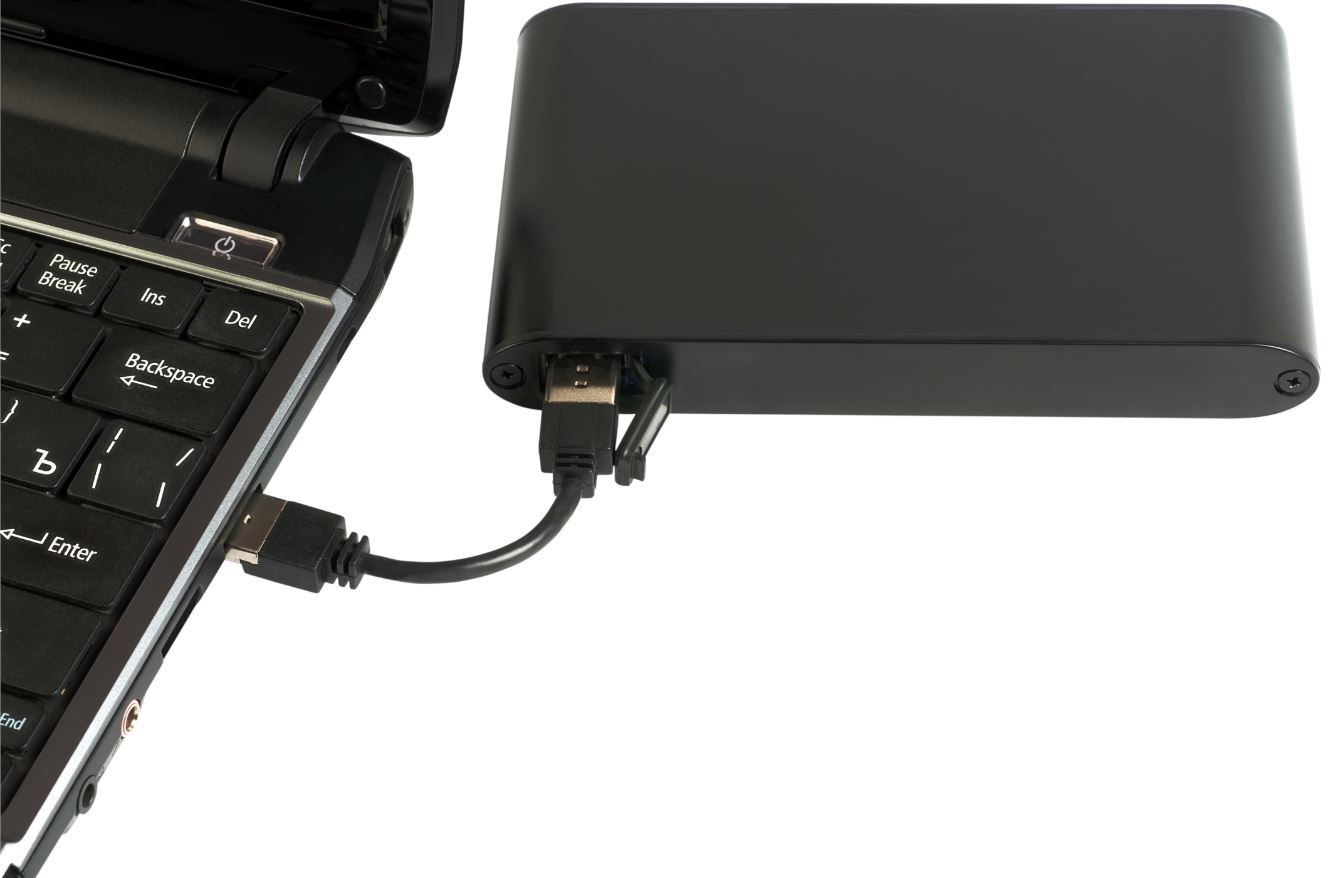
Welcome to this guide on how to change an external hard drive from read-only on a Mac. Many Mac users encounter the frustrating issue of being unable to write or modify files on their external hard drives. This can be particularly troublesome when you need to backup important data, transfer files, or perform other tasks that require writing access to the drive.
Before we delve into the solutions, let’s briefly discuss what a read-only external hard drive means. When a hard drive is set to read-only, it means that you can only view or read the files on the drive, but cannot delete, modify, or add any new files or folders to it. This read-only status is usually set by default to protect the integrity of the data on the drive. However, there are situations where you may need to change this status to enable read and write access.
In this guide, we will explore different methods to address this issue and regain full control over your external hard drive’s read and write permissions. Whether you are facing this problem with a newly purchased external hard drive or an older drive that suddenly became read-only, we’ve got you covered.
It’s important to note that while the methods described here are specifically for Mac users, some of them may also work on other operating systems. So, without further ado, let’s jump right in and find a solution that works for you!
Overview of read-only external hard drive on Mac
Understanding the reasons behind a read-only external hard drive on your Mac is crucial in finding the appropriate solution. When you connect an external hard drive to your Mac, the operating system automatically mounts it and assigns it a read and write status.
However, there are instances where the external hard drive becomes read-only, preventing any modifications to its contents. This can be incredibly frustrating, especially if you rely on the drive for important data storage or file transfers.
One common reason for an external hard drive being read-only is the file system compatibility issue. Different file systems, such as FAT32, exFAT, or NTFS, have different levels of compatibility with Mac. For instance, while FAT32 and exFAT are compatible with both Mac and Windows, NTFS is primarily designed for Windows systems.
Another possible cause is the ownership and permissions settings. Every file and folder on your Mac has certain ownership and permission settings that determine who can access, modify, or delete them. If the external hard drive’s ownership and permissions are not set correctly, it can result in read-only status.
Furthermore, hardware or software malfunctions might play a role in the read-only status of your external hard drive. Issues such as disk errors, damaged connectors, or firmware problems can prevent your Mac from properly recognizing the drive and setting read and write permissions.
In the following sections, we will explore different methods to resolve these issues and regain full control over your external hard drive. By checking and changing permissions, reformatting the drive, repairing it with Disk Utility, or utilizing third-party software, you can overcome the read-only barrier and restore the functionality of your external hard drive.
Reasons for external hard drive being read-only
There are several reasons why your external hard drive might be set to read-only on your Mac. Understanding these reasons can help you identify the root cause of the issue and choose the most appropriate solution. Here are some common factors that can result in an external hard drive being read-only:
1. File system compatibility: Different file systems have different levels of compatibility with Mac. If your external hard drive uses a file system that is not fully compatible with macOS, it can lead to read-only status. For example, if the drive is formatted with Windows NTFS, which is not natively supported by macOS, you may encounter read-only issues.
2. Ownership and permissions: Every file and folder on your Mac has ownership and permissions settings that determine who can access, modify, or delete them. If the permissions on the external hard drive are set incorrectly, it can prevent you from making any changes to the files or folders on the drive.
3. Hardware or software issues: Problems with the external hard drive itself, such as disk errors, damaged connectors, or firmware issues, can cause it to become read-only. Additionally, outdated or incompatible software or drivers on your Mac can interfere with the proper functioning of the drive and result in read-only status.
4. Write protection: Some external hard drives come with a physical write protection switch or button. If this switch is accidentally turned on, it will prevent any write operations on the drive, effectively making it read-only. It’s important to check if your drive has this feature and ensure it is in the correct position.
5. System settings: In some cases, the read-only status is caused by specific system settings on your Mac that restrict write access to external drives. These settings are typically put in place for security reasons, but they can also unintentionally lock you out of making changes to your external hard drive.
Now that we have a better understanding of the possible reasons behind a read-only external hard drive, let’s explore various methods to tackle this issue and regain write access to your drive.
Method 1: Checking and changing permissions
One of the first steps to take when dealing with a read-only external hard drive on your Mac is to check and modify the permissions settings. This method involves ensuring that you have the necessary privileges to access and modify the files and folders on the drive. Here’s how to proceed:
1. Open Finder: Launch Finder by clicking on the Finder icon in your dock or by pressing Command + Space and typing “Finder” in the Spotlight search bar.
2. Select the external hard drive: In the sidebar of the Finder window, locate and select the external hard drive that is experiencing the read-only issue. Make sure to select the actual drive and not just a specific folder or file within it.
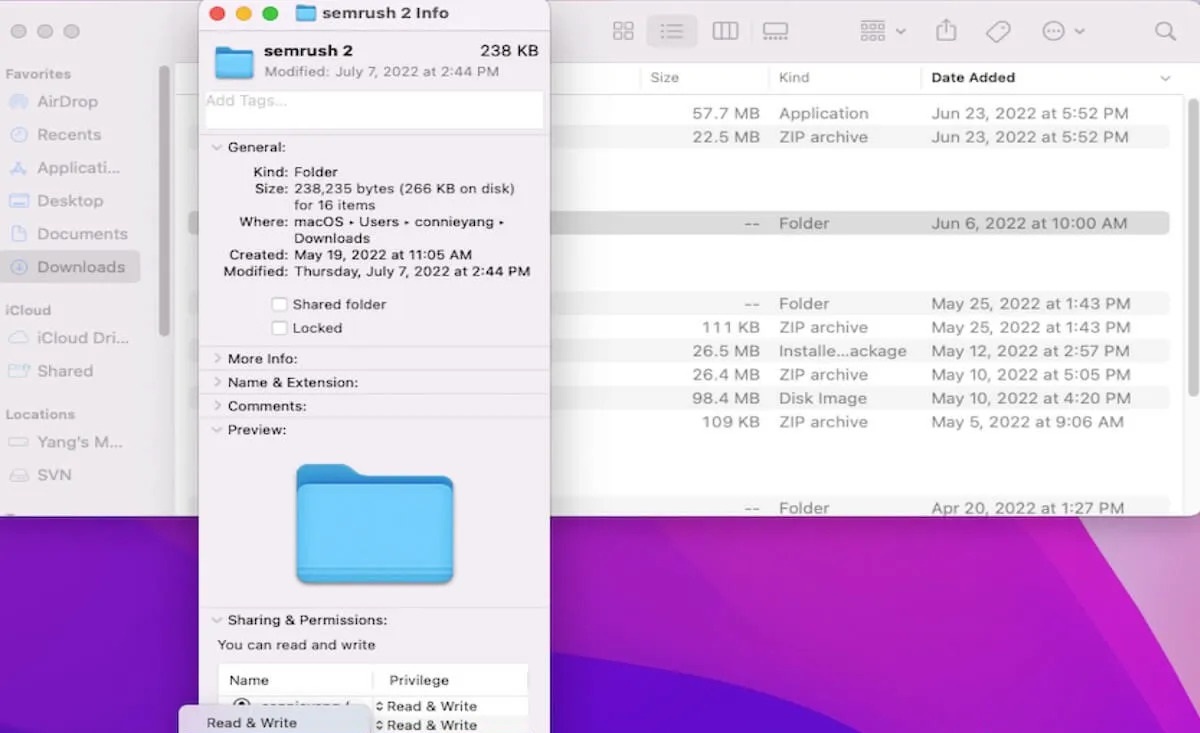
3. Get Info: With the external hard drive selected, go to the File menu and click on “Get Info” or press Command + I. This will open the Get Info window for the drive.
4. Unlock the settings: At the bottom of the Get Info window, you may see a padlock icon. If the padlock is locked, click on it and enter your administrator password to unlock the settings. This will allow you to make changes to the permissions.
5. Adjust permissions: In the Get Info window, you will see a section named “Sharing & Permissions.” Here, you can view the current permissions settings for the selected drive. To change the permissions, click on the lock icon in the bottom-right corner, enter your administrator password again, and then click on the “+” button to add yourself as a user with read and write access.
6. Apply changes: After adding yourself with the appropriate permissions, make sure to click on the gear icon below the list of users and select “Apply to enclosed items.” This will apply the new permissions to all files and folders within the external hard drive.
7. Test the drive: Close the Get Info window and try modifying a file or creating a new folder on the external hard drive to test if the read-only issue has been resolved. If you are now able to write to the drive, congratulations! If not, proceed to the next method.
By checking and adjusting the permissions settings on the external hard drive, you can often fix the read-only problem and regain full write access. However, if this method did not resolve the issue, don’t worry. We have several other methods to explore, which we will cover in the upcoming sections.
Method 2: Reformatting the external hard drive
If the previous method didn’t resolve the read-only issue on your external hard drive, you can try reformatting the drive. This method involves erasing all data on the drive and setting it up with a new file system that is compatible with your Mac. Here’s how you can reformat your external hard drive:
1. Backup your data: Before reformatting the external hard drive, it’s crucial to back up any important data stored on the drive. Formatting will erase all the files and folders, so make sure to copy them to another location, such as your Mac’s internal hard drive or a cloud storage service.
2. Launch Disk Utility: Open Finder and navigate to “Applications” > “Utilities” > “Disk Utility.”
3. Select the external hard drive: In Disk Utility, locate the external hard drive in the list of available drives and select it.
4. Erase the drive: Click on the “Erase” tab at the top of the Disk Utility window. Choose a new name for your drive and select the desired file system. For optimal compatibility with Mac, it’s recommended to choose either “Mac OS Extended (Journaled)” or “APFS” if your Mac is running macOS High Sierra or later.
5. Start the reformatting process: Double-check that you have selected the correct drive and click on the “Erase” button. Disk Utility will warn you that all data on the drive will be erased. Confirm your decision and let Disk Utility reformat the drive. The process may take some time, depending on the size of the drive.
6. Verify the drive: Once the reformatting process is complete, Disk Utility will display a notification. You can click on “Done” to close the window.
7. Test the drive: After reformatting, reconnect the external hard drive to your Mac and test if the read-only issue has been resolved. You should now be able to read from and write to the drive without any restrictions.
Reformatting the external hard drive can effectively eliminate any compatibility or permission-related issues, allowing you to regain full control over the drive. However, remember to back up your data before proceeding, as formatting will erase all existing files and folders on the drive.
Method 3: Repairing the external hard drive with Disk Utility
If you’re still facing a read-only issue with your external hard drive on Mac, it’s worth trying to repair the drive using the built-in Disk Utility tool. Disk Utility can help identify and fix any disk errors that may be causing the read-only status. Here’s how you can repair the external hard drive:
1. Open Disk Utility: Launch Finder, go to “Applications,” then “Utilities,” and click on “Disk Utility.”
2. Select the external hard drive: In Disk Utility, locate the external hard drive in the list of available drives and select it. Make sure you select the actual drive and not any of its partitions or volumes.
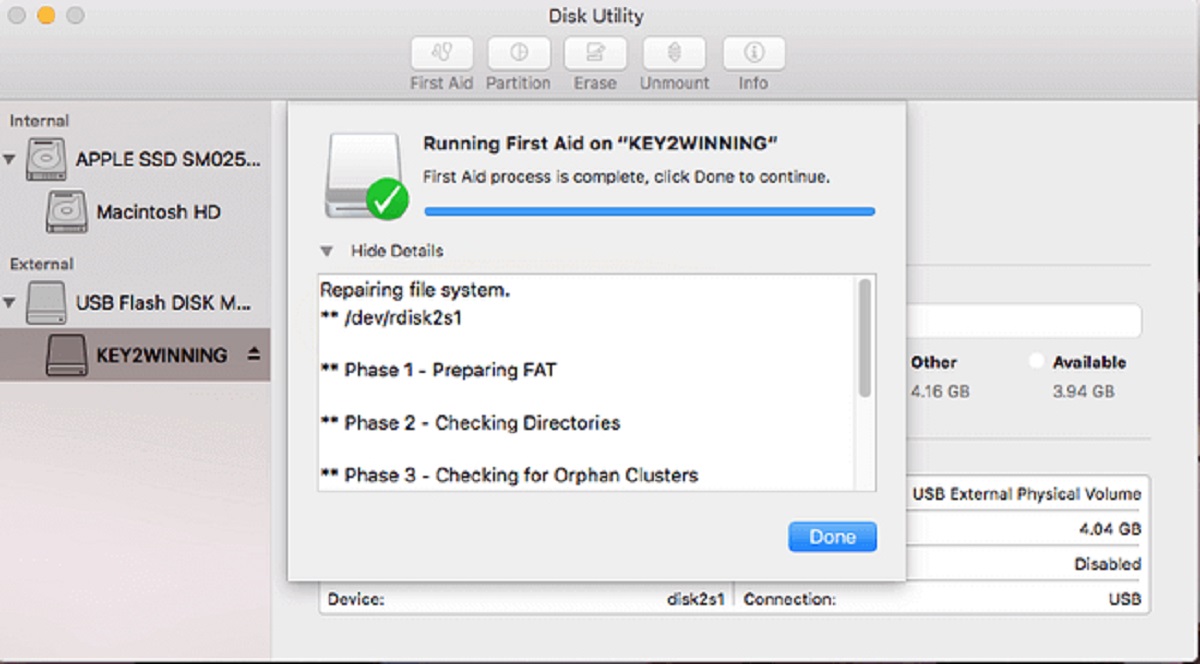
3. Choose “First Aid”: Click on the “First Aid” button at the top of the Disk Utility window. This will initiate the disk repair process.
4. Run the repair: Click on the “Run” button to begin the repair process. Disk Utility will scan the drive for errors and attempt to fix any issues that are found.
5. Monitor the progress: The repair process may take some time, depending on the size and condition of the drive. You can monitor the progress in the progress bar displayed by Disk Utility.
6. Review the results: Once the repair process is complete, Disk Utility will display a summary of the repairs performed. Take note of any specific errors that were addressed, as they may provide insights into the read-only issue.
7. Test the drive: After repairing the external hard drive, reconnect it to your Mac and test if the read-only issue has been resolved. You should now be able to access the drive with read and write permissions.
Repairing the external hard drive using Disk Utility can help resolve any underlying disk errors that may be causing the read-only status. This method is particularly useful if the issue is not related to permissions or compatibility. However, if the read-only issue persists, we have another method to explore.
Method 4: Using third-party software to remove read-only status
If the previous methods didn’t resolve the read-only issue on your external hard drive, you can consider using third-party software specifically designed to remove the read-only status. These software options often come with additional features and functionalities that can help you regain write access to your drive. Here’s how you can use third-party software to remove the read-only status:
1. Research and download: Look for reputable third-party software that specializes in managing external drives and their read and write permissions. Take some time to read reviews and determine which software is most suitable for your specific needs.
2. Install the software: Once you have chosen the software, follow the installation instructions provided by the developer. Make sure to only download software from trusted sources to avoid any potential security risks.
3. Launch the software: Open the software and connect your external hard drive to your Mac. The software should detect the drive and display relevant information about it.
4. Explore the features: Navigate through the software interface to find the option that allows you to remove the read-only status from the external hard drive. The specific steps may vary depending on the software you are using.
5. Remove the read-only status: Follow the on-screen instructions provided by the software to remove the read-only status from your external hard drive. This may involve adjusting permissions, applying changes, or running diagnostics to resolve any underlying issues.
6. Test the drive: Once the software has completed its process, reconnect the external hard drive to your Mac and check if the read-only issue has been resolved. You should now have full read and write access to the drive.
Using third-party software can provide an alternative solution when the built-in methods fail to remove the read-only status from your external hard drive. These software options are specifically designed to address such issues and often come with advanced features for managing your drives more efficiently.
Remember to choose reputable software and ensure you have a backup of your data before proceeding with any changes made by third-party software.
Conclusion
Dealing with a read-only external hard drive on your Mac can be a frustrating experience. However, with the methods outlined in this guide, you can resolve the issue and regain full control over your drive.
We first started by understanding the reasons behind a read-only external hard drive, which include file system compatibility, ownership and permissions settings, hardware or software malfunctions, write protection, and system settings. By identifying the root cause, you can choose the most appropriate solution.
We then explored four methods to remove the read-only status. By checking and changing permissions, you can ensure that you have the necessary privileges to access and modify the files on the drive. Reformatting the external hard drive can eliminate compatibility or permissions-related issues, although it’s essential to back up your data before proceeding. Using Disk Utility, you can repair any disk errors that may be causing the read-only status, enhancing the drive’s functionality. Finally, utilizing third-party software can provide additional options to remove the read-only status and manage your external hard drive more efficiently.
Remember, it’s crucial to back up your data before attempting any changes to your external hard drive. Additionally, make sure to choose reputable software if opting for a third-party solution.
By following these methods, you should be able to overcome the read-only barrier and regain write access to your external hard drive on your Mac. Enjoy the freedom of modifying, transferring, and backing up your files with ease!