Introduction
So, you’ve got an external hard drive connected to your Mac, but you’re not quite sure where to find it? Don’t worry, you’re not alone. Many Mac users find themselves in the same situation, searching for their external drives amidst the various files and folders on their desktops.
Fortunately, locating your external hard drive on a Mac is a straightforward process once you know where to look. In this article, we’ll guide you through several methods to find your external hard drive, ensuring that you can easily access and manage your files.
Whether you’re a tech-savvy Mac user or new to the platform, the following techniques will help you locate your external hard drive quickly and efficiently. From checking the desktop to using Finder, we’ll cover various methods that cater to different preferences and levels of familiarity with macOS.
By the end of this article, you’ll have a clear understanding of where to find your external hard drive on a Mac, enabling you to transfer files, back up data, and organize your digital life with ease.
So, without further ado, let’s dive into the various methods you can use to locate your external hard drive on your Mac.
Checking the Desktop
The first place to look for your external hard drive on your Mac is the desktop. By default, macOS displays connected external drives as icons directly on the desktop, making them easily accessible.
To check if your external hard drive is visible on the desktop, take a look at your screen. If you see an icon with the name of your external drive, congratulations! You’ve found it.
If you don’t see your external drive on the desktop, there are a few reasons why it might not be showing up. One possibility is that you have disabled the option to show external drives on the desktop. Don’t worry; we’ll cover how to enable this option later in the article.
Another reason why your external drive might not be visible on the desktop is that it hasn’t been properly mounted. When you connect an external drive to your Mac, it needs to be mounted to appear on the desktop. To check if your drive is properly mounted, go to the next section.
In some cases, if your external hard drive is not showing up on the desktop, it might be an indication of a deeper issue. This could be due to compatibility issues, a faulty connection, or problems with the drive itself. If this is the case, don’t worry—we’ll explore troubleshooting options later in the article.
Now that you know how to check for your external drive on the desktop let’s move on to exploring other methods to locate it on your Mac.
Navigating to Finder
If your external hard drive is not visible on the desktop, there’s no need to worry. Mac provides a powerful file management tool called Finder, which allows you to access and organize your files and drives.
To navigate to Finder, you can either click on the Finder icon located in your dock (the row of icons at the bottom of your screen) or use the keyboard shortcut Command + Spacebar to open Spotlight and search for Finder.
Once you have opened Finder, you will see a window with various options and locations on the left-hand side. This sidebar provides quick access to different folders, devices, and drives on your Mac.
Now, look for the “Devices” section in the sidebar. Under this section, you should see the name of your external hard drive listed. Click on the name of your drive to open it and view its contents.
If you do not see your external hard drive listed in the sidebar, it might be because the option to display external drives in the sidebar is disabled. Not to worry, we’ll cover how to enable this option in the next section of this article.
Using Finder allows you to perform various actions on your external hard drive, such as copying, deleting, and moving files. It provides a user-friendly interface to manage your files and organize your storage devices efficiently.
Now that you have navigated to Finder let’s explore how to customize Finder preferences to ensure that your external hard drive appears on the desktop and in the sidebar for easy access.
Opening Finder Preferences
To customize the Finder preferences and enable the display of external drives on both the desktop and sidebar, you’ll need to access the Finder Preferences. Opening Finder Preferences allows you to tweak various settings and personalize your Finder experience.
To open Finder Preferences, first, make sure you have the Finder window active or click on the Finder icon in your dock to bring it to the foreground. Then, click on the “Finder” option in the menu bar at the top of your screen and select “Preferences” from the drop-down menu.
Alternatively, you can use the keyboard shortcut Command + Comma (,). This will open the Finder Preferences window and allow you to customize various settings.
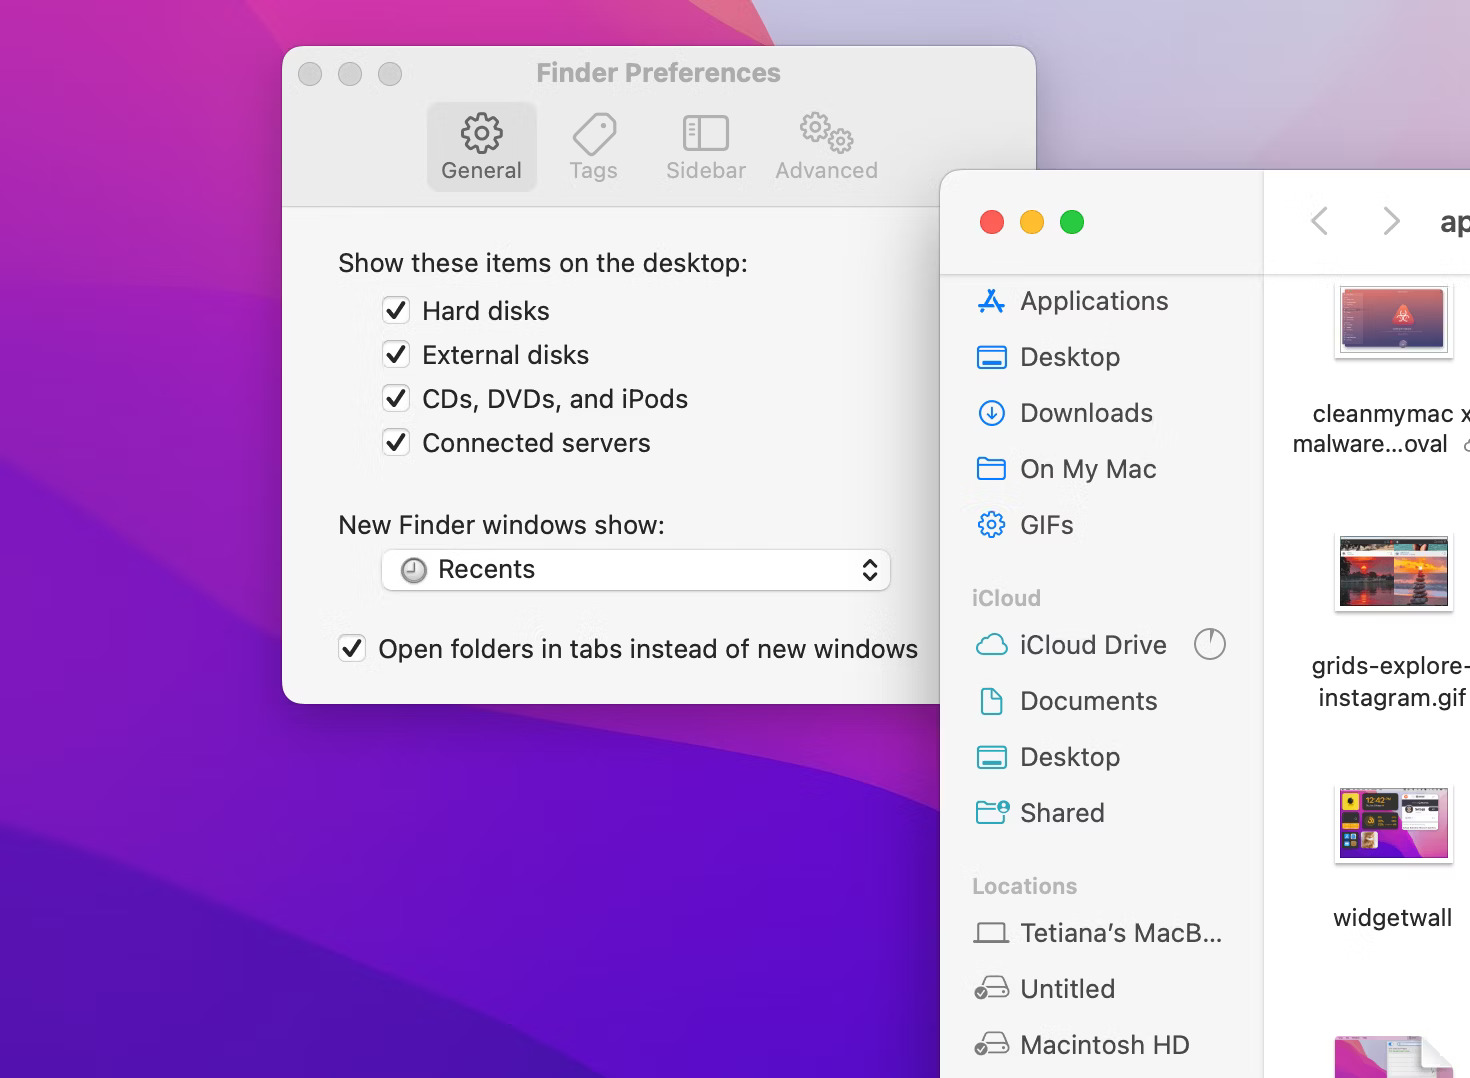
Once you have opened Finder Preferences, you will see several tabs across the top of the window. Click on the “General” tab to access general preferences for Finder.
In the General tab, you will find an option called “Show these items on the desktop.” Make sure that the checkbox next to “External disks” is selected. This will ensure that any connected external drives are displayed as icons on your desktop.
Next, click on the “Sidebar” tab in the Finder Preferences window. Here, you will find a list of options for customizing the sidebar in Finder.
Scroll down until you see the “Devices” section. Make sure that the checkbox next to “External disks” is selected. This will ensure that your external drives appear in the sidebar for easy access.
Once you have made these changes in Finder Preferences, close the window, and return to Finder. You should now see your external hard drive icon on the desktop and listed under the “Devices” section in the sidebar.
Opening Finder Preferences and customizing these settings allows you to have a more streamlined and convenient experience when it comes to accessing your external hard drives on your Mac.
Now that you have enabled the display of external drives on both the desktop and sidebar, let’s explore how to access your external drives using different methods within Finder.
Displaying External Drives on the Desktop
If you prefer to have your external drives visible on the desktop for easy access, you can enable the option to display them directly. This way, you can simply double-click on the drive’s icon to open it and view its contents.
To display your external drives on the desktop, we’ll need to revisit the Finder Preferences. Follow the steps outlined in the previous section to open Finder Preferences.
In the General tab of Finder Preferences, you will see the option called “Show these items on the desktop.” Here, make sure that the checkbox next to “External disks” is selected.
By enabling this option, macOS will display any connected external drives as icons directly on your desktop. You can easily identify them by their names, making it convenient to access and manage your files and folders.
Keep in mind that displaying all external drives on the desktop may clutter your screen if you have multiple drives connected. If having too many icons on your desktop becomes overwhelming, you can always revert to accessing your drives through Finder’s sidebar or other methods that we will cover later in this article.
Now that you have enabled the display of your external drives on the desktop, take a look at your desktop. You should see the icons representing your connected external drives. Simply double-click on the drive’s icon to open it and browse through its contents.
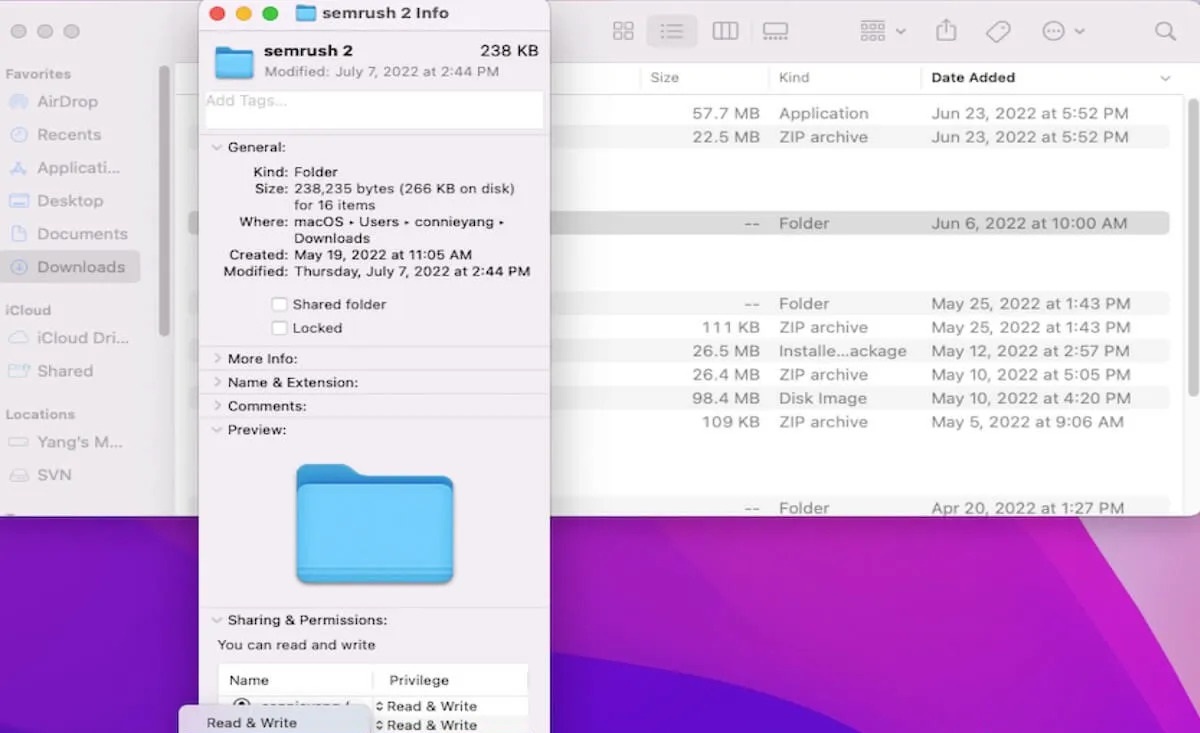
Remember that it’s crucial to properly eject any external drive before disconnecting it from your Mac. To safely eject a drive, right-click on its icon on the desktop and select “Eject” from the contextual menu. This ensures that any ongoing operations are completed, preventing data loss or potential drive corruption.
Displaying external drives on the desktop offers a quick and straightforward way to access your files and folders. However, if you prefer a more organized approach, utilizing the sidebar in Finder or other methods we’ll discuss in the following sections may be more suitable for your workflow.
Now that you know how to display your external drives on the desktop let’s explore other methods to access and locate your drives within Finder.
Using the Sidebar in Finder
Finder’s sidebar provides a convenient and customizable way to access your files, folders, and drives, including your external hard drives. By utilizing the sidebar, you can quickly navigate to your drives without cluttering your desktop with icons.
To access your external drives through the sidebar, open Finder by clicking on the Finder icon in your dock or using the keyboard shortcut Command + Spacebar to open Spotlight and search for Finder.
In the Finder window, look for the sidebar on the left-hand side. It contains various sections, including Favorites, iCloud Drive, and locations like Applications, Documents, and Downloads.
Scroll down the sidebar until you reach the “Devices” section. Under this section, you’ll find the names of your connected external drives. Simply click on the name of the drive you want to access, and it will open, displaying its contents.
If you do not see the “Devices” section in the sidebar, it might be hidden. To show the “Devices” section, go to the Finder menu bar, click on “Finder,” then select “Preferences.”
In the Finder Preferences window, click on the “Sidebar” tab. Here, you can customize which sections and items appear in the sidebar.
Make sure the checkbox next to “External disks” is selected under the “Devices” section. This will ensure that your external drives are displayed in the sidebar for easy access.
Once you have made these changes, close the Finder Preferences window and return to Finder. You should now see the “Devices” section with your external drives listed in the sidebar.
Utilizing the sidebar in Finder allows you to have a clutter-free desktop while still providing quick access to your external drives. It’s a convenient way to organize and navigate your files and folders on your Mac.
In addition to the sidebar, there are other methods within Finder to locate and access your external drives, which we will explore in the following sections of this article.
Accessing External Drives in the Go Menu
The Go menu in Finder provides another efficient way to access your external drives on your Mac. Using this menu, you can quickly navigate to specific locations, including your connected external drives, without having to search through various folders.
To access the Go menu, open Finder by clicking on the Finder icon in your dock or using the keyboard shortcut Command + Spacebar to open Spotlight and search for Finder.
In the Finder window, click on the “Go” option in the menu bar at the top of your screen. A drop-down menu will appear, displaying several locations and options.
Within the Go menu, you will find a list of recently accessed folders, as well as specific locations like Applications, Documents, and Downloads. To access your external drives, look for the “Computer” option near the bottom of the Go menu and click on it.
A window will open, showing all of your connected drives, including your external hard drives. Simply click on the name of the drive you want to access, and it will open, displaying its contents.
If you frequently access specific folders or drives, you can also add them to the Favorites section of the Go menu for quick and easy access. To add a folder or drive to the Favorites, navigate to the desired location, click on it, and drag it into the Favorites section.
Using the Go menu in Finder provides a convenient way to access your external drives without cluttering your desktop or sidebar. It offers a quick and efficient method to navigate to specific locations on your Mac.
Now that you know how to access your external drives using the Go menu, let’s move on to another method: searching for your external drives using Spotlight.
Searching for External Drives in Spotlight
Spotlight, the powerful search feature on your Mac, can be a handy tool for quickly locating your external drives. With Spotlight, you can search for files, folders, applications, and even external drives, making it a versatile method to find what you’re looking for.
To access Spotlight, click on the magnifying glass icon located in the top-right corner of your screen, in the menu bar. Alternatively, you can use the keyboard shortcut Command + Spacebar to open Spotlight.
In the Spotlight search bar that appears, start typing the name of your external drive. As you type, Spotlight will provide suggestions and search results related to what you’re entering.
If your external drive is connected and indexed by Spotlight, it should appear in the search results. You can identify it by the external drive icon next to its name. Simply click on the drive in the search results to open it and view its contents.
If your external drive doesn’t immediately show up in the search results, try typing the full name of the drive or a specific keyword related to it. Spotlight will search through your files and folders, including external drives, to find the matching results.
In addition to searching for your external drives by name, you can also use Spotlight to search for specific files or folders within your drives. This can be particularly helpful when you’re trying to locate a specific document or file that’s stored on your external drive.
Spotlight offers a quick and efficient way to locate your external drives and search for specific files within them. By harnessing the power of Spotlight’s search capabilities, you can save time and effortlessly find what you need without navigating through numerous folders.
Now that you know how to search for your external drives using Spotlight, let’s explore another method: using Disk Utility to locate your drives.
Using Disk Utility to Locate External Drives
If you’re having trouble locating your external drives using the previous methods, or if you need to manage and troubleshoot your drives, Disk Utility can be a valuable tool. Disk Utility is a built-in macOS application that allows you to manage and repair your storage devices, including external drives.
To open Disk Utility, click on the Finder icon in your dock to bring it to the foreground. Then, click on “Go” in the menu bar at the top of your screen and select “Utilities” from the drop-down menu. In the Utilities folder, you’ll find the Disk Utility application. Click on it to open.
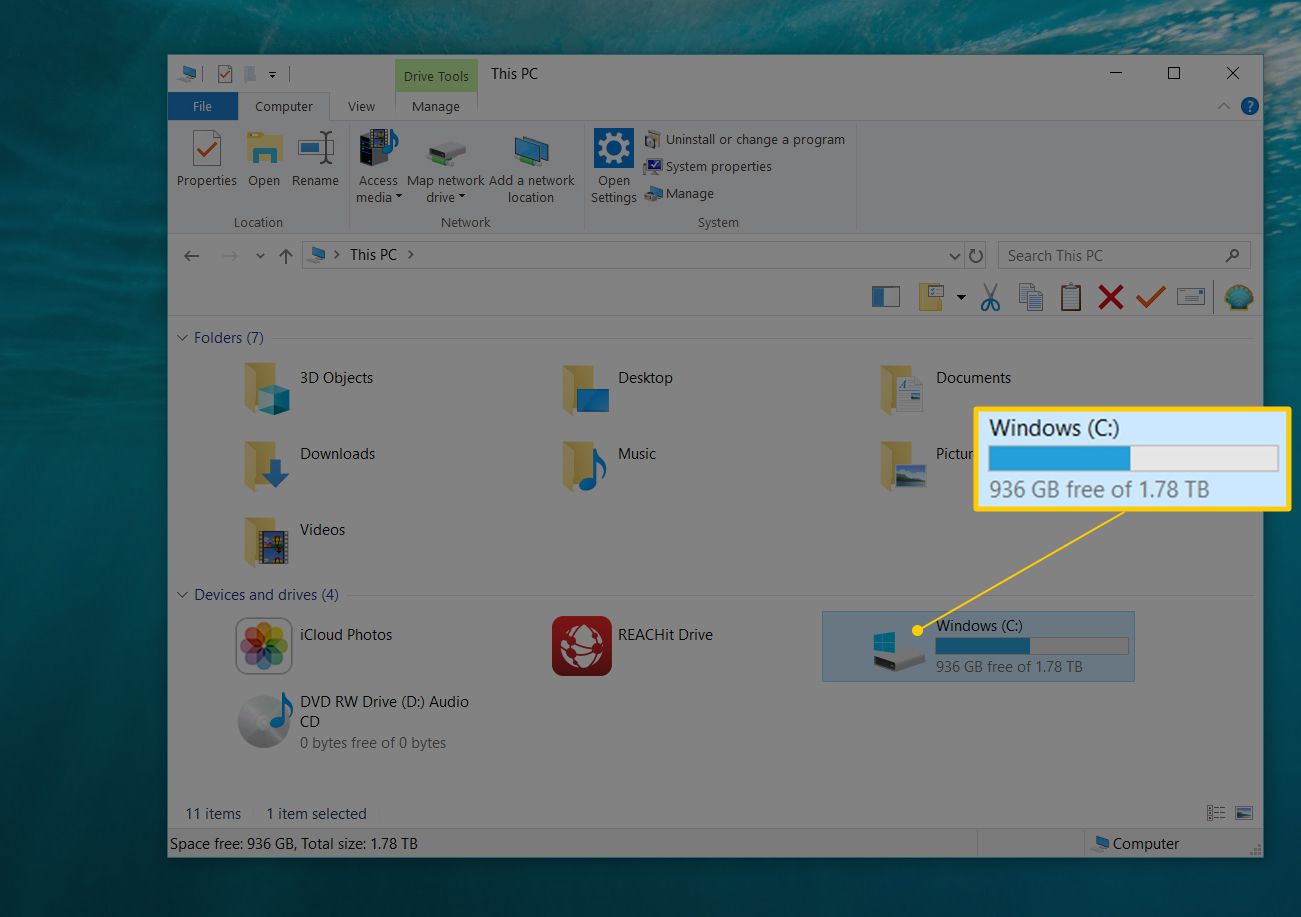
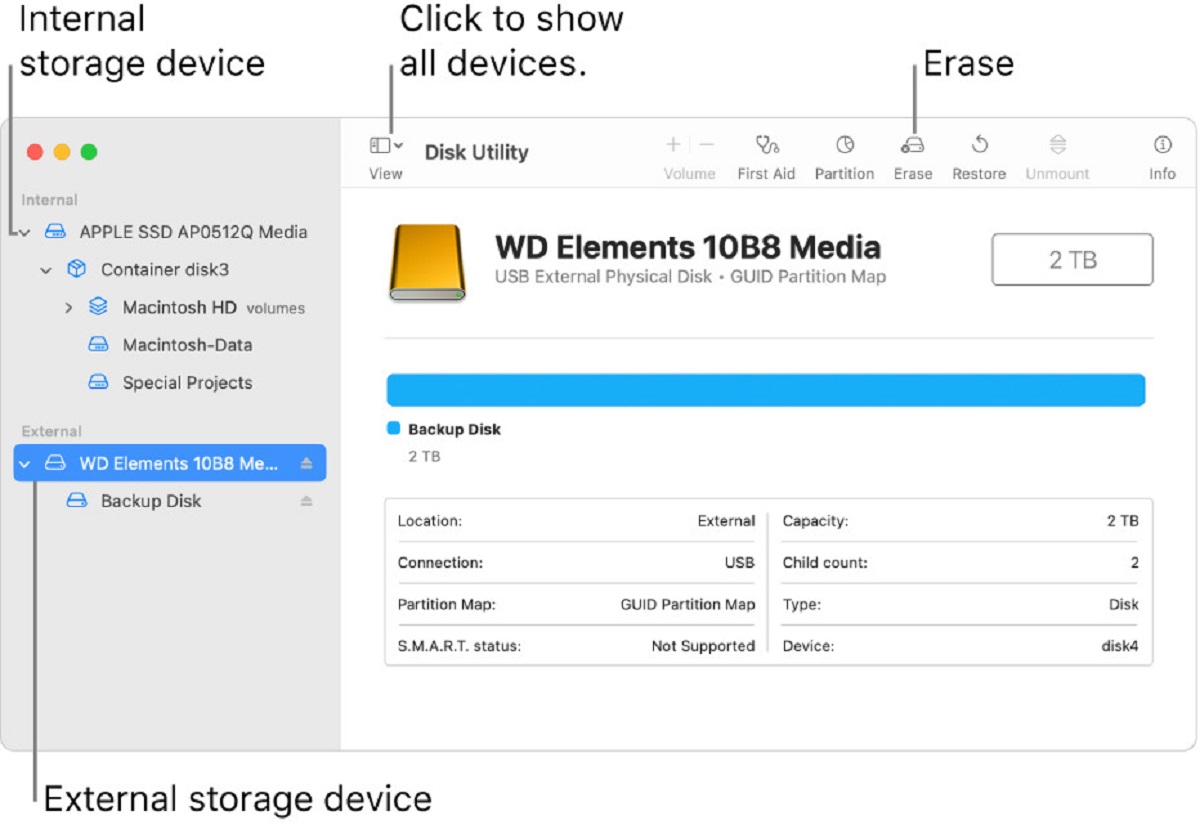
Once Disk Utility is open, you’ll see a list of all your connected drives on the left-hand side. This includes both internal and external drives. Each drive’s name, size, and type will be displayed.
Look for your external drive in the list and click on it to highlight it. You’ll then see various details about the drive in the main window, such as its capacity, used space, and format. This information can help you confirm if you’ve located the correct drive.
If your external drive is not listed in Disk Utility, it could indicate a connection issue, compatibility problem, or a faulty drive. In such cases, you may want to check the physical connections of the drive, try a different cable, or consult the manufacturer for further assistance.
On the other hand, if your drive appears in Disk Utility but is not mounting or working properly, you can use Disk Utility to perform various actions. These include repairing the drive, verifying its disk usage, erasing it, and more. Just be cautious when performing actions in Disk Utility, as they can affect the data on the drive.
Using Disk Utility can help you not only locate your external drives but also manage and troubleshoot any issues you may encounter. It’s a powerful tool that provides a deeper level of control and insight into your storage devices.
Now that you’ve learned how to use Disk Utility to locate and manage your external drives, let’s summarize the methods covered in this article before wrapping up.
Conclusion
Locating your external hard drive on a Mac is essential for accessing and managing your files. In this article, we have explored various methods to help you find your external drives efficiently.
We started by checking the desktop, where macOS displays connected external drives by default. If your drive is not visible on the desktop, we then navigated to Finder and explored opening Finder Preferences to customize settings. Enabling the display of external drives on the desktop and in the sidebar provides quick access to your drives without cluttering your screen.
We also learned how to access external drives through the sidebar in Finder, making it easy to navigate to specific locations. The Go menu in Finder provides another method to locate and access external drives by displaying them under the “Computer” option.
Spotlight, the powerful search feature on your Mac, can be used to quickly locate your external drives and search for specific files within them. Additionally, Disk Utility allows you to manage and troubleshoot your external drives, providing deeper control and insight into their functionalities.
By utilizing these methods, you can effortlessly locate, access, and manage your external drives on your Mac, making it convenient to transfer files, back up data, and organize your digital life.
Remember to properly eject your external drives before disconnecting them to prevent data loss or drive corruption.
Whether you prefer displaying drives on the desktop, navigating through the sidebar, utilizing search options, or using Disk Utility, finding your external hard drives becomes a seamless process on your Mac.
Now that you have learned these methods, you can confidently locate your external drives and optimize your file management workflow on your Mac.