Introduction
Welcome to the world of external hard drives and the importance of being able to change permissions on them. If you are a Mac user, you may have encountered situations where you need to modify the permissions on your external hard drive. This can occur when you want to access certain files, make changes, or even share the drive with others. Fortunately, Mac provides several methods for changing permissions on an external hard drive, allowing you to take full control of your data.
In this guide, we will explore three different methods to change permissions on your external hard drive. Whether you prefer using Finder, Terminal, or the Get Info option, we have you covered. But before we dive into the different methods, let’s quickly discuss why changing permissions on an external hard drive is so important.
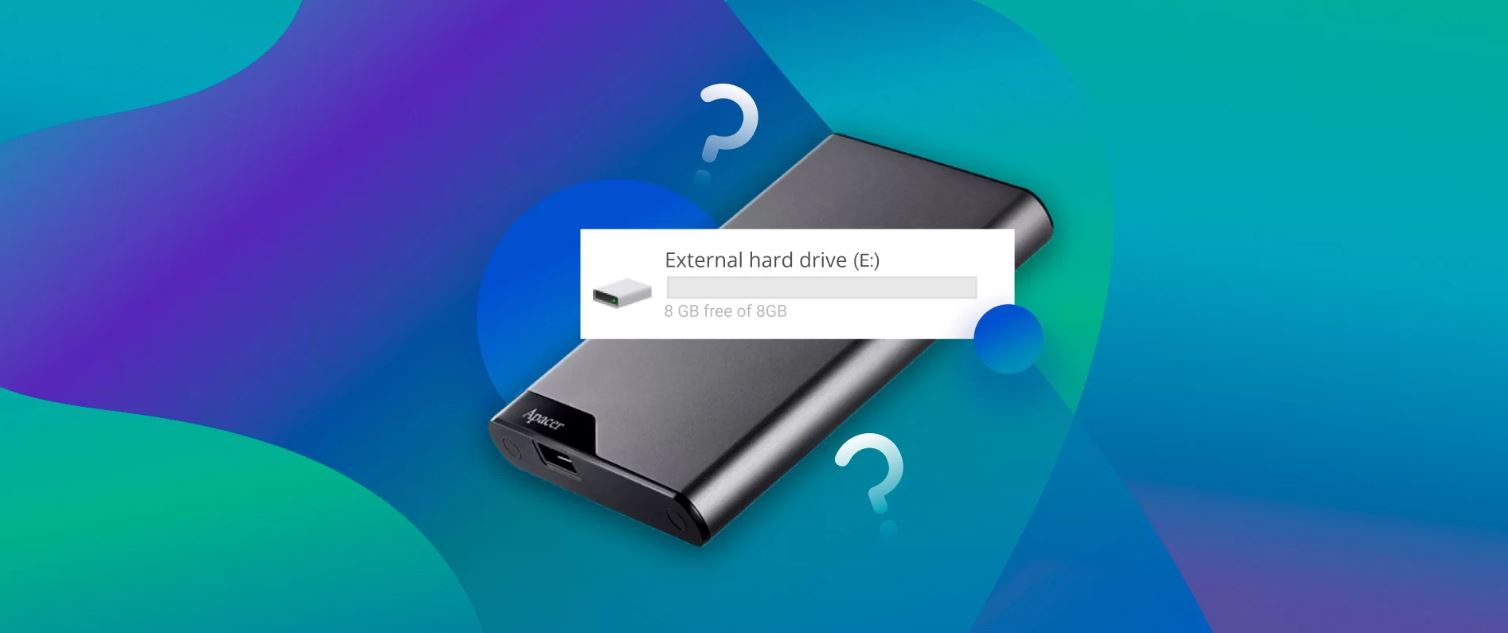
External hard drives are incredibly useful devices for storing and transporting large amounts of data. Whether you use it for backing up your important files, storing multimedia content, or simply expanding your Mac’s storage capacity, these drives play a crucial role in our digital lives. However, when it comes to accessing and modifying the files on an external hard drive, permissions can sometimes become a hindrance.
Permissions refer to the access rights granted to users or groups for different files and folders. They allow you to define who can read, write, or execute specific files. By default, Mac assigns certain permissions to the files and folders on your external hard drive. These permissions ensure that only authorized users can make changes, effectively protecting your data from accidental deletion or unauthorized access. However, there may be instances where you want to change these permissions to gain more control over your files.
Whether you want to give certain users full access to the drive, restrict access to specific files, or completely lock down the drive for security purposes, having the ability to modify permissions becomes crucial. Thankfully, Mac provides multiple methods to change permissions on your external hard drive, giving you the flexibility and control you need.
Now that we understand the importance of changing permissions on an external hard drive, let’s explore the different methods you can use to accomplish this task. Whether you’re a tech-savvy user or a beginner, we have a method suited for you. So grab your external hard drive and let’s dive in!
Why Change Permissions on an External Hard Drive?
Changing permissions on an external hard drive allows you to control who can access and modify the files and folders stored on it. Here are a few reasons why you might need to change permissions:
- Security: One of the primary reasons for changing permissions is to enhance the security of your data. By modifying permissions, you can prevent unauthorized access to your files and protect sensitive or confidential information.
- Privacy: Changing permissions allows you to restrict access to certain files or folders, ensuring that only specific users or groups can view or modify them. This is particularly useful if you store personal or sensitive data on your external hard drive.
- Sharing: If you want to share your external hard drive with others, changing permissions allows you to grant specific users or groups access to the files. You can customize the level of access, whether it’s read-only or full read and write capabilities.
- Collaboration: When working on projects with others, changing permissions on your external hard drive enables seamless collaboration. You can assign different access levels to team members, allowing them to contribute and edit files as needed.
- Troubleshooting: Sometimes, you may encounter issues accessing or modifying certain files on your external hard drive. Changing permissions can help resolve such issues by giving you the necessary access rights to work with the files.
By changing permissions on your external hard drive, you have greater control over who can access, view, and edit your files. It not only ensures the security and privacy of your data but also facilitates seamless collaboration and sharing.
Now that we understand the significance of changing permissions on an external hard drive, let’s explore the various methods you can use to achieve this task on your Mac.
Before You Start…
Before diving into the methods of changing permissions on an external hard drive, there are a few important considerations and preparations to keep in mind:
- Backup your data: Whenever you make changes to permissions, there is a potential risk of data loss or unintended consequences. To ensure the safety of your files, it is crucial to create a backup of your external hard drive before proceeding with any permission modifications.
- Administrator access: To change permissions on an external hard drive, you will need administrative access on your Mac. Make sure you are logged in as an administrator or have the necessary administrative privileges to perform these tasks.
- Understand the implications: Changing permissions can have cascading effects on the files and folders stored on your external hard drive. It is essential to have a clear understanding of the changes you want to make and how they might impact the accessibility and functionality of your data.
- Consider the purpose: Determine the reason behind changing permissions on your external hard drive. Are you doing it for security reasons, collaboration purposes, or to troubleshoot specific issues? Having a clear purpose in mind will help you choose the most appropriate method for changing permissions.
- Document existing permissions: It can be helpful to document the current permissions on your external hard drive before making any changes. This way, you have a reference point to revert to in case any issues arise or if you need to restore the original permissions.
- Research the method: Take the time to familiarize yourself with the method you plan to use for changing permissions. Whether it’s using Finder, Terminal, or the Get Info option, understanding the steps involved and potential caveats will help you carry out the process smoothly.
By taking these precautions and being prepared, you can approach the task of changing permissions on your external hard drive with confidence. Now that you have all your bases covered, let’s explore the different methods available in macOS to modify permissions on your external hard drive!
Method 1: Using Finder
Using Finder to change permissions on an external hard drive is a straightforward and user-friendly method. Follow these steps to modify the permissions:
- Connect your external hard drive to your Mac.
- Open a Finder window by clicking on the Finder icon in your Dock or by selecting Finder from the menu bar.
- In the Finder sidebar, locate and click on your external hard drive. It will be listed under the Devices section.
- Once you have opened your external hard drive in Finder, select the file or folder for which you want to change permissions. You can select multiple files or folders by holding down the Command key while selecting.
- Click on the File menu in the menu bar at the top of the screen and choose Get Info from the drop-down menu. Alternatively, you can press Command + I as a shortcut.
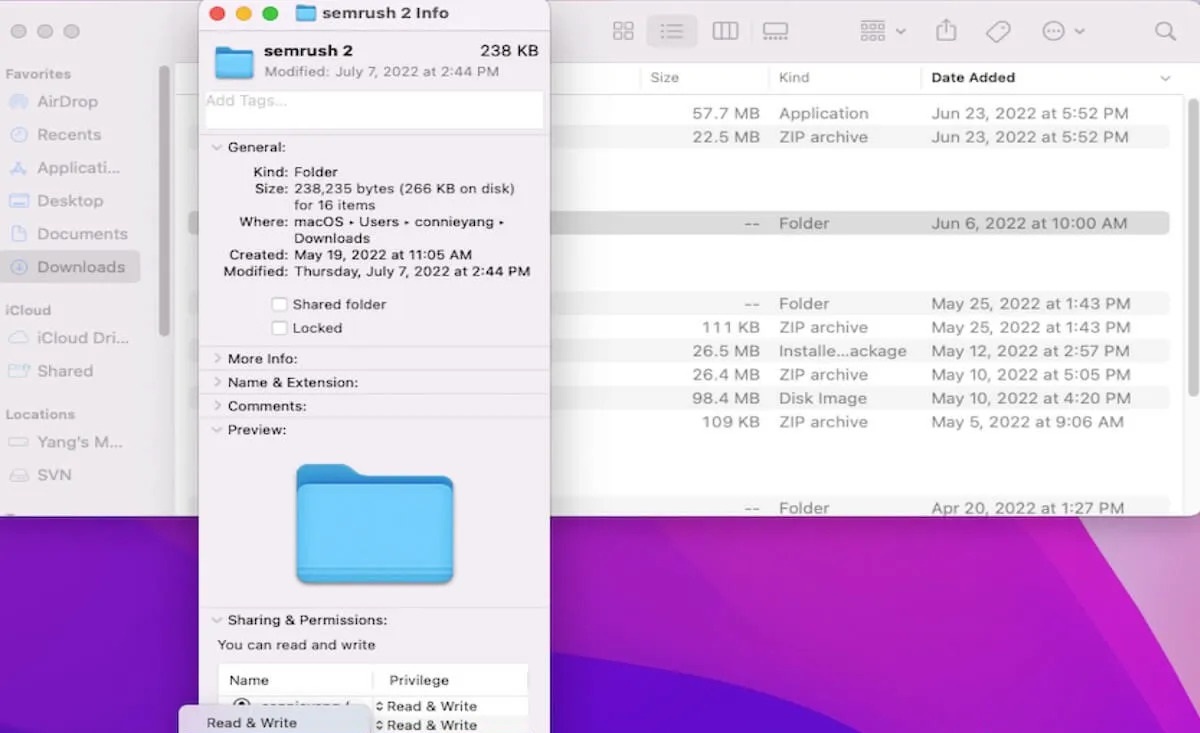
- A Get Info window will appear, displaying detailed information about the selected file or folder. Look for the section labeled “Sharing & Permissions.”
- To modify the permissions, click on the lock icon in the bottom right corner of the window. You may need to enter your administrator password to unlock the settings.
- Once you have unlocked the settings, you can adjust the permissions by clicking on the “+” or “-” button below the list of users and groups. To grant a user or group the ability to read and write, click the “+” button and select the desired user or group. To remove permissions for a user or group, click the “-” button next to their name.
- For more specific permissions, click on the gear icon below the list of users and groups. This will open a drop-down menu where you can choose from options such as “Read Only,” “Write Only,” or “No Access.” Select the appropriate level of access for each user or group.
- Once you have made the necessary changes, close the Get Info window. The permissions on the selected files or folders will be updated accordingly.
Using Finder to change permissions on your external hard drive gives you granular control over who can access and modify specific files or folders. It is a convenient method for individuals who prefer a visual and intuitive approach. With the flexibility of modifying permissions in Finder, you can easily manage access rights on your external hard drive.
Method 2: Using Terminal
If you’re comfortable with using the command line interface, using Terminal to change permissions on an external hard drive can be a quick and efficient method. Follow these steps to modify permissions:
- Connect your external hard drive to your Mac.
- Open Terminal by navigating to Applications > Utilities and selecting Terminal.
- In the Terminal window, enter the command
diskutil listand press Enter. This will display a list of connected drives, including your external hard drive. Note the identifier for your external hard drive (e.g., /dev/disk2). - Next, enter the command
sudo chmod -R permissions path_to_folder, replacing “permissions” with the desired permission settings (e.g., 755, 777) and “path_to_folder” with the actual path to the folder or drive you want to modify. - Press Enter to execute the command. You may be prompted to enter your administrator password to continue.
- The permissions on the specified folder or drive will be changed according to the command you entered.
Using Terminal to change permissions gives you direct control over the permissions on your external hard drive, making it a popular choice for experienced users and system administrators. It allows for precise modifications and can be more efficient when dealing with a large number of files or folders.
Remember to exercise caution when using Terminal, as incorrect commands or modifications can have unintended consequences. Take care to ensure you have the correct path and understand the implications of the permission changes you are making.
By utilizing Terminal, you can efficiently change permissions on your external hard drive and have complete control over the access rights for your files and folders.
Method 3: Using Get Info
The Get Info option in macOS provides a simple and effective way to change permissions on an external hard drive. Follow these steps to modify permissions:
- Connect your external hard drive to your Mac.
- Open a Finder window and navigate to the location of your external hard drive. It should be listed under the Devices section in the sidebar.
- Select the file or folder for which you want to change permissions by clicking on it.
- Right-click on the selected item (or hold down the Control key and click) to open a contextual menu. From the menu, choose Get Info. Alternatively, you can also press Command + I as a shortcut.
- A Get Info window will appear, displaying detailed information about the selected file or folder.
- Locate the section labeled “Sharing & Permissions.” This section shows the current permissions for the file or folder.
- To modify the permissions, click on the lock icon in the bottom right corner of the window. You may need to enter your administrator password to unlock the settings.
- Once you have unlocked the settings, you can adjust the permissions by clicking on the “+” or “-” button below the list of users and groups. To grant a user or group the ability to read and write, click the “+” button and select the desired user or group. To remove permissions for a user or group, click the “-” button next to their name.
- For more specific permissions, click on the gear icon below the list of users and groups. This will open a drop-down menu where you can choose from options such as “Read Only,” “Write Only,” or “No Access.” Select the appropriate level of access for each user or group.
- Once you have made the necessary changes, close the Get Info window. The permissions on the selected file or folder will be updated accordingly.
Using the Get Info option provides an easy-to-use interface for modifying permissions on your external hard drive. It allows you to quickly grant or restrict access to specific users or groups, ensuring that your files are protected and shared according to your preferences.
With the Get Info method, you can efficiently manage the permissions on your external hard drive and maintain control over the accessibility and security of your files and folders.
Conclusion
Changing permissions on an external hard drive is an essential task for Mac users who want to control access to their files and folders. Whether you need to enhance security, ensure privacy, facilitate collaboration, or troubleshoot issues, the methods outlined in this guide provide a range of options to suit your needs.
Using Finder allows for a user-friendly approach, providing a visual interface to modify permissions. It is ideal for individuals who prefer an intuitive and straightforward method. Terminal, on the other hand, offers a more direct and efficient approach, making it a popular choice among experienced users and system administrators. The Get Info option provides a simple and effective way to modify permissions, offering a balance between ease of use and customization.
Before you start modifying permissions, it is important to back up your data and understand the implications of the changes you plan to make. Having administrative access, documenting existing permissions, and researching the chosen method will help you navigate the process smoothly and confidently.
By changing permissions, you gain greater control over who can access and modify your files on the external hard drive. This enhances security, ensures privacy, facilitates collaboration, and helps resolve any access-related issues you may encounter.
Now that you have learned how to change permissions on an external hard drive using Finder, Terminal, and the Get Info option, you can confidently manage the accessibility and security of your data. Choose the method that suits your needs, follow the steps outlined, and enjoy the full control and flexibility over your external hard drive.