Introduction
Welcome to this guide on how to reformat an external hard drive to FAT32. If you have an external hard drive and you want to use it with devices that are compatible with the FAT32 file system, this article will walk you through the step-by-step process of reformatting it.
First, let’s quickly discuss what FAT32 is. FAT32 is a file system that has been around for a long time and is compatible with a wide range of devices and operating systems. It was introduced in 1996 as an upgrade to the previous FAT16 file system. The main advantage of FAT32 is its ability to handle large storage devices, with a maximum file size limit of 4GB and a maximum partition size of 2TB.
Now you might be wondering, “Why would I want to reformat my external hard drive to FAT32?” There are several reasons why you may want to do this. First, if you are using the external hard drive with devices such as game consoles, media players, or older operating systems that only support FAT32, you will need to format it accordingly. Second, FAT32 is universally recognized and supported by different platforms, so it ensures better compatibility with various devices.
Reformatting an external hard drive may seem like a daunting task, but fear not! In this guide, we will provide you with a step-by-step process to make it as simple as possible. Just make sure to back up your data before proceeding, as the reformatting process will erase all existing data on the drive.
So, whether you need to format your external hard drive for gaming, multimedia, or compatibility purposes, let’s dive in and learn how to reformat it to FAT32!
What is FAT32?
FAT32, short for File Allocation Table 32, is a widely-used file system that was introduced as an upgrade to the older FAT16 file system. Developed by Microsoft in 1996, FAT32 has become a popular choice due to its compatibility with various devices and operating systems.
One of the key advantages of FAT32 is its ability to support large storage devices. While the older FAT16 file system had limitations on file size and partition size, FAT32 addresses these limitations by supporting individual files up to 4GB in size and partition sizes up to 2 terabytes (TB).
FAT32 utilizes a file allocation table, which is essentially a directory that keeps track of the location of files on the storage device. This makes it easier for the operating system to access and manage data on the disk. The file allocation table is divided into clusters, with each cluster representing a fixed amount of space on the storage device. This cluster-based structure enables efficient file allocation and retrieval.
Another advantage of FAT32 is its widespread compatibility across different platforms. It is supported by various operating systems, including Windows, macOS, Linux, and some proprietary systems. This means that a hard drive formatted in FAT32 can be easily read and written to by different devices and can be seamlessly transferred between them.
Furthermore, FAT32 is compatible with a wide range of devices, such as game consoles, media players, cameras, and more. This makes it an ideal choice for those who want to use their external hard drive for multimedia purposes, such as storing and accessing movies, music, or photos on different devices.
However, it is worth noting that FAT32 does have some limitations. For instance, it does not support individual files larger than 4GB in size. This can be a drawback if you regularly work with large video files or disk images. Additionally, FAT32 is not the most efficient file system in terms of storage space utilization, as it has a larger overhead compared to other modern file systems.
Overall, FAT32 remains a popular choice for those who need compatibility across different devices and operating systems, as well as support for large storage devices. Now that you have a solid understanding of what FAT32 is and its advantages, let’s move on to the next section to learn how to reformat an external hard drive to FAT32.
Why reformat an external hard drive to FAT32?
There are several reasons why you may want to reformat an external hard drive to the FAT32 file system. Let’s explore some of the common scenarios where this becomes necessary:
Device Compatibility: One of the primary reasons to reformat an external hard drive to FAT32 is to ensure compatibility with various devices. Many game consoles, media players, and other electronic devices only support the FAT32 file system. By formatting your external hard drive to FAT32, you can ensure that it can be easily recognized and accessed by these devices.
Multimedia Storage: If you plan to use your external hard drive for multimedia purposes, such as storing movies, music, or photos, reformatting it to FAT32 is advantageous. The FAT32 file system is compatible with a wide range of media players, making it easy to play your favorite movies or music directly from the external hard drive without the need for additional conversions or software.
Cross-Platform File Sharing: Formatting your external hard drive to FAT32 enables seamless file sharing between different operating systems. Whether you’re using Windows, macOS, Linux, or other operating systems, you can easily connect your FAT32-formatted external hard drive to any computer and access the files without compatibility issues.
Legacy Systems: Some older operating systems, particularly those found in older computers or embedded devices, only support the FAT32 file system. If you need to use your external hard drive with such legacy systems, reformatting it to FAT32 is crucial to ensure smooth compatibility and data access.
Backup and Storage Convenience: FAT32 offers convenience in terms of backup and storage. By reformatting your external hard drive to FAT32, you can easily transfer files between different devices, such as computers and external hard drives, without worrying about compatibility issues. It provides a simple and efficient way to store and access your data, making it a preferred choice for many users.
File Size Limitation Considerations: It’s important to note that FAT32 has a limitation on individual file size, with a maximum of 4GB per file. If you regularly work with files larger than 4GB, such as high-definition videos or large software installations, FAT32 may not be suitable. In such cases, you may need to consider alternative file systems like exFAT or NTFS.
Now that you understand the reasons why you might want to reformat an external hard drive to FAT32, we can move on to the step-by-step process of doing so in the next section.
Step 1: Backup your data
Before proceeding with the reformatting process, it’s crucial to back up your data from the external hard drive. Reformatting will erase all the existing data on the drive, so it’s important to make sure you have a copy of your files in a safe location.
Here’s how you can backup your data:
1. Identify important files: Go through the contents of your external hard drive and identify the files or folders that you want to keep. This might include documents, photos, videos, music, or any other files that you wish to preserve.
2. Choose a backup method: Determine how you want to backup your data. There are several options available, depending on your preferences and resources. You can choose to use an external hard drive, cloud storage services, or even another computer on your network. Select the method that suits your needs.
3. Copy files to the backup location: Once you’ve decided on the backup method, start copying your important files from the external hard drive to the backup location. Ensure that the files are successfully transferred and verify their integrity to avoid any potential data loss or corruption.
4. Verify backup completion: Once the data transfer is complete, double-check to make sure that all your important files have been successfully backed up. Take the time to review the backup location and ensure that everything is intact and accessible.
5. Safely store the backup: After verifying the backup, store it in a secure location. This can be an external hard drive kept in a safe place, a cloud storage account with proper security measures, or any other suitable location that ensures the safety and accessibility of your backup.
By following these steps, you can ensure that your data is safely backed up before proceeding with the reformatting process. It’s always better to be safe than sorry, as reformatting the external hard drive will erase all the data it contains. Once you have successfully backed up your data, you can move on to the next step of the process.
Step 2: Connect the external hard drive to your computer
Now that you have backed up your data, it’s time to connect the external hard drive to your computer. This step is essential as it allows you to access the drive and perform the necessary actions to reformat it to the FAT32 file system.
Follow these steps to connect the external hard drive to your computer:
1. Check the connections: Ensure that both ends of the USB cable or other appropriate cables are securely plugged into their respective ports on the external hard drive and your computer. Make sure the connections are tight to maintain stable data transfer.
2. Power on the external hard drive: If your external hard drive has a power switch or button, turn it on. Some drives obtain power directly from the USB port, so they may not have a separate power switch.
3. Wait for the computer to recognize the drive: After connecting the external hard drive, your computer should detect it automatically. Depending on your operating system and settings, you may hear a sound or see a pop-up notification indicating that a new device has been connected.
4. Open File Explorer (Windows) or Finder (Mac): Open the respective file management program on your computer to view the connected devices and drives. In Windows, you can open File Explorer by pressing the Windows key and E together. On macOS, click on the Finder icon in the Dock or use the Command key and Spacebar to open Spotlight and search for Finder.
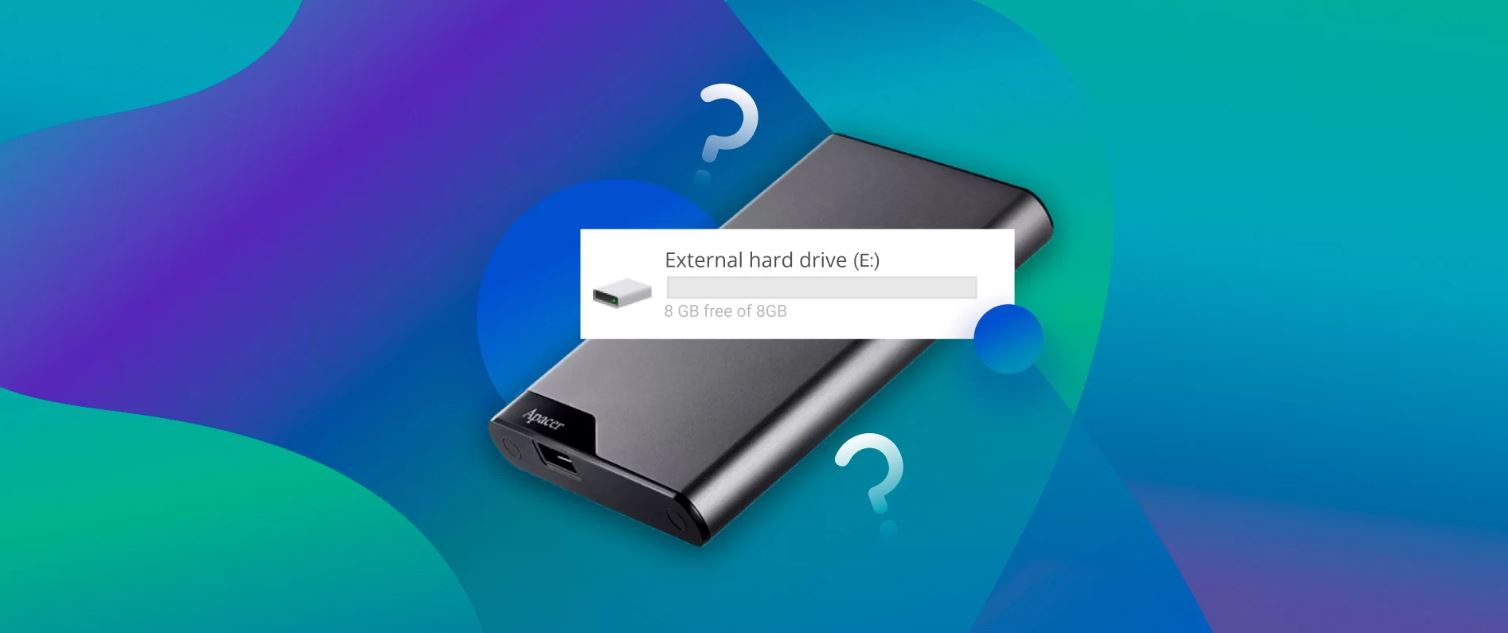
5. Locate the external hard drive: In the file management program, you should see a list of drives and connected devices. Look for the external hard drive that you just connected. It may be labeled with the drive’s name or assigned a generic drive letter (such as E: or F: in Windows).
6. Ensure proper recognition: Make sure that the external hard drive is recognized by your computer. You should see its name or assigned drive letter listed, indicating a successful connection. If you don’t see it, try disconnecting and reconnecting the drive or restarting your computer.
Once you have successfully connected the external hard drive to your computer and ensured its proper recognition, you are ready to move on to the next step of the reformatting process.
Step 3: Open Disk Management
Now that your external hard drive is connected to your computer, it’s time to open Disk Management. Disk Management is a built-in utility in Windows that allows you to manage and control your computer’s hard drives and storage devices.
Follow these steps to open Disk Management:
1. Open the Start menu: Click on the Windows Start button located at the bottom left corner of your screen. Alternatively, you can press the Windows key on your keyboard.
2. Search for Disk Management: In the search bar within the Start menu, type “Disk Management” and wait for the search results to appear. Disk Management should be listed as one of the options.
3. Open Disk Management: Click on “Disk Management” from the search results to launch the Disk Management utility. This will open a new window displaying information about your computer’s connected storage devices.
4. Take a moment to familiarize yourself: Once Disk Management is open, you’ll see a visual representation of your computer’s disk drives, including your internal hard drive(s), SSD(s), and the connected external hard drive(s). Each drive is displayed with its corresponding drive letter, size, and file system.
Note: In some older versions of Windows, Disk Management may be accessed by right-clicking “My Computer” or “This PC” on your desktop or in the Start menu, selecting “Manage,” and then navigating to “Disk Management” in the computer management console.
Now that Disk Management is open and you are familiar with its user interface, you are ready to proceed to the next step. Keep the Disk Management window open as you will need it for the upcoming steps of the reformatting process.
Step 4: Select the external hard drive
After opening Disk Management, the next step is to select the external hard drive that you want to reformat to the FAT32 file system. Disk Management provides an overview of all the connected storage devices, allowing you to identify and choose the specific drive you wish to format.
Follow these steps to select the external hard drive in Disk Management:
1. Locate the external hard drive: Examine the list of drives and devices displayed in the Disk Management window. Look for the external hard drive you connected earlier. It should be listed alongside your internal hard drive(s) and any other connected storage devices.
2. Identify the external hard drive: The external hard drive will typically be labeled with its size, make, or a custom name assigned to it. It may also be denoted by a drive letter, such as “E:”, “F:”, or another letter depending on your system configuration.
3. Verify the disk: Take a moment to double-check that you have selected the correct external hard drive. Verifying the disk ensures that you don’t accidentally format the wrong drive and risk losing important data. Pay attention to the drive’s size and any additional identifying information.
4. Right-click on the external hard drive: Once you have confirmed that you have selected the correct external hard drive, right-click on it. This will open a context menu with various options for managing the selected drive.
5. Proceed to the next steps: With the external hard drive selected and the context menu open, you are now ready to proceed to the next steps, which involve deleting existing partitions and creating a new one with the FAT32 file system.
By properly selecting the external hard drive in Disk Management, you ensure that the following steps are applied to the intended drive and avoid making any unintended changes to other disks. Take your time to identify and confirm the selection to proceed with the reformatting process smoothly and securely.
Step 5: Delete the existing partitions
Once you have selected the external hard drive in Disk Management, the next step is to delete the existing partitions on the drive. Deleting the partitions will remove any previous file systems and configurations, allowing you to create a new partition with the desired file system format, which in this case is FAT32.
Follow these steps to delete the existing partitions:
1. Right-click on the partitions: In the context menu for the selected external hard drive, you will see a list of options. Look for the option that says “Delete Volume” or “Delete Partition.” Right-click on the existing partitions one by one and select the appropriate option to delete them.
2. Confirm the deletion: A warning message will appear, informing you that deleting the partition will erase all data stored on it. Make sure you have successfully backed up your data before proceeding. Confirm the deletion by clicking “Yes” or “OK” in the warning message.
3. Repeat for all partitions: If there are multiple partitions on the external hard drive, repeat the process of right-clicking and deleting each one. This ensures that all existing partitions are removed, leaving the drive with unallocated space.
4. Verify unallocated space: After deleting all the partitions, you should see the entire external hard drive listed as unallocated space in Disk Management. Unallocated space refers to raw space on the drive that doesn’t belong to any partition or file system.
5. Confirm deletion completion: Double-check to ensure that all the existing partitions have been successfully deleted. The external hard drive should now be displayed as unallocated space, ready to be formatted with the FAT32 file system in the upcoming steps.
Remember, deleting the existing partitions will permanently erase all data on the external hard drive. Therefore, it is crucial to have a backup of your important files before proceeding. Once you have confirmed the deletion of existing partitions, you can move on to the next step and create a new partition with the desired FAT32 file system.
Step 6: Create a new partition
After deleting the existing partitions on the external hard drive, the next step is to create a new partition. This will allocate a portion of the drive’s unallocated space for use with the FAT32 file system.
Follow these steps to create a new partition:
1. Right-click on the unallocated space: In Disk Management, right-click on the unallocated space of the external hard drive. From the context menu that appears, select the option that says “New Simple Volume” or “New Partition”.
2. Initialize the new partition: A wizard will guide you through the process of creating a new partition. Click “Next” to proceed. In some cases, you may be prompted to initialize the disk. If so, select the appropriate option to perform the initialization process.
3. Specify the size of the partition: On the next screen, you can specify the size of the new partition. By default, the maximum available size is selected, which utilizes the entire unallocated space. Leave the default settings as they are, unless you want to allocate a specific amount of space for the new partition.
4. Assign a drive letter or mount point: You will be prompted to assign a drive letter or mount point to the new partition. A drive letter is typically suitable for most users, as it allows easy access to the partition through File Explorer. Select an available drive letter from the dropdown menu.
5. Format the partition: On the same screen, choose the file system format for the new partition. Select “FAT32” from the list of available file system formats. You may also be prompted to specify the allocation unit size or cluster size. The default settings are usually appropriate, but you can change them if necessary.
6. Label the partition (optional): You have the option to assign a label or name to the new partition. Enter a descriptive name if you want to easily identify the partition in the future. This step is optional, and you can leave it blank if you prefer.
7. Complete the partition creation: Review the settings and information you’ve provided in the previous steps. Once you’re satisfied, click “Finish” to create the new partition. The process may take a few moments, depending on the size of the partition and the speed of your computer and external hard drive.
After completing these steps, you should now have a new partition on the external hard drive, formatted with the FAT32 file system. This newly created partition can be used to store and access files on various devices that support FAT32.
Step 7: Choose the file system format (FAT32)
At this stage, you have reached the point where you need to choose the file system format for the new partition on your external hard drive. Since the goal is to reformat the drive to FAT32, you will proceed with selecting this file system format.
Follow these steps to choose the FAT32 file system format:
1. Open Disk Management: If you have closed the Disk Management window, reopen it by following the previous steps discussed earlier.
2. Locate the newly created partition: In the Disk Management window, locate the newly created partition on your external hard drive. It should be labeled with the assigned drive letter or name you specified during the partition creation process.
3. Right-click on the partition: Right-click on the partition and select the “Format” option from the context menu.
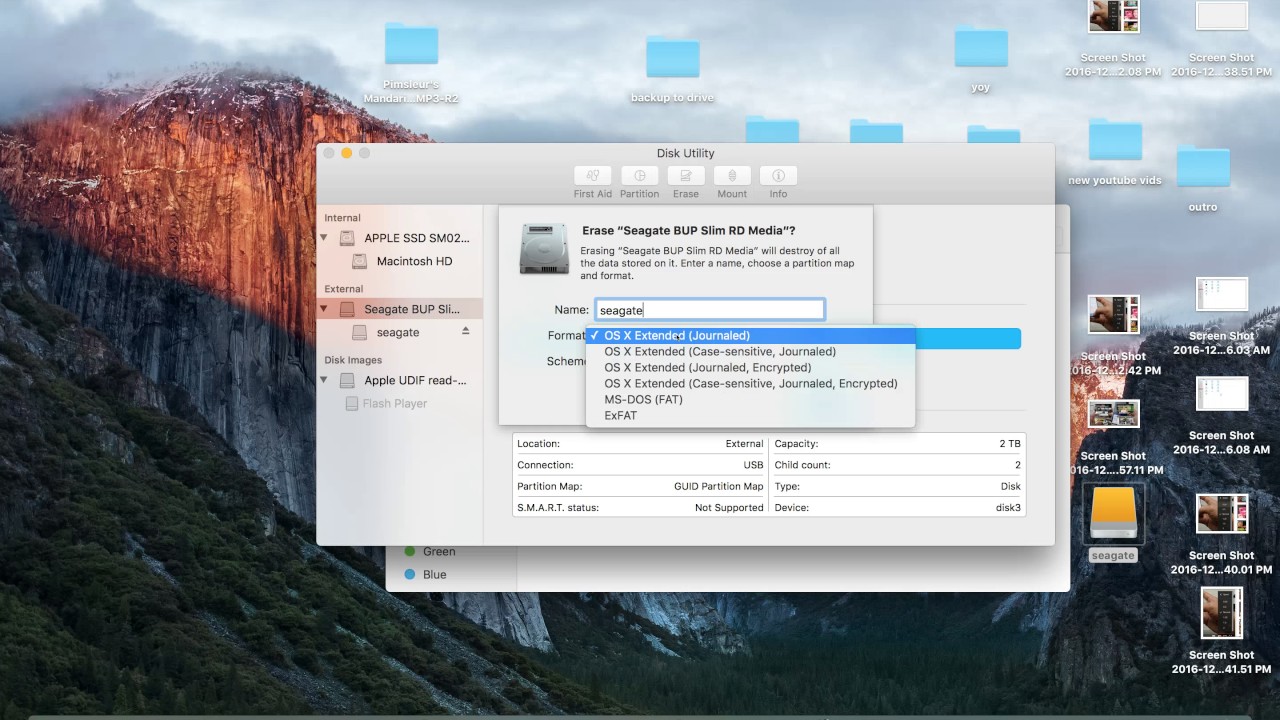
4. Choose the file system: In the format window that appears, you’ll see an option to choose the file system format. Select “FAT32” from the list of available options.
5. Other formatting options (optional): You may also have the option to change the volume label, allocation unit size, or perform a quick format. Modifying these settings is optional, and you can leave them at their default values unless you have specific requirements.
6. Start the formatting process: Review the formatting settings and information you’ve provided. Once you’re ready, click on the “OK” button or a similar option to start the formatting process.
7. Wait for the formatting to complete: The time required for the formatting process may vary depending on the size of the partition and the speed of your computer and external hard drive. Be patient and wait for the formatting to complete. A progress bar will indicate the status of the process.
After the format is complete, the newly formatted partition on your external hard drive will now be using the FAT32 file system. This format allows for improved compatibility with various devices and operating systems.
Step 8: Assign a drive letter to the partition
Now that you have successfully formatted the new partition on your external hard drive to the FAT32 file system, the next step is to assign a drive letter to the partition. Assigning a drive letter allows you to easily identify and access the partition in your file explorer or operating system.
Follow these steps to assign a drive letter to the partition:
1. Open Disk Management: If you have closed the Disk Management window, reopen it by following the steps outlined earlier.
2. Locate the newly formatted FAT32 partition: In the Disk Management window, locate the partition that you have just formatted to the FAT32 file system. It should be labeled with the assigned drive letter or name you specified during the formatting process.
3. Right-click on the partition: Right-click on the partition and select the “Change Drive Letter and Paths” option from the context menu.
4. Add or change the drive letter: In the “Change Drive Letter and Paths” window, click on the “Change” button. If the partition does not already have a drive letter assigned, click on the “Add” button instead.
5. Select the drive letter: In the new window that appears, select an available drive letter from the dropdown menu. Make sure to choose a letter that is not already in use by another drive in your system.
6. Confirm the drive letter assignment: After selecting the drive letter, click on the “OK” button or a similar option to confirm the drive letter assignment. You may encounter a warning message if the selected drive letter is currently assigned to another drive. In such cases, you can either choose a different letter or proceed with the reassignment.
7. Verify the drive letter: Once the drive letter assignment is confirmed, you should see the assigned drive letter displayed for the partition in the Disk Management window. The newly assigned drive letter allows you to easily access the partition through your file explorer or operating system.
By assigning a drive letter to the FAT32 partition, you can easily navigate and manage your files stored on the external hard drive. This step completes the process of assigning a drive letter to the newly formatted partition.
Step 9: Format the partition to FAT32
After assigning a drive letter to the partition, the next step is to format the partition to the FAT32 file system. This process will configure the partition with the desired file system format, allowing you to store and access files on the external hard drive conveniently.
Follow these steps to format the partition to FAT32:
1. Open File Explorer: Open the File Explorer on your computer. You can do this by clicking on the folder icon in the taskbar or pressing the Windows key and E simultaneously.
2. Locate the partition: In the File Explorer window, navigate to the newly assigned drive letter that represents the partition on your external hard drive.
3. Right-click on the partition: Right-click on the partition and select the “Format” option from the context menu. This will open the format settings for the partition.
4. Specify the format settings: In the format settings window, choose the FAT32 file system from the list of available options. You may also have the option to select the allocation unit size or the volume label. Unless you have specific requirements, you can leave these settings at their default values.
5. Start the formatting process: Review the format settings and information provided. Once you’re ready, click on the “Start” button or a similar option to start the formatting process.
6. Wait for the formatting to complete: The time required for the formatting process may vary depending on the size of the partition and the speed of your computer and external hard drive. Be patient and wait for the formatting to complete. You may see a progress bar indicating the status of the process.
7. Format completion: After the formatting process is complete, you will receive a notification indicating successful formatting. The partition on your external hard drive is now formatted with the FAT32 file system.
Now that the partition is formatted to FAT32, you can begin using your external hard drive to store and access files. The FAT32 file system offers compatibility with a wide range of devices and operating systems, making it a versatile choice for various purposes.
Step 10: Complete the formatting process
You’re almost there! After formatting the partition to the FAT32 file system on your external hard drive, the final step is to complete the formatting process. This involves verifying the successful completion of the formatting and performing a quick test to ensure that the external hard drive is ready for use.
Follow these steps to complete the formatting process:
1. Verify the formatting completion: Once the formatting process is complete, you will typically receive a notification or confirmation message indicating that the partition has been formatted successfully. Take a moment to verify that the formatting process has indeed been completed without any errors or interruptions.
2. Eject and reconnect the external hard drive: To ensure that the formatting changes take effect, safely eject the external hard drive from your computer. Wait for a few seconds, then reconnect the external hard drive to your computer using the appropriate cables. This will allow your computer to recognize the newly formatted partition.
3. Access the partition: Open File Explorer or your preferred file management program and navigate to the drive letter assigned to the newly formatted partition. Ensure that the partition is accessible and that you can view its contents and perform basic file operations.
4. Copy test files: To further verify the proper functionality of the formatted partition, copy a few test files to it and try accessing and opening them. This will ensure that data can be written and read from the partition without any issues.
5. Test on other devices (optional): For added confidence, you may choose to connect the external hard drive to other devices, such as game consoles, media players, or other computers, to confirm that the FAT32-formatted partition is recognized and accessible on those devices as well.
By completing these steps, you have successfully gone through the entire formatting process for your external hard drive. You can now feel confident in using the FAT32-formatted partition to store, organize, and access your files across various devices and operating systems.
Conclusion
Congratulations! You have successfully reformatted your external hard drive to the FAT32 file system. By following the step-by-step process outlined in this guide, you have ensured compatibility with various devices and operating systems while providing a convenient storage solution for your files.
We began by understanding what FAT32 is and the advantages it offers, such as compatibility, support for larger storage devices, and cross-platform file sharing. Then, we delved into the reasons why you might want to reformat an external hard drive to FAT32, including device compatibility, multimedia storage, cross-platform file sharing, legacy systems, and backup convenience.
The step-by-step process covered in detail each stage of the reformatting process. You learned to back up your data, connect the external hard drive to your computer, open Disk Management, select the external hard drive, delete the existing partitions, create a new partition, choose the FAT32 file system format, assign a drive letter, format the partition, and finally complete the formatting process.
Remember, it’s essential to back up your data before reformatting the external hard drive, as the process erases all existing data. Additionally, keep in mind the limitations of FAT32, such as the maximum file size of 4GB and larger cluster sizes, which may result in less efficient storage space utilization.
By reformatting your external hard drive to the FAT32 file system, you have unlocked increased compatibility and versatility for your storage needs. Whether it’s for gaming, multimedia, file sharing, or legacy systems, the FAT32 format enables seamless connectivity and access across a range of devices.
Now that you have successfully completed the reformatting process, you can enjoy using your external hard drive with the peace of mind that it is optimized for your specific needs.
Remember that maintaining regular backups of your important files is important to prevent data loss and safeguard your data. As you continue to use your freshly reformatted external hard drive, be mindful of keeping your files organized and backed up to ensure a seamless and secure digital experience.