Introduction
An external hard drive is a versatile storage device that allows you to expand the storage capacity of your computer or transfer files between different devices. However, before you can start using an external hard drive on a Windows computer, you may need to reformat it to ensure compatibility with the operating system.
In this guide, you will learn how to reformat an external hard drive for Windows. Whether you are setting up a new external hard drive or need to reformat an existing one, the process is relatively straightforward and can be completed in just a few simple steps.
Reformatting an external hard drive involves erasing all the existing data on the drive and setting it up with a new file system. This will ensure that the drive can be recognized and accessed by your Windows computer. It is important to note that reformatting will delete all data on the drive, so be sure to backup any important files before proceeding.
By following the steps outlined in this guide, you will be able to reformat your external hard drive smoothly and effectively. Let’s get started!
Step 1: Connect the external hard drive to your computer
The first step in the process of reformatting your external hard drive for Windows is to connect it to your computer. To do this, follow these simple steps:
- Locate the USB or Thunderbolt port on your computer. These are typically found on the sides or back of the computer.
- Take the USB or Thunderbolt cable that came with your external hard drive and plug one end into the corresponding port on your computer.
- Take the other end of the cable and plug it into the port on your external hard drive. Ensure that the connection is secure.
- Once the external hard drive is connected, you should see a notification on your computer indicating that a new device has been detected.
It’s important to ensure that the connections are secure and tight to avoid any issues during the reformatting process. Take a moment to double-check the connections before proceeding to the next step.
Connecting your external hard drive to your computer is an essential first step in the reformatting process. Once the connection is established, you can move on to the next step and begin the reformatting process.
Step 2: Open Disk Management
After connecting your external hard drive to your computer, the next step is to open Disk Management. This built-in Windows tool allows you to manage and organize the storage devices connected to your computer.
To open Disk Management, follow the steps below:
- Right-click on the Start button or press the Windows key + X on your keyboard to open the Power User menu.
- In the Power User menu, select “Disk Management” from the list of options. This will open the Disk Management window.
Alternatively, you can open Disk Management by typing “disk management” into the search bar next to the Start button and selecting “Create and format hard disk partitions” from the search results.
Once Disk Management is open, you will see a list of all the storage devices connected to your computer, including your external hard drive. The external hard drive may be labeled as “Disk X” or “Removable” in the Disk Management window.
Opening Disk Management is a crucial step in the reformatting process as it allows you to access and manage your external hard drive. With Disk Management open, you can now proceed to the next step and locate the external hard drive within the tool.
Step 3: Locate the external hard drive
Once you have opened Disk Management, the next step is to locate your external hard drive within the tool. Disk Management provides a comprehensive view of all the storage devices connected to your computer, making it easy to identify and manage them.
To locate your external hard drive, follow these steps:
- In the Disk Management window, look for a list of disks displayed in the bottom half of the window.
- Scan through the list and identify the disk that corresponds to your external hard drive. It may be labeled as “Disk X”, “Removable”, or have a similar identifier.
- Note the size and other details of the disk to confirm that it is indeed your external hard drive. Be cautious to avoid selecting the wrong disk, as formatting the wrong disk will result in data loss.
Once you have located your external hard drive, you are ready to proceed to the next step and format the drive to make it compatible with your Windows computer.
Locating your external hard drive accurately is crucial to ensure that you apply the formatting process to the correct disk. Take your time to verify the details and proceed with caution to avoid any accidental data loss or formatting of the wrong disk.
Step 4: Format the external hard drive
With your external hard drive located in Disk Management, you can now proceed to format the drive to make it compatible with your Windows computer. Formatting will erase all the existing data on the drive, so be sure to back up any important files before proceeding.
To format the external hard drive, follow these steps:
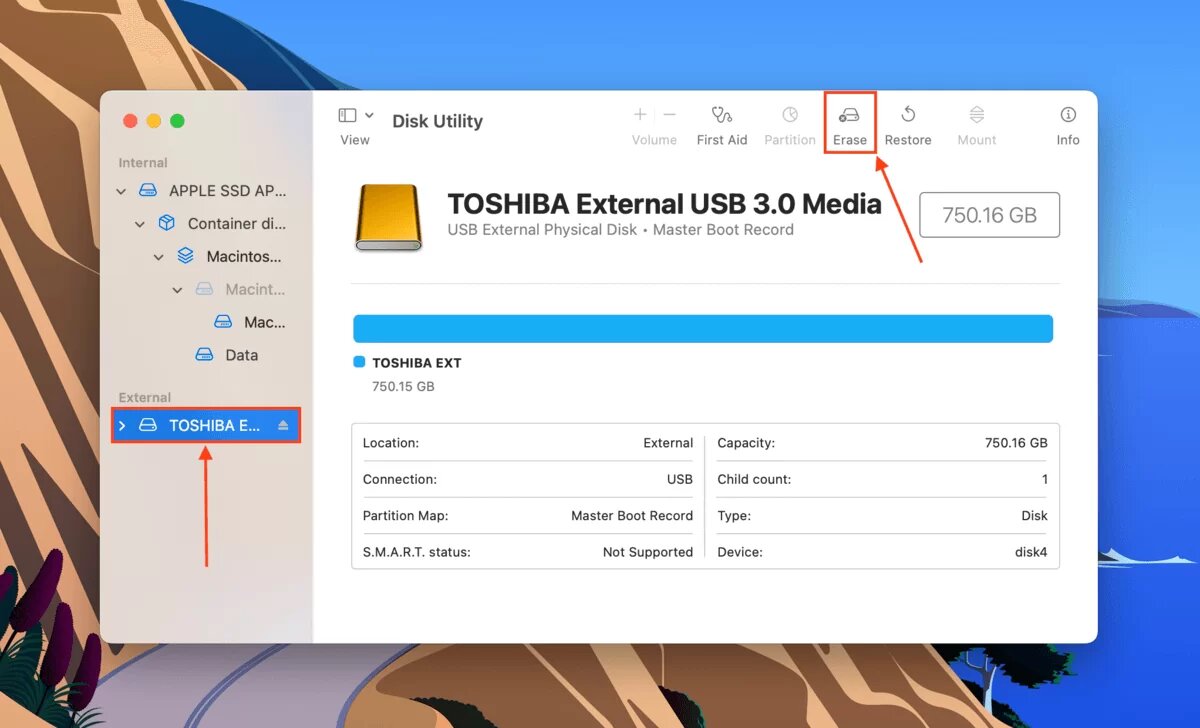
- Right-click on the disk that corresponds to your external hard drive in the Disk Management window.
- From the context menu that appears, select “Format”. This will open the Format dialog box.
- In the Format dialog box, you can specify the Volume label (optional), File system, and Allocation unit size.
- For the File system, select the desired file system. The most commonly used file system for Windows is NTFS, which supports larger file sizes and offers better security features.
- Leave the Allocation unit size as the default, or choose the recommended size if specified by the manufacturer.
Double-check that all the selected options are correct. Once you are satisfied with the formatting settings, click on the “OK” button to start the formatting process.
The formatting process may take several minutes, depending on the size of your external hard drive. During this time, do not unplug or interrupt the process. Patience is key as you wait for the formatting to complete.
After the formatting is finished, you will have a fresh and formatted external hard drive that is compatible with your Windows computer.
Note: If the “Format” option is grayed out or not available, it could indicate that there are partitions on the disk that need to be deleted or other issues. In such cases, you may need to perform additional steps to prepare the drive for formatting.
Step 5: Choose the file system
When formatting your external hard drive, one important decision you need to make is choosing the appropriate file system. The file system determines how data is organized and stored on the drive, affecting factors such as compatibility, performance, and security.
To choose the file system for your external hard drive, follow these steps:
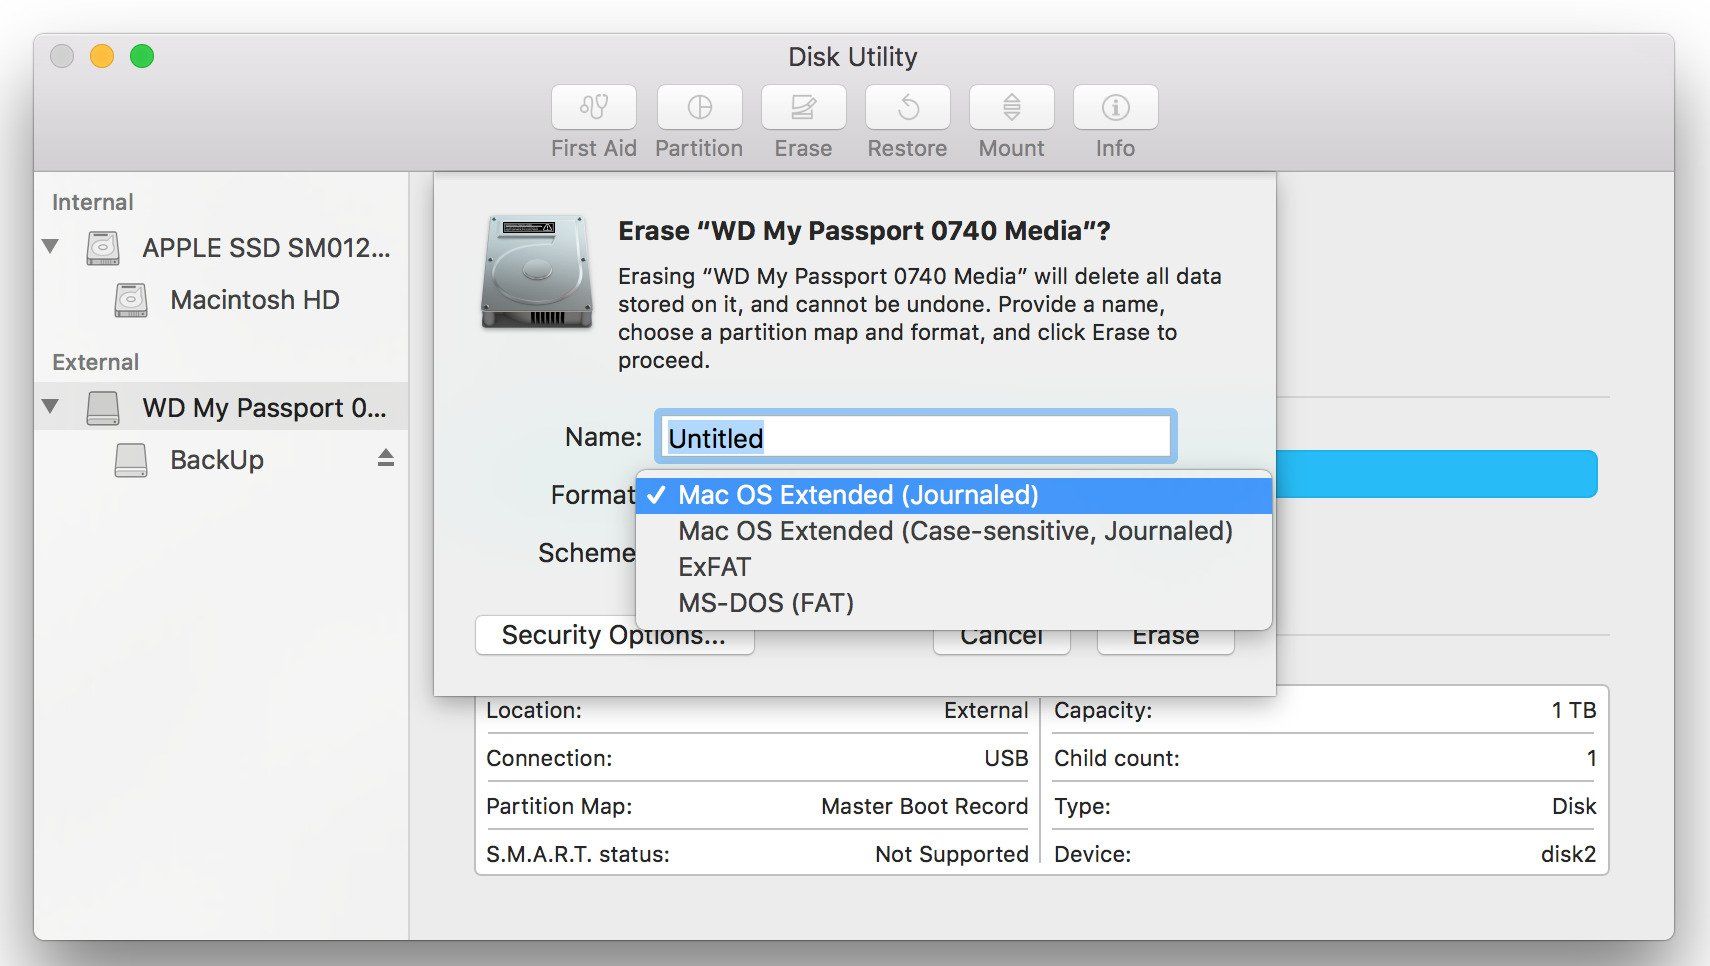
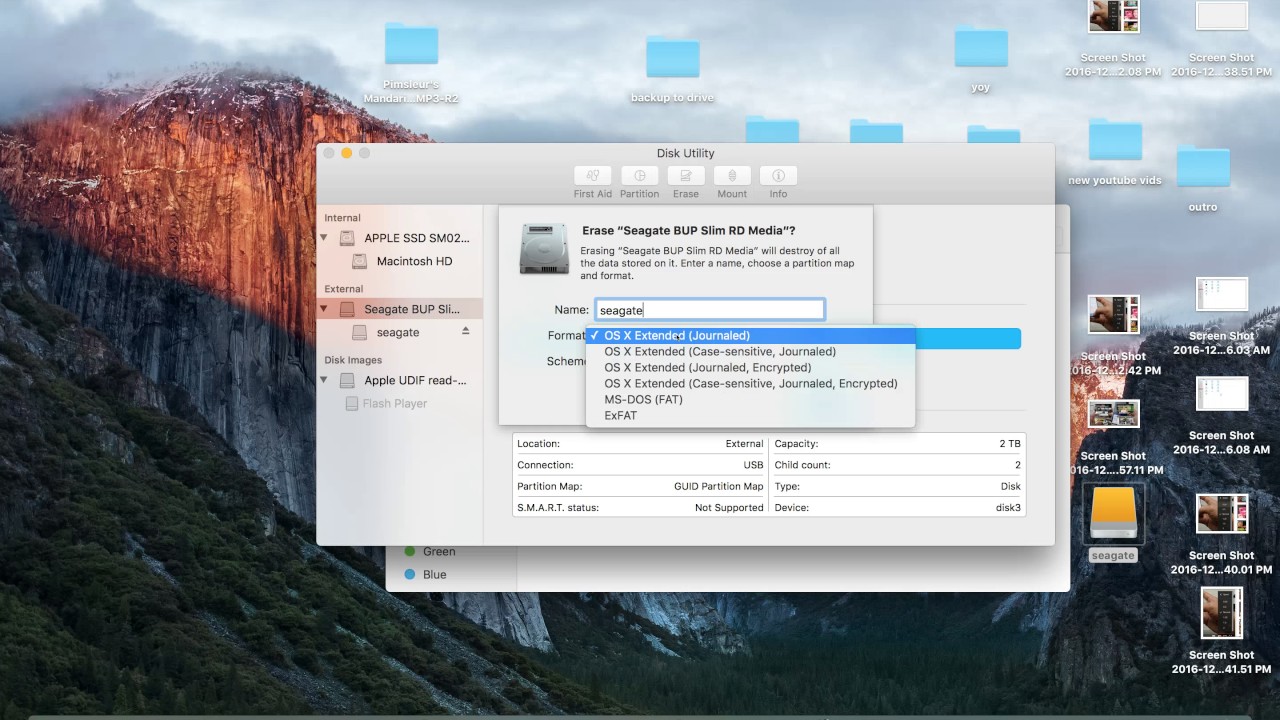
- In the Format dialog box, locate the File system section.
- Click on the dropdown menu to view the available file system options.
- For Windows compatibility, the most commonly used file system is NTFS. It offers support for large file sizes, better security features, and improved performance.
- If you plan to use your external hard drive with other operating systems, such as macOS or Linux, you may need to consider using the FAT32 or exFAT file system. FAT32 is a widely supported file system but has limitations on file size and partition size. exFAT, on the other hand, supports larger file sizes and is compatible with both Windows and macOS.
It is important to choose the file system that best suits your needs and intended usage of the external hard drive. Consider factors such as compatibility with your devices, file size limitations, and any specific requirements you may have.
Once you have selected the desired file system, proceed to the next step to assign a drive letter to your external hard drive.
Step 6: Assign a drive letter
After choosing the file system for your external hard drive, the next step is to assign a drive letter. A drive letter is a unique identifier that allows your Windows computer to recognize and access the external hard drive.
To assign a drive letter to your external hard drive, follow these steps:
- Right-click on the formatted partition of your external hard drive in the Disk Management window.
- From the context menu that appears, select “Change Drive Letter and Paths”.
- In the dialog box that opens, click on the “Change” button.
- In the next dialog box, choose an available drive letter from the dropdown menu. It is recommended to select a letter that is not already assigned to another drive on your computer.
- Click on the “OK” button to confirm and assign the selected drive letter to your external hard drive.
Once you have assigned a drive letter, your Windows computer will recognize the external hard drive with that particular letter whenever it is connected. This makes it easier to access and manage the drive through File Explorer or any other file management software.
Assigning a drive letter is an important step to ensure seamless accessibility and usage of your external hard drive. With the drive letter assigned, you are ready to move on to the next step and start the formatting process.
Step 7: Start the formatting process
Once you have chosen the file system and assigned a drive letter to your external hard drive, you are now ready to start the formatting process. Formatting will erase all the existing data on the drive, so double-check that you have backed up any important files before proceeding.
To start the formatting process, follow these steps:
- Ensure that you have selected the correct external hard drive in the Disk Management window.
- Double-check that you have chosen the desired file system and assigned a drive letter to the drive.
- Click on the “OK” button in the Format dialog box.
After clicking “OK”, a warning message will appear, informing you that formatting will erase all data on the drive. Review the message and ensure that you have backed up any necessary files.
Once you are ready to proceed, click on the “OK” button in the warning message to start the formatting process. A progress bar will appear, indicating the status of the formatting process.
During the formatting process, it is important not to unplug or interrupt the external hard drive. Doing so may result in data loss or drive corruption.
Patience is key as formatting a large external hard drive may take some time. The duration of the process depends on factors such as the size of the drive and the speed of your computer.
Once the formatting process is complete, you will have a clean and freshly formatted external hard drive, ready to be used on your Windows computer.
Step 8: Wait for the formatting to complete
After starting the formatting process for your external hard drive, it is important to exercise patience and allow the process to complete. Formatting a drive can take some time, especially for larger capacity drives or if there are any performance constraints.
While the formatting is in progress, it is crucial to resist the temptation to interrupt or disconnect the external hard drive. Doing so could result in data loss or damage to the drive.
The duration of the formatting process depends on various factors, including the size of the drive and the speed of your computer. It is not uncommon to take several minutes or even longer to complete, particularly for larger drives.
During the formatting process, you may notice a progress bar indicating the status of the operation. Do not be alarmed if the progress appears to be slow or stalls at certain points; this is normal, and the process will continue.
If you need to use your computer for other tasks during the formatting process, it is recommended to avoid performing resource-intensive activities that could potentially interfere with the process or prolong its completion.
Once the formatting is complete, you will receive a notification, and the progress bar will disappear. At this point, your external hard drive is formatted and ready to be used with your Windows computer.
Remember to safely eject the external hard drive before physically disconnecting it to ensure that all data is written and no potential data loss occurs. This can be done by right-clicking on the drive in File Explorer and selecting “Eject” or using the “Safely Remove Hardware” feature in the system tray.
By patiently waiting for the formatting to complete, you ensure a successful and error-free process, resulting in a properly formatted external hard drive for your Windows computer.
Step 9: Eject the external hard drive safely
After the formatting process is complete, it is important to safely eject the external hard drive from your Windows computer before physically disconnecting it. This ensures that all data is written and that there is no potential for data loss or drive corruption.
To safely eject the external hard drive, follow these steps:
- Open File Explorer by clicking on the folder icon in the taskbar or by pressing the Windows key + E on your keyboard.
- In the left-hand sidebar of File Explorer, locate the section labeled “This PC” or “Computer”.
- Find and select your external hard drive from the list of available drives. It is usually labeled with the drive letter you assigned earlier.
- Right-click on the drive and select “Eject” from the context menu that appears. Alternatively, you can also click on the “Eject” button in the toolbar at the top of the File Explorer window.
- Wait for a notification or confirmation message that it is safe to remove the external hard drive.
Once you receive the notification or confirmation that it is safe to remove the external hard drive, you can physically disconnect it from your computer. Make sure to handle the drive carefully and safely remove any cables or connections.
Ejecting the external hard drive safely ensures that all data is properly written and that no active processes are accessing the drive. This reduces the risk of data loss or drive corruption and helps maintain the overall health and integrity of the drive.
By following this final step, you can confidently remove your external hard drive from your Windows computer without any worries about data integrity or potential damage.
Conclusion
Reformatting an external hard drive for Windows is a straightforward process that allows you to ensure compatibility and optimize the drive for use on your computer. By following the step-by-step instructions outlined in this guide, you can successfully reformat your external hard drive and prepare it for storing and transferring files on your Windows system.
From connecting the external hard drive to your computer, opening Disk Management, locating the drive, formatting it with the desired file system, assigning a drive letter, and waiting for the process to complete, each step plays a crucial role in achieving a successful reformatting experience.
Remember that reformatting the external hard drive will erase all data, so it is essential to create backups of any important files before proceeding. Additionally, it is important to exercise patience during the formatting process and avoid interrupting it to prevent data loss or drive corruption.
Once the formatting is complete, be sure to safely eject the external hard drive before physically disconnecting it from your computer. This ensures that all data is written and there is no risk of potential data loss.
Following these guidelines will enable you to effectively reformat your external hard drive for Windows, providing you with a clean, formatted, and compatible storage solution. Whether you are setting up a new external hard drive or reformatting an existing one, this process allows you to optimize the drive’s performance and ensure it functions seamlessly with your Windows computer.
Now that you have the knowledge and understanding of how to reformat an external hard drive for Windows, you can confidently tackle this task and make the most out of your storage device.