Introduction
Welcome to this step-by-step guide on how to assign an external hard drive a letter. If you have recently connected a new external hard drive to your computer but noticed that it doesn’t have a specific letter assigned to it, don’t worry! By assigning a drive letter, you can easily access and manage the files stored on your external hard drive.
The process of assigning a letter to an external hard drive involves utilizing the Disk Management tool on your Windows computer. This tool allows you to manage your computer’s disk partitions and assign unique letters to your drives for easy identification.
Assigning a letter to your external hard drive simplifies the process of accessing its contents. Instead of dealing with complex file paths, you can simply navigate to the assigned letter, just like you would with your computer’s internal drives.
In this guide, we will walk you through the necessary steps to assign a letter to your external hard drive. Whether you’re a tech-savvy individual or a beginner, don’t worry! We’ve got you covered with clear and easy-to-follow instructions.
So, if you’re ready to give your external hard drive a letter and simplify your file management process, let’s dive into the step-by-step instructions. Follow along, and you’ll have your external hard drive assigned a letter in no time!
Step 1: Connect the external hard drive
The first step in assigning a letter to your external hard drive is to ensure that it is properly connected to your computer. Locate an available USB port on your computer and connect one end of the USB cable to the port, and the other end to the external hard drive. Make sure the connection is secure.
Once the external hard drive is connected, your computer should recognize it and notify you with a prompt or sound. It may take a few moments for your computer to detect the new hardware, so be patient if the notification doesn’t appear immediately.
Ensure that the external hard drive is powered on and functioning properly. If you encounter any issues with the connection, double-check the cables and consult the documentation for your specific external hard drive model for troubleshooting instructions.
Properly connected and recognized by your computer, your external hard drive is now ready to be assigned a letter. Proceed to the next step to learn how to open Disk Management and begin the letter assignment process.
Step 2: Open Disk Management
Once your external hard drive is connected and recognized by your computer, it’s time to open the Disk Management tool. Disk Management allows you to manage all your computer’s disk partitions, including assigning drive letters to your external devices.
To open Disk Management, there are a couple of methods you can try:
- Method 1: Using the Start Menu:
- Click on the Start menu button in the bottom left corner of your screen.
- Type “Disk Management” in the search bar.
- From the search results, click on “Create and format hard disk partitions” or “Disk Management.”
- Method 2: Using the Run Command:
- Press the Windows key + R on your keyboard to open the Run dialog box.
- Type “diskmgmt.msc” in the dialog box and click OK.
- Method 3: Using Computer Management:
- Right-click on the Start menu button and choose “Computer Management” from the context menu.
- In the Computer Management window, click on “Disk Management” under the “Storage” category.
Any of the above methods will open the Disk Management tool, displaying a list of all the drives connected to your computer, including your external hard drive.
Now that you have successfully opened Disk Management, proceed to the next step to locate your new external hard drive.
Step 3: Locate the new drive
After opening Disk Management, it’s time to locate your new external hard drive within the list of drives displayed in the Disk Management window. The drives will be listed in a graphical representation, along with their corresponding labels and other information.
Scan through the list of drives and look for the drive that corresponds to your external hard drive. You can identify it by the drive’s size and other relevant details. Typically, the external hard drive will be labeled as “Unknown” or “Unallocated” if it hasn’t been assigned a letter yet.
The drive should appear as a rectangular block, similar to your internal hard drive or other connected storage devices. Make sure to carefully identify the correct drive before proceeding with the letter assignment process.
If you can’t immediately locate your external hard drive within the list, try the following steps:
- Refresh the Disk Management window by clicking on the “Action” option in the toolbar and selecting “Refresh”.
- Check if the drive is powered on and properly connected to your computer.
- Ensure that the drive is being recognized by your computer.
- Try disconnecting and reconnecting the USB cable for the external hard drive.
- If all else fails, consult the documentation for your external hard drive or reach out to the manufacturer’s support for further assistance.
Once you have successfully located your external hard drive in the Disk Management window, you are ready to proceed to the next step and assign a letter to the drive.
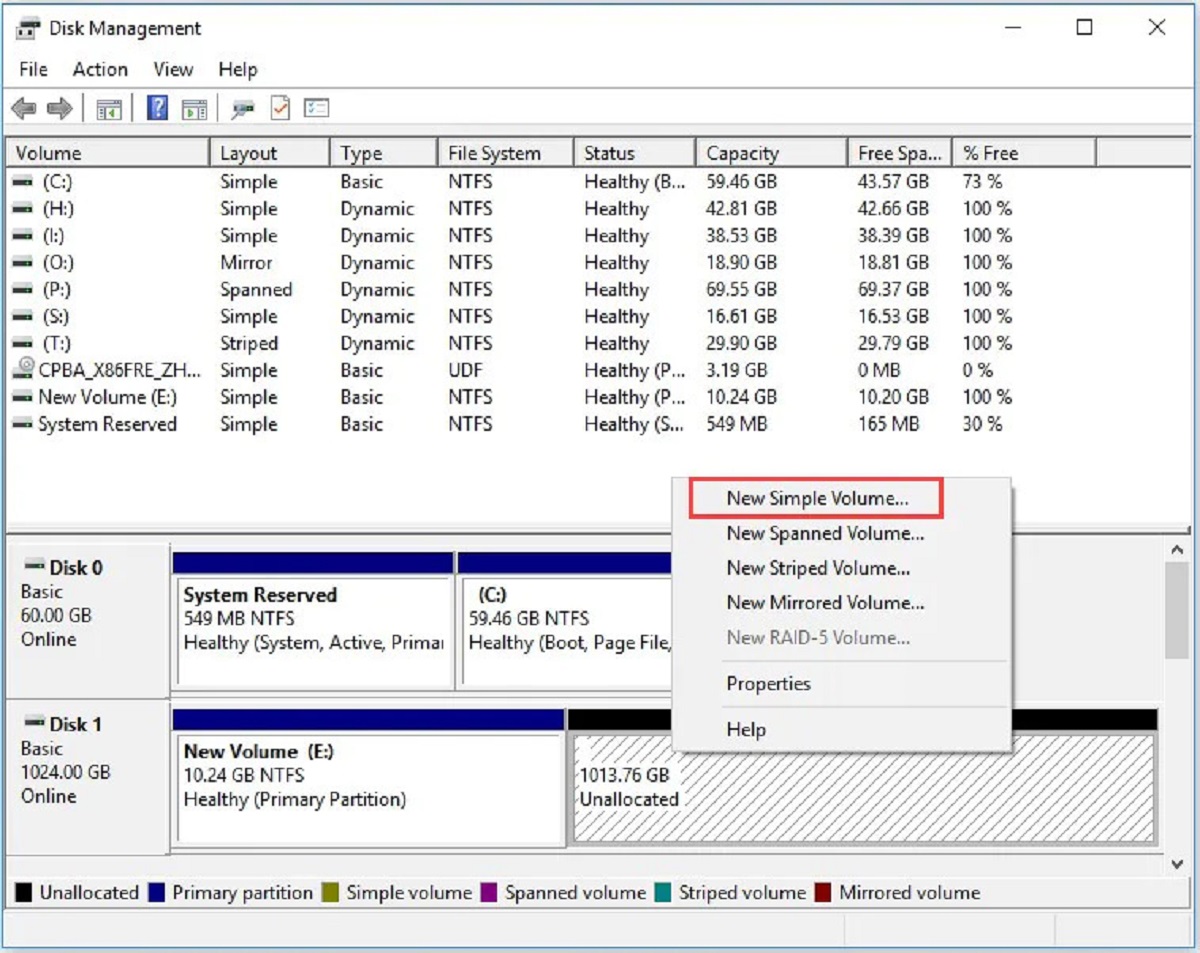
Step 4: Choose a letter for the drive
Now that you have located your external hard drive in the Disk Management window, it’s time to choose a letter to assign to the drive. The letter you choose will serve as the identifier for your external hard drive in Windows Explorer.
To choose a letter for the drive, follow these steps:
- Right-click on the rectangular block representing your external hard drive in the Disk Management window.
- From the context menu that appears, click on the “Change Drive Letter and Paths” option.
- In the new window that opens, click on the “Change” button.
- In the next window, you will see a drop-down menu with a list of available drive letters.
- Select the drive letter that you would like to assign to your external hard drive. Make sure to choose a letter that is not already in use by another drive on your computer.
- Click “OK” to confirm your selection.
Remember to choose a letter that is easy to remember and identify. This will make accessing your files on the external hard drive much more convenient.
Once you have chosen a letter for your external hard drive, you are ready to assign the letter and finalize the process. Proceed to the next step to complete the letter assignment.
Step 5: Assign the letter to the drive
After choosing a letter for your external hard drive, it’s time to assign the selected letter to the drive and complete the process. Assigning the letter will make it the permanent identifier for your external hard drive when accessing it in Windows Explorer.
To assign the letter to your external hard drive, follow these steps:
- In the “Change Drive Letter and Paths” window that is still open, click on the “Add” button.
- In the new window, make sure that the option “Assign the following drive letter” is selected.
- The previously chosen drive letter should appear in the drop-down menu automatically. If not, select it from the list.
- Click “OK” to confirm the assignment of the letter to your external hard drive.
Once you click “OK,” the assigned letter will be applied to your external hard drive, and it will be accessible using that specific letter in Windows Explorer.
It is important to note that the letter assignment is permanent, so make sure to choose the correct letter and double-check before proceeding.
With the letter successfully assigned to your external hard drive, you are ready to move on to the next step and verify the drive’s letter assignment.
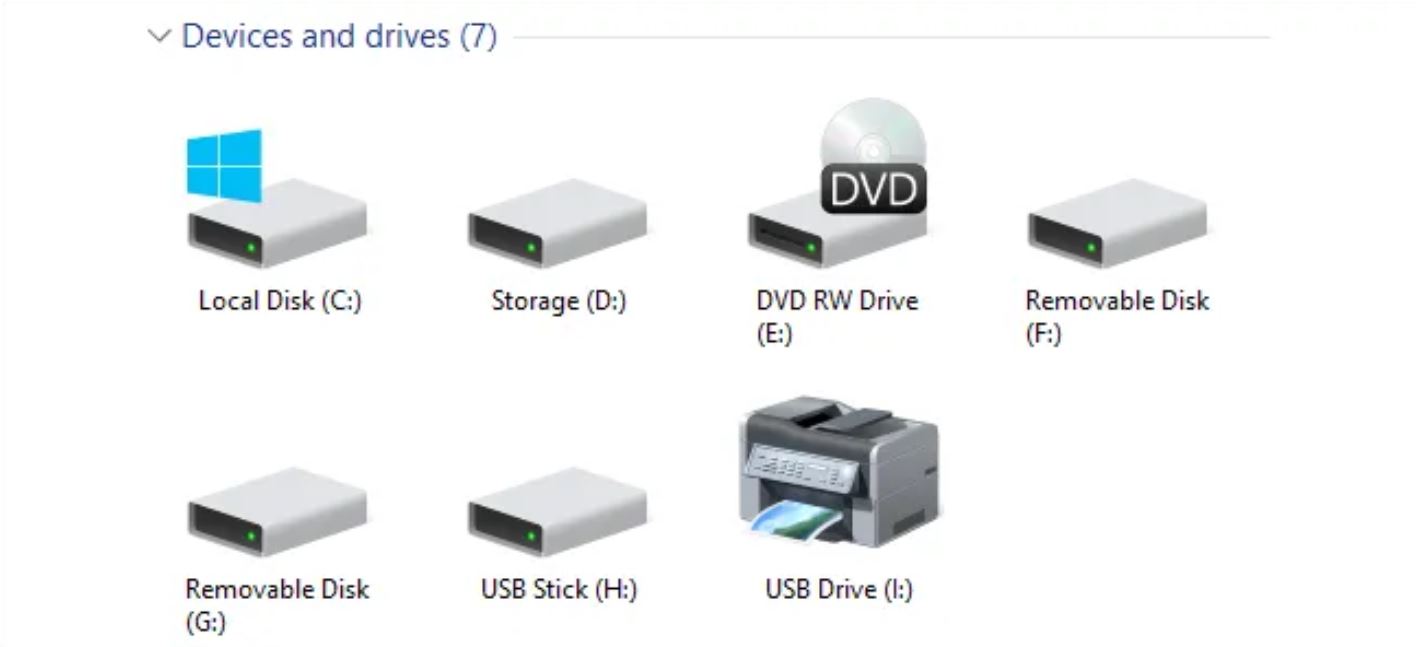
Step 6: Check the drive’s letter assignment
After assigning a letter to your external hard drive, it’s important to verify that the letter assignment was successful. This will ensure that you can easily access and manage the drive using the assigned letter.
To check the drive’s letter assignment, follow these steps:
- Open Windows Explorer by clicking on the folder icon on your taskbar or pressing the Windows key + E on your keyboard.
- In the left sidebar of Windows Explorer, locate the “This PC” or “My Computer” option and click on it.
- In the main window, you should now see a list of drives, including your external hard drive.
- Look for the drive with the letter you assigned earlier. The assigned letter should appear next to the drive’s name or label.
If you successfully see the assigned letter next to your external hard drive, congratulations! The drive’s letter assignment was successful, and you can now easily access your external hard drive using the assigned letter.
If the assigned letter doesn’t appear next to your external hard drive, make sure to double-check your steps and verify that you followed the instructions correctly. If necessary, repeat the steps from the previous sections to reassign the letter to your external hard drive.
By checking the drive’s letter assignment, you can ensure that you have successfully completed the process and can now enjoy easy access to your external hard drive in Windows Explorer.
With the drive’s letter assignment verified, you have successfully completed the process of assigning a letter to your external hard drive. Congratulations!
Conclusion
Congratulations! You have successfully learned how to assign an external hard drive a letter. By following the step-by-step instructions in this guide, you can now easily access and manage your files stored on the external hard drive using the assigned letter.
Assigning a letter to your external hard drive through the Disk Management tool allows for convenient file management, as you can simply navigate to the assigned letter in Windows Explorer and access your files without needing to remember complex file paths.
Remember, the process involves connecting the external hard drive to your computer, opening Disk Management, locating the drive, choosing a letter, assigning the letter, and finally verifying the letter assignment in Windows Explorer.
If you encounter any issues or have questions along the way, don’t hesitate to consult the documentation for your specific external hard drive model or reach out to the manufacturer’s support for further assistance.
Now that you have successfully assigned a letter to your external hard drive, enjoy the convenience of accessing and managing your files with ease.
Thank you for following this guide, and we hope it has been helpful to you. Happy file management!