Introduction
Welcome to this guide on how to open an external hard drive on Windows 10. External hard drives are extremely useful for storing large amounts of data such as files, photos, videos, and backups. However, sometimes you may encounter difficulties in opening or accessing your external hard drive. This can be frustrating, especially if you have important data stored on it.
There can be several reasons why you may not be able to open your external hard drive. It could be due to connection issues, outdated drivers, or problems with the drive letter assignment. Additionally, external hard drives can become inaccessible due to data corruption or physical damage.
This guide will walk you through the steps to troubleshoot common issues preventing you from opening your external hard drive. We will cover techniques to check for driver updates, assign a drive letter, and use Disk Management and Command Prompt to open the drive. We will also touch upon data recovery methods to help you retrieve your files in case of an inaccessible drive.
Whether you are a beginner or a seasoned Windows user, this guide will provide you with the necessary information and solutions to open your external hard drive and retrieve your valuable data. Let’s get started!
Overview of External Hard Drives
External hard drives are portable storage devices that are connected to a computer externally, typically via USB, Thunderbolt, or eSATA. They provide a convenient way to expand your computer’s storage capacity or create backups of important files.
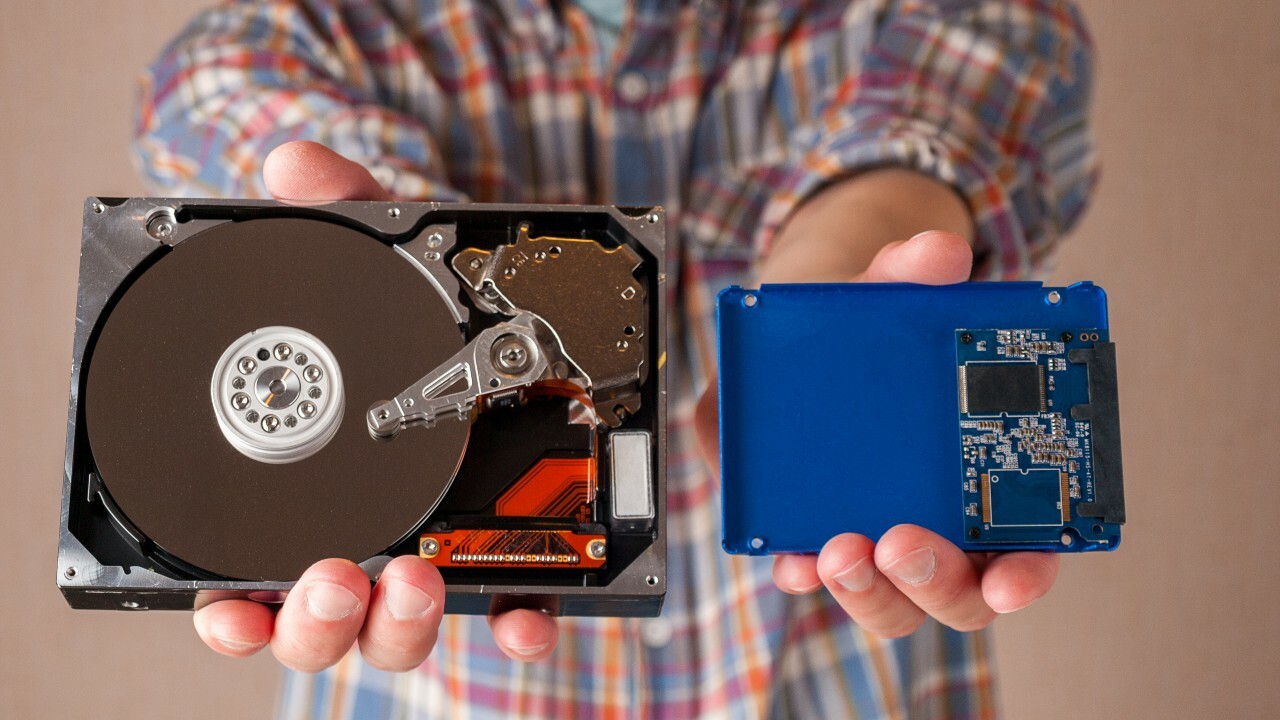
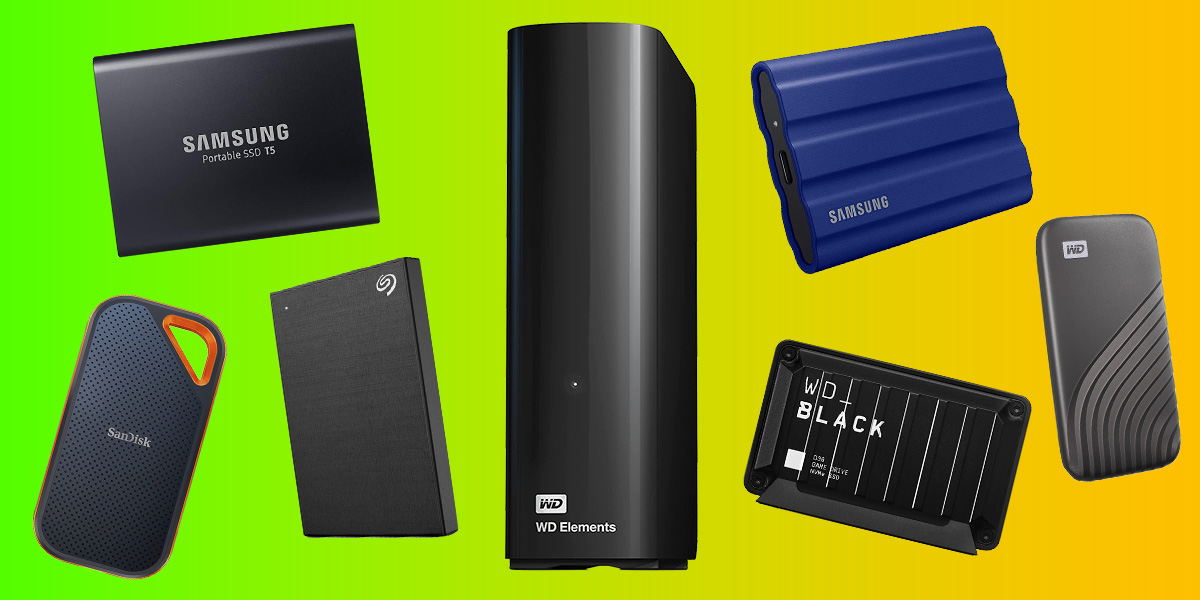
These hard drives come in various sizes, ranging from a few hundred gigabytes to several terabytes, offering ample space to store your digital content. They are available in different form factors, including traditional spinning hard drives and solid-state drives (SSDs). While traditional hard drives offer larger storage capacities at a lower cost, SSDs provide faster read and write speeds and are more resistant to physical damage.
External hard drives are compatible with both Windows and Mac operating systems, making them versatile storage solutions for users of different platforms. They can be used for a variety of purposes, such as:
- Storing and transferring files: External hard drives offer a convenient way to store and carry large files, such as media files, documents, and software installations. You can transfer files between different computers or share them with others without relying on internet connectivity.
- Backup and data protection: Regularly backing up your data is essential to protect it from loss due to hardware failure, accidental deletion, or malware attacks. External hard drives provide a reliable backup solution, allowing you to quickly restore your files in case of data loss.
- Expanding storage capacity: If your computer’s internal storage is running low, external hard drives can serve as an additional storage option. You can store less frequently used files on the external drive to free up space on your computer’s internal storage, improving its performance.
When considering an external hard drive, factors to consider include storage capacity, transfer speed, durability, and connectivity options. It is also important to choose a reputable brand known for reliable performance and data security.
Now that we have covered the basics of external hard drives, let us move on to troubleshooting common issues that prevent you from opening them on Windows 10.
Why can’t I open my external hard drive?
There could be several reasons why you may not be able to open your external hard drive on Windows 10. Understanding these reasons can help you troubleshoot the issue effectively. Here are some common causes:
1. Connection Issues: A loose or faulty USB cable, an improperly connected port, or a malfunctioning USB port can prevent your computer from recognizing the external hard drive. Ensure that the cable is securely connected, try using a different USB port, and check if the drive is getting power.
2. Outdated Drivers: Outdated or incompatible drivers can cause compatibility issues and prevent your computer from recognizing the external hard drive. It is recommended to check for driver updates using the Device Manager and install the latest drivers for your external hard drive.
3. Drive Letter Conflict: Sometimes, another drive or partition on your computer may be using the same drive letter as your external hard drive, causing a conflict. This can prevent your computer from assigning a drive letter to the external hard drive and making it accessible.
4. Disk Corruption: If your external hard drive is not properly ejected or if there is an abrupt power loss during data transfer, it can lead to disk corruption. This can result in the drive becoming inaccessible or displaying errors when you try to open it.
5. Physical Damage: External hard drives are susceptible to physical damage, such as dropping or mishandling. If the drive has suffered physical damage, it may not function properly, making it difficult to open or access the data stored on it.
Now that you understand some of the common reasons why you may be unable to open your external hard drive, let’s move on to troubleshooting solutions to help you resolve the issue and regain access to your important data.
How to troubleshoot connection issues
If you are experiencing connection issues with your external hard drive, follow these steps to troubleshoot the problem:
1. Check the cable and connections: Ensure that the USB cable connecting your external hard drive to your computer is securely plugged in on both ends. Try using a different USB cable or port to rule out any issues with the cable or port.
2. Restart your computer: Sometimes, a simple restart of your computer can resolve connection issues. Restart your computer and try connecting the external hard drive again.
3. Update USB drivers: Outdated or corrupted USB drivers can cause connectivity problems. To update the drivers, follow these steps:
- Press Windows key + X and select Device Manager from the menu.
- Expand the “Universal Serial Bus controllers” section.
- Right-click on the USB driver and select “Update driver.”
- Choose the option to search automatically for updated driver software.
- Follow the on-screen instructions to complete the driver update process.
4. Power cycle the external hard drive: Disconnect the external hard drive from your computer and unplug its power source (if applicable). Wait for a few minutes, then reconnect the power and connect the drive to your computer. This can help reset any temporary issues with the drive’s power supply.
5. Use a different computer: If possible, try connecting the external hard drive to a different computer to check if it is recognized. If it works on another computer, the issue may be related to your computer’s settings or drivers.
6. Try a different operating system: If you have access to another computer with a different operating system (such as macOS), connect the external hard drive to that computer. This can help determine if the issue is specific to the Windows operating system.
If none of the above steps resolve the connection issue, it is recommended to contact the manufacturer’s support for further assistance or consider professional data recovery services if the data stored on the external hard drive is critical.
How to check for driver updates
Outdated or incompatible drivers can often cause issues with recognizing external hard drives. To ensure that your external hard drive is compatible and functioning properly, you can follow these steps to check for driver updates:
1. Open Device Manager: Press the Windows key + X on your keyboard, then select “Device Manager” from the menu that appears.
2. Expand the “Disk drives” section: In the Device Manager window, expand the “Disk drives” category. You should see the name of your external hard drive listed.
3. Right-click and select “Update driver”: Right-click on your external hard drive and choose the “Update driver” option.
4. Select “Search automatically for updated driver software”: In the Update Driver Software dialog box, select the option to search automatically for updated driver software. Windows will then search for the latest driver updates for your external hard drive.
5. Install the updated driver: If Windows finds an updated driver, it will prompt you to install it. Follow the on-screen instructions to complete the installation process.
6. Restart your computer: After the driver update is completed, it is recommended to restart your computer to ensure that the changes take effect.
If Windows does not find any driver updates for your external hard drive or if the issue persists after updating the drivers, you can try visiting the manufacturer’s website and searching for the latest driver specifically designed for your external hard drive model. Download and install the driver according to the manufacturer’s instructions.
Keep in mind that updating drivers can improve compatibility and resolve certain issues, but it may not always solve all problems related to opening an external hard drive. If you’re still unable to open your external hard drive, there may be other underlying issues that require further troubleshooting.
In the next sections, we will explore additional methods to resolve issues with opening external hard drives, such as assigning drive letters and using Disk Management and Command Prompt to access the drives.
How to assign a drive letter to the external hard drive
If your external hard drive does not have a drive letter assigned to it, you may not be able to open or access it. Assigning a drive letter can help resolve this issue. Follow these steps to assign a drive letter to your external hard drive:
1. Open Disk Management: Press the Windows key + X on your keyboard, then select “Disk Management” from the menu that appears.
2. Locate your external hard drive: In the Disk Management window, look for your external hard drive. It will be listed along with other drives and partitions in the lower section of the window. Make sure to identify the correct drive based on its size and other specifications.
3. Right-click on the external hard drive: Right-click on the external hard drive in the Disk Management window and select “Change Drive Letter and Paths.”
4. Select “Add”: In the Change Drive Letter and Paths dialog box, click on the “Add” button.
5. Choose a drive letter: In the next window, choose an available drive letter from the drop-down menu. You can select any unused letter that is not currently assigned to another drive or partition.
6. Confirm and apply the changes: Click “OK” to confirm the chosen drive letter and apply the changes. Windows will assign the selected drive letter to your external hard drive.
7. Restart your computer: After assigning the drive letter, it is recommended to restart your computer to ensure that the changes take effect.
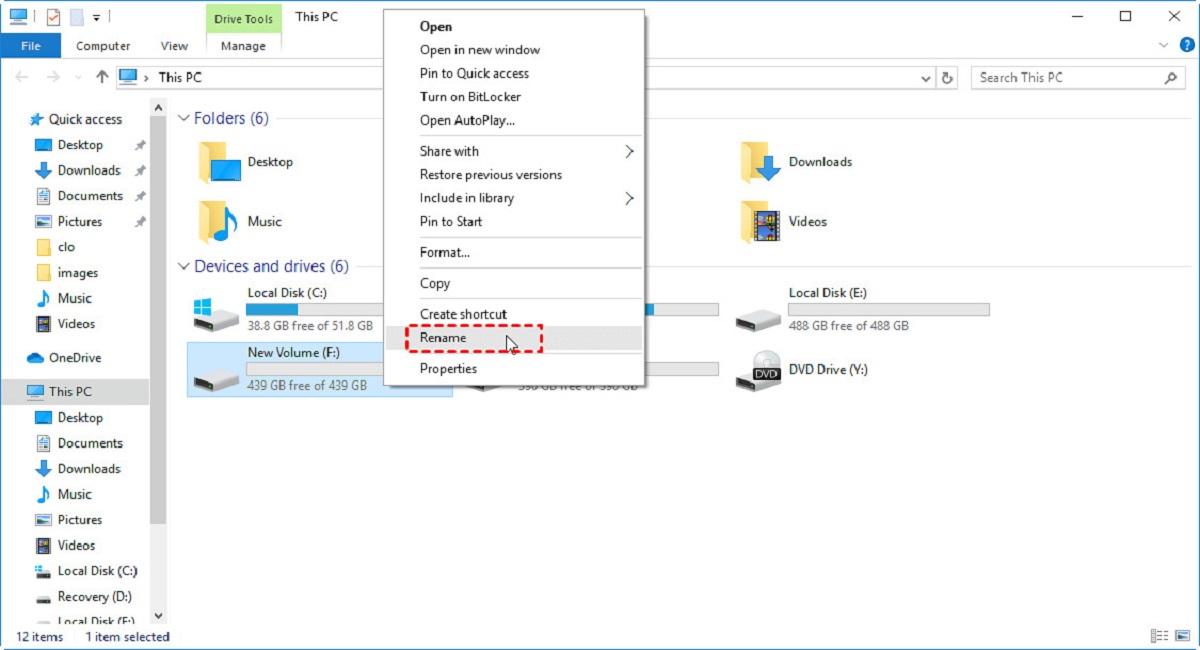
Once your computer restarts, try opening the external hard drive again. It should now have a drive letter assigned to it and be accessible through File Explorer or This PC. If you still encounter issues, proceed to the next sections for additional troubleshooting methods.
Assigning a drive letter can often resolve problems related to drive recognition. However, if the problem persists or if you receive any error messages, there may be other underlying issues that need to be addressed.
How to use Disk Management to open the external hard drive
If you’re unable to open your external hard drive using the usual methods, you can try using the Disk Management utility in Windows to access and open the drive. Here’s how:
1. Open Disk Management: Press the Windows key + X on your keyboard, then select “Disk Management” from the menu that appears.
2. Locate your external hard drive: In the Disk Management window, look for your external hard drive. It will be listed along with other drives and partitions in the lower section of the window. Make sure to identify the correct drive based on its size and other specifications.
3. Check the status of the drive: In some cases, the external hard drive may appear as “Not Initialized” or “Unallocated” in Disk Management. If this is the case, you will need to initialize the drive before you can open it. Right-click on the drive and select “Initialize Disk.” Choose the appropriate partition style (MBR or GPT) and click “OK” to proceed.
4. Assign a drive letter: Right-click on the external hard drive again and select “Change Drive Letter and Paths.” Choose the “Add” button and select an available drive letter from the drop-down menu. Click “OK” to confirm and assign the drive letter to the external hard drive.
5. Format the drive (if necessary): If the external hard drive is in a RAW or inaccessible file system format, you may need to format the drive. Right-click on the drive and select “Format.” Choose the desired file system (such as NTFS) and allocate the desired allocation unit size. Click “OK” to proceed with the formatting process. Note that formatting will erase all data on the drive, so make sure to back up any important files before proceeding.
6. Access the drive: After assigning a drive letter and formatting (if necessary), the external hard drive should now be accessible. You can try opening it through File Explorer or This PC to access your files.
If you still encounter issues or if the drive is not recognized in Disk Management, there may be other underlying problems requiring further troubleshooting. Additionally, keep in mind that using Disk Management to access the drive does not guarantee data retrieval in case of data loss or corruption. It is important to regularly back up your important files to prevent data loss.
In the next section, we’ll explore an alternative method using the Command Prompt to open the external hard drive.
How to use Command Prompt to open the external hard drive
If you’re having trouble opening your external hard drive using the usual methods, you can try using Command Prompt in Windows to access and open the drive. Follow these steps:
1. Open Command Prompt: Press the Windows key + R on your keyboard to open the Run dialog box. Type “cmd” and press Enter, or click OK. This will open the Command Prompt window.
2. Identify the drive: In the Command Prompt window, type “diskpart” and press Enter to start the DiskPart utility.
3. List the disks: In the DiskPart prompt, type “list disk” and press Enter. This will display a list of all the disks connected to your computer, including your external hard drive.
4. Select the disk: Identify your external hard drive from the list based on its size and other specifications. Type “select disk X” (replace X with the appropriate disk number) and press Enter to select the external hard drive.
5. List the volumes: Type “list volume” and press Enter. This will display a list of all the volumes (including partitions) on the selected disk.
6. Select the volume: Identify the volume associated with your external hard drive. Type “select volume X” (replace X with the appropriate volume number) and press Enter to select the volume.
7. Assign a drive letter: Type “assign letter=X” (replace X with a desired drive letter) and press Enter. This will assign the selected drive letter to the external hard drive.
8. Exit DiskPart: Type “exit” and press Enter to exit the DiskPart utility.
After following these steps, the external hard drive should now be accessible through File Explorer or This PC using the assigned drive letter.
Using Command Prompt to open the external hard drive can be a useful alternative if other methods have failed. However, it is important to note that this method requires advanced knowledge and caution when working with DiskPart. Incorrect commands or operations can cause data loss or other issues, so it’s crucial to proceed with care.
If you still encounter issues or if the drive is not recognized in Command Prompt, it is recommended to seek professional assistance or contact the manufacturer’s support for further troubleshooting.
How to recover data from an inaccessible external hard drive
If you are unable to open or access your external hard drive, there is still hope to recover your valuable data. Here are some methods you can try to retrieve your files:
1. Check the drive on another computer: Connect your external hard drive to a different computer and check if it is recognized. If it is, copy your important files to the computer’s internal storage or another external drive to create a backup.
2. Use data recovery software: There are various data recovery software programs available that can help restore data from an inaccessible external hard drive. These programs scan the drive for lost or deleted files and attempt to recover them. Some popular options include Recuva, EaseUS Data Recovery Wizard, and Stellar Data Recovery.
3. Seek professional data recovery services: If the above methods do not work or if your external hard drive has physically failed, it may be necessary to seek professional data recovery services. These services utilize specialized equipment and expertise to retrieve data from faulty or damaged drives. Though more costly, professional data recovery can greatly increase the chances of recovering your important files.
4. Take precautionary measures: It is important to handle your inaccessible external hard drive with care to avoid further damage. Avoid using the drive if you suspect physical damage or internal issues. Do not attempt to open the drive or make any modifications unless you have the necessary expertise.
Remember that data recovery is not always guaranteed, especially in cases of severe physical damage or complete drive failure. To prevent data loss in the future, it is crucial to regularly backup your important files to multiple locations, such as cloud storage or another external drive.
Keep in mind that data recovery methods should be used as a last resort, and it is always recommended to consult with a professional or expert if you are uncertain about the best course of action.
We hope that these methods will help you retrieve your data from an inaccessible external hard drive. However, prevention is always better than cure, so remember to implement regular backups to avoid the risk of losing important files.
Conclusion
In conclusion, opening an external hard drive on Windows 10 may sometimes present challenges, but with the right troubleshooting techniques, you can overcome these obstacles and regain access to your valuable data. This guide has provided you with an overview of external hard drives, common issues that prevent them from opening, and step-by-step instructions on troubleshooting connection issues, checking for driver updates, assigning drive letters, using Disk Management, and Command Prompt to access the drive. Additionally, we discussed data recovery methods in case of an inaccessible drive.
Remember to ensure that the cable connections are secure, update the drivers using the Device Manager, assign a drive letter through Disk Management, or use Command Prompt as alternative methods to open the external hard drive. If all else fails, data recovery software or professional data recovery services may be necessary to retrieve your files.
It is crucial to handle your external hard drive with care and take precautionary measures to avoid physical damage. Regularly backing up your important files to multiple locations is highly recommended to prevent data loss and minimize the impact of any unforeseen issues.
We hope that this guide has provided you with the necessary knowledge and steps to troubleshoot and resolve issues with opening an external hard drive on Windows 10. By following these techniques, you can increase the chances of successfully accessing your external hard drive and retrieving your important data.
Remember, when in doubt, it is always best to seek professional assistance or consult with the manufacturer’s support for further guidance. With patience and the right approach, you can overcome any obstacles and regain access to your external hard drive’s valuable contents.