Introduction
Welcome to another tutorial on data management! If you are looking to reformat your external hard drive, you have come to the right place. In this guide, we will walk you through the process of reformatting an external hard drive using the ExFAT file system.
External hard drives are a popular choice for storing and transferring large amounts of data due to their portability and high storage capacity. However, sometimes you may need to reformat your external hard drive to change its file system or resolve any compatibility issues.
ExFAT, which stands for Extended File Allocation Table, is a file system developed by Microsoft. It is specifically designed for use with flash drives and external storage devices. ExFAT offers advantages such as support for large file sizes, compatibility with both Windows and Mac operating systems, and improved data transfer speeds.
In this tutorial, we will guide you step by step on how to reformat your external hard drive to the ExFAT file system. But before we dive into the reformatting process, it is crucial to emphasize the importance of backing up your data.
Reformatting your external hard drive will erase all existing data on it. Therefore, it is essential to back up any important files or folders that you want to keep. You can save them onto another storage device, cloud storage, or even your computer’s internal hard drive.
Now that we have covered the basics, let’s move on to the step-by-step process of reformatting an external hard drive using the ExFAT file system. Ensure you have read through and understood the precautions mentioned in this article before proceeding to reformat your external hard drive. Let’s get started!
What is ExFAT?
ExFAT, short for Extended File Allocation Table, is a file system developed by Microsoft specifically for use with flash drives and external storage devices. It was introduced as an improved successor to the older FAT32 file system, addressing some of its limitations.
One of the key advantages of ExFAT is its ability to handle large file sizes. While FAT32 has a file size limit of 4GB, ExFAT supports individual files up to 16 exabytes (approximately 18.4 million terabytes) in size. This makes it ideal for storing large media files, such as high-definition videos or disk images.
In addition to its support for large file sizes, ExFAT is also designed to be compatible with both Windows and Mac operating systems. This cross-platform compatibility allows you to use the same external hard drive on different computers without the need for additional software or drivers.
Another advantage of ExFAT is its improved data transfer speeds. Compared to FAT32, ExFAT offers faster read and write speeds, allowing for quicker access and transfer of files. This can be particularly beneficial when working with large files or performing tasks that involve frequent data transfers.
The ExFAT file system also provides improved reliability and stability over its predecessor. It incorporates features such as a transactional NTFS log, which helps ensure the integrity of the file system in case of unexpected power failures or system crashes.
However, it is important to note that ExFAT does have some limitations. For instance, it does not support file and folder-level encryption or access control lists (ACLs). Therefore, if you require advanced file security features, you may need to consider other file systems, such as NTFS or HFS+.
Overall, ExFAT is an excellent choice for formatting external hard drives due to its support for large file sizes, cross-platform compatibility, and fast data transfer speeds. Now that you have an understanding of what ExFAT is and its advantages, let’s proceed to the next section to learn how to reformat your external hard drive using this file system.
Why choose ExFAT for an external hard drive?
When it comes to choosing a file system for your external hard drive, ExFAT offers several compelling reasons to consider. Let’s take a closer look at why you might want to choose ExFAT for your external storage needs.
1. Compatibility: ExFAT is designed to be compatible with both Windows and Mac operating systems. This means that regardless of the computer or device you connect your external hard drive to, you will be able to access and use your files without any compatibility issues. It eliminates the need for cumbersome file conversion or special software installations for cross-platform compatibility.
2. Large file support: If you frequently work with large files, such as high-definition videos, virtual machine images, or backup archives, ExFAT is an excellent choice. It supports individual file sizes up to 16 exabytes, providing you with the flexibility to store even the most massive files on your external hard drive.
3. Fast data transfer: ExFAT offers improved data transfer speeds compared to older file systems like FAT32. This means that you can copy, move, or access files on your external hard drive more quickly, enhancing your overall productivity. Whether you are transferring multimedia files or performing regular backups, ExFAT’s faster read and write speeds can save you valuable time.
4. Portability: External hard drives are often used for storing and transporting data between different devices or locations. ExFAT’s cross-platform compatibility makes it an ideal choice for maintaining data portability. Whether you are connecting your external hard drive to a Windows PC, Mac, or even certain gaming consoles, ExFAT ensures that your files can be accessed seamlessly wherever you go.
5. File system integrity: ExFAT incorporates features like a transactional NTFS log, which helps preserve the integrity of the file system even in the event of power failures or system crashes. This ensures that your data remains safe and your external hard drive maintains optimal performance over extended periods of use.
Overall, ExFAT offers a combination of compatibility, large file support, fast data transfer, and file system reliability, making it an attractive choice for formatting external hard drives. However, it is worth noting that ExFAT may not be suitable for certain scenarios that require advanced security features, such as file-level encryption or access control lists. In such cases, other file systems like NTFS or HFS+ may be more appropriate.
Now that you understand the benefits of using ExFAT for your external hard drive, let’s proceed to the next section to learn how to back up your data before reformatting.
Before reformatting: Backing up your data
Before you proceed with reformatting your external hard drive, it is crucial to back up any important data that you have stored on it. Reformatting will erase all existing data on the drive, so it’s essential to take precautious steps to prevent data loss.
Here are some steps to follow when backing up your data:
1. Identify and prioritize your important files: Take some time to go through the content on your external hard drive and identify the files and folders that you want to back up. These could include work documents, personal photos, videos, or any other data that you consider valuable.
2. Create a backup plan: Determine the best method for backing up your data. You have several options:
- External storage: Connect a separate external hard drive or USB flash drive and copy your important files over to this device. This offers a physical backup location for your data.
- Cloud storage: Use cloud storage services such as Google Drive, Dropbox, or Microsoft OneDrive to upload and store your important files securely. This allows you to access your data from any device with an internet connection.
- Internal hard drive: If you have enough storage space available on your computer’s internal hard drive, you can create a folder and copy your important files there as a temporary backup solution.
3. Organize and label your backup: Once you have chosen a backup method, organize and label your backup files and folders appropriately. This will help you locate and restore your data easily after reformatting.
4. Verify the integrity of your backup: After backing up your data, take some time to verify that the backup was successful. Double-check that the files and folders you intended to back up are present and accessible on your chosen backup location.
By following these steps and ensuring that you have a reliable backup of your important data, you can proceed with reformatting your external hard drive with peace of mind. Remember that reformatting permanently erases all data on your drive and cannot be undone, so it’s crucial to have all necessary precautions in place.
Now that your data is safely backed up, we are ready to move on to the step-by-step process of reformatting your external hard drive using the ExFAT file system.
Step 1: Connecting and initializing the external hard drive
The first step in reformatting your external hard drive is to connect it to your computer and ensure that it is properly recognized. Follow these steps:
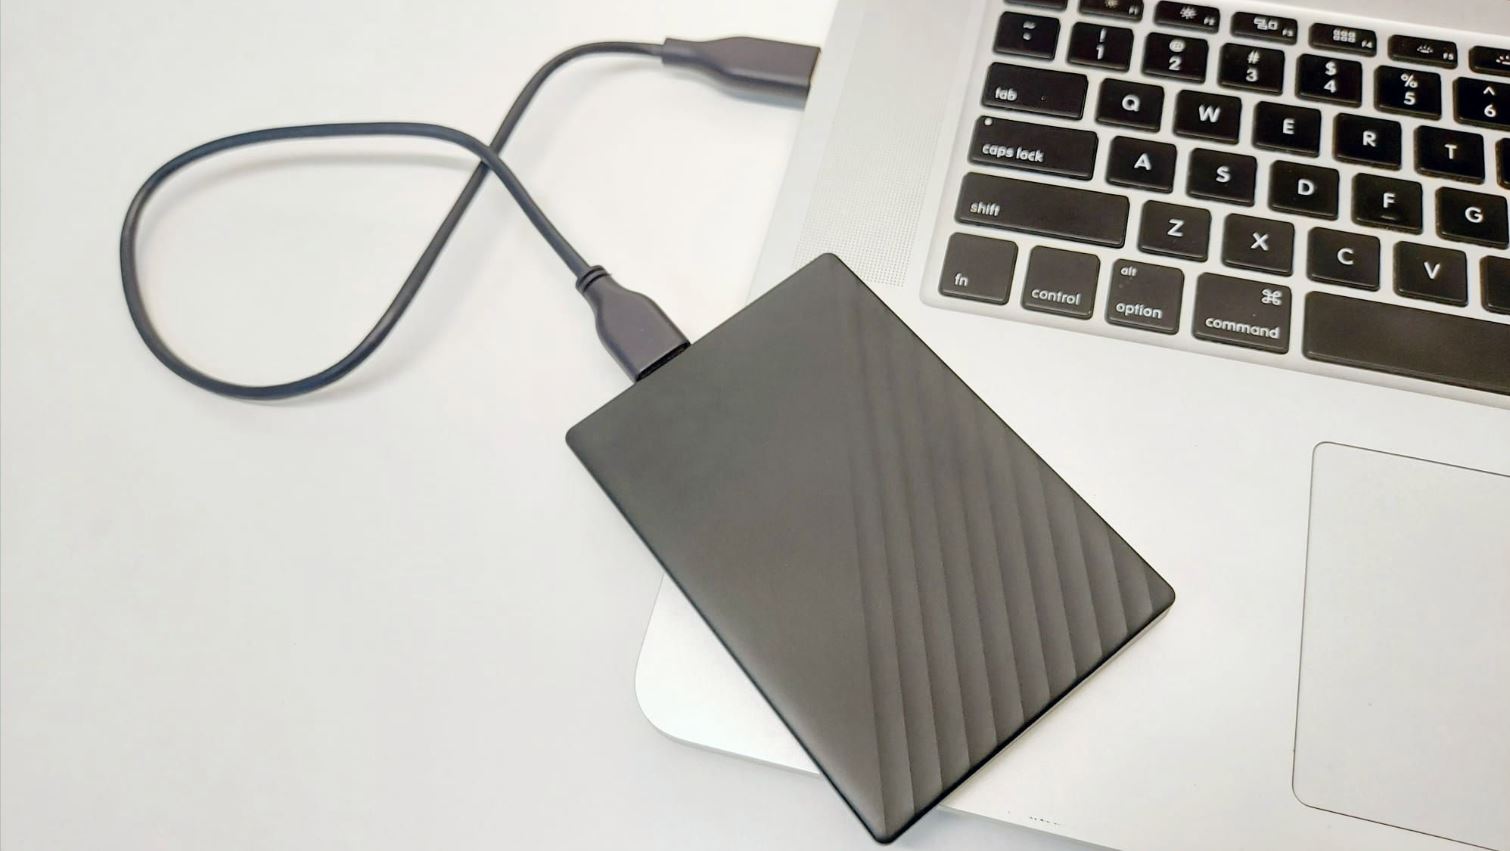
1. Connect the external hard drive: Use the appropriate cable to connect your external hard drive to your computer’s USB port. Ensure that the connection is secure.
2. Power on the external hard drive: If your external hard drive has a power switch or button, turn it on. Some external hard drives are powered directly through the USB connection and do not have a separate power switch.
3. Wait for the system to recognize the drive: Give your computer a few moments to detect the connected external hard drive. Typically, an automatic notification or pop-up will appear on your screen, indicating that a new device has been connected.
If your computer does not recognize the external hard drive, try the following:
- Check the USB cable for any damages and ensure it is properly connected at both ends.
- Try connecting the external hard drive to a different USB port on your computer.
- If available, connect the external hard drive to another computer to see if it is recognized there. This will help determine if the issue lies with the drive or your computer.
4. Initialize the external hard drive: Once your computer recognizes the external hard drive, you may need to initialize it before you can proceed with reformatting. Follow these steps:
- In Windows: Right-click on the “Start” menu and select “Disk Management” from the list. In the Disk Management window, you will see a list of all connected storage devices. Locate your external hard drive, right-click on it, and select “Initialize Disk.” Choose the appropriate disk initialization option (usually MBR or GPT) and click “OK” to proceed.
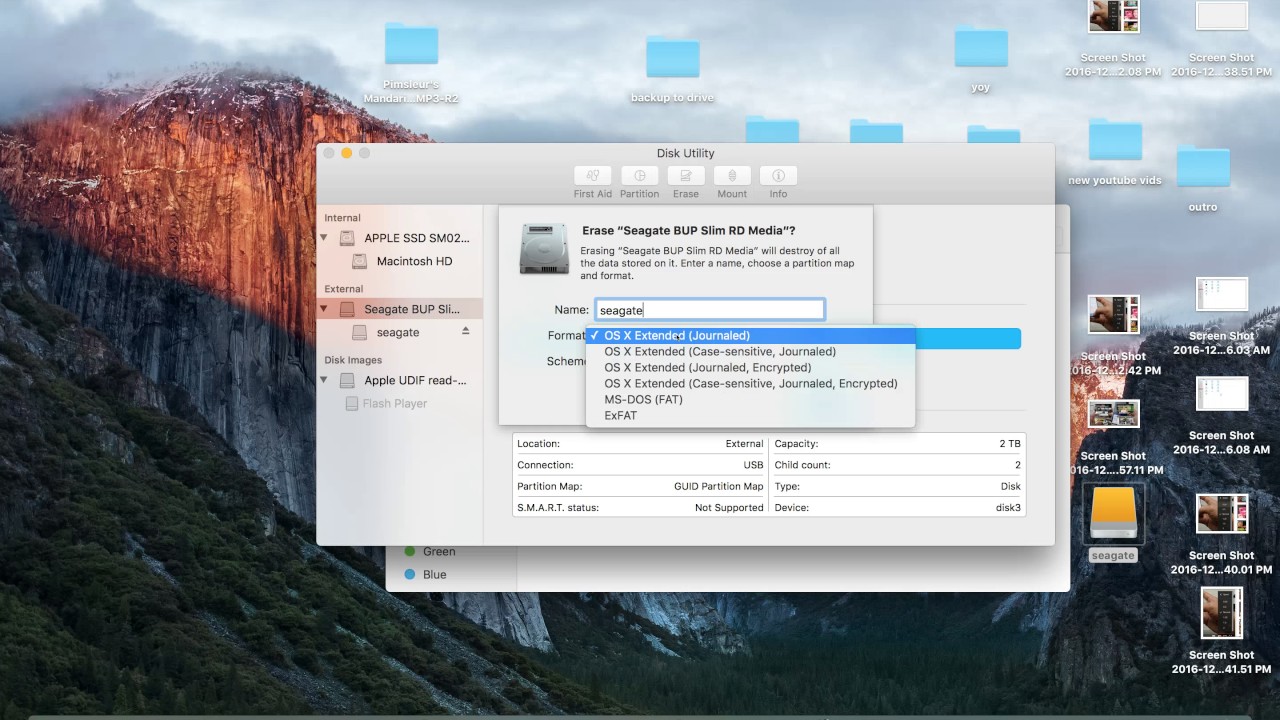
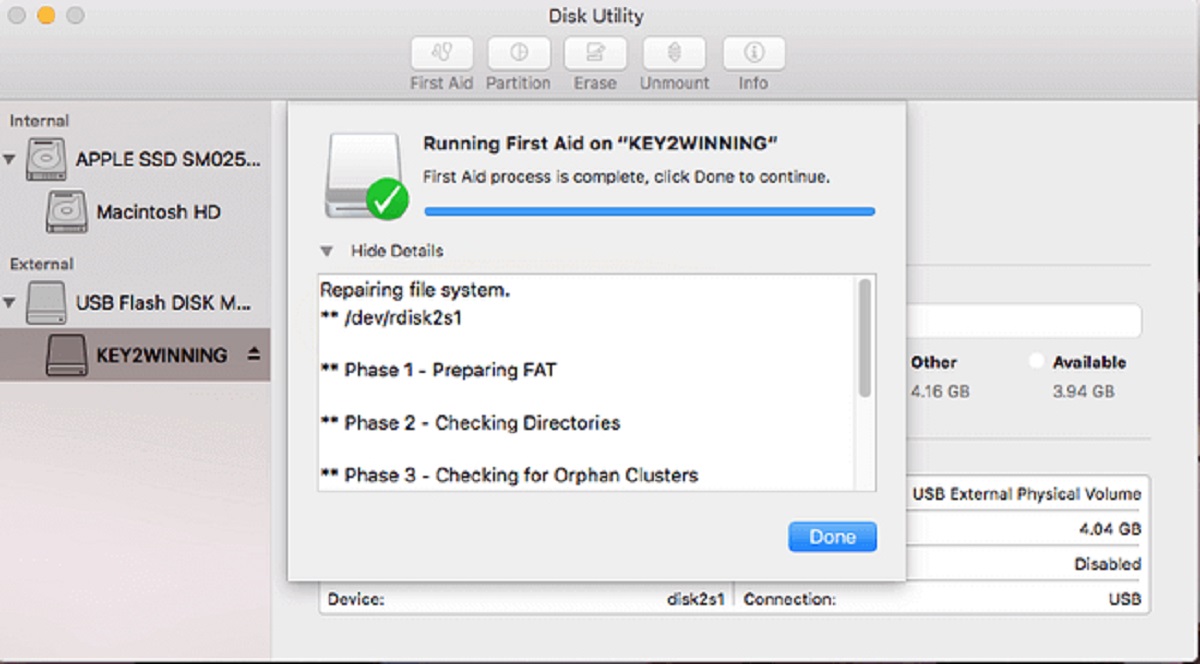
- In Mac: Open “Disk Utility” by going to “Applications” > “Utilities” > “Disk Utility.” In the left sidebar, you will see a list of all connected storage devices. Select your external hard drive and click on the “Erase” tab. Choose the appropriate partition scheme (usually GUID Partition Map) and click “Erase” to initialize the drive.
5. Ensure a successful initialization: After initializing the external hard drive, check that it is now listed and recognized correctly in the Disk Management (Windows) or Disk Utility (Mac) application.
Once you have successfully connected and initialized your external hard drive, you are ready to move on to the next step – opening Disk Management (Windows) or Disk Utility (Mac) to format the drive with the ExFAT file system.
Step 2: Opening Disk Management in Windows
Before you can begin formatting your external hard drive with the ExFAT file system in Windows, you need to open the Disk Management utility. This tool allows you to manage and manipulate disk partitions and formats. Follow these steps to open Disk Management:
1. Open the Run dialog box: You can do this by pressing the Windows key + R on your keyboard simultaneously.
2. Type “diskmgmt.msc”: In the Run dialog box, type “diskmgmt.msc” without the quotation marks. Then press Enter or click OK. This will open the Disk Management utility.
Alternatively, you can also access Disk Management by following these steps:
- Method 1: Right-click on the Start menu and select “Disk Management” from the context menu.
- Method 2: Press the Windows key, type “Disk Management” in the search bar, and select “Create and Format Hard Disk Partitions” from the search results.
After performing any of these methods, the Disk Management window will open, displaying a list of disks and their corresponding partitions.
It is important to be cautious when using Disk Management, as it allows you to modify disk partitions, which can result in data loss if not performed correctly. Before proceeding, double-check that you have selected the correct external hard drive in the Disk Management window.
Now that you have successfully opened Disk Management in Windows, you are ready to move on to the next step – selecting the external hard drive to format with ExFAT.
Step 3: Selecting the external hard drive to format
After opening the Disk Management utility in Windows, the next step is to select the external hard drive that you want to format with the ExFAT file system. Follow these steps to select the correct drive:
1. Identify the external hard drive: In the Disk Management window, you will see a list of disks and their corresponding partitions. Locate your external hard drive in the list.
2. Verify the disk information: Take a moment to verify that the disk information matches the capacity and name of your external hard drive. This step is crucial to ensure that you don’t accidentally format the wrong drive, as formatting will erase all data on the selected disk.
3. Take note of any existing partitions: If your external hard drive has existing partitions, they will be labeled as volumes within the Disk Management window. Make sure to identify and take note of any volumes associated with your external hard drive before proceeding with the formatting process.
4. Right-click on the external hard drive: Once you have identified the correct external hard drive, right-click on the disk label or the volume (if there are existing partitions) associated with your external hard drive.
5. Select “Format…”: From the right-click menu, select the “Format…” option. This will open the Format window, where you can choose the file system and configure the formatting settings.
It is important to note that formatting the external hard drive will erase all data on the drive. If you have any important data on the drive, make sure you have backed it up before proceeding with the formatting process.
By following these steps, you will be able to select the correct external hard drive in the Disk Management utility and prepare it for formatting with the ExFAT file system. In the next step, we will proceed with formatting the external hard drive using the ExFAT file system.
Step 4: Formatting the external hard drive with ExFAT
Now that you have selected the correct external hard drive in the Disk Management utility, it’s time to format it with the ExFAT file system. Follow these steps to format your external hard drive:
1. Open the Format window: Right-click on the external hard drive label or volume within the Disk Management window. From the right-click menu, select the “Format…” option. This will open the Format window.
2. Choose the file system: In the Format window, you will see a dropdown menu labeled “File system” or “Format.” Click on the dropdown menu and select “ExFAT” as the file system for your external hard drive. ExFAT is typically listed as an available option in the dropdown menu.
3. Configure the format settings: Depending on your preferences, you can customize the format settings such as the volume label and allocation unit size. The volume label allows you to assign a name to your external hard drive, while the allocation unit size determines the cluster size for data storage. You can leave these settings as their default values or make any desired changes.
4. Start the formatting process: After selecting the ExFAT file system and configuring the format settings, click on the “Start” or “OK” button to begin the formatting process. You will see a warning message informing you that all data on the disk will be erased. Make sure you have backed up any important data before proceeding.
5. Wait for the formatting to complete: The formatting process may take some time, depending on the size of your external hard drive. While the process is ongoing, avoid performing any other tasks on your computer to ensure a smooth and successful formatting process. Your external hard drive will be partitioned and formatted with the ExFAT file system.
6. Verify the format completion: Once the formatting process is complete, you will receive a notification or progress status indicating the successful formatting of your external hard drive. At this point, the external hard drive is ready for use with the ExFAT file system.
By following these steps, you can successfully format your external hard drive with the ExFAT file system. In the next step, we will assign a drive letter to the formatted hard drive to make it easily accessible.
Step 5: Assigning a drive letter to the formatted hard drive
After formatting your external hard drive with the ExFAT file system, the next step is to assign a drive letter to the formatted hard drive. A drive letter allows you to easily access and identify the external hard drive on your computer. Follow these steps to assign a drive letter:
1. Open the Disk Management utility: If you have closed the Disk Management utility after formatting the external hard drive, reopen it by following the steps mentioned in Step 2.
2. Locate the formatted hard drive: In the Disk Management window, locate the formatted hard drive. It should now appear as a volume without a drive letter assigned.
3. Right-click on the formatted hard drive: Right-click on the volume label associated with the formatted hard drive.
4. Select “Change Drive Letter and Paths…”: From the right-click menu, select the “Change Drive Letter and Paths…” option. This will open a dialog box with the available drive letter options.
5. Assign a drive letter: In the dialog box, click on the “Add” or “Change” button. A new dialog box will appear, allowing you to select a drive letter from the available options. Choose a drive letter that is not already assigned to another drive on your computer.
6. Confirm the drive letter assignment: After selecting a drive letter, click on the “OK” or “Apply” button to confirm the drive letter assignment.
7. Verify the drive letter: Once the drive letter assignment is complete, you should see the formatted hard drive with the assigned drive letter in the Disk Management window.
By following these steps, you can successfully assign a drive letter to the formatted hard drive, making it easily accessible on your computer. Now you can open File Explorer (Windows) or Finder (Mac) to access and manage your external hard drive with the ExFAT file system.
It’s important to note that the assigned drive letter may vary depending on the available drive letters on your computer. The drive letter assigned to your external hard drive will remain the same as long as the drive is connected to the same computer.
In the next step, we will verify the formatted ExFAT external hard drive to ensure that the formatting process was successful.
Step 6: Verifying the formatted ExFAT external hard drive
After assigning a drive letter to the formatted external hard drive, the final step is to verify that the formatting process was successful. Verifying the formatted ExFAT external hard drive ensures that it is ready for use and that you can access and store files on it without any issues. Follow these steps to verify the formatted hard drive:
1. Open File Explorer (Windows) or Finder (Mac): Open the file management application on your computer to access the formatted external hard drive.
2. Locate the assigned drive letter: Look for the drive letter or label that you assigned to the external hard drive. It should be listed among the other drives or devices in the file management application.
3. Access the external hard drive: Double-click on the drive letter or label of the formatted external hard drive to open it. You should be able to see the root directory of the drive, which indicates that the formatting was successful.
4. Create and copy files: To further verify the functionality of the formatted external hard drive, you can create a new folder or copy some sample files onto it. This will ensure that you can write data to the drive without any issues.
5. Open files from the external hard drive: Try opening the files that you have copied to the external hard drive to ensure that they can be accessed and read without any problems. This will confirm that the drive is correctly formatted and can be used for storing and accessing your files.
6. Eject the external hard drive: Once you have verified that the formatted ExFAT external hard drive is functioning correctly, it’s important to safely eject the drive before disconnecting it from your computer. This helps prevent data corruption and ensures that all pending write operations are completed.
By following these steps and successfully verifying the formatted ExFAT external hard drive, you can have confidence in its functionality and use it for your storage needs. Remember to always properly eject the drive and avoid disconnecting it while data is being written or accessed to avoid potential data loss or drive corruption.
Congratulations! You have successfully reformatted your external hard drive using the ExFAT file system and verified its functionality.
Conclusion
Reformatting an external hard drive using the ExFAT file system provides various benefits, such as compatibility across different operating systems, support for large file sizes, faster data transfer speeds, and improved reliability. By following the step-by-step guide outlined in this tutorial, you can easily reformat your external hard drive and take advantage of these benefits.
Remember to always back up your important data before proceeding with the reformatting process, as it erases all existing data on the drive. Taking this precaution ensures that you can recover your important files in case of any unforeseen issues.
Throughout the guide, we covered the significance of ExFAT as a file system for external hard drives, the steps involved in reformatting, and how to verify the success of the formatting process. Initiating the process by connecting and initializing the external hard drive, opening Disk Management in Windows, selecting the correct drive to format, and formatting it with the ExFAT file system are vital steps to follow.
Assigning a drive letter makes it more convenient to access and use the formatted hard drive. Finally, verifying the formatted ExFAT external hard drive ensures that it is ready for use and that files can be stored and accessed without any issues.
Now that you have successfully reformatted your external hard drive using ExFAT, you can enjoy its compatibility, larger file support, and faster data transfer speeds on both Windows and Mac operating systems.
We hope this guide has been helpful in assisting you with the reformatting process. Remember to keep your data backed up regularly and maintain good data management practices. If you have any further questions or need additional assistance, feel free to consult the relevant documentation or seek technical support from the manufacturer of your external hard drive.