Introduction
Are you having trouble with your Seagate external hard drive on your Windows 10 PC? Is it slowing down or not functioning properly? It may be time to reformat your Seagate external hard drive. Reformatting your hard drive can help resolve various issues such as corrupted data and file system errors. Additionally, reformatting allows you to customize your hard drive’s format to suit your needs.
In this guide, we will walk you through the process of reformatting your Seagate external hard drive on your Windows 10 PC. We’ll provide step-by-step instructions so that you can easily follow along and successfully reformat your drive. Don’t worry if you’re not technically inclined; we’ll explain everything in plain and simple terms.
Before we begin, it’s important to note that reformatting your Seagate external hard drive will erase all the data stored on it. Therefore, it is crucial to back up any important files or documents before proceeding with the reformatting process. This will ensure that you don’t lose any valuable data during the process.
Now that you are aware of the importance of backing up your data, let’s move on to the next section, where we’ll guide you through the first step: connecting your Seagate external hard drive to your Windows 10 PC.
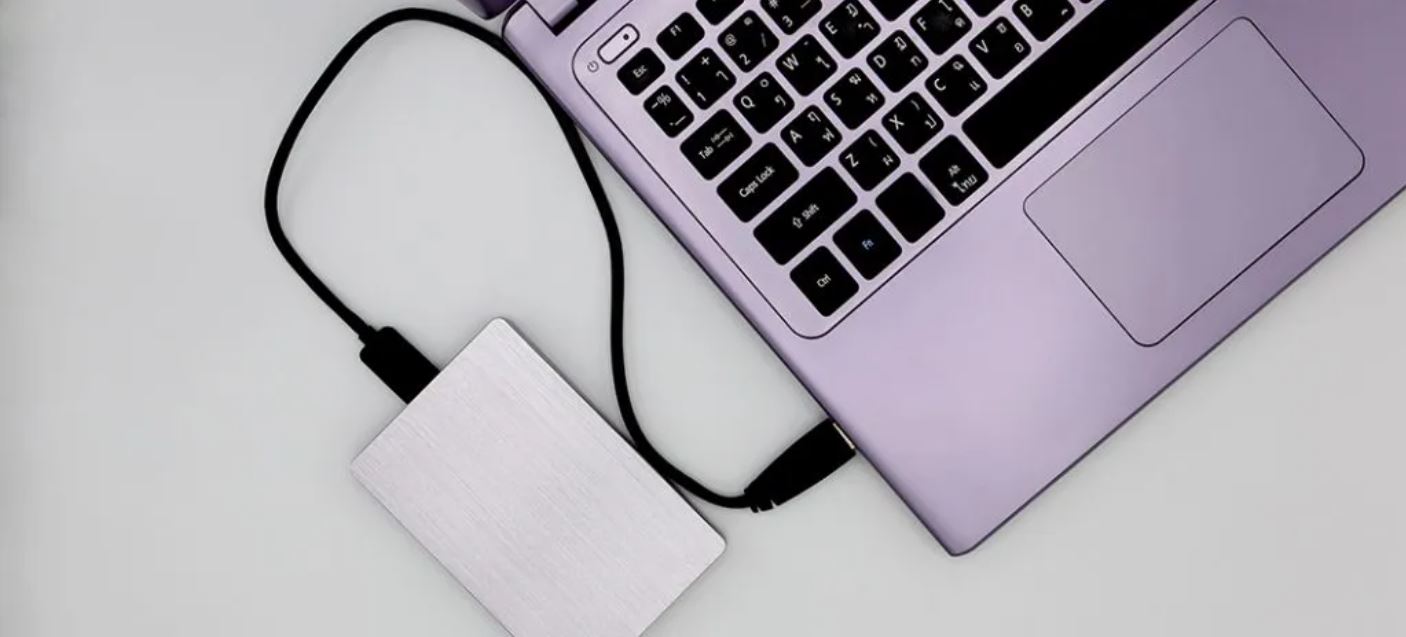
Step 1: Connect your Seagate External Hard Drive to your Windows 10 PC
The first step in reformatting your Seagate external hard drive on your Windows 10 PC is to establish a connection between the two devices. To do this, follow these simple instructions:
- Locate an available USB port on your Windows 10 PC.
- Take the USB cable that came with your Seagate external hard drive and connect one end to the USB port on your PC.
- Take the other end of the USB cable and connect it to the USB port on your Seagate external hard drive.
- Ensure that the connection is secure and that both ends of the cable are firmly inserted.
- Once the connection is made, your Windows 10 PC should detect the Seagate external hard drive and automatically install any necessary drivers.
It’s important to note that some Seagate external hard drives may require an external power source in addition to the USB connection. If this is the case for your device, make sure to connect the power cable as well.
Once the connection is established and the drivers are installed, you are ready to proceed to the next step: opening Disk Management.
Step 2: Open Disk Management
Now that you have successfully connected your Seagate external hard drive to your Windows 10 PC, the next step is to open Disk Management. Disk Management is a built-in utility in Windows that allows you to manage your hard drives and storage devices.
Here’s how you can open Disk Management:
- Press the Windows key + X on your keyboard to open the Power User Menu.
- From the menu, click on Disk Management to launch the Disk Management utility.
Alternatively, you can also open Disk Management by following these steps:
- Right-click on the Start button or press the Windows key + X on your keyboard to open the Power User Menu.
- From the menu, select Run.
- In the Run dialog box, type diskmgmt.msc and click OK or press Enter.
Once Disk Management is open, you will be able to see a list of all the connected storage devices, including your Seagate external hard drive. In the next step, we will guide you on how to locate your Seagate external hard drive in Disk Management.
Step 3: Locate your Seagate External Hard Drive
After opening Disk Management, the next step in reformatting your Seagate external hard drive on your Windows 10 PC is to locate the drive within the Disk Management utility. Here’s how you can find your Seagate external hard drive:
- Look for the list of drives displayed in the Disk Management window. The drives will be listed with their assigned drive letters, file systems, and other relevant information.
- Scroll through the list and search for your Seagate external hard drive. It may be labeled as “Seagate” or with a specific model name.
- The Seagate external hard drive will typically be listed as a “Basic” disk and shown as “Offline” or “Unknown” if it has not been initialized yet.
If you cannot find your Seagate external hard drive in the Disk Management window, ensure that the drive is properly connected to your Windows 10 PC. Check the cable connection and ensure that the hard drive is powered on, if applicable.
Once you have located your Seagate external hard drive in Disk Management, you are ready to move on to the next step: initializing the disk.
Step 4: Initialize the Disk
Now that you have located your Seagate external hard drive in Disk Management, the next step is to initialize the disk. Disk initialization is the process of preparing the disk for use by creating a new partition table.
Here’s how you can initialize your Seagate external hard drive:
- Right-click on your Seagate external hard drive in Disk Management.
- From the context menu, select “Initialize Disk”.
- In the Initialize Disk dialog box, you will see a list of available disk initialization styles: “MBR” and “GPT”.
- Choose the appropriate disk initialization style based on your needs. If you are unsure, “MBR” is typically suitable for most scenarios.
- Check the box next to “Perform a quick format” if you want to quickly format the disk during the initialization process. This will erase any existing data on the disk.
- Click “OK” to initialize the disk.
Note: Initializing the disk will erase all existing data on the Seagate external hard drive. Make sure you have backed up any important files or documents before proceeding with the initialization process.
Once the disk is initialized, you are ready to create a new partition on your Seagate external hard drive. In the next step, we will guide you through the process of creating a new partition.
Step 5: Create a New Partition
With your Seagate external hard drive initialized, the next step in reformatting is to create a new partition on the disk. A partition is a logical division of the hard drive that allows you to organize and allocate space for storing data.
To create a new partition on your Seagate external hard drive, follow these steps:
- Right-click on the unallocated space of your Seagate external hard drive in Disk Management.
- From the context menu, select “New Simple Volume”.
- The New Simple Volume Wizard will open. Click “Next” to continue.
- Specify the size of the partition. By default, the wizard will use the maximum available space. Adjust the size if needed and click “Next”.
- Select a drive letter or choose to mount the partition in an empty folder. Click “Next”.
- Choose a file system for the partition. For most scenarios, “NTFS” is recommended due to its compatibility and advanced features. Click “Next”.
- Enter a volume label (optional) to give the partition a name. Click “Next”.
- Review the summary and click “Finish” to create the new partition.
Once the new partition is created, you will see it listed in Disk Management with the assigned drive letter and file system. Your Seagate external hard drive is now ready to be formatted. In the next step, we will guide you through the process of formatting the partition.
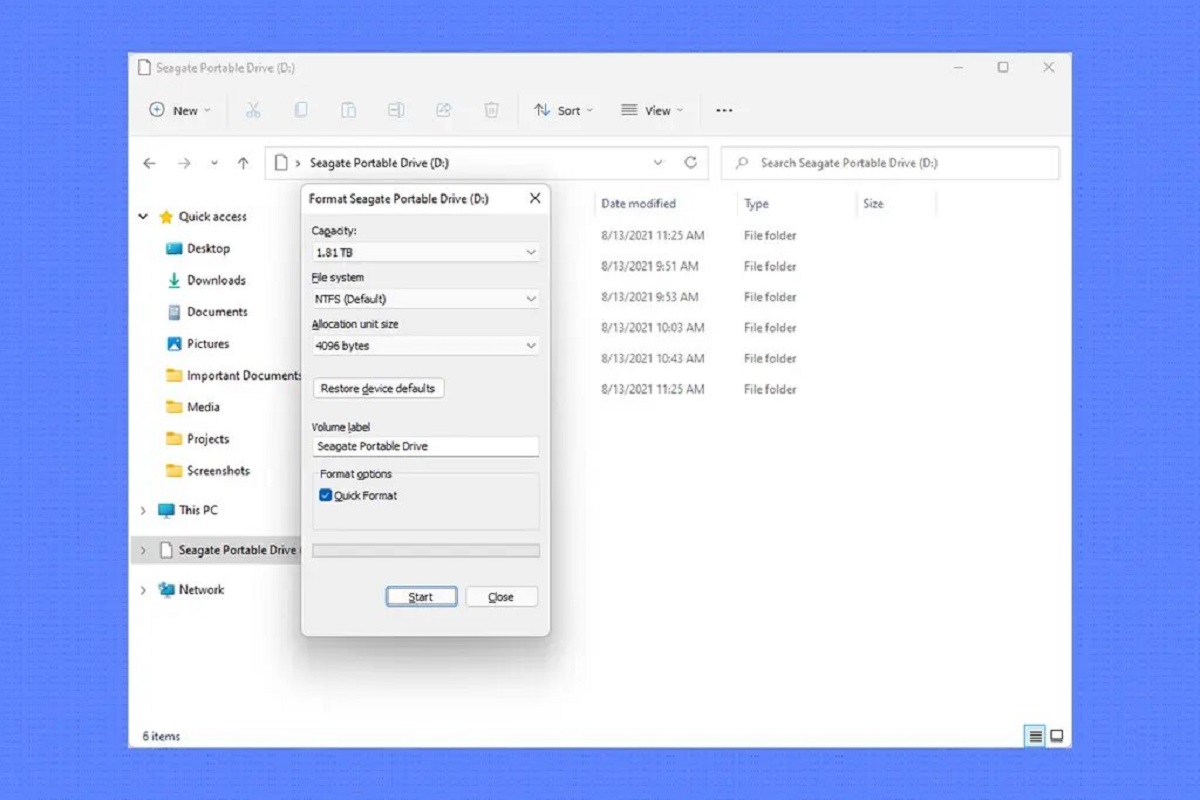
Step 6: Format the Partition
After creating a new partition on your Seagate external hard drive, the next step is to format the partition. Formatting a partition prepares it for use by creating a file system and setting up the necessary structures to store and organize data.
Follow these steps to format the partition on your Seagate external hard drive:
- Right-click on the newly created partition on your Seagate external hard drive in Disk Management.
- From the context menu, select “Format”.
- Choose the file system you want to use for the partition. “NTFS” is recommended for most scenarios due to its stability, security, and compatibility.
- Enter a volume label for the partition (optional) to give it a descriptive name. This label helps you easily identify the partition.
- Ensure that the “Quick Format” option is selected if you want to speed up the formatting process. Note that a quick format does not scan for bad sectors.
- Click “OK” to start the formatting process.
- Wait for the formatting to complete. The time required depends on the size of the partition and the speed of your computer.
- Once the formatting is finished, you will see that the partition is now listed as “Healthy” in Disk Management.
With the partition formatted, your Seagate external hard drive is ready for use. In the next step, we will guide you on how to assign a drive letter to the partition.
Step 7: Assign a Drive Letter
After formatting the partition on your Seagate external hard drive, the final step is to assign a drive letter to the partition. A drive letter allows you to easily access and identify the partition in your Windows 10 operating system.
To assign a drive letter to the partition, follow these steps:
- Right-click on the formatted partition on your Seagate external hard drive in Disk Management.
- From the context menu, select “Change Drive Letter and Paths”.
- In the Change Drive Letter and Paths dialog box, click on the “Add” button.
- Choose a drive letter from the drop-down menu. You can select any available letter that is not already assigned to another drive.
- Click “OK” to assign the drive letter to the partition.
Once the drive letter is assigned, you can now access the partition on your Seagate external hard drive through File Explorer or any other file management tool on your Windows 10 PC. The partition is now ready for use, and you can start transferring files, storing data, or using it as desired.
Congratulations! You have successfully reformatted your Seagate external hard drive on your Windows 10 PC. Your device should now be properly functioning and ready to meet your storage needs.
Remember to keep your Seagate external hard drive backed up regularly to ensure the safety of your data. Regular backups will protect your valuable files in case of unforeseen events or hardware failures.
Conclusion
Reformatting your Seagate external hard drive on your Windows 10 PC can help resolve various issues and customize your storage device to suit your needs. We have guided you through the step-by-step process, from connecting your Seagate external hard drive to opening Disk Management, initializing the disk, creating a new partition, formatting the partition, and assigning a drive letter.
Remember that reformatting your Seagate external hard drive will erase all data stored on it, so it is crucial to back up any important files before proceeding. Take the necessary precautions to protect your data and ensure a smooth reformatting process.
By following these steps, you can optimize the performance of your Seagate external hard drive and address any issues you may have encountered. Whether you want to clear corrupted data or create a new partition, these instructions will help you achieve your desired configuration.
Once your Seagate external hard drive is reformatted, you can use it with confidence, knowing that it is properly set up and ready for your storage needs. Don’t forget to regularly back up your data and keep your storage device well-maintained to ensure its longevity and reliability.
We hope this guide has been helpful in assisting you with the reformatting process. If you have any further questions or concerns, consult the official Seagate support resources or reach out to their customer support for additional assistance.
Enjoy your newly configured Seagate external hard drive and make the most out of its storage capabilities!