Introduction
In today’s digital age, reformatting a hard disk drive (HDD) is a crucial task that might be necessary for various reasons. Whether you’re experiencing performance issues, need to upgrade your operating system, or simply want to erase all data from your HDD, knowing how to reformat is essential. This process involves deleting all existing data on the drive and reinstalling the operating system. However, it should be approached with caution as it permanently erases all files and settings on the drive.
Reformatting a hard disk drive can bring numerous benefits, including improved system performance and enhanced data security. By starting with a clean slate, you can eliminate any software clutter, potentially resolving sluggishness or crashes. Additionally, formatting allows you to remove any malicious software or viruses that may have infected your computer.
In this article, we’ll guide you through the step-by-step process of reformatting your hard disk drive. Before we begin, it’s important to note that this process may vary depending on the operating system you’re using. We’ll provide instructions for both Windows and macOS, ensuring that you have a thorough understanding of the process regardless of your operating system.
However, before proceeding with any reformatting, it’s crucial to back up your important files. Reformatting will erase all data on the hard disk drive, so ensuring you have a copy of your important files is essential. This can be done by transferring files to an external storage device or utilizing cloud storage services.
Backup Your Important Files
Before reformatting your hard disk drive, it’s crucial to make sure that you have a backup of all your important files. This ensures that you don’t lose any valuable data during the reformatting process.
To back up your files, start by identifying the files and folders that you want to save. This may include documents, photos, videos, music, and any other files that you don’t want to lose. It’s a good idea to create a checklist or make a note of the specific files and folders you want to back up.
Next, you have several options for creating a backup. One common method is to use an external storage device such as an external hard drive or a USB flash drive. Connect the external storage device to your computer and copy the files and folders to the device. Make sure to organize the files in a logical way, so they are easy to find after the reformatting process.
Alternatively, you can also utilize cloud storage services such as Google Drive, Dropbox, or OneDrive. These services allow you to store your files online and access them from any device with an internet connection. Simply upload your files to the cloud storage service and ensure they are synced before proceeding with the reformatting process.
Remember, it’s important to double-check that all your important files are successfully backed up before proceeding. Take the time to verify that the backup is complete and that you haven’t missed any crucial files. This step will provide you with peace of mind knowing that your important data is safe and secure.
Once you have completed the backup process and verified the integrity of your files, you are ready to proceed with reformatting your hard disk drive. The next section will guide you through creating a bootable USB drive, which is necessary for the reformatting process.
Create a Bootable USB Drive
Before reformatting your hard disk drive, you will need to create a bootable USB drive. This will allow you to start your computer from the USB drive and access the necessary tools to reformat the HDD. Follow these steps to create a bootable USB drive:
1. Choose a suitable USB drive: Select a USB drive with enough storage capacity to accommodate the tools required for reformatting. It’s recommended to use a USB drive with at least 8GB of storage.
2. Download the operating system installation file: Visit the official website of your operating system and download the installation file. Ensure that you choose the correct version that matches your computer’s specifications.
3. Use a third-party software: Depending on your operating system, you’ll need a third-party software to create a bootable USB drive. For Windows, you can use tools like Rufus, UNetbootin, or Windows USB/DVD Download Tool. For macOS, you can use the built-in Disk Utility software.
4. Format the USB drive: Before creating the bootable USB, format the USB drive using the appropriate file system. For Windows, use the FAT32 file system, while macOS users should choose the APFS format.
5. Run the software: Launch the third-party software you downloaded earlier and follow the instructions provided to create a bootable USB drive. This usually involves selecting the operating system installation file and the USB drive as the target device.
6. Wait for the process to finish: The software will begin the process of creating the bootable USB drive. It may take some time, so be patient and avoid interrupting the process.
Once the bootable USB drive is created successfully, you are now ready to proceed to the next step – booting your computer from the USB drive. This will allow you to access the tools needed to reformat the hard disk drive.
Boot From the USB Drive
To reformat your hard disk drive, you need to boot your computer from the previously created bootable USB drive. This step will allow you to access the necessary tools and utilities for reformatting. Here’s how you can boot from the USB drive:
1. Insert the bootable USB drive: Plug the bootable USB drive into an available USB port on your computer. Ensure that no other external storage devices are connected to avoid any confusion during the boot process.
2. Restart your computer: Once the USB drive is inserted, restart your computer. You can typically do this by clicking on the Start menu and selecting the Restart option. Alternatively, you can use keyboard shortcuts such as Ctrl + Alt + Delete to bring up the restart options menu.
3. Enter the BIOS settings: During the startup process, your computer will display a logo or a prompt to enter the BIOS settings. This is typically done by pressing a specific key, such as F2 or Delete, as indicated on the screen. Quickly press the designated key to access the BIOS settings.
4. Change the boot order: Once inside the BIOS settings, navigate to the boot options section. Look for the “Boot Order” or “Boot Sequence” settings and change the primary boot device to the USB drive. Ensure that the USB drive is set to the top of the boot order list.
5. Save and exit BIOS: After setting the USB drive as the primary boot device, save the changes and exit the BIOS settings. This is usually done by pressing the F10 key and confirming the changes by selecting “Yes” or “Save and Exit” option.
6. Your computer will now restart: With the boot order changed, your computer will automatically restart. It will now boot from the USB drive instead of the internal hard disk drive. Keep in mind that the boot process might take longer than usual due to the operating system installation files loaded on the USB drive.
Congratulations! You have successfully booted from the USB drive. Next, you’ll need to proceed with deleting existing partitions on the hard disk drive. This will allow you to create a fresh partition and format the HDD in the next steps.
Delete Existing Partitions
Before you can format your hard disk drive, you’ll need to delete any existing partitions on the drive. Partitions are separate sections of the hard drive that divide it into different storage spaces. Deleting these partitions will ensure that you have a clean slate to create a new partition and format your HDD. Follow these steps to delete existing partitions:
1. Access the Disk Management tool: For Windows users, right-click on the Start menu and select “Disk Management” from the menu. For macOS users, open the Disk Utility tool from the Applications folder or by searching for it in Spotlight.
2. Identify the correct hard disk drive: In the Disk Management or Disk Utility window, you’ll see a list of all connected storage devices. Locate the hard disk drive you want to reformat and ensure that you select the correct one. Be cautious not to select any other disk or partition that contains important data.
3. Delete existing partitions: Right-click on each partition on the hard disk drive and select the “Delete Volume” or “Delete Partition” option. Confirm any prompts or warnings that may appear. Repeat this step for all existing partitions on the hard disk drive until all partitions are deleted.
4. Merge unallocated space (optional): Once all partitions are deleted, you might see unallocated space on the hard disk drive. If you want to use the entire drive as a single partition, right-click on the unallocated space and select the “New Simple Volume” option. Follow the on-screen instructions to create a new partition utilizing the full drive capacity.
5. Verify the changes: Take a moment to double-check that all partitions are deleted and that the entire hard disk drive is now unallocated space. This ensures that you have a clean drive ready for formatting and reinstalling the operating system.
With the existing partitions deleted, you have successfully prepared your hard disk drive for formatting. In the next section, we’ll guide you through the process of formatting the HDD to create a new file system and prepare it for the operating system installation.
Format the Hard Disk Drive
Now that you have deleted the existing partitions on your hard disk drive, it’s time to format the drive. Formatting will create a new file system on the drive, preparing it for the installation of the operating system. Here’s how you can format your hard disk drive:
1. Open the Disk Management tool: For Windows users, right-click on the Start menu and select “Disk Management” from the menu. For macOS users, open the Disk Utility tool from the Applications folder or by searching for it in Spotlight.
2. Locate the unallocated space: In the Disk Management or Disk Utility window, you should see the unallocated space on your hard disk drive. This is the space that was previously occupied by the deleted partitions.
3. Right-click on the unallocated space: In the Disk Management or Disk Utility window, right-click on the unallocated space and select the “New Simple Volume” or “Add” option. This will open a wizard that will guide you through the formatting process.
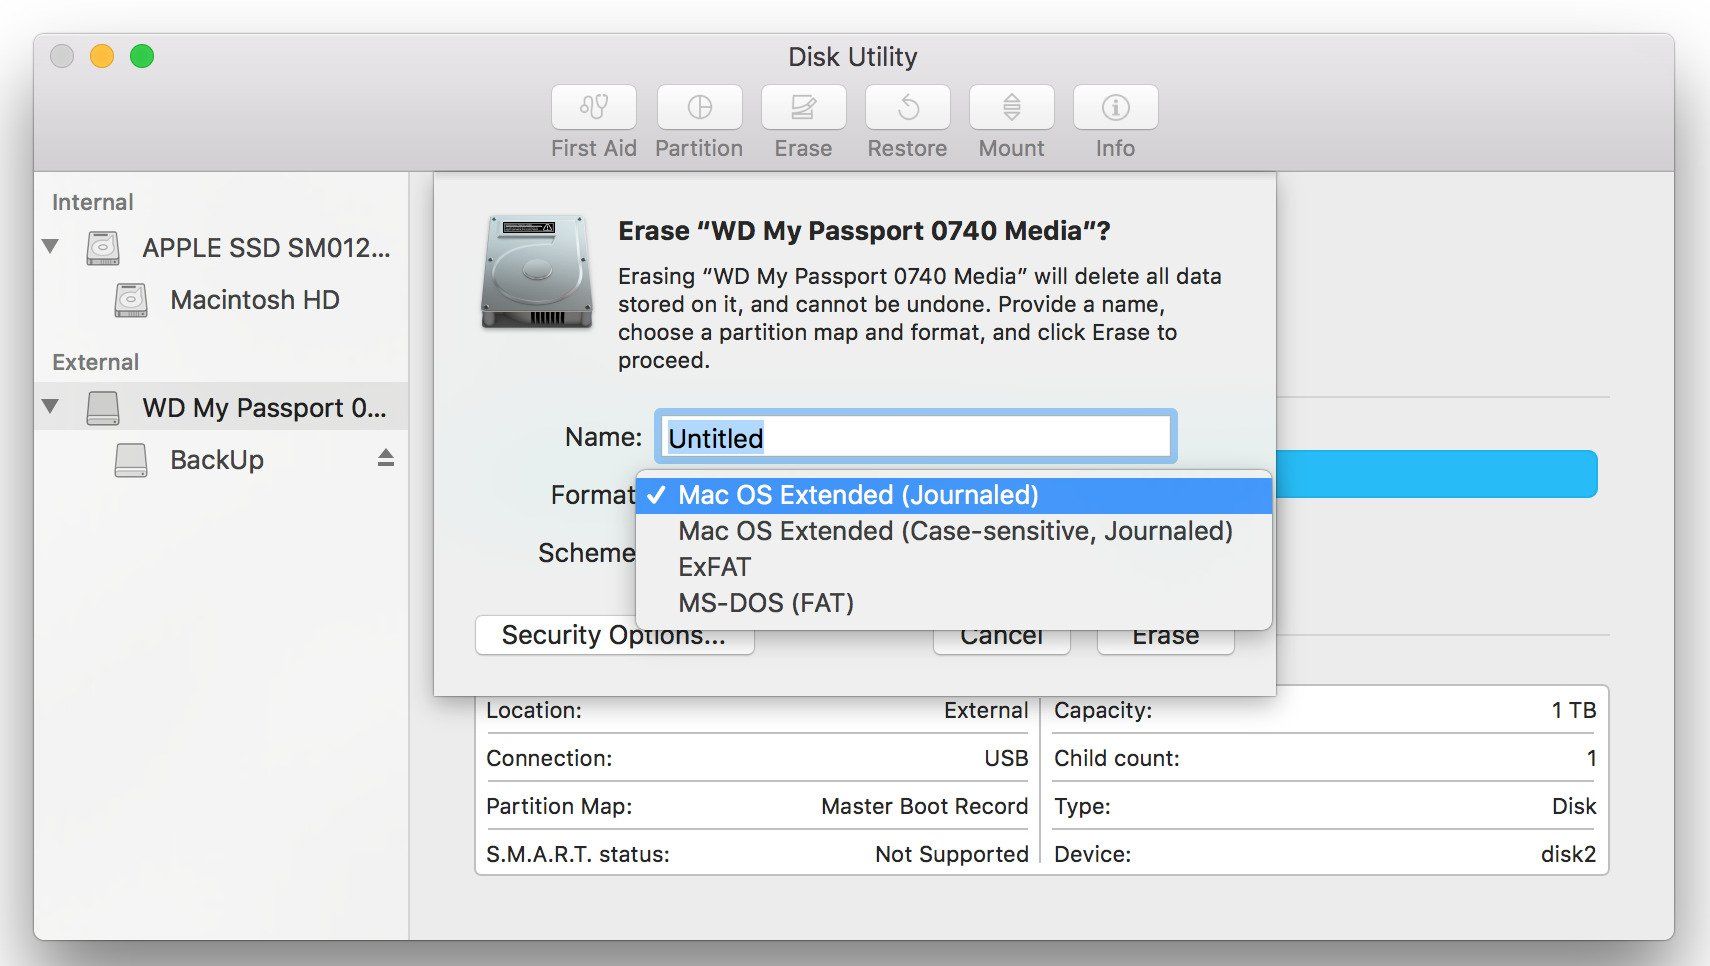
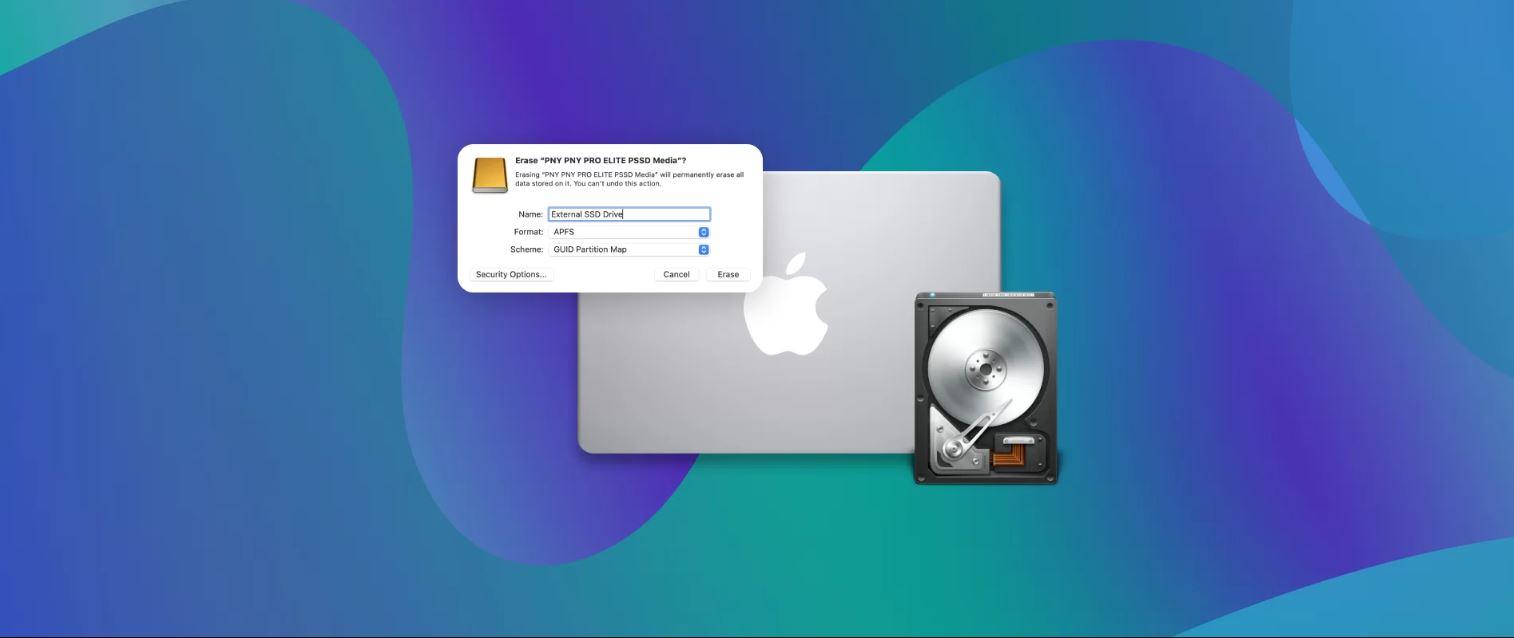
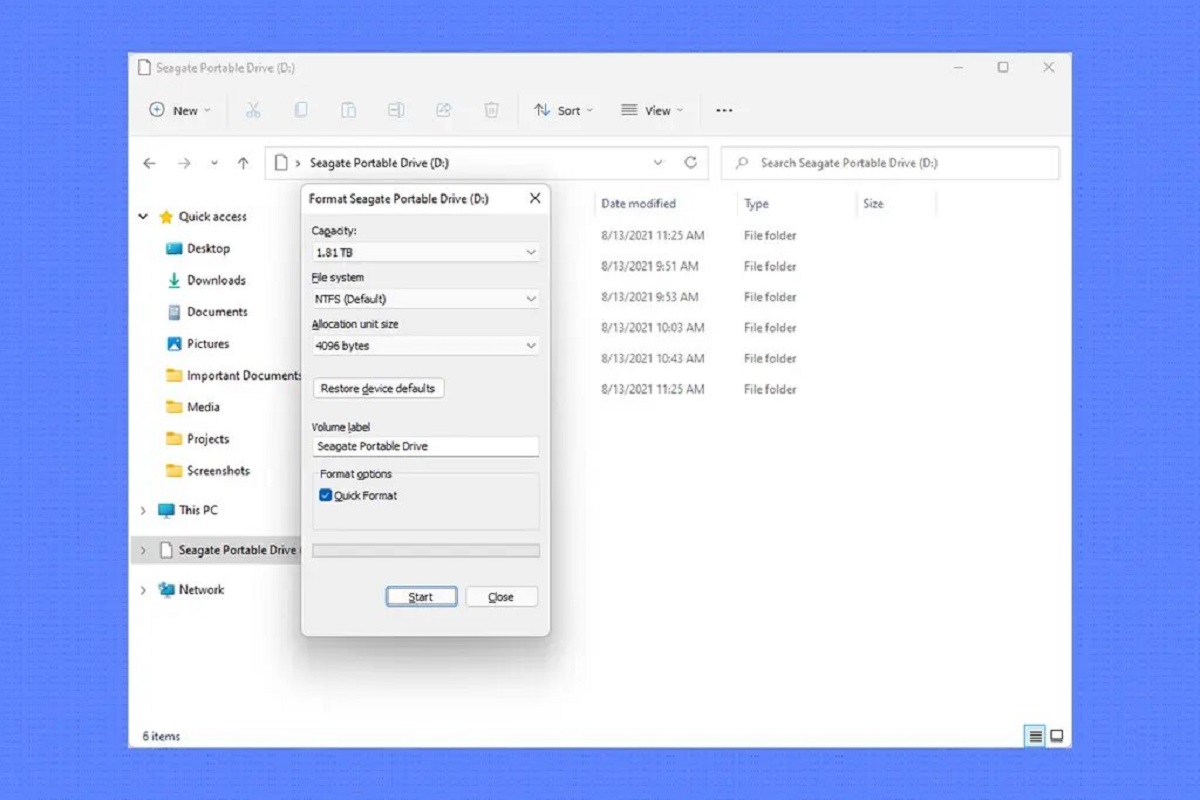
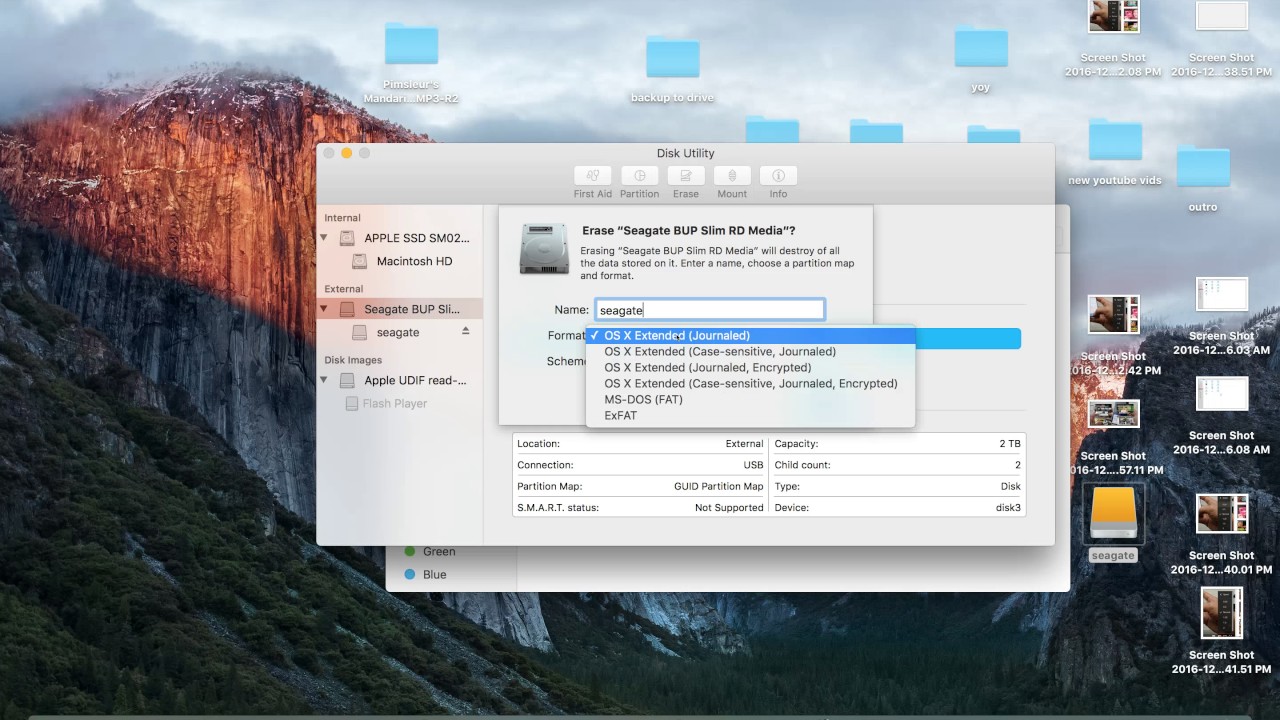
4. Follow the formatting wizard: The formatting wizard will prompt you to configure the settings for the new volume. You can choose the file system format (such as NTFS for Windows or APFS for macOS), assign a drive letter or label, and perform a quick or full format. Follow the instructions provided by the wizard and adjust the settings according to your preferences.
5. Begin the formatting process: Once you have configured the settings, click on the “Next” or “Finish” button to start the formatting process. The tool will begin formatting the hard disk drive, creating a new file system and preparing it for the operating system installation.
6. Wait for the formatting to complete: The time required to format the hard disk drive will depend on various factors, including the size of the drive and the chosen formatting options. Be patient and avoid interrupting the process to ensure a successful format.
Once the formatting process is complete, you have successfully formatted your hard disk drive. The drive is now ready to be used for the installation of the operating system. In the next section, we’ll discuss how to reinstall the operating system on the newly formatted hard disk drive.
Reinstall the Operating System
With the hard disk drive formatted, it’s now time to reinstall the operating system. The operating system is the core software that manages your computer and allows you to interact with it. Here’s how you can reinstall the operating system:
1. Prepare the installation media: Locate your operating system installation media, which could be a DVD or a bootable USB drive that contains the installation files. If you don’t have an installation media, you can download the official installation files from the manufacturer’s website.
2. Insert the installation media: If you’re using a DVD, insert it into the DVD drive of your computer. If you’re using a bootable USB drive, insert it into an available USB port.
3. Restart your computer: Restart your computer and enter the BIOS settings by pressing the designated key during startup. Look for the “Boot Order” or “Boot Sequence” settings and ensure that the DVD drive or the USB drive is set as the primary boot device. Save the changes and exit the BIOS settings.
4. Follow the on-screen prompts: With the installation media inserted and the boot order set, your computer will now start from the installation media. Follow the on-screen prompts to begin the installation process. You may need to select the preferred language, agree to the terms and conditions, and choose the installation drive (which is the newly formatted hard disk drive).
5. Customize the installation options (optional): Depending on your operating system, you may have the option to customize various installation options, such as partition sizes, user accounts, and additional software. Take the time to review these options and adjust them according to your preferences.
6. Wait for the installation to complete: The installation process may take some time, especially if you’re installing a major operating system update. Be patient and avoid interrupting the process until it is fully completed.
After the operating system installation is complete, your computer will restart, and you will be prompted to set up your user account and configure any additional settings. Follow the on-screen instructions to complete the initial setup process.
By reinstalling the operating system, you have restored your computer to its original state with a clean installation. In the event that you backed up your important files, you can now proceed with restoring them to your computer.
Restore Your Backed-Up Files
Now that you have successfully reinstalled the operating system, it’s time to restore your backed-up files. Restoring your files will bring back all your important documents, photos, videos, and other data that you backed up before reformatting your hard disk drive. Here’s how you can restore your files:
1. Connect your external storage device or access your cloud storage: If you backed up your files to an external storage device such as an external hard drive or a USB drive, connect the device to your computer. If you used a cloud storage service, ensure that you have access to the service.
2. Copy your files back to your computer: Depending on the backup method you used, there are different ways to restore your files. If you backed up to an external storage device, simply copy and paste your files from the device back into their original locations on your computer. If you used a cloud storage service, download your files from the service and save them to your desired location on your computer.
3. Organize your files: As you restore your files, take the opportunity to organize them in a logical manner. Create folders and subfolders if necessary, and ensure that your files are placed in the appropriate locations for easy access and management.
4. Verify file integrity: After restoring your files, take the time to verify their integrity. Open and check a few files from different categories to ensure that they were successfully restored without any errors or corruption.
5. Install necessary applications and software: If you had any applications or software installed on your previous operating system that you wish to continue using, reinstall them from their respective sources. Use the installation files or discs that you saved before reformatting.
It’s important to note that during the reformatting process, some applications or software might have been removed, and you may need to reinstall them from scratch. Take this opportunity to review and evaluate which applications you truly need and carefully choose which ones to reinstall.
By restoring your backed-up files, you have successfully brought back your important data and reinstated your digital environment. Take the time to organize your files, reinstall necessary applications, and ensure that everything is in working order. With your files restored, you can now continue using your computer with peace of mind.
Conclusion
Reformatting a hard disk drive is a meticulous process that requires careful consideration and planning. By following the steps outlined in this guide, you can confidently reformat your hard disk drive and reinstall the operating system with ease. Let’s recap the key points covered in this article:
– Back up your important files: Before starting the reformatting process, ensure that you have a backup of all your important files. This will prevent any data loss during the reformatting process.
– Create a bootable USB drive: Prepare a bootable USB drive with the necessary installation files for the operating system. This will allow you to start your computer from the USB drive and access the tools required for reformatting.
– Boot from the USB drive: Configure your computer’s BIOS settings to boot from the USB drive. This will enable you to access the necessary tools and utilities for reformatting.
– Delete existing partitions: Delete all existing partitions on the hard disk drive using the Disk Management or Disk Utility tool. This step removes any previous partitions and prepares the drive for a fresh installation.
– Format the hard disk drive: Format the hard disk drive using the formatting options provided by the operating system. This will create a new file system on the drive and prepare it for the installation of the operating system.
– Reinstall the operating system: Follow the on-screen prompts and reinstall the operating system using the installation media. Choose the desired settings and customize the installation as needed.
– Restore your backed-up files: Copy your backed-up files from an external storage device or download them from cloud storage. Organize your files and reinstall necessary applications and software.
By carefully following these steps, you can successfully reformat your hard disk drive, reinstall the operating system, and restore your important files. Remember to exercise caution when performing these tasks and double-check all the steps to avoid any unintended data loss. With a fresh operating system and restored files, you can enjoy a clean and optimized computer experience.