Introduction
Welcome to this guide on how to change the BIOS hard disk drive setting to AHCI or IDE on an HP Pavilion laptop. The BIOS (Basic Input/Output System) is a crucial component of any computer system that allows you to configure various hardware settings. Among these settings is the option to choose between AHCI (Advanced Host Controller Interface) and IDE (Integrated Drive Electronics) modes for your hard disk drive.
Why would you want to change the hard disk drive setting, you might wonder? Well, there can be several reasons. One common motivation is to improve the overall performance and speed of your laptop. AHCI is generally considered faster and more efficient than IDE. Additionally, changing the setting can help resolve compatibility issues with certain operating systems or software.
Now, let’s dive into the step-by-step process of how to change the hard disk drive setting on an HP Pavilion laptop. Before we begin, please note that accessing the BIOS and making changes to the settings requires some technical knowledge. It is important to follow the instructions carefully and proceed with caution to avoid any unintended consequences.
What is the BIOS?
The BIOS, or Basic Input/Output System, is a firmware that resides in the motherboard of a computer. It is responsible for initializing and configuring various hardware components before the operating system kicks in. The BIOS serves as a bridge between the hardware and the software, allowing for communication and control between them.
When you power on your computer, the BIOS is the first thing that loads. It performs a power-on self-test (POST) to check if all the hardware components are functioning correctly. It then searches for an operating system to boot from, typically stored on the hard disk drive or the solid-state drive. In the absence of an operating system, the BIOS can also boot from other devices such as a USB drive or a CD/DVD.
The BIOS provides a user interface, known as the BIOS setup utility or BIOS configuration utility, which allows users to customize and configure various settings. These settings include boot order, system date and time, CPU and RAM settings, and hard disk drive settings, among others.
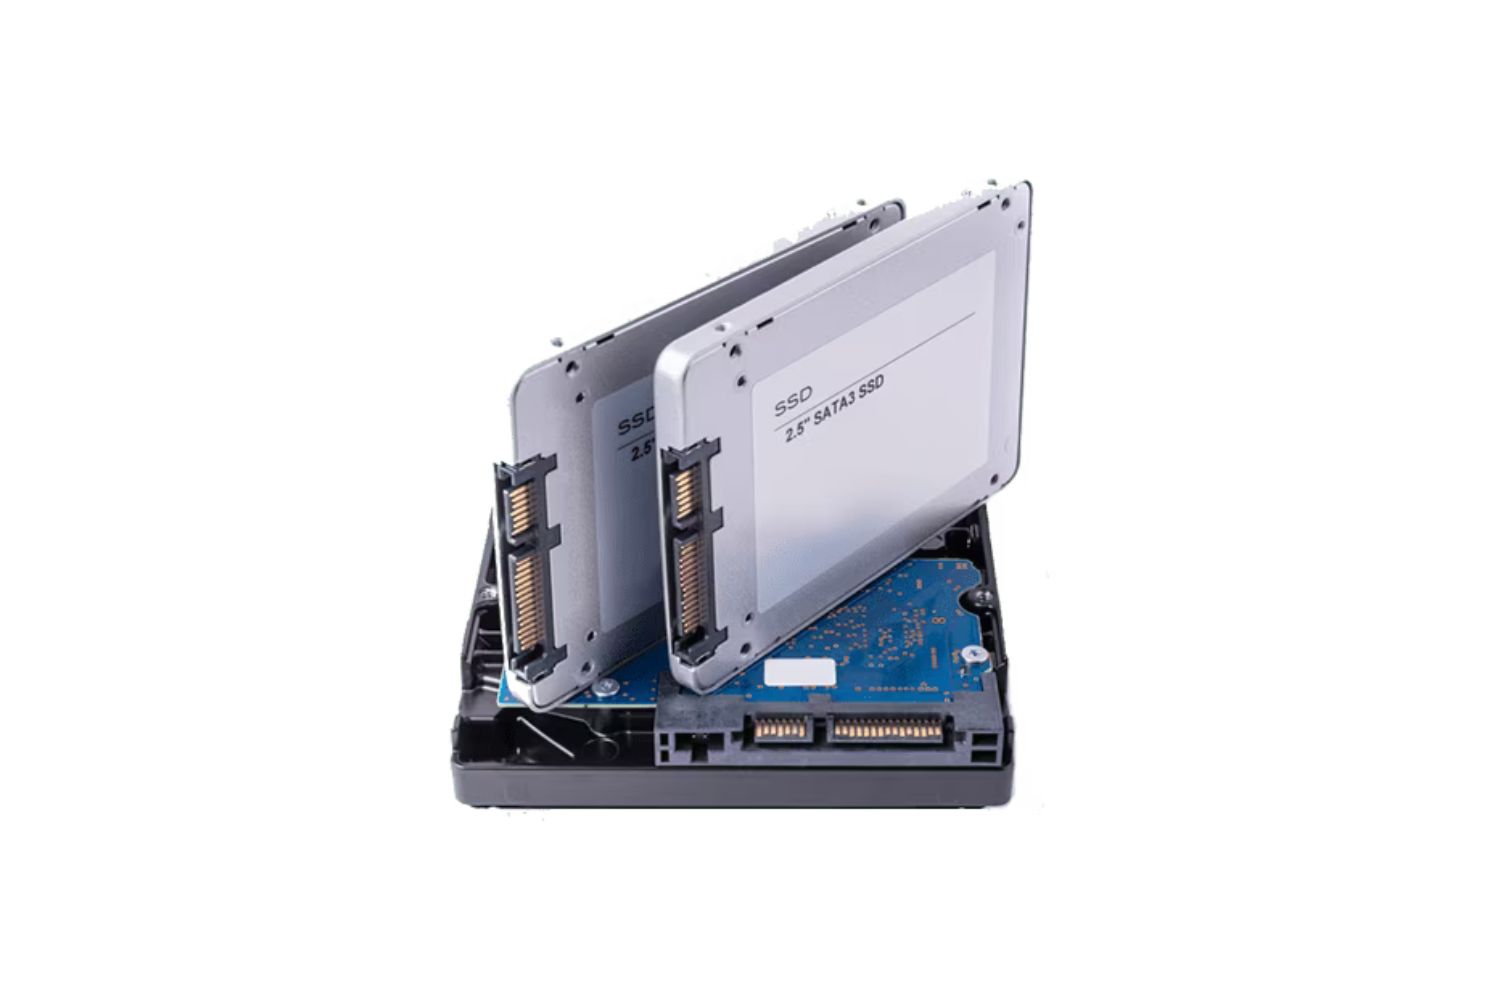
One critical aspect of the BIOS configuration is the hard disk drive setting, which dictates how the computer interacts with the storage device. The two main modes for the hard disk drive setting are AHCI (Advanced Host Controller Interface) and IDE (Integrated Drive Electronics).
Now that you have a better understanding of what the BIOS is and its importance, let’s move on to the reasons why you might want to change the hard disk drive setting on your HP Pavilion laptop.
Why Change the Hard Disk Drive Setting?
There are several reasons why you might want to change the hard disk drive setting on your HP Pavilion laptop. Let’s explore the main motivations behind this configuration change:
1. Performance Improvement: One of the primary reasons to change the hard disk drive setting is to enhance the performance of your laptop. The AHCI mode offers better performance compared to the older IDE mode. It supports features such as Native Command Queuing (NCQ), hot plugging, and faster data transfer rates. By switching to AHCI, you can potentially experience faster boot times, improved application loading times, and overall smoother system performance.
2. Compatibility: Another reason to change the hard disk drive setting is to ensure compatibility with specific operating systems or software. Some newer operating systems, such as Windows 8, 10, and Linux distributions, may require the AHCI mode to function properly. Installing these operating systems with the IDE mode enabled can result in driver conflicts or limited functionality. By switching to AHCI, you can ensure seamless compatibility with the latest operating systems and software.
3. RAID Configuration: If you plan to set up a RAID (Redundant Array of Independent Disks) configuration using multiple hard drives, changing the hard disk drive setting to AHCI is necessary. RAID configurations offer improved data redundancy, increased performance, and fault tolerance. However, most RAID setups require AHCI mode to be enabled in the BIOS for optimal functionality.
4. Troubleshooting Disk Issues: In some cases, changing the hard disk drive setting can help troubleshoot disk-related issues. For example, if you are encountering frequent drive errors, slow disk performance, or other storage-related problems, switching between AHCI and IDE modes can help identify and resolve these issues. By testing different modes, you can determine if the problem lies with the mode being used and take appropriate action.
5. Future-Proofing: Lastly, changing the hard disk drive setting allows you to future-proof your laptop. As newer technologies and advancements emerge, IDE mode may become outdated and unsupported. By switching to AHCI, you ensure that your laptop remains compatible with future hardware and software updates, ensuring a smooth user experience in the long run.
Now that you understand the reasons why changing the hard disk drive setting is beneficial, let’s move on to the step-by-step process of accessing the BIOS and making the necessary adjustments on your HP Pavilion laptop.
Step 1: Accessing the BIOS
The first step in changing the hard disk drive setting on your HP Pavilion laptop is to access the BIOS. The BIOS can usually be accessed by pressing a specific key or combination of keys during the boot process. Here’s how:
1. Start your HP Pavilion laptop: Ensure that your laptop is turned off. Press the power button to boot it up.
2. Identify the BIOS access key: Pay attention to the screen during the boot process. Look for a message that prompts you to press a specific key or key combination to enter the BIOS setup. Common keys include Del, F2, F10, or Esc. The specific key may vary depending on your HP Pavilion model, so refer to your laptop’s user manual or HP’s support website for the correct key.
3. Press the BIOS access key: Once you identify the key or key combination, press it immediately to enter the BIOS setup utility. Be sure to press the key(s) before the Windows logo appears on the screen. If you miss the timing, restart your laptop and try again.
4. Navigate through the BIOS: Use the keyboard arrow keys to navigate through the BIOS menu. The BIOS interface will vary depending on your laptop model, but you should be able to move up, down, left, and right using the arrow keys on your keyboard. Take your time to familiarize yourself with the BIOS layout.
5. Save any important data: Before making any changes in the BIOS, ensure that you have saved any important data on your laptop. Changing the hard disk drive setting may require reformatting the disk, which will erase all data. Make sure to back up your files to an external storage device or cloud service.
Now that you have successfully accessed the BIOS setup utility, let’s move on to the next step: navigating the BIOS menu to locate the hard disk drive setting.
Step 2: Navigating the BIOS Menu
After accessing the BIOS on your HP Pavilion laptop, the next step is to navigate through the BIOS menu to locate the hard disk drive setting. Each BIOS version may have a slightly different layout, but the general steps remain the same. Follow the instructions below:
1. Use arrow keys: The arrow keys on your keyboard will allow you to navigate through the BIOS menu options. Use the up and down arrow keys to move between different menu categories and the left and right arrow keys to expand or collapse submenus.
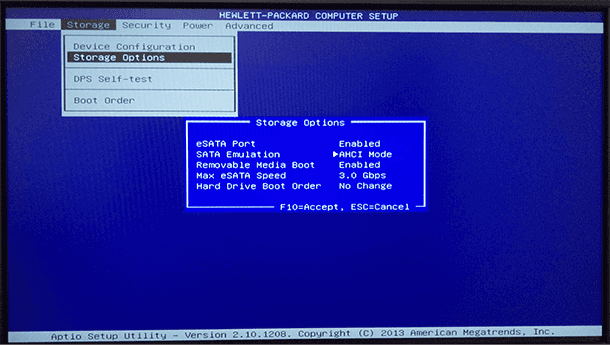
2. Look for storage or drive-related options: Typically, the hard disk drive setting will be located within the storage or drive-related menu. Look for menu options like “Storage,” “Drives,” or “SATA Configuration.” The exact name may vary depending on your laptop model and BIOS version.
3. Enter the submenu: Once you locate the appropriate menu category, press the Enter key to enter the submenu. In some cases, you may need to press a specific key, such as “F10” or “Enter,” to access the submenu directly.
4. Explore available options: Inside the submenu, you should see a list of available options related to the hard disk drive settings. Take your time to review the options and make note of any settings that mention AHCI or IDE. Some common options include “AHCI,” “IDE,” or “SATA Mode.”
5. Read the instructions: Pay attention to any instructions or guidelines provided on the BIOS screen or in the user manual. Some BIOS versions may provide additional information or prompts for changing the hard disk drive setting. Follow these instructions carefully to avoid any mistakes.
By navigating through the BIOS menu, you are now ready to locate the hard disk drive setting. In the next step, we will discuss how to change the setting to AHCI. Stay tuned!
Step 3: Locating the Hard Disk Drive Setting
Now that you are navigating through the BIOS menu on your HP Pavilion laptop, the next step is to locate the hard disk drive setting. The exact location and name of this option may vary depending on your laptop model and BIOS version, but the general steps remain similar. Follow the instructions below:
1. Look for storage or drive-related options: Within the BIOS menu, search for a category that pertains to storage, drives, or SATA configuration. Common names for this category include “Storage,” “Drives,” or “SATA Configuration.” Enter the submenu associated with this category.
2. Explore available options: Once inside the storage or drive-related submenu, you should see a list of available options. Scan through the options and look for the one that specifically refers to the hard disk drive setting. Possible options include “AHCI,” “IDE,” “SATA Mode,” or similar variations.
3. Read the description and current setting: Pay attention to the descriptions provided for each option. The current setting should also be indicated. This will help you identify whether AHCI or IDE mode is currently enabled for your hard disk drive.
4. Select the hard disk drive setting: Use the arrow keys to highlight the hard disk drive setting option. Press Enter to access the available choices for this setting.
5. Change the setting: From the list of available choices, select the desired setting for your hard disk drive. If you want to switch to AHCI mode, choose the AHCI option. If you want to switch to IDE mode, select the IDE option.
6. Save the changes: Once you have made your selection, navigate to the option to save the changes. This is typically done by pressing the designated key or selecting the appropriate option mentioned in the BIOS menu.
By locating the hard disk drive setting within the BIOS menu, you are now ready to proceed with changing the setting to either AHCI or IDE mode. In the next steps, we will discuss how to change the setting to AHCI and IDE separately. Keep following along!
Step 4: Changing the Setting to AHCI
If you’ve decided to switch your hard disk drive setting to AHCI mode, follow these instructions in the BIOS of your HP Pavilion laptop:
1. Select AHCI: Once you have located the hard disk drive setting in the BIOS menu, choose the AHCI option. Use the arrow keys to highlight the AHCI setting.
2. Save the changes: After selecting AHCI, navigate to the option to save the changes you made. This is typically done by pressing the designated key or selecting the appropriate option mentioned in the BIOS menu.
3. Restart your laptop: To apply the changes and switch to AHCI mode, exit the BIOS setup utility and restart your HP Pavilion laptop. The AHCI mode should now be enabled for your hard disk drive.
Note: After changing the hard disk drive setting to AHCI, you may need to reinstall your operating system if it was previously installed in IDE mode. Ensure that you have backed up all important data before proceeding with any reinstallation.
By following these steps, you have successfully changed the hard disk drive setting to AHCI mode. This can potentially improve the performance and compatibility of your laptop. However, if you decide to switch back to IDE mode or encounter any difficulties, follow the next step to learn how to change the setting accordingly.
Step 5: Changing the Setting to IDE
If you’ve decided to switch your hard disk drive setting to IDE mode, follow these instructions in the BIOS of your HP Pavilion laptop:
1. Select IDE: Once you have located the hard disk drive setting in the BIOS menu, choose the IDE option. Use the arrow keys to highlight the IDE setting.
2. Save the changes: After selecting IDE, navigate to the option to save the changes you made. This is typically done by pressing the designated key or selecting the appropriate option mentioned in the BIOS menu.
3. Restart your laptop: To apply the changes and switch to IDE mode, exit the BIOS setup utility and restart your HP Pavilion laptop. The IDE mode should now be enabled for your hard disk drive.
Note: After changing the hard disk drive setting to IDE, you may need to reinstall your operating system if it was previously installed in AHCI mode. Ensure that you have backed up all important data before proceeding with any reinstallation.
By following these steps, you have successfully changed the hard disk drive setting to IDE mode. This mode can be beneficial for certain operating systems or software that may not be fully compatible with AHCI mode. However, keep in mind that IDE mode may have limitations compared to AHCI mode in terms of performance and certain advanced features.
Now that you know how to change the hard disk drive setting to AHCI or IDE, let’s move on to the final step: saving and exiting the BIOS.
Step 6: Saving and Exiting the BIOS
Once you have made the necessary changes to the hard disk drive setting in the BIOS of your HP Pavilion laptop, the final step is to save the changes and exit the BIOS. Follow these instructions to complete the process:
1. Save the changes: In the BIOS menu, navigate to the option to save the changes you made. This option is typically labeled as “Save Changes,” “Apply,” or similar. Press the designated key or select the appropriate option mentioned in the BIOS menu to save your changes. This step ensures that your new hard disk drive setting is applied.
2. Exit the BIOS: Once you have saved the changes, navigate to the option to exit the BIOS setup utility. This option is usually labeled as “Exit,” “Quit,” or similar. Press the designated key or select the appropriate option mentioned in the BIOS menu to exit the BIOS. Your laptop will then proceed to reboot.
3. Verify the changes: After your HP Pavilion laptop restarts, check if the new hard disk drive setting is applied. You can do this by accessing the BIOS again and navigating to the same location where you changed the setting. Verify that it reflects the desired mode (AHCI or IDE) that you selected.
4. Test the functionality: Once you have confirmed the new hard disk drive setting, test the functionality of your laptop. Pay attention to the performance, compatibility, and overall stability of your system. If everything is working as expected, you have successfully changed the hard disk drive setting on your HP Pavilion laptop.
Remember, accessing and making changes in the BIOS requires caution and a basic understanding of the system. If you experience any difficulties or are unsure about any steps, consider seeking assistance from a technical expert or referring to your laptop’s user manual.
By saving and exiting the BIOS, you have completed the process of changing the hard disk drive setting on your HP Pavilion laptop. Enjoy the improved performance and compatibility that comes with the new setting!
Conclusion
In this guide, we have explored how to change the BIOS hard disk drive setting to AHCI or IDE on an HP Pavilion laptop. The BIOS is a critical component that allows you to configure various hardware settings, including the hard disk drive setting. By changing this setting, you can enhance the performance, compatibility, and overall functionality of your laptop.
We discussed the importance of accessing the BIOS and the reasons why you might want to change the hard disk drive setting. Whether it is to improve performance, ensure compatibility with specific operating systems or software, set up a RAID configuration, troubleshoot disk issues, or future-proof your laptop, changing the hard disk drive setting can be a beneficial step.
Through a series of step-by-step instructions, we covered how to access the BIOS, navigate the BIOS menu, locate the hard disk drive setting, and change it to either AHCI or IDE mode. We emphasized the importance of saving any important data before making any changes and provided a reminder to reinstall the operating system if necessary after switching modes.
Finally, we discussed the process of saving the changes and exiting the BIOS, ensuring that the new hard disk drive setting is applied. We encouraged users to verify the changes and test the functionality of their laptop to ensure everything is working as expected.
Remember, changing the BIOS settings can have a significant impact on your laptop’s performance, so it’s crucial to proceed with caution and follow the instructions carefully. If you encounter any difficulties or are unsure about any steps, it’s always a good idea to seek assistance from a technical expert.
We hope that this guide has provided you with a clear understanding of how to change the BIOS hard disk drive setting on an HP Pavilion laptop. By making informed decisions and optimizing your hardware configuration, you can take full advantage of your laptop’s capabilities and enjoy a better computing experience.