Introduction
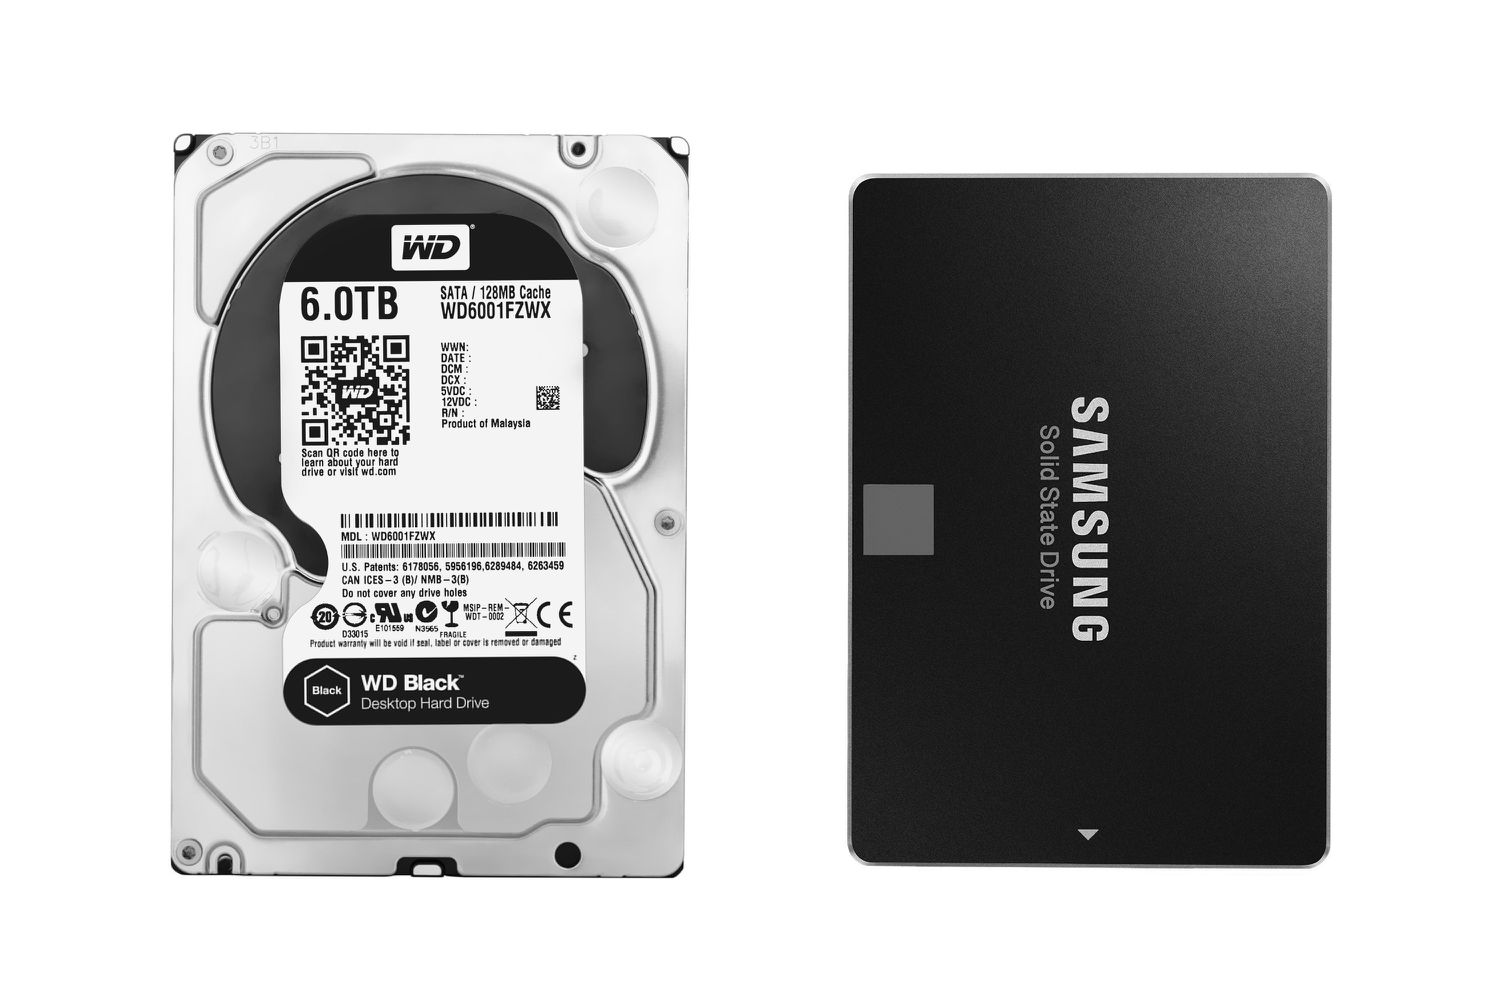
A Solid State Drive (SSD) is a type of storage device that is becoming increasingly popular in the world of computers and technology. Unlike traditional Hard Disk Drives (HDDs) that use moving parts to read and write data, SSDs utilize NAND flash memory to store and retrieve information. This technology offers numerous advantages over HDDs, such as faster performance, improved durability, reduced power consumption, and quieter operation.
Optimizing your SSD is essential to maximize its performance, lifespan, and overall efficiency. By implementing a few simple optimizations, you can enhance the speed and responsiveness of your computer, ensure the integrity of your data, and prolong the lifespan of your SSD.
In this article, we will explore various techniques and tips on how to optimize a Solid State Drive. We will discuss firmware updates, enabling TRIM functionality, disabling disk indexing and hibernation, adjusting power plan settings, minimizing temporary files, disabling Windows page file, enabling AHCI mode, and keeping your SSD cool. By implementing these optimizations, you can ensure that your SSD is working at its peak performance and enjoy a smoother and more efficient computing experience.
What is a Solid State Drive (SSD)
A Solid State Drive, commonly known as an SSD, is a type of storage device that has gained significant popularity in recent years. Unlike traditional Hard Disk Drives (HDDs) that use magnetic disks and mechanical components, SSDs utilize NAND flash memory technology to store and retrieve data. This results in a faster, more efficient, and more reliable storage solution.
SSDs offer several key advantages over HDDs. One of the most notable benefits is the speed at which data is transferred. SSDs have significantly faster read and write speeds compared to their HDD counterparts. This means that applications load faster, files transfer more quickly, and the overall system operates with greater efficiency.
In addition to speed, SSDs are also more durable. Since SSDs don’t have any moving parts, they are less prone to mechanical failure that can be a common issue with HDDs. This makes SSDs more reliable and longer-lasting, making them an ideal choice for both personal and professional use.
Another advantage of SSDs is their power efficiency. SSDs consume less power compared to HDDs, which helps to preserve the battery life of laptops and other portable devices. This can be particularly beneficial for users who are constantly on the go and rely on their devices for extended periods.
Furthermore, SSDs operate silently as they don’t have spinning disks or moving parts. This creates a quieter computing experience, allowing users to focus on their work or entertainment without the distraction of constant noise.
Overall, Solid State Drives provide a significant improvement in performance, durability, power efficiency, and noise reduction when compared to traditional HDDs. As the prices of SSDs continue to decrease, they have become a popular choice for both casual users and professionals who require faster, more reliable storage. By understanding the benefits of SSDs, you can make an informed decision when it comes to upgrading your storage solution and enjoy the numerous advantages that SSDs have to offer.
Benefits of Using an SSD
Using a Solid State Drive (SSD) as your primary storage device comes with a multitude of advantages that can greatly enhance your computing experience. Let’s explore some of the key benefits of using an SSD.
1. Faster Performance: One of the biggest advantages of an SSD is its remarkable speed. SSDs have faster read and write speeds compared to traditional Hard Disk Drives (HDDs). This translates into faster boot times, quicker application launches, and overall snappier system performance. Tasks such as file transfers, video editing, and gaming can all benefit from the improved speed of an SSD.
2. Improved Durability: Unlike HDDs, SSDs have no moving parts. This makes them more resistant to physical shock, vibrations, and accidental drops. SSDs are built to withstand everyday wear and tear, making them a more reliable storage option for both desktops and laptops.
3. Energy Efficiency: SSDs consume less power than HDDs, which can significantly help to extend the battery life of laptops and other portable devices. This energy efficiency not only benefits your productivity on the go but also reduces your overall carbon footprint.
4. Quiet Operation: Since SSDs don’t have any spinning disks or moving parts, they operate silently. This eliminates the annoying buzzing or whirring noises that are commonly associated with HDDs. With an SSD, you can enjoy a quieter and more peaceful computing environment.
5. Compact and Lightweight: SSDs are smaller and lighter in comparison to HDDs. This makes them an excellent choice for devices that prioritize portability, such as ultrabooks and tablets. The smaller form factor also allows for greater flexibility when installing an SSD in your system.
6. Faster File Access: SSDs provide near-instantaneous access to your data. This means that you can open and retrieve files in a matter of seconds, resulting in a smoother workflow and improved productivity.
Overall, the benefits of using an SSD extend far beyond just faster speeds. SSDs offer increased durability, energy efficiency, silent operation, and greater portability. By upgrading to an SSD, you can experience a significant boost in performance and enjoy a more reliable and efficient computing experience.
Understanding SSD Optimization
Optimizing your Solid State Drive (SSD) is crucial to unlocking its full potential and ensuring optimal performance. SSD optimization involves implementing various techniques and settings that are specifically tailored to maximize the efficiency and lifespan of your SSD. Let’s delve deeper into the key aspects of SSD optimization.
Firmware Updates: Like any other hardware component, SSDs benefit from regular firmware updates. These updates often include bug fixes, performance enhancements, and compatibility improvements. Checking for and installing the latest firmware updates from your SSD manufacturer’s website can help keep your SSD running smoothly.
Enabling TRIM Functionality: The TRIM command is an essential feature for optimal SSD performance. TRIM helps the operating system inform the SSD which blocks of data are no longer in use, allowing the SSD to efficiently manage and organize its storage. Enabling TRIM ensures that your SSD’s performance remains consistent over time.
Disabling Disk Indexing: By default, Windows indexes files for faster searching. However, this constant indexing can put unnecessary strain on your SSD and reduce its overall lifespan. Disabling disk indexing for your SSD can help minimize unnecessary write operations and improve performance.
Disabling Hibernation: Hibernation is a useful feature that allows your computer to save the current state of your system to the hard drive and turn off. However, when hibernation is enabled, your system creates a large file called the hiberfil.sys on your SSD. Disabling hibernation can free up valuable SSD storage space and reduce unnecessary read and write operations.
Disabling Defragmentation: SSDs don’t need defragmentation like traditional HDDs. In fact, defragmenting an SSD can actually wear out the drive faster by performing unnecessary read and write operations. Disabling automatic defragmentation for your SSD can help maintain its lifespan and prevent unnecessary wear and tear.
Adjusting Windows Power Plan Settings: Windows power plans can affect the performance of your SSD. Setting your power plan to “High Performance” ensures that your SSD’s performance isn’t compromised by power-saving settings. However, it’s important to note that this may slightly increase power consumption.
Minimizing Temporary Files: Temporary files accumulate over time and can take up valuable SSD storage space. Regularly cleaning up temporary files using built-in Windows tools or third-party applications helps free up storage capacity and ensures optimal SSD performance.
Disabling Windows Page File: When you have sufficient RAM, disabling the Windows page file (virtual memory) can help reduce unnecessary read and write operations on your SSD. However, make sure you have enough physical RAM before disabling the page file to prevent system instability.
Enabling AHCI Mode: AHCI (Advanced Host Controller Interface) mode enables advanced features and optimizations specific to SSDs. Enabling AHCI mode in your computer’s BIOS settings ensures that your SSD can fully utilize its capabilities for improved performance and compatibility.
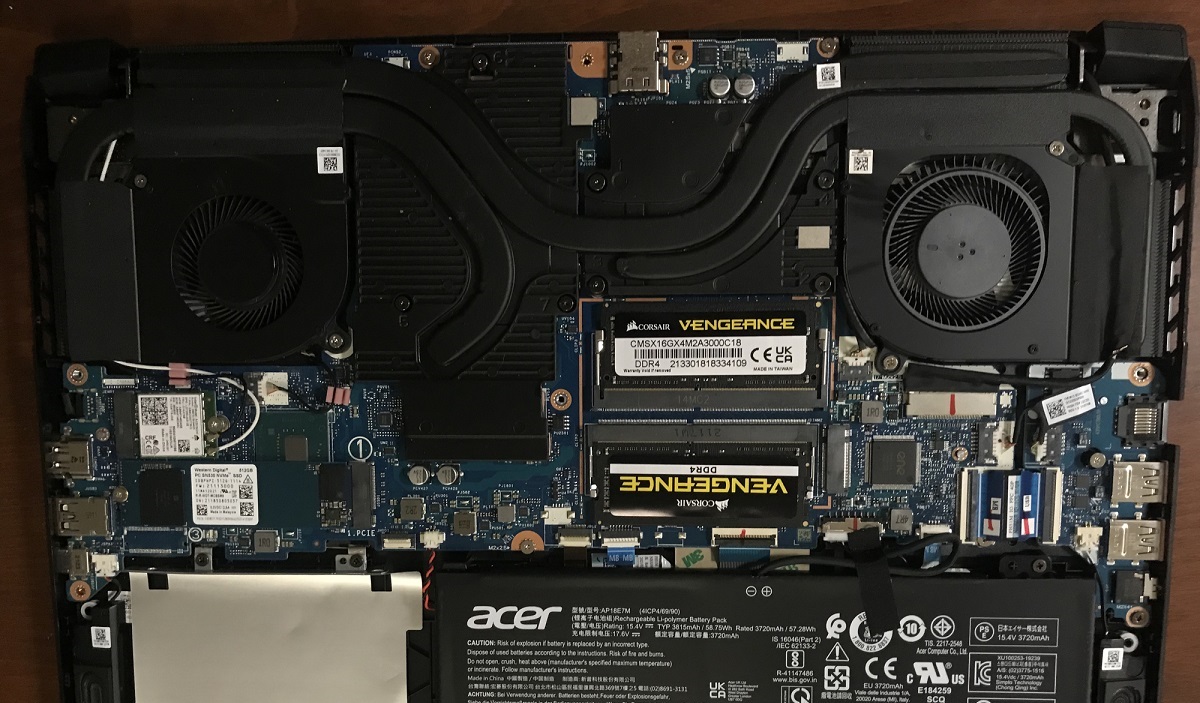
Keeping Your SSD Cool: SSDs generate less heat compared to HDDs, but they are still susceptible to overheating. Excessive heat can degrade an SSD’s performance and lifespan. Ensure proper airflow within your system, and consider using cooling solutions such as heat sinks or fans to keep your SSD cool.
By understanding these essential aspects of SSD optimization and implementing the recommended techniques and settings, you can ensure that your Solid State Drive operates at its best, providing faster speeds, increased lifespan, and overall improved performance.
Update Your SSD Firmware
Regularly updating the firmware of your Solid State Drive (SSD) is an important step in optimizing its performance and ensuring stability. SSD firmware updates often include bug fixes, security patches, performance improvements, and compatibility enhancements provided by the manufacturer. Keeping your SSD firmware up to date helps maintain its functionality and can even address potential issues that might affect its performance.
The process of updating your SSD firmware may vary depending on the manufacturer and model of your SSD. Here are the general steps to follow:
- Check for the latest firmware: Visit the website of your SSD manufacturer and check if there are any available firmware updates for your specific SSD model. Manufacturers often provide firmware update tools or downloadable firmware files.
- Read the release notes: Before proceeding with the firmware update, it’s important to read the release notes provided by the manufacturer. This will give you insights into the improvements or fixes addressed by the firmware update.
- Backup your data: It’s critical to create a backup of your important data before performing any firmware updates. While firmware updates are generally safe, there is a small risk of data loss or corruption. Having a backup ensures that your data is protected.
- Follow the manufacturer’s instructions: The SSD manufacturer will provide specific instructions on how to update the firmware. These instructions may involve using an update tool provided by the manufacturer or manually flashing the firmware using specific software.
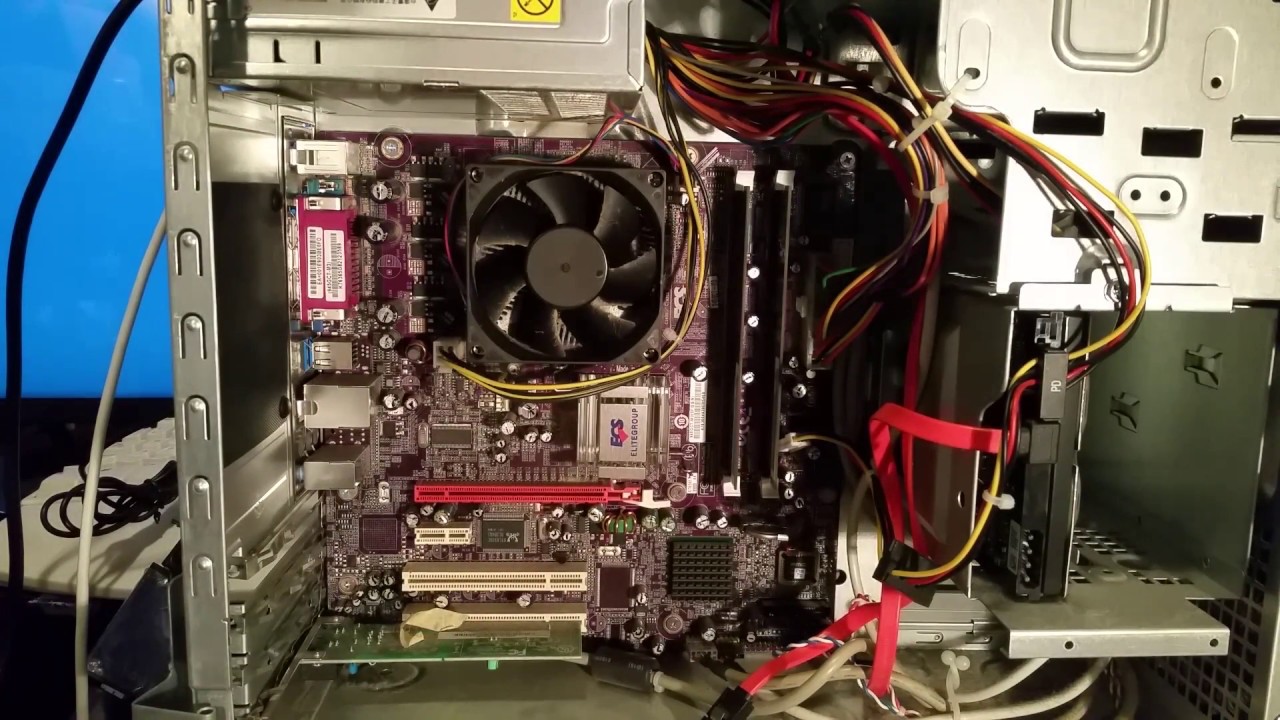
- Connect your SSD: Ensure that your SSD is properly connected to your computer when performing the firmware update. This is usually done via SATA cable or M.2 slot, depending on the SSD form factor.
- Perform the firmware update: Follow the provided instructions to execute the firmware update process. This may involve running an executable file or using a firmware update utility.
- Monitor the update process: During the firmware update, it’s essential to keep an eye on the progress and ensure that there are no interruptions like power loss or system shutdown. Interruptions during firmware updates can cause permanent damage to the SSD.
- Verify successful update: After the firmware update is complete, verify that the update was successful. Some manufacturer-provided tools or utilities may provide confirmation of a successful firmware update.
By regularly checking for and updating your SSD firmware, you can ensure that your SSD operates at its best. Firmware updates can bring enhancements to performance, reliability, and compatibility, ultimately improving your overall computing experience.
Enable TRIM Functionality
Enabling TRIM functionality is a crucial step in optimizing the performance and lifespan of your Solid State Drive (SSD). TRIM is a command that allows the operating system to inform the SSD which blocks of data are no longer in use and can be erased. This helps the SSD maintain its performance and extend its lifespan by optimizing the allocation of storage.
By enabling TRIM, the SSD’s internal garbage collection mechanism can efficiently reclaim space that was previously used by deleted files or data. This process helps prevent performance degradation and ensures that the SSD operates at its maximum speed, even after prolonged use.
Enabling TRIM functionality depends on your operating system and the SSD controller. Here are the general steps to enable TRIM:
- Check TRIM compatibility: Verify that your SSD supports TRIM functionality. Most modern SSDs and operating systems support TRIM, but it’s always a good idea to double-check by referring to the SSD manufacturer’s specifications or documentation.
- Check operating system compatibility: Ensure that your operating system supports TRIM. TRIM is supported by Windows operating systems (Windows 7 and above), macOS, and many Linux distributions. However, older operating systems may not have built-in TRIM support.
- Enable TRIM on Windows: If you are using Windows, TRIM is usually enabled by default. You can verify it by opening the Command Prompt and typing
fsutil behavior query DisableDeleteNotify. If the result is “DisableDeleteNotify = 0”, TRIM is already enabled. If not, you can enable TRIM by typingfsutil behavior set DisableDeleteNotify 0in the Command Prompt (admin privileges may be required). - Enable TRIM on macOS: For macOS users, TRIM is also typically enabled by default for Apple SSDs. However, if you are using a third-party SSD, you may need to enable TRIM manually by using the Terminal. Consult official Apple documentation or SSD manufacturer instructions for the specific commands to enable TRIM on your macOS version.
- Enable TRIM on Linux: Linux distributions usually have TRIM enabled by default. However, it’s always a good idea to verify. Depending on the distribution and version, you might need to install additional utilities or edit configuration files. Refer to the documentation of your specific Linux distribution for instructions on enabling TRIM.
Enabling TRIM functionality is essential for maintaining the long-term performance and health of your SSD. By following the appropriate steps based on your operating system, you can ensure that your SSD benefits from the advantages of TRIM, leading to improved performance, efficient storage allocation, and extended lifespan.
Disable Disk Indexing
Disabling disk indexing is an effective way to optimize the performance and lifespan of your Solid State Drive (SSD). Disk indexing is a feature in operating systems that creates and maintains an index of files on your storage device, allowing for faster file searches. While this feature can be helpful for HDDs, it can put unnecessary strain on SSDs due to the frequent read and write operations involved.
Here are the steps to disable disk indexing on different operating systems:
- Disable disk indexing on Windows: On Windows, you can disable disk indexing for your SSD by following these steps:
- Open File Explorer and right-click on the SSD drive you want to optimize.
- Select “Properties” from the context menu.
- In the Properties window, under the General tab, uncheck the box that says “Allow files on this drive to have contents indexed.”
- Click “Apply” and then choose the option to apply changes to the selected drive only or to all subfolders and files.
- Click “OK” to save the changes.
- Disable disk indexing on macOS: On macOS, you can disable disk indexing for your SSD by following these steps:
- Go to “System Preferences” and select “Spotlight”.
- Click on the “Privacy” tab.
- Drag and drop the SSD drive into the list of locations that Spotlight will not search.
- Close the Spotlight preferences window.
- Disable disk indexing on Linux: On Linux distributions, the process to disable disk indexing may vary depending on the desktop environment and search tool you are using. Generally, you can disable disk indexing by:
- Opening the settings or preferences of your desktop environment or search tool.
- Searching for the indexing options or preferences.
- Disabling indexing for your SSD or excluding it from the indexed locations.
Consult the documentation or support resources for your specific distribution and search tool for detailed instructions.
Disabling disk indexing on your SSD reduces unnecessary read and write operations, leading to improved performance and a longer lifespan. However, keep in mind that searching for files on your SSD may take a bit longer without the indexing feature enabled. Nevertheless, the trade-off is often worth it when it comes to optimizing SSD performance.
Disable Hibernation
Disabling hibernation is an effective optimization technique for your Solid State Drive (SSD). Hibernation is a power-saving feature on computers that allows the system to save the current state to the hard drive and shut down entirely. While hibernation can be useful, it involves writing a large file called hiberfil.sys to the storage drive, which can take up valuable space on your SSD and cause unnecessary read and write operations.
Here’s how you can disable hibernation on different operating systems:
- Disable hibernation on Windows: To disable hibernation on Windows, follow these steps:
- Open the Command Prompt with administrator privileges by right-clicking on the Start button and selecting “Command Prompt (Admin)” or “Windows PowerShell (Admin)”.
- Type the command “
powercfg /hibernate off” and press Enter. - Close the Command Prompt.
By disabling hibernation, the hiberfil.sys file will be removed, freeing up valuable space on your SSD.
- Disable hibernation on macOS: Disabling hibernation on macOS requires using the Terminal and executing a simple command. Here are the steps:
- Open Terminal from the Utilities folder or by using Spotlight search.
- Enter the command “
sudo pmset -a hibernatemode 0” and press Enter. - Enter your administrator password when prompted.
- Close the Terminal.
With hibernation disabled, macOS will no longer create the hibernation file on your SSD.
- Disable hibernation on Linux: Disabling hibernation on Linux involves editing a configuration file. The steps may vary depending on the distribution and desktop environment you are using. Here is a general approach:
- Open a text editor with administrative privileges, such as Terminal or Gedit.
- Open the
grubconfiguration file with root permission. The file is usually located at/etc/default/grub. - Locate the line that starts with
GRUB_CMDLINE_LINUX. - Add
resume=noneto the line so that it looks likeGRUB_CMDLINE_LINUX="resume=none". - Save and close the file.
- Update the GRUB configuration by running the command “
sudo update-grub“.
Consult the documentation or support resources for your specific distribution for detailed instructions on disabling hibernation.
Disabling hibernation on your SSD not only saves storage space but also reduces unnecessary read and write operations, leading to improved performance and a longer lifespan for your SSD.
Disable Defragmentation
When it comes to optimizing your Solid State Drive (SSD), one important step is to disable defragmentation. Unlike traditional Hard Disk Drives (HDDs), SSDs don’t benefit from defragmentation, and in fact, performing defragmentation on an SSD can cause unnecessary wear and tear on the drive, potentially reducing its lifespan.
Defragmentation is the process of rearranging fragmented files on a hard drive to improve read and write speeds. This process is essential for HDDs, as it reduces the time it takes for the disk’s read/write heads to access scattered file fragments. However, since SSDs have no moving parts and can access data almost instantly, defragmenting an SSD isn’t necessary and can actually be detrimental to its performance.
Here’s how to disable defragmentation on different operating systems:
- Disable defragmentation on Windows: Windows typically detects that you’re using an SSD and disables automatic defragmentation. To ensure it’s disabled, you can follow these steps:
- Open the “Defragment and Optimize Drives” tool by searching for it in the Start menu.
- Select your SSD drive from the list.
- Click on “Change Settings” or “Modify Schedule”.
- Ensure that the option to “Run on a schedule” is unchecked.
- Click “OK” to save the changes.
With automatic defragmentation disabled, your SSD won’t undergo unnecessary fragmentation processes.
- Disable defragmentation on macOS: macOS, by default, doesn’t perform automatic defragmentation on SSDs. You don’t need to disable any settings manually.
- Disable defragmentation on Linux: Similarly, Linux file systems such as ext4 and Btrfs handle fragmentation in a way that doesn’t require manual defragmentation, particularly for SSDs. Therefore, there is typically no need to disable defragmentation manually.
It’s important to note that some SSD optimization utilities may falsely claim to optimize an SSD by defragmenting it. However, these utilities won’t provide any tangible benefit and can potentially harm your SSD.
By disabling defragmentation, you’ll ensure that your SSD can operate at its optimal performance level, reduce unnecessary wear, and prolong its lifespan, ultimately enhancing your overall computing experience.
Adjust Windows Power Plan Settings
Adjusting the power plan settings on your Windows computer is an effective way to optimize the performance of your Solid State Drive (SSD). These settings control how your computer manages power consumption, which can directly impact the performance and longevity of your SSD.
Here are the steps to adjust the power plan settings on Windows:
- Open Power Options: Click on the Start button and search for “Power Options”. Select the “Power Options” control panel from the search results.
- Select a Power Plan: On the Power Options page, you’ll see a list of available power plans. Select the one that is currently active or the one you want to adjust.
- Click on “Change Plan Settings”: On the selected power plan, click on the link that says “Change Plan Settings”.
- Adjust Power Plan Options: On the next page, you’ll find various options to adjust the power plan settings. Here are a few specific settings to consider:
- Turn off display: Set a shorter duration for the display to turn off when idle. This reduces unnecessary power consumption and prevents screen burn-in, improving both power efficiency and SSD lifespan.
- Put the computer to sleep: Set a shorter duration before the computer enters sleep or standby mode when idle. Choosing a shorter duration reduces power consumption and unnecessary wear on the SSD.
- Adjust advanced power settings: Click on the “Change advanced power settings” link to access more detailed power settings. Here, you can fine-tune options such as hard disk power-saving mode. Set it to a low power-saving mode or disable it altogether to prevent frequent spinning down of the SSD, which can impact performance.
- Save Changes: After adjusting the desired power plan options, click on the “Save Changes” button at the bottom of the page to apply the new settings.
By properly adjusting the power plan settings, you can strike a balance between power conservation and SSD performance. Optimal power plan settings help to reduce unnecessary power consumption and minimize wear and tear on the SSD, ensuring it operates efficiently and lasts longer.
Minimize Temporary Files
Minimizing the accumulation of temporary files is an important step in optimizing the performance and storage capacity of your Solid State Drive (SSD). Temporary files are created by various applications and processes and can take up valuable space on your SSD, potentially affecting its performance and longevity. By regularly managing and removing temporary files, you can ensure that your SSD operates efficiently and has enough available space for your important data.
Here are some tips to minimize temporary files on your SSD:
- Use Disk Cleanup: Windows provides a built-in tool called Disk Cleanup that helps you identify and remove unnecessary files, including temporary files. To access Disk Cleanup, search for it in the Start menu, select the drive where your operating system is installed (usually C:), and follow the prompts to clean up temporary files.
- Clear Browser Cache: Web browsers store temporary files, website data, and cached images to improve browsing speed. However, these files can accumulate over time and occupy significant space on your SSD. Regularly clearing your browser cache helps free up space and can improve overall browser performance. Refer to your browser’s settings or preferences to locate the option to clear cache and browsing data.
- Remove Unnecessary Downloads and Installers: Check your Downloads folder and delete any files that are no longer needed. This can include downloaded files, installation packages, and files that have already been installed.
- Delete Temporary Files of Applications: Some applications generate temporary files that are not automatically removed. Browse through the settings or preferences of various applications you use and look for options to delete temporary or cached files.
- Use Third-Party Cleaning Tools: There are many third-party cleaning tools available that can help you identify and remove unnecessary files, including temporary files. These tools often offer more advanced features and automation for managing temporary files. Popular options include CCleaner, BleachBit, and Wise Disk Cleaner.
By regularly minimizing temporary files on your SSD, you can free up valuable storage space, optimize performance, and prolong the lifespan of your SSD. It is recommended to incorporate temporary file cleanup into your routine maintenance tasks to ensure your SSD operates at its best.
Disable Windows Page File
Disabling the Windows page file on your Solid State Drive (SSD) can be a beneficial optimization technique, particularly if you have sufficient physical RAM in your system. The page file, also known as virtual memory, is a reserved space on the hard drive that Windows uses as an extension of physical memory when it runs out of RAM. While virtual memory provides a safety net for preventing system crashes due to low memory, it can also lead to unnecessary read and write operations on your SSD.
Here’s how you can disable the Windows page file on your SSD:
- Access System Properties: Right-click on the “This PC” or “My Computer” icon on your desktop and select “Properties” from the context menu. Alternatively, you can press the Windows key + Pause/Break key to open System Properties.
- Select Advanced System Settings: In the System Properties window, click on the “Advanced system settings” option located in the left-hand sidebar.
- Go to Performance Settings: In the System Properties window, under the “Advanced” tab, click on the “Settings” button within the “Performance” section.
- Access Virtual Memory Settings: In the Performance Options window, navigate to the “Advanced” tab, and click on the “Change” button within the “Virtual memory” section.
- Modify Virtual Memory: In the Virtual Memory window, uncheck the box that says “Automatically manage paging file size for all drives.” Select the SSD drive where the page file is currently located, choose the “No paging file” option, and click “Set.”
- Apply Changes: Click “OK” in all open windows to apply the changes. You will need to restart your computer for the changes to take effect.
Disabling the Windows page file reduces unnecessary read and write operations on your SSD, potentially improving performance and extending its lifespan. However, it’s crucial to ensure that you have sufficient physical RAM to handle your daily computing tasks. If you notice frequent system crashes or low memory warnings after disabling the page file, consider increasing your RAM capacity or reverting the changes and allowing Windows to manage the page file automatically.
Enable AHCI Mode
Enabling Advanced Host Controller Interface (AHCI) mode is an important step in optimizing your Solid State Drive (SSD) for enhanced performance and compatibility. AHCI is an industry standard that provides advanced features and optimizations specifically designed for SSDs, such as Native Command Queuing (NCQ) and Hot Plug support.
Enabling AHCI mode allows your SSD to fully utilize its capabilities and communicate more efficiently with the rest of your system. By default, newer motherboards often come with AHCI mode enabled. However, if your SSD was previously connected in IDE mode, it is worth checking and enabling AHCI mode for optimal performance.
Here’s how to enable AHCI mode on Windows:
- Ensure compatibility: Verify that your SSD and motherboard support AHCI mode, as older hardware may not have this capability. Check the manufacturer’s documentation or website for information about AHCI support.
- Edit Windows Registry: Press the Windows key + R to open the Run dialog box. Type “regedit” and press Enter to open the Registry Editor.
- Navigate to Registry Key: In the Registry Editor, navigate to
HKEY_LOCAL_MACHINE\\SYSTEM\\CurrentControlSet\\Services\\iaStorVorHKEY_LOCAL_MACHINE\\SYSTEM\\CurrentControlSet\\Services\\iaStordepending on your system. - Modify Start Value: Double-click on the “Start” key within the iaStorV (or iaStor) folder. Change the value data to “0” (zero) to enable AHCI mode.
- Save Changes and Restart: Click “OK” to save the changes in the Registry Editor. Restart your computer for the changes to take effect.
- Enter BIOS/UEFI Setup: During the boot process, usually when you first turn on your computer, repeatedly press the specific key (such as F2, Del, or Esc) to enter the BIOS or UEFI setup.
- Switch to AHCI Mode: Locate the SATA Configuration or Storage Configuration section in the BIOS/UEFI settings. Change the SATA mode from IDE or RAID to AHCI. Save the changes and exit the BIOS/UEFI setup.
Enabling AHCI mode for your SSD ensures optimal performance and compatibility, allowing your SSD to leverage advanced features provided by the AHCI protocol. However, it’s important to note that changing SATA modes may require additional drivers or may affect the bootability of your system. Ensure you have necessary drivers installed and make any required adjustments to your system’s boot settings.
Keep Your SSD Cool
Ensuring that your Solid State Drive (SSD) remains cool is an important consideration for optimizing its performance and extending its lifespan. While SSDs generate less heat compared to traditional Hard Disk Drives (HDDs), they can still be affected by excessive heat, which can degrade performance and potentially shorten their lifespan.
Here are some tips to help keep your SSD cool:
- Adequate airflow: Proper airflow within your system is crucial for maintaining the temperature of your SSD. Ensure that your computer case has sufficient intake and exhaust fans to promote the flow of fresh air into the system and the expulsion of hot air.
- Proper mounting: Ensure that your SSD is securely and properly mounted in your computer case. Loose or poorly fitted SSDs may not receive adequate ventilation or cooling from the surrounding components.
- Heat sinks or thermal pads: If your SSD manufacturer provides heat sinks or thermal pads, consider using them. These accessories help to dissipate heat from the SSD, improving its cooling efficiency. Additionally, make sure that the heat sinks or thermal pads do not obstruct the airflow within the system.
- Avoid overheating: Avoid subjecting your SSD to extreme temperatures. High temperatures can negatively impact the performance and longevity of the drive. Ensure that your computer is kept in a cool and well-ventilated environment, away from direct sunlight or other sources of heat.
- Do not cover SSDs: Avoid covering your SSD with any materials or accessories that may impede its natural cooling process. SSDs rely on external airflow and heat dissipation to maintain optimal temperatures.
- Monitor temperatures: Use software utilities or third-party applications to monitor the temperature of your SSD. If you notice excessively high temperatures, consider optimizing the cooling system in your computer or repositioning your SSD to improve airflow.
By implementing these practices, you can help keep your SSD operating within its optimal temperature range. Maintaining proper cooling ensures that your SSD consistently performs at its best and remains reliable over its lifespan.
Conclusion
Optimizing your Solid State Drive (SSD) is crucial for maximizing its performance, efficiency, and longevity. By implementing the various techniques discussed in this article, you can ensure that your SSD operates at its full potential, providing faster data access, improved durability, and enhanced overall system responsiveness.
Throughout this article, we explored the importance of firmware updates to keep your SSD up to date with the latest improvements and bug fixes. Enabling TRIM functionality helps your SSD maintain consistent performance and efficient storage allocation. Disabling disk indexing and hibernation reduces unnecessary read and write operations, conserving valuable SSD resources. Additionally, disabling defragmentation and adjusting Windows power plan settings contribute to improving SSD performance and power efficiency.
Managing temporary files, disabling the Windows page file (virtual memory) when sufficient RAM is available, and enabling AHCI mode further optimize the performance and compatibility of your SSD. Lastly, ensuring proper cooling for your SSD helps maintain a suitable operating temperature, contributing to optimal performance and longevity.
Remember, every optimization technique mentioned in this article is aimed at enhancing the performance and lifespan of your SSD. However, it is important to consider your specific system configuration and requirements when implementing these optimizations. Some techniques may require additional software or hardware considerations, so always refer to your SSD manufacturer’s instructions and documentation to ensure compatibility and proper usage.
By following these SSD optimization techniques and regularly maintaining your SSD, you can enjoy a faster, more efficient, and more reliable computing experience for years to come.