Introduction
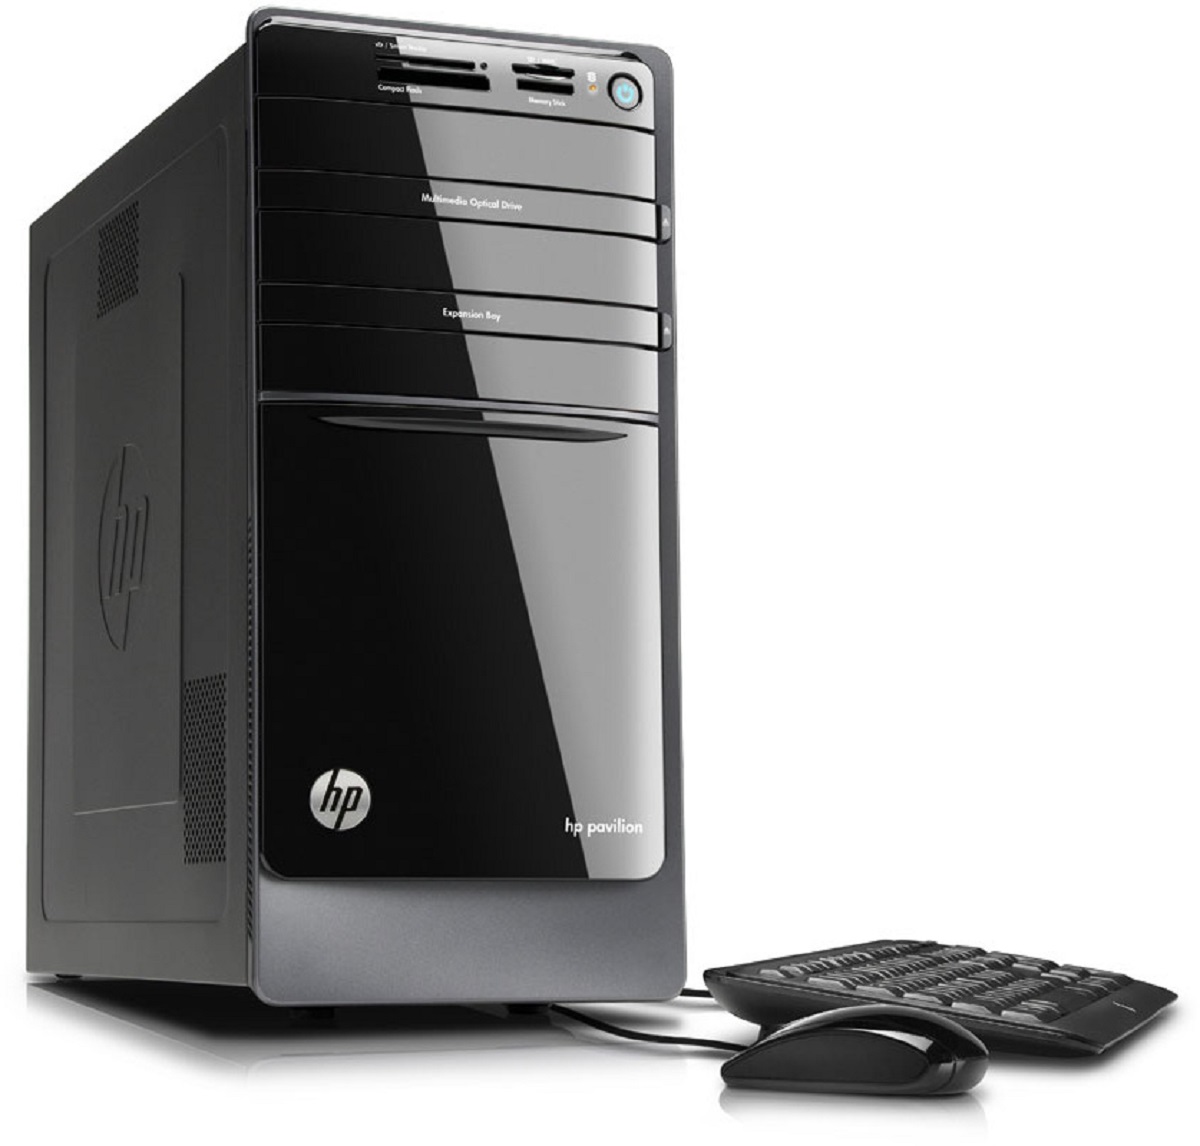
Welcome to the comprehensive guide on how to install a Solid State Drive (SSD) on an HP Pavilion P7-1380T CTO Desktop PC. If you have been experiencing slow boot times, sluggish performance, or are simply looking to upgrade your computer’s storage capabilities, installing an SSD can drastically improve your overall computing experience.
SSDs are known for their lightning-fast speeds, durability, and energy efficiency compared to traditional hard disk drives (HDDs). By replacing your PC’s existing HDD with an SSD, you can benefit from faster boot times, near-instantaneous file transfers, and quicker application load times.
In this guide, we will walk you through the step-by-step process of installing an SSD on your HP Pavilion P7-1380T CTO Desktop PC. We will also cover important procedures such as backing up your data, disconnecting and reconnecting your computer, configuring BIOS settings, reinstalling your operating system, and restoring your backed-up data.
Before we begin, please note that this guide is specific to the HP Pavilion P7-1380T CTO Desktop PC model. While the general installation steps may apply to other desktop models, it is important to consult your computer’s user manual or manufacturer’s website for model-specific instructions.
Now, let’s gather the necessary tools and materials, and get started on upgrading your PC with an SSD for enhanced performance and storage capabilities.
Requirements
Before you begin the SSD installation process on your HP Pavilion P7-1380T CTO Desktop PC, ensure that you have the following materials and tools:
- An SSD: Choose an SSD that is compatible with your desktop PC’s specifications. Consider factors such as storage capacity, speed, and budget.
- SATA cables: You will need a SATA data cable and a SATA power cable to connect your new SSD to the motherboard and power supply.
- Screwdriver: A Phillips-head or flat-head screwdriver (depending on your PC’s case design) will be required to open and close the computer case.
- External storage device: To back up your data before the installation, you will need an external hard drive, USB flash drive, or cloud storage service.
- Operating system installation media: If you plan to reinstall your operating system, make sure you have the installation disk or a bootable USB drive.
- Internet connection: A stable internet connection is recommended for downloading the latest drivers and updates for your newly-installed SSD.
It is essential to ensure that you have a clean and clutter-free workspace to safely carry out the installation process. Additionally, take necessary precautions such as grounding yourself to prevent static discharge that can damage sensitive computer components.
Remember to consult your computer’s user manual or visit the manufacturer’s website for specific information on your HP Pavilion P7-1380T CTO Desktop PC’s compatibility, recommended SSD models, and any additional requirements or considerations before proceeding with the installation.
Once you have gathered all the necessary tools and materials, proceed to the next section to back up your data before opening up your computer case for the SSD installation.
Backing up your data
Before starting the installation process, it is crucial to back up your important data to ensure it is safe and accessible during and after the SSD installation. Follow these steps to create a backup of your data:
- Identify your important files: Take some time to identify the files, folders, and applications that hold important data. These may include documents, photos, videos, music, and any other files you want to preserve.
- Choose a backup method: Decide on the backup method that suits your needs. You can opt for an external hard drive, USB flash drive, cloud storage service, or a combination of these.
- Copy files to backup storage: Using the chosen backup method, copy your important files to the selected storage device. Ensure that you have enough space to accommodate all the data.
- Verify the backup: After the copy process is complete, take a few moments to verify that all important files have been successfully backed up. Check folder structures and open random files to ensure they are intact.
Additionally, if you have any programs or applications that are essential to your work or daily usage, make a note of them and ensure you have the necessary installation files or access to download them again later.
It is critical to double-check that your backup is complete and error-free. This step provides peace of mind and ensures you can restore your data if necessary.
Remember, the backup process may take some time depending on the size of your data. Be patient and allow ample time for the files to be successfully copied to the backup storage.
Once you have confirmed the completeness and accuracy of your backup, you are ready to proceed with shutting down and disconnecting your HP Pavilion P7-1380T CTO Desktop PC in the next section.
Shutting down and disconnecting your computer
Before you begin the physical installation of the SSD, it is important to shut down your computer and disconnect any power sources to ensure your safety and prevent potential damage to the internal components. Follow these steps:
- Save and close all open files and applications on your computer.
- Click on the “Start” button in the bottom left corner of your screen, then select “Shut down” or “Power off” from the options that appear. Allow the computer to fully shut down.
- Once the computer is powered off, unplug the power cord from the wall outlet or surge protector. This will prevent any accidental power supply to your computer during the installation process.
- If you have any peripherals connected to your computer, such as printers or external storage devices, disconnect them from the USB or other ports. This will ensure that there are no obstructions when accessing the computer’s internal components.
- Carefully move your computer to a well-lit and static-free work area. Ensure that you ground yourself by touching an unpainted metal surface to discharge any static electricity before proceeding. This will prevent any static shocks that can damage sensitive computer components.
By following these steps, you have now safely shut down your HP Pavilion P7-1380T CTO Desktop PC and disconnected it from any power sources. In the next section, we will guide you through the process of opening the computer case to access the internals.
Opening the computer case
Now that your HP Pavilion P7-1380T CTO Desktop PC is safely shut down and disconnected from power sources, it’s time to open the computer case and access the internal components. Follow these steps to open the case:
- Locate the screws or latches that hold the computer case closed. The specific design of your computer case may vary, but common locations for case fasteners are at the back, side, or bottom of the case.
- Using a Phillips-head or flat-head screwdriver (depending on the case design), carefully remove the screws or release the latches to open the computer case. Remember to keep track of the screws and set them aside in a safe place for later use.
- Once the case is open, you will have clear access to the internal components of your HP Pavilion P7-1380T CTO Desktop PC. Take a moment to familiarize yourself with the layout and location of the existing storage drive and other components.
During this process, be cautious not to put excessive force on any part of the computer case or components. If you encounter any resistance when opening the case, double-check for any remaining screws or fasteners that may need to be removed.
It is important to note that opening your computer case may void any warranties or service agreements you have with the manufacturer or retailer. If your computer is still under warranty and you are uncomfortable opening the case yourself, consider contacting the manufacturer or a certified technician for assistance.
Now that you have successfully opened the computer case, proceed to the next section to learn how to install the solid-state drive (SSD) in your HP Pavilion P7-1380T CTO Desktop PC.
Installing the solid-state drive
With the computer case open and the internal components visible, you are now ready to install the solid-state drive (SSD) into your HP Pavilion P7-1380T CTO Desktop PC. Follow these steps to install the SSD:
- Locate an available drive bay within your computer case where the SSD can be installed. Typically, these drive bays are located near the front of the case and are designed to hold 3.5″ or 2.5″ drives.
- If your SSD is a 2.5″ drive, you may need to use a mounting bracket or adapter to secure it in the drive bay. Follow the manufacturer’s instructions specific to your SSD model to attach the mounting bracket, if required.
- Align the SSD with the drive bay or mounting bracket slots, ensuring that the connectors on the SSD align with the appropriate ports.
- Carefully insert the SSD into the drive bay or mounting bracket slots, applying gentle pressure until it is securely in place. Note that some cases may require screws to secure the SSD in place, while others use tool-free mechanisms.
- If your SSD requires a power connection, locate the appropriate SATA power cable from your power supply and connect it to the power port on the SSD. Ensure a secure connection.
- Next, connect the SATA data cable to the SATA port on the motherboard, and then connect the other end to the SSD. Again, ensure a secure connection.
- Double-check that all connections are firmly seated and secure.
Once the SSD is installed and all connections are secure, you can proceed to the next section to close the computer case and prepare to reconnect your HP Pavilion P7-1380T CTO Desktop PC.
Closing the computer case
Now that you have successfully installed the solid-state drive (SSD) in your HP Pavilion P7-1380T CTO Desktop PC, it’s time to close the computer case to secure the internal components. Follow these steps to close the case:
- Ensure that all cables and connections inside the computer case are neatly organized and not obstructing any fans or other components.
- Carefully align the side panel of the computer case with the edges of the case itself.
- Slowly slide and press the side panel back into place, ensuring that it fits snugly against the case.
- If your computer case uses screws to secure the side panel, locate the screws that you set aside earlier. Use a screwdriver to fasten the screws back into the corresponding holes.
- Double-check that the side panel is securely fastened and there are no gaps or loose sections.
It is important to note that closing the computer case properly ensures that the internal components are protected and that the cooling system functions optimally. A properly closed case helps prevent dust accumulation and potential damage to the components.
With the computer case securely closed, you are now ready to proceed to the next section to reconnect your HP Pavilion P7-1380T CTO Desktop PC.
Reconnecting your computer
After successfully closing the computer case, it’s time to reconnect your HP Pavilion P7-1380T CTO Desktop PC to ensure all necessary components and peripherals are properly connected. Follow these steps to reconnect your computer:
- Locate the power cable that was disconnected earlier and plug it back into the power outlet or surge protector.
- Reconnect any peripherals that were previously disconnected, such as printers, external hard drives, or USB devices, to the appropriate ports on your computer.
- If you have a monitor, keyboard, and mouse connected to your computer, ensure that they are properly plugged in and securely connected.
- Once all the connections are in place, verify that each cable is inserted firmly and secured to avoid any accidental disconnections.
- Double-check that no cables or wires are blocking any cooling vents, as this can hinder airflow and potentially cause overheating.
With the connections reestablished and verified, you can now prepare to power on your HP Pavilion P7-1380T CTO Desktop PC. Before starting, take a moment to ensure that you have downloaded and saved any necessary drivers or installation files for your SSD and other peripherals, as you may need them during the next steps.
In the next section, we will guide you through the process of configuring your BIOS settings for optimal SSD performance. This step is crucial to ensure that your computer recognizes and utilizes the newly installed solid-state drive.
Configuring your BIOS settings
Once you have reconnected your HP Pavilion P7-1380T CTO Desktop PC, it is important to configure your BIOS settings to ensure optimal performance and compatibility with the newly installed solid-state drive (SSD). Follow these steps to configure your BIOS settings:
- Power on your computer and immediately press the designated key to access the BIOS setup utility. The key to access the BIOS may vary depending on your computer’s manufacturer; commonly used keys include Del, F2, or F10. Refer to your computer’s manual or the manufacturer’s website for the specific key.
- Navigate through the BIOS menus using the arrow keys on your keyboard.
- Look for a section related to storage or drives. It may be labeled as “Boot,” “SATA Configuration,” or something similar.
- Ensure that the SSD is detected by the BIOS. It should appear on the list of connected drives. If the SSD is not recognized, check the connections and make sure it is properly installed.
- If your BIOS settings have an option for “AHCI” (Advanced Host Controller Interface), select it to enable AHCI mode for the SSD. This mode offers improved performance and features for modern storage devices.
- Save the changes made to the BIOS settings and exit the BIOS setup utility. The key combination to save and exit may be displayed on the screen, such as “F10” or “Save and Exit.”
- Your computer will restart with the updated BIOS settings.
Configuring the BIOS settings correctly ensures that your computer recognizes and optimizes the SSD for enhanced performance. It may also enable additional features specific to your SSD model.
After configuring the BIOS settings, you are now ready to reinstall your operating system onto the SSD. This step is necessary to fully utilize the benefits of the new solid-state drive. Proceed to the next section to learn how to reinstall your operating system.
Reinstalling your operating system
With the BIOS settings configured, it is time to reinstall your operating system onto the newly installed solid-state drive (SSD) in your HP Pavilion P7-1380T CTO Desktop PC. Follow these steps to reinstall your operating system:
- Make sure you have the installation media for your operating system, such as a DVD or a bootable USB drive. If you don’t have one, you may need to create it using the appropriate installation files.
- Insert the installation media into the appropriate drive, whether it be a DVD drive or a USB port.
- Restart your computer and press the designated key to access the boot menu. The key to access the boot menu may vary depending on your computer’s manufacturer, commonly used keys include F12 or Esc. Consult your computer’s manual or the manufacturer’s website for the specific key.
- From the boot menu, select the option that corresponds to the installation media. This will boot your computer from the installation media and start the operating system installation process.
- Follow the on-screen instructions to proceed with the operating system installation. During the installation process, you will typically have the option to select the SSD as the destination for the installation.
- Depending on the operating system you are installing, you may be prompted to format the SSD before proceeding. Ensure that you have selected the correct SSD and proceed with the formatting if necessary.
- Continue following the on-screen instructions to complete the installation of your operating system onto the SSD.
- After the installation is complete, your computer will restart. Remove the installation media from the drive or USB port to allow your computer to boot from the newly installed operating system on the SSD.
Reinstalling your operating system onto the SSD ensures that your computer takes full advantage of the SSD’s speed and performance capabilities. It provides a fresh start and allows you to fully utilize the benefits of the new storage device.
In the next section, we will guide you through the process of restoring your backed-up data to the newly installed operating system on the SSD. This step is essential to regain access to your files, applications, and settings.
Restoring your backed-up data
Now that you have successfully reinstalled your operating system onto the newly installed solid-state drive (SSD), it’s time to restore your backed-up data. By following these steps, you can regain access to your files, applications, and settings:
- Connect the external storage device that contains your backed-up data to your computer.
- If you are using a cloud storage service, log in to your account and ensure that your files are accessible.
- Navigate to your backed-up data on the external storage device or in your cloud storage account.
- Select the files and folders you wish to restore to your computer’s SSD. You can either copy them directly to the desired location on the SSD or use a specific backup and restore utility depending on your backup method.
- If you have applications that were not included in your backed-up data, reinstall them using the original installation files or the appropriate installation media.
- Once the data restoration process is complete, take some time to verify that your files have been successfully restored and are accessible on your new operating system.
- Test your applications and ensure that they are functioning properly after the restoration process.
It is important to note that some settings may not be backed up by default, especially system-specific configurations. Take note of any custom settings or preferences you had in your previous operating system and manually configure them if necessary.
By restoring your backed-up data, you can seamlessly continue your work, access your important files, and make use of your favorite applications on the newly installed operating system on the SSD.
With your data restored, you have completed the process of installing a solid-state drive on your HP Pavilion P7-1380T CTO Desktop PC. Enjoy the enhanced performance, speed, and storage capabilities that your new SSD brings!
Conclusion
Congratulations! You have successfully installed a solid-state drive (SSD) on your HP Pavilion P7-1380T CTO Desktop PC. By following the step-by-step guide, you have unlocked the benefits of improved performance, faster boot times, and increased storage capabilities.
Throughout the process, you learned how to back up your data, disconnect and reconnect your computer, open and close the computer case, install the SSD, configure your BIOS settings, reinstall the operating system, and restore your backed-up data. These steps ensure a smooth and successful SSD installation experience.
With the SSD installed, your computer’s overall performance and responsiveness will experience a significant boost. You can expect faster file transfers, quicker application load times, and improved multitasking capabilities. The enhanced durability and energy efficiency of the SSD also contribute to a more efficient and reliable computing experience.
Remember to consult your computer’s user manual or the manufacturer’s website for any specific instructions or considerations related to your HP Pavilion P7-1380T CTO Desktop PC model. Every computer model may have slight variations in terms of installation procedures and compatibility.
Now that you have upgraded to an SSD, make sure to regularly back up your data to keep it safe and secure. Additionally, consider performing regular maintenance tasks such as disk cleanup and disk defragmentation to optimize the performance of your SSD.
Thank you for following this guide. We hope that your new SSD brings improved speed, efficiency, and storage capabilities to your HP Pavilion P7-1380T CTO Desktop PC, enhancing your overall computing experience.


