Introduction
Welcome to this guide on how to change your SSD to AHCI. If you’re unfamiliar with AHCI, don’t worry – we’ll cover all the basics and guide you through the process step by step. AHCI stands for Advanced Host Controller Interface, and it is a mode that allows your storage devices to communicate with your computer’s operating system. By switching your SSD to AHCI, you can potentially improve its performance and unlock advanced features.
Many users wonder why they should change their SSD to AHCI when it is already functioning in its default mode, typically the IDE (Integrated Drive Electronics) mode. The primary reason is that AHCI offers significant benefits, such as better data transfer speeds, Native Command Queuing (NCQ) for improved multitasking, and support for hot swapping. These advantages can greatly enhance the overall performance and user experience of your SSD.
Before you proceed with changing your SSD to AHCI, it’s crucial to check if your system supports AHCI mode. While most modern systems do, some older hardware may not, so it’s always best to confirm compatibility beforehand to avoid any compatibility issues later on.
Additionally, it’s essential to create a backup of your data before making any changes to your SSD. This serves as a safety net in case anything goes wrong during the AHCI conversion process. Creating a backup ensures that your important files and data are protected and can be easily recovered.
Furthermore, it is also recommended to backup your current SSD driver. This ensures that you have a copy of the existing driver in case you encounter any difficulties after switching to AHCI mode. Having the original SSD driver on hand simplifies the troubleshooting process if any issues arise.
In the following sections, we will guide you through the process of changing your SSD to AHCI for different operating systems, including Windows, macOS, and Linux. We’ll provide detailed instructions and troubleshoot common issues that you may encounter along the way.
So, without further ado, let’s get started and unlock the full potential of your SSD by switching it to AHCI mode!
What is AHCI?
AHCI stands for Advanced Host Controller Interface, which is a mode that allows your computer’s operating system to communicate with your storage devices. It is a standard interface protocol that supports SATA (Serial ATA) devices, including hard drives and solid-state drives (SSDs).
Before AHCI, the default mode for storage devices was IDE (Integrated Drive Electronics) or legacy mode. IDE mode worked well for traditional hard drives, but it had limitations when it came to SSDs. The AHCI mode was developed to leverage the full potential of SSDs and provide additional features that improve performance and functionality.
One of the main advantages of AHCI is the ability to enable Native Command Queuing (NCQ). NCQ is a feature that reorders read and write commands to optimize the data flow between the drive and the computer. This can significantly improve multitasking, as the drive can prioritize and complete multiple commands simultaneously.
In addition to NCQ, AHCI also supports hot swapping, which means you can connect or disconnect the SSD while the computer is running. This feature can be particularly useful for external drives or in situations where you need to quickly swap drives without restarting the computer.
Another key benefit of AHCI is higher data transfer speeds. The AHCI protocol enables faster data transfer rates between the drive and the computer, maximizing the performance potential of your SSD. This can result in quicker boot times, faster file transfers, and improved overall system responsiveness.
It’s important to note that AHCI is a hardware-based feature, meaning it requires compatibility with your computer’s motherboard. Most modern systems support AHCI by default, but it’s always a good idea to confirm compatibility before making any changes to your SSD mode.
In summary, AHCI is an advanced interface protocol that allows your operating system to communicate with your storage devices efficiently. It offers benefits such as Native Command Queuing, hot swapping, and faster data transfer speeds. By switching your SSD from IDE to AHCI mode, you can unlock the full potential of your drive and enhance its performance and functionality.
Why Change SSD to AHCI?
There are several compelling reasons to change your SSD to AHCI mode. Let’s explore why making this switch can greatly benefit your overall computing experience.
1. Improved Performance: AHCI mode unlocks the full potential of your SSD, allowing it to perform at its best. The increased data transfer speeds, enabled by AHCI, can result in faster boot times, quicker file access, and improved application load times. This can significantly enhance the overall responsiveness and efficiency of your system, especially when dealing with large files or resource-heavy tasks.
2. Native Command Queuing (NCQ): By switching to AHCI, you can take advantage of NCQ, which optimizes the order in which data is read from or written to the SSD. NCQ reorders the commands in a way that minimizes the movement of the drive’s read/write heads and maximizes throughput, resulting in improved multitasking capabilities and better overall performance.
3. Hot Swapping Support: If you frequently connect and disconnect your storage devices, especially external drives, AHCI provides the convenience of hot swapping. This means you can plug in or remove your SSD while your computer is running, without the need to restart or shut down the system. This feature can be particularly useful for IT professionals, data transfer, or in situations where quick and seamless drive swapping is required.
4. Enhanced Compatibility: Many modern operating systems, such as Windows, macOS, and Linux, are designed to work optimally with AHCI mode. By switching your SSD to AHCI, you align it with the system’s default mode, ensuring compatibility and reducing the risk of compatibility-related issues. This can lead to smoother system operation and better driver support.
5. Future-Proofing: As technology continues to advance, more applications and software are being optimized to take advantage of the capabilities offered by AHCI mode. By changing your SSD to AHCI, you ensure that your system is ready to leverage these advancements and enjoy improved performance and compatibility with future software updates and hardware upgrades.
It’s important to note that while changing your SSD to AHCI mode offers numerous benefits, it’s crucial to ensure compatibility with your system and backup your data before making any modifications. Additionally, some older hardware or specialized systems may not support AHCI, so it’s essential to check your system specifications or consult the manufacturer’s documentation.
Overall, switching your SSD from its default IDE mode to AHCI mode can result in significant performance improvements, enhanced compatibility, and future-proofing your system. By making this switch, you unleash the full capabilities of your SSD and optimize its performance for a smoother and more efficient computing experience.
Check if Your System Supports AHCI
Before proceeding with changing your SSD to AHCI mode, it’s important to verify if your system supports AHCI. While most modern systems do support AHCI, there may be rare cases where older hardware or specialized systems might not have this capability. Here’s how you can check if your system supports AHCI:
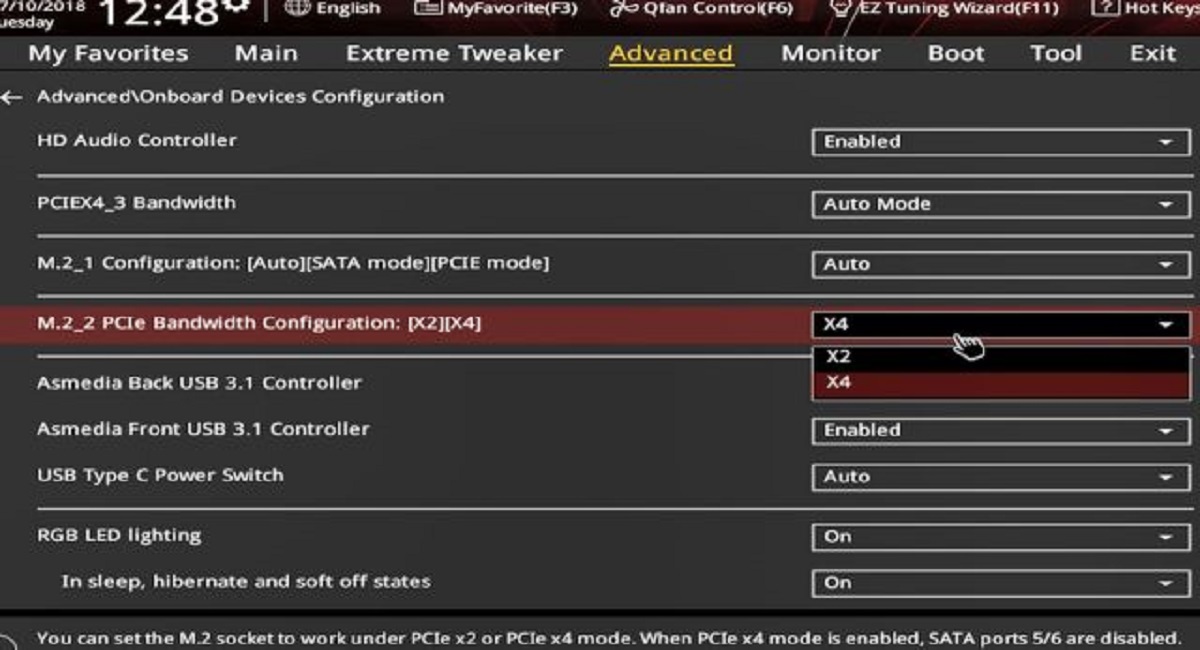
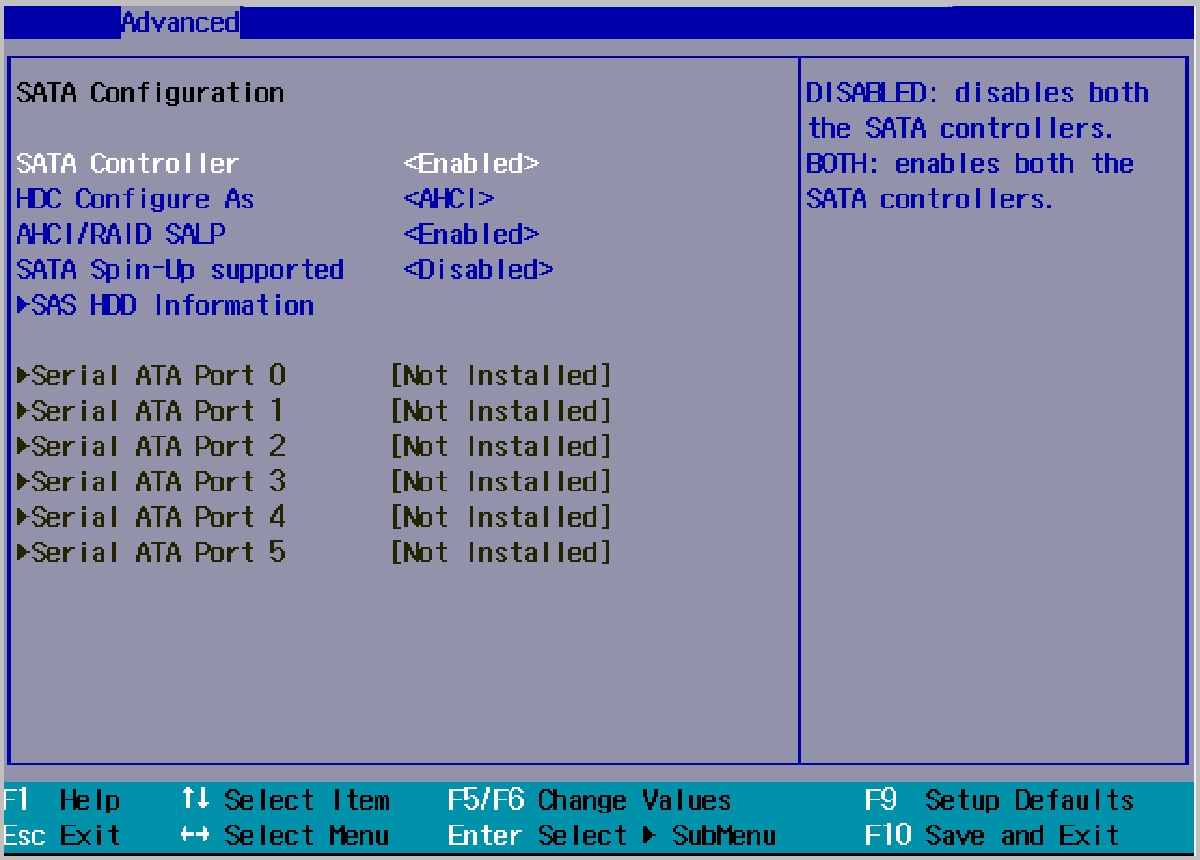
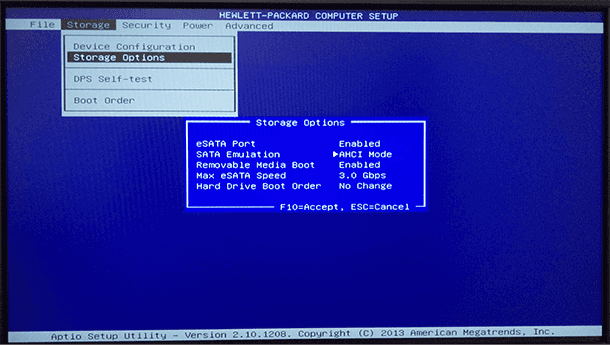
1. Check the BIOS Settings: The first step is to access your computer’s BIOS (Basic Input/Output System) settings. You can usually do this by restarting your computer and pressing the designated key (such as F2, Del, or Esc) to enter the BIOS setup. Once in the BIOS, navigate to the storage or SATA configuration section. Look for an option that mentions AHCI or SATA mode. If you find such an option, it indicates that your system supports AHCI.
2. Check the Motherboard Specifications: If you are unsure about the AHCI support in your system’s BIOS settings, you can also consult the specifications of your motherboard. You can typically find this information in the user manual or by searching for your motherboard model online. Look for details about AHCI support or SATA modes. If your motherboard supports AHCI, it’s likely that your system does as well.
3. Consult the Manufacturer’s Documentation: In some cases, the manufacturer’s documentation or website may have specific information about AHCI support for your system. Refer to their resources to determine if your system supports AHCI. Additionally, you can reach out to the manufacturer’s customer support for assistance or clarification.
It’s important to note that if your system does not support AHCI, you may be limited to using the default IDE mode. While IDE mode works perfectly fine for traditional hard drives, it does not offer the same advanced features and performance benefits as AHCI.
If your system does support AHCI, you can proceed with the process of changing your SSD to AHCI mode. It’s vital to remember that changing the storage mode requires specific steps and precautions, which we will cover in the subsequent sections for different operating systems – Windows, macOS, and Linux.
Ensuring AHCI compatibility beforehand is crucial to avoid complications or potential issues during the transition process. By determining if your system supports AHCI, you can confidently proceed with the next steps to unlock the enhanced performance and capabilities of your SSD.
Backup Your Data
Before you proceed with changing your SSD to AHCI mode, it is essential to create a backup of your data. This precautionary step ensures that your important files and documents are protected in case anything goes wrong during the AHCI conversion process. Here’s how you can backup your data:
1. Identify Important Data: Begin by identifying the data that you want to backup. This includes documents, photos, videos, music, and any other files that you consider valuable or irreplaceable. Make a list of all the folders and files that you need to back up to ensure that nothing is overlooked.
2. Choose a Backup Method: There are several backup methods available, depending on your preferences and requirements. You can use an external hard drive or SSD, network-attached storage (NAS) devices, cloud storage services, or even burn your data onto DVDs or Blu-ray discs. Choose the method that suits your needs and ensures the safety and accessibility of your backed-up data.
3. Transfer Your Data: Once you have selected your backup method, it’s time to transfer your data. Connect your external storage device or set up your chosen backup solution. Copy and paste the identified files and folders to the backup location. Ensure that the transfer is complete and that all files have been successfully backed up.
4. Verify the Backup: After the data transfer is complete, it’s crucial to verify the backup to ensure that all your important files have been successfully copied. Double-check the backup location and compare the files in your original location with the backed-up files to confirm accuracy and completeness.
5. Test the Backup Restoration: It’s recommended to test the restoration process of your backup to ensure that you can easily retrieve your data if needed. Select a few files from the backup and restore them to a separate storage location to confirm that the restoration process works as expected.
6. Create Regular Backup Schedule: To maintain the safety of your data, it’s a good practice to establish a regular backup schedule. Determine how frequently you want to back up your data based on its importance and how frequently it changes. Regular backups ensure that you have an up-to-date copy of your files and minimize the risk of data loss.
Creating a backup of your data is a critical step before making any modifications to your SSD, such as changing it to AHCI mode. By taking the time to backup your files, you can ensure the safety and accessibility of your data in the event of any unforeseen issues or complications.
Remember, prevention is always better than cure when it comes to data loss. So, don’t skip this step and make sure your important files are backed up before proceeding further.
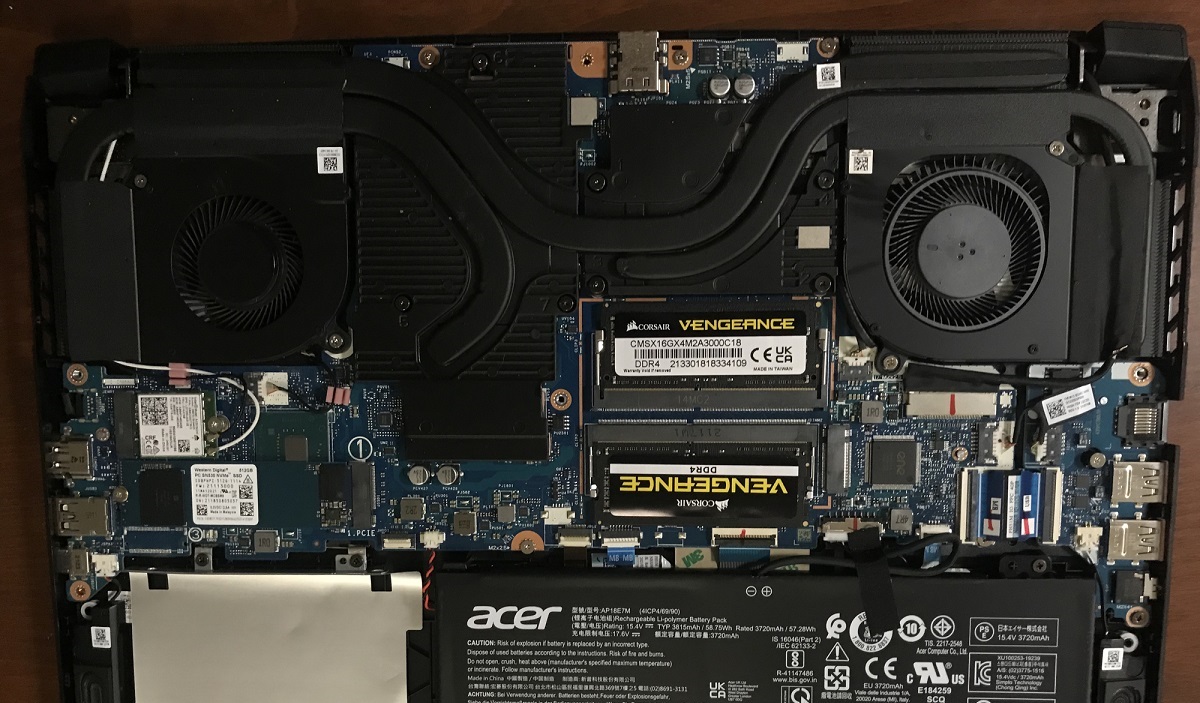
Backup Your Current SSD Driver
In addition to backing up your data, it is important to create a backup of your current SSD driver before changing it to AHCI mode. Having a backup of the driver will allow for easier troubleshooting and recovery in case any issues arise during or after the conversion process. Here’s how you can backup your current SSD driver:
1. Identify the SSD Driver: Start by identifying the specific driver for your SSD. This information can usually be found on the manufacturer’s website or in the device manager of your operating system. Make a note of the driver name and version to ensure you can easily locate and reinstall it if needed.
2. Locate the Current Driver Files: Once you have identified the SSD driver, locate the corresponding driver files on your computer. These files are typically stored in a specific directory or folder. You may need to navigate to the system folder or the folder where your drivers are stored to find the SSD driver files.
3. Create a Backup Folder: Create a new folder in a convenient location on your computer or an external storage device and name it something like “SSD Driver Backup.” This folder will be used to store the backup copies of the SSD driver files.
4. Copy the Driver Files: Copy all of the SSD driver files from their current location to the newly created backup folder. You can do this by selecting the files, right-clicking, and choosing the “Copy” option, then navigating to the backup folder and selecting the “Paste” option. Alternatively, you can also drag and drop the driver files into the backup folder.
5. Verify the Backup: Once the copying process is complete, verify that all of the SSD driver files have been successfully backed up. Compare the files in the backup folder with the original driver files to ensure they match in terms of size and content. This step ensures that you have a complete backup of the SSD driver files.
6. Store the Backup Safely: It is important to store the backup of the SSD driver files in a safe and easily accessible location. Consider using an external storage device or cloud storage to ensure redundancy and protection against accidental loss or damage of the backup files.
Having a backup of your current SSD driver prevents any loss of functionality or compatibility issues that may occur with the AHCI conversion. If you encounter any problems after switching to AHCI mode, you can simply reinstall the backed-up driver to restore your SSD’s functionality.
Remember to keep the backup of your SSD driver files in a secure location and make a note of where it is stored. This way, you can easily access it if needed and ensure a smooth transition to AHCI mode for your SSD.
Changing SSD to AHCI in Windows
If you’re using a Windows operating system and want to switch your SSD to AHCI mode, follow the steps outlined below:
1. Create a System Restore Point: Before making any changes, it’s a good practice to create a system restore point as a safety net. In the event that something goes wrong during the process, you can easily revert to the previous system state. To create a restore point, type “create a restore point” in the Windows search bar, select the “Create a restore point” option, and follow the prompts to create a restore point for your system.
2. Enter the BIOS Settings: Restart your computer and continuously press the designated key (e.g., F2, Del, Esc) to enter the BIOS settings. The specific key varies depending on your system. Once in the BIOS, navigate to the storage or SATA configuration section. Look for an option related to SATA mode or AHCI mode.
3. Switch to AHCI Mode: Select the option that enables AHCI mode for your SSD. The option might be labeled as “AHCI,” “AHCI Mode,” or something similar. Save the changes and exit the BIOS settings. Your computer will restart.
4. Update the Windows Registry: Changing to AHCI mode requires a modification to the Windows registry. To do this, press the Windows key + R to open the Run dialog box. Type “regedit” and press Enter to open the Registry Editor.
5. Backup the Registry (Optional): Before proceeding, it’s recommended to create a backup of the registry. To do this, select “File” in the Registry Editor menu and choose “Export.” Save the backup file in a safe location.
6. Navigate to the Registry Key: In the Registry Editor, navigate to the following key: HKEY_LOCAL_MACHINE\System\CurrentControlSet\Services\storahci\StartOverride
7. Modify the StartOverride Value: Double-click on the “StartOverride” value on the right-hand side. In the Value data field, change the value to 0. Click OK to save the changes.
8. Restart Your Computer: Close the Registry Editor and restart your computer. Windows will now load the AHCI drivers and enable AHCI mode for your SSD.
9. Verify AHCI Mode: Once your computer restarts, confirm that AHCI mode is successfully enabled. You can do this by checking the Device Manager. Right-click on the Start button, select Device Manager, and expand the “IDE ATA/ATAPI controllers” category. If you see “Standard AHCI Controller” listed, it means that your SSD is now running in AHCI mode.
By following these steps, you can successfully switch your SSD to AHCI mode in Windows. Remember to create a system restore point, backup the registry (if desired), and verify AHCI mode after the changes are made. Enjoy the enhanced performance and features that AHCI provides for your SSD in Windows!
Changing SSD to AHCI in macOS
If you are using a macOS-based system and want to switch your SSD to AHCI mode, here’s how you can do it:
1. Backup Your Data: Before proceeding with any changes, ensure that you have a backup of all your important data. This ensures that your files are safe in case any issues arise during the AHCI conversion process.
2. Restart in Recovery Mode: Restart your Mac and hold down the Command + R keys immediately after hearing the startup sound. This will boot your Mac into Recovery Mode.
3. Open Disk Utility: Once in Recovery Mode, select “Disk Utility” from the available options. This will open the Disk Utility application.
4. Select Your SSD: In Disk Utility, locate and select your SSD from the list of available drives on the left-hand side of the window.
5. Erase the SSD: With your SSD selected, click on the “Erase” tab at the top of the Disk Utility window. Choose a new name for your SSD and select the desired format (usually APFS or macOS Extended). Click on the “Erase” button to erase your SSD.
6. Quit Disk Utility: Once the erasing process is complete, quit Disk Utility to return to the main Recovery Mode window.
7. Open Terminal: From the main Recovery Mode window, select “Utilities” from the menu bar at the top of the screen, then choose “Terminal” from the drop-down menu. This will open the Terminal application.
8. Enter the Command: In the Terminal window, type the following command: sudo nvram "recovery-boot-mode=unused" and press Enter. You may be prompted to enter your admin password.
9. Restart Your Mac: After entering the command, restart your Mac by selecting the Apple menu and choosing “Restart.” Your Mac will now boot normally into macOS.
10. Enable AHCI Mode: Once your Mac has restarted, open Terminal again. Type the following command: sudo nvram "ahci-mode=1" and press Enter. Again, you may be prompted to enter your admin password.
11. Restart Your Mac: After entering the command, restart your Mac once again. Your SSD will now be in AHCI mode.
By following these steps, you can successfully switch your SSD to AHCI mode in macOS. Remember to backup your data, erase your SSD, and enable AHCI mode using Terminal in Recovery Mode. Enjoy the improved performance and compatibility that AHCI provides for your SSD in macOS!
Changing SSD to AHCI in Linux
If you are using a Linux-based operating system and want to switch your SSD to AHCI mode, here’s how you can do it:
1. Create a Backup: Before making any changes, it’s always a good practice to create a backup of your important data. This ensures that your files are safe in case anything goes wrong during the AHCI conversion process.
2. Open Terminal: Open a Terminal window by navigating to the Applications menu, selecting “Accessories” or “System Tools,” and then clicking on the “Terminal” application.
3. Check Current Mode: In the Terminal, enter the following command to check the current mode of your SSD: sudo hdparm -I /dev/sdX (replace “sdX” with the appropriate drive identifier, such as “sda” or “sdb”). Look for the “Transport” section and verify if it is currently in AHCI mode.
4. Edit GRUB Configuration: Open the GRUB configuration file by entering the following command in the Terminal: sudo nano /etc/default/grub. This will open the GRUB configuration file in the Nano text editor.
5. Edit GRUB Command Line: Locate the line that starts with GRUB_CMDLINE_LINUX= and append the following text to the end of the line: libahci.ignore_sss=1. This ensures that Linux ignores the SSD controller’s current state and forces the AHCI driver to load.
6. Save and Exit: Press Ctrl + X to exit Nano. When prompted, press Y to save the changes, and then press Enter to confirm the file name.
7. Update GRUB Configuration: Now, update the GRUB configuration by entering the command: sudo update-grub in the Terminal. This ensures that the changes made in the previous step take effect.
8. Restart Your System: After updating GRUB, restart your system for the changes to take effect. You can either restart using the GUI or enter the command sudo reboot in the Terminal.
9. Verify AHCI Mode: Once your system has restarted, open the Terminal again and enter the command sudo hdparm -I /dev/sdX (replace “sdX” with the appropriate drive identifier) to check the SSD’s mode. Verify that it is now in AHCI mode.
By following these steps, you can successfully switch your SSD to AHCI mode in Linux. Remember to create a backup, edit the GRUB configuration, update GRUB, and verify the AHCI mode after the changes are made. Enjoy the improved performance and functionality that AHCI offers for your SSD in Linux!
Troubleshooting Common Issues
While changing your SSD to AHCI mode can bring improved performance and features, there are potential issues that you may encounter during or after the conversion process. Here are some common issues and troubleshooting steps to help you resolve them:
1. Boot Failure: If your computer fails to boot after switching to AHCI mode, it may be due to compatibility issues or incorrect BIOS settings. Try switching back to the original storage mode (IDE or RAID) and check if your system boots successfully. If it does, ensure that your computer’s BIOS is updated to the latest version. Additionally, double-check that all cables connected to your SSD are securely attached and functioning properly.
2. Device Recognition Failure: If your system is unable to recognize the SSD or if the SSD is not listed in the device manager after switching to AHCI mode, it could be a driver-related issue. Ensure that you have the latest drivers installed for your SSD model. You can download the drivers from the manufacturer’s website and install them. Restart your system and check if the SSD is now recognized.
3. Blue Screen of Death (BSOD): If you encounter a BSOD after changing to AHCI mode, it may indicate a driver incompatibility or conflict. Try booting your system in Safe Mode and uninstalling any previously installed SSD drivers. Then, download and install the latest drivers compatible with AHCI mode. Restart your system and see if the BSOD issue is resolved.
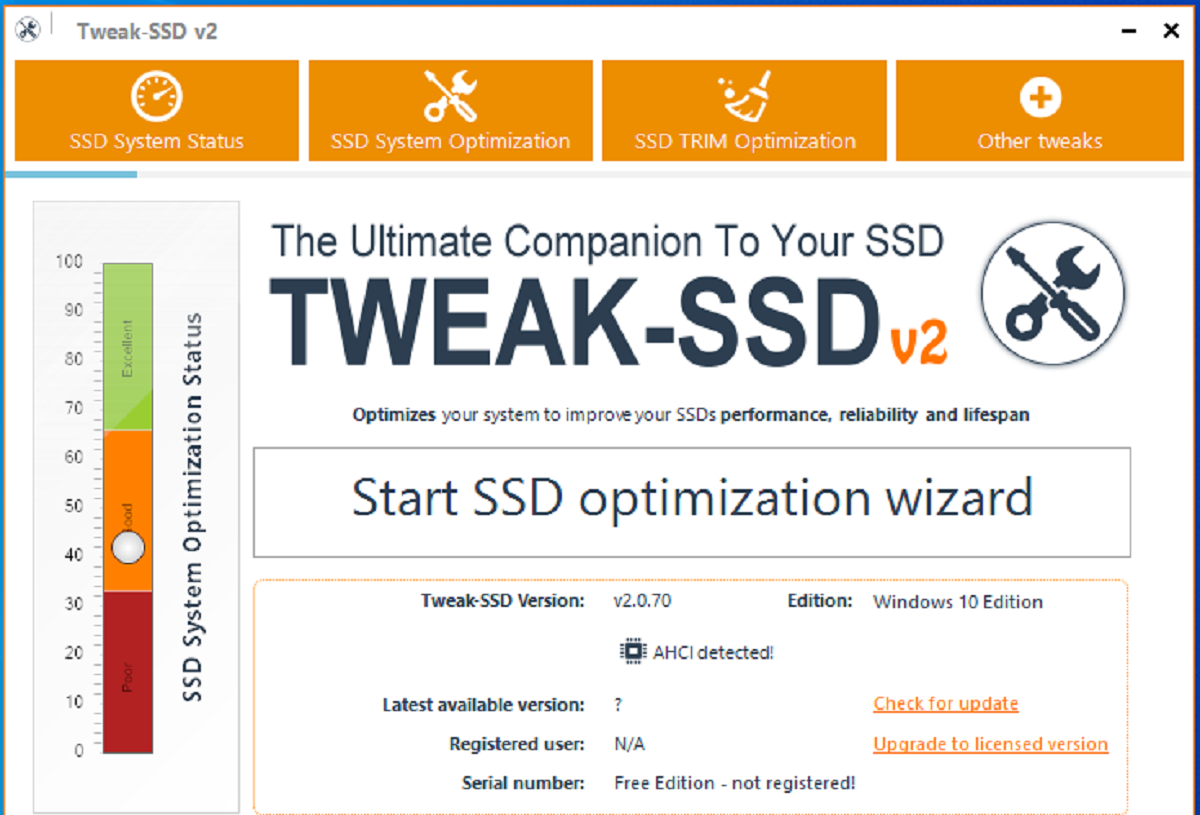
4. Slow Performance: If you notice a decrease in performance after switching to AHCI mode, it could be due to various factors. First, ensure that you have TRIM enabled for your SSD as it helps maintain optimal performance. You can do this by entering the command sudo trimforce enable in macOS or using the TRIM Enabler software in Windows. Additionally, check if your SSD firmware is up to date and consider optimizing your operating system and applications for SSD usage.
5. Error Messages: If you receive error messages related to the AHCI mode or your SSD after the conversion, it’s essential to research the specific error codes or messages for more information. Look for solutions or troubleshooting steps specific to the error message. Sometimes, a firmware update or a BIOS update can resolve such issues. Consult the manufacturer’s support documentation or forums for further assistance.
Remember, troubleshooting can vary depending on your specific hardware, operating system, and the nature of the issue. If you encounter any problems during the AHCI conversion process, it’s recommended to consult the manufacturer’s support resources, community forums, or seek assistance from trained professionals.
By being aware of common issues and their potential solutions, you can tackle any challenges that may arise during the transition to AHCI mode and ensure a smooth and successful switch for your SSD.
Conclusion
Changing your SSD to AHCI mode can significantly enhance its performance and unlock advanced features that improve your overall computing experience. AHCI offers benefits such as increased data transfer speeds, Native Command Queuing (NCQ) for improved multitasking, and support for hot swapping. Whether you are using Windows, macOS, or Linux, the process of switching to AHCI mode requires careful steps and precautions to ensure a smooth transition.
Prior to making any changes, it is crucial to check if your system supports AHCI mode and to create backups of both your data and current SSD driver. These backups serve as safety measures in case any issues arise during or after the conversion process. It is always better to be prepared and have the ability to restore your system to its previous state if necessary.
For users on Windows, the process involves accessing the BIOS settings, modifying the registry, and restarting the computer. macOS users should enter Recovery Mode, erase the SSD, and enable AHCI mode using Terminal commands. Linux users will need to edit the GRUB configuration and update the boot settings to enable AHCI mode.
Throughout this guide, we have also discussed common issues that may occur during the AHCI conversion process and provided troubleshooting steps to help resolve them. Remember to research specific error messages, consult manufacturer support resources, and reach out to community forums for further assistance if needed.
By following the steps outlined in this guide and taking into account the potential challenges, you can successfully switch your SSD to AHCI mode and unlock its full potential. Enjoy the improved performance, faster data transfer speeds, and enhanced functionality that AHCI brings to your SSD.
Should you encounter any difficulties or have specific questions, do not hesitate to consult your device manufacturer’s documentation or seek assistance from qualified professionals. With the right know-how and precautionary measures, you can make the most of AHCI and optimize your SSD’s performance for a smoother and more efficient computing experience.