Introduction
If you’re looking to boost the performance of your Solid State Drive (SSD), you’ve come to the right place. SSDs have become increasingly popular due to their faster read and write speeds compared to traditional hard drives. However, even the best SSDs can experience slowdowns over time, affecting your system’s overall performance.
Fortunately, there are several steps you can take to optimize and make your SSD run faster. In this article, we’ll explore tried and tested methods that can help you maximize the potential of your SSD and improve the overall speed and efficiency of your computer.
Before we delve into the optimization techniques, it’s important to note that SSDs have a limited number of write cycles. However, modern SSDs have greatly improved in endurance, and with proper optimization, you can prolong the lifespan of your SSD while enjoying faster speeds.
It’s also worth mentioning that the steps outlined in this article apply to Windows operating systems. If you’re using a different operating system, the optimization methods may vary. Now, without further ado, let’s dive into the steps you can take to make your SSD run faster.
Check and Update Firmware
One of the first things you should do to optimize your SSD’s performance is to check and update its firmware. Firmware acts as the software that controls the functionality of your SSD. Manufacturers often release firmware updates to address any bugs or issues and to enhance the overall performance of the drive. Updating the firmware ensures that you’re running the latest version, which can result in improved reliability and speed.
To check if there’s an available firmware update for your SSD, visit the manufacturer’s website and navigate to the support or downloads section. Look for the firmware section and search for your specific SSD model. If a firmware update is available, download it and follow the instructions provided by the manufacturer to install it.
Before proceeding with the firmware update, it’s crucial to back up your important data. Firmware updates involve making changes to the SSD’s internal software, and there’s always a slight risk associated with it. By backing up your data, you ensure that even if something goes wrong during the update process, your valuable files remain safe.
It’s important to note that different SSD manufacturers might have different methods for updating the firmware. Some may provide a standalone updater tool, while others may require you to create a bootable USB drive. Make sure to carefully read the instructions provided by the manufacturer to ensure a smooth firmware update process.
Regularly checking for firmware updates is a good practice, as it allows you to take advantage of any performance optimizations and bug fixes that the manufacturer releases. By keeping your SSD’s firmware up to date, you can ensure that your drive is running at its best and enjoy the maximum speed and reliability that it has to offer.
Enable TRIM
TRIM is a command that helps optimize the performance of your SSD by improving the efficiency of the drive’s read and write operations. When data is deleted from an SSD, it leaves behind empty blocks scattered across the drive. Without TRIM, the drive would need to perform additional work to write new data to these scattered blocks, which can lead to performance degradation over time.
To enable TRIM on your SSD, you need to ensure that your operating system and SSD support this feature. Most modern operating systems, including Windows and macOS, automatically enable TRIM for compatible SSDs. However, it’s a good practice to double-check and confirm that TRIM is indeed enabled on your system.
To verify the status of TRIM on Windows, open the Command Prompt as an administrator and enter the following command: fsutil behavior query DisableDeleteNotify. If the command returns a value of 0, TRIM is enabled. If it returns a value of 1, TRIM is disabled. If TRIM is disabled, you can enable it by entering the command: fsutil behavior set DisableDeleteNotify 0.
On macOS, TRIM is usually enabled by default for internal SSDs. However, if you’re using a third-party SSD or have disabled TRIM in the past, you can enable it by opening the Terminal and entering the command: sudo trimforce enable. Follow the on-screen instructions and restart your Mac to apply the changes.
Enabling TRIM ensures that your SSD maintains optimal performance by allowing it to efficiently manage the storage of data. By enabling TRIM on your system, you can help prolong the lifespan of your SSD and ensure that it continues to deliver the best possible performance.
Optimize Start-up Programs
When you turn on your computer, numerous programs and applications may automatically launch and run in the background. While some of these programs are essential for system functionality, others may not be necessary and can slow down the start-up process of your computer. Optimizing the start-up programs can help improve the boot time and overall performance of your SSD.
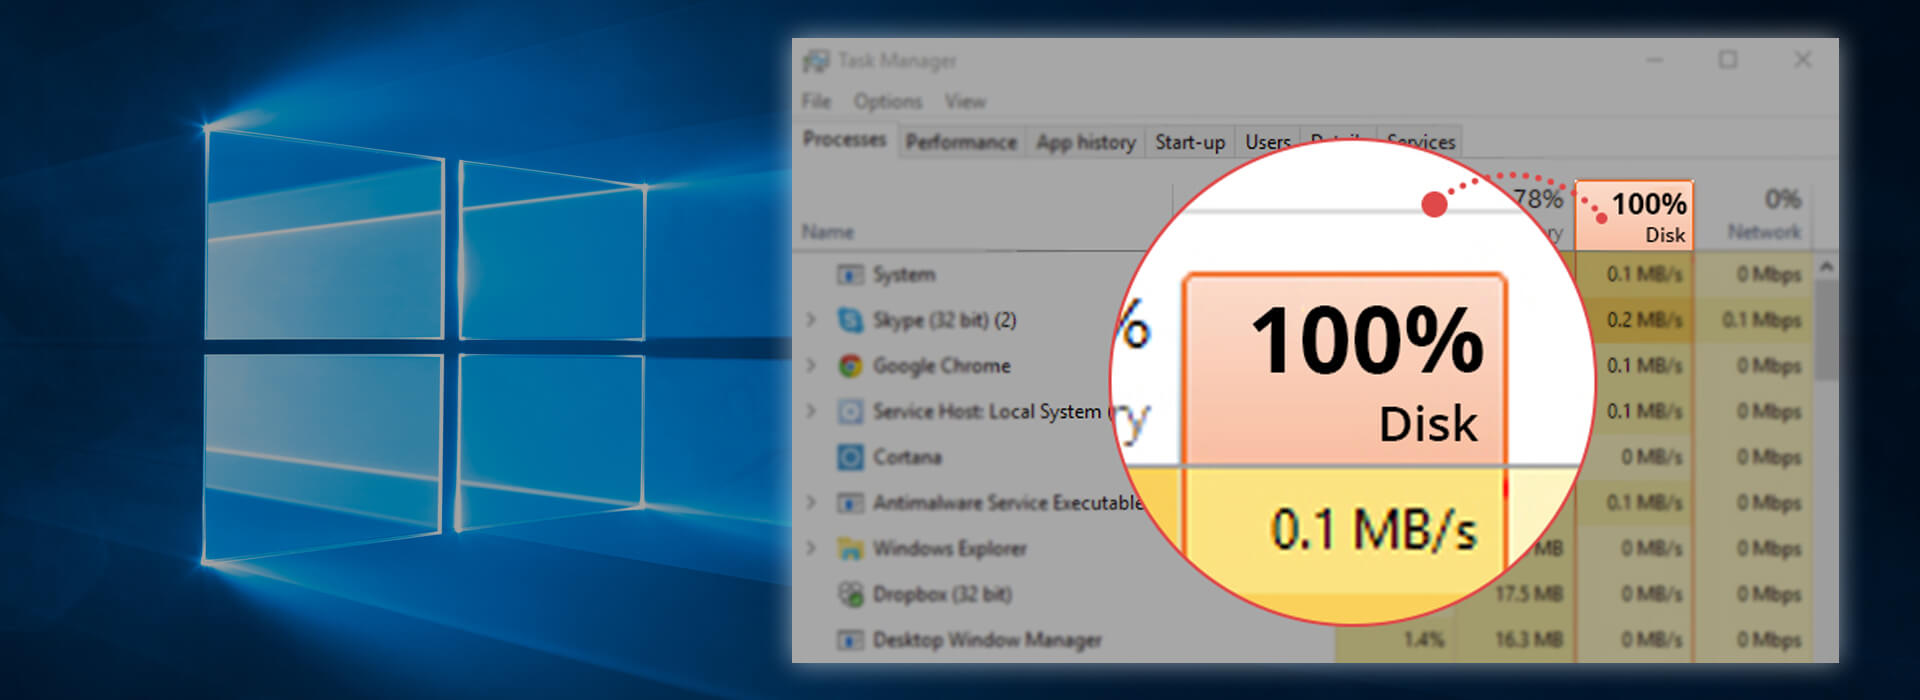
To optimize start-up programs on Windows, you can utilize the built-in Task Manager. Right-click on the taskbar and select “Task Manager” from the menu. In the Task Manager window, navigate to the “Startup” tab to view the list of programs that automatically start when your computer boots up. Identify any non-essential programs and disable them by right-clicking and selecting “Disable”. Be cautious not to disable any critical system processes or applications.
On macOS, you can manage start-up programs through the “System Preferences”. Click on the Apple menu and select “System Preferences”. Then, choose “Users & Groups” and click on your user account. Switch to the “Login Items” tab, where you’ll see a list of programs that open when you log in. Select any unnecessary programs and click on the “-” button to remove them from the list.
By optimizing your start-up programs, you can reduce the amount of time it takes for your computer to start up and decrease the strain on your SSD. This will result in faster boot times and a more responsive system overall.
It’s worth noting that regularly reviewing and managing your start-up programs is important, as new applications and software updates may add themselves to the start-up process. By periodically checking and disabling unnecessary start-up programs, you can ensure that your SSD runs faster and that your computer starts up quickly each time you power it on.
Clear Temporary Files
Over time, temporary files accumulate on your SSD, taking up valuable storage space and potentially slowing down your system. These temporary files include cached website data, temporary installation files, and other miscellaneous files generated by applications. Clearing these files regularly can help improve the performance of your SSD and free up valuable storage space.
On Windows, you can use the built-in Disk Cleanup utility to clear temporary files. Simply press the Windows key + R to open the Run dialog box, then type “cleanmgr” and hit Enter. Select your SSD drive from the drop-down menu and click on “Ok”. The utility will calculate the amount of space you can free up by deleting temporary files. Check the boxes next to “Temporary files” and any other file categories you want to remove, then click on “Ok” to start the cleanup process.
On macOS, you can use the “Storage Management” feature to delete temporary files. Go to the Apple menu, select “About This Mac”, click on “Storage”, and then click on “Manage”. In the Storage Management window, click on “Recommendations” and select “Review Files” under “Optimize Storage”. You can then check the boxes next to “Caches” and “Temporary Files” to delete them.
In addition to using these built-in utilities, there are also third-party tools available that can help you clean temporary files from your SSD. These tools often offer more advanced features and allow for more thorough cleaning of temporary and junk files.
By regularly clearing temporary files, you can not only reclaim storage space on your SSD but also improve the overall performance of your system. Removing these unnecessary files reduces the workload on your SSD and allows it to operate more efficiently, resulting in faster read and write speeds.
Remember to exercise caution when deleting temporary files, especially if you’re using third-party tools. Make sure to carefully review the files before deleting them to avoid accidentally removing any important data or system files.
Disable Hibernation
Hibernation is a power-saving feature in both Windows and macOS that allows you to save your system’s current state to the hard drive, allowing you to power off the computer while still preserving your open applications and files. However, the hibernation feature can take up a significant amount of space on your SSD, especially if you have limited storage capacity.
Disabling hibernation can help free up valuable disk space and potentially improve the performance of your SSD. On Windows, you can disable hibernation by opening the Command Prompt as an administrator and entering the command: powercfg.exe /hibernate off. This will disable the hibernation feature and remove the hiberfil.sys file from your SSD.
On macOS, hibernation is known as “Safe Sleep.” To disable Safe Sleep, open the Terminal and enter the command: sudo pmset standby 0. This will disable Safe Sleep and prevent your Mac from writing the hibernation mode to the SSD.
Keep in mind that disabling hibernation means that your computer won’t be able to use this feature anymore. However, if you rarely or never use hibernation and prefer to have additional storage space on your SSD, disabling it is a practical option.
If you use a laptop and frequently rely on the hibernation feature to save your work and preserve battery life, you may want to reconsider disabling hibernation. However, if you primarily use a desktop computer or have ample storage capacity on your SSD, disabling hibernation can help optimize your SSD’s performance by reclaiming precious disk space.
Remember to weigh the pros and cons of disabling hibernation based on your specific needs. If you decide to disable this feature, make sure to properly shut down your computer instead of using hibernation mode to avoid any potential data loss or system instability.
Disable Superfetch
Superfetch is a feature in Windows that aims to improve system performance by preloading frequently used applications into memory. While this feature can be beneficial for traditional hard drives, it may not provide significant performance benefits for SSDs and can even lead to unnecessary disk usage and wear.
Disabling Superfetch on your SSD can help optimize its performance and reduce unnecessary read and write operations. To disable Superfetch, open the Run dialog box by pressing the Windows key + R, then type “services.msc” and hit Enter. In the Services window, scroll down and locate “Superfetch” in the list of services. Right-click on Superfetch and select “Properties”. In the properties window, under the “General” tab, change the startup type to “Disabled” and click on “Apply” and “Ok” to save the changes. Restart your computer for the changes to take effect.
It’s important to note that Superfetch may be called differently in different versions of Windows. In Windows 10, it is known as “SysMain”. The process to disable it is the same as described above.
Disabling Superfetch can help reduce unnecessary overhead on your SSD, leading to improved performance and potentially prolonging the lifespan of your drive. However, it’s worth mentioning that the impact of disabling Superfetch may vary depending on your specific use case and system configuration. If you frequently open and close applications or have a significant amount of RAM, the benefits of disabling Superfetch might be less noticeable.
If you ever feel the need to re-enable Superfetch, you can follow the same steps mentioned above but change the startup type to “Automatic” or “Automatic (Delayed Start)” instead of “Disabled”.
By disabling Superfetch, you can ensure that your SSD’s resources are utilized more efficiently, resulting in a snappier and more responsive system overall.
Adjust Power Settings
Adjusting the power settings on your computer can play a role in optimizing the performance of your SSD. By modifying these settings, you can strike a balance between performance and power consumption, ensuring that your SSD runs at its best without sacrificing energy efficiency.
On Windows, you can access the power settings by going to the Control Panel and selecting “Power Options”. From there, you can choose from various predefined power plans or create a custom power plan to suit your needs. It’s generally recommended to select the “High Performance” power plan to maximize your SSD’s performance. However, be aware that this power plan may result in higher power consumption and reduced battery life on laptops.
Within the power plan settings, you may find additional options that can be modified. Look for settings related to hard disk power-off timers or sleep settings. Adjusting these settings can help avoid excessive idling or frequent sleep/wake cycles, which can impact the responsiveness and overall performance of your SSD.
On macOS, power settings can be accessed through the “System Preferences”. Click on the Apple menu, select “System Preferences”, and choose “Energy Saver”. From there, you can adjust the power-related settings based on your preferences. It’s recommended to disable any options that put your SSD or system into a sleep mode during periods of inactivity if you want to maximize performance.
When adjusting power settings, it’s important to find the right balance for your specific needs. If you’re using a laptop and frequently rely on battery power, you may want to prioritize energy efficiency over maximum performance. On the other hand, if you’re using a desktop or value performance above all else, adjusting power settings for maximum performance can help your SSD operate at its peak.
Keep in mind that adjusting power settings might only have a marginal impact on your SSD’s performance, especially if you have a high-performance SSD. However, it’s a good practice to optimize your power settings to ensure that your computer and SSD are running efficiently and providing the best possible performance.
Disable Indexing
Indexing is a feature in Windows that helps speed up file searches by creating an index of file names and their contents on your SSD. While indexing can be useful for traditional hard drives, it may not provide significant benefits for SSDs, which already have fast read speeds. Disabling indexing can help optimize the performance of your SSD and reduce unnecessary read and write operations.
To disable indexing, open the File Explorer and right-click on the SSD drive that you want to disable indexing for. Select “Properties” from the context menu. In the Properties window, under the “General” tab, uncheck the box that says “Allow files on this drive to have contents indexed in addition to file properties”. You will be prompted to apply the changes to the folder and all subfolders and files. Select the option that suits your needs and click on “Ok” to save the changes. This process may take some time if you have a large number of files on your SSD.
Disabling indexing can free up valuable resources on your SSD and potentially improve its performance, especially during file searches. However, it’s worth noting that search queries for file names may take slightly longer without indexing enabled, as it won’t have the assistance of the pre-created index.
It’s important to mention that disabling indexing may not be necessary on all SSDs or in all usage scenarios. If you frequently search for files on your SSD or use applications that rely heavily on indexing, it may be beneficial to keep indexing enabled. In such cases, consider selectively disabling indexing for specific folders or file types that are unlikely to be searched often.
On macOS, the indexing feature is called “Spotlight.” To adjust Spotlight preferences and exclude certain directories from indexing, go to the Apple menu, select “System Preferences”, and click on “Spotlight”. From there, you can modify the search results to exclude specific locations or file types from being indexed by Spotlight.
By disabling or selectively adjusting indexing, you can ensure that your SSD dedicates resources towards essential tasks and minimize unnecessary read and write operations, ultimately enhancing the overall performance and lifespan of your SSD.
Enable AHCI Mode
AHCI (Advanced Host Controller Interface) is a mode that allows your SSD to communicate with the computer’s operating system in a more efficient manner. By enabling AHCI mode, you can take full advantage of the advanced features and capabilities of your SSD, leading to improved performance and compatibility.
To enable AHCI mode, you will need to enter the BIOS (Basic Input/Output System) or UEFI (Unified Extensible Firmware Interface) settings of your computer. The process for accessing the BIOS/UEFI settings may vary depending on your computer manufacturer and model, so refer to the user manual or the manufacturer’s website for specific instructions. Once you’re in the BIOS/UEFI settings, navigate to the SATA configuration section and look for an option related to the disk controller or AHCI mode. Enable AHCI mode and save the changes before exiting the BIOS/UEFI settings.
Enabling AHCI mode allows your SSD to take advantage of advanced features such as Native Command Queuing (NCQ), which optimizes the execution of read and write requests, and Hot Plug, which allows you to connect and disconnect storage devices while the computer is running.
It’s important to note that enabling AHCI mode is typically recommended for systems using a newer operating system, such as Windows 7 or later versions. Older operating systems, such as Windows XP, may not natively support AHCI mode and may require additional drivers to be installed. Before enabling AHCI mode, ensure that you have the necessary drivers or that your operating system supports it.
Switching to AHCI mode may require you to reinstall your operating system or perform additional configuration steps. Therefore, it’s crucial to back up your important data before making any changes to the BIOS/UEFI settings or reinstalling the operating system.
By enabling AHCI mode, you can unlock the full potential of your SSD, allowing it to deliver faster data transfer speeds, improved responsiveness, and better overall performance. However, keep in mind that the impact of enabling AHCI mode may vary depending on factors such as the specific SSD model, the computer’s hardware configuration, and the tasks you perform on your system.
Conclusion
Optimizing your SSD can significantly enhance the performance and efficiency of your computer. By following the steps outlined in this article, you can ensure that your SSD is running at its best and enjoying the maximum speed and reliability it has to offer.
Checking and updating the firmware of your SSD is essential to address any bugs, improve reliability, and take advantage of performance enhancements released by the manufacturer. Enabling TRIM helps your SSD efficiently manage the storage of data, prolonging its lifespan and maintaining consistent performance.
Optimizing start-up programs reduces the time taken for your computer to boot up and ensures that only essential applications are running in the background. Clearing temporary files not only frees up storage space but also improves overall system performance.
Disabling hibernation and Superfetch can reduce unnecessary disk usage and optimize SSD performance, especially for those with limited storage capacity. Adjusting power settings strikes a balance between performance and energy efficiency, allowing you to achieve optimal SSD performance without sacrificing power consumption.
Finally, choosing to disable indexing or selectively adjusting its settings provides a performance boost by reducing unnecessary read and write operations on your SSD.
Each of these optimization techniques plays a role in maintaining and maximizing the functionality of your SSD. However, it’s important to note that the impact of these optimizations may vary depending on factors such as your specific hardware configuration, the software you use, and your individual computing habits and needs.
Remember to regularly maintain and monitor your SSD’s performance to ensure it continues to operate efficiently. Stay up to date with the latest firmware updates from the manufacturer and periodically review and adjust your system settings based on your requirements.
By following these optimization techniques, you can extend the life of your SSD, improve system responsiveness, and enjoy faster data transfer speeds, resulting in an overall smoother computing experience.