Introduction
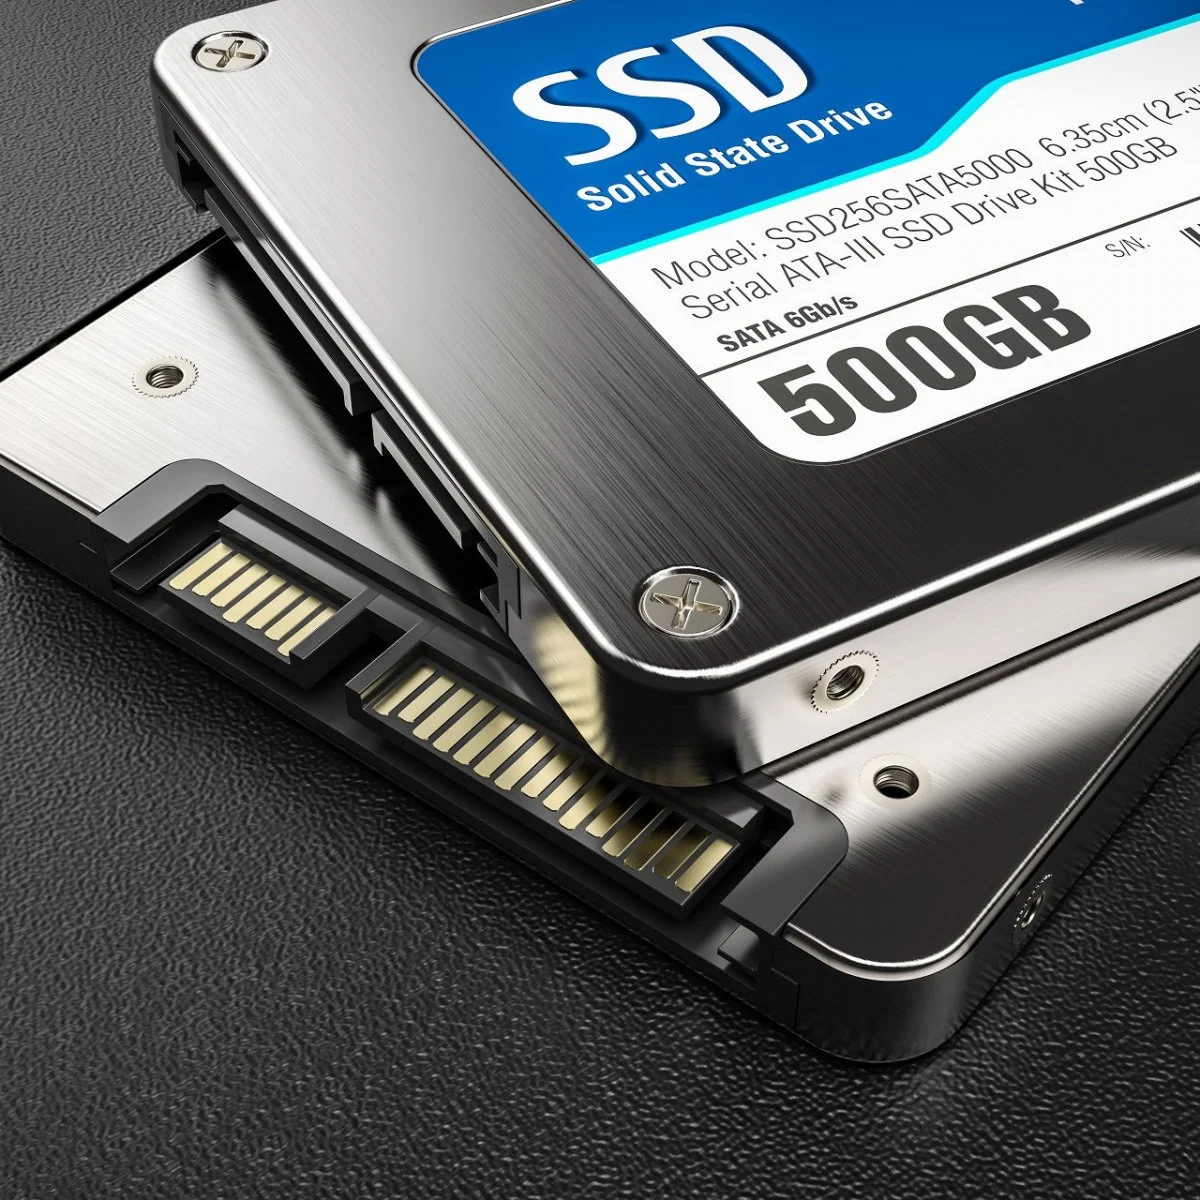
Welcome to the world of solid-state drives (SSDs), the modern storage solution that offers faster speeds and improved performance compared to traditional hard disk drives (HDDs). If you’re using Windows 10, you have the opportunity to further optimize your SSD to maximize its potential.
SSDs use flash memory to store data, allowing for quicker access times and faster transfer speeds. However, they require different optimization techniques compared to HDDs. Windows 10 provides several built-in features and settings that can help you unlock the full potential of your SSD.
In this article, we will explore various optimization methods that you can apply to your SSD on a Windows 10 system. These methods will not only enhance the performance of your SSD but also prolong its lifespan, ensuring you get the most out of your investment.
Whether you’re a gamer looking for faster load times, a content creator in need of snappy file transfers, or a general user seeking a smoother computing experience, optimizing your SSD can greatly improve your overall system performance.
So, let’s dive in and discover the top ten ways to optimize your SSD for Windows 10!
Understanding SSDs and Windows 10 Optimization
Before we delve into the specific methods for optimizing your SSD, it’s important to understand a few key concepts about SSDs and how they interact with Windows 10.
First and foremost, SSDs use a different technology than traditional HDDs. Instead of mechanical spinning disks, SSDs rely on flash memory to store and retrieve data. This means they have no moving parts, resulting in faster access times and lower power consumption.
However, SSDs have a limited number of write cycles. Each time data is written to an SSD, it gradually wears out the memory cells. To address this, SSDs employ a technique called wear leveling, where data is spread evenly across the drive to prevent certain cells from wearing out faster than others. This helps to prolong the lifespan of the SSD.
Windows 10 includes built-in features and settings specifically designed to optimize SSD usage. By enabling these features and making a few adjustments, you can maximize the performance and lifespan of your SSD.
Now that we have a basic understanding of SSDs and their relationship with Windows 10, let’s explore the ten optimization methods that will help you get the most out of your SSD.
Enable TRIM
TRIM is a feature supported by both SSDs and the Windows operating system that helps maintain optimal performance and longevity of the drive. When enabled, TRIM ensures that the SSD’s memory cells are quickly cleared of previously stored data that is no longer in use.
By enabling TRIM, you allow the operating system to inform the SSD which blocks of data are no longer needed and can be erased. This helps to minimize write amplification, a process that can negatively impact SSD performance over time.
To enable TRIM in Windows 10, follow these steps:
- Open the Start menu and type “Command Prompt.”
- Right-click on the Command Prompt app and select “Run as administrator.”
- In the Command Prompt window, type the following command and hit Enter:
fsutil behavior set DisableDeleteNotify 0 - Restart your computer to apply the changes.
Once TRIM is enabled, your SSD will be able to efficiently manage its memory cells, reducing performance degradation and prolonging the lifespan of the drive.
It’s important to note that TRIM requires both the SSD and the operating system to support the feature. Most modern SSDs and Windows 10 already have TRIM support, but it’s always a good idea to check the manufacturer’s documentation and ensure that TRIM is supported and enabled on your specific SSD.
Enabling TRIM is a crucial step in optimizing your SSD, as it allows for better data management and maintenance, resulting in improved performance and increased longevity of your drive.
Disable Superfetch
Superfetch is a feature in Windows 10 that analyzes your usage patterns and preloads frequently accessed data into memory. While this feature can be beneficial for HDDs, it can have a negative impact on SSD performance.
When Superfetch is enabled, it continuously reads and writes data on the SSD, causing unnecessary wear and tear on the drive. SSDs are already highly efficient in accessing data quickly, so the benefits of Superfetch are minimal.
Disabling Superfetch can help reduce unnecessary disk activity and improve the overall performance of your SSD. Here’s how to disable Superfetch:
- Open the Start menu and type “services.msc”.
- Press Enter to open the Services window.
- Scroll down and locate “Superfetch” in the list of services.
- Right-click on Superfetch and choose “Properties”.
- In the Properties window, under the General tab, change the Startup type to “Disabled”.
- Click “Apply” and then “OK” to save the changes.
After disabling Superfetch, your SSD will experience fewer unnecessary read and write operations, resulting in improved overall performance and potentially extending the lifespan of your drive.
Remember that disabling Superfetch does not affect the functionality of your system. Windows 10 will still operate smoothly, and you’ll notice a positive impact on your SSD’s performance.
It’s worth mentioning that Superfetch is different from the Windows Disk Defragmenter. Defragmenting an SSD is not recommended as it can cause unnecessary wear on the drive. SSDs perform best when they have free space to allocate data in a way that minimizes write amplification.
By disabling Superfetch, you can optimize your SSD’s performance and ensure a longer lifespan for your drive.
Disable Drive Indexing
Drive indexing is a feature in Windows 10 that creates an index of files on your hard drive, allowing for faster file searches. While this feature can be beneficial for HDDs, it can be unnecessary for SSDs since they already offer faster file access times.
By disabling drive indexing on your SSD, you can reduce unnecessary read and write activity, which can help to improve overall performance and minimize wear and tear on the drive.
Here’s how to disable drive indexing:
- Open File Explorer and right-click on the SSD drive you want to disable indexing for.
- Select “Properties” from the drop-down menu.
- In the Properties window, under the General tab, uncheck the box that says “Allow files on this drive to have contents indexed.”
- Click “Apply” and then “OK” to save the changes.
Disabling indexing may result in slightly longer file search times, but the trade-off is improved performance and potentially longer SSD lifespan.
It’s important to note that drive indexing can be beneficial for HDDs, so if you have both an SSD and an HDD in your system, you can choose to disable indexing only for your SSD.
By disabling drive indexing for your SSD, you can optimize its performance and reduce unnecessary disk activity. This simple tweak will help your SSD operate more efficiently, enhancing your overall computing experience.
Disable Prefetching
Prefetching is a feature in Windows 10 that tries to predict which applications and files you will access next and preloads them into memory for faster access. While this feature can be useful for HDDs, it can result in unnecessary disk activity and reduced performance for SSDs.
Disabling prefetching can help reduce the amount of unnecessary data being read and written to your SSD, which can improve overall performance and minimize wear on the drive.
To disable prefetching, follow these steps:
- Open the Start menu and type “regedit”. Press Enter to open the Registry Editor.
- Navigate to the following key:
HKEY_LOCAL_MACHINE\SYSTEM\CurrentControlSet\Control\Session Manager\Memory Management\PrefetchParameters - On the right side of the window, double-click on “EnablePrefetcher” and change its value to 0 (zero).
- Next, double-click on “EnableSuperfetch” and change its value to 0 (zero).
- Click “OK” to save the changes.
- Restart your computer for the changes to take effect.
Once prefetching is disabled, your SSD will experience reduced unnecessary read and write operations, resulting in improved overall performance and potentially extending the lifespan of your drive.
It is important to note that disabling prefetching may lead to slightly longer load times for applications and files that are not frequently accessed. However, the performance benefits of disabling prefetching on an SSD outweigh the minimal impact on load times.
By disabling prefetching, you can optimize your SSD’s performance and reduce unnecessary disk activity, allowing your drive to operate more efficiently and improving your overall computing experience.
Optimize System Settings
In addition to specific features and settings, there are general system settings you can optimize to further enhance the performance of your SSD on Windows 10.
Here are a few system settings to consider:
- Disable visual effects: Windows 10 comes with various visual effects that can consume system resources. By disabling or minimizing these effects, you can free up resources and improve overall system performance. To access the visual effects settings, right-click on the Start button, select “System,” then click on “Advanced system settings,” navigate to the “Advanced” tab, and click on “Settings” under the “Performance” section.
- Adjust power settings: Windows 10 power plans can affect the performance of your SSD. It is recommended to use the “High Performance” power plan to ensure optimal performance. To change the power plan, right-click on the battery icon in the taskbar, select “Power Options,” and choose the “High Performance” plan.
- Disable unnecessary startup programs: Having too many programs launching at startup can slow down your system boot time and consume system resources. Navigate to the Task Manager (Ctrl + Shift + Esc), go to the “Startup” tab, and disable any unnecessary programs from starting up with your system.
- Keep your system and drivers up to date: Regularly updating Windows 10 and your device drivers is crucial for optimal performance and stability. Windows updates often include bug fixes and performance improvements, while updated device drivers ensure compatibility and functionality with your SSD.
By optimizing these system settings, you can further maximize the performance of your SSD on Windows 10. These adjustments help reduce resource consumption, improve overall system responsiveness, and create a smoother computing experience.
Remember to periodically review and adjust these settings based on your specific needs and hardware configuration. Optimizing system settings in combination with other SSD optimization techniques will result in a well-tuned and efficient system.
Disable Hibernation
Hibernation is a feature in Windows 10 that allows your computer to save the current state of your system to the hard drive before shutting down. While hibernation can be useful for conserving energy and quickly resuming your work, it can take up a significant amount of space on your SSD.
Disabling hibernation can help free up valuable disk space and reduce unnecessary write operations on your SSD, improving overall performance and potentially extending the lifespan of your drive.
Here’s how to disable hibernation:
- Open the Command Prompt as an administrator. You can do this by right-clicking on the Start button and selecting “Command Prompt (Admin)”.
- In the Command Prompt window, type the following command and press Enter:
powercfg.exe /hibernate off - Close the Command Prompt window.
Once hibernation is disabled, you will notice increased available disk space on your SSD, and your computer will no longer use hibernation as a shutdown option.
It’s important to note that disabling hibernation will also disable the “Hibernate” option in the power menu. Instead, your computer will go into sleep mode when you choose to shut it down.
If you rarely use hibernation and are looking to optimize your SSD’s performance and free up disk space, disabling hibernation is a recommended step. However, if you frequently rely on hibernation to save your work and resume it quickly, it may be best to leave this feature enabled.
By disabling hibernation, you can optimize your SSD’s performance, utilize disk space more efficiently, and ensure a smoother computing experience.
Adjust Power Plan Settings
Windows 10 power plans can have a significant impact on the performance and energy consumption of your system, including your SSD. By adjusting the power plan settings, you can optimize your SSD’s performance and balance it with energy efficiency.
Here are a few power plan settings to consider:
- Choose the “High Performance” power plan: The “High Performance” power plan is designed to provide maximum performance, making it an ideal choice for optimizing your SSD. To change the power plan, right-click on the battery icon in the taskbar, select “Power Options,” and choose the “High Performance” plan.
- Adjust the advanced power settings: Within each power plan, you can further customize the power settings to fine-tune your SSD’s performance. To access the advanced power settings, click on “Change plan settings” next to your chosen power plan, then click on “Change advanced power settings.” Here, you can adjust settings such as “Hard disk” and “PCI Express” to ensure they are optimized for performance rather than energy savings.
- Disable USB selective suspend: USB selective suspend is a feature that allows Windows to power down specific USB ports to conserve energy. However, this feature can cause delays when accessing USB devices connected to your SSD. To disable USB selective suspend, go to the advanced power settings, expand the “USB settings” category, and set the “USB selective suspend setting” to “Disabled.”
By adjusting power plan settings, you can ensure that your SSD receives the necessary power and resources to operate at its optimal performance level. This will result in improved system responsiveness and faster access to your data.
Remember to strike a balance between maximizing performance and conserving energy. While the “High Performance” power plan provides the best performance, it may consume more power than other plans, so consider your specific needs when choosing a power plan.
By fine-tuning the power plan settings, you can optimize your SSD’s performance and balance it with energy efficiency, ensuring a smooth and efficient computing experience.
Disable System Restore
System Restore is a feature in Windows 10 that allows you to revert your system to a previous state if any issues occur. While System Restore can be a lifesaver in certain situations, it can also consume valuable disk space on your SSD.
Disabling System Restore can help free up disk space on your SSD and reduce unnecessary write operations, further optimizing its performance.
Here’s how to disable System Restore:
- Open the Start menu and type “System Protection.”
- Click on “Create a restore point” from the search results.
- In the System Properties window, under the System Protection tab, select your SSD drive and click on the “Configure” button.
- Select the “Disable system protection” option and click on “Apply.”
- Click on “OK” to save the changes.
Once System Restore is disabled, your computer will no longer create restore points or use disk space for this purpose.
It’s important to note that disabling System Restore means you will no longer have the option to restore your system to a previous state using this feature. However, you can still utilize other backup and recovery methods to safeguard your data.
If you regularly perform backups or use alternative methods for system restoration, disabling System Restore can help optimize your SSD’s performance by freeing up disk space and reducing unnecessary write operations.
By disabling System Restore, you can further optimize your SSD’s performance and ensure efficient usage of disk space, resulting in a smoother computing experience.
Use AHCI Mode
AHCI (Advanced Host Controller Interface) mode is a modern storage controller mode that provides enhanced features and performance for SATA (Serial ATA) devices, including SSDs. By enabling AHCI mode for your SSD, you can take full advantage of its capabilities and optimize its performance on Windows 10.
Here’s how to enable AHCI mode:
- Press Win + R to open the Run dialog box.
- Type “regedit” and press Enter to open the Registry Editor.
- Navigate to the following key:
HKEY_LOCAL_MACHINE\System\CurrentControlSet\Services\storahci\StartOverride - Double-click on the “StartOverride” value on the right side of the window.
- Change the value data from “3” to “0” and click OK.
- Restart your computer to apply the changes.
Once your SSD is in AHCI mode, it will be able to utilize advanced features such as Native Command Queuing (NCQ) and hot-swapping, resulting in improved performance and better compatibility with your system.
It’s important to note that changing your SSD from IDE mode to AHCI mode requires careful steps to avoid system instability. Before proceeding with the change, it’s recommended to back up your important data and create a system restore point as a precautionary measure.
By enabling AHCI mode for your SSD, you can maximize its performance, take advantage of advanced features, and ensure compatibility with your Windows 10 system.
Keep Your SSD Firmware Up to Date
SSD manufacturers regularly release firmware updates that provide bug fixes, performance improvements, and other enhancements. Keeping your SSD firmware up to date is crucial for maintaining optimal performance and ensuring compatibility with your Windows 10 system.
Firmware updates can address issues such as performance degradation, compatibility with new technologies, and security vulnerabilities. By keeping your SSD firmware up to date, you can ensure that your drive operates at its best and takes advantage of the latest features and improvements.
To update your SSD firmware, follow these general steps:
- Visit the website of your SSD manufacturer or check for updates using their software utility (if available).
- Search for the latest firmware update specifically designed for your SSD model.
- Download the firmware update and follow the manufacturer’s instructions for installation.
- Ensure that your computer is connected to a reliable power source and avoid interrupting the firmware update process.
- After the firmware update is complete, restart your computer to apply the changes.
It’s important to note that firmware updates can vary depending on the manufacturer and model of your SSD. Therefore, it’s crucial to carefully read and follow the instructions provided by the manufacturer to avoid any potential issues.
By keeping your SSD firmware up to date, you can optimize its performance, address potential issues, and ensure compatibility with your Windows 10 system. Regular firmware updates are essential for maintaining the longevity and functionality of your SSD.
Conclusion
Optimizing your SSD for Windows 10 can significantly enhance its performance, improve system responsiveness, and extend its lifespan. By following the ten methods outlined in this guide, you can unlock the full potential of your SSD and enjoy a faster, more efficient computing experience.
From enabling TRIM and disabling features like Superfetch and prefetching to adjusting power plan settings and keeping your SSD firmware up to date, these optimizations help to reduce unnecessary disk activity, minimize wear and tear, and ensure efficient utilization of resources.
While each method provides its own benefits, it’s important to take a holistic approach to SSD optimization. By implementing multiple techniques in combination, you can maximize the performance and longevity of your SSD.
Remember to always back up your important data and create system restore points before making any significant changes to your settings or firmware. This ensures that you have a safety net in case anything goes wrong during the optimization process.
Whether you’re a gamer seeking faster load times, a content creator in need of snappy file transfers, or a general user looking for an overall smoother computing experience, optimizing your SSD for Windows 10 is a worthwhile endeavor.
Take the time to implement these optimization methods and enjoy the benefits of a fully optimized SSD. Your system will thank you with improved performance, faster access to data, and an extended lifespan for your SSD.