Introduction
Installing games on a solid-state drive (SSD) has become increasingly popular among gaming enthusiasts. An SSD offers faster loading times, improved performance, and smoother gameplay compared to traditional hard drives. This article will guide you through the process of installing games on an SSD, ensuring that you can fully utilize its capabilities for an enhanced gaming experience.
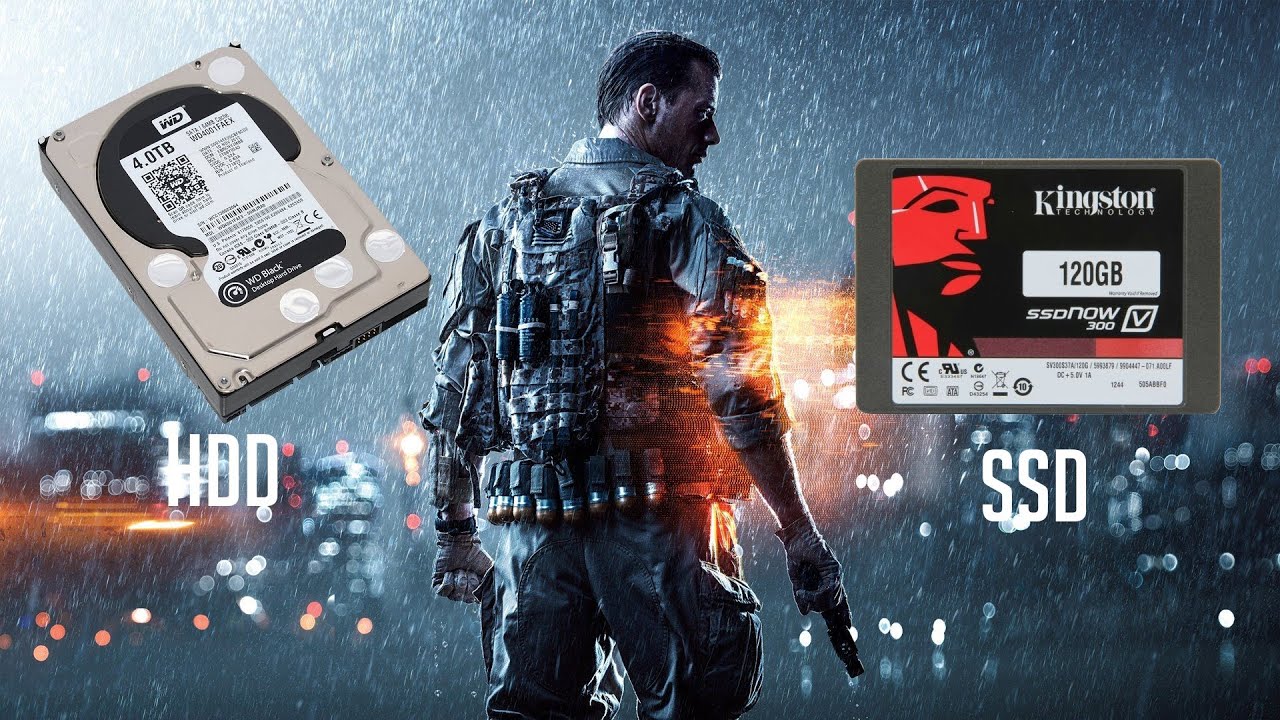
As technology advances, games have become more graphics-intensive and require substantial storage space. Running these games from an SSD can significantly improve their performance, reducing load times and lag during gameplay. In addition, the faster read and write speeds of an SSD can minimize stuttering and reduce the time spent waiting for the game to load or save data.
Before diving into the installation process, it is important to check if your system is compatible with an SSD. Most modern computers have SATA III ports that support SSDs, but older systems may only have SATA II ports. Confirming compatibility ensures that your SSD can function optimally with your hardware.
Once you have confirmed compatibility, the next step is to prepare your SSD. This involves backing up any important data currently stored on the SSD, as the installation process will format the drive and erase all existing data. Taking this precautionary step will prevent any loss of important files.
Another aspect to consider is the available space on your SSD. Games can take up a significant amount of storage space, so it is essential to ensure that the SSD has enough capacity to accommodate your desired games. If necessary, you may need to upgrade to a larger SSD or use a combination of SSD and traditional hard drives to create a hybrid storage setup.
Installing the SSD itself is a straightforward process. You need to open your computer case, locate an available drive bay, and connect the SSD using the provided cables. After physically installing the SSD, you will need to format it using your computer’s operating system to prepare it for use.
To install games on your SSD, you will need to have the required software available. This includes the game installation files themselves, as well as any necessary gaming platforms or launchers. You can either download these files from online platforms or use physical installation media, such as DVDs or USB drives.
Once you have the necessary software, select the installation location for your games. You can choose to install them directly on the SSD or create a specific folder for game installations. This will depend on your preference and available storage space on the SSD.
After selecting the installation location, you can begin installing the games. Follow the prompts provided by the game installation wizard, and the games will be installed on your SSD. Once the installation is complete, you can launch and enjoy your games with improved speed and performance.
Remember to optimize the game settings to maximize the benefits of running games on an SSD. Adjusting graphics settings, enabling features like V-Sync or anti-aliasing, and ensuring that the game is running in fullscreen mode can further enhance your gaming experience on an SSD.
By following these steps, you can take full advantage of the benefits an SSD offers for gaming. Faster load times, improved performance, and smoother gameplay await as you install your favorite games on an SSD. So, let’s begin the process and elevate your gaming experience to new heights!
Why Install Games on an SSD?
Installing games on a solid-state drive (SSD) has numerous advantages that greatly enhance your gaming experience. Here are the key reasons why you should consider installing games on an SSD:
1. Faster Loading Times: One of the most noticeable benefits of running games on an SSD is significantly reduced loading times. Games installed on traditional hard drives can take a considerable amount of time to load, leading to frustrating delays. With an SSD, games load much faster, allowing you to jump into the action without unnecessary waiting.
2. Improved Performance: SSDs offer faster data transfer speeds and read/write operations compared to traditional hard drives. This translates to smoother gameplay, reduced stuttering, and more seamless transitions between game scenes. As a result, you can enjoy a more immersive gaming experience with improved responsiveness.
3. Reduced Lag: Lag can be a major hindrance while gaming, especially in online multiplayer games. By installing games on an SSD, you can minimize lag and latency issues. The faster data access and processing speed of an SSD contribute to smoother online gameplay, reducing the frustrations associated with lag spikes.
4. Quick Saves and Loading Saves: Saving and loading game progress is much faster on an SSD. Whether it’s saving your game midway through a level or reloading a previous save file, SSDs expedite these processes, allowing you to seamlessly resume your gaming sessions.
5. Better Level Streaming: Some games employ a technique known as level streaming, where the game loads data for the current level while simultaneously unloading data from the previous level. SSDs excel in handling level streaming, as they can quickly read the necessary data, resulting in smoother transitions between levels and a more immersive gaming experience.
6. Minimal Noise and Vibrations: Unlike traditional hard drives that contain spinning disks and mechanical parts, SSDs have no moving components. This means they operate silently and do not produce any vibrations. By installing games on an SSD, you can enjoy a quieter and more peaceful gaming environment.
7. Extended Lifespan: SSDs have a longer lifespan compared to traditional hard drives. The absence of moving parts reduces the risk of mechanical failure, making SSDs more durable and reliable over time. Installing games on an SSD can, therefore, help extend the lifespan of your gaming storage solution.
Overall, installing games on an SSD is a game-changer for any gamer seeking enhanced performance and a seamless gaming experience. With faster loading times, improved game responsiveness, reduced lag, and smoother level transitions, you can fully immerse yourself in your favorite games without any unnecessary interruptions. Upgrade your gaming setup with an SSD today and unlock the true potential of your gaming rig!
Check SSD Compatibility
Before diving into the installation process, it is crucial to ensure that your system is compatible with an SSD. Here are the key steps to check SSD compatibility:
1. SATA Support: The first thing to verify is whether your computer supports Serial ATA (SATA) connections. Most modern computers have SATA III ports, which are backward compatible with SATA II and SATA I. Check your motherboard’s specifications or consult the manufacturer’s documentation to confirm the SATA version.
2. Available Drive Bays: Identify if your computer has available drive bays to physically install the SSD. Check the internal configuration of your computer and ensure that there is a free space to mount the SSD securely.
3. Power Connection: Verify if your power supply unit (PSU) has the necessary power connectors for the SSD. Most SSDs use SATA power connectors, which are standard in modern PSUs. If your PSU doesn’t have the required connectors, you may need to consider using adapter cables or upgrading your PSU.
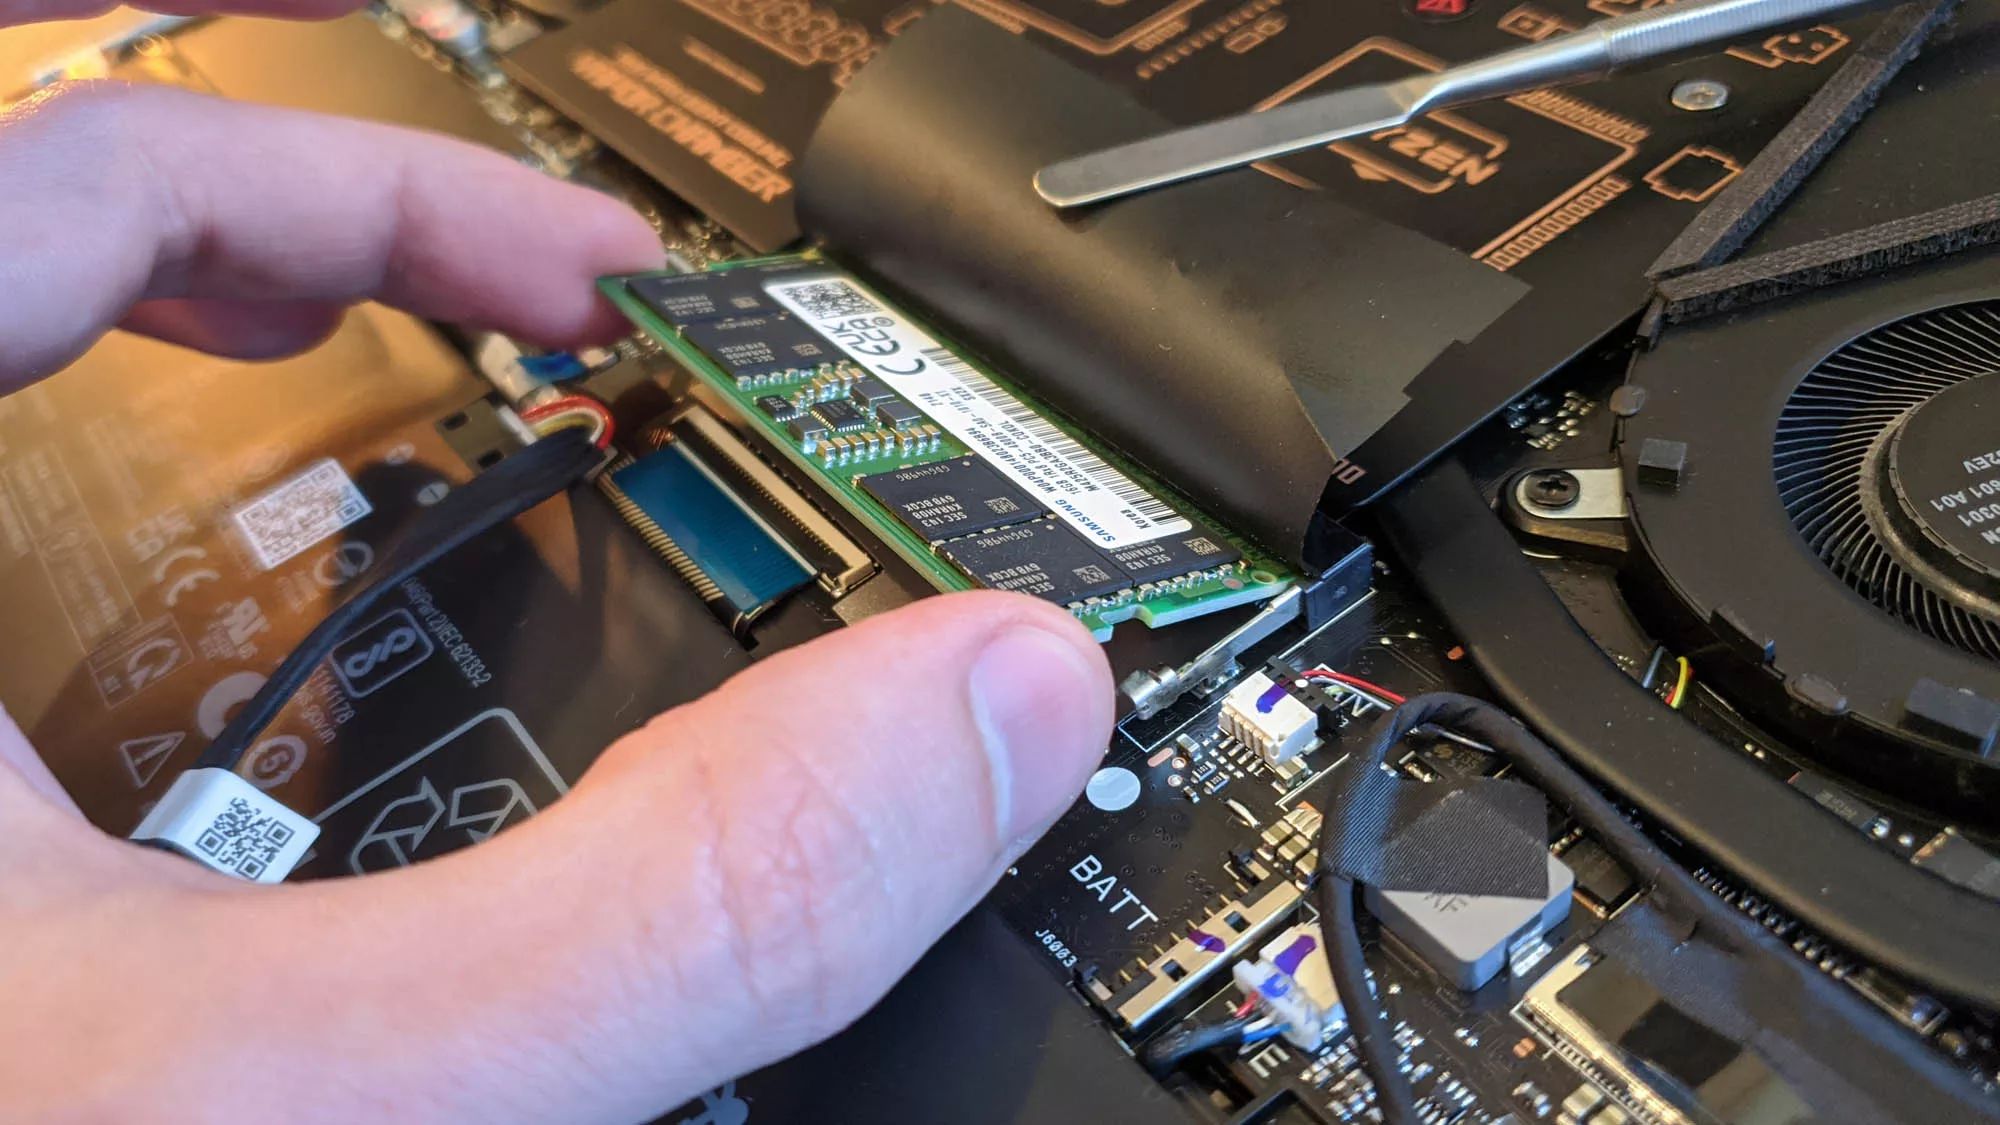
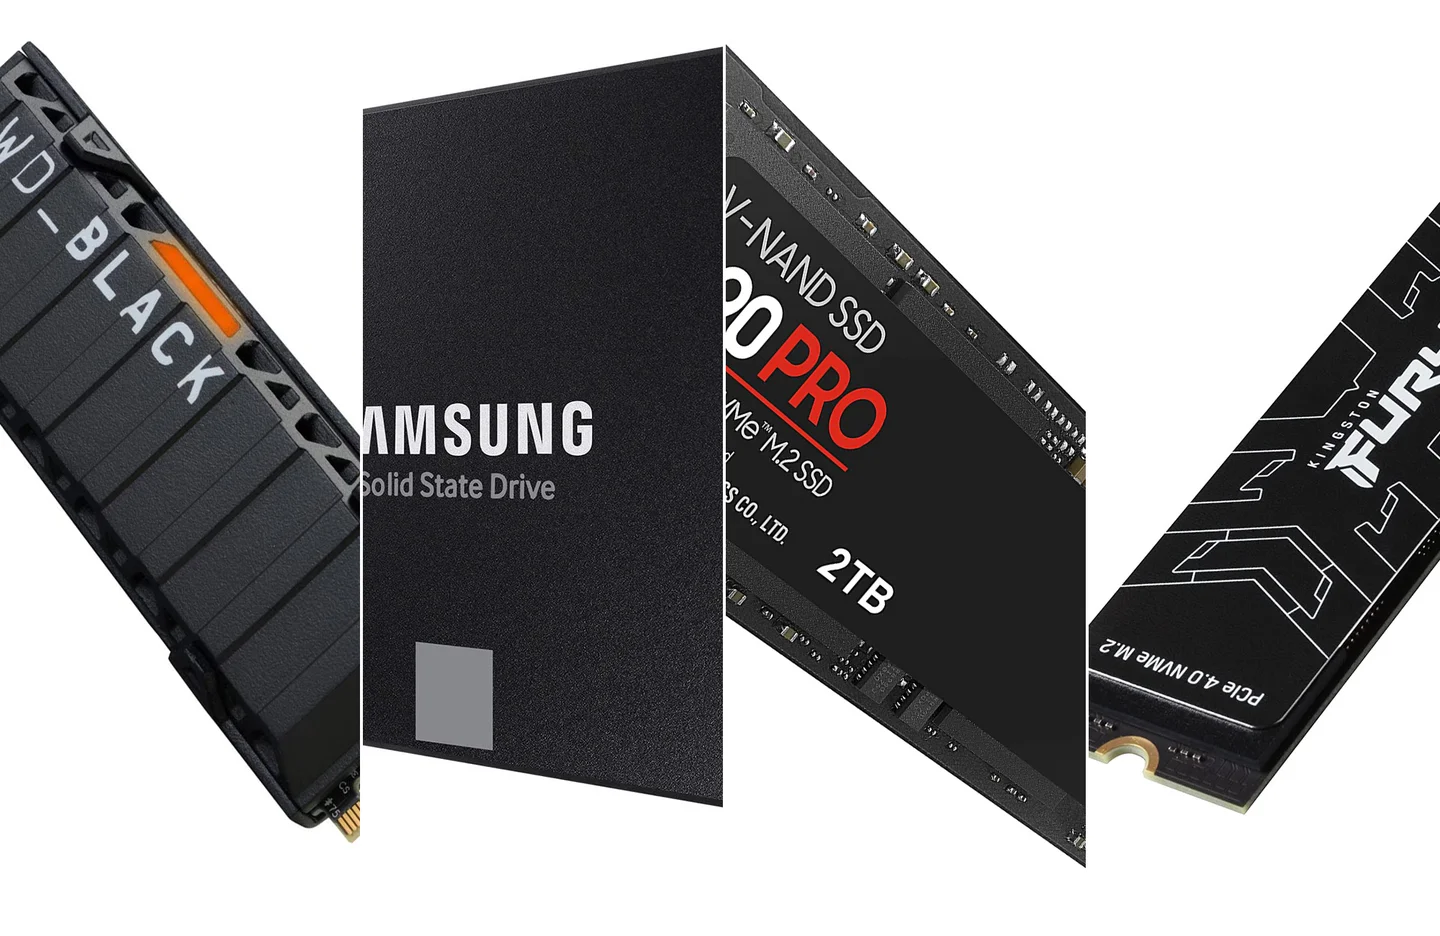
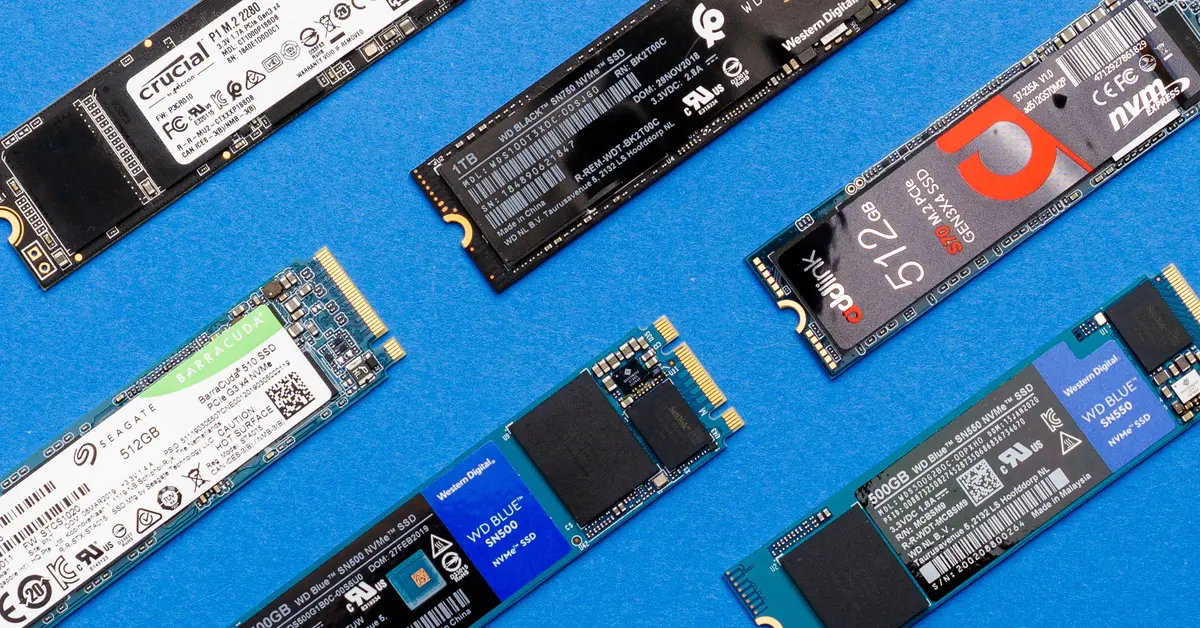
4. Form Factor: SSDs come in different form factors, such as 2.5 inches, M.2, or PCIe cards. Ensure that the SSD you plan to install is compatible with the available slots or drive bays in your computer. Check the specifications of your motherboard or consult the manufacturer’s documentation for information on supported form factors.
5. Operating System Compatibility: Confirm that your operating system (OS) supports the SSD you intend to install. Nearly all modern OS versions, including Windows, macOS, and Linux, have built-in support for SSDs. However, it is still advisable to check the system requirements of your OS and ensure compatibility.
6. BIOS/UEFI: Check if your computer’s BIOS/UEFI firmware supports booting from an SSD. This will allow you to install the OS on the SSD and take full advantage of its performance benefits. Enter the BIOS/UEFI settings during the computer startup process and navigate to the boot options to verify SSD boot support.
By conducting these compatibility checks, you can ensure that your system is ready for an SSD installation. Keep in mind that if your computer does not meet the necessary criteria, you may need to upgrade certain components or consider alternative storage options.
Additionally, it is important to note that while most modern laptops and desktops support SSD installations, some older systems may have limitations. In such cases, consult with a professional or refer to the manufacturer’s documentation for further assistance.
Now that you have confirmed the compatibility of your system, you can proceed with the preparation and installation of your SSD. It’s time to unlock the true potential of your gaming experience with improved speed, performance, and efficiency!
Prepare Your SSD
Before installing games on your solid-state drive (SSD), it is essential to properly prepare the drive to ensure a smooth installation process. Follow these steps to prepare your SSD:
1. Back Up Existing Data: Before proceeding with any changes to your SSD, it is vital to back up any important data that is currently stored on the drive. The installation process will require formatting the SSD, which will erase all existing data. By creating a backup, you can ensure that no valuable files are lost.
2. Disconnect Power and Data Cables: If your computer is already powered on, shut it down and unplug it from the power source. Open the computer case and locate the SSD, then disconnect both the power and data cables connected to the SSD. This step ensures that there are no active connections or potential data transfers during the preparation process.
3. Ground Yourself: Before handling the SSD, make sure to ground yourself by touching a grounded object or wearing an anti-static wristband. This prevents any static electricity from damaging the SSD or other components.
4. Inspect the SSD: Take a moment to visually inspect the SSD for any physical damage or defects. Ensure that there are no visible signs of wear or components that have come loose during transport or storage. If you notice any issues, contact the manufacturer for guidance.
5. Orientation and Mounting: Identify the correct orientation for installing the SSD in your computer. Most SSDs have screw holes that align with the mounting brackets or slots within the computer case. Follow the manufacturer’s instructions or consult the computer’s manual for specific guidance on mounting your SSD securely.
6. Secure the SSD: Once you have determined the appropriate mounting position, carefully secure the SSD in place using screws or other fastening mechanisms. Make sure the SSD is firmly seated and properly aligned to ensure a secure connection.
7. Connect Power and Data Cables: Reconnect the power and data cables to the SSD. Ensure that the power cable is securely connected to the power supply unit (PSU) and the data cable is plugged into the appropriate SATA port on the motherboard. Double-check the connections to avoid any loose or improperly seated cables.
8. Close the Computer Case: Carefully close the computer case, ensuring that all screws or latches are tightened to secure the case. This step helps protect your components from dust, debris, and other external factors that may affect their performance.
Preparing your SSD prior to installing games on it ensures a clean and optimized foundation for your gaming storage. With the SSD securely mounted and connected, you’re now ready to move on to the next steps of the installation process. So let’s proceed to the next stage and unlock the full potential of your gaming experience with an SSD!
Backup Games
Before proceeding with the installation of games on your solid-state drive (SSD), it is crucial to back up your existing games. This backup ensures that you have a copy of your games in case anything goes wrong during the installation process. Follow these steps to back up your games:
1. Identify Game Installation Locations: Determine where your games are currently installed. They are typically located in the “Program Files” or “Program Files (x86)” directory on your primary hard drive. However, some games may be installed in custom directories or on different drives, so it is important to verify the installation paths.
2. Create a Backup Folder: Choose a location on your computer or an external storage device where you will create a backup folder for your games. This folder will serve as a temporary storage space for your game files.
3. Copy Game Files: Locate the installation folders of each game you want to back up, and copy the entire folder to the backup destination. This ensures that all game files, including executable files, configuration files, and saved game data, are included in the backup.
4. Organize Backup Folder: Once all the game files are copied to the backup folder, consider organizing the files for easier management. Create subfolders for each game and label them accordingly. This will make it easier to locate specific games when restoring the backup files.
5. Verify Backup: After copying the game files, verify that the backup was successful. Double-check that all necessary files and folders are present and intact in the backup location. This step ensures that you have a reliable backup in case you need to restore your games.
6. Test Restoration: To further ensure the integrity of your backup, choose one game from the backup and restore it to its original location on your primary hard drive. Launch the game from the restored files to confirm that it runs correctly. This test helps identify any issues with the backup and allows you to address them before proceeding with the installation on the SSD.
7. External Storage Option: As an alternative or additional precaution, you can consider creating a backup of your games on an external storage device, such as a USB drive or an external hard drive. This provides an extra layer of security and allows for easy restoration in case of a system failure or SSD installation complications.
By following these steps, you can confidently proceed with the installation of games on your SSD, knowing that you have a backup of your precious game files. In the event of any unforeseen issues during the installation process, you can restore your games from the backup and continue your gaming experience seamlessly.
Take the time to ensure that your backups are up-to-date and regularly create new backups as you install or update games. This practice safeguards your game progress and prevents any potential data loss. Now that your games are safely backed up, you can proceed to the next steps and install them on your SSD for an enhanced gaming experience.
Consider Available Space
When preparing to install games on your solid-state drive (SSD), it is essential to consider the available space on the drive. SSDs come in various capacities, and depending on the size of your game library, you may need to assess whether your SSD can accommodate all your games. Here are some important factors to consider when evaluating available space:
1. Determine Game Sizes: Assess the sizes of the games you wish to install on the SSD. Game file sizes can range from a few gigabytes to over 100 gigabytes, depending on the complexity and graphics requirements. Take note of the space each game occupies so that you can estimate the total storage necessary.
2. Consider the SSD Capacity: Check the capacity of your SSD to determine how much available space you have. Keep in mind that SSDs operate most efficiently when they are not filled to maximum capacity. To ensure optimal performance, it is advisable to leave at least 10-20% of the SSD’s capacity free.
3. Prioritize Favorite Games: Identify your most frequently played or favorite games that would benefit the most from the speed and performance improvements of an SSD. By prioritizing these games for installation on the SSD, you can optimize the available space for the titles that matter most to you.
4. Consider Game Updates and DLCs: Take into account the need for future game updates and downloadable content (DLCs). These additional files can increase the overall space requirements for each game. Allocate sufficient space on the SSD to accommodate these updates and DLCs, if possible.
5. External Storage Options: If you find that your SSD does not have enough space to install all your desired games, consider using external storage options. External hard drives or USB 3.0 flash drives can provide additional space for storing less frequently played games or archiving games that you don’t currently play.
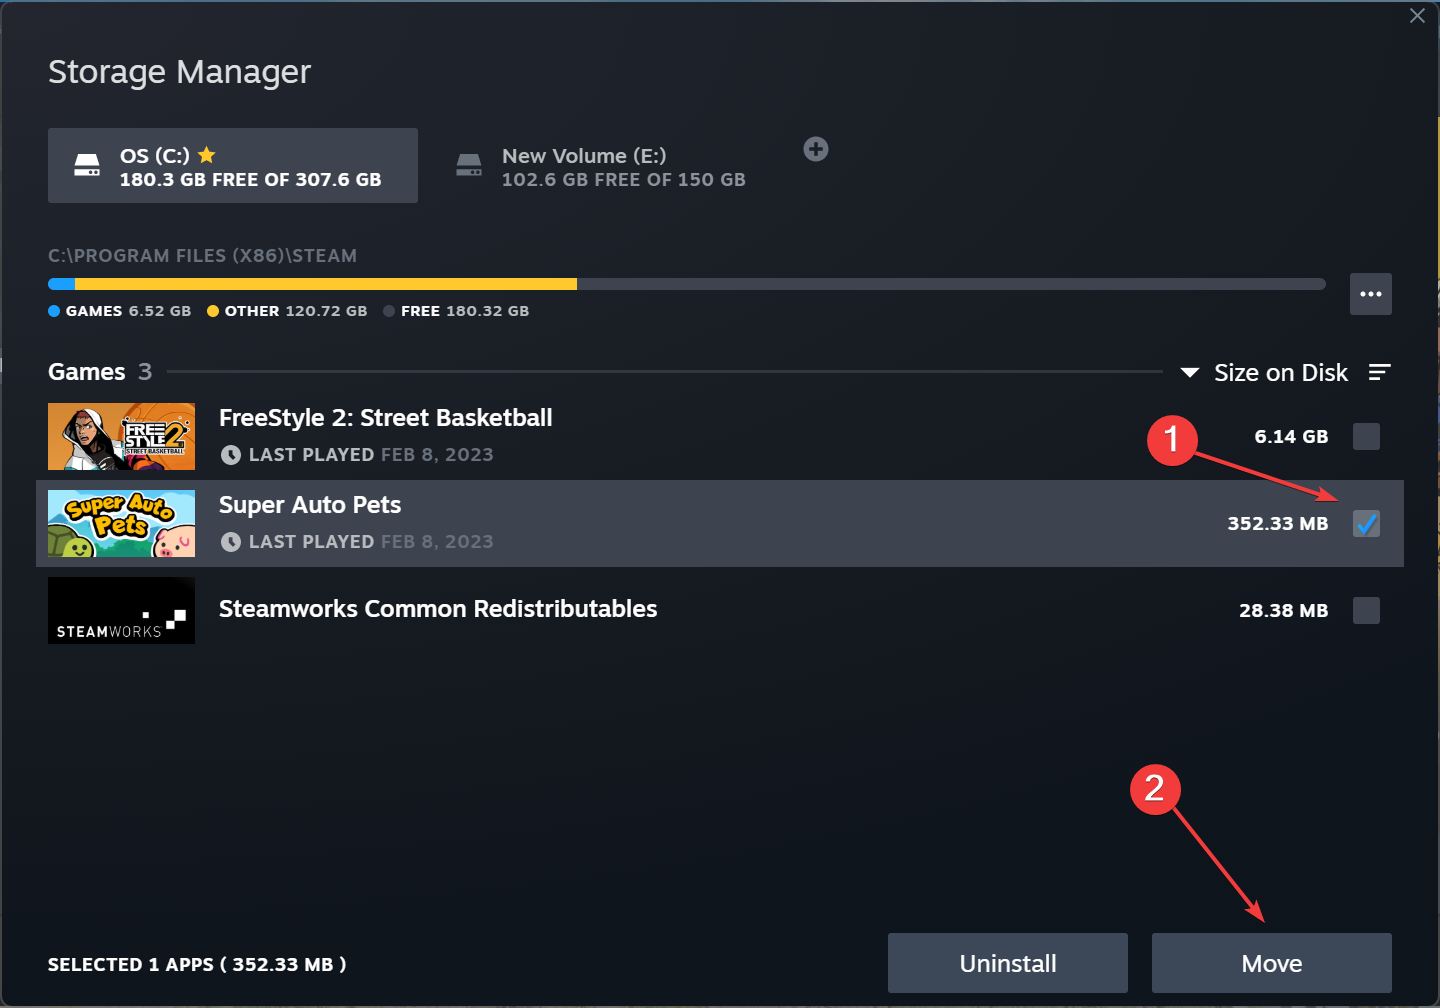
6. Game Removal and Reinstallation: If you run out of space on your SSD and need to install new games, consider removing less frequently played games from the SSD. You can uninstall them from the SSD but keep the game files so that you can reinstall them later when you want to play them again.
7. Regular Space Management: Make it a habit to regularly monitor the space usage on your SSD. Remove any unnecessary or unused game files to free up space. This practice ensures that you can install new games or updates without running into space constraints.
By considering available space, you can effectively manage your game library and optimize the use of your SSD for the best gaming experience. Assessing game sizes, prioritizing favorites, and exploring external storage options can help you make informed decisions concerning installing games on the SSD. This way, you can strike a balance between performance and storage capacity, maximizing the benefits of your solid-state drive in gaming.
Install the SSD
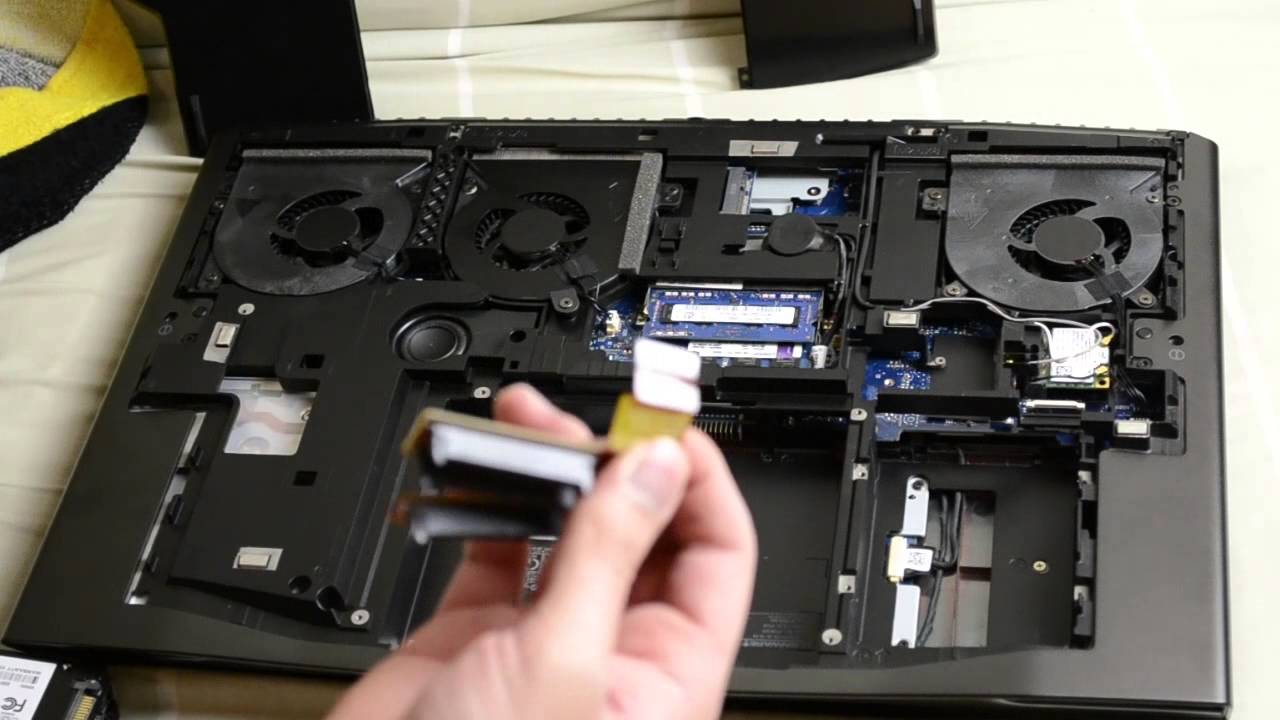
Installing the solid-state drive (SSD) is a crucial step in the process of upgrading your gaming setup. Follow these steps to properly install the SSD in your computer:
1. Power Off and Unplug: Ensure that your computer is powered off and unplugged from the power source. This precautionary measure protects both you and the computer from any potential electrical hazards.
2. Open the Computer Case: Depending on the type of computer you have, you may need to remove screws or latches to open the computer case. Refer to the manufacturer”s instructions or consult online resources for guidance on opening your specific computer model.
3. Identify an Available Drive Bay: Locate an available drive bay where you can mount the SSD. This bay is typically found inside the computer case and is specifically designed to hold storage devices securely. Depending on your computer”s configuration, the drive bay may be in different positions, so consult your computer”s manual if needed.
4. Prepare the Mounting Bracket: Some SSDs may require a mounting bracket, while others have built-in mounting holes. If your SSD requires a bracket, secure it to the SSD following the manufacturer”s instructions. Ensure that the bracket aligns with the mounting holes on the SSD.
5. Secure the SSD in the Drive Bay: Carefully place the SSD in the chosen drive bay, aligning the mounting holes on the SSD with the holes or guides in the bay. Use screws or other fastening mechanisms to securely attach the SSD to the bay. Tighten the screws just enough to hold the SSD in place without over-tightening.
6. Connect the Power Cable: Locate the SATA power cable from your power supply unit (PSU). Connect one end of the cable to the SSD”s power port. Ensure that the connection is secure.
7. Connect the Data Cable: Locate a SATA data cable, typically included with your motherboard or SSD. Connect one end of the data cable to the SSD”s data port and the other end to an available SATA port on the motherboard. Make sure the connection is firmly seated on both ends.
8. Check Connections: Double-check all connections, including the power and data cables, to ensure they are secure and properly connected. Loose connections can cause performance issues or prevent the SSD from functioning correctly.
9. Close the Computer Case: Once all connections are verified, carefully close the computer case. Align the edges of the case and secure any screws or latches to ensure that the case is closed securely.
With your SSD successfully installed, you are now one step closer to enjoying improved gaming performance and faster load times. The installation process may vary depending on your computer’s configuration, so refer to your specific computer’s documentation or seek professional assistance if needed. Hang tight as we move on to the next steps to complete the installation process and get your games up and running on the SSD!
Connect the SSD to Your Computer
After successfully installing the solid-state drive (SSD) in your computer, the next step is to connect it to your system. Follow these steps to ensure a proper connection:
1. Power Off and Unplug: Make sure your computer is powered off and unplugged from the power source before proceeding with the connection.
2. Open the Computer Case: Remove the screws or latches necessary to open the computer case. Refer to the manufacturer’s instructions or online resources for guidance specific to your computer model.
3. Locate SATA Ports: Identify the SATA ports on your motherboard. These ports are usually labeled SATA 1, SATA 2, and so on. Newer motherboards may have SATA 3 or SATA 6 ports, which support faster data transfer speeds. Choose an available SATA port for your SSD.
4. Connect the Data Cable: Take one end of the SATA data cable, typically included with your motherboard or SSD, and connect it to the SATA port on your motherboard. Ensure the connection is secure and properly aligned with the port.
5. Connect the Power Cable: Take the SATA power cable from your power supply unit (PSU) and connect it to the SSD’s power port. The power cable typically has a rectangular connector with a notch that matches the SSD port. Ensure the connection is secure.
6. Check Connections: Double-check both the data and power connections to ensure they are securely connected and properly aligned. Loose connections can result in performance issues or prevent the SSD from functioning correctly.
7. Close the Computer Case: Carefully close the computer case, ensuring that all screws or latches are securely fastened. This step protects your SSD and other components from dust and potential damage.
Once you have completed these steps, you can proceed with powering on your computer and confirming that the SSD is properly recognized by the system. Depending on your computer’s configuration, you may need to enter the BIOS/UEFI settings to verify the SSD is detected and set it as the boot drive if desired.
Note that if your SSD requires additional connections, such as M.2 or PCIe drives, consult the manufacturer’s instructions or your computer’s documentation for specific guidance on connecting these types of SSDs.
By correctly connecting the SSD to your computer, you have established the necessary data and power connections to ensure proper functionality. Now, let’s move forward and format the SSD to prepare it for the installation of the required software and games.
Format the SSD
After connecting the solid-state drive (SSD) to your computer, the next step is to format the drive. Formatting prepares the SSD for use and allows the operating system to recognize and allocate space on the drive. Follow these steps to format your SSD:
Note: Formatting will erase all data on the SSD, so ensure that you have backed up any important files before proceeding.
1. Power on Your Computer: Ensure that your computer is powered on and that the SSD is connected securely.
2. Access Disk Management: Depending on your operating system, there are different ways to access Disk Management. On Windows, you can access it by right-clicking on the Start menu, selecting “Disk Management” from the menu that appears. On macOS, open “Finder,” go to “Applications,” select “Utilities,” and then open “Disk Utility.”
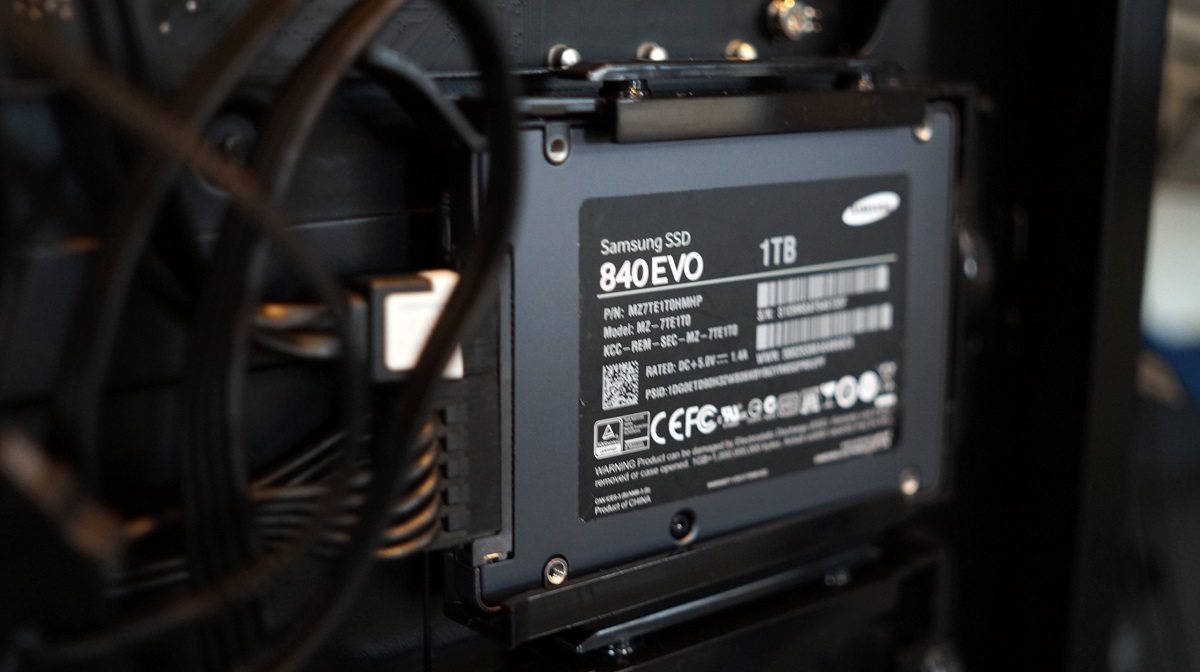
3. Locate the SSD: In Disk Management, locate the SSD among the list of available disks. It is usually labeled with the manufacturer’s name and the storage capacity.
4. Initialize the SSD: Right-click on the SSD and select “Initialize Disk” or a similar option. Choose the appropriate partition style for your system (typically either MBR or GPT). For most modern systems, it is recommended to select GPT as it supports larger capacity drives and additional functionality.
5. Create a New Partition: Right-click on the unallocated space of the SSD and select “New Simple Volume” or a similar option. Follow the prompts in the wizard to set the desired partition size, assign a drive letter, and choose the file system format. For Windows systems, NTFS is the recommended file system format.
6. Format the SSD: During the partition creation process, you will be given the option to format the partition. Ensure that the format type is set to the desired file system format (e.g., NTFS). Click on “Format” and wait for the process to complete. This may take some time depending on the size of the SSD.
7. Verify the Formatting: Once formatting is complete, you should see the newly formatted partition labeled with the assigned drive letter in Disk Management. This indicates that the SSD has been successfully formatted and is ready for use.
Formatting the SSD effectively prepares it for the installation of operating systems, software, and games. It establishes a file system structure that the system can recognize and use to store and retrieve data efficiently. By following these steps, you can ensure that your SSD is properly formatted and ready to deliver optimal performance in your gaming setup.
Now that the formatting is complete, you can proceed with installing the required software to unleash the potential of your SSD for gaming.
Install the Required Software
With your solid-state drive (SSD) properly formatted and ready for use, the next step in installing games is to ensure you have the required software to proceed. Follow these steps to install the necessary software:
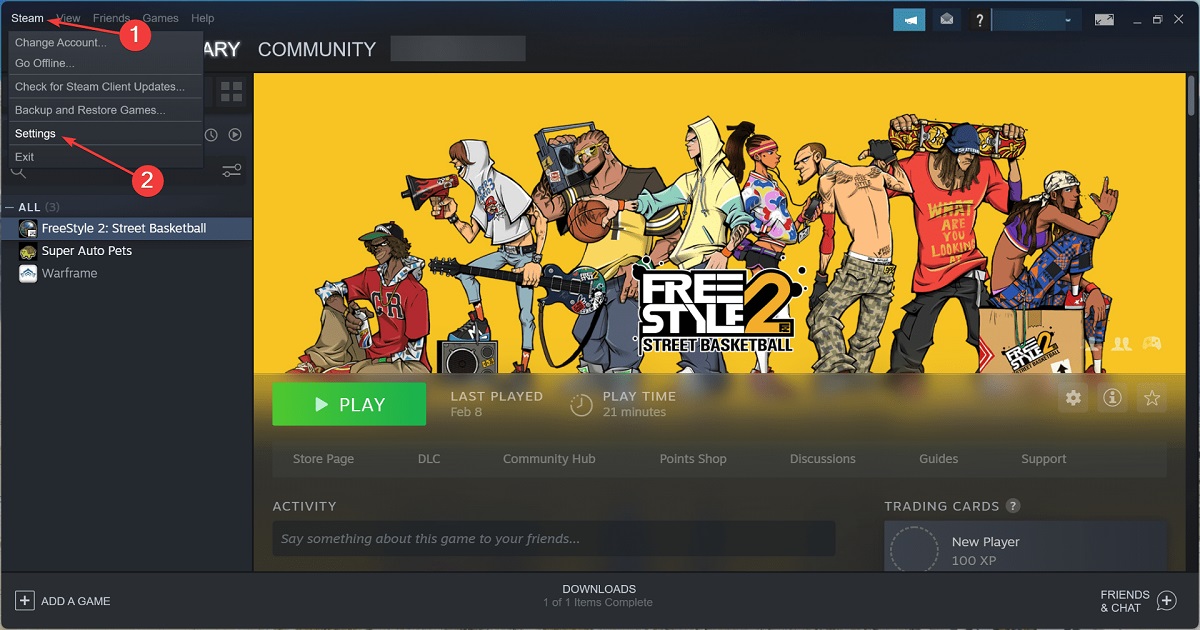
1. Game Platform: If your games require a specific platform or launcher, such as Steam, Epic Games Store, or GOG Galaxy, ensure that you have it installed on your computer. Visit the platform’s official website and download the latest version of the installer.
2. Download and Install the Game Platform: Run the installer for the game platform and follow the on-screen instructions to complete the installation. Create an account or sign in if you already have one.
3. Account Setup: After installing the game platform, set up your account by providing the necessary details. This will allow you to access and manage your game library within the platform.
4. Update the Game Platform: Once the game platform is installed, it is important to update it to the latest version. Launch the platform and check for updates within the settings or options menu. Updating the platform ensures that you have the latest features, bug fixes, and security enhancements.
5. Library Import (Optional): If you have existing games installed on your computer, such as those from other platforms or physical copies, you can often import them into your newly installed game platform. Refer to the platform’s documentation or support resources for instructions on how to import your games.
6. Game Installation Files: Locate the game installation files that you previously backed up or acquired. These files can be in the form of downloaded installers, physical media such as DVDs, or backup files on an external storage device.
7. Run the Game Installation Wizard: Double-click on the game installation file or run the installer you obtained. Follow the on-screen instructions to begin the installation process. Most game installation wizards will prompt you to agree to the terms of service and select an installation location.
8. Choose the Installation Location: When prompted, select the SSD as the installation location for your games. If the game platform offers the option to choose a default installation directory, ensure it is set to your SSD. This ensures that games are installed directly on your SSD, taking advantage of its superior performance.
9. Complete the Game Installation: Follow the prompts from the game installation wizard to complete the installation process. Typically, you will need to select additional options, such as language preferences and optional components, before the game installation begins. The duration of the installation process will depend on the size and complexity of the game.
Once the game installation is complete, you can launch the game from the game platform’s library or shortcut. The game will run from your SSD, benefiting from faster loading times and improved performance.
Repeat these steps for each game you want to install on your SSD. It is recommended to prioritize your favorite or most-played games first. Enjoy the enhanced gaming experience that your SSD provides, with faster load times, minimized lag, and smoother gameplay.
Now that the required software is installed, you’re ready to locate the game installation files and proceed with the actual game installations on your SSD.
Locate Game Installation Files
Before proceeding with the game installations on your solid-state drive (SSD), you need to locate the game installation files. Depending on how you acquired the games, these files can be in various forms. Follow these steps to locate your game installation files:
1. Downloaded Games: If you downloaded the games digitally from online platforms like Steam, Epic Games Store, or GOG, the installation files are typically stored in a specific directory on your computer. For example, on Windows, the default installation folder for Steam games is “C:\Program Files (x86)\Steam\steamapps\common”. Check the settings in the game platform to confirm the installation directory.
2. Physical Media: If you purchased games on physical media (e.g., DVDs or Blu-ray discs), locate the installation CDs or DVDs that came with the game. Insert the disc into your computer’s disc drive, and the installation process should begin automatically. Follow any on-screen prompts to install the game.
3. Backup Files: If you previously backed up your games, locate the backup files on your computer or external storage device. These files may be in a compressed format, such as ZIP or RAR. Extract the files to a location on your computer where you can easily access them during the installation process.
4. Game Platform Libraries: If you already have game platforms like Steam or GOG installed, check their libraries to view the list of installed games. From these libraries, you can obtain the installation files and copy them to a location of your choice on your SSD.
5. Game Save Files: In addition to the installation files, consider locating any game save files you may have. These files contain your progress and game settings, allowing you to continue playing from where you left off. Save files are usually stored in a separate directory, specific to each game. Consult the game’s documentation or online resources for the location of the save files.
Remember to organize and keep track of the game installation files to easily locate them during the installation process. Create a dedicated folder on your SSD or an external storage device for storing all the game installation files. This way, you can easily access them when installing games on your SSD.
By following these steps, you can successfully locate the game installation files and ensure a smooth installation process on your SSD.
Now that you have located the necessary game installation files, you’re ready to proceed with choosing the installation location for each game on your SSD. This step allows you to take full advantage of the speed and performance enhancements provided by your SSD during gameplay.
Choose Installation Location
When installing games on your solid-state drive (SSD), it is important to choose the appropriate installation location to maximize the benefits of your SSD’s speed and performance. Follow these steps to select the installation location for each game:
1. Default Installation Directory: When you initiate the game installation process, the game platform or installer may provide a default installation directory. By default, this directory is usually on your primary hard drive. However, you can change this location to your SSD.
2. Select the SSD: When prompted to choose an installation location, navigate to your SSD and select it as the preferred destination for the game installation. This ensures that the game files are installed directly on the SSD, utilizing its faster read and write speeds for improved performance.
3. Create a Game Folder: Within your SSD, you can create a specific folder for game installations. This allows you to keep all game files organized in one location. Create a dedicated folder with a clear and identifiable name, such as “Games,” “Game Library,” or something similar.
4. Consider Partitioning: If you have a larger SSD or plan to install a significant number of games, you may consider partitioning the drive. This involves dividing the SSD into separate sections, each with its own designated purpose. You can allocate a specific partition or partition size for game installations, ensuring optimal storage management.
5. Balance Available Space: While SSDs provide fast performance, they tend to have smaller capacities compared to traditional hard drives. Consider the size of your SSD and the available space before deciding on the number and size of games to install. Balance your game library with the available storage to avoid running out of space on the SSD.
6. Prioritize Frequently Played Games: If you have limited space on your SSD, prioritize installing your most frequently played games. Focus on the games that benefit the most from the SSD’s improved loading times and performance enhancements. Less frequently played games can be installed on other storage devices or downloaded again when needed.
7. Consider Game and System Requirements: Before proceeding with the installation, double-check the game’s system requirements and ensure your SSD meets the minimum specifications. Some games may have specific requirements or restrictions regarding the storage device, so it’s essential to confirm compatibility.
By carefully choosing the installation location, you can optimize your SSD’s performance and ensure that your games run smoothly. Remember to balance available space, prioritize frequently played games, and consider any game or system requirements when deciding where to install each game. This way, you can fully leverage the benefits of your SSD and enhance your gaming experience.
Now that you have chosen the installation location, it’s time to proceed with installing the games on your SSD and unleashing the full potential of your gaming setup.
Install the Games
Now that you have located the game installation files and chosen the installation location on your solid-state drive (SSD), you can proceed with installing the games. Follow these steps to install your games on the SSD:
1. Launch the Game Installation Wizard: Double-click on the game installation file or run the installer you obtained. This will launch the game installation wizard and initiate the installation process.
2. Read and Agree to the Terms: Carefully read the terms and conditions presented in the installation wizard. If you agree, select the checkbox indicating your acceptance and proceed to the next step.
3. Select Installation Location: During the installation process, you will be prompted to select the destination for the game installation. Choose the previously determined installation location on your SSD. If necessary, browse to the appropriate folder or partition within the SSD.
4. Customize Installation Options (Optional): Depending on the game, you may have the option to customize the installation process. This can include choosing the installation language, selecting specific game components to install, or configuring additional settings. Make your desired selections and proceed.
5. Begin the Installation: Once you have chosen the installation location and customized any necessary options, click on the “Install” or “Next” button to start the installation process. The installer will copy the necessary files to your SSD.
6. Wait for the Installation to Complete: The duration of the installation process will vary depending on the size and complexity of the game. Be patient and allow the installer to complete the installation on your SSD. Avoid interrupting the process to prevent any installation errors.
7. Launch the Game: After the installation is complete, the game may offer you the option to launch it immediately. If not, close the installer and search for the game in your game platform’s library or the installed game folder on your SSD. Double-click on the game’s executable file or launch it from your game platform to start playing.
8. Repeat for Additional Games: If you have multiple games to install on your SSD, repeat the above steps for each game. Ensure that you allocate sufficient space on your SSD for each installation.
9. Game Updates and Patches: Once the game is installed, check for any available updates or patches within the game platform. Keeping your games up to date ensures that you have access to the latest features, bug fixes, and security enhancements.
By following these steps, you can successfully install games on your SSD and take advantage of the faster load times and improved performance that the SSD offers. Enjoy an enhanced gaming experience with reduced load times and smoother gameplay.
Remember to manage your SSD space effectively by regularly uninstalling games you no longer play or transferring less frequently played games to other storage devices to free up space on your SSD. This allows you to maintain optimal performance and make the most of your SSD’s capabilities.
Now that you have installed your games, it’s time to optimize the game settings to further enhance the gaming experience on your SSD.
Optimize Game Settings
After installing games on your solid-state drive (SSD), it’s important to optimize the game settings to ensure the best performance and visual experience. Follow these steps to maximize the benefits of running games on your SSD:
1. Graphics Settings: Adjust the graphics settings within each game to find the right balance between visual quality and performance. Optimize settings such as resolution, texture quality, shadow quality, anti-aliasing, and post-processing effects based on the capabilities of your computer and personal preference. Experiment with different settings to achieve smoother gameplay without sacrificing visual fidelity.
2. Frame Rate: Consider targeting a higher frame rate to take advantage of your SSD’s faster loading times. Many games offer options to cap or uncapped the frame rate. Unlocking the frame rate can provide a smoother and more responsive gaming experience, especially in fast-paced or competitive games.
3. Full Screen Mode: Ensure that the game is running in full-screen mode to eliminate potential performance issues caused by other background processes or applications. Full-screen mode optimizes the game’s resources and can lead to better performance on your SSD.
4. V-Sync: Experiment with vertical synchronization (V-Sync) settings. V-Sync synchronizes the game’s frame rate with your monitor’s refresh rate to prevent screen tearing. However, it can impact performance. Try toggling V-Sync on or off to find the best balance between visual smoothness and performance.
5. Driver Updates: Regularly update your graphics card drivers. New driver releases often optimize gaming performance, fix bugs, and provide compatibility improvements. Visit the manufacturer’s website for your graphics card and download the latest drivers specific to your model.
6. Game-Specific Tweaks: Research specific tweaks or optimizations for each game you play. Some games have community-created patches, mods, or settings adjustments that can further improve performance or enhance specific features. Look for dedicated forums, Reddit communities, or official game websites for helpful tips or recommendations.
7. Monitor Settings: Adjust your monitor’s settings to ensure optimal visuals. Set the correct refresh rate, color temperature, and brightness. Calibrate your monitor if necessary to achieve accurate colors and a balanced image.
8. SSD Maintenance: Regularly maintain your SSD by optimizing its performance. Keep your SSD firmware up to date, ensure it has enough free space for optimal operation, and periodically run disk cleanup tools to remove unnecessary files. These practices can improve overall system performance and longevity.
9. Background Applications: Close unnecessary background applications and processes before launching a game. This frees up system resources and ensures that the game has full access to your SSD’s speed and performance.
By optimizing game settings, you can maximize the benefits of running games on your SSD. The combination of faster load times and improved performance will help you achieve a more immersive and enjoyable gaming experience.
Experiment with different settings based on your preferences and hardware capabilities. Fine-tune the settings for each game to strike the right balance between performance and visual quality. Embrace the superior speed of your SSD and unlock the full potential of your gaming setup!
Now that you have optimized your game settings, it’s time to dive into your gaming sessions and enjoy the enhanced performance and responsiveness delivered by your SSD.
Conclusion
In conclusion, installing games on a solid-state drive (SSD) can significantly enhance your gaming experience. The SSD’s faster loading times, improved performance, and seamless gameplay make it an ideal choice for avid gamers. By following the steps outlined in this guide, you can successfully install games on your SSD and optimize their settings for optimal performance.
We started by discussing the advantages of installing games on an SSD, highlighting the faster loading times, reduced lag, improved performance, and smoother gameplay. We then covered important factors to consider, such as SSD compatibility, available space, and the necessary preparation steps, including backing up games and connecting the SSD to your computer.
The guide also provided detailed instructions on choosing the installation location, locating game installation files, installing the required software, and optimizing game settings for better performance and visual experience. With each step, you worked towards maximizing the benefits of running games on your SSD.
Remember, regularly update your SSD’s firmware, keep your system and graphics card drivers up to date, and perform necessary maintenance tasks to ensure smooth operation and optimal performance. Additionally, manage your SSD space effectively to make the most of its capacity.
By incorporating these strategies, you can fully leverage the capabilities of your SSD, unleashing the true potential of your gaming setup. So, go ahead and enjoy gaming like never before with faster load times, reduced lag, and smoother gameplay.
In the ever-evolving world of gaming, staying up to date with the latest technologies and optimizing your hardware can provide a competitive edge and enhance your overall gaming experience. With the installation and optimization of games on your SSD, you have taken a significant step towards achieving that edge.
So, let the games begin and immerse yourself in a world of seamless gaming with your SSD-powered setup!