Introduction
Welcome to our guide on how to get your SSD to show up in the BIOS. If you have recently installed a new SSD on your computer but are unable to see it in the BIOS, you may be feeling frustrated and unsure of what steps to take next. Fortunately, we are here to help you troubleshoot this issue and get your SSD up and running.
The BIOS, or Basic Input/Output System, is a firmware that is built into your computer’s motherboard. It is responsible for booting up your system and initializing various hardware components, including your storage devices. However, sometimes the SSD doesn’t appear in the BIOS, preventing you from utilizing its full potential.
There can be several reasons why your SSD is not showing up in the BIOS. It could be due to a loose SATA connection, outdated BIOS version, incorrect BIOS settings, or a hardware compatibility issue. In this guide, we will explore various troubleshooting steps to help you resolve this issue and ensure that your SSD is detected by the BIOS.
Before we dive into the solutions, it’s important to note that working inside the BIOS requires caution, as any incorrect changes can potentially harm your system. Therefore, make sure to follow the instructions carefully and consult your motherboard’s documentation if you are unsure about any step.
Now, without further ado, let’s explore the troubleshooting steps to get your SSD to show up in the BIOS.
Check the SATA Connection
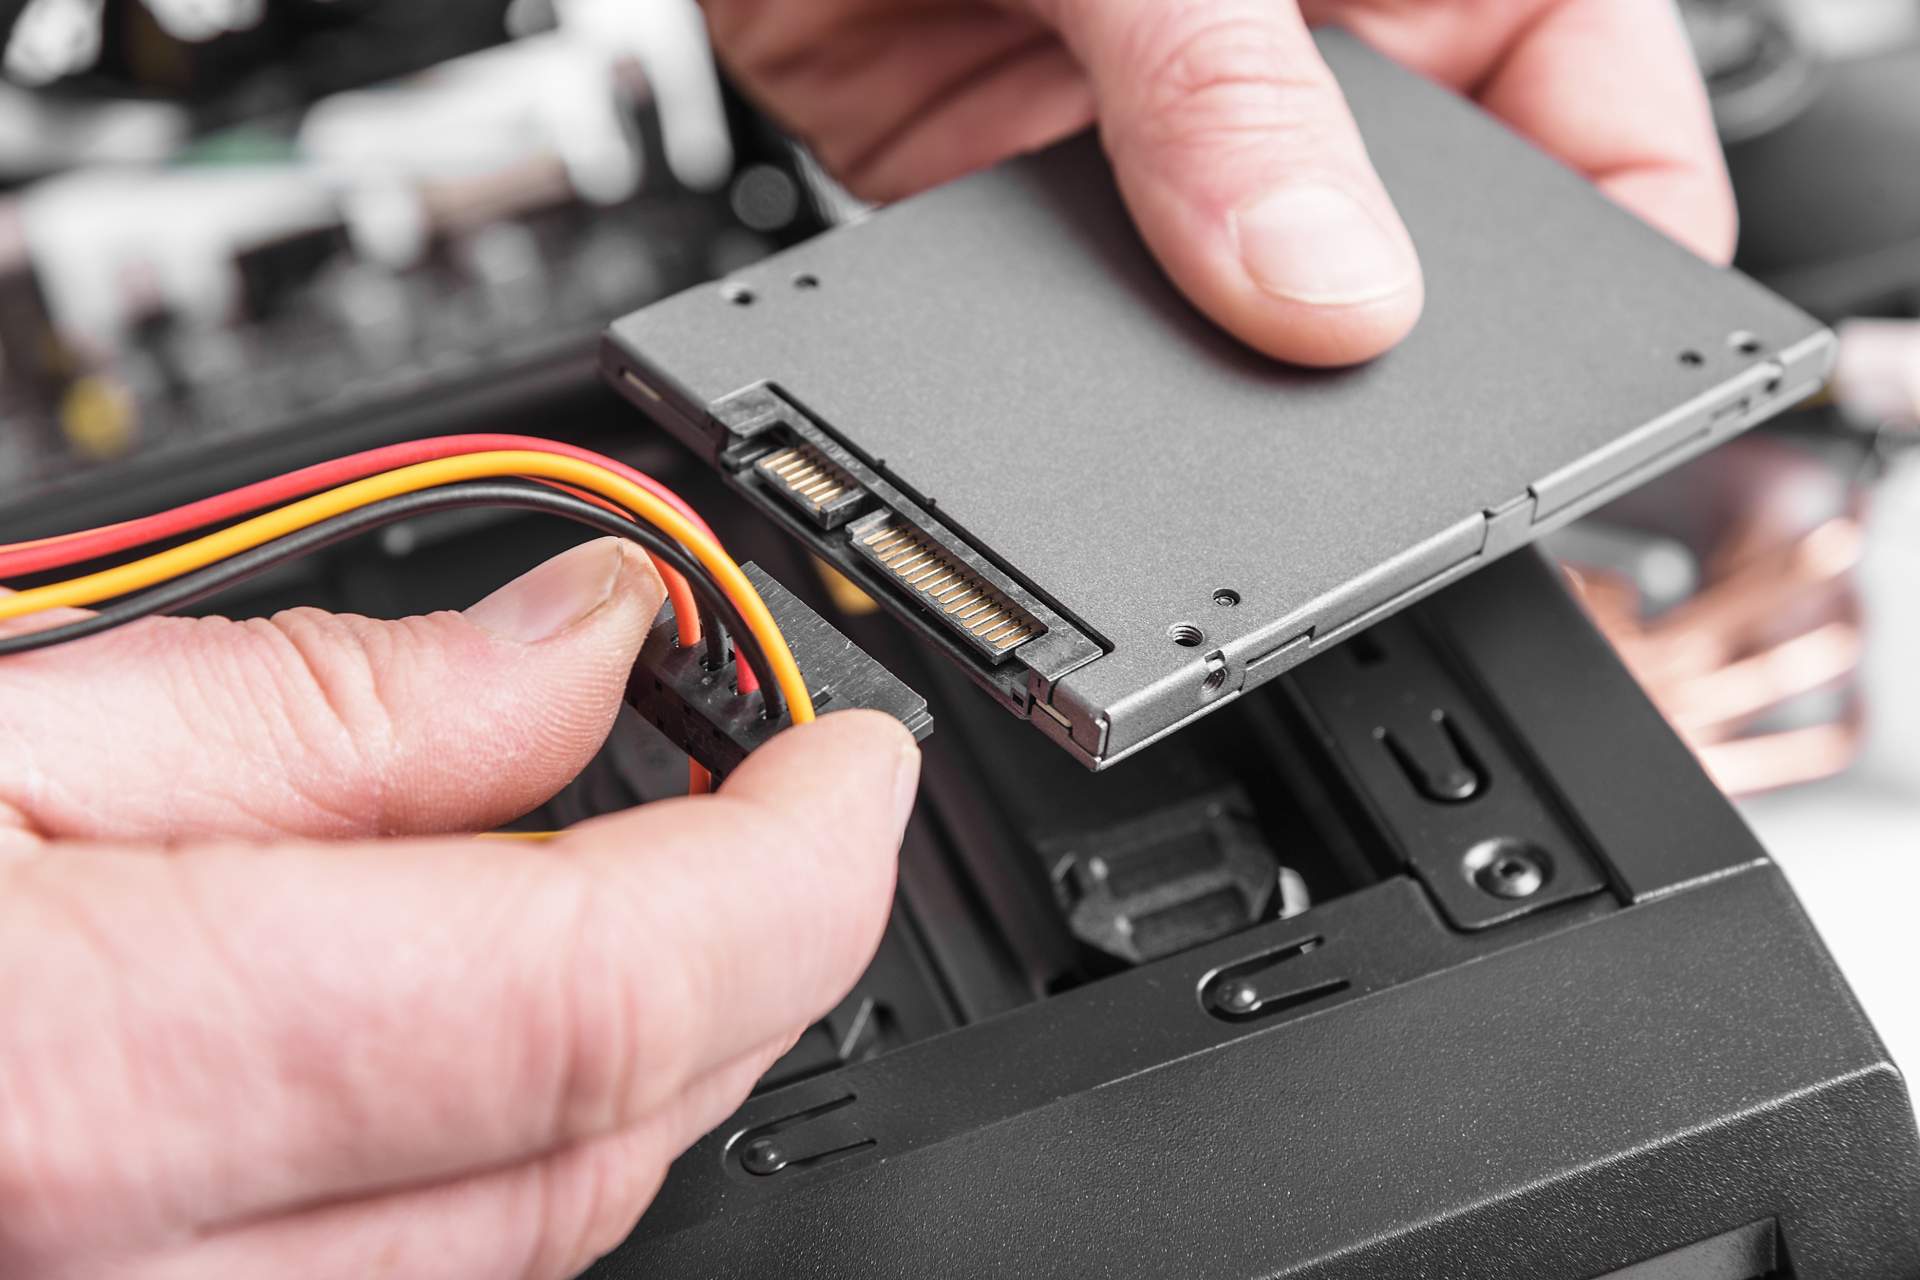
One of the first things you should do when your SSD is not showing up in the BIOS is to check the SATA connection. The SATA (Serial ATA) cable connects the SSD to the motherboard, allowing for data transfer. A loose or faulty connection can cause the SSD to go undetected.
To check the SATA connection:
- Turn off your computer and unplug the power cable.
- Open your computer case to access the internal components.
- Locate the SATA cable that is connected to your SSD and make sure it is securely plugged into both the SSD and the motherboard.
- If the connection seems loose, gently remove the cable and reseat it firmly.
- Inspect the cable for any visible damage or frayed wires. If you notice any, consider replacing the cable.
- Once you have ensured a secure and intact SATA connection, close your computer case and reconnect the power cable.
After following these steps, turn on your computer and access the BIOS. Check if the SSD is now detected. If it still doesn’t show up, proceed to the next troubleshooting step.
In some cases, the issue may not lie with the SATA connection itself, but rather with the SATA port on the motherboard. If possible, try connecting the SSD to a different SATA port to rule out any port-related issues.
Checking and fixing the SATA connection should be the first step in troubleshooting when your SSD is not showing up in the BIOS. By ensuring a secure and functioning connection, you can eliminate a common cause of detection issues.
Initialize the SSD in Disk Management
If your SSD is not showing up in the BIOS, it might be due to the fact that it has not been initialized in the operating system. Initializing the SSD in Disk Management allows the operating system to recognize and utilize the drive.
Follow these steps to initialize the SSD in Disk Management:
- Right-click the “Start” button and select “Disk Management” from the context menu. This will open the Disk Management utility.
- In Disk Management, you should see a list of all connected storage devices. Look for the SSD that is not showing up in the BIOS.
- If the SSD appears as “Not Initialized,” right-click on it and select “Initialize Disk.”
- Choose the desired disk initialization style: MBR (Master Boot Record) or GPT (GUID Partition Table), depending on your system requirements. If you are unsure, you can consult the documentation of your motherboard or operating system.
- Click “OK” to initialize the disk.
- After initializing the SSD, you will need to create a partition and format the drive. Right-click on the “Unallocated” space of the SSD and select “New Simple Volume.”
- Follow the on-screen instructions to create a partition and assign a drive letter to the SSD.
- Once the partition is created, right-click on it and select “Format.”
- Choose the desired file system, allocation unit size, and volume label.
- Click “OK” to format the SSD.
After completing these steps, exit Disk Management and check if the SSD is now detected in the BIOS. By initializing and formatting the SSD, you ensure that it is properly recognized by the operating system and the BIOS.
If the SSD still does not show up in the BIOS, continue troubleshooting with the next steps.
Update BIOS to the Latest Version
If you have checked the SATA connection and initialized the SSD in Disk Management but it is still not showing up in the BIOS, it may be due to an outdated BIOS. Updating your BIOS to the latest version can often resolve compatibility issues and improve the detection of hardware, including your SSD.
Here’s how you can update your BIOS to the latest version:
- Visit the website of your motherboard manufacturer.
- Search for the support page or downloads section for your specific motherboard model.
- Look for the latest BIOS version available for download. Make sure to select the correct version that matches your motherboard model.
- Download the BIOS update file to a USB flash drive or other removable media.
- Restart your computer and enter the BIOS by pressing the appropriate key during startup (usually Del, F2, or F10).
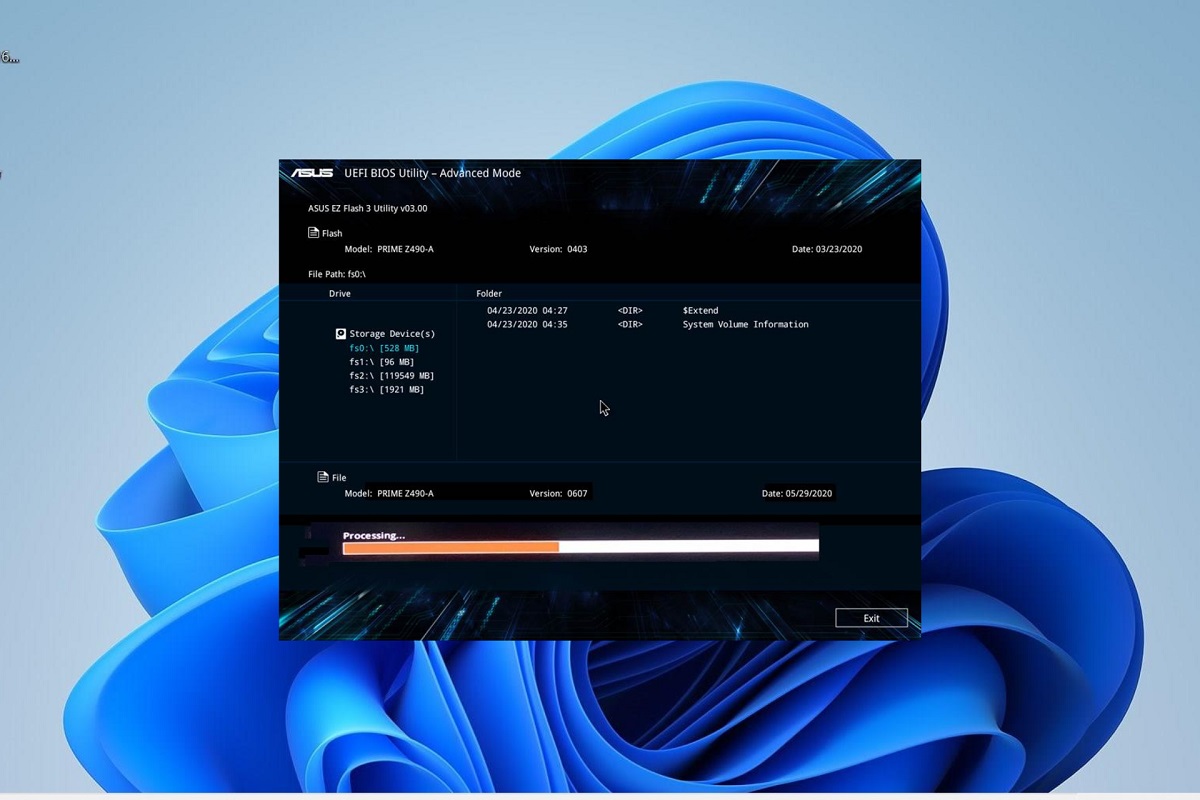
- Navigate to the “BIOS Update” or “Update” section in the BIOS menu.
- Select the option to update the BIOS from a USB flash drive or other removable media.
- Follow the on-screen instructions to locate and select the BIOS update file that you downloaded.
- Start the BIOS update process and wait for it to complete. Do not turn off your computer or interrupt the update process.
- Once the update is finished, restart your computer and enter the BIOS again.
- Check if the SSD is now detected in the BIOS.
Updating the BIOS can be a critical process, as any interruptions or errors can potentially damage your motherboard. Therefore, make sure to follow the manufacturer’s instructions carefully and ensure a stable power supply during the update.
If updating the BIOS does not resolve the issue, proceed to the next troubleshooting step.
Enable AHCI Mode
If your SSD is not showing up in the BIOS, it may be because the Advanced Host Controller Interface (AHCI) mode is not enabled. AHCI is a standard interface that allows the operating system to communicate with the storage devices efficiently.
To enable AHCI mode and potentially resolve the issue, follow these steps:
- Restart your computer and enter the BIOS by pressing the appropriate key during startup (usually Del, F2, or F10).
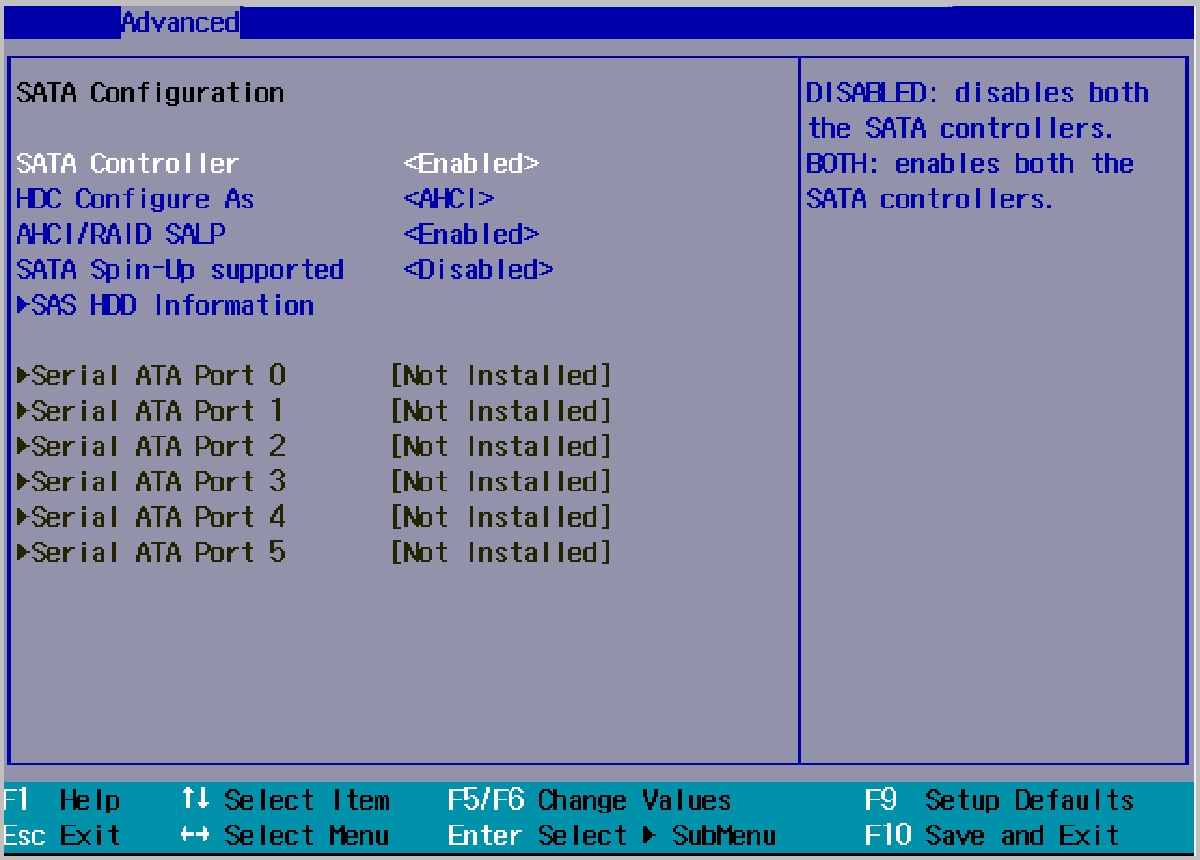
- Navigate to the “Storage” or “Configuration” section in the BIOS menu.
- Look for the SATA Mode or AHCI Mode setting.
- If the SATA Mode is set to IDE or RAID, change it to AHCI mode.
- Save the changes and exit the BIOS. Your computer will restart.
- After the restart, your operating system will detect the SSD in AHCI mode.
Enabling AHCI mode allows your SSD to take full advantage of its performance capabilities. If the SSD is still not showing up in the BIOS after enabling AHCI mode, move on to the next troubleshooting step.
Keep in mind that changing the SATA mode to AHCI may affect the boot process, especially if you had previously installed the operating system with a different SATA mode. In such cases, you may need to perform additional steps to ensure a smooth transition to AHCI mode.
If enabling AHCI mode does not resolve the issue, continue troubleshooting with the next steps.
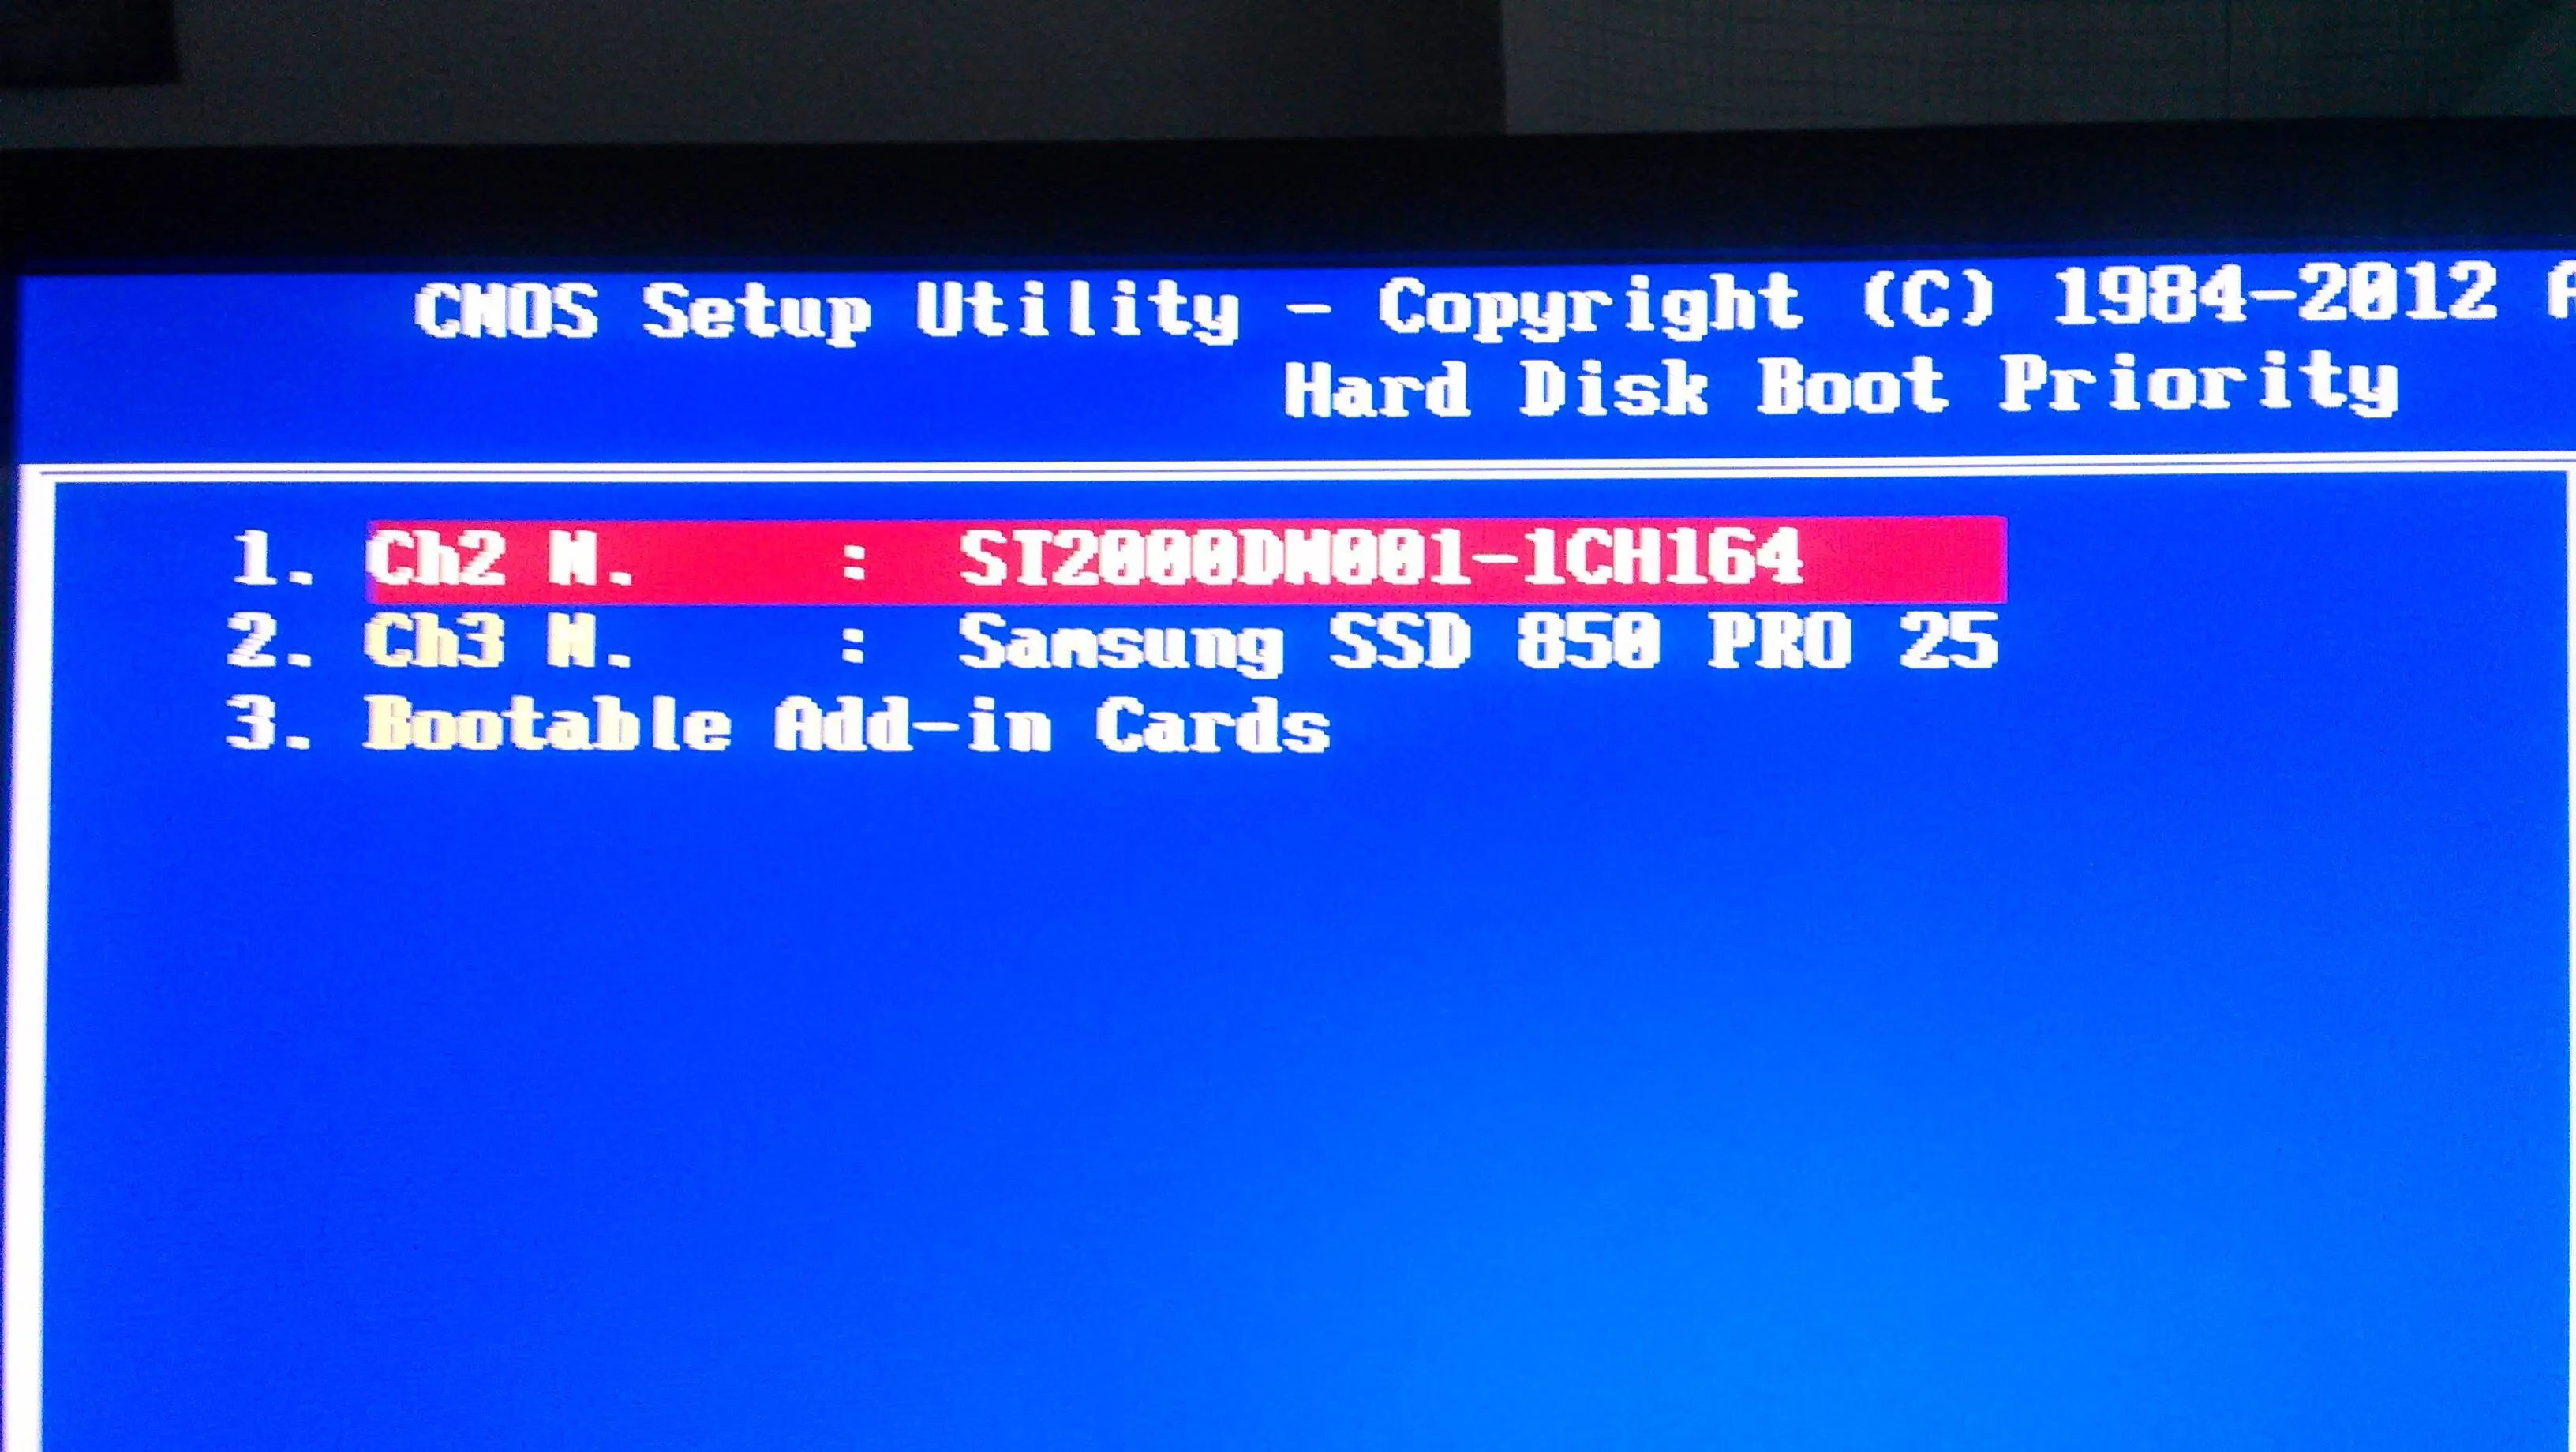
Disable Legacy Boot
If your SSD is not showing up in the BIOS, it could be due to the Legacy Boot mode being enabled. Legacy Boot mode allows the system to boot from older hardware interfaces, which can sometimes interfere with the detection of newer storage devices like SSDs.
To disable Legacy Boot and potentially resolve the issue, follow these steps:
- Restart your computer and enter the BIOS by pressing the appropriate key during startup (usually Del, F2, or F10).
- Navigate to the “Boot” or “Boot Settings” section in the BIOS menu.
- Look for the Legacy Boot or Compatibility Support Mode (CSM) setting.
- If Legacy Boot or CSM mode is enabled, disable it.
- Save the changes and exit the BIOS. Your computer will restart.
- Check if the SSD is now detected in the BIOS.
Disabling Legacy Boot mode ensures that the BIOS prioritizes newer booting methods that are compatible with SSDs. If the SSD still does not show up in the BIOS after disabling Legacy Boot, proceed to the next troubleshooting step.
It’s important to note that if you have an older operating system or have installed the operating system using Legacy Boot, disabling Legacy Boot may prevent the system from booting properly. In such cases, you may need to reinstall the operating system or perform additional configuration steps to ensure compatibility with the SSD.
If disabling Legacy Boot does not resolve the issue, continue troubleshooting with the next steps.
Run a Hardware Diagnostics Test
If your SSD is not showing up in the BIOS, it’s important to rule out any potential hardware issues. Performing a hardware diagnostics test can help identify if there are any problems with the SSD or other components of your system.
Here’s how you can run a hardware diagnostics test:
- Check if your computer has a built-in hardware diagnostics tool. Many manufacturers include diagnostic utilities that can test various hardware components, including storage devices.
- If your computer does not have a built-in diagnostics tool, you can use third-party software to perform the test. There are several reputable hardware diagnostic programs available for free or paid use.
- Download and install the hardware diagnostics software of your choice. Follow the instructions provided by the software to run the diagnostics test specifically for your SSD or storage devices.
- Allow the software to scan and analyze your system’s hardware components. It will check for any issues or errors that may be affecting the detection of the SSD.
- Review the test results and look for any indications of problems with the SSD or other relevant components.
- If any issues are identified, consult the documentation or support resources provided by the hardware diagnostics software to troubleshoot and resolve the problem.
Running a hardware diagnostics test can help pinpoint hardware-related issues that may be causing the SSD to not show up in the BIOS. If the test reveals any problems, take appropriate measures to fix them, such as contacting the manufacturer’s support or seeking professional assistance if needed.
If the hardware diagnostics test does not uncover any issues with the SSD or other components, proceed to the next troubleshooting step.
Reset the BIOS Settings
If you have tried all the previous troubleshooting steps and your SSD is still not showing up in the BIOS, resetting the BIOS settings to their default values can help resolve any misconfigurations that may be causing the issue. Resetting the BIOS settings will revert any changes you have made and restore the BIOS to its original state.
To reset the BIOS settings, follow these steps:
- Shut down your computer and disconnect the power cable.
- Locate the CMOS battery on your motherboard. It is a small coin-like battery.
- Remove the CMOS battery by gently pushing the release latch or using a small screwdriver to pry it out.
- Wait for a couple of minutes to ensure that the residual power in the system is completely drained.
- Reinsert the CMOS battery in its original position.
- Reconnect the power cable and turn on your computer.
- Enter the BIOS by pressing the appropriate key during startup (usually Del, F2, or F10).
- Check if the SSD is now detected in the BIOS.
Resetting the BIOS settings can clear any configuration issues that may be preventing the SSD from showing up. However, keep in mind that this will also reset any personalized settings you may have made in the BIOS, such as boot order or overclocking settings. Make sure to take note of any important settings before performing the reset.
If resetting the BIOS settings does not solve the issue, it’s recommended to seek further assistance from the manufacturer’s support or a professional technician to diagnose and resolve the problem.
Conclusion
In this guide, we have explored various troubleshooting steps to help you get your SSD to show up in the BIOS. We started by checking the SATA connection and ensuring that it is securely connected to both the SSD and the motherboard. Then, we discussed the importance of initializing the SSD in Disk Management and formatting it to make it recognizable by the operating system.
We also covered the significance of updating the BIOS to the latest version to improve compatibility and enhance the detection of hardware, including the SSD. Additionally, we explored enabling AHCI mode and disabling Legacy Boot, which can contribute to the proper detection of the SSD in the BIOS.
If the issue persists, we recommended running a hardware diagnostics test to identify any potential hardware problems that may be affecting the detection of the SSD. Lastly, we discussed the option of resetting the BIOS settings to their default values, which can help resolve any misconfigurations that may be causing the issue.
It’s important to note that troubleshooting the detection of an SSD might require different approaches based on your specific hardware and system configuration. Therefore, it’s recommended to consult your motherboard’s documentation or seek assistance from the manufacturer’s support if you encounter any difficulties.
By following these troubleshooting steps, you should be able to resolve the issue and ensure that your SSD is properly recognized by the BIOS, allowing you to unlock its full potential in terms of performance and storage capabilities for your computer.