Introduction
Welcome to the world of solid-state drives (SSDs), where speed and performance reign supreme. M.2 SSDs, in particular, have gained popularity for their compact form factor and lightning-fast read/write speeds. However, encountering an issue where your M.2 SSD is not being detected can be frustrating and worrisome.
When your M.2 SSD is not detected by your computer, it can impact your productivity, gaming experience, or even lead to data loss. But before you start to panic, it’s important to understand that several factors could be behind this issue.
In this article, we will guide you through the possible causes and solutions when your M.2 SSD is not being detected. From installation errors to compatibility issues and software conflicts, we will cover a range of troubleshooting steps to help you get your SSD up and running again.
It’s important to note that the specific steps required may vary depending on your computer’s make, model, and operating system. However, the general principles discussed here will apply to most scenarios.
So, if you find yourself asking, “Why is my M.2 SSD not detected?” read on to discover the possible causes and solutions to get your M.2 SSD back in action.
Possible Causes of M.2 SSD Not Being Detected
When your M.2 SSD is not being detected by your system, there can be several potential causes. Understanding these causes can help you narrow down the troubleshooting steps and find an appropriate solution. Here are some common reasons why your M.2 SSD might not be detected:
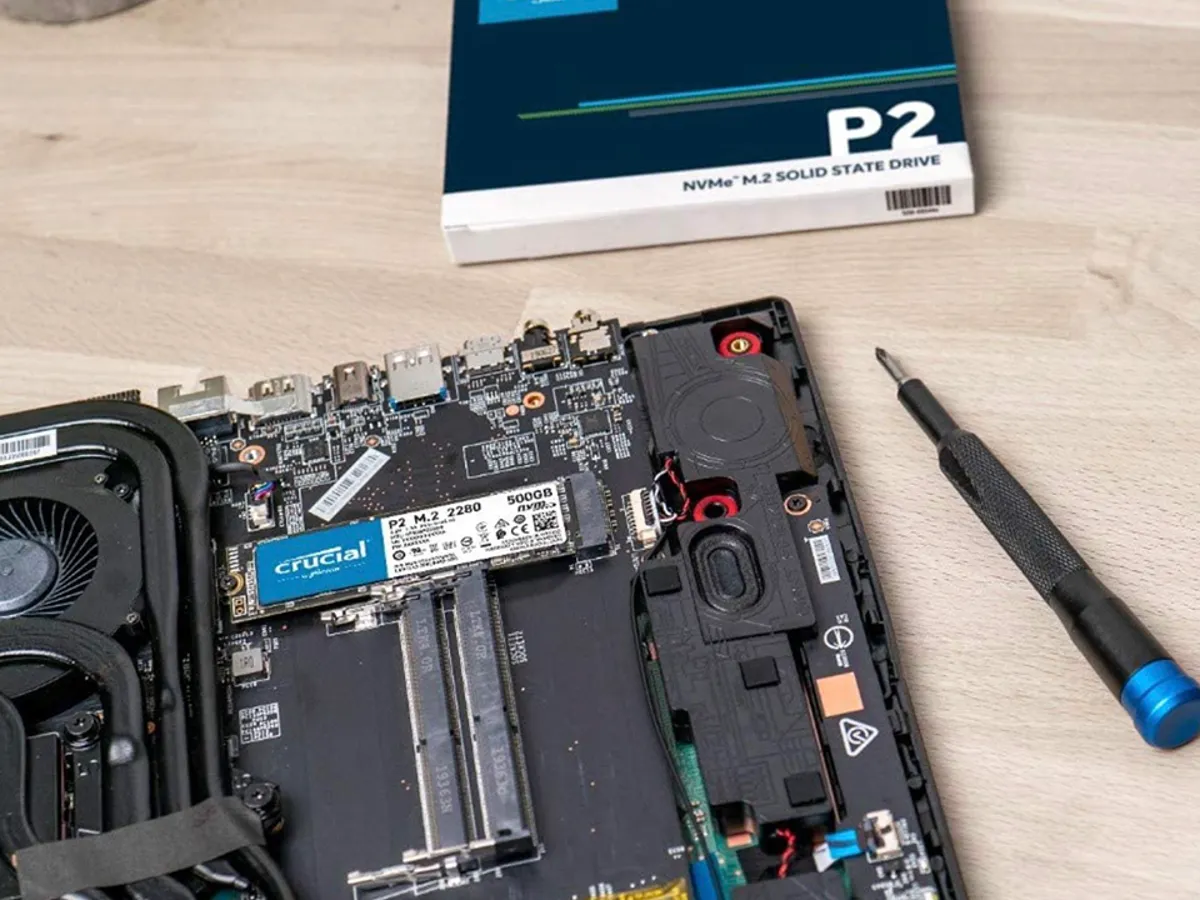
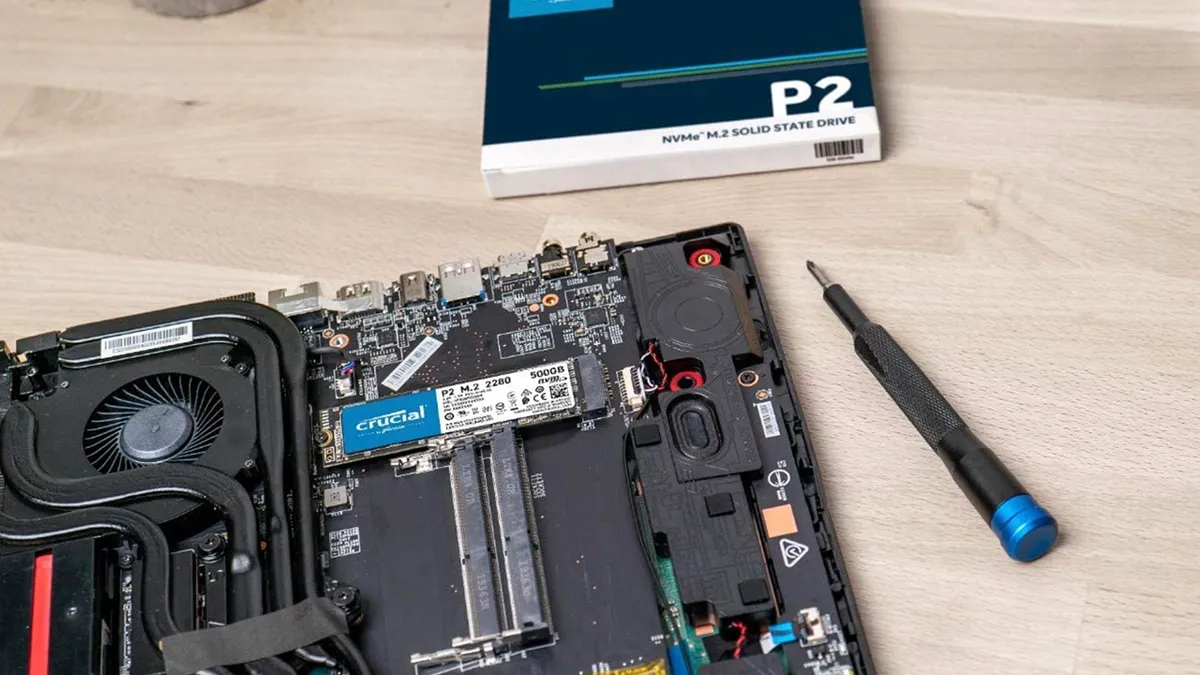
- Incorrect Installation: One of the most common causes of an undetected M.2 SSD is incorrect installation. Ensure that the drive is properly inserted into the M.2 slot, making sure it is securely in place. Double-check the alignment of the notches on the M.2 SSD and the slot to ensure they match.
- Incompatible Hardware or BIOS Settings: Incompatibility between hardware components or outdated BIOS settings can prevent your M.2 SSD from being recognized. Some older motherboards may not support M.2 SSDs or require a BIOS update to enable M.2 functionality. Check your motherboard’s specifications and update the BIOS if necessary.
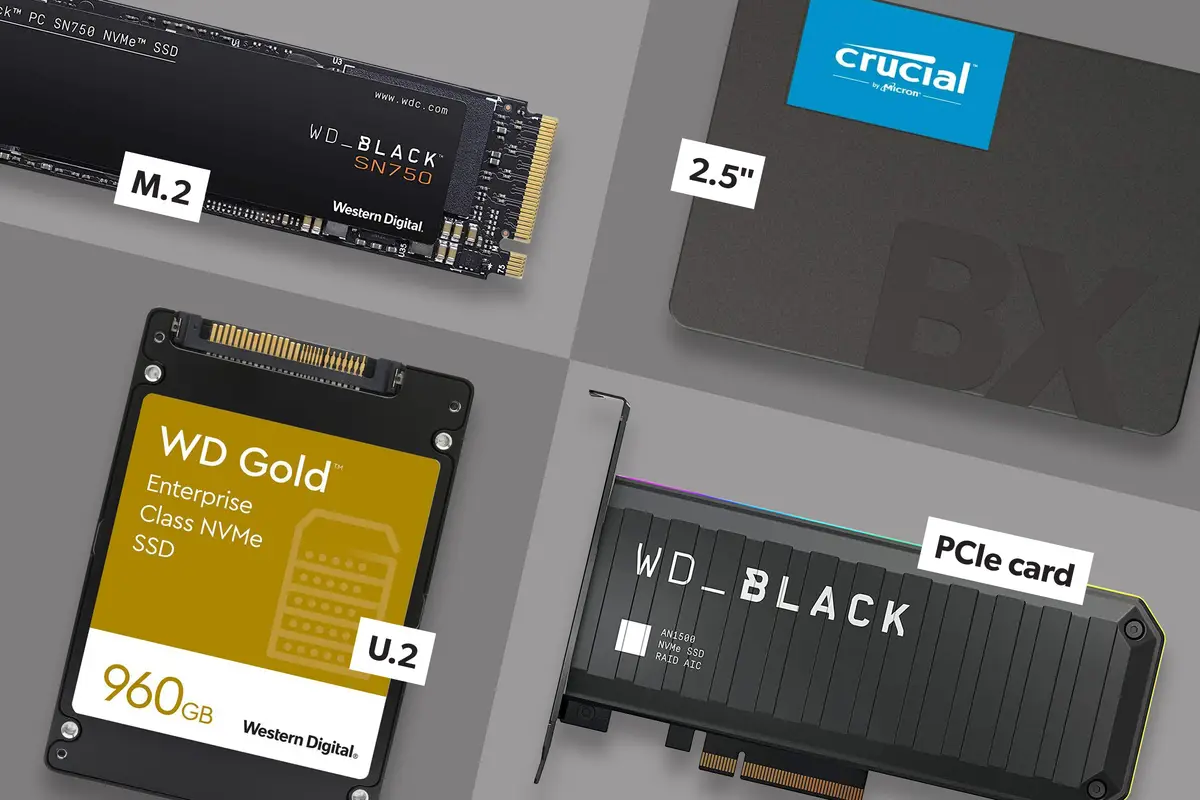
- SATA or NVMe Connection Issues: Depending on the type of M.2 SSD (SATA or NVMe), different connection protocols are used. Ensure that you have connected the drive to the appropriate connector on the motherboard. SATA M.2 SSDs connect to a SATA port, while NVMe M.2 SSDs use a specialized NVMe slot.
- Outdated Drivers or Firmware: Outdated drivers and firmware can also lead to undetected M.2 SSDs. Check the manufacturer’s website for the latest drivers and firmware updates for your specific M.2 SSD model. Install them following the provided instructions to ensure compatibility and optimal performance.
- Physical Damage or Defects: Sometimes, physical damage or defects on the M.2 SSD itself can prevent it from being detected. Inspect the SSD for any visible signs of damage and ensure that it is properly seated. If you suspect a hardware issue, you may need to contact the manufacturer for further assistance.
These are just a few of the possible causes for an undetected M.2 SSD. Troubleshooting the issue requires careful examination and elimination of potential factors. In the following sections, we will explore step-by-step solutions to help you identify and resolve the problem with your M.2 SSD.
Check if the M.2 SSD is Installed Correctly
When your M.2 SSD is not being detected, the first step is to ensure that it has been installed correctly. Here’s how you can check:
- Power Off and Unplug: Before working with any internal components, make sure to power off your computer and unplug it from the power source. This ensures your safety and prevents any electrical damage.
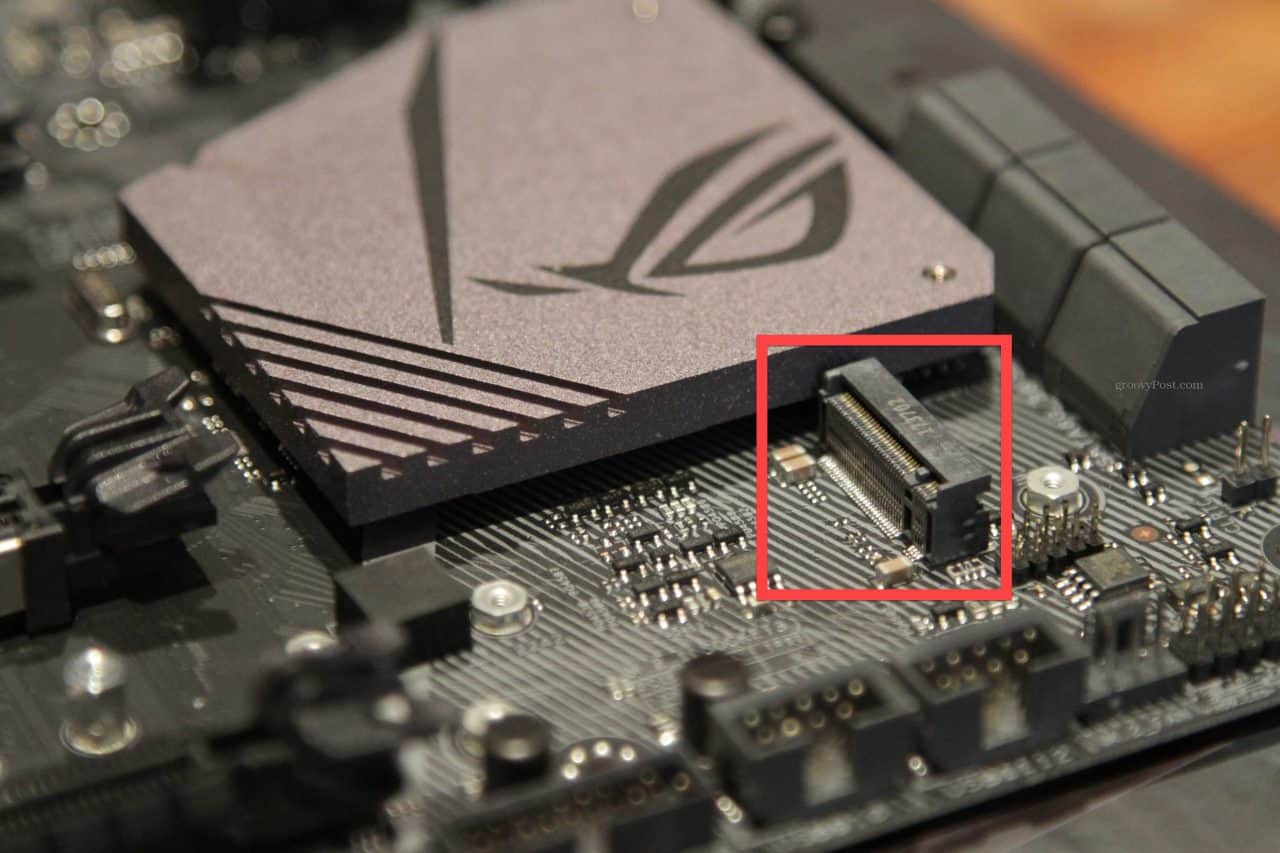
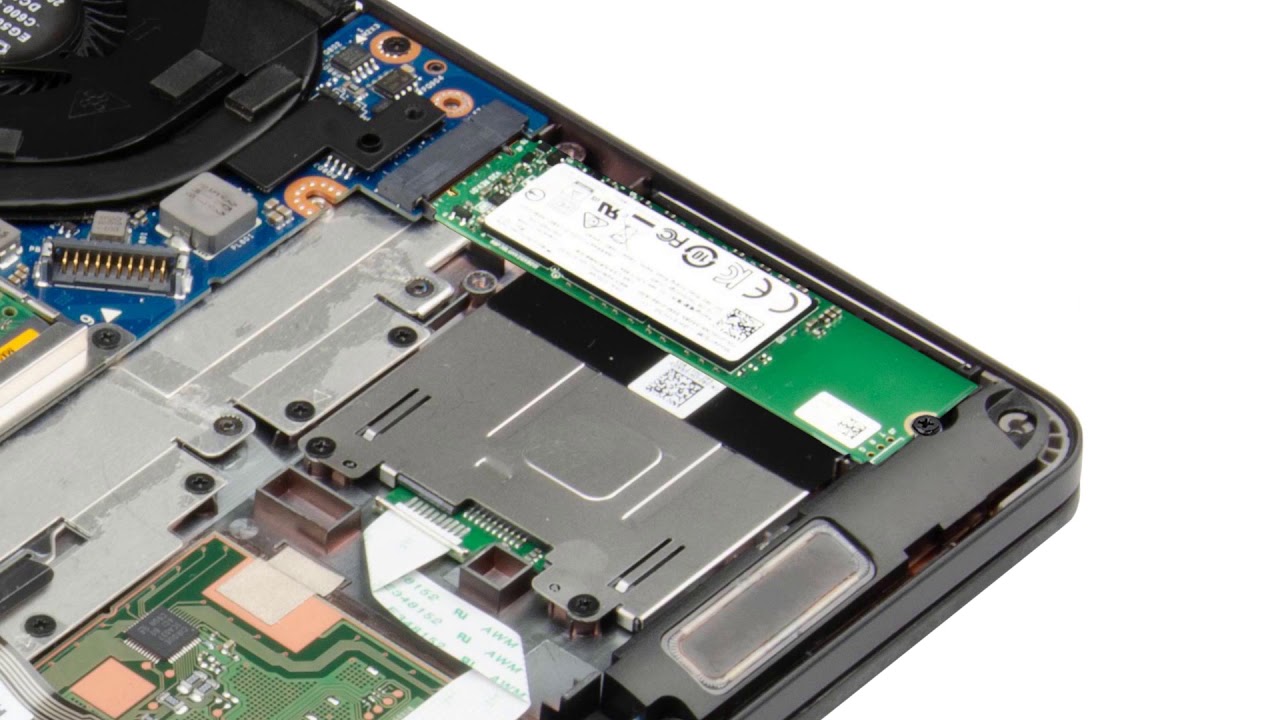
- Locate the M.2 Slot: Identify the M.2 slot on your motherboard. It is usually located near the CPU socket or labeled as “M.2” on the motherboard. Consult your motherboard’s manual for specific instructions if needed.
- Align the Notches: Ensure that the notches on the M.2 SSD line up with the keying notch on the M.2 slot. This ensures proper alignment and prevents any installation errors. Insert the M.2 SSD into the slot at a slight angle and gently press it down until it is seated firmly.
- Tighten the Screw (if applicable): Some M.2 slots require a screw to secure the SSD in place. If your motherboard has a screw, tighten it gently to hold the SSD securely. Be careful not to overtighten, as it may damage the SSD or the motherboard.
- Reassemble and Power On: After installing the M.2 SSD, carefully reassemble your computer and reconnect all cables. Plug in your computer and power it on.
Once your computer is powered on, check if the M.2 SSD is detected by the system. Enter the BIOS/UEFI settings by pressing the appropriate key (usually Del, F2, or F12) during the boot process. Look for the M.2 SSD in the list of recognized devices. If it is detected, you have successfully installed the M.2 SSD.
If the M.2 SSD is still not being detected, double-check the installation to ensure it is properly seated and aligned. Sometimes, a loose connection or misalignment can prevent detection. You may have to remove and reinsert the M.2 SSD, ensuring it is securely in place.
Checking the installation of the M.2 SSD is an essential first step and can often resolve the issue. However, if the SSD is still not detected, proceed to the next troubleshooting steps to identify the underlying cause.
Verify Compatibility and BIOS Settings
Another possible reason for your M.2 SSD not being detected is compatibility issues or incorrect BIOS settings. Follow these steps to verify compatibility and adjust BIOS settings:
- Check Motherboard Compatibility: Ensure that your motherboard supports M.2 SSDs. Check the manufacturer’s website or refer to your motherboard’s manual for compatibility information. Some older motherboards may not have M.2 support or require a BIOS update to enable it.
- Update BIOS: If your motherboard supports M.2 SSDs but the SSD is still not being detected, it may be necessary to update the BIOS. Visit the manufacturer’s website and download the latest BIOS version for your motherboard model. Follow the provided instructions to update the BIOS firmware, ensuring that you follow all safety precautions outlined by the manufacturer.
- Enter BIOS/UEFI Settings: Restart your computer and enter the BIOS/UEFI settings by pressing the appropriate key (usually Del, F2, or F12) during the boot process. The key may vary depending on your motherboard model. Consult your motherboard’s manual if you are unsure about the key.
- Enable M.2 Support: Once in the BIOS settings, navigate to the “Advanced” or “Storage” tab, or a similar section that deals with storage devices. Look for an option that enables M.2 support or allows you to choose the type of M.2 SSD (SATA or NVMe). Enable this option if it is disabled or adjust it according to the type of M.2 SSD you have installed.
- Save and Exit: After making the necessary changes, save the settings and exit the BIOS/UEFI. Your system will restart, and the changes will take effect. Check if the M.2 SSD is detected by the system after the restart.
Verifying compatibility and adjusting BIOS settings can often resolve issues related to M.2 SSD detection. By ensuring that your motherboard supports M.2 SSDs and enabling the appropriate settings in the BIOS, you increase the chances of a successful detection.
If the M.2 SSD is still not being detected, proceed to the next troubleshooting steps to further investigate and resolve the issue.
Confirm SATA or NVMe Connection
When troubleshooting an undetected M.2 SSD, it’s essential to verify that the correct connection is being used for your specific M.2 SSD type. Depending on whether your SSD is SATA or NVMe, different connection protocols are required. Follow these steps to confirm the SATA or NVMe connection:
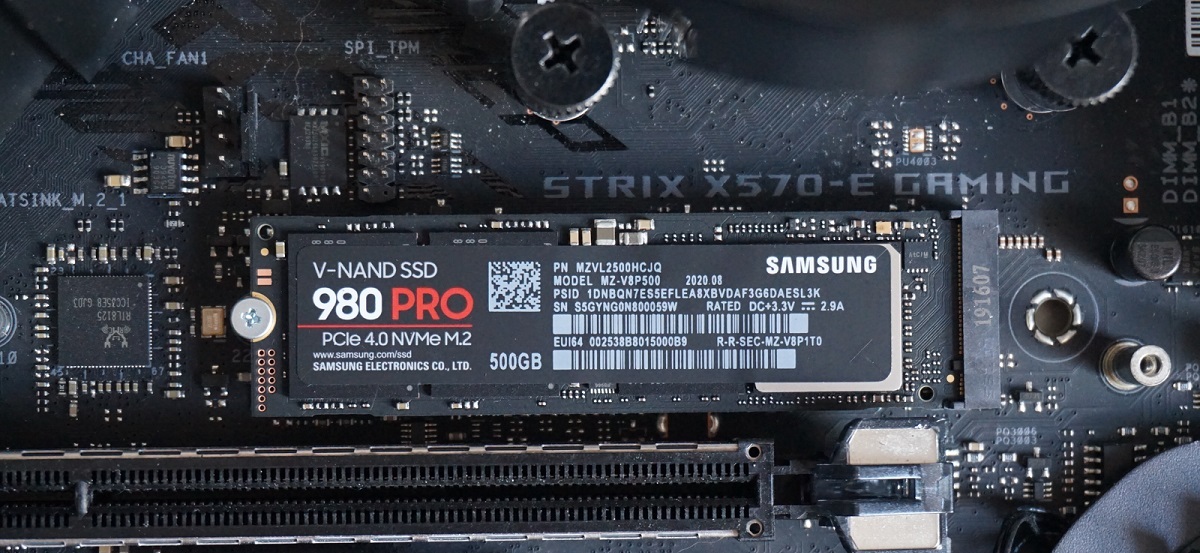
- Consult SSD Documentation: Refer to the documentation or specifications of your M.2 SSD to determine whether it is a SATA or NVMe SSD. This information will help you determine the appropriate connection type.
- Check Motherboard Specifications: Examine your motherboard’s specifications to identify the available M.2 slots and their connection types. The motherboard manual or manufacturer’s website will provide this information. Confirm that the M.2 slot you are using matches the connection type of your SSD.
- Inspect M.2 Slot Labeling: Look for any labels or markings near the M.2 slot on your motherboard. It may specify whether it is a SATA or NVMe slot. If no labeling is present, consult your motherboard manual for clarification.
- Verify Cable Connection: If your M.2 SSD is SATA, ensure that it is connected to a SATA port on the motherboard using the appropriate cable. On the other hand, if your SSD is NVMe, it should be connected to a dedicated NVMe slot, typically labeled as such on the motherboard or in the manual.
- Reboot and Check Detection: After confirming the correct connection, restart your computer and check if the M.2 SSD is detected by the system. Enter the BIOS/UEFI settings to verify if the SSD is recognized in the list of devices.
Confirming the SATA or NVMe connection is crucial to ensure the proper functioning of your M.2 SSD. Using the wrong connection can result in the SSD not being detected by the system. By following these steps and double-checking the connection, you can eliminate any connection-related issues and move on to other troubleshooting methods if necessary.
If the SSD is still not being detected, continue to the next section to explore additional troubleshooting steps.
Update Drivers and Firmware
Outdated drivers and firmware can often be the cause of an undetected M.2 SSD. Keeping your drivers and firmware up to date is crucial for optimal performance and compatibility. Follow these steps to update drivers and firmware for your M.2 SSD:
- Identify the SSD Model: Determine the make and model of your M.2 SSD. You can find this information on the SSD itself or in the documentation that came with it.
- Visit the Manufacturer’s Website: Go to the website of the SSD manufacturer or the computer’s manufacturer if the SSD is OEM. Look for the “Support” or “Downloads” section.
- Search for the Latest Drivers: Search for the latest drivers and firmware for your M.2 SSD model in the support/downloads section. Download the appropriate files for your operating system.
- Install the Drivers: After downloading the drivers, run the installer and follow the on-screen instructions to install them. Reboot your computer after the installation process is complete.
- Verify Firmware Updates: Check if there are any firmware updates available for your M.2 SSD model. Firmware updates can improve compatibility, performance, and reliability. Follow the manufacturer’s instructions to update the SSD’s firmware, if applicable.
- Reboot and Check Detection: After updating the drivers and firmware, restart your computer and check if the M.2 SSD is detected by the system. Enter the BIOS/UEFI settings to verify if the SSD is recognized in the list of devices.
Updating the drivers and firmware of your M.2 SSD can often resolve compatibility issues and ensure proper recognition by your system. By keeping the drivers and firmware up to date, you can maximize the performance and stability of your SSD.
If the M.2 SSD is still not being detected, proceed to the next troubleshooting steps to further investigate and resolve the issue.
Check for Physical Damage or Defects
Physical damage or defects on the M.2 SSD itself can sometimes prevent it from being detected by your system. To ensure that your SSD is in optimal condition, follow these steps to check for physical damage or defects:
- Inspect the SSD: Carefully examine the M.2 SSD for any visible signs of physical damage, such as bent pins, cracks, or broken components. Check the gold contact pins on the SSD for dirt, debris, or corrosion. If you notice any damage or issues, it may indicate a faulty SSD.
- Verify Proper Seating: If the M.2 SSD is partially or loosely inserted into the slot, it may not be detected. Remove the SSD from the slot and reinsert it, ensuring that it is securely seated. Apply gentle pressure until the SSD snaps into place. A loose connection can cause detection issues.
- Use a Different Slot (if available): If you have multiple M.2 slots on your motherboard, try inserting the SSD into a different slot. This can help identify if the problem is with the specific slot or the SSD itself.
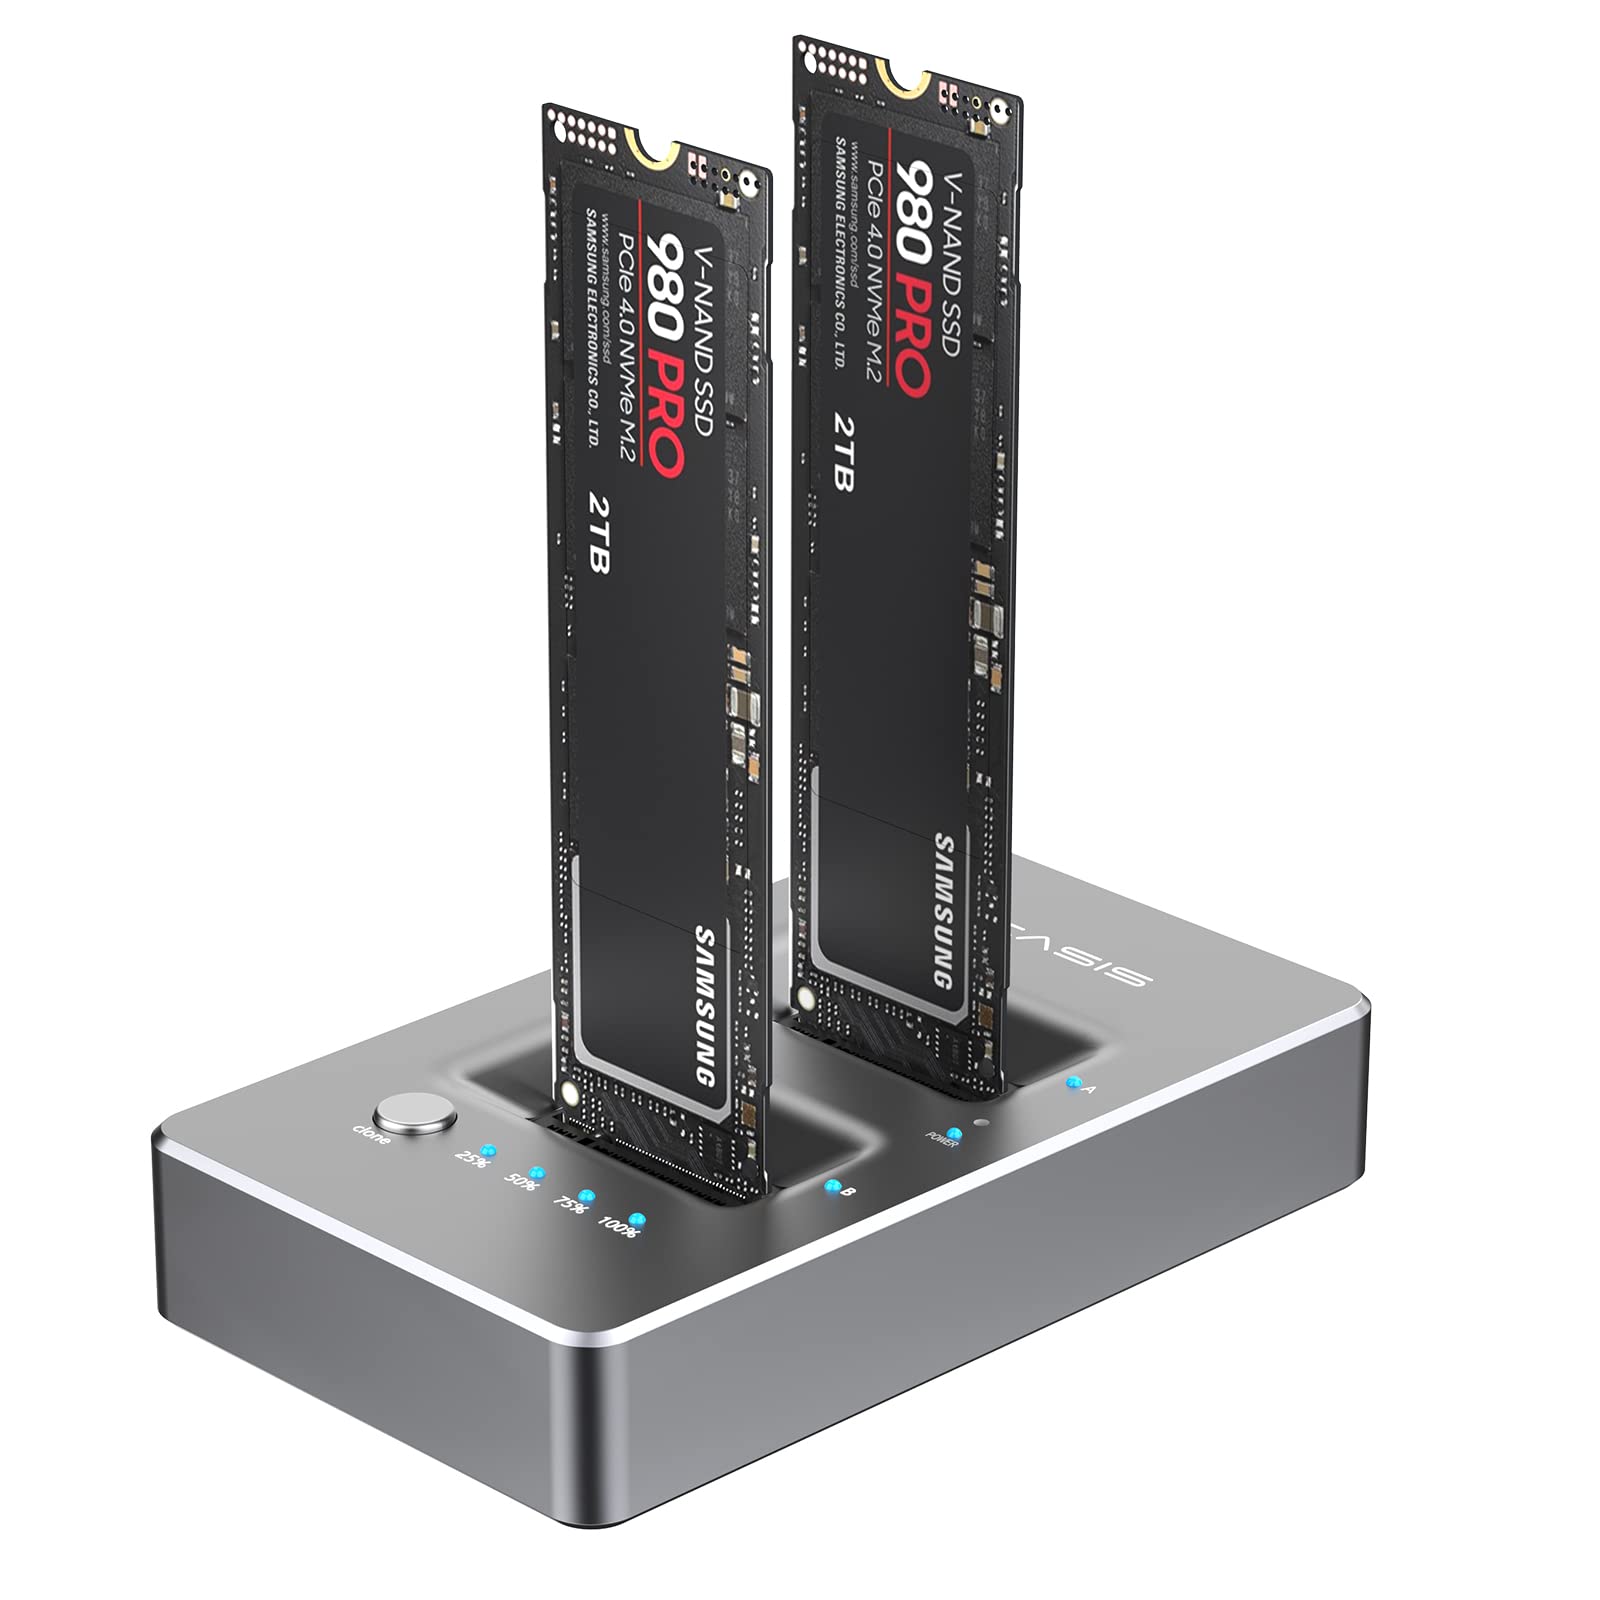
- Test with a Known Working System: If possible, test the M.2 SSD on a different computer or laptop that supports M.2 drives. This helps determine if the problem is isolated to your system or if the SSD itself is faulty.
- Contact the Manufacturer: If you believe that your M.2 SSD is physically damaged or defective, contact the manufacturer’s customer support for further assistance. They can provide guidance on troubleshooting steps or initiate a warranty claim or replacement if necessary.
Checking for physical damage or defects is an important step in troubleshooting an undetected M.2 SSD. By carefully inspecting the SSD and ensuring proper seating, you can address any physical issues that may be causing the detection problem.
If the SSD continues to be undetected even after checking for physical damage or defects, proceed to the next troubleshooting steps to further investigate and resolve the issue.
Troubleshoot Using Disk Management Utility
When your M.2 SSD is not being detected, using the Disk Management utility in Windows can help troubleshoot the issue. Follow these steps to access and use the Disk Management utility:
- Open Disk Management: Press the Windows key + R to open the Run dialog box. Type “diskmgmt.msc” and press Enter. The Disk Management utility will open.
- Check for Unallocated Space: In the Disk Management window, look for your M.2 SSD. If it is listed but shows as “Unallocated,” it means the SSD is recognized by the system but not yet initialized or formatted. Right-click on the unallocated space and select “Initialize Disk.” Follow the prompts to initialize the disk and allocate a drive letter.
- Create and Format Partitions: If the drive appears as “Online” with allocated space but without drive letters or file format, right-click on it and select “New Simple Volume.” Follow the on-screen instructions to create a new partition and format it with the desired file system (e.g., NTFS).
- Assign Drive Letters: If the SSD is listed but doesn’t have a drive letter assigned, right-click on the partition and select “Change Drive Letter and Paths.” Click “Add” and assign a drive letter to the SSD. This will make the drive accessible in Windows Explorer.
- Rescan Disks: If your SSD is still not detected, click on “Action” in the Disk Management window and select “Rescan Disks.” This forces the system to recheck for any connected disks or storage devices. After rescanning, check if the M.2 SSD appears.
The Disk Management utility provides a visual representation of your disk drives and allows you to manage their partitions and assign drive letters. By using this utility, you can ensure that your M.2 SSD is properly initialized, formatted, and assigned a drive letter, making it accessible to your operating system.
If the M.2 SSD is still not detected after using the Disk Management utility, continue to the next troubleshooting steps to further investigate and resolve the issue.
Seek Professional Help or RMA the SSD
If you have gone through the previous troubleshooting steps and your M.2 SSD is still not being detected, it may be time to seek professional help or consider initiating a return merchandise authorization (RMA) for the SSD. Here are the recommended steps:
- Contact Technical Support: Reach out to the technical support team of your M.2 SSD manufacturer or your computer manufacturer. Explain the issue you are facing and the troubleshooting steps you have already taken. They may provide additional guidance based on your specific situation.
- Consult a Professional: If you are not comfortable troubleshooting the issue yourself, consider seeking assistance from a computer repair technician or a professional who specializes in SSD-related problems. They have the expertise and tools to diagnose and resolve complex issues.
- Initiate RMA (Return Merchandise Authorization): If your SSD is still under warranty and all troubleshooting attempts have failed, you may be eligible for an RMA. Contact the manufacturer’s customer support and inquire about their RMA process. They will provide instructions on returning the SSD for evaluation and potential replacement.
- Backup Data (if possible): Before returning or replacing the SSD, it is important to back up any valuable data stored on it, if possible. Use an external storage device or cloud backup services to ensure you don’t lose any important files.
While seeking professional help or initiating an RMA may involve some inconvenience, it is often the best course of action when all other troubleshooting methods have been exhausted. Remember to keep your warranty information, proof of purchase, and any relevant documentation ready when contacting technical support or initiating an RMA.
By seeking professional assistance or initiating an RMA, you can ensure that the undetected M.2 SSD issue is properly diagnosed and resolved, either through repair or replacement.