Introduction
Welcome to this guide on how to format an Xbox external hard drive. If you’re a gamer, you know how important it is to have enough storage space for your games and media. While the Xbox console itself comes with internal storage, it’s always a good idea to invest in an external hard drive to expand your storage capacity.
Having a properly formatted external hard drive is crucial for the smooth functioning of your Xbox. It allows you to install and play games, save game progress, and store media files without worrying about running out of space. However, formatting an external hard drive for Xbox can be a bit tricky if you’re not familiar with the process.
This guide aims to provide you with step-by-step instructions and important tips on how to format an Xbox external hard drive. Whether you’re setting up a new hard drive or reformatting an existing one, we’ll help you navigate through the process seamlessly.
Before we begin, it’s important to note that formatting an external hard drive erases all the data stored on it. So, if you have any important files or games on the drive, make sure to back them up before proceeding with the formatting process.
Now that we’ve covered the basics, let’s dive into the world of formatting Xbox external hard drives and making the most of your gaming experience.
Understanding Xbox External Hard Drive
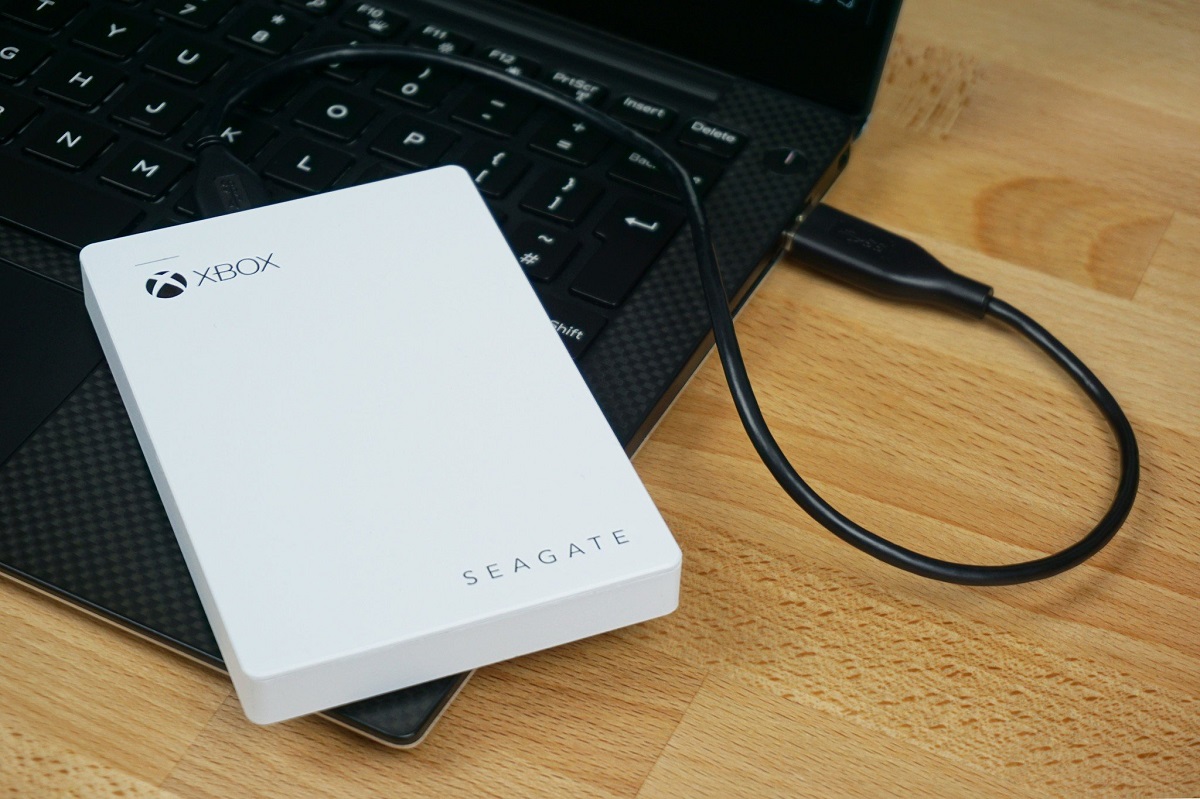
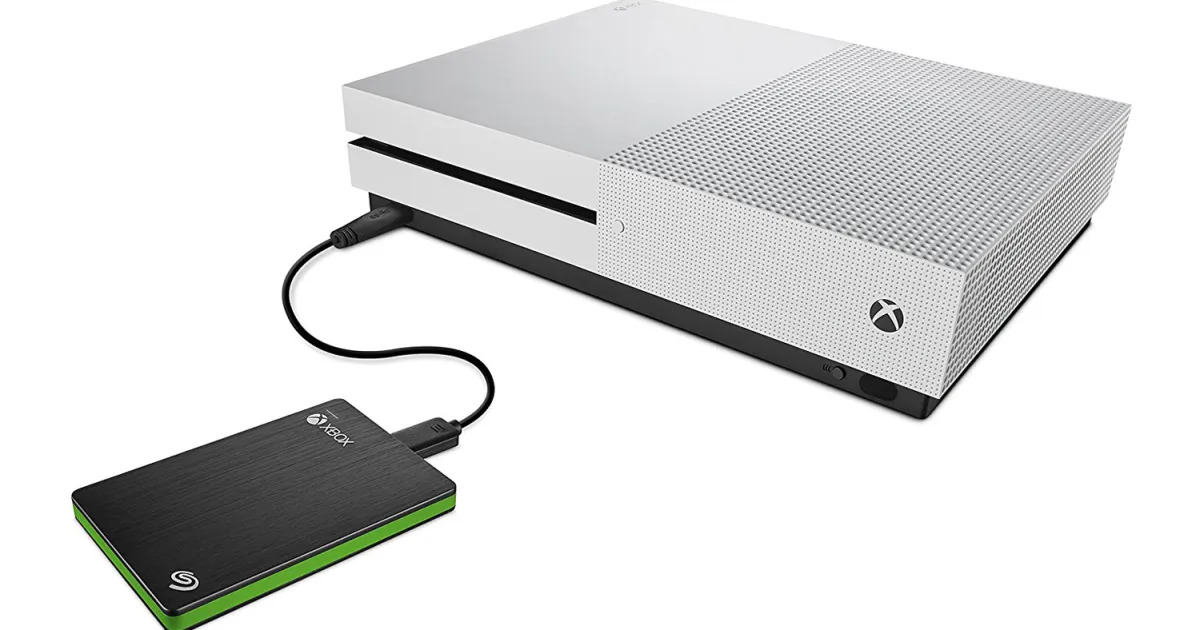
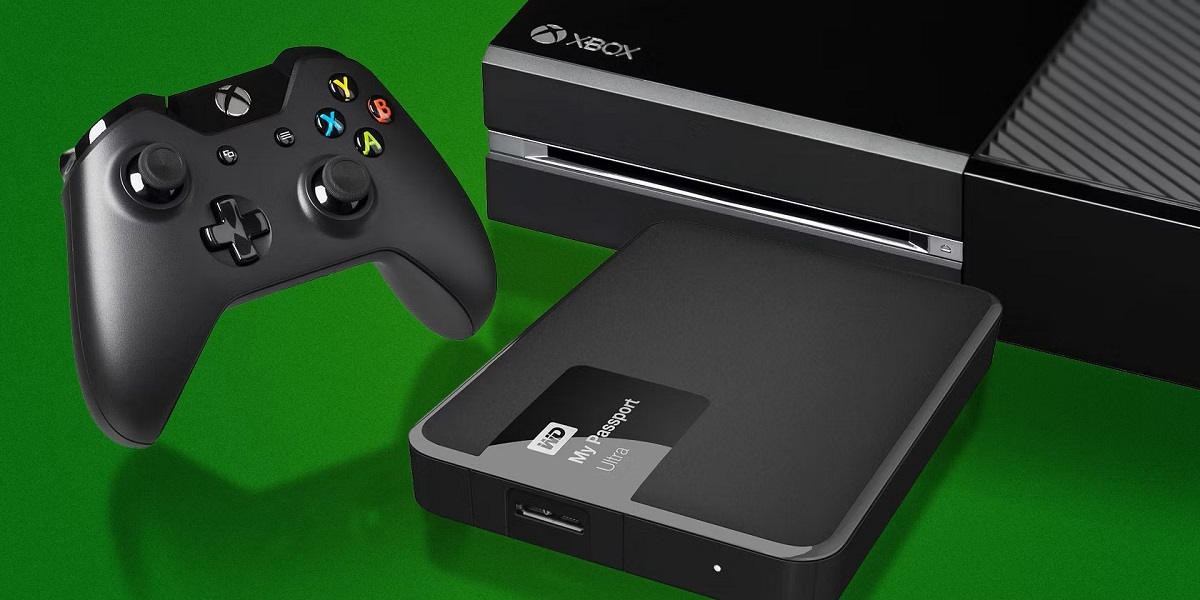
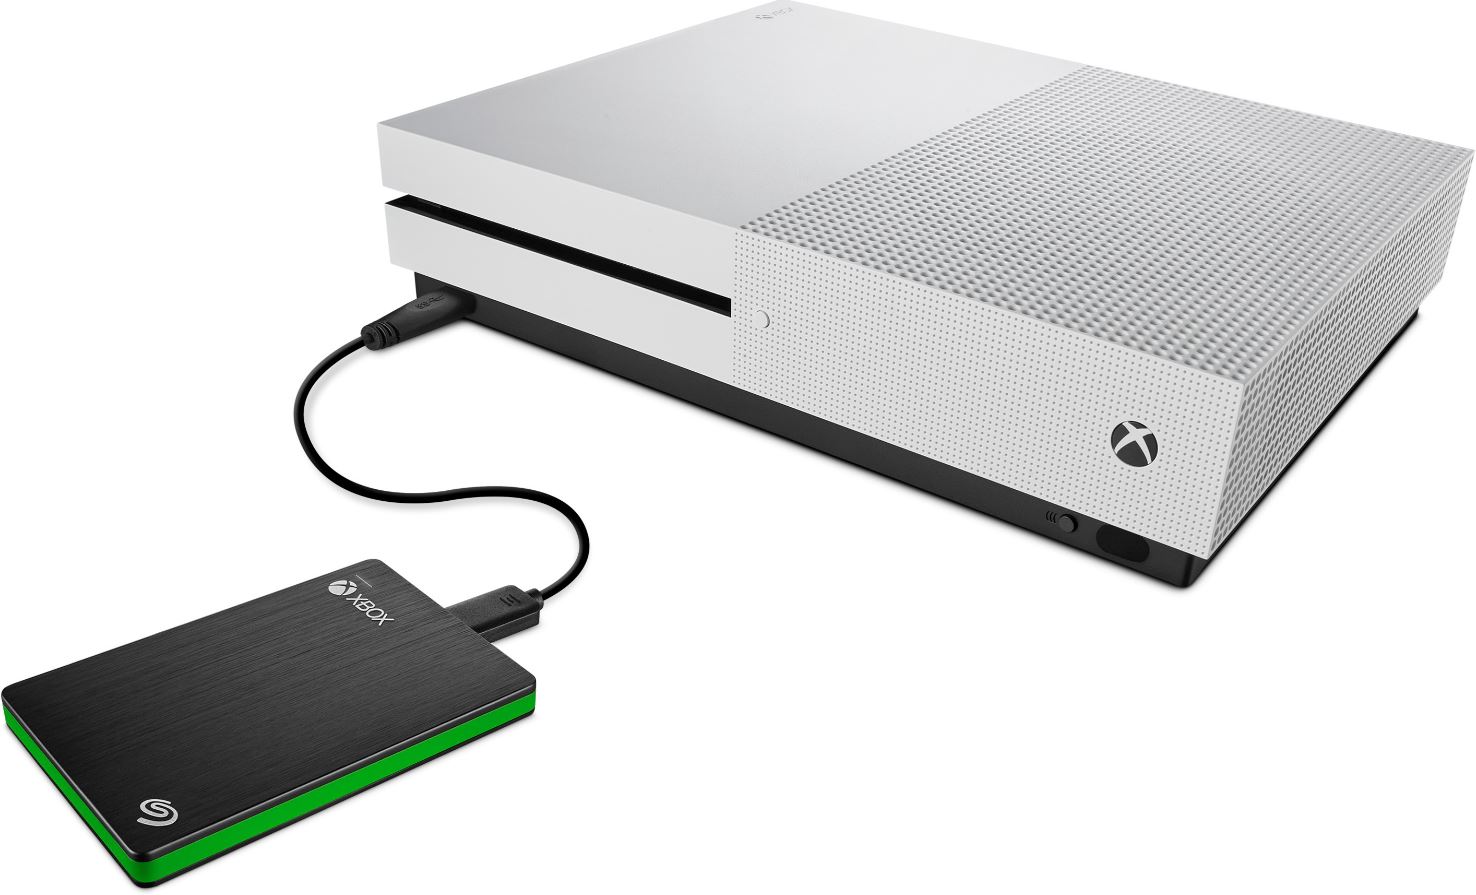
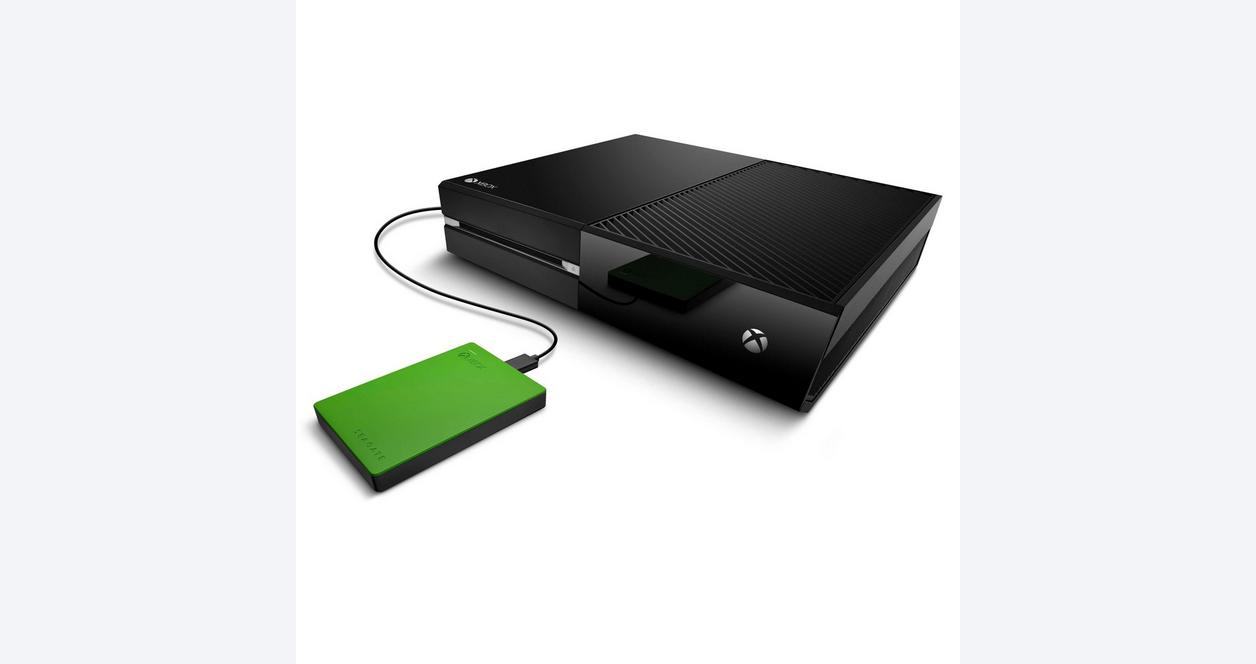
An Xbox external hard drive is a storage device that is connected to your Xbox console to expand its storage capacity. It allows you to store games, game progress, digital downloads, and other media files such as videos, music, and pictures. By having an external hard drive, you can avoid the hassle of constantly deleting games or files to free up space on your internal hard drive.
External hard drives for Xbox come in different storage capacities, ranging from a few hundred gigabytes to several terabytes. When choosing an external hard drive, it’s important to consider the amount of storage space you need, based on the number of games you plan to install and your media storage requirements.
One of the key factors to consider while selecting an external hard drive is the connection type. Xbox consoles support USB 3.0 and USB 3.1 connections, which offer faster data transfer rates compared to USB 2.0. It is recommended to choose an external hard drive with USB 3.0 or higher to ensure optimal performance.
External hard drives can be formatted in various file systems, including NTFS, exFAT, and FAT32. These file systems determine how the data is stored and organized on the hard drive. Different Xbox consoles support different file systems, so it’s important to choose the appropriate one to ensure compatibility.
It’s worth noting that Xbox consoles can only support a maximum of two external hard drives at a time. This means you’ll need to manage your storage space efficiently and consider the size and capacity of the hard drives you connect to your Xbox.
Understanding the basics of Xbox external hard drives is essential before proceeding with the formatting process. In the next sections, we’ll explore the steps to format an external hard drive for Xbox and provide tips for managing game files effectively.
Formatting Basics
Formatting an Xbox external hard drive involves preparing the drive for use with your Xbox console. It involves erasing all existing data on the drive and configuring it to meet the compatibility requirements of the Xbox system. Here are some important things to keep in mind when it comes to formatting:
Backup: Before formatting your external hard drive, make sure to back up any important files or games stored on it. Formatting will erase all data on the drive, so it’s crucial to have a backup to prevent data loss.
Compatibility: Each Xbox console has specific compatibility requirements for the file system used on external hard drives. The supported file systems include NTFS, exFAT, and FAT32. Check the documentation or the official Xbox website to determine which file systems are supported by your Xbox console.
Storage Capacity: Consider your storage needs and choose an external hard drive with sufficient capacity for your gaming and media files. Keep in mind that games, especially newer titles, can require several hundred gigabytes of storage space.
Connection Type: The external hard drive should connect to your Xbox console through a USB 3.0 or higher port for optimal performance. Ensure that the cable and connector are in good condition to prevent any connection issues during the formatting process.
Formatting Process: The process of formatting an Xbox external hard drive may vary slightly depending on the Xbox console model and the file system you choose. However, the general steps involve accessing the system settings, selecting the storage menu, and formatting the drive.
Now that we have covered the basics of formatting an Xbox external hard drive, let’s move on to the step-by-step guide for formatting your external hard drive for use with your Xbox.
Step-by-Step Guide to Format Xbox External Hard Drive
Formatting an Xbox external hard drive is a straightforward process. Follow these step-by-step instructions to format your external hard drive for use with your Xbox console:
- Connect the external hard drive to one of the USB ports on your Xbox console.
- Turn on your Xbox console and wait for it to fully boot up.
- Press the Xbox button on your controller to open the guide menu.
- Navigate to the “Settings” tab and select “System”.
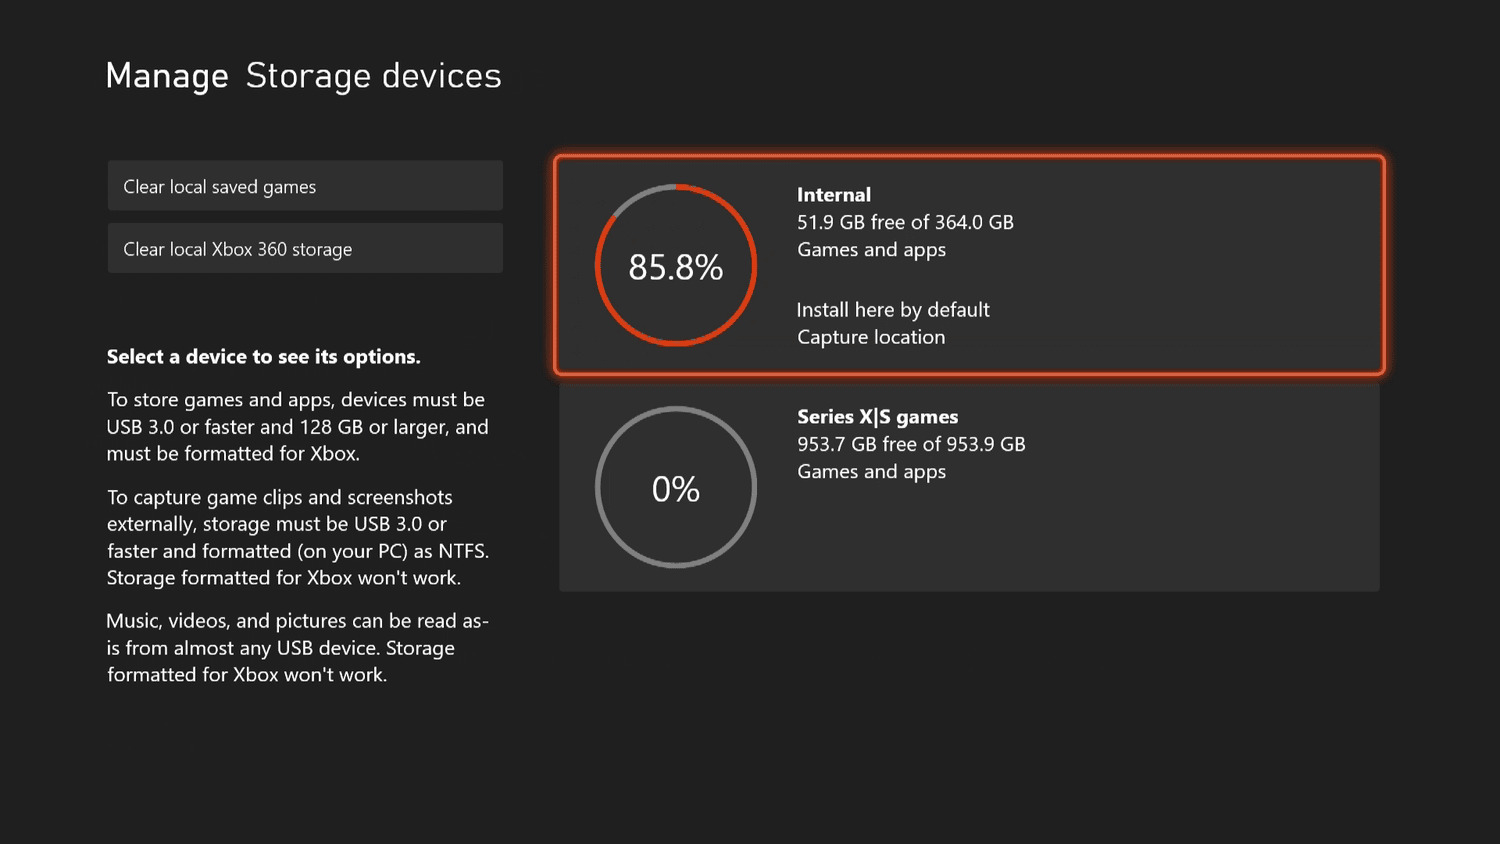
- Scroll down and select “Storage”.
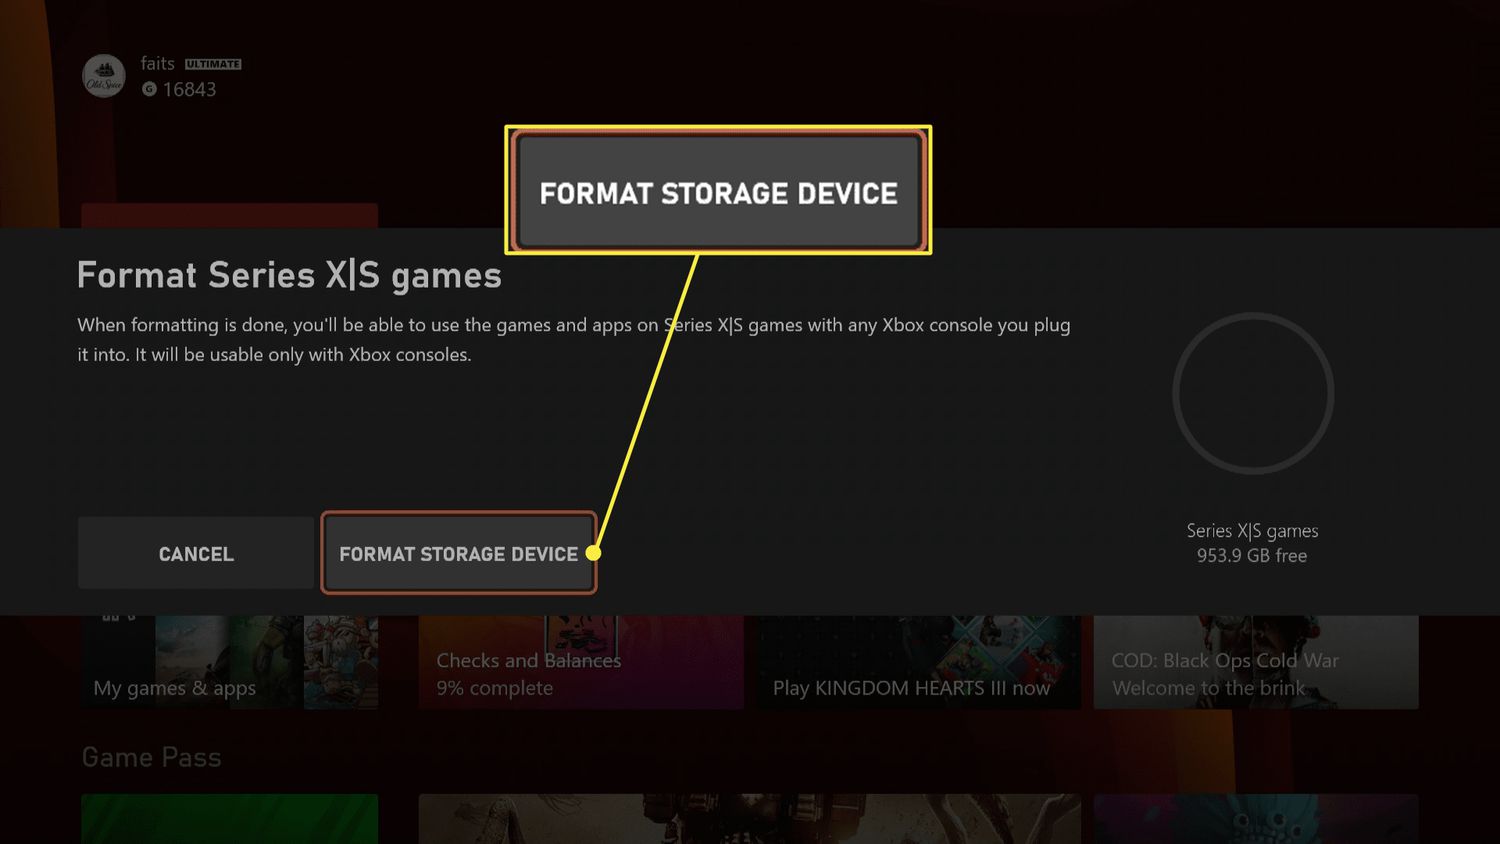
- Under the “Storage” menu, you’ll see a list of connected storage devices. Select the external hard drive you want to format.
- Choose the “Format Storage Device” option.
- Next, select the desired file system for your external hard drive. Make sure to choose a file system that is compatible with your Xbox console. If you’re unsure, refer to the Xbox documentation or website for compatibility information.
- Confirm the formatting process. A warning message will appear, reminding you that all data on the selected drive will be erased.
- Once you confirm the formatting, the Xbox console will begin formatting the external hard drive. This might take a few minutes, depending on the size of the drive.
- Once the formatting is complete, the external hard drive will be ready for use with your Xbox console. You can now install games and media files on the formatted drive.
That’s it! You’ve successfully formatted your Xbox external hard drive. You can repeat these steps if you want to format additional external hard drives for use with your Xbox.
Remember, formatting an external hard drive will erase all data on it, so make sure to back up any important files or games before proceeding with the formatting process.
Now that you know how to format your Xbox external hard drive, let’s move on to the next section to learn about choosing the right file system for your needs.
Choosing the Right File System
When it comes to formatting an Xbox external hard drive, choosing the right file system is important for compatibility and optimal performance. The file system determines how the data is stored and organized on the hard drive. Here are the main file systems supported by Xbox consoles:
- NTFS: This is the default file system for Windows operating systems and offers advanced features such as file permissions and encryption. NTFS supports large file sizes and is generally recommended for Xbox external hard drives. It provides faster read and write speeds, making it ideal for storing and playing large games.
- exFAT: exFAT is a lightweight file system that supports large file sizes and is compatible with both Xbox consoles and Windows/Mac systems. It’s a great option if you plan to use your external hard drive across different platforms. However, exFAT may have slightly slower performance compared to NTFS.
- FAT32: FAT32 is an older file system that has limitations in terms of maximum supported file size and drive capacity. It’s compatible with Xbox consoles, but it may not be suitable for storing large game files. It’s recommended to use FAT32 for smaller drives and non-game-related media storage.
When choosing the file system for your Xbox external hard drive, consider the following factors:
- Game File Sizes: If you plan to install and play large games, such as modern AAA titles, it’s recommended to use the NTFS file system. It provides better performance and supports larger file sizes.
- Compatibility: If you intend to use your external hard drive across multiple platforms, including Xbox consoles, Windows, and Mac systems, consider choosing exFAT. It offers cross-platform compatibility, allowing you to easily transfer files between different devices.
- Drive Capacity: If you have a smaller capacity drive (below 32GB), FAT32 may be a suitable option. However, keep in mind the limited file size and drive capacity restrictions of the FAT32 file system.
It’s crucial to choose a file system that is supported by your Xbox console to ensure seamless compatibility and performance. Refer to the Xbox documentation or website for specific information on file system compatibility for your Xbox model.
Now that you understand the options available, it’s time to select the appropriate file system for your Xbox external hard drive and proceed with the formatting process.
Managing Game Files on Xbox External Hard Drive
With the expanded storage capacity of an Xbox external hard drive, you can store and manage your game files more efficiently. Here are some tips for effectively managing game files on your Xbox external hard drive:
- Game Installation: When installing games, you have the option to choose the storage location. Select your external hard drive as the default installation location to save space on your console’s internal drive. This can be done through the settings menu on your Xbox console.
- Game Transfers: If you have games already installed on your console’s internal drive, you can transfer them to your external hard drive to free up space. Simply go to the settings menu, select “System”, then “Storage”. Choose the game you want to transfer and select the “Move” or “Copy” option to move it to the external hard drive.
- Game Organization: To keep your game files organized, create separate folders or categories for different games or genres on your external hard drive. This will make it easier to locate and access specific games when you want to play them.
- Game Updates: Keep in mind that game updates and patches are separate from the game files. They are usually installed on your console’s internal drive. However, you can check for options to download and install updates directly to your external hard drive to save space on the internal drive.
- Managing Storage Space: Regularly check the storage space on your external hard drive to ensure you have enough space for new game installations. If your storage is running low, consider deleting games you no longer play or moving them to a backup storage device to free up space.
By efficiently managing game files on your Xbox external hard drive, you can easily organize your game library, save space on your console’s internal drive, and have quick access to all your favorite games.
Keep in mind that disconnecting or unplugging your external hard drive while the Xbox console is in use can disrupt the gaming experience and potentially cause data loss or corruption. Ensure that you safely remove the external hard drive through the Xbox console’s settings before disconnecting it.
Now that you have a clear understanding of how to manage game files on your Xbox external hard drive, you’re ready to enjoy an enhanced gaming experience with ample storage space.
Troubleshooting Common Issues
While formatting and using an Xbox external hard drive is generally straightforward, you may encounter some common issues along the way. Here are a few troubleshooting tips for addressing these issues:
- Drive Not Recognized: If your Xbox console does not recognize your external hard drive, try the following steps:
- Ensure that the drive is properly connected to the USB port on your console. Try unplugging and reconnecting the drive.
- Check if the drive is functioning properly by connecting it to a different device such as a computer. If it doesn’t work on any device, it may be a hardware issue and you should consider contacting the manufacturer for support.
- If the drive works on other devices but still isn’t recognized by your Xbox, try restarting your console. Sometimes a simple restart can resolve connection issues.
- Formatting Errors: If you encounter errors during the formatting process, such as “Unable to Format” or “Format Failed”, try these troubleshooting steps:
- Ensure that the external hard drive is not write-protected. Some drives have a physical switch to enable write protection. Disable write protection if it’s enabled.
- Check if the drive is using a compatible file system. Consult your Xbox console documentation to verify which file systems are supported.
- If the issue persists, try formatting the drive using a different computer or a different operating system. This can help determine if the issue is specific to the Xbox console.
- Slow Performance: If you notice sluggish performance or slow loading times when playing games stored on your external hard drive, consider these troubleshooting steps:
- Ensure that your external hard drive is connected to a USB 3.0 (or higher) port on your Xbox console. USB 2.0 ports have slower data transfer rates and can impact performance.
- Check if the drive is heavily fragmented. If so, you can connect the drive to a computer and run a disk defragmentation tool to optimize its performance.
- If possible, try using a different external hard drive to see if the performance issue persists. The drive itself may be the cause of the slowdown.
If you continue to experience difficulties with your Xbox external hard drive despite troubleshooting, it’s recommended to contact Xbox customer support or the manufacturer of your external hard drive for further assistance.
By being aware of these common issues and following the troubleshooting tips provided, you can overcome potential hurdles and ensure a smooth and enjoyable gaming experience with your Xbox external hard drive.
Conclusion
In conclusion, formatting an Xbox external hard drive is an essential step in expanding your storage capacity and improving your gaming experience. By following the steps and guidelines provided in this guide, you can easily format your external hard drive, choose the appropriate file system, and effectively manage your game files.
Remember to back up any important data before formatting, and always ensure that your external hard drive is compatible with your Xbox console. Take advantage of features such as game transfers, organizing game files, and managing storage space to optimize your gaming setup.
If you encounter any issues during the formatting or usage of your external hard drive, refer to the troubleshooting tips provided. If the issues persist, don’t hesitate to reach out to Xbox customer support or the manufacturer for further assistance.
With a properly formatted Xbox external hard drive, you’ll have ample space to install and play your favorite games, store media files, and enjoy a seamless gaming experience without worrying about storage limitations.
We hope this guide has been helpful and that you’re now ready to format and utilize your Xbox external hard drive to its fullest potential. Happy gaming!