Introduction
Partitioning and formatting a hard disk drive is an essential step in setting up a new computer or managing storage on an existing system. It involves dividing the hard drive into multiple sections called partitions and preparing them for use by the operating system. Proper partitioning and formatting not only optimize disk space allocation but also improve overall system performance.
Understanding the basics of hard disk partitioning is crucial before diving into the technicalities. Each partition acts as a separate storage unit, allowing you to organize data, install multiple operating systems, or separate system files from personal files. The chosen file system, such as FAT32, NTFS, or exFAT, determines how the data is stored, accessed, and managed on the partition.
There are different types of partitions, each serving a specific purpose. Primary partitions are the main sections that can be bootable and hold an operating system. Extended partitions serve as containers for logical partitions, which in turn are used to store data. GPT (GUID Partition Table) and MBR (Master Boot Record) are the two common partitioning schemes used.
To successfully partition and format a hard disk drive, it is vital to plan your strategy in advance. Consider factors such as the size of the drive, the intended use of the partitions, and the desired file system. Additionally, take into account the operating system you are using and any compatibility requirements.
In this article, we will guide you through the steps involved in partitioning and formatting a new hard disk drive as well as an existing one. We will also provide a walkthrough using different operating systems, including Windows, macOS, and Linux. Finally, we’ll discuss troubleshooting common issues that may arise during partitioning and formatting, and share some best practices for maintaining and managing your partitions.
Understanding Hard Disk Partitioning
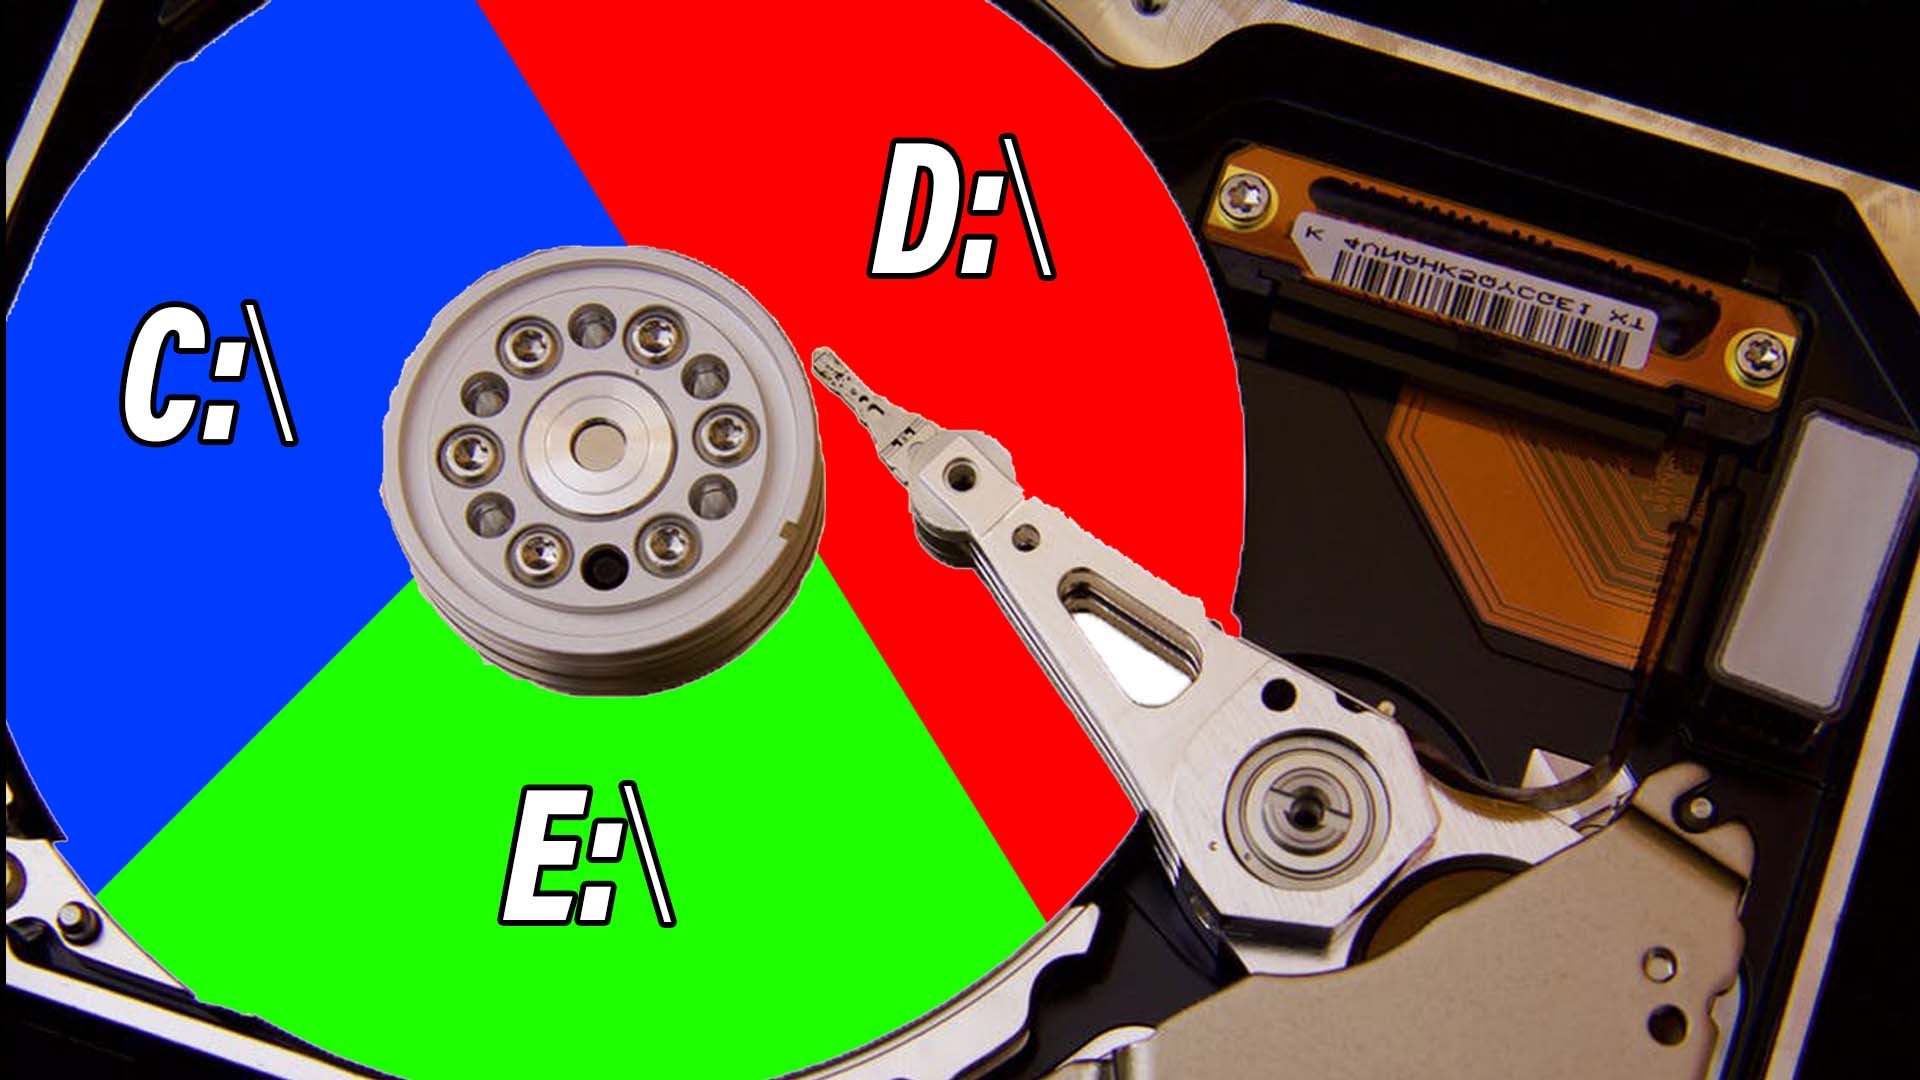
Hard disk partitioning is the process of dividing a physical hard drive into separate sections or partitions. Each partition acts as an independent storage unit, allowing you to organize and manage data efficiently. By partitioning a hard disk drive, you can allocate storage space for different purposes, such as installing operating systems, storing personal files, or creating backup partitions.
There are several benefits to partitioning a hard drive. Firstly, it provides better data organization and management. Instead of storing all your data in one large partition, you can create multiple partitions to separate different types of files. For example, you can have one partition specifically for your operating system and applications, while another is dedicated to storing personal files like documents, photos, and videos. This makes it easier to locate and manage specific files.
Partitioning also allows for more efficient use of disk space. When you format a partition, you choose a file system that determines how the data is stored and accessed. Different file systems have varying cluster sizes, which can affect the amount of space wasted when storing small files. By using separate partitions with different file systems optimized for specific types of data, you can minimize wasted disk space.
Another advantage of partitioning is the ability to have multiple operating systems on a single hard drive. Each operating system will have its own partition, allowing you to dual-boot or multi-boot your computer. This is particularly useful for developers, enthusiasts, or individuals who need to run different operating systems for specific tasks or compatibility reasons.
Understanding the different types of partitions is essential when partitioning a hard disk drive. The primary partition is the main section that can hold an operating system and is typically limited to four per hard drive. Logical partitions are created within an extended partition and are used for data storage. The extended partition acts as a container for multiple logical partitions. Each partition is assigned a drive letter or mount point, allowing easy access and identification.
Two common partitioning schemes are the GPT (GUID Partition Table) and MBR (Master Boot Record). GPT is a newer partitioning scheme that supports larger disk sizes, more partitions, and provides more robust data protection. MBR, on the other hand, is the older partitioning scheme and is limited to a maximum of four primary partitions.
By understanding the basics of hard disk partitioning, you can make informed decisions when setting up and managing your storage. In the next section, we will discuss the different types of partitions in more detail, as well as explore various strategies for planning your partitioning and formatting approach.
The Different Types of Partitions
When partitioning a hard disk drive, it is important to understand the different types of partitions that can be created. Each type serves a specific purpose and determines how the storage space is allocated and used. Let’s take a closer look at the primary partitions, extended partitions, and logical partitions.
1. Primary Partitions:
A primary partition is a standalone section of a hard disk drive that can be used to install an operating system. Typically, a hard drive can have up to four primary partitions. Each primary partition is assigned a unique drive letter or mount point and can be set as active, allowing the system to boot from it. By creating multiple primary partitions, you can have a dual-boot or multi-boot system, where each partition contains a different operating system.
2. Extended Partitions:
An extended partition is not used for storing data directly. Instead, it acts as a container for logical partitions. Unlike primary partitions, which are limited to four per hard drive, you can have only one extended partition. The purpose of the extended partition is to overcome the limitation of four primary partitions and provide the ability to create more partitions within the extended partition.
3. Logical Partitions:
Logical partitions are created within the extended partition and are used for data storage. They function similarly to primary partitions but are contained within the extended partition. Logical partitions are assigned their own drive letters or mount points and can be used to organize data based on different categories or file types. For example, you can have a logical partition dedicated to storing documents, another for multimedia files, and so on.
It’s important to note that logical partitions can only exist within an extended partition. Therefore, if you plan to create multiple data storage partitions, you will need to create an extended partition first and then divide it into logical partitions.
When it comes to partitioning a hard disk drive, it’s also essential to consider the partitioning scheme used. The two most common partitioning schemes are the GPT (GUID Partition Table) and MBR (Master Boot Record). The GPT scheme is newer and supports larger disk sizes, more partitions, and provides better data protection. The MBR scheme, on the other hand, is older and only supports up to four primary partitions. Depending on your system requirements and the capabilities of your operating system, you may need to choose one partitioning scheme over the other.
Understanding the different types of partitions allows you to plan and create a well-organized storage structure on your hard disk drive. In the next section, we will discuss the steps involved in planning your partitioning and formatting strategy, ensuring that you allocate the right amount of space to each partition.
Planning Your Partitioning and Formatting Strategy
Before diving into partitioning and formatting your hard disk drive, it is essential to plan your strategy carefully. By considering various factors, you can ensure that your partitions are optimized for your specific needs and that you allocate the right amount of space to each partition. Here are some steps to help you plan your partitioning and formatting strategy:
1. Evaluate Your Storage Needs:
Start by assessing how you will use your hard disk drive. Determine the types of data you will store, such as operating systems, applications, personal files, or multimedia. This will help you identify the number and size of partitions required.
2. Determine Partition Sizes:
Consider the size requirements for each partition. Allocate more space to partitions that will store larger files, such as multimedia or software installations. Smaller partitions can be used for system files or smaller data sets.
3. Choose the File System:
Selecting the appropriate file system is crucial, as it affects how data is stored, accessed, and managed on the partition. Different operating systems have compatibility requirements, so choose a file system that works well with your operating system and supports the features you need.
4. Consider Future Expansion:
Anticipate your future storage needs and consider allocating extra space to partitions that may require additional data storage. This allows you to expand the partitions without disrupting your existing data.
5. Compatibility with Multiple Operating Systems:
If you plan to have multiple operating systems or create a dual-boot/multi-boot setup, ensure that your partitioning strategy accounts for the needs and compatibility of each operating system.
6. Backup and Recovery:
Consider creating a separate partition for backups to protect your important data. This allows for easy restoration in case of system failures or data loss.
Once you have a clear understanding of your storage needs and the desired partitioning scheme, you can proceed to the actual partitioning and formatting process. In the next sections, we will walk you through the steps to partition and format a new hard disk drive, as well as an existing one. We will also provide guidance for partitioning and formatting using various operating systems.
Steps to Partitioning and Formatting a New Hard Disk Drive
Partitioning and formatting a new hard disk drive is a crucial step when setting up a fresh system. Whether you’ve just installed a new hard drive or are starting from scratch, follow these steps to effectively partition and format your new hard disk drive:
1. Connect and Initialize the Hard Disk Drive:
Connect the new hard disk drive to your computer using the appropriate cables. Open the Disk Management utility in Windows or the Disk Utility in macOS to initialize the drive. Follow the on-screen instructions to initialize it. Make sure to select the appropriate partitioning scheme, either MBR or GPT, based on your needs and system requirements.
2. Create Primary and Extended Partitions:
After initializing the drive, you can start creating partitions. If you plan to have more than four partitions, create an extended partition first. Then, within the extended partition, create logical partitions as needed. Assign appropriate sizes to each partition based on your storage requirements.
3. Choose the File System:
Select the file system for each partition. Windows commonly uses the NTFS file system, which provides robust security and supports larger file sizes. macOS uses the APFS file system by default, providing features like encryption and improved performance. Ensure compatibility with your operating system and consider any specific needs or requirements for your data.
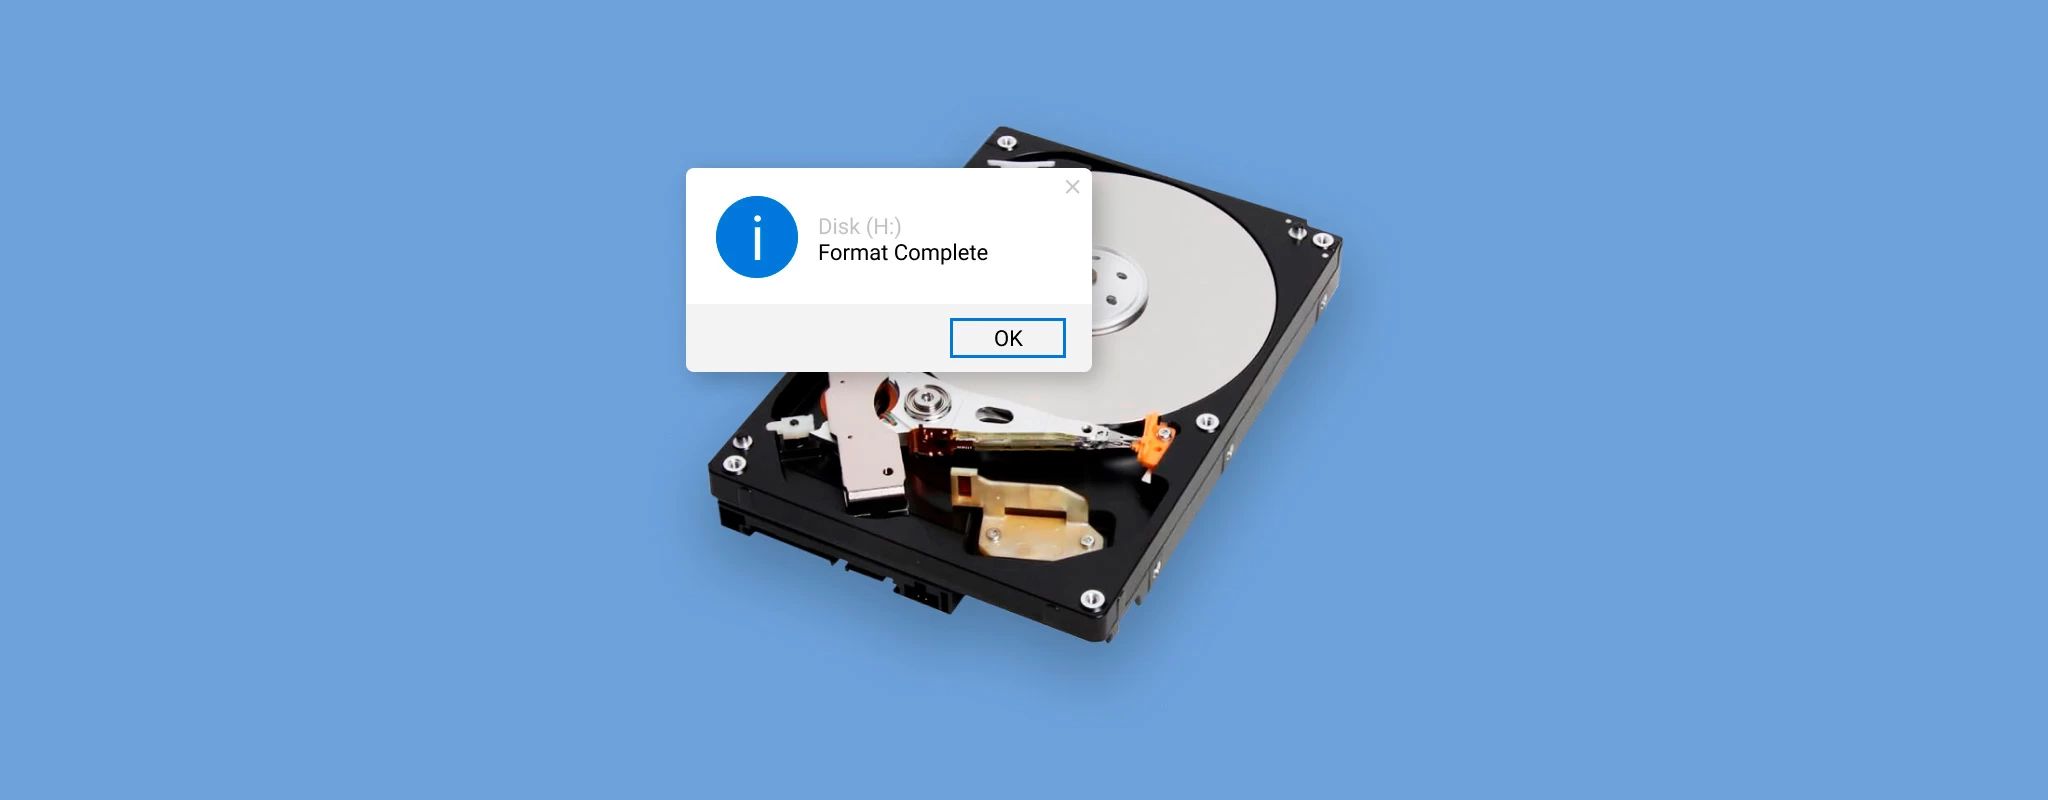
4. Format the Partitions:
Once you’ve created the partition and selected the file system, proceed to format each partition. In Windows, right-click on each partition and select “Format”. Choose the file system, give the partition a name, and proceed with the formatting process. In macOS, select each partition and click on the “Erase” button. Choose the file system and provide a name for the partition before erasing.
5. Verify and Assign Drive Letters or Mount Points:
After formatting, verify that each partition appears correctly in the file explorer or disk utility. Confirm that the drive letters or mount points have been assigned according to your preferences. Make any necessary adjustments to the drive letters or mount points to ensure easy accessibility and organization.
Once you’ve completed these steps, your new hard disk drive is properly partitioned and formatted. You can now start using it to install your operating system, store files, or perform any other required tasks. Remember to follow best practices for managing and maintaining your partitions to optimize the performance and longevity of your hard disk drive.
Steps to Partitioning and Formatting an Existing Hard Disk Drive
If you already have an existing hard disk drive with data on it, you can still partition and format it to optimize storage and organizational capabilities. However, it’s important to note that partitioning and formatting will erase all existing data on the drive. Follow these steps to partition and format an existing hard disk drive:
1. Backup Your Data:
Prior to partitioning and formatting, it’s crucial to back up your important data on a separate storage device or online backup service. This ensures that you have a copy of your files in case of accidental data loss during the process.
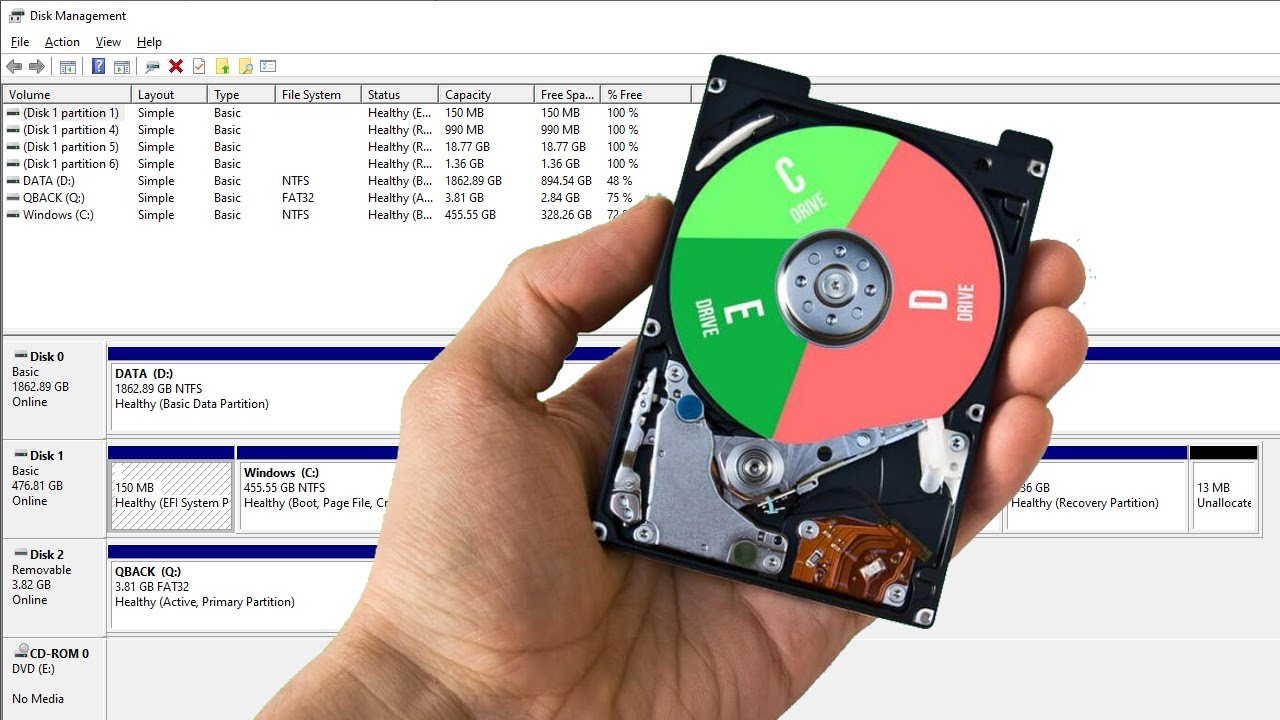
2. Open Disk Management or Disk Utility:
In Windows, open Disk Management by right-clicking on the Start button and selecting “Disk Management” from the menu. In macOS, open Disk Utility from the Applications folder or Spotlight search.
3. Locate the Existing Hard Disk Drive:
In the Disk Management or Disk Utility window, locate the existing hard disk drive you want to partition and format. Take note of its current partitions and the space available.
4. Shrink or Delete Existing Partitions:
If you need more partitions or want to modify the existing ones, you can shrink or delete them. Right-click on a partition in Disk Management (Windows) or select a partition in Disk Utility (macOS) and choose the appropriate option to shrink or delete the partition. Keep in mind that deleting a partition will erase all the data stored on it.
5. Create New Partitions:
Once you have freed up space by shrinking or deleting partitions, you can create new partitions. Right-click on the unallocated space in Disk Management (Windows) or select the drive and click on the “+” button in Disk Utility (macOS). Specify the size, file system, and assign a name to each new partition.
6. Format the New Partitions:
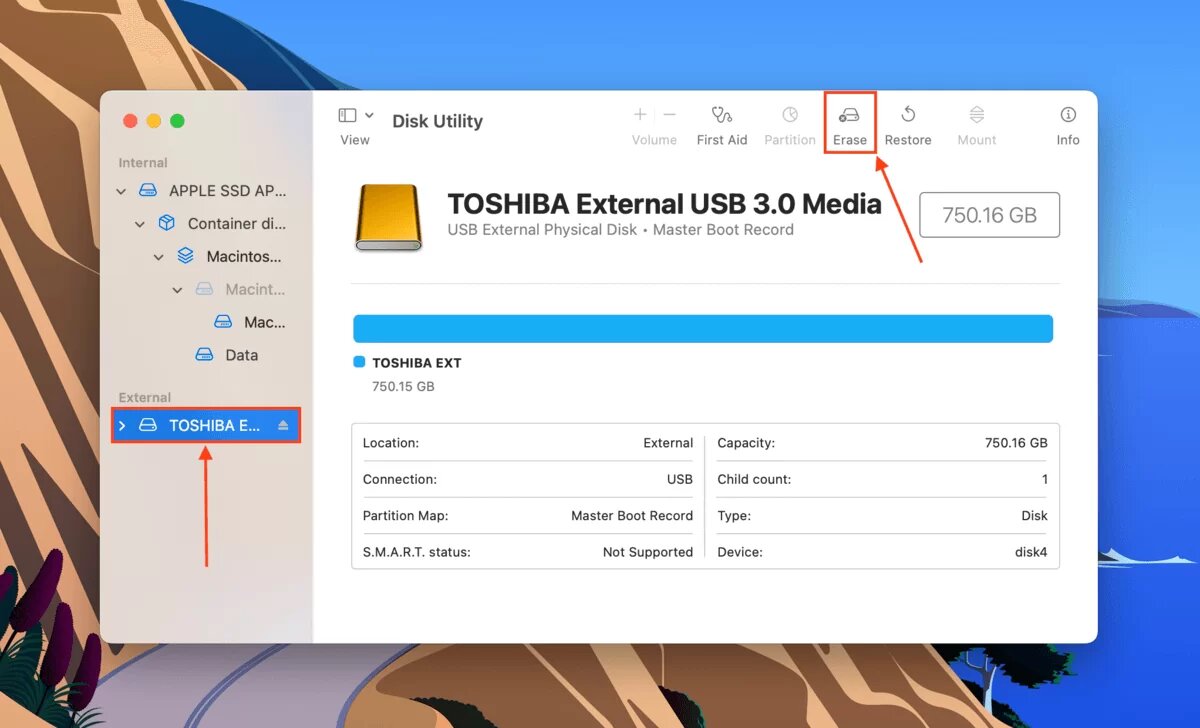
After creating the new partitions, format them with the desired file system. Right-click on each new partition in Disk Management (Windows) and select “Format”. In Disk Utility (macOS), select each new partition and click on the “Erase” button. Choose the file system and provide a name before erasing.
7. Verify and Assign Drive Letters or Mount Points:
After formatting, verify that each partition appears correctly in the file explorer or disk utility. Confirm that the drive letters or mount points have been assigned according to your preferences. Adjust drive letters or mount points if needed for easy accessibility and organization.
Once you have completed these steps, your existing hard disk drive will be successfully partitioned and formatted. You can now start using the newly created partitions for storing data, installing operating systems, or performing any other required tasks. Remember to restore your backed-up data to the appropriate partitions and follow best practices for managing and maintaining your partitions to optimize performance and organization.
A Walkthrough of Partitioning and Formatting Using Various Operating Systems
Partitioning and formatting a hard disk drive can vary depending on the operating system you are using. In this section, we will provide a brief walkthrough of partitioning and formatting using three popular operating systems: Windows, macOS, and Linux.
1. Windows:
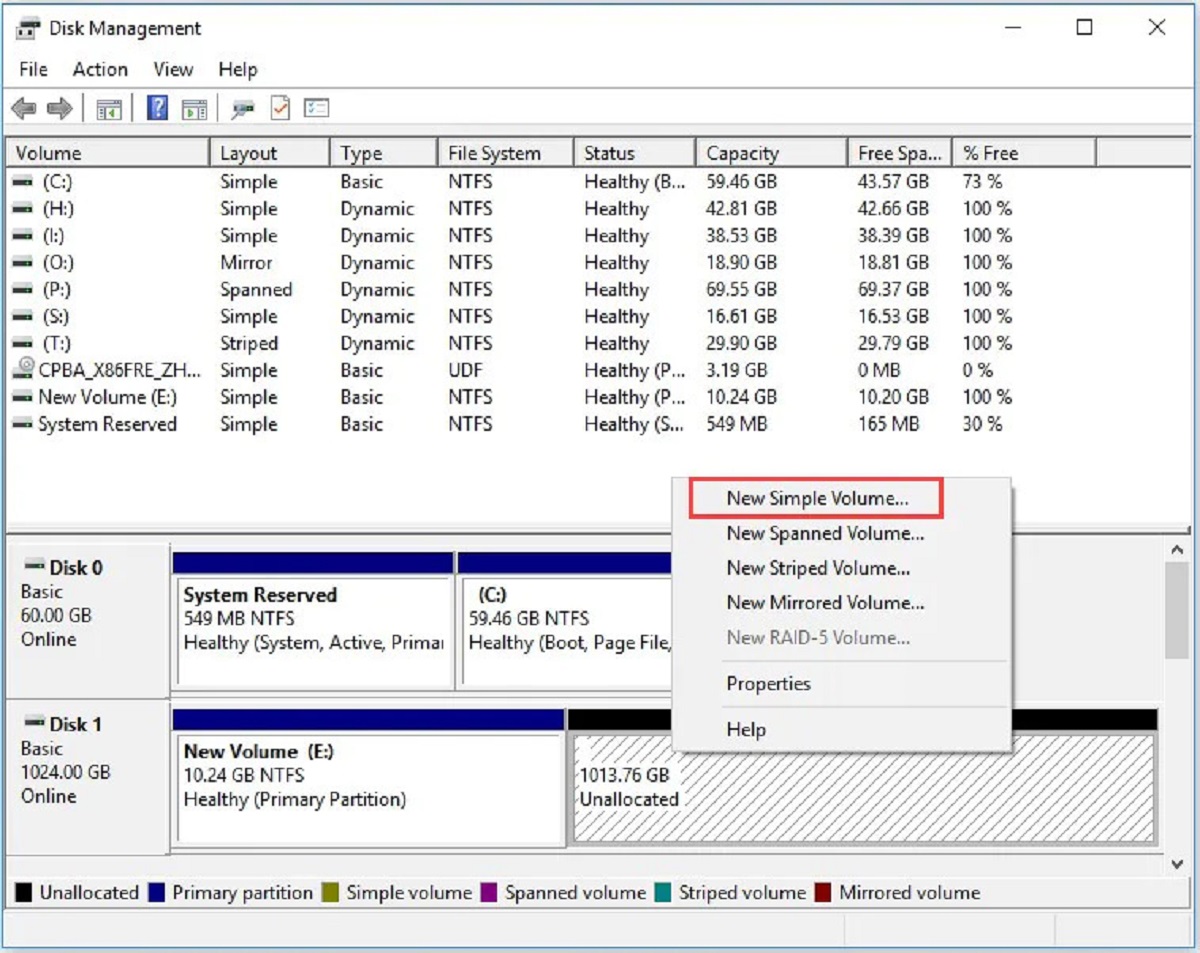
– Open the Disk Management utility by right-clicking on the Start button and selecting “Disk Management” from the menu.
– Locate the hard disk drive you want to partition and format.
– Right-click on the unallocated space and select “New Simple Volume”. Follow the on-screen instructions to specify the partition size, assign a drive letter, and choose the file system (typically NTFS).
– After creating the partition, right-click on it and select “Format”. Choose the file system, provide a name for the partition, and proceed with the formatting process.
2. macOS:
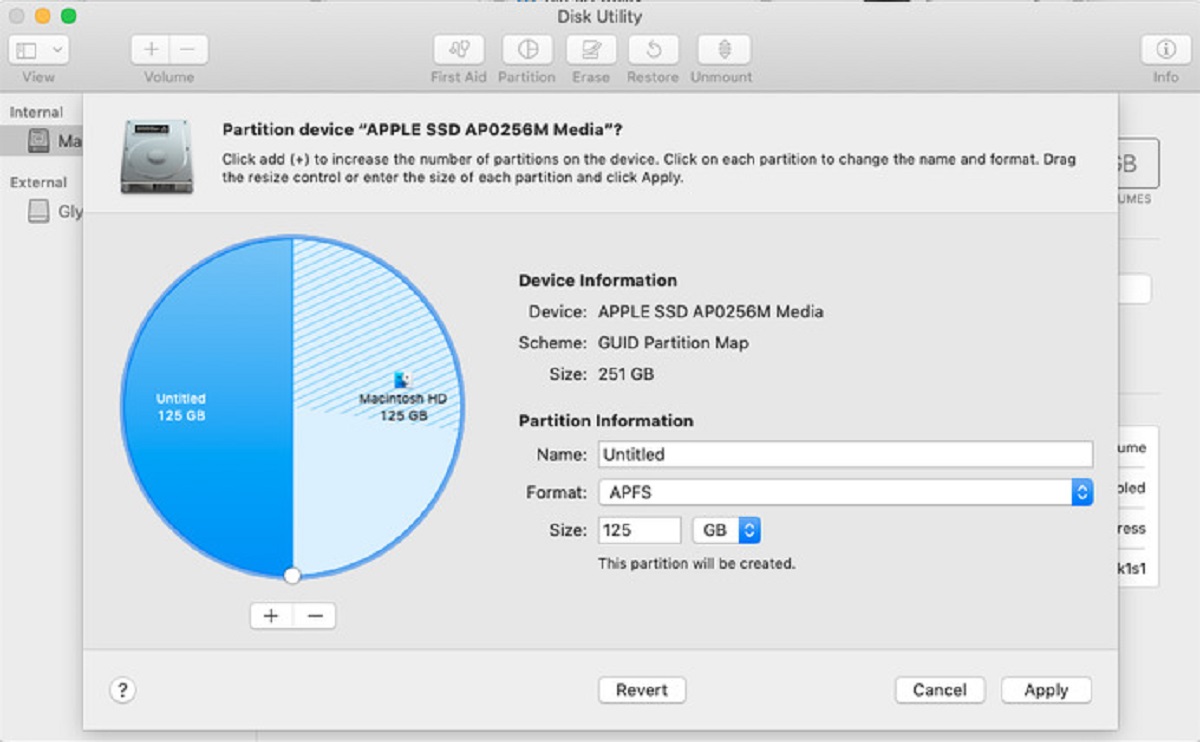
– Open the Disk Utility application from the Applications folder or by searching in Spotlight.
– Locate the hard disk drive you want to partition and format in the sidebar.
– Click on the “Partition” tab and click the “+” button to add a new partition.
– Specify the partition size, choose the file system (typically APFS or Mac OS Extended), and provide a name for the partition.
– After creating the partition, click on the “Erase” button and choose the file system. Provide a name for the volume and proceed with the erasing process.
3. Linux:
– Open a terminal window and launch the GParted utility by typing “sudo gparted” (without quotes) and entering your password.
– Select the hard disk drive you want to partition and format from the drop-down menu in GParted.
– Right-click on the unallocated space and choose to create a new partition.
– Specify the partition size, file system (such as ext4 for Linux), and label for the partition.
– Apply the changes by clicking on the “Apply” button in GParted.
Remember that the exact steps and specific terminology may vary depending on the version of the operating system you are using. Always refer to the official documentation or relevant resources for detailed instructions specific to your operating system.
By following these general walkthroughs, you can successfully partition and format your hard disk drive using Windows, macOS, or Linux.
Troubleshooting Common Issues with Partitioning and Formatting
Partitioning and formatting a hard disk drive may encounter some common issues that can hinder the process. In this section, we will discuss common problems that you may encounter during partitioning and formatting and provide troubleshooting tips to help you overcome them.
1. Disk Not Recognized:
If the hard disk drive is not recognized by the operating system, ensure that it is properly connected to the computer. Check the cables and connections and make sure the drive is powered on. If the issue persists, try connecting the drive to a different port or using a different cable.
2. Unallocated Space:
If you see unallocated space on your hard disk drive, it means that the space has not been allocated to any partition. To resolve this, open the disk management utility (such as Disk Management in Windows or Disk Utility in macOS) and create new partitions within the unallocated space. Define the partition size, file system, and assign a drive letter or mount point.
3. Partition Not Accessible:
If a partition is not accessible or does not appear in the file explorer or disk utility, it could be due to a variety of reasons. Ensure that the partition is properly formatted with the correct file system and that it has been assigned a drive letter or mount point. If the partition is still not accessible, it may be corrupted. Consider using data recovery tools or seeking professional help to recover the data.
4. Error Messages During Formatting:
If you encounter error messages during the formatting process, pay attention to the specific error details. Common errors include “Cannot format the disk,” “Disk is write-protected,” or “Windows was unable to complete the format.” To resolve these issues, ensure that the disk is not write-protected, close any programs or processes that may be accessing the disk, or try using a different formatting tool or utility.
5. Incorrect Formatting or File System Type:
If you accidentally format a partition with the wrong file system type or need to change the file system, you may need to reformat the partition. However, keep in mind that reformatting the partition erases all data on it. Make sure to back up your important data before proceeding with reformatting.
If you continue to experience issues with partitioning and formatting, it is recommended to consult official documentation, online forums, or seek assistance from knowledgeable individuals. Troubleshooting steps may vary depending on the specific operating system and utility being used.
Understanding common issues and their troubleshooting tips will help you overcome any obstacles that may arise during the partitioning and formatting process, ensuring a smooth and successful setup for your hard disk drive.
Best Practices for Maintaining and Managing Your Partitions
Once you have successfully partitioned and formatted your hard disk drive, it is important to implement best practices for maintaining and managing your partitions. By following these practices, you can optimize performance, improve data organization, and ensure the longevity of your storage. Here are some best practices to consider:
1. Regular Backups:
Regularly back up your important data to a separate storage device or online backup service. This ensures that you have a copy of your files in case of unforeseen data loss or system failures. It is recommended to schedule automatic backups to ensure that your data is always protected.
2. Disk Cleanup and Organization:
Regularly perform disk cleanup by deleting unnecessary files and organizing your data. Remove temporary files, old backups, and any unused applications or files to free up disk space and improve the overall performance of your system.
3. Avoid Partition Overcrowding:
Avoid overcrowding your partitions by allocating sufficient space for each partition. If a partition starts to run low on space, consider resizing or moving partitions to allocate more space as needed. This helps to prevent performance issues and ensures efficient data storage.
4. Regular Disk Maintenance:
Perform regular disk maintenance tasks, such as defragmentation (for NTFS file systems) or optimization (for APFS file systems), to improve disk performance. This reorganizes files on the disk and reduces file fragmentation, leading to faster and more efficient access to data.
5. Monitor Disk Health:
Use disk monitoring tools to regularly check the health and performance of your hard disk drive. These tools can provide information about disk temperature, SMART status, and potential issues or errors. Monitoring disk health allows you to identify problems early on and take preventive measures to avoid data loss or drive failure.
6. Keep Software and Drivers Updated:
Regularly update your operating system, disk management tools, and device drivers to ensure compatibility and access to new features and bug fixes. Keeping your software and drivers up-to-date minimizes compatibility issues and enhances overall system performance.
7. Be Cautious During Operations:
Exercise caution when performing operations on your partitions, such as resizing, moving, or deleting. Double-check your actions to prevent unintended data loss or system failures. Always have a backup of your data before making any major changes to your partitions.
8. Understand Your File System:
Take the time to understand the characteristics and limitations of the file system you choose for each partition. Different file systems have varying capabilities, performance levels, and compatibility requirements. Understanding your file system helps you make informed decisions and ensures efficient and reliable data storage.
Following these best practices will help you maintain and manage your partitions effectively, leading to optimal performance, data organization, and reliability for your hard disk drive. Regularly review and update your partitioning strategy as your storage needs change to ensure efficiency and maximize the utilization of your storage space.
Conclusion
Partitioning and formatting a hard disk drive is a critical step in setting up a new computer or managing storage on an existing system. By dividing the hard drive into partitions and formatting them with the appropriate file system, you can optimize data organization, improve performance, and enhance the overall efficiency of your storage.
In this article, we discussed the importance of understanding hard disk partitioning, the different types of partitions, and the steps involved in partitioning and formatting a new hard disk drive as well as an existing one. We also provided a walkthrough of the process on various operating systems, including Windows, macOS, and Linux.
Additionally, we shared troubleshooting tips for common issues that may arise during the partitioning and formatting process, and we highlighted best practices for maintaining and managing your partitions, such as regular backups, disk cleanup, and monitoring disk health.
By following the guidelines and best practices outlined in this article, you can effectively partition and format your hard disk drive, ensuring efficient data organization, improved system performance, and reliable storage. Remember to always make backups of your data and exercise caution when making changes to your partitions to avoid data loss or system failures.
With a well-structured and properly formatted hard disk drive, you can experience seamless operation, efficient data management, and an enhanced computing experience.