Introduction
Welcome to the world of technology, where the need for efficient storage solutions is ever-increasing. If you’re a Mac and PC user, you might have encountered some challenges when it comes to using your external hard drive seamlessly on both systems. One effective way to overcome this hurdle is by partitioning your external hard drive, allowing you to allocate separate sections for each operating system.
Partitioning involves dividing your external hard drive into multiple sections or partitions, each acting as a separate storage area. By creating separate partitions for Mac and PC, you can format the partitions accordingly, enabling smooth compatibility. Whether you want to store different types of files on each partition or keep your data organized, partitioning your external hard drive provides the flexibility you need.
In this step-by-step guide, we will walk you through the process of partitioning an external hard drive for both Mac and PC systems. By following these instructions, you will be able to use your drive on both platforms hassle-free. So, let’s get started and unlock the full potential of your external hard drive!
Why Partitioning?
Partitioning an external hard drive offers numerous benefits and can greatly enhance your workflow and organization. Here are some compelling reasons why you should consider partitioning your drive:
- Compatibility: One of the primary reasons for partitioning is to ensure compatibility between Mac and PC systems. By creating separate partitions for each operating system, you can format them accordingly, allowing you to use the external hard drive seamlessly on both platforms.
- File Organization: Partitioning allows you to keep your files organized and easily accessible. You can allocate different partitions for specific purposes, such as one for work-related files, another for personal documents, and so on. This way, you can quickly locate and access the files you need without having to sift through a cluttered drive.
- Data Protection: By creating separate partitions, you can isolate certain files or folders and protect them from inadvertent deletion or modification. This provides an added layer of security for important data and reduces the risk of accidental data loss.
- Improved Performance: Partitioning an external hard drive can also improve its overall performance. By allocating separate partitions for different types of data, you can reduce fragmentation and optimize file access. This can result in faster read/write speeds and smoother data transfer.
- Operating System Experimentation: If you’re someone who likes to experiment with different operating systems or run multiple versions of an OS, partitioning allows you to create dedicated partitions for these purposes. This way, you can install and test new systems without affecting your main operating environment.
Overall, partitioning provides you with a flexible and efficient storage solution. It enables compatibility, improves organization, enhances data protection, boosts performance, and supports experimentation with different operating systems. Now that you understand the benefits, let’s dive into the step-by-step process of partitioning an external hard drive for both Mac and PC.
How to Partition an External Hard Drive for Mac
If you’re using a Mac and want to partition your external hard drive, follow these simple steps:
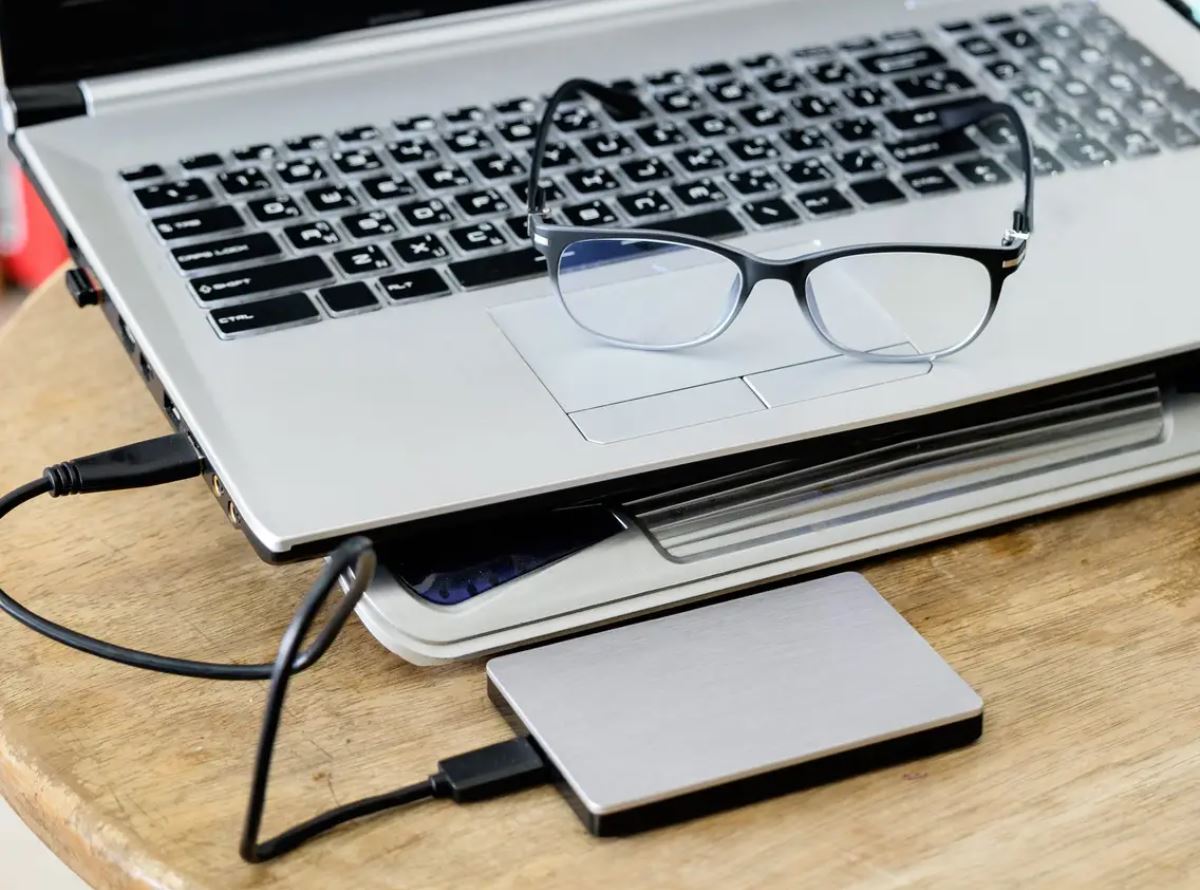
- Step 1: Connect the external hard drive to your Mac. Make sure the drive is properly connected to your Mac through a USB or Thunderbolt port. Ensure that the drive is recognized and visible in the Finder.
- Step 2: Open Disk Utility. Go to the Applications folder, then the Utilities folder, and launch Disk Utility. Alternatively, you can search for Disk Utility using Spotlight.
- Step 3: Select the external hard drive. In Disk Utility, you will see a list of drives on the left-hand side. Locate and select your external hard drive from the list.
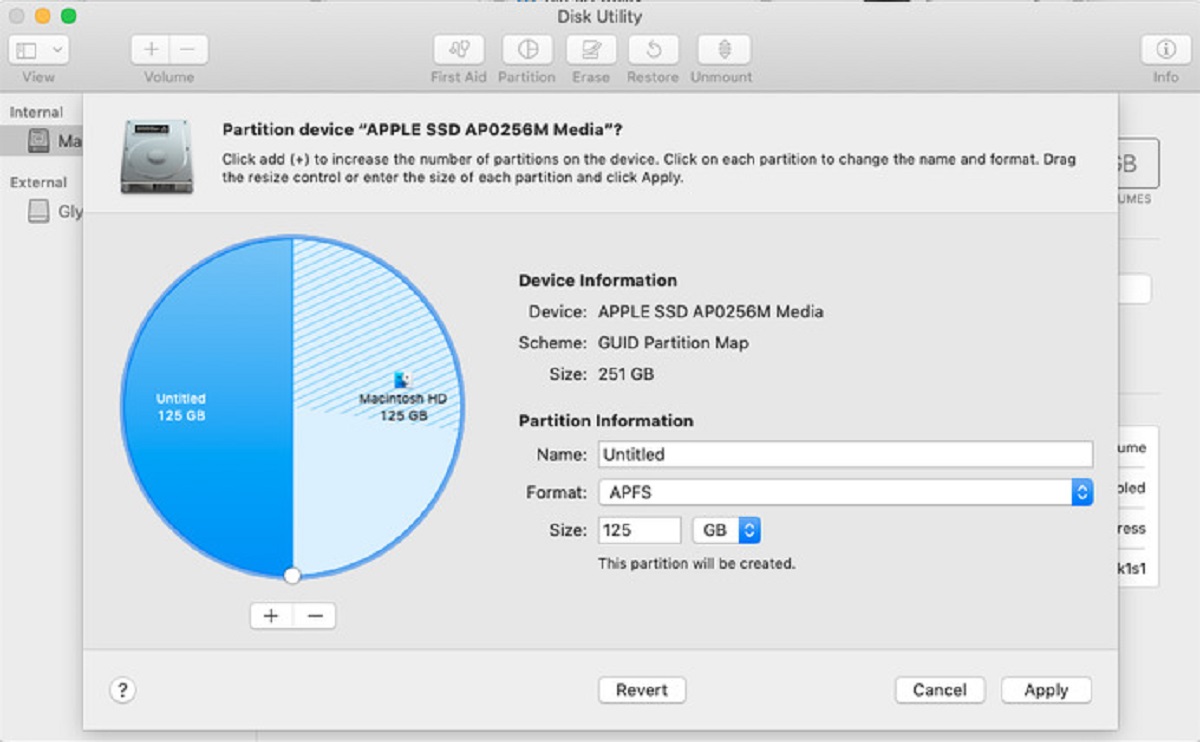
- Step 4: Click on the “Partition” tab. Once you have selected your external hard drive, click on the “Partition” tab at the top of the Disk Utility window.
- Step 5: Select the number of partitions. In the Partition tab, you will see a graphical representation of your external hard drive. To partition the drive, click on the “+” button to add a new partition. You can choose to create multiple partitions as needed.
- Step 6: Adjust the partition size. After adding a partition, you can adjust its size by dragging the divider on the graphical representation. Allocate the desired amount of space to each partition.
- Step 7: Set the partition format. Select each partition individually and choose the desired format from the drop-down menu. For Mac compatibility, choose “Mac OS Extended (Journaled)” as the format.
- Step 8: Click on “Apply” to start the partitioning process. Once you have adjusted the partition size and format, click on the “Apply” button to start the partitioning process. Disk Utility will confirm if you want to proceed with the partitioning. Click “Partition” to proceed.
Wait for Disk Utility to complete the partitioning process. Once finished, your external hard drive will be successfully partitioned, and you can now use it on your Mac. Remember to eject the drive properly before disconnecting it to avoid data loss.
Now that you have learned how to partition an external hard drive for Mac, let’s move on to the process of partitioning for PC.
Step 1: Connect the External Hard Drive to your Mac
The first step in partitioning your external hard drive for your Mac is to ensure it is properly connected. Follow these steps to connect your external hard drive:
- Gather the necessary cables. Depending on the type of external hard drive you have, you may need a USB or Thunderbolt cable to connect it to your Mac. Make sure you have the appropriate cable on hand.
- Locate the USB or Thunderbolt port. On your Mac, identify the USB or Thunderbolt port where you will connect your external hard drive. The number and location of these ports vary depending on the model of your Mac.
- Plug in the cable. Connect one end of the cable to the appropriate port on your Mac. Then, connect the other end of the cable to the corresponding port on your external hard drive. Ensure the connection is secure.
- Power on the external hard drive. Some external hard drives require their own power source, such as an AC adapter. If necessary, plug in the power adapter for your external hard drive and turn it on. If your external hard drive is powered solely by the USB or Thunderbolt connection, it will power on automatically when connected to your Mac.
- Wait for the Mac to recognize the drive. Once the external hard drive is connected and powered on, your Mac should detect it automatically. You may hear a sound or see a notification indicating a new drive has been connected.
- Open Finder. To access your external hard drive, open Finder by clicking on the blue smiley face icon located on the dock at the bottom of your Mac’s screen. Alternatively, you can click on the Finder icon on the top left corner of the menu bar.
- Locate the external hard drive. In the Finder window, you should see a list of drives under the “Devices” section in the left sidebar. Look for your external hard drive and click on its name to access its contents.
Once you have successfully connected your external hard drive to your Mac and located it in Finder, you are ready to proceed with the next steps to partition the drive using Disk Utility. Let’s move on to Step 2: Open Disk Utility.
Step 2: Open Disk Utility
After successfully connecting your external hard drive to your Mac, the next step in partitioning the drive is to open Disk Utility. Disk Utility is a built-in application that allows you to manage and manipulate storage devices on your Mac. Follow these steps to open Disk Utility:
- Go to the Applications folder. Click on the Finder icon located on the dock at the bottom of your Mac’s screen. In the Finder window, you will see a list of shortcuts on the left-hand side. Locate and click on the “Applications” folder to open it.
- Open the Utilities folder. Within the Applications folder, scroll down or search for the “Utilities” folder. Double-click on it to access its contents.
- Launch Disk Utility. In the Utilities folder, you will find various system utilities. Locate and double-click on “Disk Utility” to open the application.
Alternatively, you can use Spotlight to quickly search for and open Disk Utility. Simply click on the magnifying glass icon located on the top right corner of the menu bar and type “Disk Utility” in the search field. Once the Disk Utility icon appears, press “Enter” or click on the icon to launch the application.
Once launched, Disk Utility will display a list of storage devices connected to your Mac, including your internal hard drive and any external drives. You are now ready to proceed to the next step: selecting the external hard drive in Disk Utility.
Step 3: Select the External Hard Drive
After launching Disk Utility on your Mac, the next step in partitioning your external hard drive is to select it within the application. Follow these steps to select the external hard drive in Disk Utility:
- Locate the external hard drive in Disk Utility. Once Disk Utility is open, you will see a list of storage devices on the left-hand side of the window. Look for the name of your external hard drive in this list.
- Click on the external hard drive. Select your external hard drive by clicking on its name in the list. The name may vary depending on the brand or model of your external hard drive, but it is generally labeled with the name or manufacturer of the drive.
- Confirm the selection. After clicking on the external hard drive, Disk Utility will display information about the drive, including its capacity, format, and partition layout. Ensure that the information displayed matches your external hard drive to confirm that you have selected the correct device.
By selecting the external hard drive in Disk Utility, you are preparing it for the partitioning process. Make sure to choose the correct device to avoid any accidental data loss or partitioning of the wrong drive.
Once you have successfully selected the external hard drive, you can proceed to the next step: clicking on the “Partition” tab in Disk Utility to further customize the partitioning settings.
Step 4: Click on the “Partition” Tab
After selecting your external hard drive in Disk Utility, you are ready to customize the partitioning settings. This can be done by clicking on the “Partition” tab within Disk Utility. Follow the steps below to proceed:
- Locate the “Partition” tab. In the Disk Utility window, you will see multiple tabs at the top of the window, including “First Aid,” “Erase,” and “Partition.” Click on the “Partition” tab to access the partitioning settings.
- Review the current partition layout. After clicking on the “Partition” tab, Disk Utility will display a graphical representation of your external hard drive and its current partition layout (if any). You will see one or more sections representing the existing partitions on the drive.
- Prepare to customize the partitioning settings. The “Partition” tab allows you to add, modify, or remove partitions on your external hard drive. You can adjust the size, format, and number of partitions to suit your specific needs.
By clicking on the “Partition” tab, you have accessed the partitioning settings in Disk Utility. This step is crucial for customizing the way you want to divide your external hard drive into separate partitions.
Next, we will proceed to Step 5: Select the number of partitions and adjust their sizes. This will enable you to define the specific partition layout that best suits your requirements.
Step 5: Select the Number of Partitions
After clicking on the “Partition” tab in Disk Utility, you are now able to define the number of partitions you wish to create on your external hard drive. Follow these steps to determine the number of partitions:
- Review the current partition layout. When you enter the “Partition” tab in Disk Utility, you will see a graphical representation of your external hard drive and its current partition configuration (if any). Take note of the existing partitions and their sizes.
- Add a new partition. To create a new partition, click on the “+” button located below the graphical representation. This will add a new partition to the layout.
- Determine the number of partitions. Decide on the appropriate number of partitions you want to create on your external hard drive. This can depend on factors such as the intended use, organization, and storage requirements.
- Adjust the partition sizes. After adding a new partition, you can adjust its size by dragging the divider that separates the partitions in the graphical representation. You can increase or decrease the size of each partition according to your needs.
By selecting the number of partitions, you have the flexibility to divide your external hard drive into multiple sections based on your requirements. This allows you to allocate specific space for different purposes, applications, or operating systems.
Once you have determined the appropriate number of partitions for your external hard drive, you can proceed to the next step: adjusting the sizes of the partitions to allocate the desired amount of space to each section.
Step 6: Adjust the Partition Size
After selecting the desired number of partitions in Disk Utility, the next step is to adjust the size of each partition to allocate the appropriate amount of space. Follow these steps to adjust the partition sizes:
- Review the current partition layout. In the Disk Utility window, you will see a graphical representation of your external hard drive and its partitions. Take note of the current sizes of the partitions.
- Select a partition to resize. Click on a partition within the graphical representation to select it. The selected partition will be highlighted or outlined to indicate that it is active.
- Adjust the partition size. To resize the selected partition, you can drag the partition’s dividing line within the graphical representation. Drag the divider left or right to increase or decrease the size of the partition accordingly.
- Repeat for other partitions. If you have multiple partitions and want to adjust their sizes, repeat the process for each partition individually. Select a partition, resize it by dragging the divider, and move on to the next partition.
- Balance the partition sizes. Aim to allocate the appropriate amount of space to each partition based on your needs. Consider factors such as the intended use, storage requirements, and the type of data you plan to store in each partition.
By adjusting the partition sizes, you can allocate the necessary space to each section of your external hard drive. This customization ensures that you have sufficient room for specific data, applications, or operating systems.
Once you have adjusted the partition sizes to your satisfaction, you can proceed to the next step: selecting the appropriate format for each partition. This will determine the compatibility and functionality of the partitions on your Mac system.
Step 7: Set the Partition Format
After adjusting the partition sizes in Disk Utility, the next step is to set the format for each partition on your external hard drive. The format determines the file system that will be used and affects the compatibility and functionality of the partitions. Follow these steps to set the partition format:
- Select a partition to format. In the Disk Utility window, click on a partition within the graphical representation to select it. The selected partition will be highlighted or outlined to indicate that it is active.
- Click on the “Format” dropdown menu. After selecting a partition, you will see a dropdown menu labeled “Format” within the Disk Utility window. Click on this dropdown menu to view the available format options.
- Choose the desired format. From the available options, select the format that best suits your needs. For Mac compatibility, choose “Mac OS Extended (Journaled)” as the format. If you require cross-platform compatibility with Windows systems, consider selecting “ExFAT” as the format.
- Repeat for other partitions. If you have multiple partitions on your external hard drive, repeat the format selection process for each partition. Select a partition, choose the appropriate format, and move on to the next partition.
- Consider the purpose and usage. When selecting the format, consider the purpose and usage of each partition. Different formats have different advantages and limitations, so choose accordingly based on your specific needs.
By setting the partition format, you ensure that each section of your external hard drive is formatted in a way that is compatible with your intended use. This step is crucial for seamless data access and sharing between your Mac and other devices, such as Windows computers.
Once you have set the partition format for each partition, you are now prepared to move on to the next step: applying the changes and initiating the partitioning process in Disk Utility.
Step 8: Click on “Apply” to Start the Partitioning Process
After adjusting the partition sizes and setting the format for each partition in Disk Utility, you are ready to apply the changes and initiate the partitioning process. Follow these steps to proceed:
- Review the partition settings. Before applying the changes, take a final look at the partition layout, sizes, and formats to ensure they meet your requirements. Make any necessary revisions if needed.
- Click on the “Apply” button. Once you are satisfied with the partition settings, locate the “Apply” button within Disk Utility and click on it. This action will prompt a confirmation dialogue box to appear.
- Confirm the partitioning process. In the confirmation dialogue box, Disk Utility will summarize the actions that will be taken during the partitioning process. Review the information to make sure it aligns with your intentions.
- Click on “Partition” to proceed. Once you have reviewed the summary and are ready to proceed, click on the “Partition” button within the confirmation dialogue box. Disk Utility will then initiate the partitioning process.
- Wait for the process to complete. Disk Utility will now begin partitioning your external hard drive based on the settings you have specified. The time it takes to complete this process depends on the size of your drive and the number of partitions being created.
- Monitor the progress. As Disk Utility partitions your external hard drive, a progress bar or percentage indicator will inform you of the ongoing process. Keep an eye on this information to track the progress.
- Avoid interrupting the process. To ensure a successful partitioning process, refrain from disconnecting or interrupting your external hard drive while Disk Utility is still working. Wait patiently until the process is complete.
- Verify the partitioning. Once the partitioning process is finished, Disk Utility will display a confirmation message indicating the successful creation of the partitions. Take a moment to review the information presented.
By clicking on “Apply” and starting the partitioning process, you have set the changes in motion and allowed Disk Utility to reconfigure your external hard drive according to the specified partition settings. Once the process is complete, you can enjoy the benefits of your newly partitioned drive, including improved organization and compatibility.
Now that the partitioning process for your Mac is complete, you can disconnect your external hard drive and start using it on your Mac system. If you require instructions for partitioning the same external hard drive for a PC, read on to the next section.
How to Partition an External Hard Drive for PC
If you have an external hard drive that you want to partition specifically for use with a PC, follow these steps to complete the process:
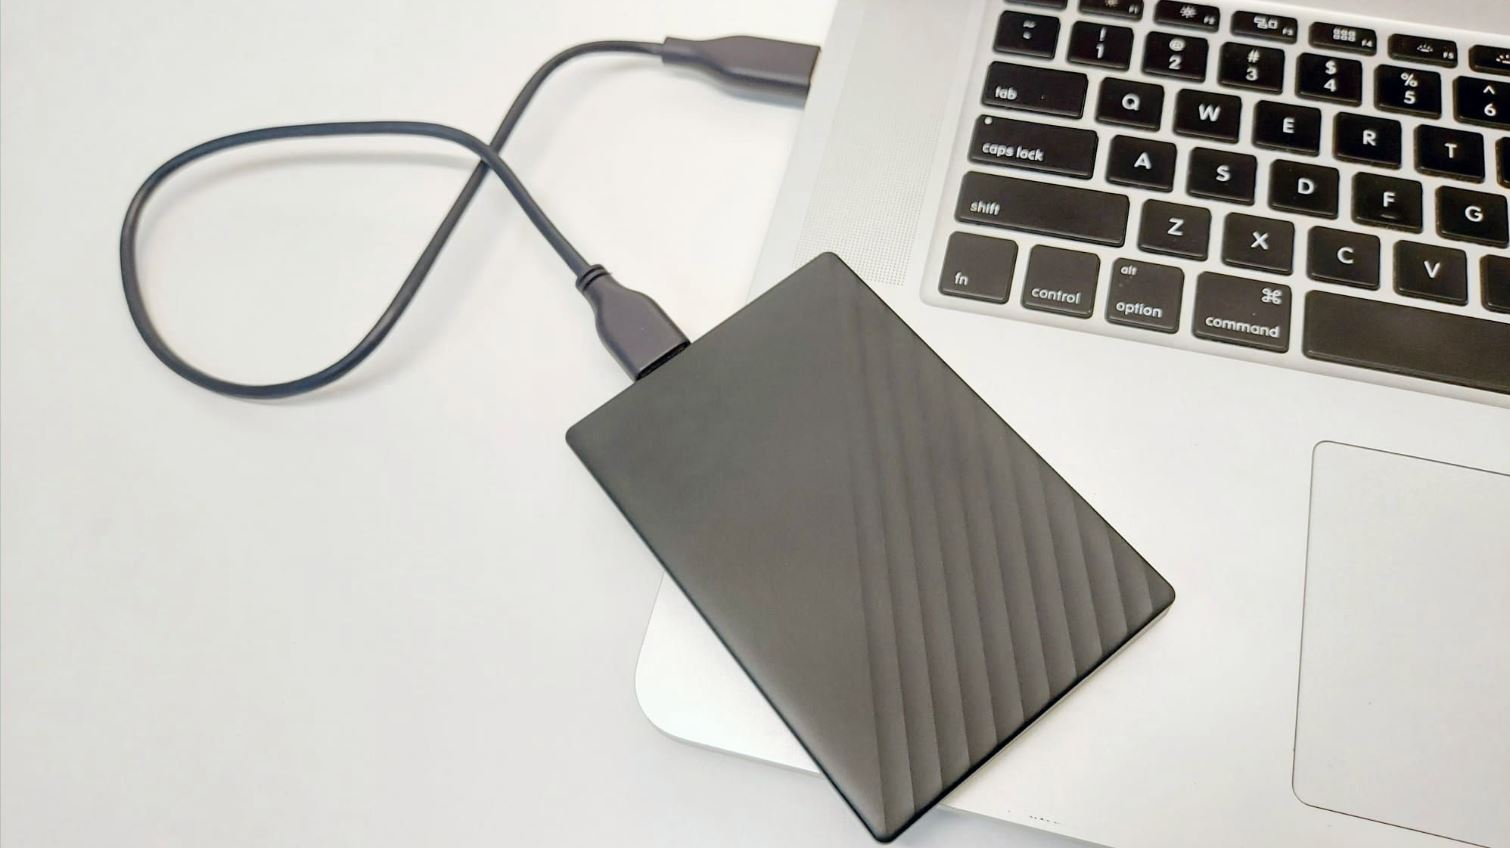
- Step 1: Connect the external hard drive to your PC. Use a USB cable to connect the external hard drive to an available USB port on your PC. Ensure that the drive is properly connected and recognized by your computer.
- Step 2: Open Disk Management. Press the Windows key + X on your keyboard to open the Power User Menu. From the menu, select “Disk Management.” This will launch the Disk Management utility on your PC.
- Step 3: Locate the external hard drive. In the Disk Management window, you will see a list of drives connected to your PC. Locate your external hard drive in the list. It may be labeled with the drive letter or the name of the drive.
- Step 4: Right-click on the external hard drive. Once you have located the external hard drive in Disk Management, right-click on it to access the context menu.
- Step 5: Select “Shrink Volume”. In the context menu, select the option “Shrink Volume.” This will allow you to free up unallocated space on the drive for creating the new partition.
- Step 6: Adjust the partition size. In the “Shrink” window, you will see the total size of the drive and the amount of available space to shrink. Enter the desired amount of space for the new partition in the “Enter the amount of space to shrink in MB” field.
- Step 7: Create a new partition. After entering the size for the new partition, click on the “Shrink” button. Disk Management will shrink the volume and create unallocated space on the drive.
- Step 8: Assign a drive letter to the new partition. Right-click on the unallocated space and select the option “New Simple Volume.” This will launch the “New Simple Volume Wizard.”
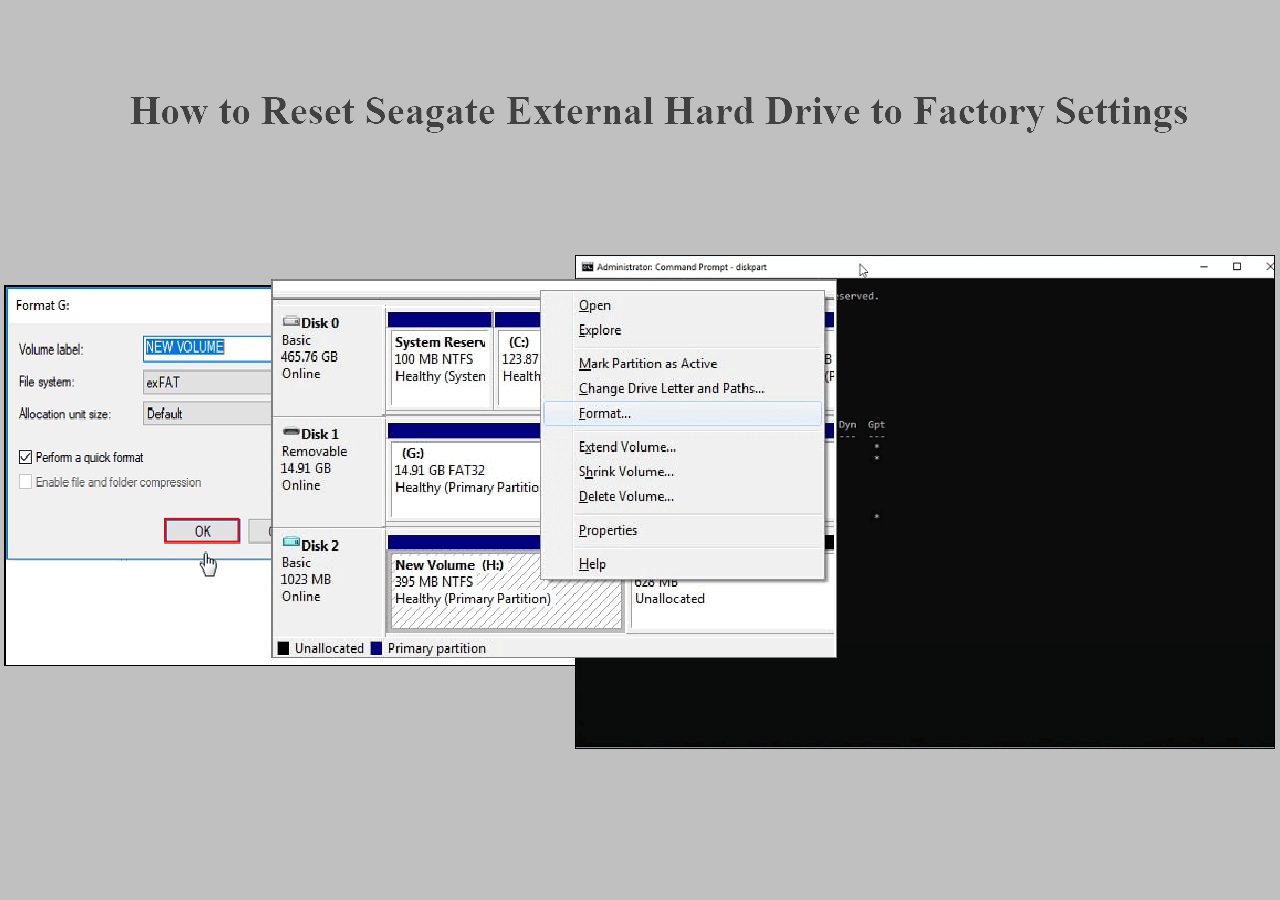
- Step 9: Format the new partition. Follow the instructions in the “New Simple Volume Wizard” to format the new partition. Select the desired file system, allocation unit size, and assign a drive letter to the new partition.
- Step 10: Click on “Finish” to complete the partitioning process. Once you have finished formatting the new partition, click on the “Finish” button to finalize the partitioning process. The new partition will now be created and ready for use on your PC.
By following these steps, you can successfully partition your external hard drive specifically for use with a PC. The newly created partition will allow you to organize your data, optimize storage, and enhance compatibility with your Windows system.
Now that you know how to partition your external hard drive for both Mac and PC, you can enjoy the benefits of a more organized and flexible storage solution. Whether you’re using a Mac or a PC, properly partitioning your external hard drive allows for smoother data management and improved efficiency.
Step 1: Connect the External Hard Drive to Your PC
To begin the process of partitioning your external hard drive for use with a PC, you first need to ensure that the drive is properly connected. Follow these steps to connect your external hard drive:
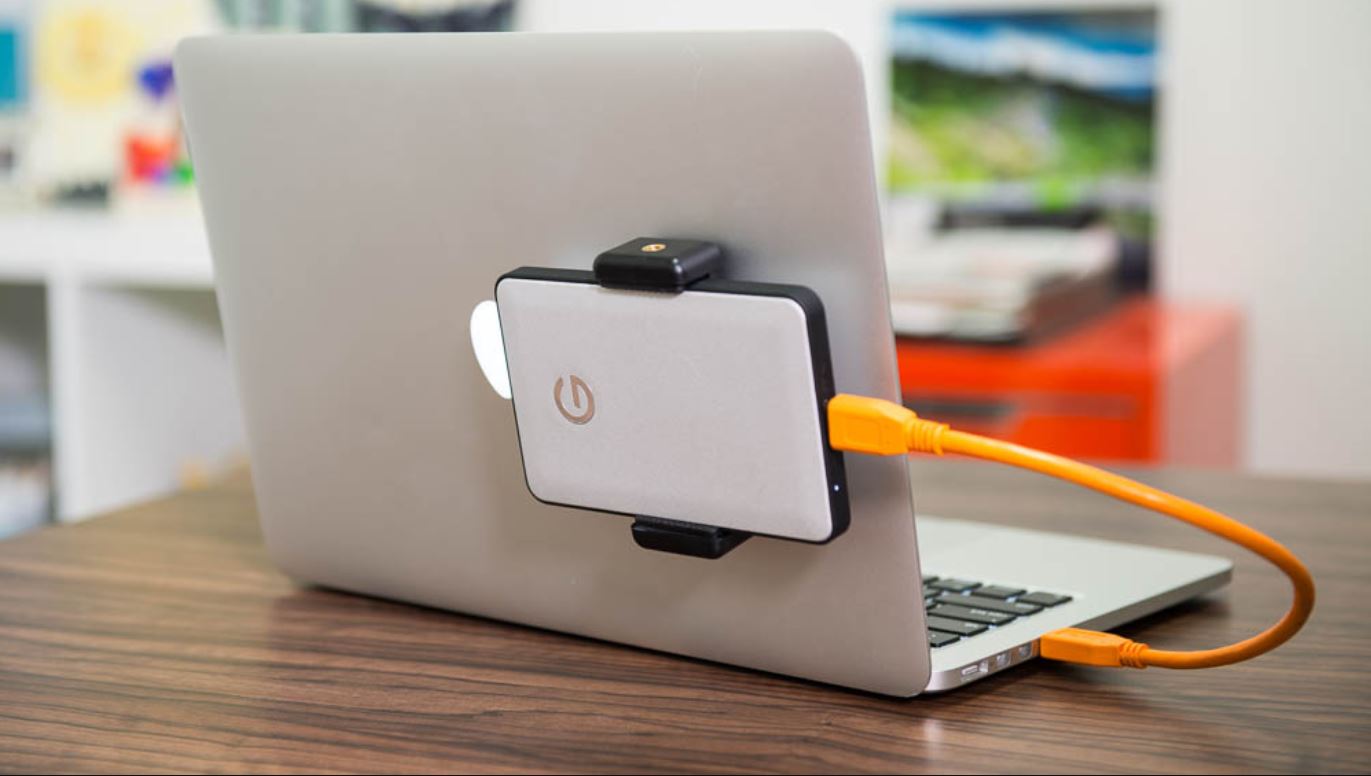
- Gather the necessary cables. Depending on the type of external hard drive you have, you may need a USB cable or an external hard drive docking station to connect it to your PC. Ensure that you have the appropriate cable or docking station available.
- Locate an available USB port. Examine your PC’s ports and locate an available USB port to connect your external hard drive. USB ports are typically located on the front or back of the computer tower or on the sides of a laptop.
- Connect the cable or docking station. Connect one end of the USB cable to your external hard drive or docking station, and plug the other end into the selected USB port on your PC. Ensure that the connection is secure.
- Power on the external hard drive. If your external hard drive requires a separate power source, such as an AC adapter, plug it into a power outlet and turn it on. Some external hard drives draw power from the USB connection itself, so they will power on automatically when connected to your PC.
- Wait for the PC to recognize the drive. Once connected, your PC should detect the external hard drive automatically. Windows will typically display a notification or sound to indicate the successful connection of a new device.
By connecting your external hard drive to your PC, you have established the physical connection necessary to begin the partitioning process. It is essential to ensure a secure and proper connection to proceed with the next steps.
Now that your external hard drive is connected to your PC, you can move on to the next step: opening Disk Management to access the partitioning tools.
Step 2: Open Disk Management
After connecting your external hard drive to your PC, the next step in partitioning the drive is to open Disk Management. Disk Management is a built-in utility in Windows that allows you to manage and control your computer’s storage devices. Follow these steps to open Disk Management:
- Access the Start menu. Click on the Start button located at the bottom-left corner of your screen, typically represented by the Windows logo. Alternatively, you can press the “Windows” key on your keyboard.
- Search for Disk Management. In the search bar within the Start menu, type “Disk Management” and wait for the search results to appear. The search results will display the “Create and format hard disk partitions” option.
- Open Disk Management. In the search results, click on the “Create and format hard disk partitions” option. This will launch the Disk Management utility on your PC.
You can also access Disk Management through the Control Panel. Follow these steps to navigate through the Control Panel:
- Access the Control Panel. Click on the Start button and scroll through the list of apps until you find the Windows System group. Expand the group, and then click on “Control Panel.”
- Navigate to Administrative Tools. In the Control Panel, click on the “System and Security” category, followed by “Administrative Tools.”
- Open Disk Management. In the Administrative Tools section, double-click on “Computer Management.” In the Computer Management window, expand the “Storage” category and select “Disk Management.”
By opening Disk Management, you gain access to a comprehensive view of your computer’s storage devices. This utility allows you to manage disks, partitions, and volumes, including the ability to create, delete, format, and resize partitions.
Now that you have successfully opened Disk Management on your PC, you are ready to proceed with the next steps to partition your external hard drive.
Step 3: Locate the External Hard Drive
After opening Disk Management on your PC, the next step in partitioning your external hard drive is to locate it within the Disk Management interface. Follow these steps to find your external hard drive:
- Scan the list of drives. In the Disk Management window, you will see a list of drives that are currently connected to your PC. This includes your internal hard drives and any external storage devices.
- Identify the external hard drive. Look for your external hard drive within the list. The drives will be labeled with information such as their size, label, and file format. The external hard drive may be labeled with a drive letter (such as E:, F:, etc.) or a volume name.
- Note the status of the drive. Take note of the status of the external hard drive in Disk Management. It should display whether the drive is recognized, online, offline, or any other relevant status information.
- Pay attention to unallocated space. If your external hard drive is new or hasn’t been partitioned, it may appear as unallocated space in Disk Management. In this case, you will need to create a new partition on the unallocated space.
Identifying your external hard drive in Disk Management is crucial to ensure that you are working on the correct disk. Pay close attention to the size, label, and status information to confirm that you have located the correct drive.
Once you have successfully located the external hard drive within Disk Management, you can proceed to the next step: modifying the partitions on the drive to create a new partition for your PC.
Step 4: Right-click on the External Hard Drive
Now that you have located your external hard drive in Disk Management, the next step in partitioning the drive for your PC is to right-click on it to access the context menu. Follow these steps to proceed:
- Locate the external hard drive. In the Disk Management window, scan the list of drives until you find your external hard drive. It should be labeled with a drive letter or a volume name.
- Right-click on the external hard drive. Once you have found your external hard drive, right-click on it to open the context menu. This menu will provide you with various options for managing the drive.
By right-clicking on the external hard drive, you can access a range of options to perform specific actions on the drive, such as creating a new partition, deleting or formatting existing partitions, assigning drive letters, and more. The available options in the context menu may vary depending on the current state and configuration of the drive.
Proceed to the next step to select the “Shrink Volume” option, which allows you to free up unallocated space for creating a new partition on your external hard drive.
Step 5: Select “Shrink Volume”
After right-clicking on your external hard drive in Disk Management, the next step in partitioning the drive for your PC is to select the “Shrink Volume” option. This will free up unallocated space on the drive, allowing you to create a new partition. Follow these steps to proceed:
- Locate the context menu. After right-clicking on your external hard drive in Disk Management, a context menu will appear with various options.
- Find and select “Shrink Volume”. Within the context menu, locate the “Shrink Volume” option and click on it. This action will launch the “Shrink” dialog box.
By selecting the “Shrink Volume” option, you initiate the process of resizing the existing partition on your external hard drive to free up space for creating a new partition. Windows will calculate the maximum amount of space that can be shrunk from the selected partition.
Proceed to the next step to adjust the size of the partition and determine the amount of unallocated space to be allocated for the new partition.
Step 6: Adjust the Partition Size
After selecting the “Shrink Volume” option in Disk Management, the next step in partitioning your external hard drive for your PC is to adjust the size of the existing partition. This will determine the amount of unallocated space that will be available for creating the new partition. Follow these steps to proceed:
- Review the current partition size. After selecting the “Shrink Volume” option, a “Shrink” dialog box will appear. This box will display the total size of the selected partition, as well as the amount of available space that can be shrunk.
- Enter the desired size for the new partition. In the “Enter the amount of space to shrink in MB” field, you can either specify the desired size for the new partition in megabytes (MB), or you can adjust the size using the shrink dialog box’s graphical interface.
- Consider the size limitation. Keep in mind that the maximum amount of space you can shrink may be limited by the existing data and the location of files on the partition. Windows will calculate the available space based on these factors.
- Manage the unallocated space. Once you have determined the desired size for the new partition, Disk Management will shrink the existing partition and free up unallocated space on the drive.
By adjusting the partition size, you are allocating a specific amount of space from the existing partition to create the new partition. Ensure that you allocate enough space for your needs, taking into consideration the size requirements of the files and data that will be stored on the new partition.
Once you have adjusted the partition size and the unallocated space is available, you can proceed to the next step: creating the new partition on your external hard drive.
Step 7: Create a New Partition
After adjusting the partition size in Disk Management, the next step in partitioning your external hard drive for your PC is to create a new partition using the unallocated space. Follow these steps to proceed:
- Right-click on the unallocated space. In the Disk Management window, locate the unallocated space that was created by shrinking the existing partition. Right-click on the unallocated space to access the context menu.
- Select “New Simple Volume”. Within the context menu, select the option “New Simple Volume”. This will launch the “New Simple Volume Wizard”, which will guide you through the steps of creating the new partition.
- Follow the instructions in the wizard. The “New Simple Volume Wizard” will present a series of prompts and options to customize the new partition. Follow the instructions and provide the requested information, such as the partition size, drive letter assignment, and file system formatting.
- Choose the partition size. In the wizard, specify the size for the new partition. You can choose to use the entire unallocated space or allocate a specific size for the partition.
- Assign a drive letter. Select a drive letter from the available options, which will be used to identify and access the new partition in Windows.
- Format the new partition. Choose the desired file system format for the new partition. The options typically include NTFS, FAT32, and exFAT. Consider the compatibility requirements for your usage scenario when selecting the format.
- Complete the process. Follow the remaining steps in the wizard to complete the creation of the new partition. Review the provided information and confirm the settings before proceeding.
By creating a new partition, you are utilizing the unallocated space on your external hard drive to define a separate storage area. This provides you with a dedicated space to store files, data, or other content according to your specific needs.
Once you have completed the steps in the “New Simple Volume Wizard”, the new partition will be created on your external hard drive. You can now access and use the new partition to store and manage your data on your PC.
Step 8: Assign a Drive Letter to the New Partition
After creating the new partition on your external hard drive, the next step in partitioning for your PC is to assign a drive letter to the newly created partition. This will allow you to identify and access the partition easily in Windows. Follow these steps to proceed:
- Locate the new partition. In the Disk Management window, find the newly created partition on your external hard drive. It should appear as a block of allocated space with a “Healthy (Primary Partition)” status.
- Right-click on the new partition. Right-click on the newly created partition to open the context menu.
- Select “Change Drive Letter and Paths”. Within the context menu, locate and select the option “Change Drive Letter and Paths”. A new window will appear, displaying the current drive letter assignment.
- Click on “Add”. In the “Change Drive Letter and Paths” window, click on the “Add” button to assign a drive letter to the new partition.
- Choose a drive letter. Select a drive letter from the available options. It is recommended to choose a letter that is not already assigned to another drive to avoid conflicts.
- Click on “OK”. After selecting the desired drive letter, click on the “OK” button to confirm the assignment. The drive letter will now be assigned to the new partition.
By assigning a drive letter to the new partition, you can easily identify and access the partition in Windows File Explorer or any other software that requires a drive letter to locate files or data. The assigned drive letter acts as a unique identifier for the partition on your PC.
Once you have completed this step, the new partition on your external hard drive will be readily accessible and identifiable using the assigned drive letter.
Step 9: Format the New Partition
After assigning a drive letter to the newly created partition on your external hard drive, the next step in partitioning for your PC is to format the partition. Formatting prepares the partition for use by configuring the file system and structure. Follow these steps to proceed:
- Locate the newly created partition. In the Disk Management window, find the partition that you have assigned a drive letter to. Ensure that it is selected or highlighted.
- Right-click on the partition. Right-click on the partition to access the context menu.
- Select “Format”. In the context menu, click on the “Format” option. This will open the “Format” dialog box.
- Configure the formatting options. In the “Format” dialog box, you can define the configuration settings for the new partition.
- Choose the file system format. Select the desired file system format for the partition. The available options typically include NTFS, FAT32, and exFAT.
- Assign a volume label (optional). Enter a name or label for the new partition, if desired. This label will be displayed in Windows File Explorer and can help you identify the purpose or content of the partition.
- Enable quick format (optional). If you want to expedite the formatting process, check the box for “Quick Format”. This option skips the complete sector-by-sector scan, resulting in faster formatting.
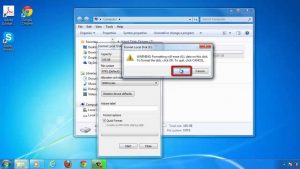
- Click on “OK” to start the format. Once you have configured the formatting options, click on the “OK” button to commence the formatting process. A confirmation dialog may appear, notifying you that all data on the partition will be permanently erased.
- Wait for the format to complete. The formatting process may take some time, depending on the size of the partition and the selected format. A progress bar will indicate the ongoing process.
By formatting the new partition, you are establishing the file system structure and preparing the partition for data storage and retrieval. This step ensures the partition is fully functional and compliant with the selected file system format.
Once the format is complete, the new partition will be ready for use. It can now be accessed, files can be written to it, and data can be stored or retrieved within the partition.
Step 10: Click on “OK” to Complete the Partitioning Process
After formatting the new partition on your external hard drive, the final step in the partitioning process for your PC is to click on the “OK” button to complete the setup. Follow these steps to proceed:
- Review the formatting settings. Before finalizing the partitioning process, take a moment to review the formatting settings that you have chosen. Make sure that the file system format, volume label (if applicable), and other options are as desired.
- Click on the “OK” button. Once you have reviewed the formatting settings, click on the “OK” button within the formatting dialog box. This action will initiate the formatting process for the new partition.
- Wait for the process to complete. The formatting process will now commence, during which the partition structure and file system will be established according to the selected formatting settings. The time it takes to complete will depend on the size of the partition and the speed of your system.
- Monitor the progress. While the formatting is underway, a progress bar will indicate the percentage of completion. Allow the process to finish without interruption.
- Confirm completion. Once the formatting process is complete, a notification or completion message will appear in Disk Management. This indicates that the partitioning process has been successfully concluded.
By clicking on the “OK” button, you are signaling that you have reviewed and accepted the formatting settings for the new partition. This step triggers the actual formatting process, configuring the partition for data storage and retrieval.
With the completion of this final step, the partitioning process for your external hard drive on your PC is now finished. The new partition is ready for use, and you can begin storing and managing your files and data on it.
Conclusion
Congratulations! You have successfully partitioned your external hard drive for both Mac and PC systems. Partitioning your external hard drive provides you with greater flexibility, enabling seamless compatibility between different operating systems and improved organization of your data.
For Mac users, you learned how to connect your external hard drive, open Disk Utility, select the drive, click on the “Partition” tab, adjust the partition sizes, set the partition format, and apply the changes. This ensures that your external hard drive can be used effortlessly on your Mac system.
For PC users, you discovered how to connect your external hard drive, open Disk Management, locate the drive, right-click on the drive, select “Shrink Volume,” adjust the partition size, create a new partition, assign a drive letter, format the new partition, and finalize the partitioning process. These steps enable seamless utilization of the external hard drive on your PC.
Remember, partitioning provides numerous benefits, including compatibility between Mac and PC systems, efficient file organization, data protection, improved performance, and the ability to experiment with different operating systems. By carefully following the steps outlined in this guide, you can optimize your external hard drive to meet your specific needs.
Now that you have successfully partitioned your external hard drive, you can enjoy the convenience and improved functionality it brings to your workflow. Whether you need separate sections for Mac and PC data, or you want to keep your files organized, partitioning allows you to have better control over your storage solution.
Take advantage of your newly partitioned external hard drive, and make the most of its enhanced compatibility and organization. Store files, transfer data, and manage your information seamlessly between your Mac and PC systems.
Keep in mind that partitioning an external hard drive permanently modifies its structure, so it is essential to double-check your settings and ensure that you have the necessary backups for any important data.
Thank you for following this guide. Now, go ahead and make the most of your partitioned external hard drive!