Introduction
Welcome to our guide on how to use an external hard drive formatted for Mac on a PC. If you’ve recently switched from a Mac to a PC or find yourself needing to access files stored on a Mac-formatted external hard drive, this article is for you. While Mac and PC systems use different file systems, it is still possible to make the external hard drive work seamlessly between the two.
As many of you may already know, Mac computers typically use the HFS+ or APFS (Apple File System) formats, while PCs run on the NTFS (New Technology File System) or exFAT (Extended File Allocation Table) formats. The file system formatting determines how data is organized, stored, and accessed on the hard drive. While the PC can read both NTFS and exFAT formats, by default, it cannot directly access or write files on a Mac-formatted drive.
In the sections that follow, we will break down the process of using a Mac-formatted external hard drive on a PC into simple steps. We will look at how to format the hard drive in a PC-compatible format, how to transfer files from the Mac to the PC, and provide troubleshooting tips for common issues you may encounter along the way. So, let’s get started!
Before we begin, please note that formatting an external hard drive will erase all existing data on the drive. Make sure to backup any important files before proceeding with the formatting process. Additionally, it’s always a good idea to use a reliable and up-to-date antivirus program to scan files when moving them between different systems.
Understanding the Differences Between Mac and PC Formats
Before we delve into the process of using a Mac-formatted external hard drive on a PC, it is important to understand the key differences between the file systems used by Mac and PC systems. This understanding will help us navigate the challenges that arise when trying to access files across these platforms.
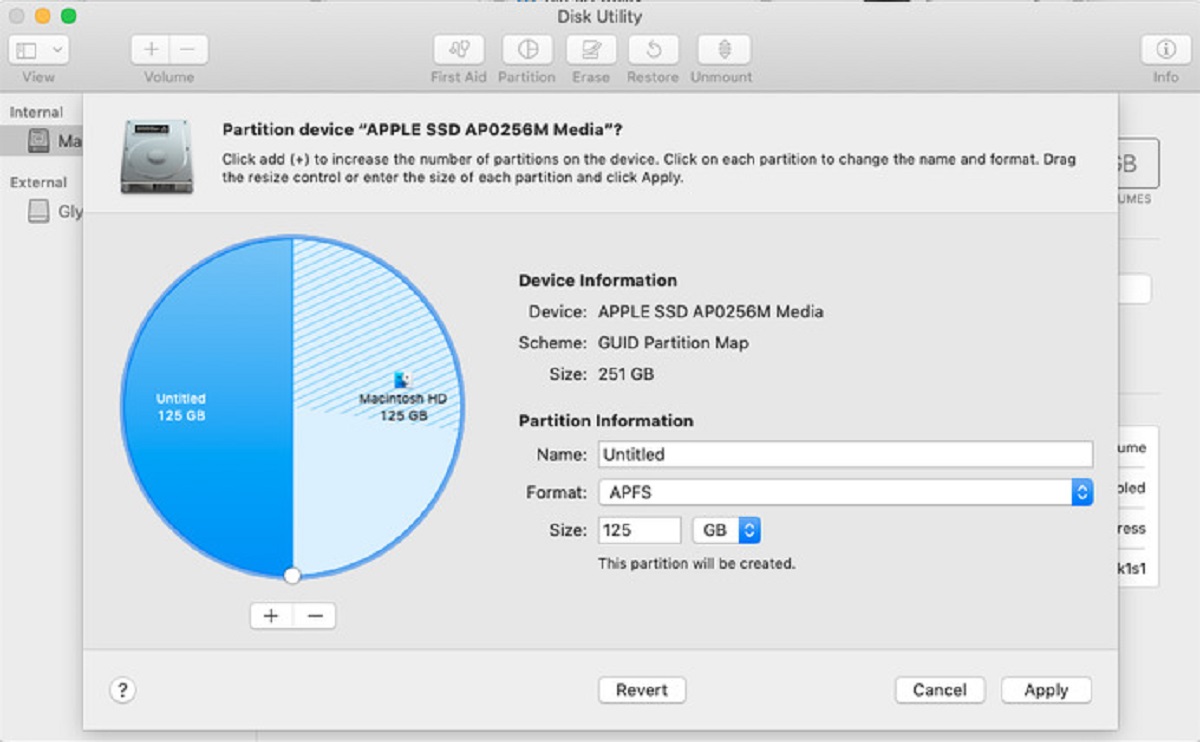
Mac computers primarily use the HFS+ (Hierarchical File System Plus) or APFS (Apple File System) formats. These file systems are optimized for Mac OS X and offer features such as journaling, which helps prevent data corruption in case of sudden power loss or system crashes. Additionally, Mac file systems are case-insensitive by default, meaning that file names that only differ in case will be considered the same.
On the other hand, PCs typically use the NTFS (New Technology File System) or exFAT (Extended File Allocation Table) formats. NTFS is the default file system for Windows and offers features like file permissions and encryption. exFAT, introduced by Microsoft, is a file system designed for use with flash drives and external storage devices. It is compatible with both Windows and Mac systems, making it a popular choice for cross-platform usage.
The main challenge arises when attempting to read or write files on an external hard drive that was originally formatted for Mac on a PC. By default, Windows can read NTFS and exFAT formats but cannot write or modify Mac-formatted drives. This limitation can be frustrating, especially when you need to access important files stored on a Mac-formatted external hard drive.
Fortunately, there are ways to overcome this limitation and make Mac-formatted drives compatible with PCs. In the next sections, we will explore the step-by-step process of formatting the drive for PC use and transferring files from a Mac to a PC.
Formatting the External Hard Drive for PC
In order to make a Mac-formatted external hard drive compatible with a PC, we need to reformat the drive using a file system that both Mac and PC can recognize. Here’s how you can do it:
- Backup your data: Before proceeding with the formatting process, it is crucial to back up any important data on the external hard drive. This will ensure that you don’t lose any files during the formatting process.
- Connect the external hard drive to your PC: Plug in the external hard drive to an available USB port on your PC. Make sure it is properly connected and recognized by the system.
- Open Disk Management: Right-click on the “Start” button and select “Disk Management” from the list of options. This will open the Disk Management utility, which allows you to manage storage devices connected to your PC.
- Select the external hard drive: Locate the external hard drive in the list of drives displayed in Disk Management. Identify the correct drive by its size and make sure you select the right one to avoid formatting the wrong drive and losing data.
- Delete existing partitions: Right-click on each partition displayed on the external hard drive and select “Delete Volume” from the context menu. Repeat this process for all existing partitions on the drive until it appears as unallocated space.
- Create a new partition: Right-click on the unallocated space and select “New Simple Volume” from the context menu. Follow the on-screen instructions to create a new partition and allocate the desired amount of space for it.
- Select the file system: When prompted to choose the file system, select either NTFS or exFAT. NTFS is recommended for maximum compatibility and supports larger file sizes, while exFAT is more suitable for smaller drives and provides better cross-platform compatibility.
- Format the drive: Complete the process by following the on-screen prompts to format the newly created partition. This may take some time depending on the size of the drive.
- Assign a drive letter: Once the formatting process is complete, right-click on the newly formatted partition and select “Change Drive Letter and Paths.” Assign a drive letter of your choice to easily access the drive in the future.
- Finalize the formatting: Confirm your selections and allow the system to complete the formatting process. Once done, you will have successfully formatted the external hard drive for PC use.
Congratulations! You have now formatted your Mac-formatted external hard drive to be compatible with a PC. In the next section, we will explore how to transfer files from the Mac to the newly formatted drive for seamless cross-platform access.
Transferring Files from Mac to PC
Now that you have successfully formatted the external hard drive for PC use, it’s time to transfer your files from the Mac to the newly formatted drive. Follow these steps to ensure a seamless transfer:
- Connect the external hard drive to your Mac: Plug in the formatted external hard drive into an available USB port on your Mac. Ensure that the Mac recognizes the drive and mounts it properly.
- Open Finder: On your Mac, open Finder, which is the file management application.
- Locate the files you want to transfer: Navigate to the files or folders you wish to transfer to the PC. You can select individual files or entire folders, depending on your preference.
- Copy the files: Once you have selected the files or folders, right-click on them and select “Copy” from the context menu. Alternatively, you can press Command + C to copy the selected items.
- Open the external hard drive: In Finder, locate and open the external hard drive. It should be listed under the “Devices” section in the sidebar.
- Paste the files: Right-click inside the external hard drive folder and select “Paste” from the context menu. Alternatively, you can press Command + V to paste the copied files.
- Wait for the transfer to complete: The transfer process may take some time depending on the size and number of files being transferred. Avoid disconnecting the external hard drive or interrupting the transfer process to prevent data loss or corruption.
- Eject the external hard drive: Once the transfer is complete, safely eject the external hard drive from your Mac. This ensures that the files are properly written and the drive can be safely removed.
- Connect the external hard drive to your PC: Take the external hard drive and connect it to an available USB port on your PC. Make sure it is recognized and mounted by the system.
- Navigate to the external hard drive: Open File Explorer on your PC and locate the external hard drive. It should appear as a new drive under the “This PC” or “My Computer” section.
- Access the transferred files: You can now access the transferred files and folders on your PC. Double-click on them to open or use them as you would with any other files on your PC.
That’s it! You have successfully transferred your files from the Mac to the PC using the newly formatted external hard drive. In the next section, we will provide some troubleshooting tips to help you address common issues that may arise during this process.
Troubleshooting Tips
While transferring files from a Mac to a PC using a formatted external hard drive is generally a straightforward process, you may encounter some common issues along the way. Here are some troubleshooting tips to help you address these issues:
- Drive not recognized: If your PC is not recognizing the formatted external hard drive, try connecting it to a different USB port. You can also try restarting your PC and ensuring that the drive is properly connected.
- Unable to copy files: If you encounter difficulties copying files from your Mac to the external hard drive, make sure that the files are not in use or locked on your Mac. Close any open applications or files that may be preventing the copying process.
- File compatibility issues: When transferring files between Mac and PC, be aware that some file formats may not be fully compatible. For example, certain specialized Mac software or file types may not be easily accessible or usable on a PC. Ensure that the files you are transferring are compatible with the software available on your PC.
- File name issues: Pay attention to file name compatibility. Macs allow the use of characters that Windows does not support in file names, such as colons and forward slashes. Additionally, Macs are case-insensitive by default, whereas PCs are case-sensitive. Rename any files with incompatible names before transferring them to the PC to avoid any issues.
- Data corruption: While transferring files, it’s essential to handle the external hard drive with care and avoid disconnecting it abruptly. Sudden removal can lead to data corruption. Always eject or safely remove the drive from your Mac or PC before physically disconnecting it.
- Virus detection: Before transferring files from your Mac to a PC, run an antivirus scan on your Mac to ensure that the files you’re transferring are not infected with any malware or viruses. This step helps prevent accidentally transferring harmful files to your PC.
- File organization: Take the opportunity to reorganize and tidy up your files during the transfer process. This can make it easier to find and access files on both your Mac and PC in the future.
- Seek professional help: If you encounter persistent issues or are unsure about the process, consider seeking professional assistance from a tech support specialist. They can provide personalized guidance and solutions to your specific situation.
By following these troubleshooting tips, you can overcome common challenges and ensure a smooth file transfer process from Mac to PC using a formatted external hard drive.
Conclusion
In conclusion, using an external hard drive formatted for Mac on a PC is possible with a few simple steps. By understanding the differences between Mac and PC file systems, formatting the external hard drive for PC use, and transferring files between the two platforms, you can seamlessly access and use your data across both systems.
Throughout this guide, we’ve covered the essential steps to make a Mac-formatted external hard drive compatible with a PC. We started by explaining the differences between Mac and PC file formats, highlighting the challenges users face when trying to access files across these platforms. We then explored the process of formatting the external hard drive for PC use, ensuring that it can be recognized and accessed by both Mac and PC systems.
We also discussed how to transfer files from a Mac to the newly formatted drive, allowing for seamless cross-platform access. By following the steps outlined, you can efficiently copy your files from a Mac to a PC, ensuring that they are accessible and usable on both systems.
Additionally, we provided troubleshooting tips to help you address common issues that may arise during the process, such as drive recognition problems, file compatibility issues, and data corruption risks. These tips serve as a resource to overcome challenges and ensure a smooth and successful file transfer experience.
Remember, always back up your data before proceeding with any formatting or file transfer process. It is crucial to safeguard your important files and prevent any potential loss or damage. Take the time to organize and rename your files as needed for compatibility purposes, and be mindful of safe ejecting the external hard drive before physically disconnecting it.
With the knowledge and steps outlined in this guide, you can now confidently use an external hard drive formatted for Mac on a PC. Enjoy seamless access to your files, regardless of the platform you are using. Whether you’ve recently switched from Mac to PC or need to collaborate with users on different systems, this guide will help you bridge the gap and make your data easily accessible and shareable.