Introduction
Welcome to this step-by-step guide on how to remove a partition on an external hard drive. Often, when managing our digital storage, we may find ourselves in situations where we want to reorganize or repurpose our hard drive partitions. Whether you want to merge multiple partitions, create new ones, or simply free up space, deleting a partition can be a necessary step.
Understanding how partitions work and the process of removing them is essential to ensure that you don’t accidentally delete important data or damage your external hard drive. In this guide, we will walk you through the process of removing a partition safely and efficiently.
Before we dive into the step-by-step instructions, it is important to note that removing a partition will permanently delete all data within it. Therefore, it is crucial to back up any important files or documents before proceeding with the partition removal process. Taking this precautionary measure will help protect your valuable data from being lost forever.
In the following sections, we will guide you through each step of the process, from backing up your data to deleting the partition and, if needed, creating a new partition. By following these instructions carefully, you’ll be able to successfully remove a partition on your external hard drive without any unnecessary complications.
So, without further ado, let’s get started on this journey to remove a partition on your external hard drive and regain control over your storage space.
Understanding Partitions
Before we proceed with removing a partition on an external hard drive, let’s take a moment to understand what partitions are and how they function. A partition is a logical division or separate section of a hard drive that allows you to organize and manage your data more efficiently.
Partitions serve several purposes, such as separating the operating system files from user files, creating multiple storage spaces for different purposes, or facilitating dual boot configurations. Each partition has its file system, which determines how data is stored, accessed, and organized within that specific partition.
When you plug in an external hard drive, it usually comes with one or more pre-configured partitions. These partitions may already contain data or be allocated for specific functions. However, there may be instances where you want to modify or remove these partitions to better suit your needs.
It’s important to note that removing a partition will permanently erase all the data stored within it. Therefore, it is crucial to back up any important files or documents before proceeding with partition removal to avoid any data loss. Once a partition is deleted, the storage space it occupied becomes unallocated and will be merged back into the free space on the external hard drive.
Understanding partitions will help you make informed decisions when managing your storage space. Whether you want to consolidate existing partitions, create new ones, or simply free up space, having a clear understanding of how partitions work is essential.
In the following sections, we will provide a step-by-step guide on how to remove a partition on an external hard drive, ensuring that you have the necessary knowledge and confidence to successfully complete the process. So, let’s move on to the next step: backing up your data before proceeding with partition removal.
Step 1: Back up your data
Before removing a partition on your external hard drive, it is imperative to back up all your important data. This precautionary step ensures that you don’t lose any valuable files during the partition removal process. Here’s how you can back up your data:
- Identify the files to be backed up: Take some time to determine which files and documents you want to back up. These could include personal files, photos, videos, or any other data that you don’t want to lose.
- Select a backup method: Choose a backup method that suits your needs and preferences. You can opt for external storage devices like USB drives or external hard drives, cloud-based storage services, or even network-attached storage (NAS) solutions.
- Copy or transfer your files: Once you have decided on a backup method, start copying or transferring your files to the chosen backup destination. Make sure to organize your files in a way that allows for easy retrieval later on.
- Verify the backup: After the backup process is complete, it is crucial to verify that all your important files are successfully backed up. Take a moment to double-check the backup destination and ensure that the files are intact and accessible.
Taking the time to back up your data before removing a partition provides you with peace of mind, knowing that your important files are safely stored elsewhere. In case of any unforeseen issues during the partition removal process, you can easily restore your data from the backup.
Once you have successfully backed up your data, you are ready to proceed to the next step: opening Disk Management. This built-in Windows utility allows you to manage your hard drive partitions effectively. Let’s move on to Step 2 and begin the partition removal process.
Step 2: Open Disk Management
To remove a partition on your external hard drive, you’ll need to access the Disk Management utility in Windows. Disk Management allows you to view and manage the partitions on all connected storage devices. Follow these steps to open Disk Management:
- Press the Windows key: On your keyboard, press the Windows key or click on the Windows Start button to open the Start menu.
- Type “Disk Management”: In the search bar, type “Disk Management” and select the “Create and format hard disk partitions” option from the search results.
- Launch Disk Management: Click on the “Create and format hard disk partitions” option, and Disk Management will open.
Alternatively, you can also access Disk Management by right-clicking on the Windows Start button and selecting “Disk Management” from the context menu that appears. This method provides a quick way to open Disk Management without having to type in a search query.
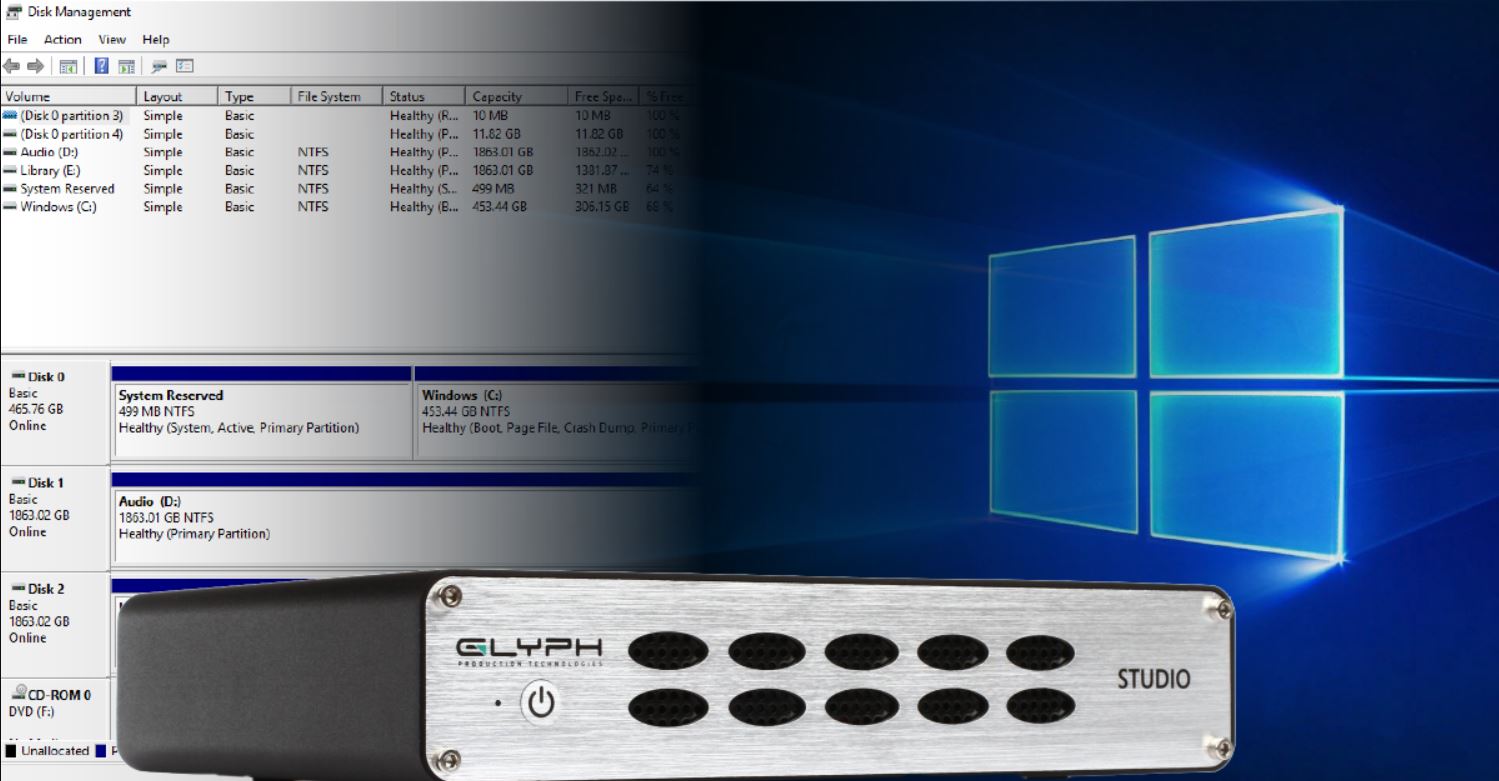
Once Disk Management opens, you will see a list of all connected storage devices, including your external hard drive. The graphical representation will show the partitions on each device, along with relevant information such as the file system, partition size, and more.
Now that you have successfully opened Disk Management, you are ready to proceed to the next step: locating the external hard drive within Disk Management. This step will allow you to identify the partition you wish to remove. Let’s move on to Step 3 and continue the partition removal process.
Step 3: Locate the External Hard Drive
In this step, we will guide you on how to locate your external hard drive within the Disk Management utility. Once you have identified the correct drive, you can proceed with removing the desired partition. Here’s how you can locate the external hard drive in Disk Management:
- Look for your external hard drive: Scan through the list of drives displayed in Disk Management to locate your external hard drive. The drives will be listed by their assigned letters, such as “C:”, “D:”, and so on.
- Identify the correct disk: Pay attention to the disk number associated with your external hard drive. Disk Management will display essential information about each disk, such as its size and status.
- Inspect the partitions: After identifying the correct disk, you will see a graphical representation of the disk and its partitions. Locate the partition you wish to remove on the disk representation.
It’s important to double-check and ensure that you have identified the correct partition and disk before proceeding with the removal process. Deleting the wrong partition can result in permanent data loss, so exercise caution and confirm that you are selecting the intended partition.
Once you have successfully located the external hard drive and the desired partition within Disk Management, you are ready to move on to the next step: deleting the partition. This will involve permanently removing the selected partition from your external hard drive. Let’s proceed to Step 4 and continue with the partition removal process.
Step 4: Delete the Partition
Now that you have located the partition you want to remove on your external hard drive within Disk Management, we can proceed with deleting it. Deleting a partition will permanently erase all data contained within it, so ensure that you have backed up any important files before proceeding. Follow these steps to delete the partition:
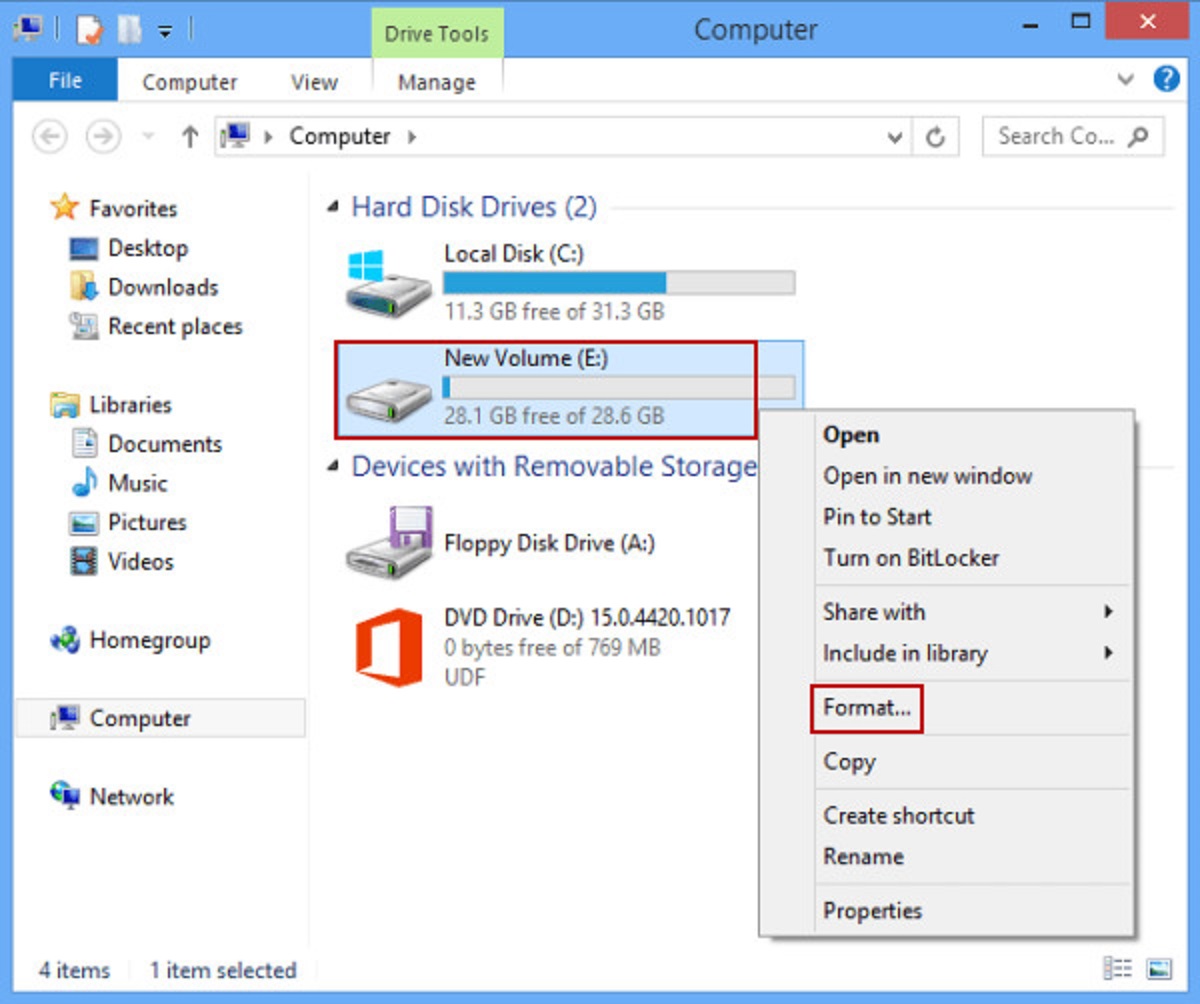
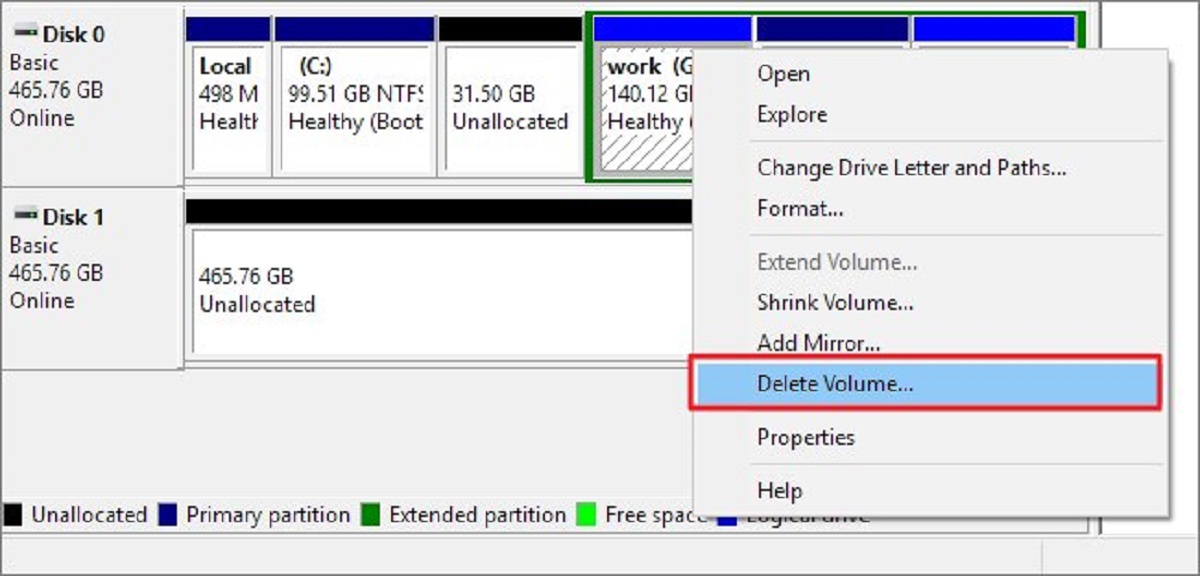
- Right-click on the partition: On the graphical representation of your external hard drive within Disk Management, right-click on the partition you want to remove. A context menu will appear.
- Select “Delete Volume”: From the context menu, choose the option labeled “Delete Volume.” This action will initiate the process of removing the selected partition.
- Confirm the deletion: A prompt will appear asking you to confirm the deletion of the partition. Read the warning carefully and ensure that you have selected the correct partition. Click “Yes” to proceed with the deletion.
- Wait for the process to complete: The deletion process may take a few moments, depending on the size of the partition. Disk Management will display the progress of the deletion, and once it is complete, the partition will be removed from your external hard drive.
During the deletion process, you may notice that the partition disappears from the graphical representation in Disk Management. This indicates that the partition has been successfully removed. However, the allocated storage space that was previously occupied by the partition will now be marked as “Unallocated.”
Congratulations! You have successfully deleted the partition on your external hard drive. In the next step, we will guide you through the process of confirming the deletion and ensuring that the partition has been removed permanently. Let’s move on to Step 5 and complete the partition removal process.
Step 5: Confirm the Deletion
After deleting a partition on your external hard drive, it is essential to confirm that the deletion was successful and that the partition has been permanently removed from your storage device. In this step, we will guide you through the process of confirming the deletion:
- Check the Disk Management display: Take a look at the graphical representation of your external hard drive in Disk Management. The deleted partition should no longer be visible, indicating that it has been successfully removed.
- Verify the unallocated space: Look for any unallocated space on your external hard drive. This space represents the storage that was previously occupied by the deleted partition. The size of the unallocated space should match the size of the partition you deleted.
Confirming the deletion is crucial to ensure that your external hard drive is now free from the partition you wanted to remove. If you still see the partition or any inconsistencies in the Disk Management display, double-check your actions and repeat the steps to ensure the deletion was executed correctly.
Once you have verified that the partition has been deleted and the unallocated space is present, you can proceed to the next step: creating a new partition (if desired). Creating a new partition can help you utilize the freed-up space on your external hard drive for different purposes or better organization. Let’s move on to Step 6 and explore the process of creating a new partition (optional).
Step 6: Create a New Partition (Optional)
If you have deleted a partition on your external hard drive and would like to utilize the freed-up space for a new purpose, you have the option to create a new partition. Creating a new partition allows you to organize your data separately or allocate storage space for a specific use. Follow these steps to create a new partition:
- Right-click on the unallocated space: In Disk Management, locate the unallocated space on your external hard drive, which was previously occupied by the deleted partition. Right-click on the unallocated space and select the option labeled “New Simple Volume.”
- Follow the New Simple Volume Wizard: The New Simple Volume Wizard will guide you through the process of creating a new partition. Click “Next” to proceed.
- Specify the size of the partition: Enter the desired size for your new partition. You can either allocate the entire unallocated space or specify a custom size based on your requirements.
- Assign a drive letter or mount point: Choose a drive letter or mount point for the new partition. This letter or mount point will be used to access your new partition from your operating system.
- Format the partition: Select a file system for the new partition and choose whether to perform a quick format or full format. A quick format is usually sufficient for most situations.
- Assign a volume label: Give your new partition a meaningful name by assigning a volume label. This label will help you easily identify the partition and its purpose.
- Complete the wizard: Review the settings you have selected for the new partition and click “Finish” to create the partition. Disk Management will format and configure the new partition accordingly.
Once the process is complete, you will have a new partition on your external hard drive, ready to be used for storing files and data. Make sure to manage your partitions efficiently and consider your storage needs when creating new partitions.
With the creation of a new partition or the completion of the partition removal process, you have successfully managed and organized your external hard drive’s storage space. Congratulations! You now have a better understanding of how to remove a partition, as well as how to create new partitions if the need arises.
Remember to always back up your important data before making any changes to your partitions, as this will help safeguard against potential data loss. Properly managing your partitions will contribute to a more efficient and organized storage system.
Conclusion
In this comprehensive guide, we have walked you through the step-by-step process of removing a partition on an external hard drive. Understanding partitions and how they work is essential to ensure the safe removal of a partition without risking data loss or damaging your storage device.
We began by emphasizing the importance of backing up your data before proceeding with partition removal. This crucial step ensures that your important files are protected and can be easily restored if needed. We then guided you on how to open Disk Management, locate the external hard drive, and delete the desired partition. Confirming the deletion provides reassurance that the partition has been successfully removed.
We also discussed the optional step of creating a new partition if you wish to utilize the freed-up space for a specific purpose. Creating a new partition allows for better organization and efficient utilization of your external hard drive’s storage space.
Remember that whenever you are managing your storage device partitions, it’s important to exercise caution and double-check your actions. Always back up your data, confirm your selections, and follow the steps carefully to prevent any unintentional data loss.
By following the steps outlined in this guide, you can confidently remove partitions on your external hard drive, create new partitions, and manage your storage space effectively. Whether you’re reorganizing your storage, consolidating partitions, or creating separate spaces for different purposes, taking control of your partitions allows for better data management and improved system performance.
Now that you have the knowledge and understanding, you can confidently navigate the process of removing a partition on your external hard drive. Enjoy the freedom to organize, manage, and optimize your storage space according to your needs and preferences.
Thank you for choosing this guide, and we hope it has been helpful in your journey to remove a partition on your external hard drive. Should you have any further questions or need additional assistance, feel free to consult relevant resources or seek expert advice.