Introduction
Welcome to the world of command prompt! While graphical user interfaces have made it easy to perform most computing tasks, there are still times when you may need to rely on the command line for certain operations. Formatting a hard disk drive is one such task that can be accomplished using the command prompt.
In this article, we will guide you through the process of formatting a hard disk drive using the command prompt. Whether you want to clean up an old drive, prepare a new one for use, or troubleshoot disk-related issues, this method can come in handy.
Before we begin, it is important to note that formatting a hard disk drive will erase all data on the drive. Therefore, it is crucial to back up any important files or data before proceeding with the formatting process. Additionally, we recommend following this guide only if you have a basic understanding of the command prompt and are comfortable executing commands.
Through a series of steps, we will walk you through the entire process, from opening the command prompt to completing the format process. By the end of this article, you will have the necessary knowledge and skills to format a hard disk drive using the command prompt.
Prerequisites
Before you begin the process of formatting a hard disk drive using the command prompt, there are a few prerequisites you need to consider:
- Administrative access: Ensure that you have administrative access to your computer. Without sufficient privileges, you may encounter errors or limitations when executing commands in the command prompt.
- Backup your data: As mentioned earlier, formatting a hard disk drive will erase all data on the drive. It is crucial to back up any important files or data before proceeding. You can transfer your files to an external storage device or use cloud storage services for backup.
- Identify the disk: It is essential to identify the disk number of the hard disk drive you want to format. You can do this by using the Disk Management utility in Windows or by running the ‘diskpart’ command in the command prompt.
- External boot drive: If you are formatting the drive that contains the operating system, you will need an external boot drive. This will allow you to boot into a different operating system or recovery environment to perform the format process.
- Careful consideration: Before proceeding with the format process, make sure you have selected the correct disk. Formatting the wrong disk could result in permanent data loss.
Once you have fulfilled these prerequisites, you are ready to proceed with formatting your hard disk drive using the command prompt. It is always a good practice to double-check that you have met all the requirements to ensure a smooth and successful formatting process.
Step 1: Opening Command Prompt
In order to format a hard disk drive using the command prompt, you first need to open the command prompt. Follow these steps to open the command prompt:
- Press the Windows key on your keyboard or click on the Start button located in the bottom-left corner of your screen.
- Type “cmd” in the search bar or select Command Prompt from the list of applications suggested.
- Right-click on the Command Prompt option and select Run as administrator. This will open the command prompt with administrative privileges.
Another way to open the command prompt with administrative privileges is to press the Windows key + X on your keyboard and select Command Prompt (Admin) or Windows PowerShell (Admin) from the menu.
Once the command prompt is open, you are ready to move on to the next step, which is identifying the disk you want to format.
Step 2: Identifying the Disk
Before you can format a hard disk drive using the command prompt, you need to identify the disk that you want to format. Here’s how you can do it:
- In the command prompt, type
diskpartand press Enter. This will open the DiskPart utility, which allows you to manage disks and partitions. - Next, type
list diskand press Enter. This will display a list of all the disks connected to your computer. - Look for the disk number that corresponds to the one you want to format. Take note of this number as you will need it in the subsequent steps.
The list of disks will include both internal and external drives, so make sure you select the correct disk number to avoid accidentally formatting the wrong disk. You can identify the disk based on its size and other parameters, such as the manufacturer or model name.
Once you have identified the disk number, you can proceed to the next step, which involves selecting the disk for formatting.
Step 3: Selecting the Disk
After identifying the disk you want to format, the next step is to select the disk using the command prompt. Follow these instructions:
- In the command prompt, type
select disk [disk number], replacing[disk number]with the actual disk number you noted in the previous step. - Press Enter to execute the command. You will see a message confirming that the disk has been selected.
By selecting the disk, you are telling the system that you want to perform operations on that particular disk. It is important to double-check the disk number before executing the command to ensure that you have selected the correct disk.
Once you have successfully selected the disk, you can proceed to the next step, which involves cleaning the disk to remove any existing partitions or data.
Step 4: Cleaning the Disk
Before you can format the disk, it is important to clean it to remove any existing partitions or data. Here’s how you can clean the disk using the command prompt:
- In the command prompt, make sure you have the correct disk selected by running the command
list disk. This will display a list of disks along with their corresponding disk numbers. - Confirm that the selected disk is the one you want to clean. If it is not the correct disk, use the
select disk [disk number]command to choose the correct disk. - Once you have the correct disk selected, run the command
clean. This command will remove all partitions and data from the disk. - Wait for the cleaning process to complete. This may take a few moments, depending on the size of the disk.
- After the cleaning process is finished, you will see a message indicating that the disk has been cleaned.
By cleaning the disk, you are essentially wiping it clean of any existing partitions or data. This step is necessary to ensure a fresh start before proceeding with the formatting process.
Once the disk is cleaned, you are ready to move on to the next step, which involves creating a new partition on the disk.
Step 5: Creating a New Partition
After cleaning the disk, the next step is to create a new partition on the disk. Follow these steps to create a new partition using the command prompt:
- In the command prompt, ensure that the correct disk is still selected by running the command
list diskand confirming the disk number. - Once you have confirmed the correct disk, run the command
create partition primary. This command will create a new primary partition on the disk. - Wait for the creation process to complete. The time it takes may vary depending on the size of the disk.
- After the partition has been created, you will see a message indicating the successful creation of the partition.
By creating a new partition, you are preparing the disk to be formatted and used for your desired purpose. A partition is a logical division of the disk that can be assigned a drive letter and formatted with a file system.
Once the new partition is created, you are ready to move on to the next step, which involves formatting the partition to prepare it for use.
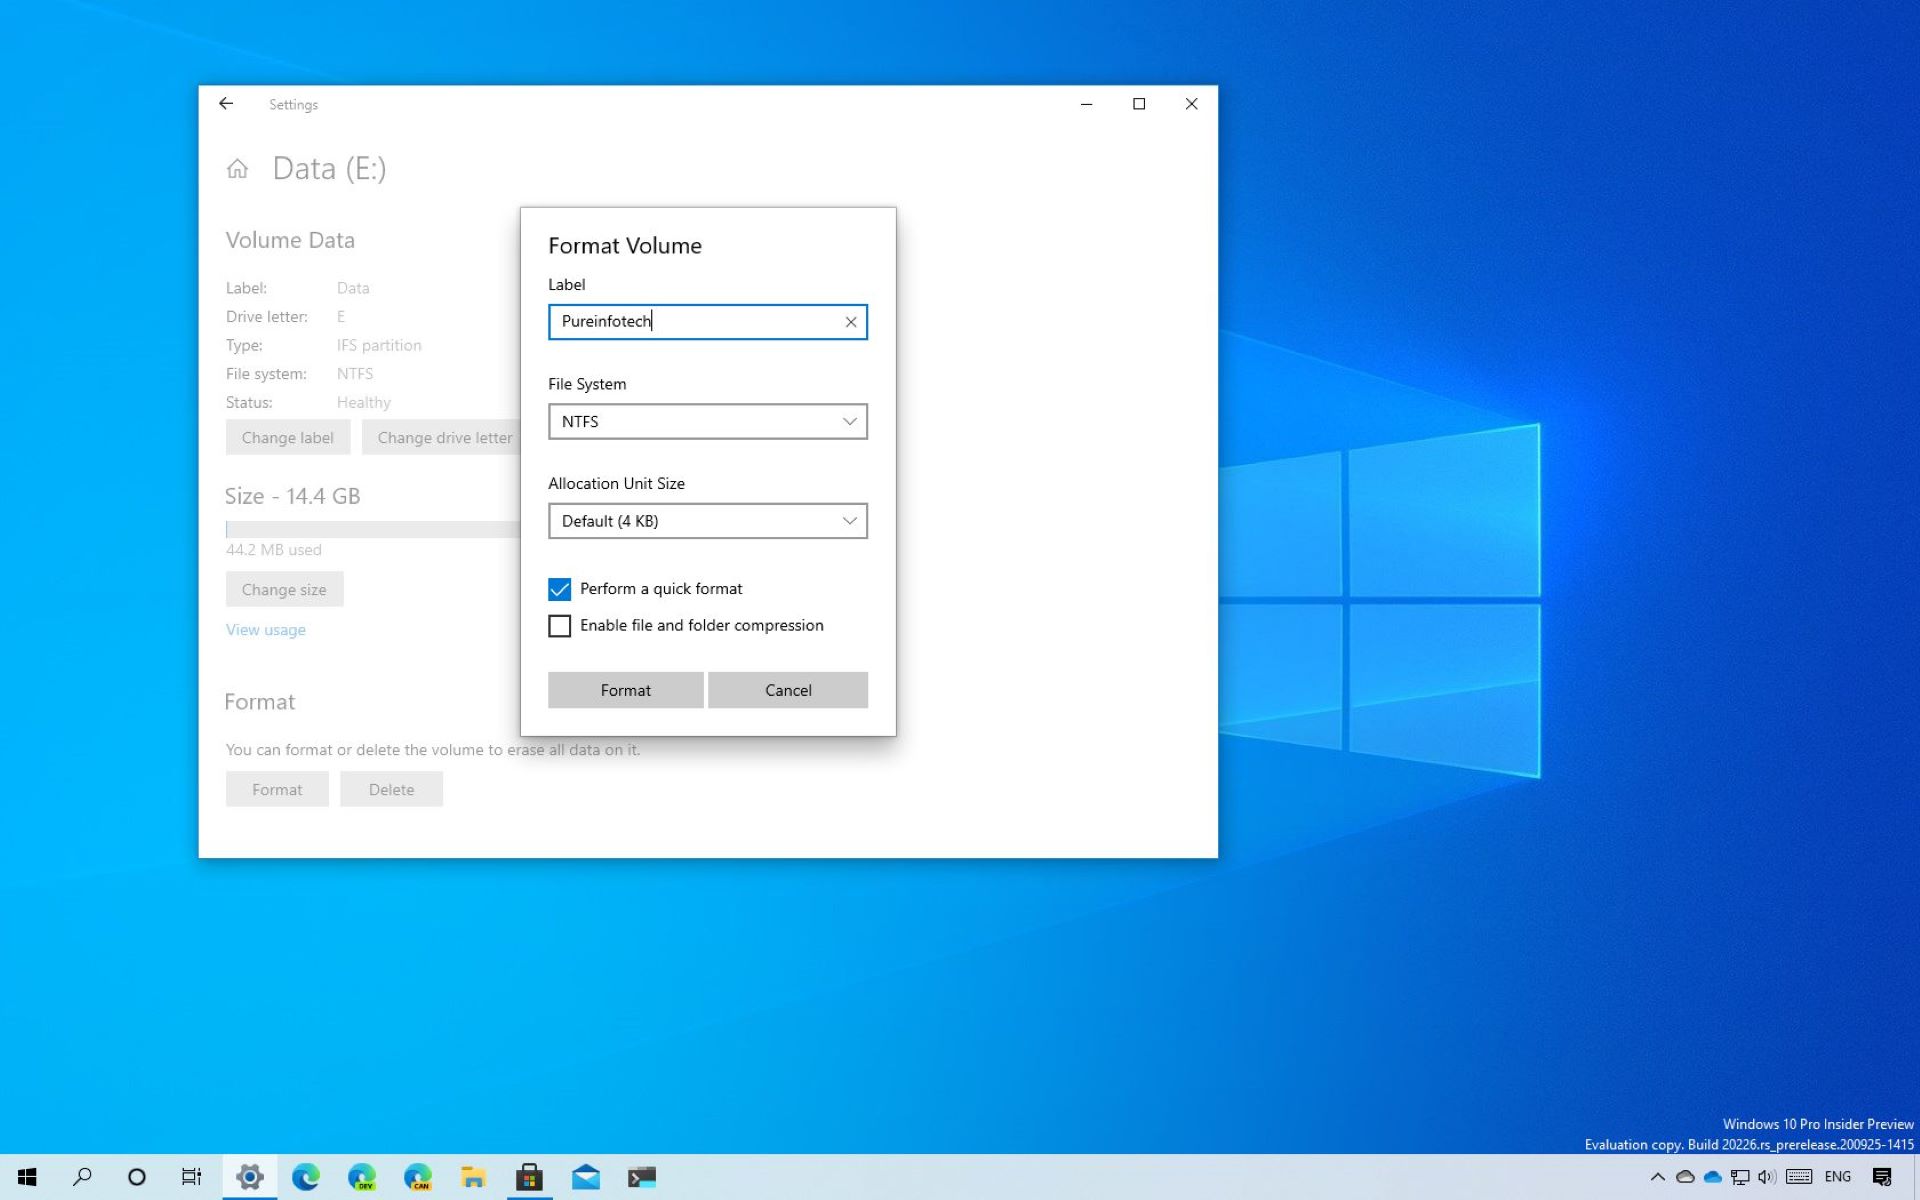
Step 6: Formatting the Partition
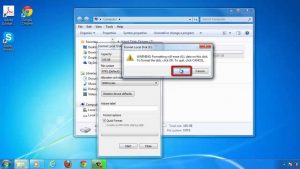
After creating a new partition on the disk, the next step is to format the partition. Formatting a partition involves preparing it for use by setting up the file system and other necessary structures. Here’s how you can format the partition using the command prompt:
- In the command prompt, ensure that the correct partition is selected by running the command
list partitionand confirming the partition number. - Once you have confirmed the correct partition, run the command
format fs=ntfs quick. This command will format the partition with the NTFS file system in a quick mode, which skips the sector-by-sector scan. - Wait for the formatting process to complete. The time it takes may vary depending on the size of the partition.
- After the formatting is finished, you will see a message confirming the successful completion of the format.
Note: In the above command, ntfs represents the file system type. You can replace it with fat32 or exfat if you prefer those file systems for your partition.
By formatting the partition, you are preparing it to store and organize data. The file system you choose will determine the compatibility, security, and maximum file size limitations of the partition.
Once the partition is formatted, you are ready to move on to the next step, which involves assigning a drive letter to the partition.
Step 7: Assigning a Drive Letter
After formatting the partition, the next step is to assign a drive letter to the partition. Assigning a drive letter allows you to easily access and identify the partition in the file explorer. Follow these steps to assign a drive letter to the partition:
- In the command prompt, ensure that the correct partition is selected by running the command
list partitionand confirming the partition number. - Once you have confirmed the correct partition, run the command
assign letter=[drive letter], replacing[drive letter]with the desired letter you want to assign to the partition (for example,F). - Wait for the process to complete. You will see a message indicating that the drive letter has been successfully assigned.
- Go to your file explorer and check if the partition is now visible with the assigned drive letter.
Assigning a drive letter to the partition makes it easier to access and manage the data stored on the partition. The assigned letter becomes the identifier for the partition when interacting with it through the file system.
Once you have assigned a drive letter to the partition, you are ready to proceed to the final step, which involves completing the format process.
Step 8: Completing the Format Process
After assigning a drive letter to the partition, the final step is to complete the format process. This involves ensuring that the necessary changes are applied and verifying that the formatted partition is fully functional. Follow these steps to complete the format process using the command prompt:
- In the command prompt, type
exitand press Enter to exit the DiskPart utility. This will return you to the regular command prompt. - Verify that the newly formatted partition is visible in your file explorer with the assigned drive letter. You should be able to access and store data on the partition.
- Perform a quick test on the formatted partition by copying a few files onto it and accessing them. This will ensure that the partition is functioning as expected.
- Congratulations! You have successfully formatted a hard disk drive using the command prompt.
By completing the format process, you have prepared the partition for use. It is now ready for storing data, installing an operating system, or any other purpose you have in mind.
Remember to keep your important data backed up on separate storage devices to avoid any potential loss during the formatting process.
Now that you have mastered the process of formatting a hard disk drive using the command prompt, you can confidently perform this task whenever the need arises.
Conclusion
Formatting a hard disk drive using the command prompt may seem daunting at first, but with the right guidance, it can be a straightforward process. In this article, we have walked you through the step-by-step instructions to format a hard disk drive using the command prompt.
We started by opening the command prompt and ensuring that we had the necessary administrative access. We then identified the disk we wanted to format and selected it using the diskpart utility. After that, we cleaned the disk to remove any existing partitions or data.
Next, we created a new partition on the disk and formatted it with the file system of our choice. We assigned a drive letter to the partition, allowing easy access and management of the formatted partition through the file explorer.
Finally, we completed the format process by verifying that the necessary changes were applied and ensuring the fully functional status of the formatted partition.
By following these steps, you can confidently format a hard disk drive using the command prompt, whether you want to clean up an old drive, prepare a new one for use, or troubleshoot disk-related issues.
Remember, formatting a hard disk drive will erase all data on the drive, so make sure to back up any important files or data before proceeding. Additionally, double-check the disk number and take all necessary precautions to avoid accidentally formatting the wrong disk.
Now that you have learned how to format a hard disk drive using the command prompt, you have acquired a valuable skill that can assist you in various computing scenarios. Feel free to refer back to this article whenever you need to refresh your memory or guide others through the process.