Introduction
Creating a partition on an external hard drive can be a beneficial task, allowing you to organize your files and optimize the storage space. Whether you’re using the external hard drive for backup purposes, transferring large files, or creating separate sections for different types of data, partitioning can help improve efficiency and accessibility.
In this guide, we will walk you through the step-by-step process of creating a partition on an external hard drive. You don’t need to be a tech expert to follow along – just a basic understanding of computer operations is sufficient. By the end, you’ll be able to divide your external hard drive into multiple sections, each with its own drive letter and independent storage capacity.
Before we dive into the steps, it’s important to note that the process may vary slightly depending on the operating system you’re using. In this guide, we will focus on Windows. If you’re using a Mac or Linux system, the steps may be different, but the concepts behind partition creation remain the same.
So, if you’re ready to make the most out of your external hard drive storage, grab your device and let’s get started!
What You Will Need
Before you begin creating a partition on your external hard drive, gather the following items:
- External Hard Drive: Ensure that you have a functioning external hard drive with enough free storage space. This will be the drive on which you will create the partition.
- Computer: You will need a computer with the necessary cables to connect and power up your external hard drive. Make sure your computer is fully operational.
- Operating System: This guide is tailored specifically for Windows users. Ensure that your computer is running a Windows operating system, such as Windows 10, 8, or 7.
- Admin Privileges: To create a partition, you need administrative privileges on your computer. Make sure you are logged in as an administrator or have the necessary permissions.
- Backup Data: It’s always a good idea to back up any important data on your external hard drive before creating a partition. While the partition creation process generally doesn’t erase existing data, it’s better to be safe than sorry.
Once you have gathered these essentials, you’re ready to move on to the next steps in creating a partition on your external hard drive. With everything in place, you can proceed with confidence, knowing that you have the necessary tools at your disposal.
Step 1: Connect the External Hard Drive
The first step in creating a partition on an external hard drive is to connect it to your computer. Follow these simple instructions to establish a connection:
- Locate an available USB port on your computer.
- Take the USB cable that came with your external hard drive and plug one end into the appropriate port on the external hard drive.
- Connect the other end of the USB cable to the USB port on your computer. Make sure the connection is secure.
- If your external hard drive has a separate power source, such as an AC adapter, make sure it is plugged into a power outlet.
- Power on the external hard drive by pressing the power button or switching it on. Wait for the drive to initialize.
- Your computer should detect the external hard drive and automatically install any necessary drivers. This process may take a few moments.
- Once the external hard drive is successfully connected and recognized by your computer, you can proceed to the next step.
It’s important to note that some external hard drives may require additional steps for connection, such as using Thunderbolt or eSATA connections. Refer to the manufacturer’s instructions or consult their website for specific guidance on connecting your particular external hard drive.
Now that your external hard drive is connected and ready to go, you can move on to the next step of creating a partition.
Step 2: Open the Disk Management Tool
To create a partition on your external hard drive, you need to access the Disk Management tool in Windows. Follow these steps to open the Disk Management tool:
- On your Windows computer, press the Windows key + X on your keyboard to open the Power User Menu.
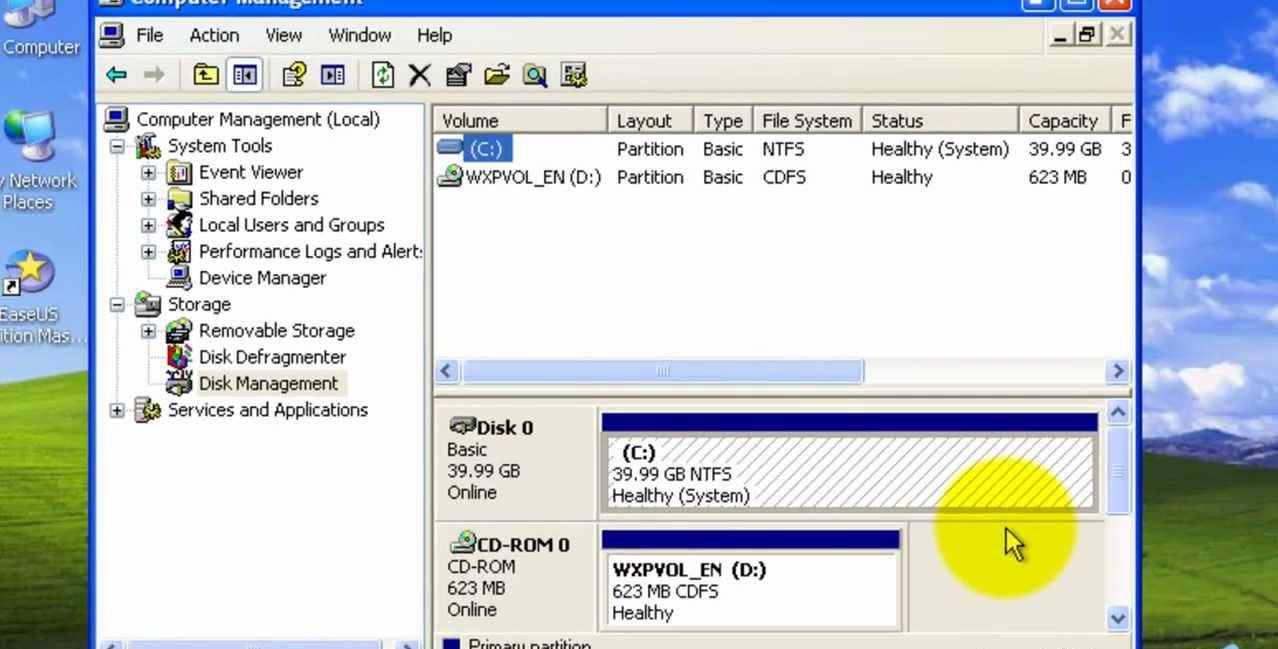
- From the Power User Menu, select Disk Management. This will open the Disk Management window.
- Alternatively, you can also open the Disk Management tool by right-clicking the Start button and selecting Disk Management from the context menu.
Once the Disk Management tool is open, you will see a list of all the connected drives, including your external hard drive, along with their respective partitions and unallocated space.
If your external hard drive is not listed, make sure it is properly connected and powered on. You can also try restarting your computer and reconnecting the drive.
Now that you have successfully opened the Disk Management tool and can see your external hard drive, you can proceed to the next step of selecting the drive to create a partition.
Step 3: Select the External Hard Drive
After opening the Disk Management tool, it’s time to select your external hard drive in order to create a partition on it. Follow these steps to select the drive:
- In the Disk Management window, look for the list of drives and partitions. Identify your external hard drive by its size and label. Be cautious not to accidentally select the wrong drive, as this process will modify the selected drive.
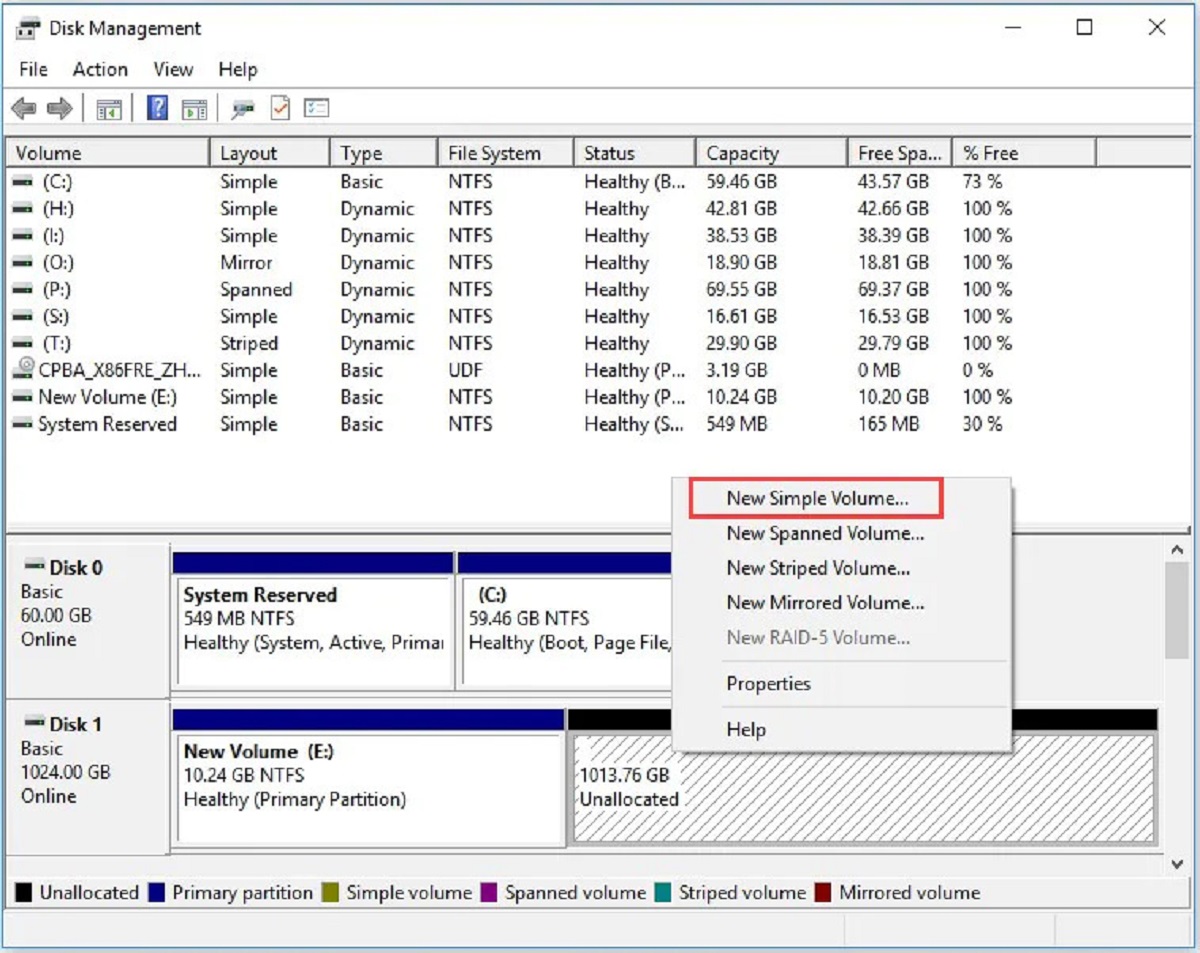
- Right-click on the external hard drive’s volume or unallocated space to open the context menu.
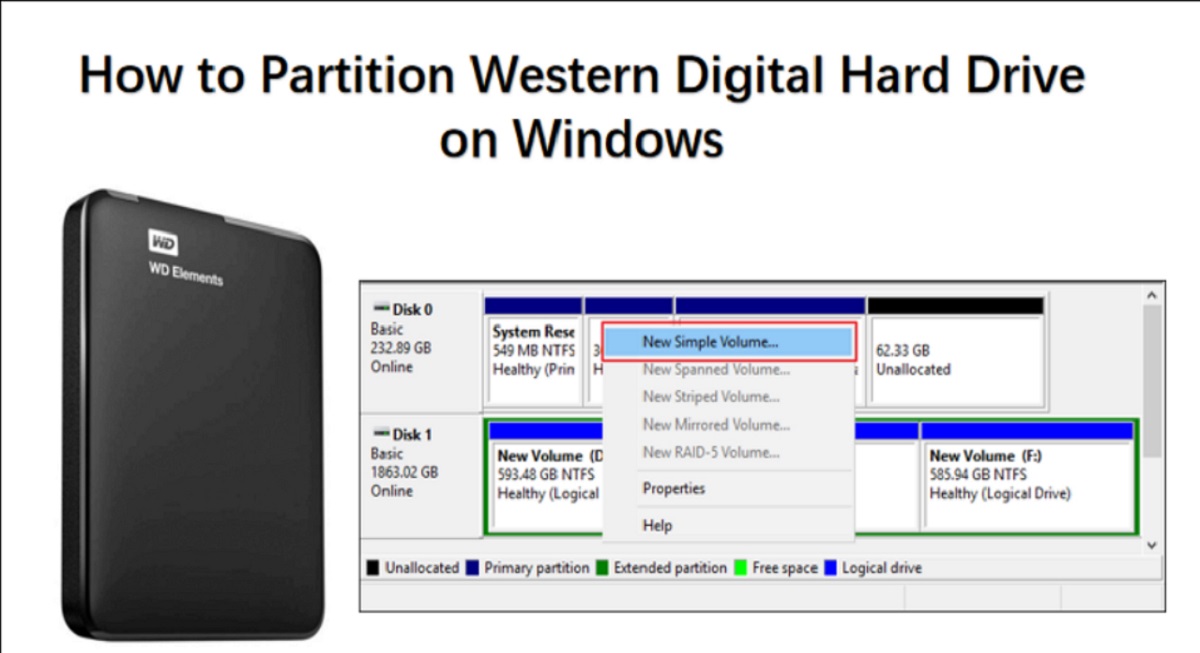
- From the context menu, select the option that says “New Simple Volume…”. This will open the New Simple Volume Wizard.
The New Simple Volume Wizard is a built-in tool that guides you through the process of creating a new partition on the selected drive. This wizard will walk you through specifying the partition size, assigning a drive letter, and formatting the partition.
If the external hard drive already has existing partitions, make sure to select the unallocated space to create a new partition. If there is no unallocated space, you may need to shrink an existing partition to create space for the new partition.
By selecting the external hard drive and launching the New Simple Volume Wizard, you are ready to move on to the next step in creating a partition on your external hard drive.
Step 4: Create a New Partition
Now that you have selected your external hard drive and opened the New Simple Volume Wizard, it’s time to create a new partition. Follow these steps to create the partition:
- In the New Simple Volume Wizard, click “Next” to proceed to the next step.
- Specify the size for your new partition. You can either enter the desired size in megabytes (MB) or accept the maximum size displayed by default. Keep in mind that the size you specify will determine the amount of storage space allocated to the new partition.
- Click “Next” to proceed.
- Assign a drive letter to the new partition. You can choose an available drive letter from the dropdown menu. Alternatively, you can select the option to let Windows automatically assign a drive letter.
- Click “Next” to continue.
- Select the file system format for the new partition. For most users, the recommended format is NTFS, as it offers better compatibility, security, and performance. You can also choose to enable file and folder compression if desired.
- Click “Next” to proceed.
- Review the summary of your settings and configuration for the new partition. Ensure that everything is correct before proceeding.
- Click “Finish” to create the new partition on your external hard drive.
Windows will now begin the process of creating the new partition. The time it takes to complete this process may vary depending on the size of the partition and the performance of your computer.
Once the partition creation process is complete, you will see the new partition listed in the Disk Management window. Congratulations! You have successfully created a new partition on your external hard drive.
Step 5: Adjust Partition Size and Format
After creating the new partition on your external hard drive, you have the option to adjust the partition size and format to suit your needs. Follow these steps to make any necessary adjustments:
- Open the Disk Management tool by following the steps mentioned earlier.
- In the Disk Management window, locate the newly created partition on your external hard drive.
- Right-click on the partition and select the option that says “Extend Volume” if you wish to increase the partition size. This option allows you to utilize any unallocated space on the drive.
- Alternatively, if you want to shrink the partition size, right-click on the partition and select the option that says “Shrink Volume”. This option allows you to free up space for other partitions or allocate the extra space to existing partitions.
- Follow the prompts in the Extend or Shrink Volume wizard to adjust the partition size accordingly.
- To format the partition, right-click on the partition and select the “Format” option from the context menu.
- In the Format dialog box, select the file system format you prefer, such as NTFS or exFAT.
- You can also assign a new volume label and enable or disable quick formatting depending on your preference.
- Click “OK” to start the formatting process.
The time taken to adjust the partition size or format depends on the size of the partition and the speed of your computer.
Once the adjustments have been made, the partition will be ready for use. You can now store files and data on your external hard drive according to the modified partition size and format.
Step 6: Assign a Drive Letter
Assigning a drive letter to your newly created partition on the external hard drive is essential to access and identify it easily. Follow these steps to assign a drive letter:
- Open the Disk Management tool as mentioned in the previous steps.
- In the Disk Management window, locate the partition you want to assign a drive letter to on your external hard drive.
- Right-click on the partition and select the “Change Drive Letter and Paths” option from the context menu.
- In the Change Drive Letter and Paths dialog box, click on the “Add” or “Change” button to proceed.
- Select the option to assign a drive letter and choose a letter from the available list.
- Click “OK” to confirm your selection and close the dialog box.
- The drive letter will now be assigned to the selected partition, allowing you to access it easily through File Explorer or any other file management tool.
Assigning a drive letter helps in organizing your storage devices and makes it convenient to navigate through different partitions on your external hard drive. Be sure to choose a drive letter that is not already in use by any other drive or device on your computer.
Once the drive letter has been assigned, you can start using the partition and saving files on your external hard drive using the specified drive letter.
Step 7: Complete the Partition Creation
Now that you have gone through the previous steps of connecting the external hard drive, opening the Disk Management tool, selecting the drive, creating a new partition, adjusting its size and format, and assigning a drive letter, it’s time to complete the partition creation process. Follow these final steps:
- Ensure that you have reviewed all the settings and adjustments made in the previous steps.
- Double-check that the selected partition has been assigned the desired drive letter.
- If all the information is correct, click on the “OK” button or the “Finish” button (depending on the dialogue box).
- Windows will now finalize the changes and complete the partition creation process.
- Wait for the process to finish. The time taken can vary depending on the size of the partition and the speed of your computer.
- Once the partition creation is complete, you will see the newly created partition listed in the Disk Management tool with its assigned drive letter and file system format.
- You can now access the partition and begin storing files and data on your external hard drive’s newly created partition.
Remember to safely eject or disconnect your external hard drive from your computer whenever necessary. This will help prevent data loss or drive corruption.
Congratulations! You have successfully created a partition on your external hard drive. Enjoy the improved organization and optimized storage space that comes with having separate partitions on your device.
Conclusion
Creating a partition on an external hard drive can greatly enhance your file organization, storage efficiency, and overall usability of the device. By following the step-by-step process outlined in this guide, you can easily create partitions on your external hard drive, allowing you to separate and manage different types of files with ease.
We started by connecting the external hard drive to your computer and opening the Disk Management tool, which allowed us to select the drive and initiate the partition creation process. We then proceeded to create a new partition, adjust its size and format, and assign a drive letter to it.
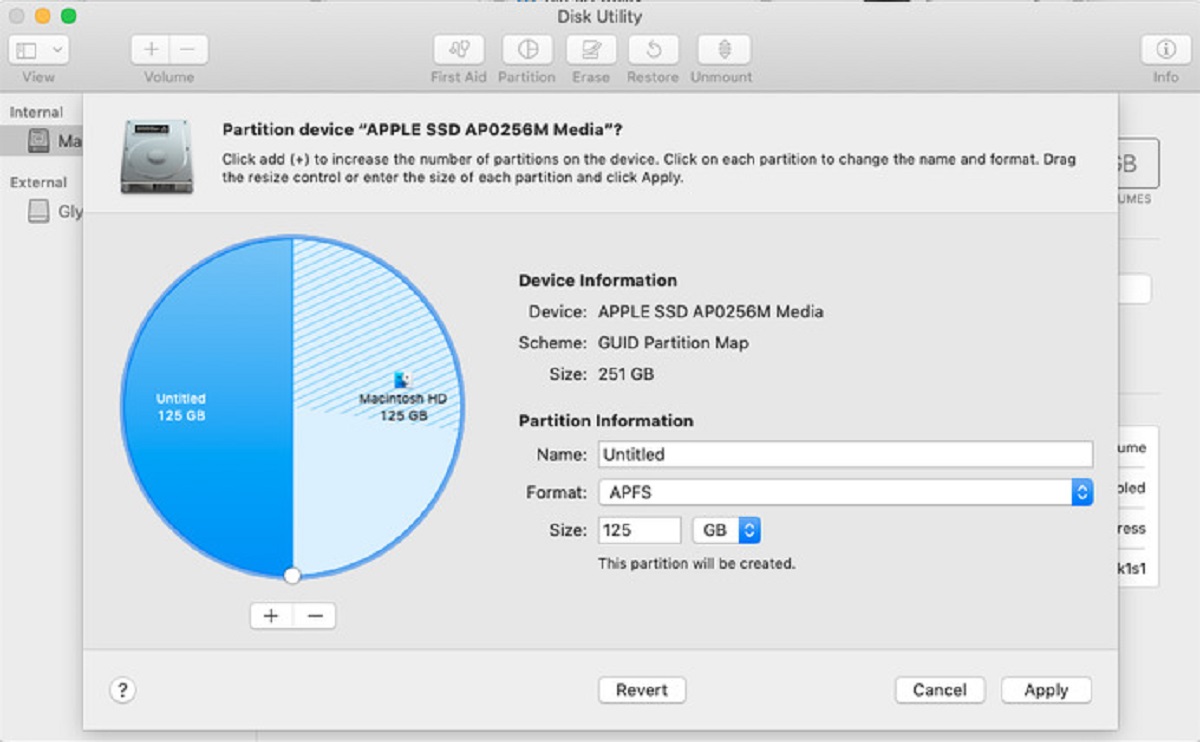
One important thing to note is that the process may vary slightly depending on the operating system you are using. While this guide focused on Windows, Mac and Linux users can also create partitions on their external hard drives using similar principles.
Remember to exercise caution throughout the process and take necessary precautions such as backing up your data before creating a partition. It is also essential to ensure that you have administrative privileges on your computer to perform these tasks.
Once you have completed the partition creation, you can enjoy the benefits of having a well-organized external hard drive, with separate sections for different types of data or specific purposes.
Now that you have acquired the knowledge and skills to create partitions on your external hard drive, don’t hesitate to explore and leverage this newfound capability. Maximize your storage space and optimize your file management by creating partitions that align with your specific needs.
Congratulations on taking the initiative to enhance the functionality of your external hard drive. Happy partitioning!