Introduction
Welcome to our comprehensive guide on how to partition an external hard drive. If you find yourself needing to organize and manage your hard drive space more effectively, partitioning can be a valuable solution. Whether you want to create separate sections for different types of data, allocate space for a specific operating system, or simply enhance your data management practices, partitioning offers a range of benefits.
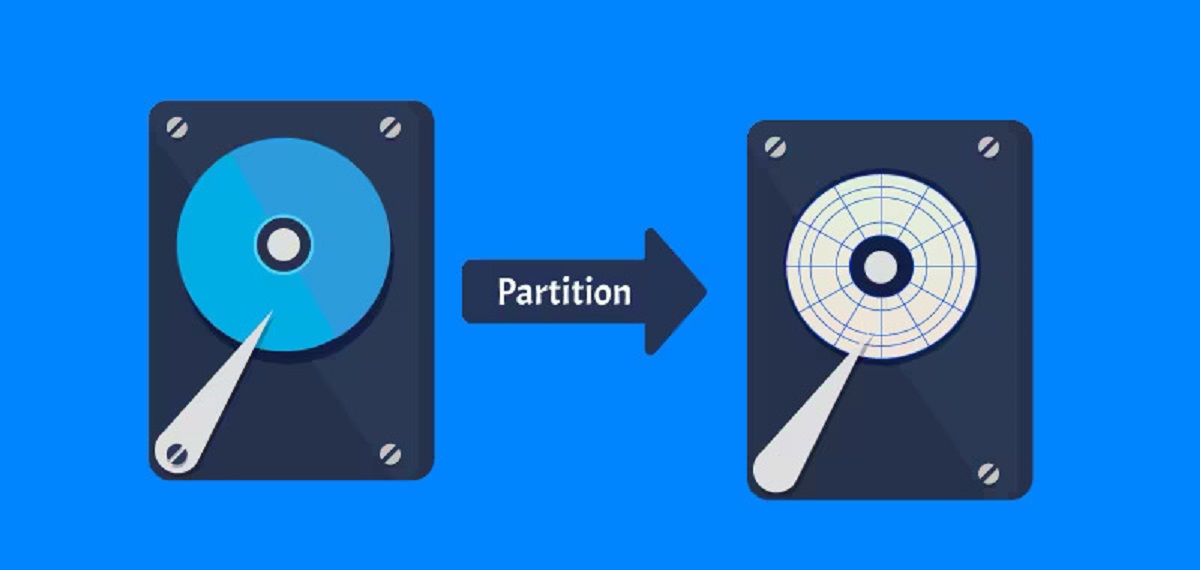
Partitioning allows you to divide your external hard drive into multiple virtual drives, each with its own file system. This means you can create independent sections on your hard drive that can be used for different purposes, such as storing documents, media files, or even running a separate operating system. By doing so, you can ensure better organization and prevent data loss in case of a system or drive failure.
In this step-by-step guide, we will walk you through each phase of the partitioning process, from selecting the appropriate partitioning tool to verifying the partitions. No matter your level of technical expertise, our instructions will help you successfully partition your external hard drive without encountering any complications.
Please note that partitioning an external hard drive will involve formatting the entire disk, meaning you will lose all existing data. Therefore, it is crucial to back up any important files or documents before proceeding. Additionally, it is essential to choose a reputable partitioning tool that suits your specific requirements.
Step 1: Choosing the right partitioning tool
Choosing the right partitioning tool is crucial to ensure a successful partitioning process. There are several tools available in the market, both free and paid, that offer a range of features and capabilities. Before selecting a tool, consider the following factors:
- User-friendliness: Opt for a partitioning tool with an intuitive user interface and clear instructions. This will make the partitioning process easier, especially if you are a beginner.
- Compatibility: Ensure that the tool supports the operating system you are using and is compatible with your external hard drive. Some partitioning tools may be limited to specific operating systems or may not work with certain models of external hard drives.
- Features: Evaluate the features offered by different partitioning tools. Look for tools that provide options for creating, resizing, and managing partitions, as well as options to recover lost or deleted partitions.
- Reliability: Read reviews and research the reputation of the partitioning tool. It is important to choose a reliable and reputable tool to avoid potential data loss or other issues during the partitioning process.
Some popular partitioning tools that are widely used and recommended by experts include EaseUS Partition Master, MiniTool Partition Wizard, and AOMEI Partition Assistant. These tools offer a combination of user-friendly interfaces, comprehensive features, and good performance.
Be sure to download the partitioning tool from the official website to avoid installing any malware or potentially harmful software. Once you have selected the appropriate partitioning tool, proceed to the next step, which involves connecting your external hard drive.
Step 2: Connecting the external hard drive
Before you can begin the partitioning process, you’ll need to connect your external hard drive to your computer. Follow these steps to ensure a proper connection:
- Check the connections: Ensure that the cables connecting your external hard drive to your computer are securely plugged in. This includes the USB, Thunderbolt, or eSATA cable, depending on the type of connection your external hard drive supports.
- Power on the hard drive: If your external hard drive has a power switch, make sure it is turned on. Some drives are powered by the USB connection itself, so you may not need to manually turn on the drive.
- Check for recognition: After connecting your external hard drive, wait for your computer to recognize it. You should receive a notification or see the drive listed in the File Explorer or Finder, depending on your operating system.
If your external hard drive is not being recognized by your computer, try the following troubleshooting steps:
- Try a different USB port or cable: Sometimes, connectivity issues can be fixed by using a different USB port or cable. Try connecting the drive to a different USB port or using a different cable to rule out any issues with the current connection.
- Restart your computer: A simple restart of your computer can often resolve recognition issues. Restart your computer, reconnect the external hard drive, and check if it is now being recognized.
- Update drivers: Outdated or faulty drivers can cause issues with recognizing external devices. Update the drivers for your USB ports or consider reinstalling them to ensure they are functioning properly.
- Try on a different computer: If none of the above steps work, try connecting your external hard drive to a different computer. This will help determine if the issue lies with the drive or the computer.
Once your external hard drive is properly connected and recognized by your computer, you are ready to move on to the next step, which involves formatting the entire disk.
Step 3: Formatting the entire disk
Formatting the entire disk is an essential step in preparing your external hard drive for partitioning. This process will erase all existing data on the drive, so it is crucial to back up any important files before proceeding. Follow these steps to format the entire disk:
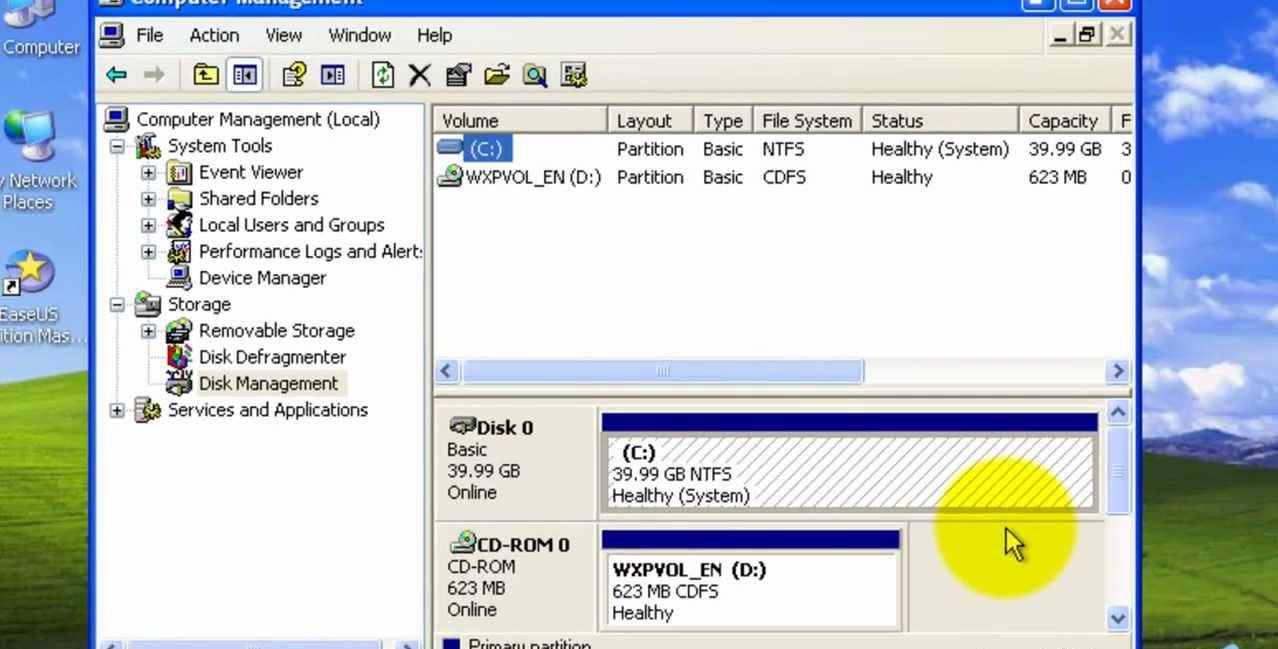
- Open Disk Management: On Windows, right-click on the Start button and select “Disk Management” from the context menu. On macOS, open the Disk Utility by going to “Applications” > “Utilities” > “Disk Utility.”
- Locate your external hard drive: In the Disk Management or Disk Utility window, you will see a list of available drives. Identify your external hard drive based on its size, model name, or other relevant information.
- Right-click and select “Format”: On Windows, right-click on your external hard drive and select “Format” from the context menu. On macOS, select your external hard drive and click on the “Erase” tab.
- Choose the file system: Select the desired file system for your external hard drive. For Windows, NTFS is commonly used, while macOS typically uses the APFS or Mac OS Extended (Journaled) file system. Make sure to choose the appropriate file system based on your intended usage.
- Assign a volume label: Optionally, you can assign a volume label or name to your external hard drive. This label will be displayed as the drive’s name in your file explorer or finder.
- Confirm and start the formatting process: Double-check your settings and click on “Format” or “Erase” to begin the formatting process. Depending on the size of your external hard drive, this process may take some time.
- Wait for the formatting to complete: Once the formatting process is complete, you will receive a confirmation message. Your external hard drive is now ready to be partitioned.
Remember, formatting the entire disk will erase all data on the drive, so ensure that you have backed up any necessary files beforehand. With the disk now formatted, you can proceed to the next step, which involves creating multiple partitions.
Step 4: Creating multiple partitions
With your external hard drive formatted, you can now proceed to create multiple partitions. Partitioning allows you to divide your hard drive into separate sections, each with its own file system and storage capacity. Follow these steps to create multiple partitions:
- Open Disk Management: On Windows, right-click on the Start button and select “Disk Management” from the context menu. On macOS, open Disk Utility by going to “Applications” > “Utilities” > “Disk Utility.”
- Select your external hard drive: In the Disk Management or Disk Utility window, locate your external hard drive from the list of available drives.
- Resize the existing partition: If your external hard drive has already been partitioned, you may need to resize the existing partition to create space for new ones. Right-click on the existing partition and select “Shrink Volume” (Windows) or “Resize” (macOS).
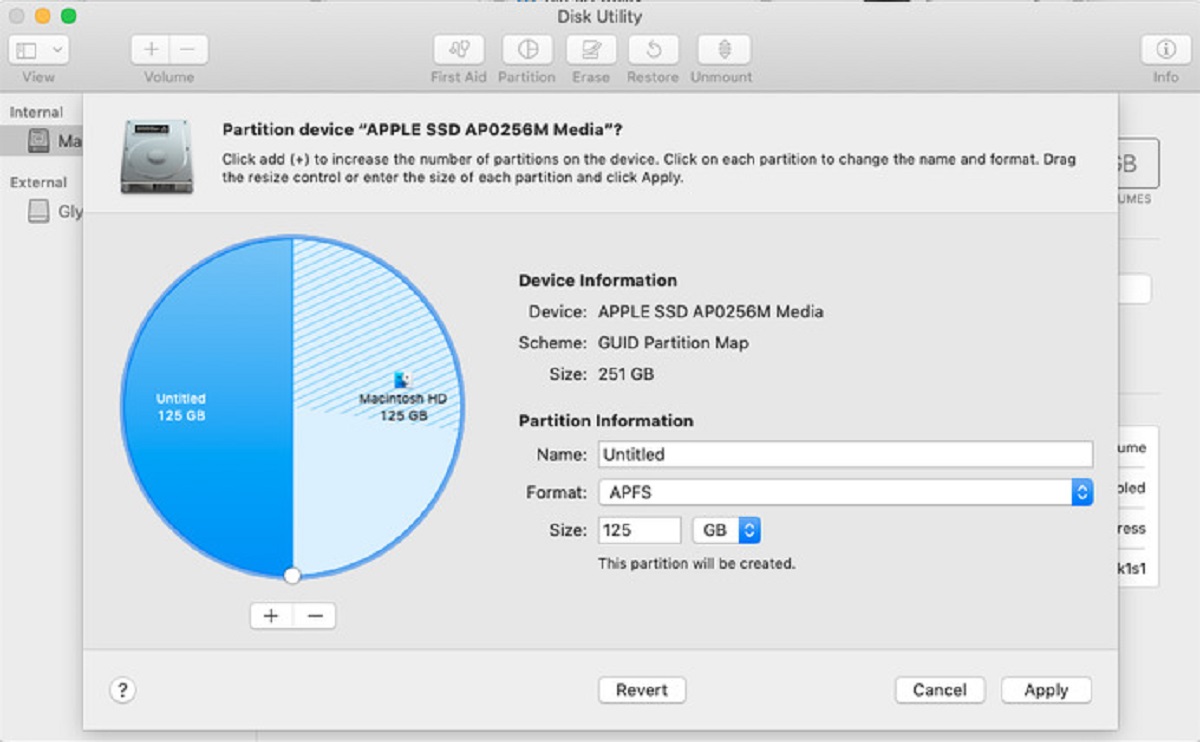
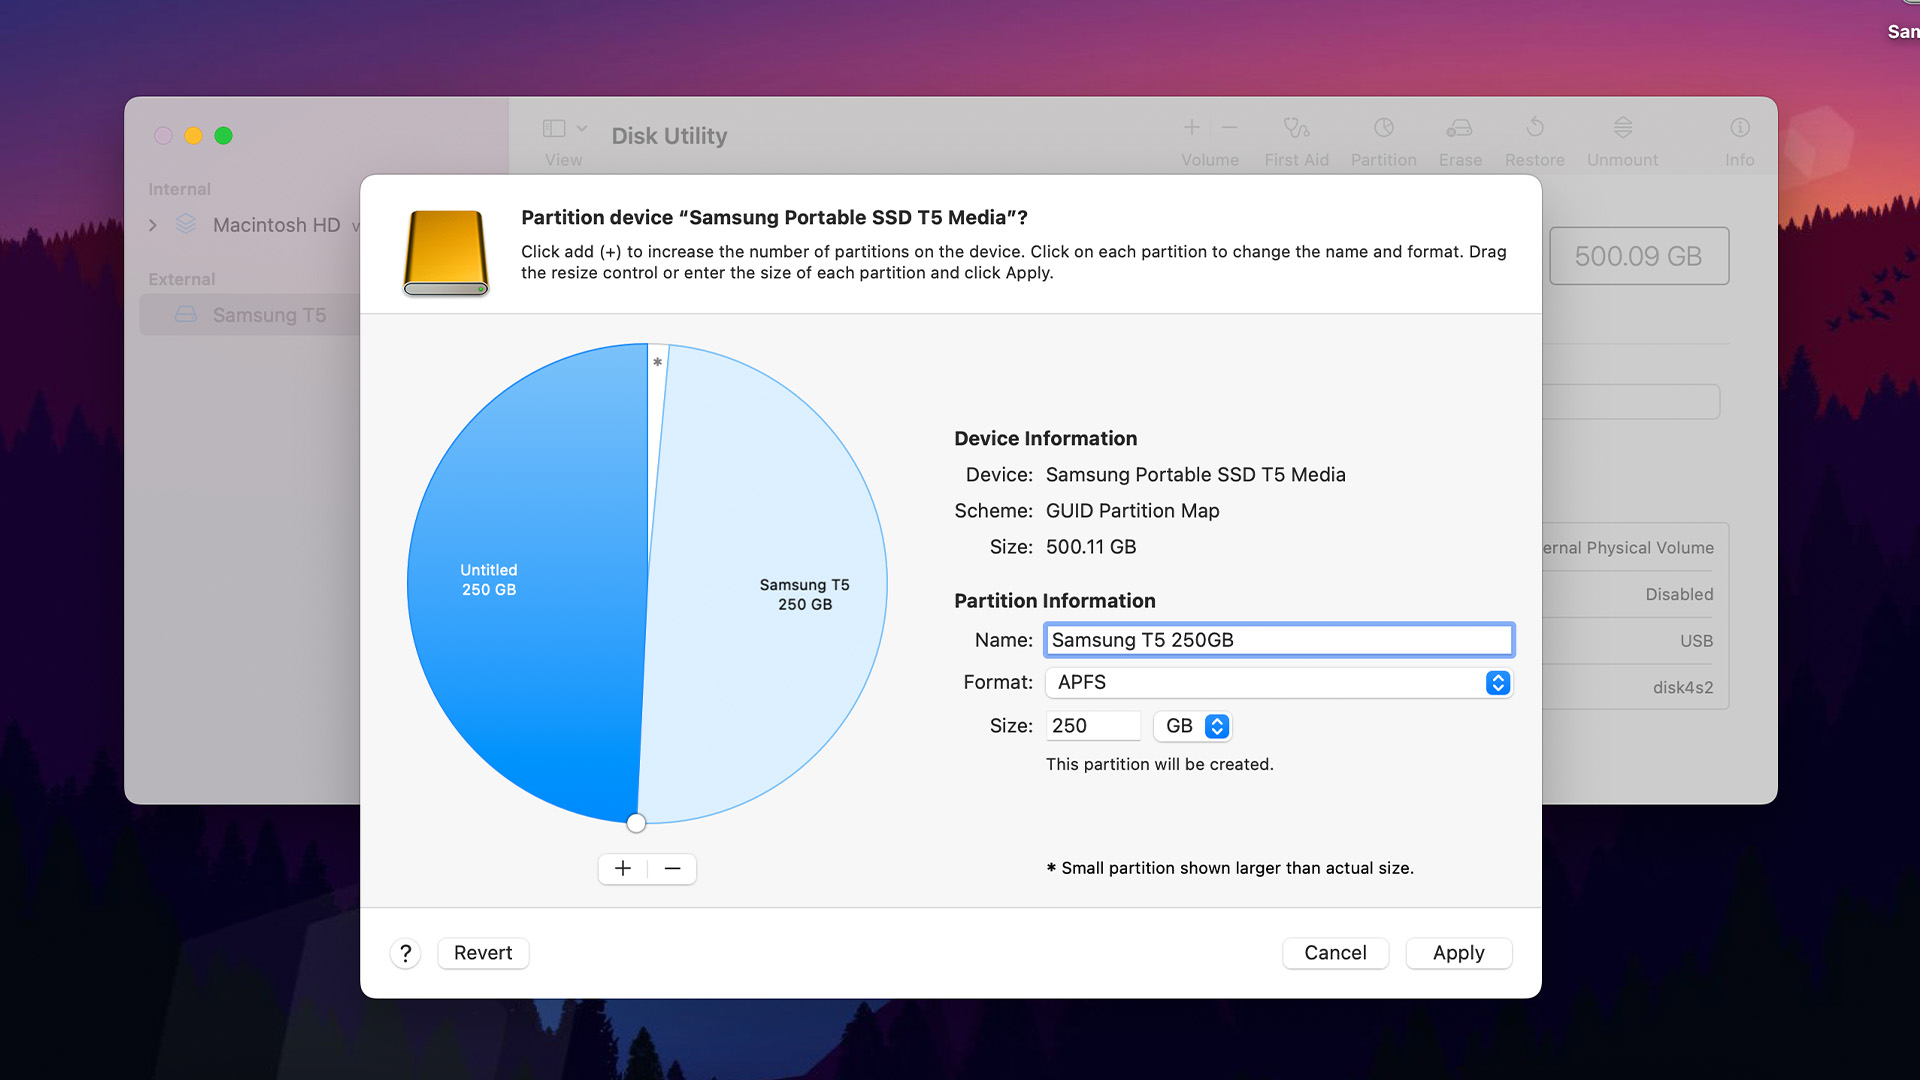
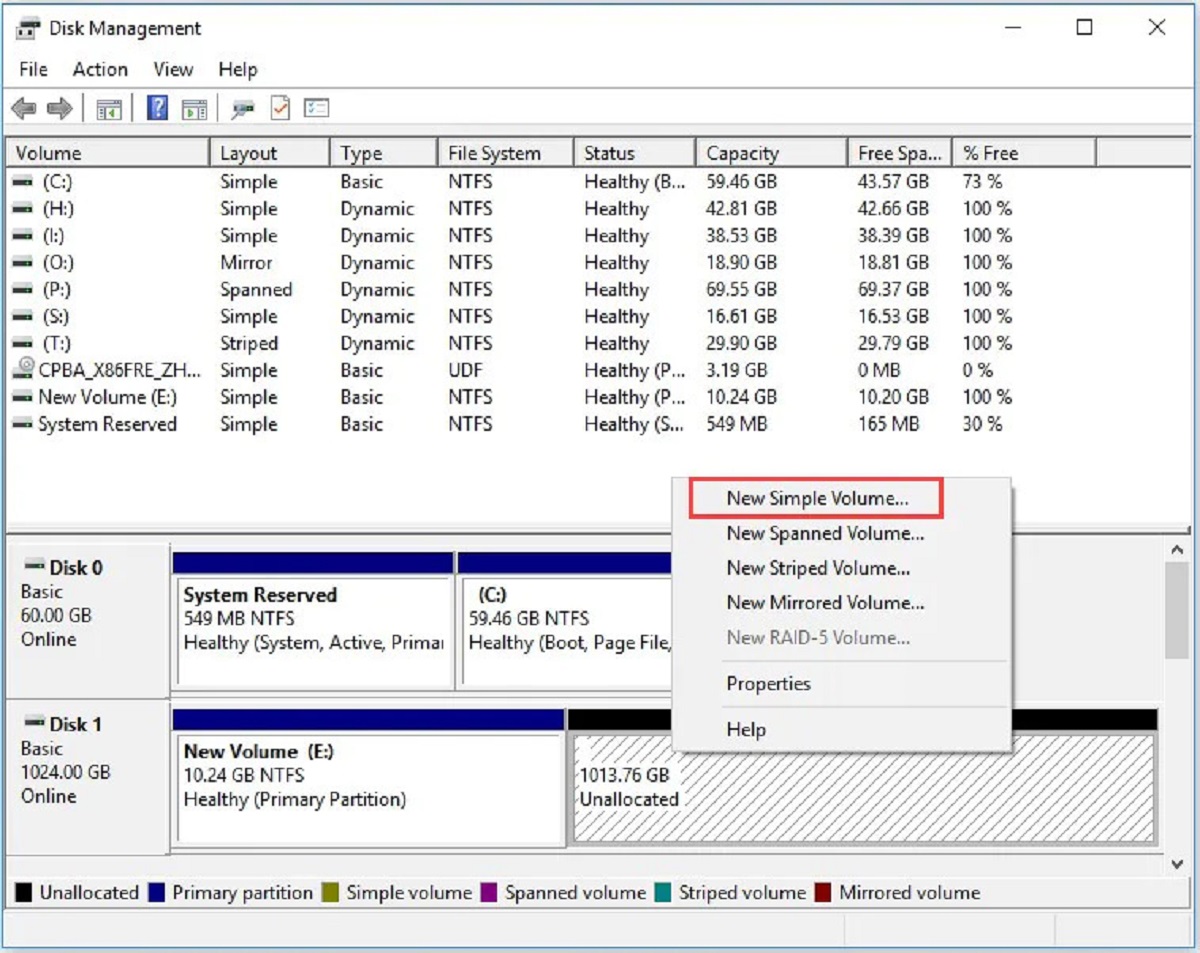
- Create a new partition: After resizing the existing partition (or if your drive is unallocated), right-click on the unallocated space and select “New Simple Volume” (Windows) or click on the “+” button and enter the desired size (macOS).
- Specify the partition size: Enter the desired size for your new partition in megabytes (MB) or gigabytes (GB). You can create multiple partitions by repeating this step.
- Assign the drive letter: Choose a drive letter or let the system automatically assign one to your new partition. This letter will be used to identify the partition in your file explorer or finder.
- Format the new partition: Select the file system for your new partition, such as NTFS, exFAT, or FAT32 (Windows), or APFS or Mac OS Extended (Journaled) (macOS). Formatting the partition will prepare it for use.
- Repeat for additional partitions: If you want to create more partitions, repeat the previous steps until you have created all the desired partitions on your external hard drive.
By creating multiple partitions, you can organize your data more effectively and allocate storage space according to your specific needs. With your partitions created, you can now proceed to the next step, which involves adjusting the partition sizes if necessary.
Step 5: Adjusting the partition sizes
After creating multiple partitions on your external hard drive, you may find the need to adjust their sizes to better suit your storage requirements. Follow these steps to adjust the partition sizes:
- Open Disk Management: On Windows, right-click on the Start button and select “Disk Management” from the context menu. On macOS, open Disk Utility by going to “Applications” > “Utilities” > “Disk Utility.”
- Select the partition: In the Disk Management or Disk Utility window, locate the partition you wish to adjust in the list of available partitions.
- Resize the partition: Right-click on the partition and select “Resize/Expand/Adjust” (Windows) or click on the partition and select “Partition” > “Resize” (macOS).
- Adjust the partition size: In the resize dialog box, adjust the partition size by either dragging the partition boundary or entering the new size manually.
- Confirm the changes: After adjusting the partition size, review the changes and ensure they are in line with your requirements.
- Apply the changes: Click on “Apply” or “OK” to save the changes and proceed with resizing the partition.
- Wait for the process to complete: The resizing process may take some time, depending on the size of the partition and the amount of data it contains.
By adjusting the partition sizes, you can allocate more or less space to specific partitions based on your needs. This allows for better organization and optimization of available storage. Make sure to consider your current and future storage requirements when adjusting partition sizes.
Once you have adjusted the partition sizes to your satisfaction, you can move on to the next step, which involves assigning drive letters to your partitions.
Step 6: Assigning drive letters
Assigning drive letters to your partitions is an important step in managing and accessing your external hard drive. Each partition requires a unique drive letter to differentiate it from other drives on your computer. Follow these steps to assign drive letters:
- Open Disk Management: On Windows, right-click on the Start button and select “Disk Management” from the context menu. On macOS, open Disk Utility by going to “Applications” > “Utilities” > “Disk Utility.”
- Select the partition: In the Disk Management or Disk Utility window, locate the partition to which you want to assign a drive letter.
- Right-click or control-click: On Windows, right-click on the partition and select “Change Drive Letter and Paths.” On macOS, control-click on the partition and select “Rename.”
- Choose an available drive letter: In the dialog box that appears, select an available drive letter from the drop-down menu.
- Confirm the changes: Review the changes and ensure that the selected drive letter does not conflict with any existing drives on your computer.
- Apply the changes: Click on “OK,” “Apply,” or “Rename” to save the changes and assign the drive letter to the partition.
- Verify the drive letter assignment: Check in your file explorer or finder to ensure that the drive letter has been successfully assigned to the partition.
- Repeat for other partitions: If you have multiple partitions, repeat the previous steps to assign drive letters to each partition.
Assigning drive letters helps you easily identify and access your different partitions, making it simpler to navigate through your external hard drive. It is recommended to choose drive letters that are easy to remember and correlate to the purpose of each partition.
Once you have assigned drive letters to all your partitions, you can proceed to the next step, which involves labeling the partitions.
Step 7: Labeling the partitions
Labeling your partitions is a useful practice that allows you to easily identify and differentiate between them. By assigning meaningful names or labels to your partitions, you can quickly identify their purpose or contents. Follow these steps to label your partitions:
- Open Disk Management: On Windows, right-click on the Start button and select “Disk Management” from the context menu. On macOS, open Disk Utility by going to “Applications” > “Utilities” > “Disk Utility.”
- Select the partition: In the Disk Management or Disk Utility window, locate the partition you want to label.
- Right-click or control-click: On Windows, right-click on the partition and select “Change Drive Letter and Paths.” On macOS, control-click on the partition and select “Rename.”
- Enter the desired label: In the dialog box that appears, enter the desired label or name for your partition. Choose a descriptive name that reflects the purpose or contents of the partition.
- Apply the changes: Click on “OK,” “Apply,” or “Rename” to save the changes and assign the label to the partition.
- Verify the partition label: Check in your file explorer or finder to ensure that the label has been successfully assigned to the partition.
- Repeat for other partitions: If you have multiple partitions, repeat the previous steps to label each partition accordingly.
Labeling your partitions makes it easier to navigate and locate specific data on your external hard drive. It also helps prevent confusion and ensures that you can quickly find the partition you need.
Remember to use clear and concise labels that accurately represent the contents or purpose of each partition. Once you have labeled all your partitions, you can proceed to the next step, which involves verifying the partitions.
Step 8: Verifying the partitions
Verifying your partitions is an essential step to ensure that the partitioning process was successful and that your partitions are functioning as intended. By verifying your partitions, you can confirm that they are properly formatted, labeled, and accessible. Follow these steps to verify your partitions:
- Open your file explorer or finder: Launch your file explorer on Windows or finder on macOS to view the available drives and partitions on your computer.
- Locate your external hard drive: Navigate to the section where external drives are listed and locate your external hard drive.
- Access the partitions: Double-click on each partition to open and explore its contents. Confirm that the partition is accessible and that its contents match what you expect.
- Check the drive letters and labels: Ensure that the drive letters assigned to the partitions match the ones you assigned during the partitioning process. Also, verify that the labels you gave to the partitions are correctly displayed.
- Perform read and write tests: Copy files to and from the partitions to ensure that you have read and write access to the data. This will confirm that the partitions are functioning properly.
- Verify partition size and available space: Check the properties or information window of each partition to confirm that the size and available space match your intended allocation.
By performing these verification steps, you can ensure that your partitions are correctly set up and ready for use. If you encounter any issues during the verification process, such as inaccessible partitions or incorrect drive letters, double-check the partitioning steps you followed or consider seeking assistance from technical support.
Once you have successfully verified all your partitions and ensured their proper functionality, congratulations! You have completed the partitioning process for your external hard drive. You can now enjoy the benefits of organized storage and optimized data management.
Conclusion
Congratulations on successfully partitioning your external hard drive! By following the step-by-step guide outlined in this article, you have learned how to choose the right partitioning tool, connect your external hard drive, format the entire disk, create multiple partitions, adjust partition sizes, assign drive letters, label the partitions, and verify their functionality. Partitioning your external hard drive offers numerous benefits, including better organization, improved data management, and increased flexibility in allocating storage space.
Remember to always back up your important files before starting the partitioning process, as formatting the disk will erase all existing data. Additionally, make sure to choose a reliable and reputable partitioning tool that suits your specific requirements.
With your external hard drive partitioned, you can now enjoy the convenience of separate sections for different types of data, the ability to install multiple operating systems, or simply more efficient data organization. Whether you are a professional handling large volumes of data or an individual seeking to optimize your storage, partitioning can greatly enhance your overall experience.
As you continue to use your external hard drive, take advantage of the labeled partitions and assigned drive letters to easily navigate and access your data. Regularly verify the functionality of the partitions to ensure they remain in good working order.
Thank you for following our guide on how to partition an external hard drive. We hope this information has been valuable to you and that you now feel confident in managing your external storage effectively. Partitioning your hard drive is a powerful technique that can significantly enhance your data management practices and streamline your workflow.
Happy partitioning!