Introduction
A hard disk drive (HDD) is a crucial component of any computer system. It serves as the primary storage device, housing all the files, programs, and operating system required for the computer to function. Over time, as the amount of data we generate and store increases, it becomes necessary to organize and manage our hard disk drives more effectively. One way to optimize storage is by partitioning the hard disk drive.
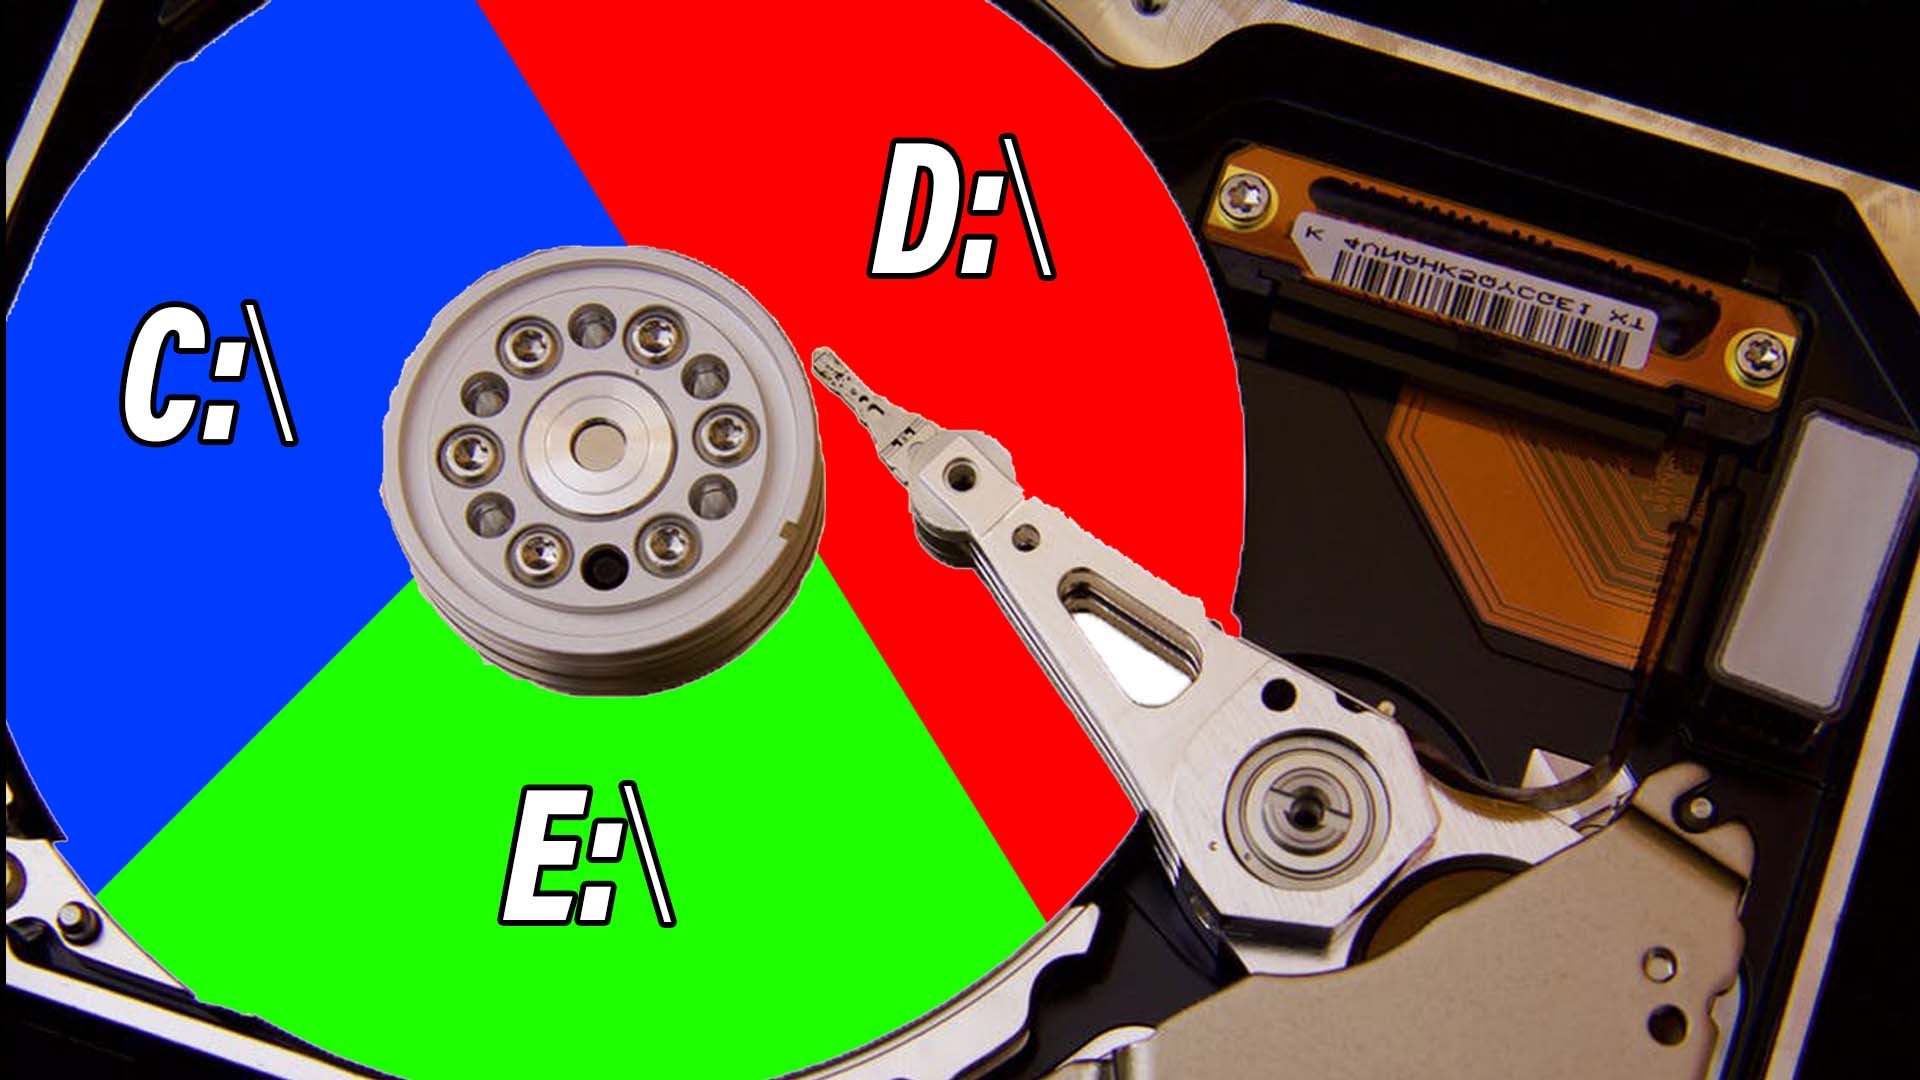
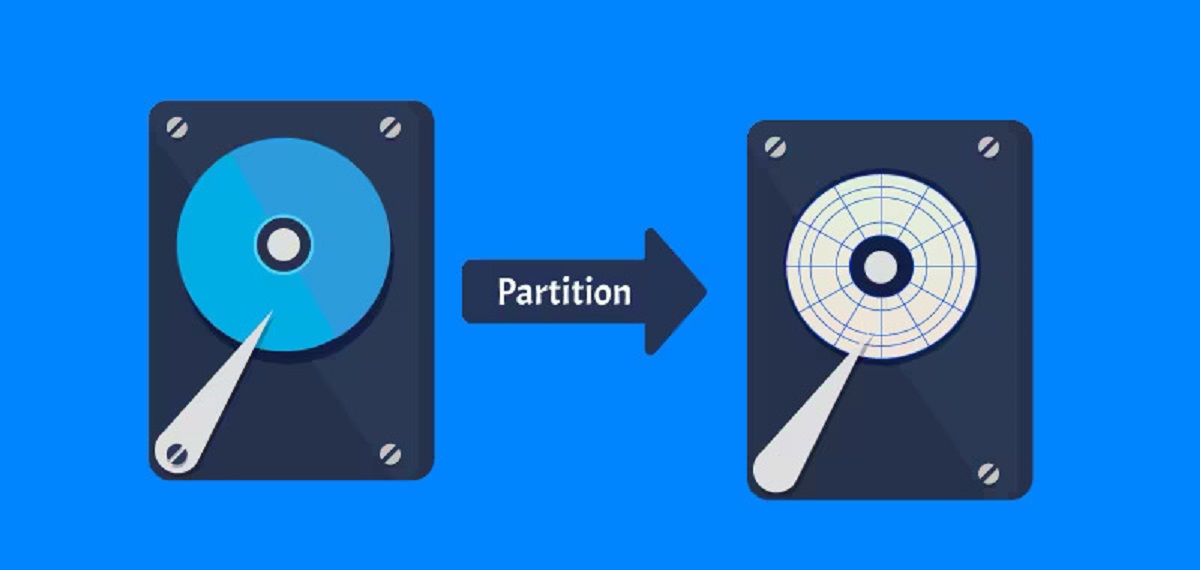
Partitioning a hard disk drive involves dividing it into separate sections or partitions. Each partition acts as a separate entity with its own file system, allowing you to organize and manage your data more efficiently. Partitioning offers several advantages, such as improved performance, data protection, and the ability to run multiple operating systems on the same drive. Additionally, it allows you to allocate storage space according to your specific needs and preferences.
While the idea of partitioning may seem daunting to some, it is a straightforward process that can be accomplished with the help of partitioning tools available in the market. This guide will walk you through the step-by-step process of partitioning a hard disk drive, ensuring that you can make the most out of your storage space and optimize your system’s performance.
Before diving into the partitioning process, it’s essential to consider a few factors, such as backing up your data, understanding the current layout of your hard disk drive, and choosing the right partitioning tool. By taking these precautions, you can ensure that your data remains safe throughout the process and that the partitioning is done smoothly.
So, if you’re ready to unleash the full potential of your hard disk drive and maximize its capabilities, let’s delve into the world of hard disk drive partitioning and discover how it can revolutionize your computing experience.
What is a Hard Disk Drive?
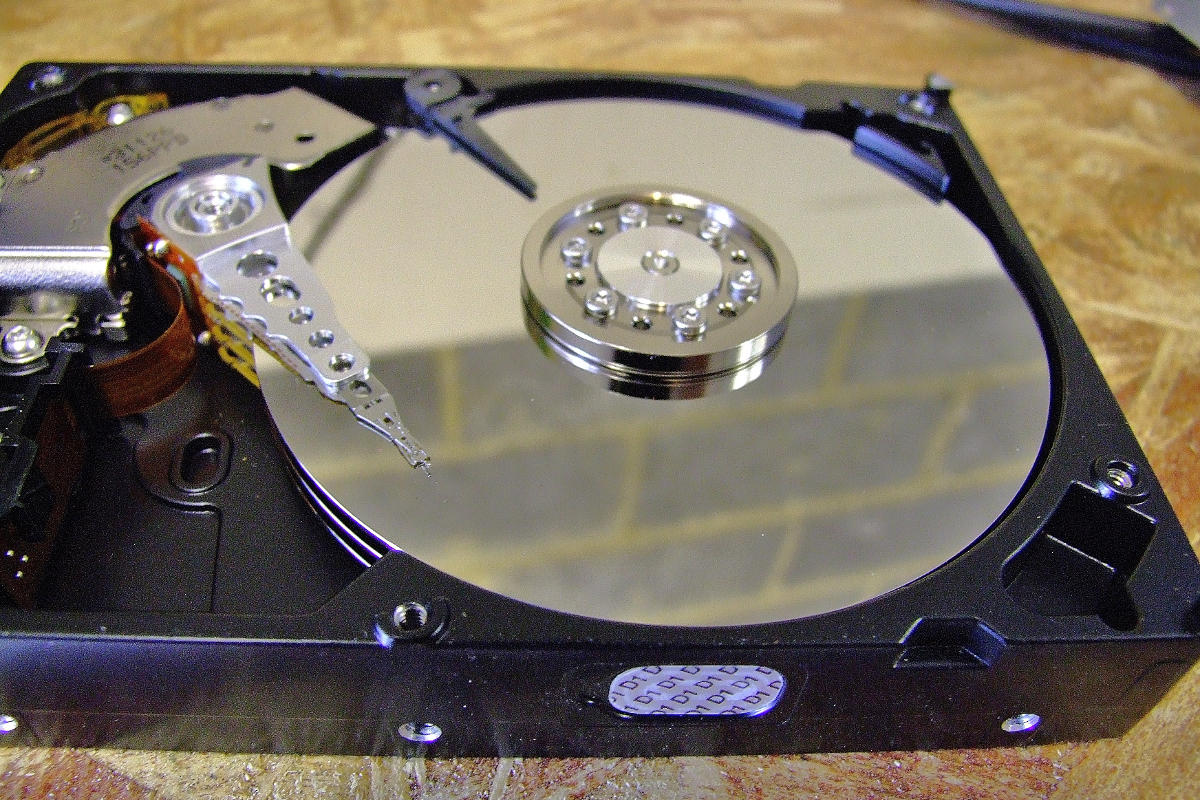
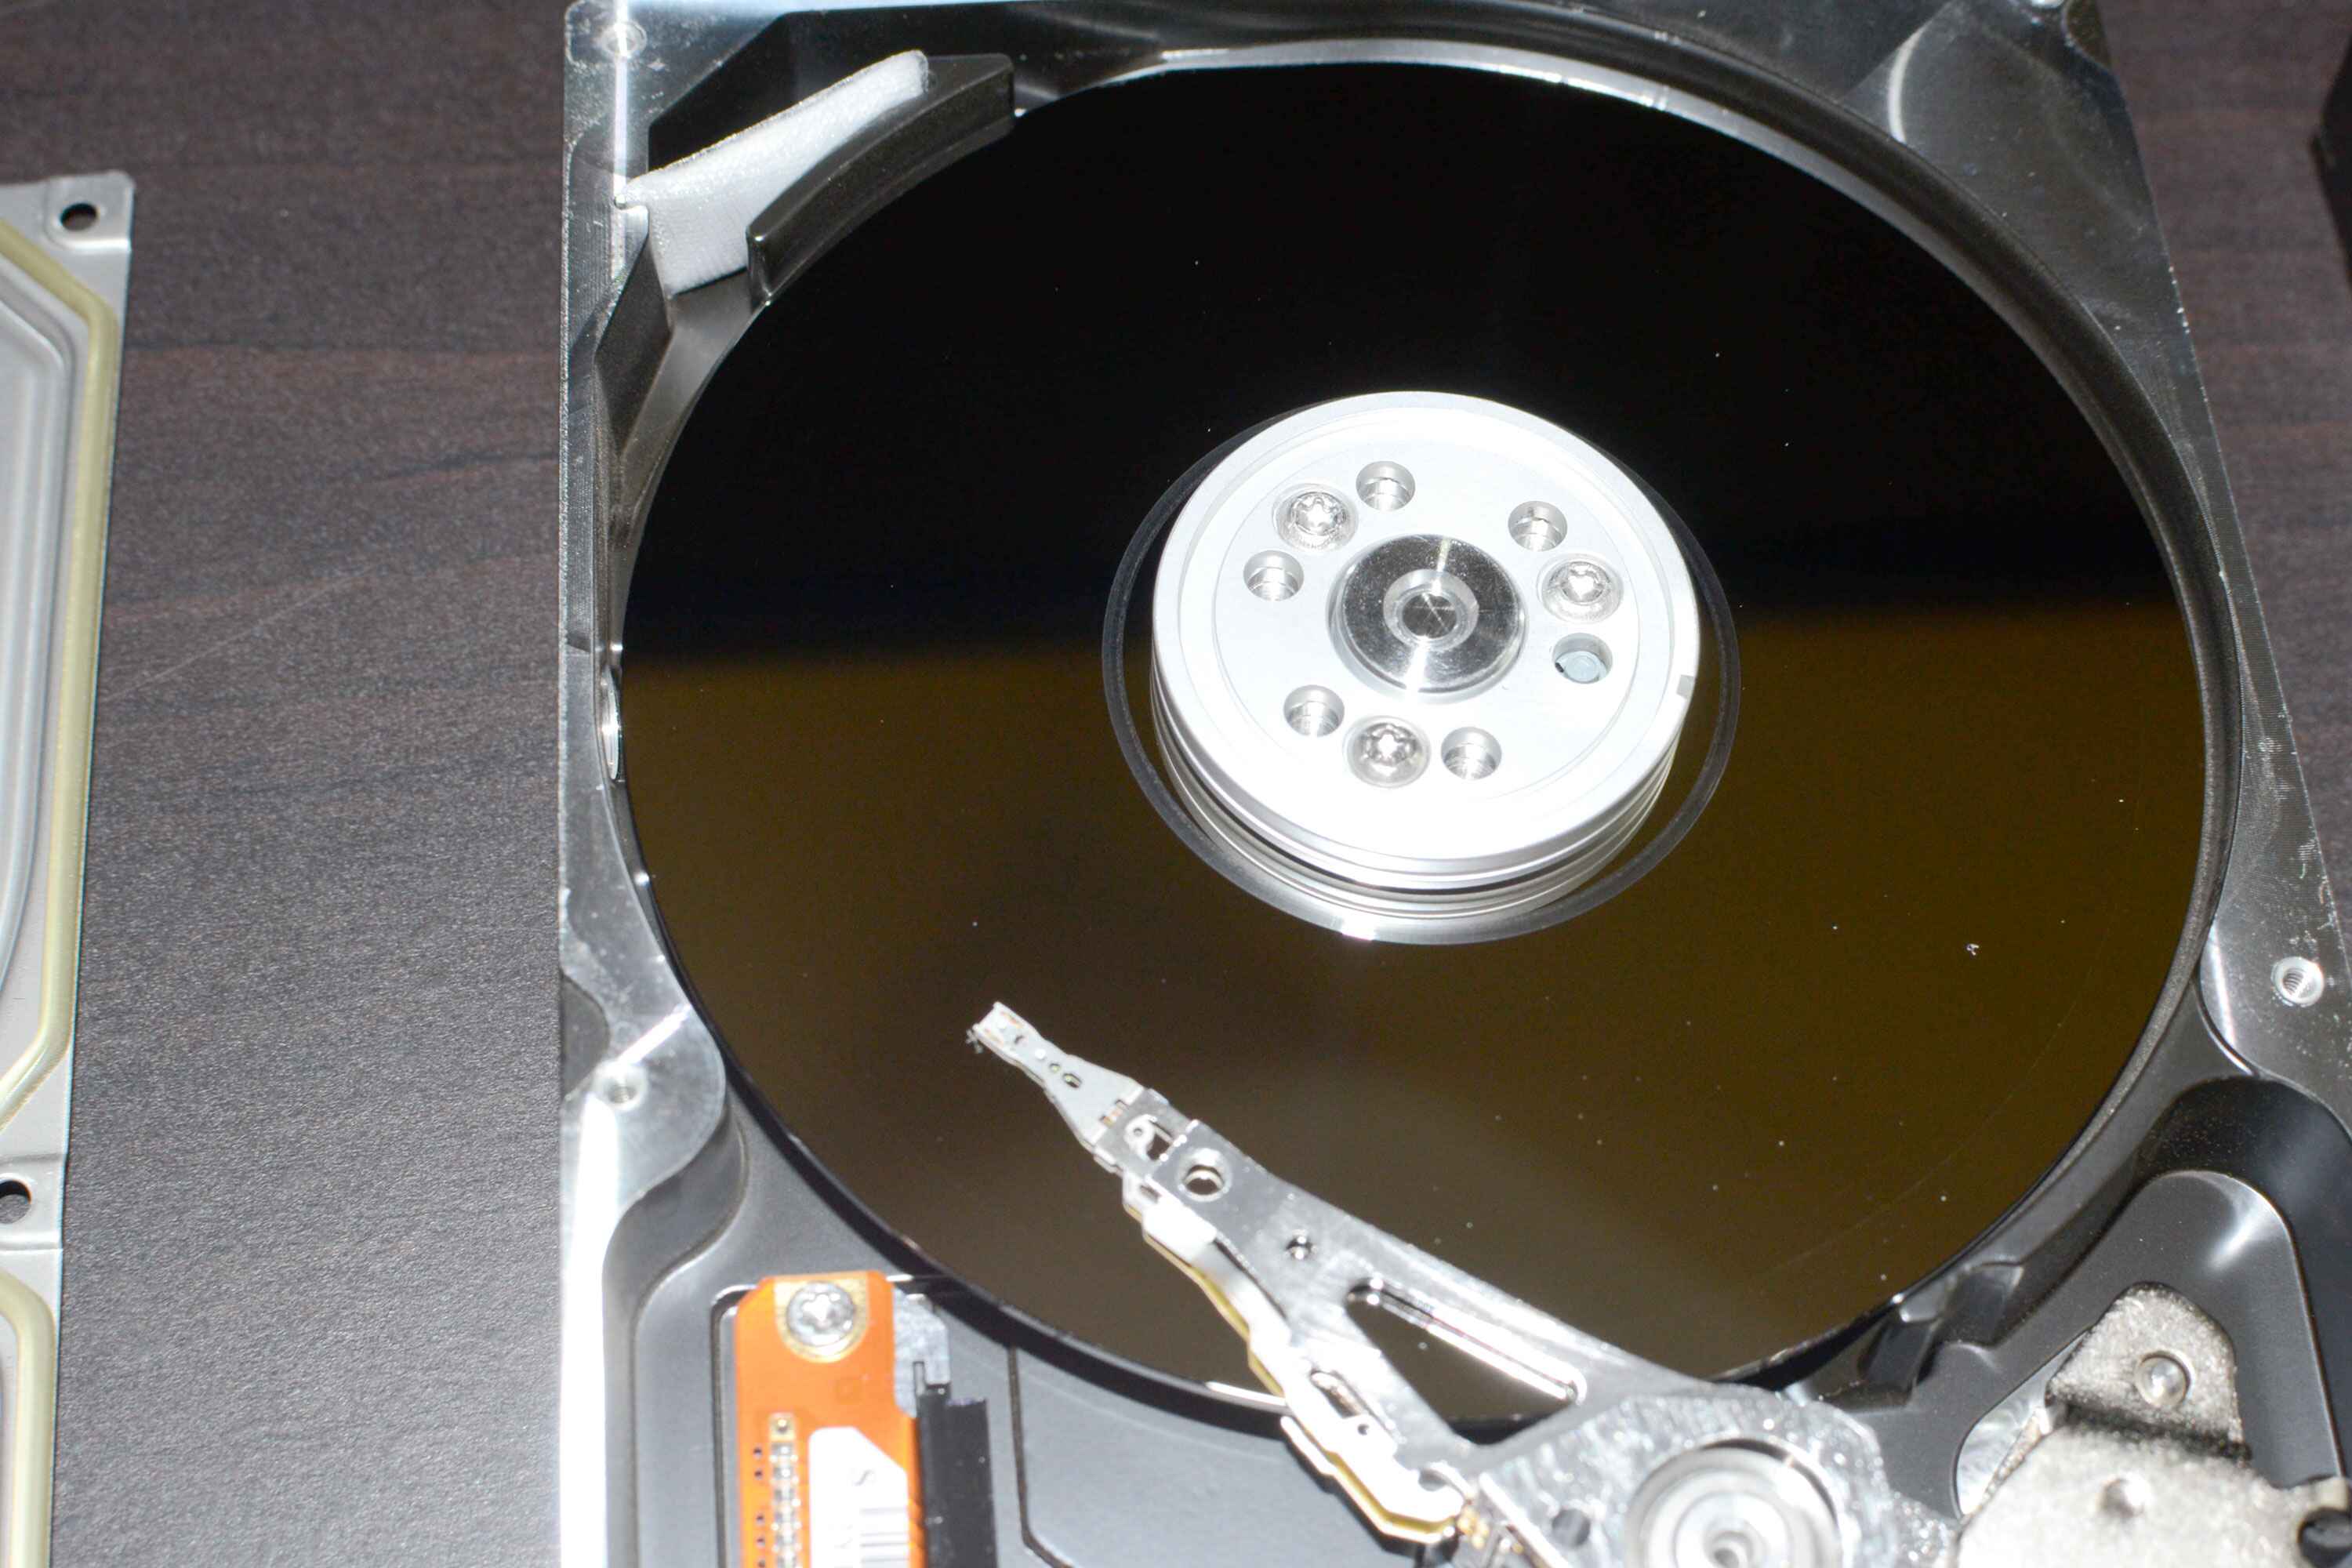
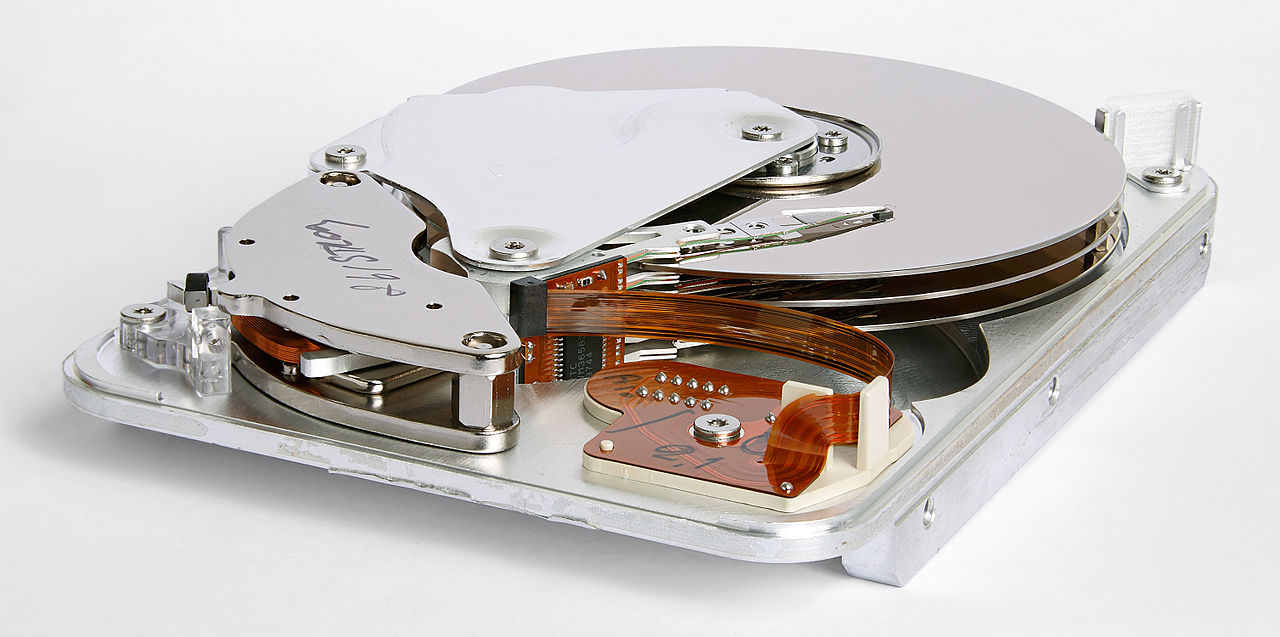
A hard disk drive (HDD) is a storage device commonly used in computers and laptops to store and retrieve digital data. It consists of one or more spinning magnetic disks (platters) coated with a magnetic material. These platters rotate at high speeds while read/write heads mounted on an arm move across the surface to access and store data.
The capacity of a hard disk drive is typically measured in gigabytes (GB) or terabytes (TB) and can range from a few hundred gigabytes to multiple terabytes. The larger the capacity, the more data the hard disk drive can hold. This makes HDDs ideal for storing large files, such as videos, photos, and software installations.
A hard disk drive is always present in a computer system as the primary storage medium. It stores the operating system, software applications, personal files, and other data. When you turn on your computer or access any file, the hard disk drive comes into play by retrieving the necessary data and making it available for use.
Hard disk drives have been in use for decades and have evolved to become more reliable and efficient. While solid-state drives (SSDs) have gained popularity in recent years due to their faster read/write speeds and durability, HDDs still remain a dominant force in the storage market due to their lower cost per gigabyte.
However, it is worth noting that HDDs are mechanical devices and are prone to wear and tear. They can also be affected by physical shocks, which can lead to data loss. Therefore, it is essential to handle hard disk drives with care and regularly backup important data to ensure its safety.
In summary, a hard disk drive is a vital component of a computer system that stores and retrieves digital data. It consists of spinning magnetic platters and read/write heads that allow for data access and storage. While solid-state drives offer faster performance, HDDs continue to be widely used due to their cost-effectiveness and high storage capacity.
Why Partition a Hard Disk Drive?
Partitioning a hard disk drive offers several benefits and can greatly enhance the organization and efficiency of your computer system. Here are a few key reasons why you might consider partitioning your hard disk drive:
1. Improved Performance:
By partitioning your hard disk drive, you can separate your data into different sections. This helps to prevent fragmentation, a common issue where large files are scattered across the disk, causing slower read and write speeds. With partitions, you can allocate specific areas for different types of files, ensuring that your system runs more smoothly and efficiently.
2. Data Protection and Disaster Recovery:
When you partition your hard disk drive, you can assign different partitions to different purposes. This allows you to create a dedicated partition for your important files and documents, ensuring that they are separate from the partition containing the operating system and applications. In the event of a system failure or virus attack, you can easily recover your critical data without affecting the system files.
3. Multiple Operating Systems:
Partitioning a hard disk drive enables you to install multiple operating systems on the same physical drive. This is especially useful for individuals who want to experiment with different operating systems, such as Windows, Linux, or macOS, without the need for separate hardware. Each operating system can be installed on a separate partition, allowing you to choose the one you want to use at startup.
4. Efficient File Management:
With separate partitions, you can organize your files more effectively. For example, you could have a partition dedicated to your multimedia files, such as photos, videos, and music, while another partition can be allocated for work-related documents and projects. This makes it easier to locate specific files and ensures that your storage space is utilized optimally.
5. Flexibility for Upgrades and Maintenance:
Partitioning provides flexibility when it comes to upgrading or reinstalling your operating system. You can keep your personal files and data on a separate partition, allowing you to format and reinstall the operating system without the risk of losing important files. This makes the process of system upgrades and maintenance much smoother and reduces the chances of data loss.
Partitioning a hard disk drive is a versatile and effective way to optimize your computer system’s performance, enhance file management, and protect your data. Whether you want to improve performance, protect important files, or experiment with different operating systems, partitioning offers a range of benefits that can greatly improve your overall computing experience.
Things to Consider Before Partitioning a Hard Disk Drive
Before diving into the process of partitioning your hard disk drive, there are a few important things to consider. These factors can help ensure a smooth partitioning process and protect your data. Here are some key points to keep in mind:
1. Back Up Your Data:
Partitioning involves making changes to your hard disk drive’s structure, which carries a risk of data loss. It is crucial to back up all your important files and folders before proceeding with the partitioning process. This way, if anything goes wrong during partitioning, you have a copy of your data that can be restored.
2. Understand the Current Layout of Your Hard Disk Drive:
Before partitioning your hard disk drive, it is essential to have a clear understanding of its current layout. This includes the number of existing partitions, their sizes, and the file systems they use. This information will help you determine how to allocate space for new partitions and ensure that important data is not accidentally deleted.
3. Choose the Right Partitioning Tool:
There are numerous partitioning tools available in the market, each with its own set of features and capabilities. Research and choose a reliable and user-friendly partitioning tool that suits your needs. Make sure it supports your operating system and allows you to perform the partitioning tasks you require, such as creating, resizing, and merging partitions.
4. Consider Partition Sizes and Number:
When partitioning your hard disk drive, you need to decide on the size and number of partitions you want to create. Consider your storage requirements and how you plan to use each partition. It is generally recommended to create separate partitions for the operating system, applications, personal files, and any additional partitions for specific purposes.
5. Labels and Drive Letters:
Assigning labels and drive letters to each partition can greatly simplify the file management process. Use descriptive labels that clearly indicate the purpose of each partition. You can also assign specific drive letters to ensure consistency in accessing your partitions across different applications and operating systems.
By considering these factors and taking necessary precautions, you can ensure a successful partitioning process and protect your valuable data. Remember to back up your data, understand the current layout of your hard disk drive, choose the right partitioning tool, determine the partition sizes and number, and assign appropriate labels and drive letters. With careful planning and execution, you can reap the benefits of a well-organized and efficient hard disk drive partitioning scheme.
Step-by-Step Guide: How to Partition a Hard Disk Drive
Partitioning a hard disk drive may sound complex, but with the right tools and knowledge, it can be a straightforward process. Follow this step-by-step guide to partition your hard disk drive:
- Back Up Your Data: Before proceeding with any partitioning steps, it is crucial to back up all your important data. This ensures that you have a copy of your files in case anything goes wrong during the process.
- Determine the Current Layout of Your Hard Disk Drive: Use disk management tools or utilities to understand the current layout of your hard disk drive. Note the number of existing partitions, their sizes, and file systems. This will help you plan your new partitioning scheme.
- Choose a Partitioning Tool: Research and choose a reliable partitioning tool that suits your needs. Popular options include EaseUS Partition Master, MiniTool Partition Wizard, and GParted.
- Launch the Partitioning Tool: Once you’ve selected a partitioning tool, launch it on your computer.
- Select the Hard Disk Drive for Partitioning: From within the partitioning tool, select the hard disk drive that you want to partition. Make sure you choose the correct one to avoid accidentally partitioning the wrong drive.
- Specify the Size and Number of Partitions: Determine the sizes and number of partitions you want to create on your hard disk drive. Enter the desired values in the partitioning tool, making sure to allocate space according to your needs.
- Assign Labels and Drive Letters to Each Partition: Provide appropriate labels for each partition to identify their purpose easily. You can also assign drive letters to make accessing the partitions more convenient.
- Apply the Partitioning Changes: Once you’ve configured the partition sizes, labels, and drive letters, proceed to apply the partitioning changes. This step may take some time, depending on the size of your hard disk drive and the number of partitions being created.
- Format and Mount the Newly Created Partitions: After the partitioning changes have been successfully applied, format each new partition with the desired file system (such as NTFS, FAT32, or exFAT) and mount them to make them accessible. This will prepare the partitions for use.
By following these steps, you can partition your hard disk drive effectively and enjoy the benefits of a well-organized storage solution that meets your specific needs.
Back Up Your Data
Before you start the process of partitioning your hard disk drive, it is essential to back up all your important data. Partitioning involves making changes to the structure of your hard disk drive, and there is a slight risk of data loss if something goes wrong during the process. By taking the time to back up your data, you can ensure that you have a copy of your files in case anything unexpected happens.
There are several ways to back up your data, depending on your preferences and the amount of data you need to backup:
External Hard Drive or USB Drive:
One of the most common and straightforward methods to back up your data is by copying it to an external hard drive or a USB drive. Simply connect the external storage device to your computer, and then manually copy and paste your important files and folders to the device. This method is suitable for smaller amounts of data or when you want the flexibility of having your backup in a physical format.
Cloud Storage Services:
Cloud storage services like Google Drive, Dropbox, or OneDrive offer convenient and secure options for backing up your data. These services allow you to upload your files and folders to their servers, providing an off-site backup solution. It is recommended for larger amounts of data or if you want to access your backup files from multiple devices. Remember to choose a reputable cloud storage provider and ensure that your data is encrypted and protected.
Disk Imaging Software:
Disk imaging software creates a complete, bit-by-bit copy of your hard disk drive, including all the partitions and files. This method creates an exact replica of your drive, allowing for easy restoration if needed. Programs like Acronis True Image, Macrium Reflect, or Clonezilla provide disk imaging capabilities. It is a more comprehensive approach to backup, but it requires more time and disk space to complete the backup process.
Regardless of the method you choose, make sure to double-check that all your important files and documents are included in the backup. It is important to verify the integrity of the backup by attempting to restore a few files to ensure they are accessible and intact.
By taking the time to back up your data before partitioning your hard disk drive, you can have peace of mind knowing that your files are safe and secure. It allows you to proceed with the partitioning process confidently, knowing that you have a copy of your valuable data in case anything goes wrong.
Determine the Current Layout of Your Hard Disk Drive
Before you start partitioning your hard disk drive, it is essential to have a clear understanding of its current layout. This includes knowing the number of existing partitions, their sizes, and the file systems they use. Determining the current layout will help you plan your new partitioning scheme effectively and ensure that you don’t accidentally delete important data.
There are multiple ways to determine the current layout of your hard disk drive:
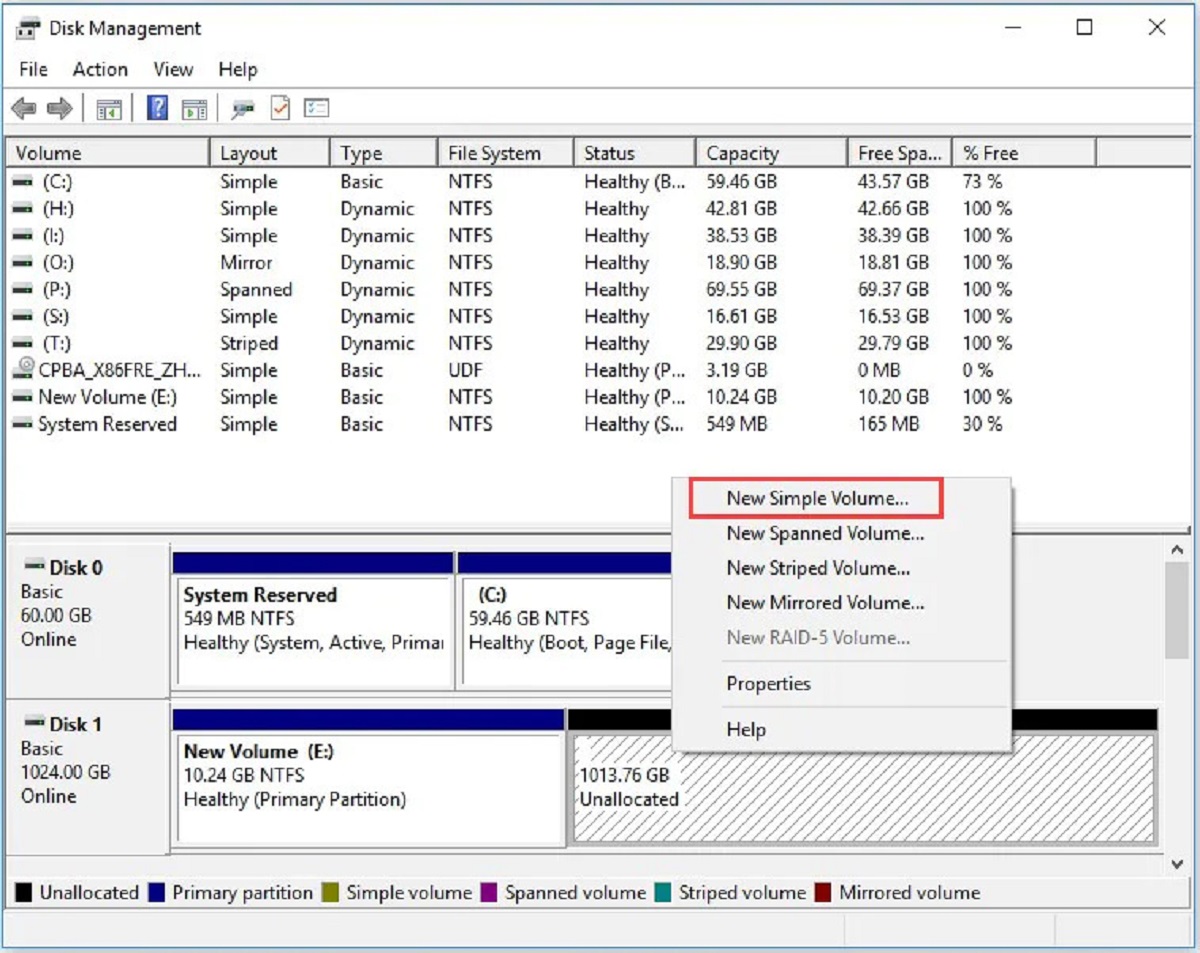
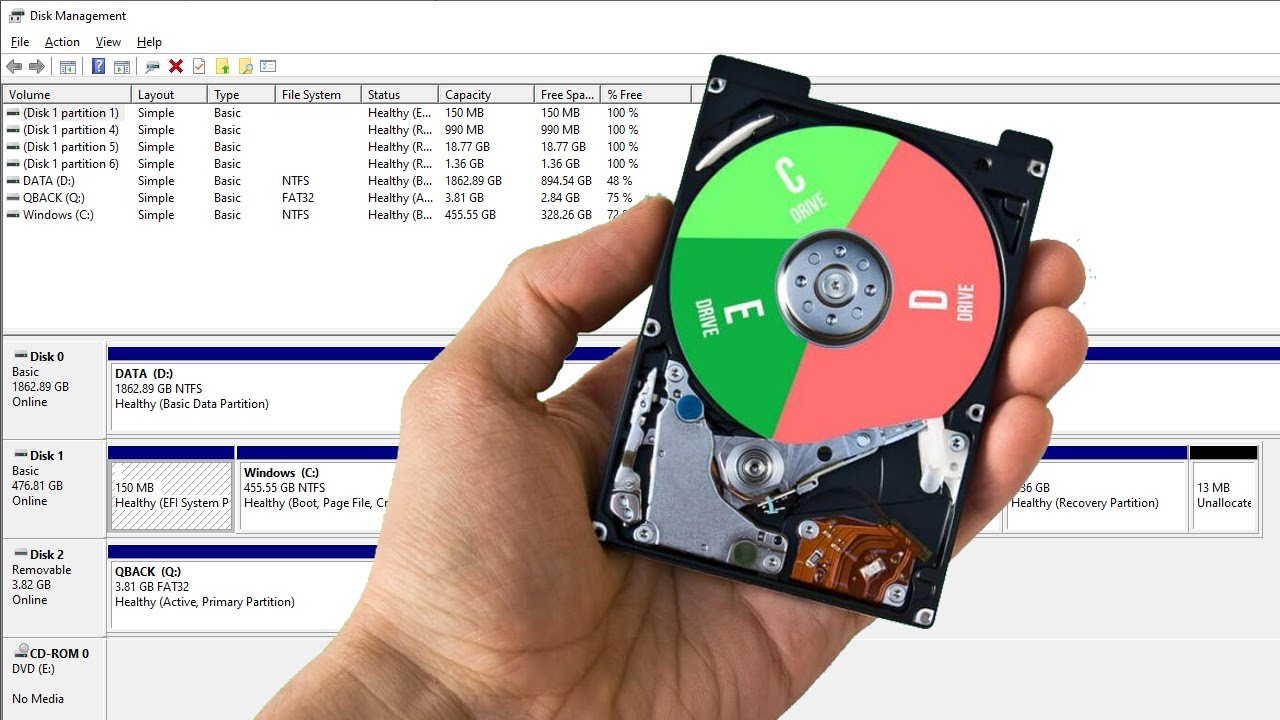
1. Disk Management Tool (Windows):
Windows provides a built-in disk management tool that allows you to view and modify the partitions on your hard disk drive. To access this tool, right-click on “My Computer” or “This PC” (depending on your Windows version) and select “Manage.” In the Computer Management window, click on “Disk Management” under the “Storage” section. Here, you can see a graphical representation of your hard disk drive and its existing partitions, along with their sizes and file systems.
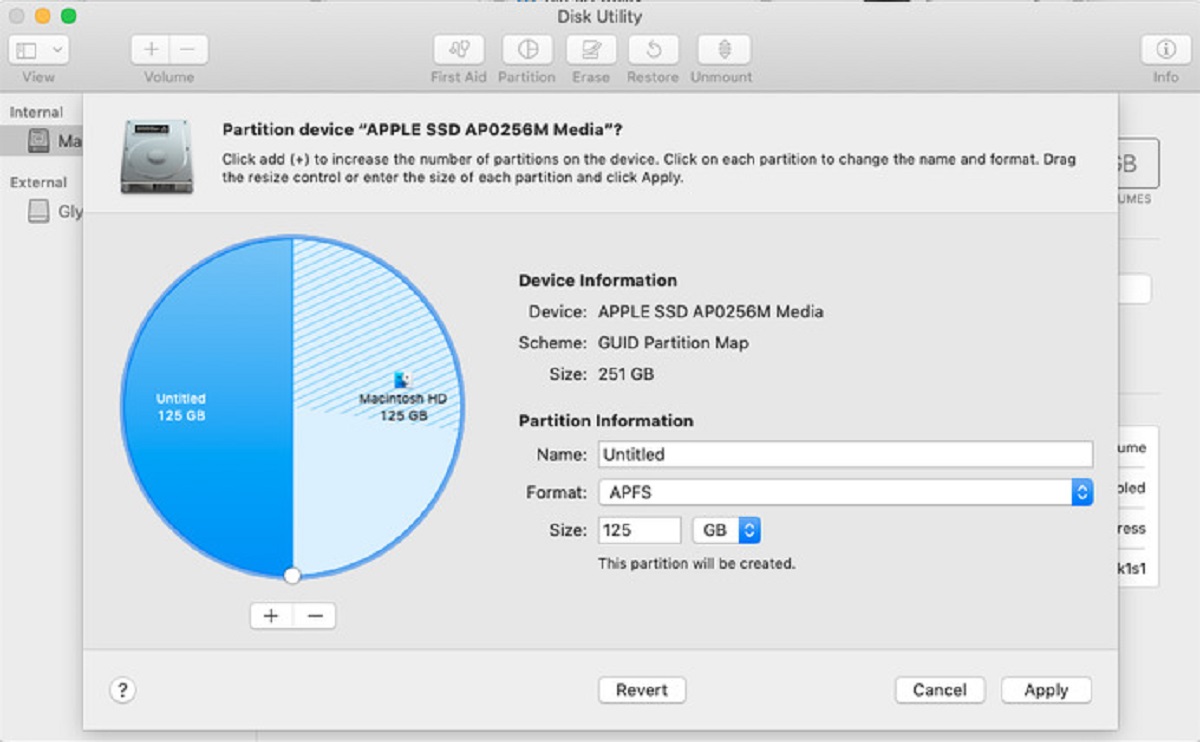
2. Disk Utility (macOS):
macOS users can use the Disk Utility tool to view their hard disk drive layout. To access Disk Utility, go to “Applications” > “Utilities” > “Disk Utility.” In the Disk Utility window, select your hard disk drive from the sidebar. You will see an overview of the drive, including the number and sizes of existing partitions, and the file systems they use.
3. Command Line Tools (Advanced Users):
Advanced users can also use command-line tools like “fdisk” or “diskutil” (macOS) to get detailed information about their hard disk drive partitions. These tools provide more technical information, such as the partition scheme (MBR or GPT), partition IDs, and other details. Using command line tools requires a basic understanding of the command line interface and may not be suitable for novice users.
Once you have identified the existing partitions on your hard disk drive, take note of their sizes, file systems, and any important files or data stored on them. This information will help you plan your new partition layout effectively.
It is important to proceed with caution and avoid making any changes to the existing partitions without careful consideration. Accidental deletion or modification of your current partitions can result in data loss. If you are unsure about the current layout or any specific partition, it is best to seek guidance from a knowledgeable individual or consult professional assistance.
By determining the current layout of your hard disk drive, you can plan your partitioning strategy with confidence and ensure that your data remains intact throughout the process.
Choose a Partitioning Tool
When it comes to partitioning your hard disk drive, choosing the right partitioning tool is crucial. A reliable partitioning tool provides the necessary features and user-friendly interface to efficiently create, resize, and manage partitions on your hard disk drive. Here are some factors to consider when choosing a partitioning tool:
1. Compatibility:
Ensure that the partitioning tool you choose is compatible with your operating system. Different partitioning tools are available for Windows, macOS, and Linux. Make sure to select a tool that works seamlessly with your specific operating system version.
2. Ease of Use:
Look for a partitioning tool with an intuitive and user-friendly interface. The tool should have clear instructions and features organized in an easily accessible manner. This simplifies the partitioning process, even for those with limited technical knowledge.
3. Partitioning Features:
Consider the specific partitioning features offered by the tool. Ideally, it should allow you to create new partitions, resize existing partitions, merge or delete partitions, and convert the file system without data loss. Having a tool with comprehensive partitioning options provides flexibility in setting up your hard disk drive according to your needs.
4. Reliability and Safety:
Choose a partitioning tool with a solid reputation for reliability and data safety. It should have built-in safeguards to prevent accidental data loss during the partitioning process. Additionally, consider tools that offer features like backup and restore functionality for added peace of mind.
5. Customer Support:
Check if the partitioning tool provides reliable customer support. Look for tools that offer documentation, user guides, and tutorials to assist you in using their software effectively. Having access to prompt customer support can be helpful in case you encounter any issues or have questions during the partitioning process.
6. User Reviews and Recommendations:
Research user reviews and recommendations for different partitioning tools. Consider the experiences of other users to gauge the tool’s performance, reliability, and ease of use. Pay attention to both positive and negative feedback to make an informed decision.
Some popular partitioning tools that meet these criteria include EaseUS Partition Master, MiniTool Partition Wizard, GParted, and Paragon Partition Manager. These tools offer a range of features, user-friendly interfaces, and reliable performance to help you partition your hard disk drive with ease.
Before using any partitioning tool, familiarize yourself with its functionality and ensure you have a backup of your important data. This way, you can confidently proceed with partitioning your hard disk drive, knowing that you have chosen a reliable and suitable tool for the task at hand.
Launch the Partitioning Tool
After selecting the appropriate partitioning tool for your operating system and partitioning needs, the next step is to launch the tool on your computer. Launching the partitioning tool will allow you to access its interface and begin the process of partitioning your hard disk drive. Here’s how you can get started:
1. Locate the Partitioning Tool:
Depending on the partitioning tool you have chosen, you may have downloaded and installed it previously from the official website or another trusted source. Locate the partitioning tool in your applications or programs folder, or search for it using the search function on your operating system.
2. Double-click or Run the Partitioning Tool:
To launch the partitioning tool, simply double-click on its icon or select the program from the search results. If prompted, provide the necessary permissions or enter administrative credentials to run the tool with the required privileges.
3. Wait for the Partitioning Tool to Load:
Once launched, the partitioning tool will load its interface and initialize any necessary components. The loading time may vary depending on the complexity of the program and your computer’s specifications. Be patient and wait for the partitioning tool to fully load before proceeding.
4. Familiarize Yourself with the Partitioning Tool Interface:
Take a moment to familiarize yourself with the partitioning tool’s interface. Pay attention to the various menus, buttons, and options available. Take note of any documentation or guides provided with the partitioning tool to better understand its functionality and features.
5. Explore the Tools and Functions:
Take some time to explore the tools and functions offered by the partitioning tool. Get acquainted with the options for creating new partitions, resizing existing partitions, merging or deleting partitions, and modifying file systems. Understanding these functions will help you make informed decisions during the partitioning process.
6. Review Safety Precautions:
Before proceeding with any partitioning actions, review any safety precautions or warnings provided by the partitioning tool. Pay attention to any specific guidelines or recommendations to ensure a smooth and safe partitioning process.
Launching the partitioning tool is the first step towards partitioning your hard disk drive. It grants you access to the necessary functions and features to create, modify, and manage partitions effectively. Take the time to navigate through the interface and become familiar with the tools and options provided. Being prepared and knowledgeable about the partitioning tool will help you make informed decisions as you progress through the partitioning process.
Select the Hard Disk Drive for Partitioning
Once you have launched the partitioning tool, the next step is to select the specific hard disk drive that you want to partition. This step ensures that you are working with the correct drive and prevents any accidental partitioning or modification of other drives. Here’s how you can select the hard disk drive for partitioning:
1. Identify the Hard Disk Drives:
Within the partitioning tool’s interface, you should see a list or graphical representation of the available hard disk drives on your computer. Take a moment to identify the disk that you wish to partition.
2. Verify the Drive Information:
Pay close attention to the drive’s label, size, and other identifying information to ensure that you have selected the correct hard disk drive. Double-check this information against what you expected to see based on your knowledge of your computer’s hardware configuration.
3. Select the Hard Disk Drive:
Once you have confirmed that you are selecting the correct hard disk drive, click on it to highlight or select it within the partitioning tool’s interface. This action tells the partitioning tool that you want to perform partitioning actions on this specific drive.
4. Review Additional Drive Information (Optional):
Some partitioning tools provide additional information about the selected hard disk drive, such as its current partitioning scheme, health status, or SMART (Self-Monitoring, Analysis, and Reporting Technology) data. Familiarize yourself with this information if it is available, as it can provide useful insights into the drive’s condition.
5. Confirm the Selection:
Once you have selected the desired hard disk drive for partitioning and reviewed any pertinent information, confirm your selection. Ensure that the partitioning tool has recognized and highlighted the correct drive.
By selecting the correct hard disk drive for partitioning, you can ensure that any partitioning actions you perform will affect the intended drive and preserve the data on other drives. It is important to exercise caution during this step to avoid any accidental modification or deletion of data on other drives. Taking the time to double-check and verify your selection will help you proceed with confidence in the partitioning process.
Specify the Size and Number of Partitions
Once you have selected the hard disk drive for partitioning, the next step is to specify the size and number of partitions you want to create on the drive. This step allows you to allocate storage space according to your specific needs and preferences. Here’s how you can proceed:
1. Determine the Desired Partition Sizes:
Consider how you want to allocate the available storage space on the hard disk drive. Think about the types of files and data you plan to store on each partition and how much storage capacity each partition requires. It is important to strike a balance between allocating enough space for each partition and ensuring that you have sufficient free space for future use.
2. Enter the Partition Sizes:
Within the partitioning tool’s interface, specify the size for each partition. Some partitioning tools allow you to specify the size in megabytes (MB), gigabytes (GB), or as a percentage of the total available space. Enter the desired sizes for each partition, ensuring that the total allocated space does not exceed the total capacity of the hard disk drive.
3. Adjust Partition Sizes (If Needed):
If you have made a miscalculation or if your needs change during the partitioning process, most partitioning tools allow you to adjust the partition sizes. You can resize or reassign space between partitions to create a partitioning scheme that better suits your requirements.
4. Consider the Number of Partitions:
Decide on the number of partitions you want on the hard disk drive. This may depend on various factors, such as the number of different operating systems you want to install, the need for separate storage areas, or the desire for better organization and file management. Strike a balance between having enough partitions to meet your needs and keeping the partitioning layout easy to navigate and manage.
5. Plan for Future Expansions or Changes:
Consider any potential future needs or changes that may require modifying the partition layout. Leave room for expansion or adjustability in case you need to create additional partitions, resize existing partitions, or change the partitioning scheme in the future.
By specifying the size and number of partitions on your hard disk drive, you can effectively allocate storage space to meet your specific requirements. Taking the time to plan and consider your needs during this step will result in a well-organized hard disk drive layout that supports efficient file management and easy access to your data.
Assign Labels and Drive Letters to Each Partition
Once you have specified the size and number of partitions for your hard disk drive, the next step is to assign labels and drive letters to each partition. Assigning labels and drive letters helps you easily identify and access the different partitions on your system. Here’s how you can proceed:
1. Understand Labels and Drive Letters:
Labels and drive letters are the names or identifiers given to each partition. A label is a descriptive name that you can assign to a partition, while a drive letter is a single letter of the alphabet associated with a partition. These labels and drive letters will be used to refer to the partitions within the operating system and other applications.
2. Assign Labels to each Partition:
Select each partition, one by one, and assign a meaningful label to it. The label can reflect the purpose of the partition, such as “System,” “Data,” “Applications,” “Media,” or any other name that helps you easily identify its contents. It is recommended to use descriptive and concise labels for clarity.
3. Assign Drive Letters to each Partition:
Assigning drive letters to your partitions helps you easily access them within the operating system. Drive letters are single letters from the English alphabet, such as “C,” “D,” “E,” and so on. Select the desired drive letter for each partition, ensuring that it doesn’t conflict with any existing drive letters already in use.
4. Review and Adjust:
After assigning labels and drive letters to each partition, review the configuration to ensure that it aligns with your intended layout and organization. Double-check for any conflicts or inconsistencies in the assigned labels or drive letters. Make adjustments as necessary to ensure a clear and logical partitioning scheme.
5. Consider System Reserved and Boot Partitions:
Some partitioning tools may create additional special partitions, like the System Reserved or Boot partitions, required for the proper functioning of the operating system. These partitions often receive specific labels and drive letters automatically during the partitioning process. Familiarize yourself with these special partitions and ensure that they are labeled and assigned the correct drive letters.
By assigning labels and drive letters to each partition, you create an organized and easily navigable system. Labels provide a quick way to identify the purpose of each partition, while drive letters enable seamless access to your partitions within the operating system and other applications.
Apply the Partitioning Changes
After specifying the size, number of partitions, and assigning labels and drive letters, the next step is to apply the partitioning changes to your hard disk drive. Applying the changes involves finalizing the partition layout and making the necessary modifications to the hard disk drive. Here’s how you can proceed:
1. Review the Partition Layout:
Take a moment to review the partition layout you have created. Ensure that the size and number of partitions meet your requirements and that the labels and drive letters are correctly assigned to each partition.
2. Confirm or Preview the Changes:
Depending on your partitioning tool, you may have the option to preview the changes or see a summary of the pending changes before applying them. Take this opportunity to double-check and verify the partitioning changes you are about to make.
3. Commit to the Partitioning Changes:
Once you are satisfied with the partition layout and have reviewed the changes, proceed to commit or apply the partitioning changes. This action will initiate the process of modifying the hard disk drive to create the desired partitions and make the necessary adjustments to the file system and partition table.
4. Wait for the Changes to be Applied:
The partitioning tool will carry out the necessary operations to apply the changes to the hard disk drive. This process may take some time, depending on the size of the drive and the complexity of the changes being made. Be patient and allow the partitioning tool to complete its tasks.
5. Review and Verify the Partition Changes:
After the partitioning changes have been applied, carefully review the final partition layout to ensure that it matches your intended configuration. Double-check for any discrepancies or unexpected changes. Verify that the partitions have been created, resized, or modified correctly.
6. Backup the New Partition Layout (Optional):
Consider creating a backup or image of the new partition layout. This backup can be helpful in case you need to revert to the previous partition layout or restore the partitions in case of any unforeseen issues or data loss.
By applying the partitioning changes, you solidify the intended partition layout on your hard disk drive. Ensuring that the changes are accurately implemented helps you achieve the desired organization, storage allocation, and access to your data.
Format and Mount the Newly Created Partitions
After applying the partitioning changes to your hard disk drive, the next step is to format and mount the newly created partitions. Formatting prepares the partitions for use by creating a file system, while mounting makes the partitions accessible within the operating system. Here’s how you can proceed:
1. Determine the File System:
Decide on the file system you want to use for each partition. Popular file systems include NTFS, FAT32, and exFAT. Consider the compatibility requirements of your operating system and the type of data you plan to store on the partition when choosing the appropriate file system.
2. Format the Partitions:
Using the partitioning tool, select each newly created partition one by one and initiate the formatting process. Choose the desired file system for each partition and follow the prompts provided by the partitioning tool to complete the formatting process. Be aware that formatting erases any existing data on the partition, so ensure that you have backed up any important files beforehand.
3. Assign Drive Letters:
Once the partitions are formatted, the partitioning tool may automatically assign drive letters to them. Verify that the assigned drive letters are as desired, making sure they do not conflict with any existing drive letter assignments. Modify the drive letters if necessary.
4. Mount the Partitions:
To make the newly formatted partitions accessible within the operating system, they need to be mounted. Depending on the partitioning tool, the partitions may be automatically mounted, or you may need to manually mount them. Follow the instructions provided by the partitioning tool to mount the partitions correctly.
5. Verify Accessibility:
After mounting the partitions, verify their accessibility by navigating to them through file explorer or using relevant operating system tools. Ensure that you can read from and write to the partitions without any issues. Check if the assigned labels and drive letters are correctly displayed for each partition.
By formatting and mounting the newly created partitions, you finalize the setup process and make the partitions ready for use. Taking the time to properly format and mount the partitions ensures that they are accessible and functional within the operating system, allowing you to store and access data efficiently.
Conclusion
Partitioning a hard disk drive is a valuable process that allows you to optimize your storage space, enhance performance, and improve data organization. By following the steps outlined in this guide, you can successfully partition your hard disk drive and create a well-structured and efficient storage system.
Throughout the partitioning process, it is crucial to take precautions to safeguard your data. Always back up your important files before making any changes to your hard disk drive. This ensures that you have a copy of your data in case of any unforeseen issues or data loss during the partitioning process.
Additionally, choosing the right partitioning tool plays a significant role in the success of the partitioning endeavor. Consider compatibility, ease of use, supported partitioning features, reliability, and customer support when selecting a partitioning tool that suits your needs.
When partitioning your hard disk drive, take the time to carefully plan the size and number of partitions based on your storage requirements and preferences. Assigning labels and drive letters to each partition is vital for easy identification and access. Formatting and mounting the partitions properly ensure their usability within the operating system.
Remember to review and verify your partition layout at each step, double-checking the partition sizes, labels, and drive letters to ensure everything aligns with your desired configuration.
Overall, partitioning your hard disk drive provides numerous benefits, including improved performance, data protection, flexibility in running multiple operating systems, and efficient file management. By partitioning your hard disk drive, you can make the most out of your storage space and enhance your overall computing experience.
So, armed with the knowledge and tools presented in this guide, go ahead and partition your hard disk drive with confidence, unlocking the full potential of your storage solution!