To enable secure boot gigabyte motherboard, you must disable CSM, enable TPM, and then turn on Secure Boot within the UEFI firmware. This is a mandatory requirement for Windows 11 and many modern games with anti-cheat software, such as Valorant and EA Sports FC.
Pre-check: Is your system ready for Secure Boot?
Before making any changes, confirm your system is already configured correctly. Secure Boot requires the system to be in UEFI mode and the Windows disk to use the GPT partition style. To verify your current state, press the Windows Key + R, type msinfo32, and press Enter. In the System Information window, look for "Secure Boot State", if it already shows "On", you are done. If it shows "Off" or "Not Supported", proceed with the steps below. Also check that "BIOS Mode" reads "UEFI"; if it says "Legacy", you will need to convert your disk to GPT and switch to UEFI mode first.
Update your UEFI (BIOS) to the latest version
Before enabling Secure Boot, it is highly recommended to update your motherboard's UEFI (BIOS) to the latest version. Visit the Gigabyte website, locate your exact motherboard model, and download the most recent firmware. Flashing the latest UEFI ensures compatibility with Secure Boot and prevents potential bugs that could cause the feature to appear "Not Active" after you enable it.
Access the UEFI setup and switch to Advanced Mode
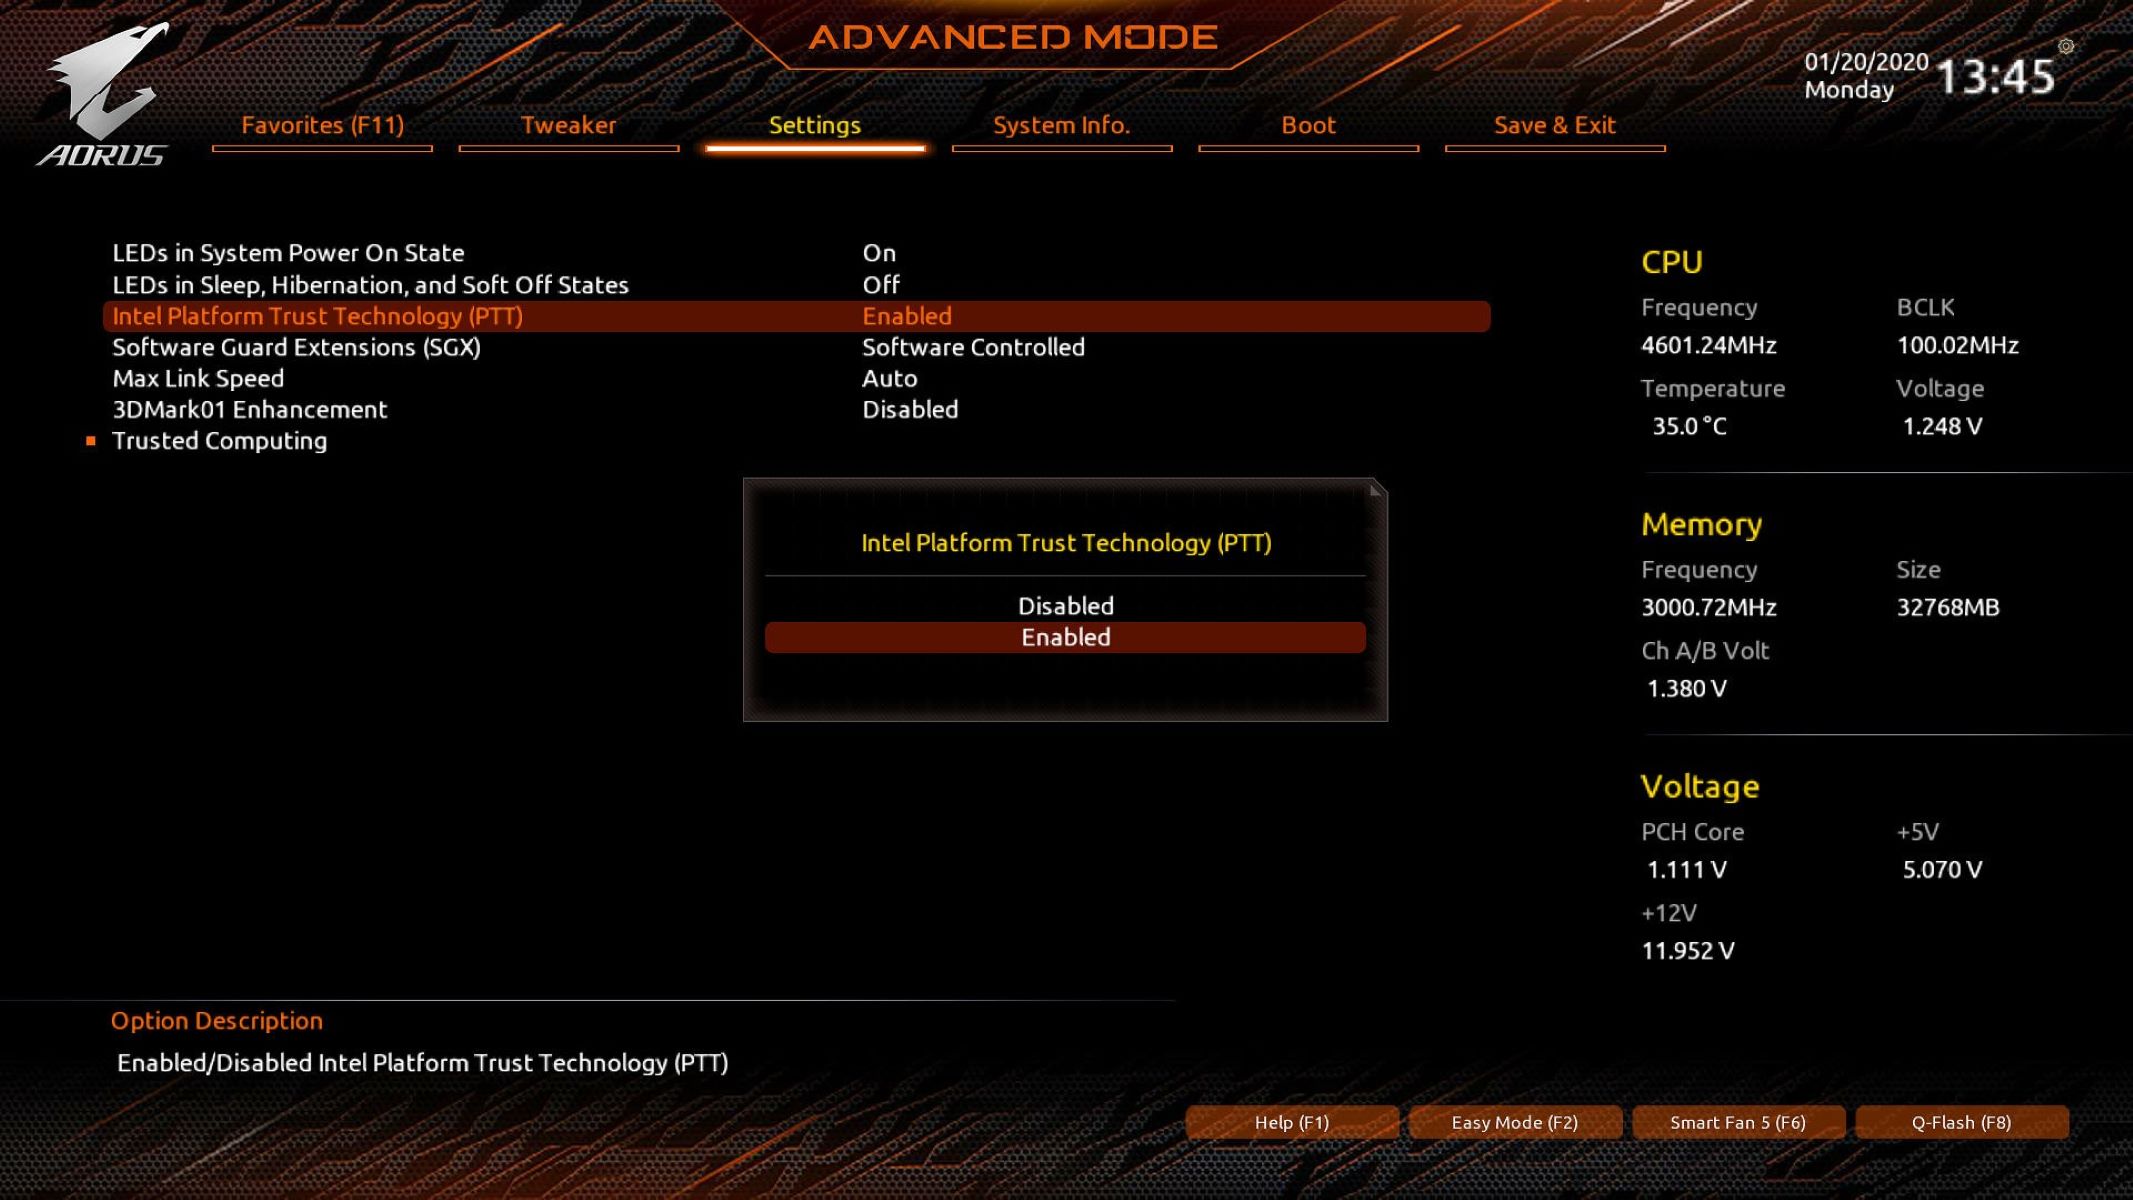
To access the UEFI/BIOS settings, reboot your PC and repeatedly press the "Delete" key at the Gigabyte splash screen. Once in the UEFI, ensure you are in "Advanced Mode"; if you land on "Easy Mode", switch modes by pressing F2. Advanced Mode gives you access to all necessary settings, including CSM, TPM, and Secure Boot options.
Disable Compatibility Support Module (CSM)
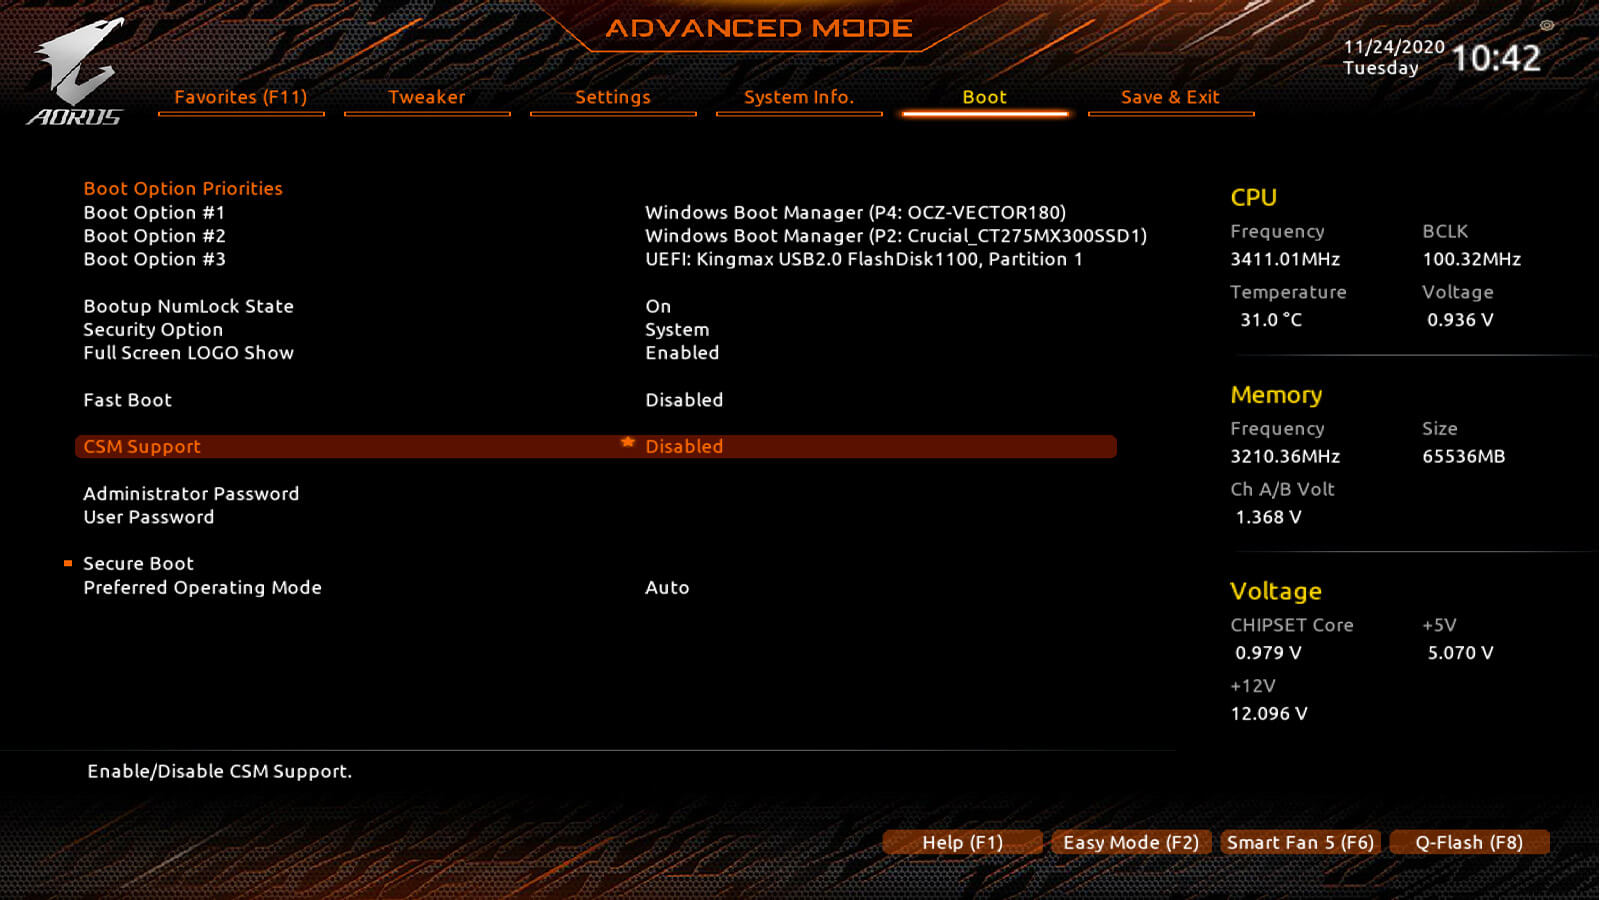
The "Compatibility Support Module (CSM)" must be disabled before Secure Boot can be enabled. Navigate to the "Boot" tab in the BIOS and set "CSM Support" to "Disabled". This is a mandatory prerequisite, Secure Boot cannot function while CSM is active, as CSM allows legacy boot methods that bypass the security checks Secure Boot enforces.
Enable the Trusted Platform Module (TPM)
The Trusted Platform Module (TPM) must be enabled. For AMD CPUs, this is typically "AMD CPU fTPM" found under "Advanced Mode > Settings", set to "Enabled" or "Auto". TPM provides the hardware-based security that Secure Boot relies on to verify boot components.
Enable Secure Boot and restore factory keys
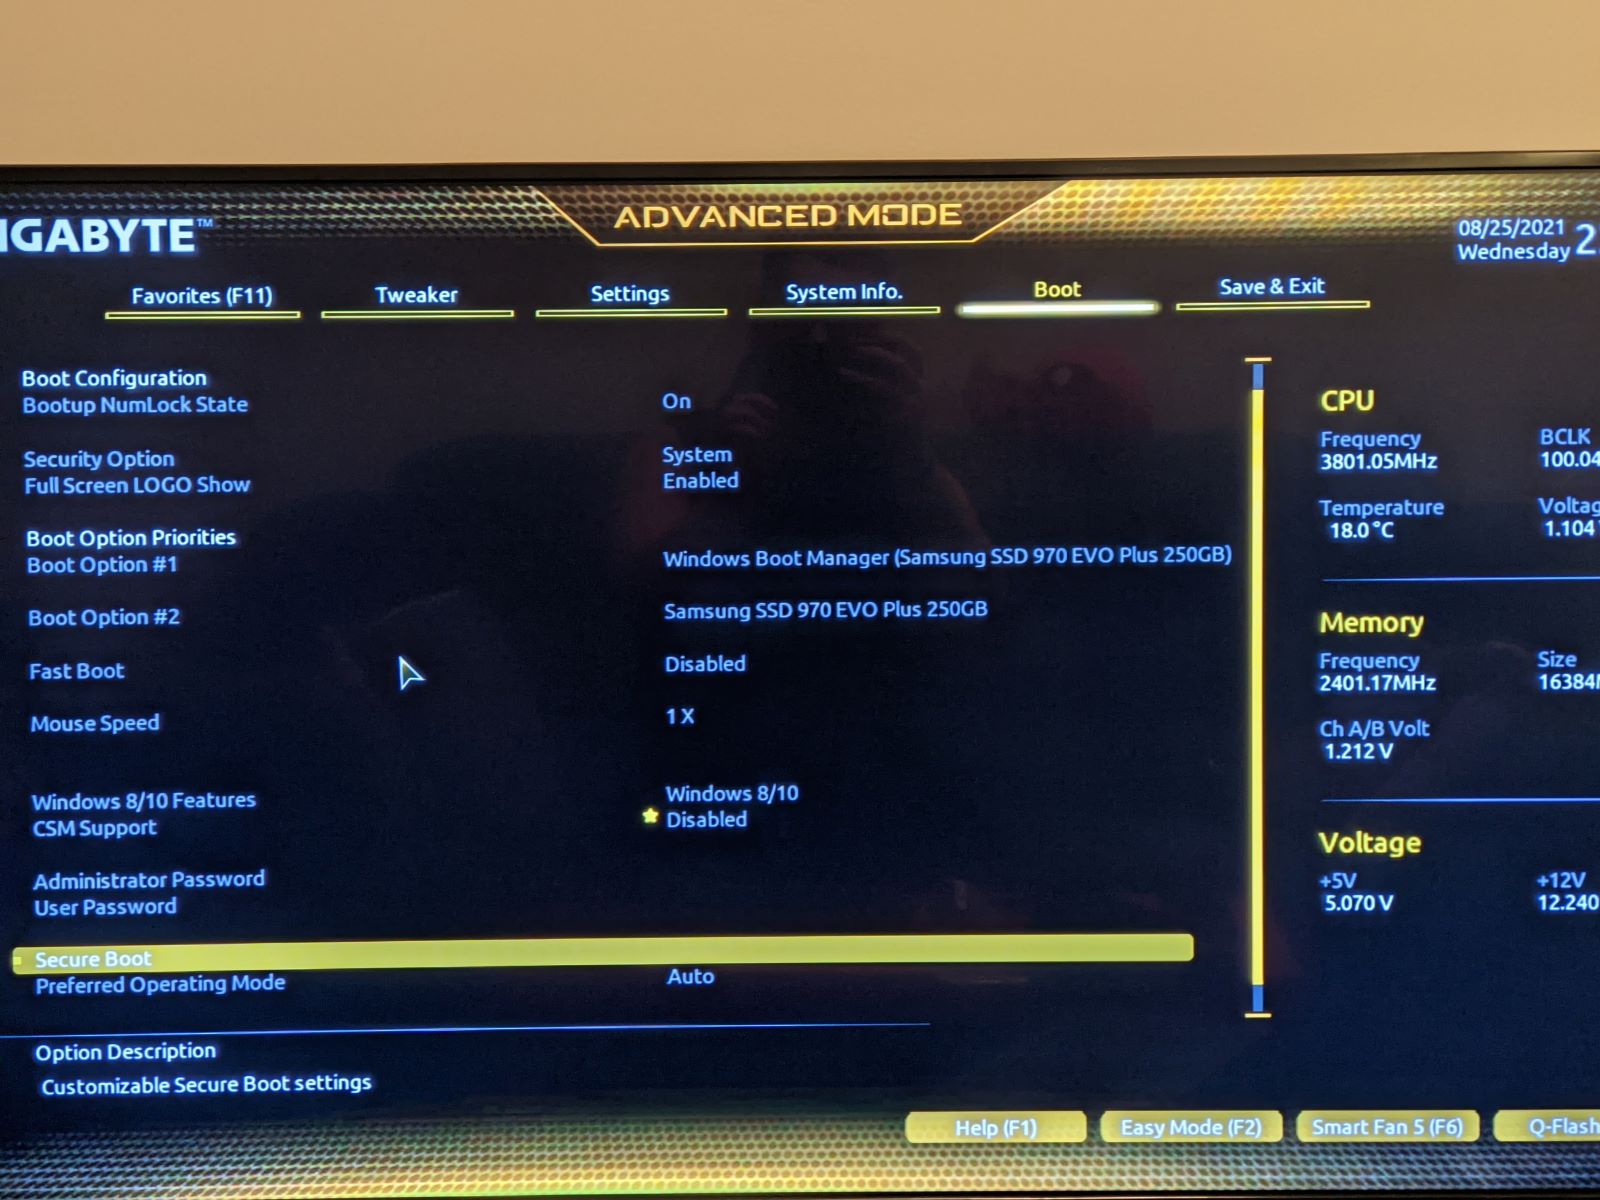
After disabling CSM and enabling TPM, navigate to the "Boot" tab and select the "Secure Boot" option. Set the "Secure Boot" option to "Enabled". If Secure Boot is "Enabled" but shows "Not Active", you may need to restore factory secure boot keys. To restore factory keys, change "Secure Boot Mode" from "Standard" to "Custom", then select "Key Management" and choose to "Restore Factory Keys". This action re-validates the trusted signature database, forcing Secure Boot to become active.
Save changes and verify in Windows
Once all settings are applied, press F10 to save and exit the UEFI. Confirm the save action when prompted. Let the system reboot fully into Windows. To confirm success, press Windows Key + R, type msinfo32, and check that "Secure Boot State" shows "On". If it still shows "Off", double-check that CSM is disabled and that you restored factory keys, a common oversight that leaves Secure Boot inactive despite being enabled.
Related reading: How To Enable TPM 2.0 On Gigabyte Motherboard, How To Configure SSD In Bios, and How Do I Know How Many SSD Slots I Have.