Introduction
Welcome to the fascinating world of motherboard construction! In this step-by-step guide, we will walk you through the process of building a motherboard from scratch. Whether you’re a tech enthusiast looking to expand your knowledge or a DIYer eager to create your own custom motherboard, this article is for you!
A motherboard is the heart and soul of any computer system. It is a complex printed circuit board that acts as the central hub, connecting all the crucial components of a computer together, including the processor, memory, storage, and peripherals. Without a functioning motherboard, a computer simply cannot operate.
While most computer users are accustomed to purchasing pre-built motherboards, there is an undeniable satisfaction in constructing one yourself. By building your own motherboard, you gain a deeper understanding of the intricate inner workings of a computer and have the freedom to customize it according to your specific needs and preferences.
In this guide, we will cover everything from selecting the right components to testing the functionality of your custom-built motherboard. Along the way, we will provide helpful tips and insights to ensure a successful build. So, grab your soldering iron and let’s get started on this exciting journey!
Note:
- This process requires a good understanding of electronics and soldering. Take proper precautions and consult professional resources if needed.
- Building a motherboard from scratch is an advanced project. It is recommended for enthusiasts or experienced individuals only.
Now that we’ve set the stage, let’s dive into the basics of motherboard construction, where the magic truly begins!
What is a motherboard?
A motherboard, also known as a mainboard or system board, is a vital component that forms the backbone of any computer system. It is a complex printed circuit board that serves as a platform for various hardware components to connect and communicate with each other. Think of it as the central nervous system of a computer, facilitating the flow of information and power between all the other parts.
At its core, the motherboard acts as a foundation for other essential components, such as the CPU (Central Processing Unit), RAM (Random Access Memory), GPU (Graphics Processing Unit), storage devices, expansion cards, and connectivity ports. These components are mounted or connected to the motherboard, allowing them to work cohesively and efficiently.
The layout and design of a motherboard can vary depending on its form factor, which dictates its physical size and the arrangement of its components. Common form factors include ATX, Micro-ATX, and Mini-ITX. The choice of form factor depends on factors such as the size of the computer case and the intended use of the system.
In addition to physically connecting components, the motherboard also provides electrical pathways for data transmission and power delivery. For example, the CPU socket on the motherboard allows the processor to plug in and establish communication with other components through the motherboard’s circuitry.
Furthermore, the motherboard typically contains various chips, such as the BIOS (Basic Input/Output System), which provides the firmware necessary for the computer to boot up and initialize hardware components. The BIOS, or its modern counterpart the UEFI (Unified Extensible Firmware Interface), plays a crucial role in controlling the system’s startup process.
Overall, the motherboard’s primary function is to coordinate and facilitate the smooth operation of all the interconnected components within a computer system. It acts as a bridge, ensuring that data, power, and instructions flow seamlessly between different parts, enabling the system to perform tasks effectively and efficiently.
Now that we have a solid understanding of what a motherboard is and its key role in a computer system, let’s delve into the intricate world of motherboard construction and gain the knowledge required to build our own masterpiece!
The basics of motherboard construction
Understanding the basics of motherboard construction is essential before diving into the intricate process of building one yourself. Let’s explore the key components and elements that make up a typical motherboard.
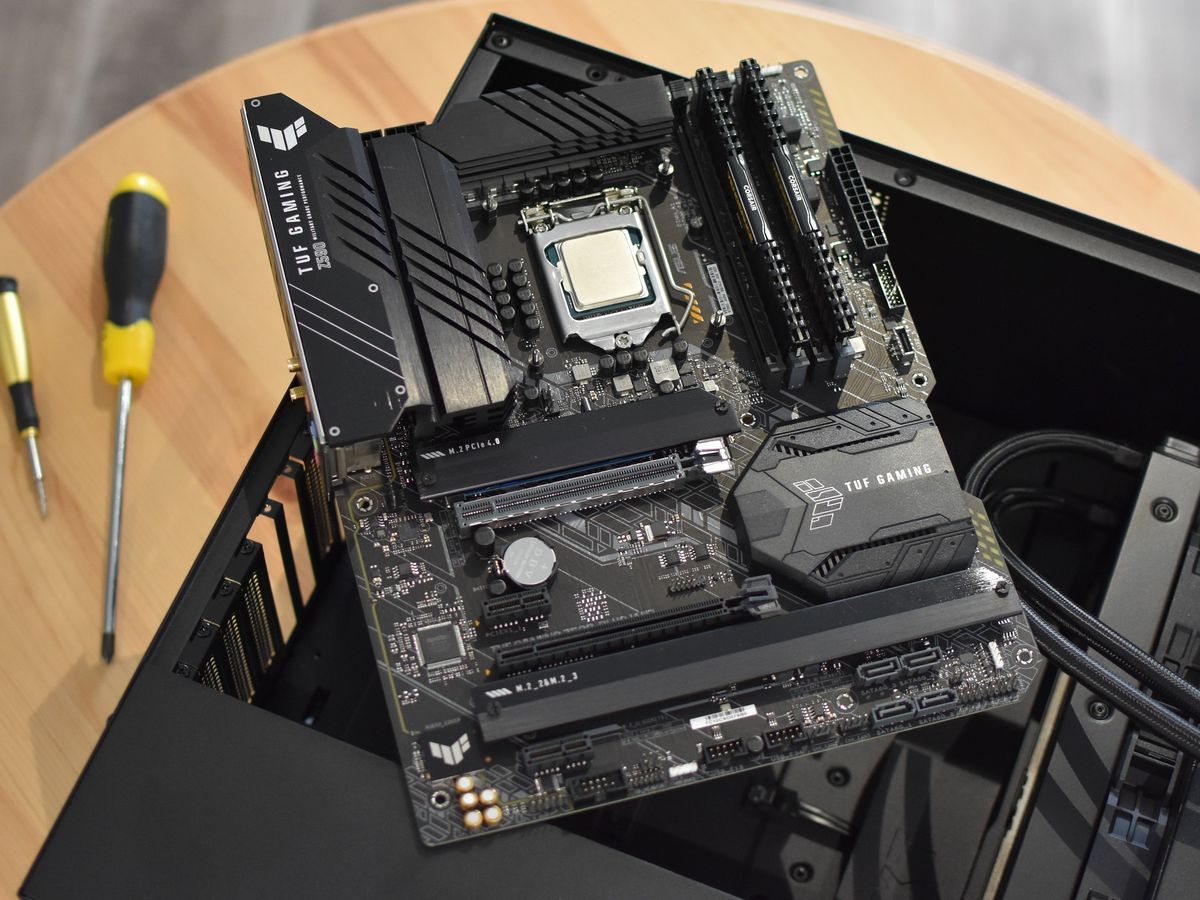
1. PCB (Printed Circuit Board): The foundation of a motherboard is the PCB, which is a flat board made of a non-conductive material, typically fiberglass. It features a network of copper traces that act as pathways to conduct electricity and transmit signals between the various components.
2. CPU Socket: The CPU socket is a specialized connector on the motherboard that enables the processor to be mounted. It ensures proper alignment and establishes a secure electrical connection for data transfer and power delivery.
3. RAM Slots: Random Access Memory (RAM) slots are responsible for housing the memory modules that provide temporary storage for data to be processed by the CPU. The number and type of RAM slots on a motherboard determine the maximum amount and speed of memory that can be installed.
4. Expansion Slots: Expansion slots allow for the addition of expansion cards, such as graphics cards, sound cards, and network cards, to enhance the capabilities of the system. These slots provide connections for these cards to communicate with the rest of the hardware.
5. Chipset: The chipset is a collection of integrated circuits on the motherboard that manage data flow between the CPU, memory, storage devices, and other peripherals. It plays a crucial role in controlling the overall system performance and compatibility.
6. Power Connectors: Motherboards feature power connectors to receive power from the PSU (Power Supply Unit) and distribute it to the various components. The primary power connector is typically a 24-pin ATX connector, with additional connectors for CPU power.
7. Storage Interfaces: Motherboards have storage interfaces, such as SATA (Serial ATA) or M.2 slots, to connect storage devices like hard drives and solid-state drives. These interfaces provide high-speed data transfer capabilities.
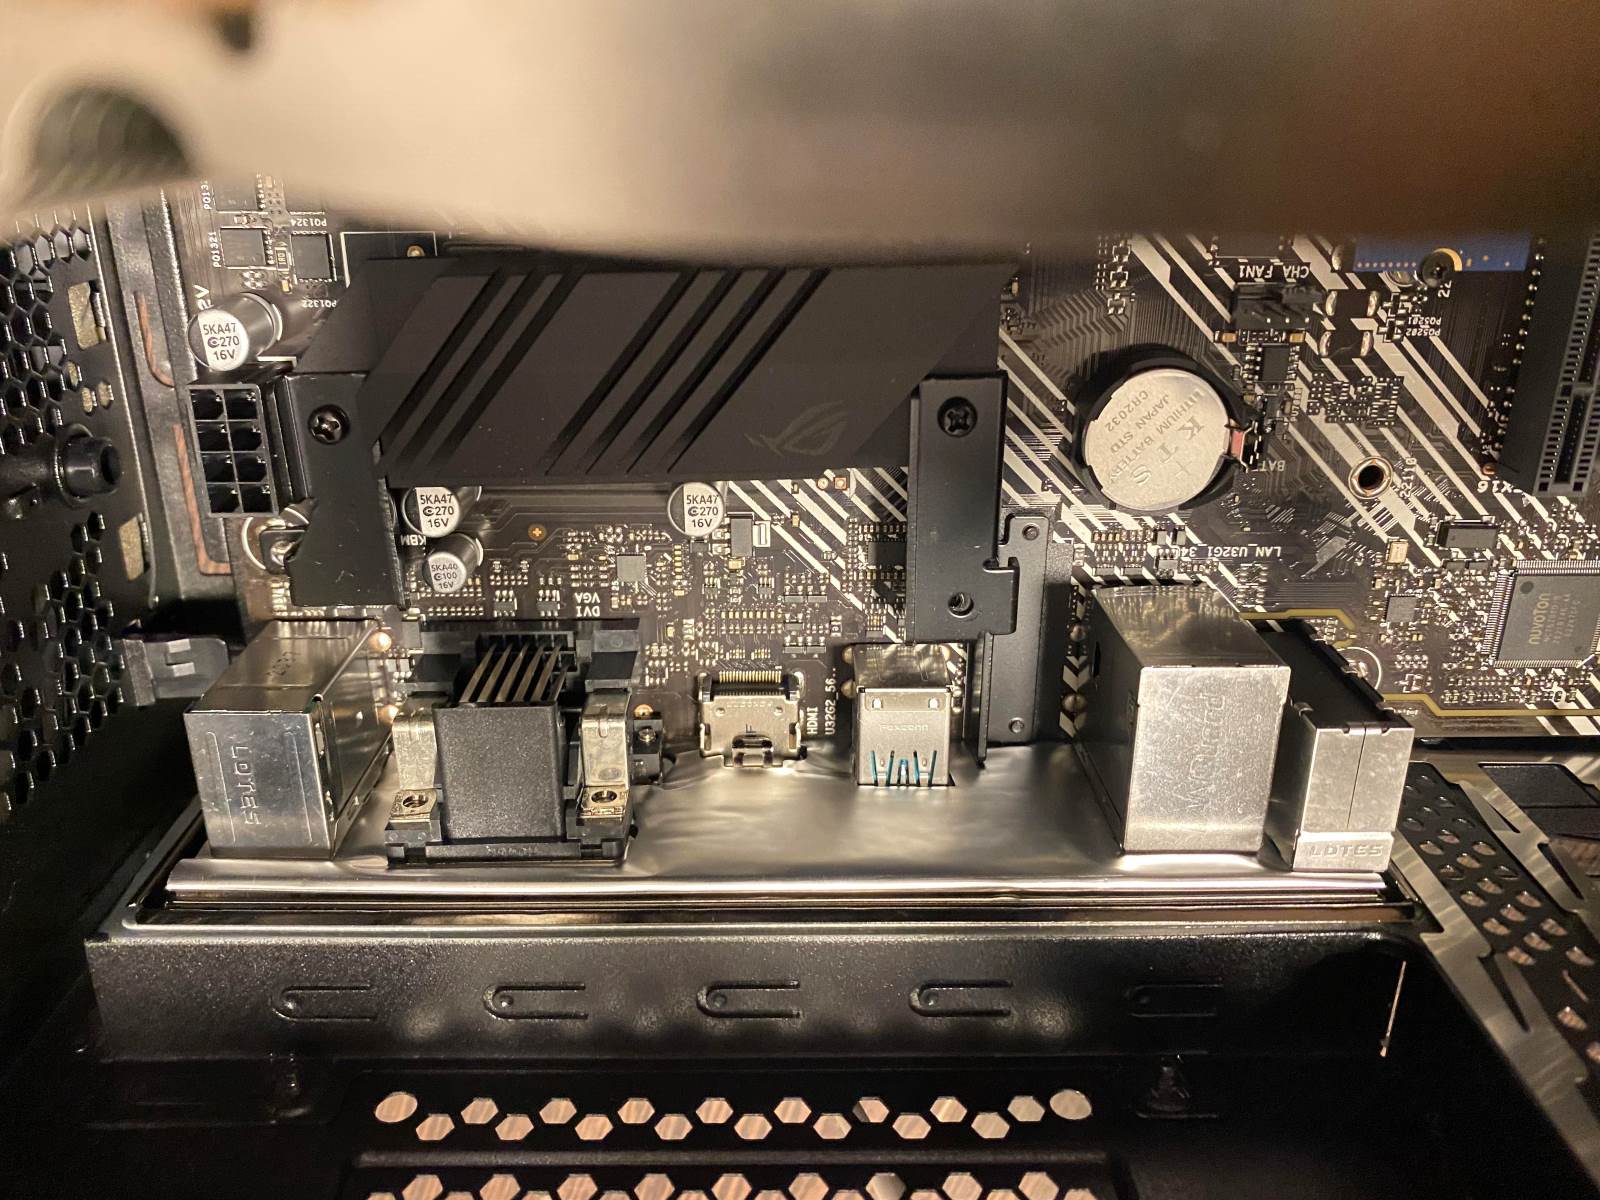
8. I/O Ports: The motherboard features various I/O ports for connecting external devices, including USB ports, audio jacks, Ethernet ports, and display connectors. These ports allow the computer to communicate and interact with peripheral devices.
9. BIOS/UEFI: The motherboard contains firmware known as the BIOS or UEFI, which initializes the hardware during the boot process and provides configuration options for various settings.
Now that we have a solid foundation of the basic components of a motherboard, we can move on to the exciting process of building one ourselves. In the next section, we will explore the step-by-step process of creating a custom motherboard from scratch.
Step 1: Choosing the right components
When it comes to building your own motherboard, selecting the right components is crucial for a successful build. Every component must be compatible with each other and meet your specific requirements. Let’s explore the key components you’ll need to consider:
1. CPU (Central Processing Unit): The CPU is the brain of your computer and determines its processing power. Consider factors like the number of cores, clock speed, and socket type to ensure compatibility with your motherboard.
2. RAM (Random Access Memory): RAM plays a vital role in system performance and multitasking capabilities. Choose RAM modules that are compatible with your motherboard’s memory slots and consider the desired capacity and speed.
3. Storage Devices: Select storage devices like hard drives or solid-state drives (SSDs) that match your storage requirements and connect to the appropriate interfaces, such as SATA or M.2 slots.
4. Graphics Card: If you require high-performance graphics for gaming or graphic-intensive tasks, choose a compatible graphics card that fits in the available expansion slots and provides the desired level of performance.
5. Power Supply: A reliable power supply is essential for stable and efficient operation. Make sure to choose a power supply unit (PSU) with the appropriate wattage and connectors to support all your components.
6. Motherboard Form Factor: Select a motherboard with the appropriate form factor, such as ATX, Micro-ATX, or Mini-ITX, that fits your desired computer case and offers the required number of expansion slots and features.
7. Connectivity: Consider the number and types of I/O ports you require for connecting peripherals, such as USB ports, audio jacks, Ethernet ports, and video outputs. Ensure the chosen motherboard has the necessary interfaces.
8. Cooling System: Adequate cooling is crucial to prevent overheating and ensure optimal performance. Choose a cooling solution that aligns with your system’s requirements, whether it’s air cooling or liquid cooling.
9. Budget and Longevity: Consider your budget and future upgrade plans. Invest in quality components that provide a balance between performance, reliability, and value for money. Ensure the chosen components are supported by the manufacturer with regular firmware updates.
Take your time to research and compare different options for each component. Check the specifications and compatibility requirements provided by the manufacturers. Utilize online resources and user reviews to gather insights and make informed decisions.
By selecting the right components, you lay the foundation for a well-performing and future-proof motherboard. Once you have chosen your components, it’s time to move on to the next step – preparing the circuit board for assembly.
Step 2: Preparing the circuit board
After choosing the right components, the next step in building your own motherboard is to prepare the circuit board for assembly. This step is crucial as it involves ensuring a clean and organized workspace and taking necessary precautions to handle the delicate PCB. Let’s dive into the details of how to prepare the circuit board:
1. Clean the workspace: Start by clearing your workspace and ensuring it is clean and free from dust or other debris. A clutter-free area will help you focus and prevent any accidental damage to the circuit board or its components.
2. Anti-static precautions: Ground yourself and take anti-static precautions to avoid damaging sensitive electronic components. Use an anti-static wristband or touch a grounded metal object before handling the circuit board.
3. Familiarize yourself with the circuit board: Examine the circuit board carefully and familiarize yourself with its layout and features. Identify the CPU socket, RAM slots, expansion slots, power connectors, and other vital components and connectors.
4. Inspect the circuit board: Carefully inspect the circuit board for any visible defects or damage. Look for any soldering issues, damaged traces, or bulging/leaking capacitors. If you notice any problems, consider getting a replacement before proceeding.
5. Read the motherboard manual: Consult the motherboard’s manual or manufacturer’s website to understand its specific layout, components, and any special instructions or precautions to be followed during assembly.
6. Set up a safe working area: Use an anti-static mat or surface to place the circuit board on, ensuring it is protected from accidental electrostatic discharge. This further minimizes the risk of damaging components due to static electricity.
7. Prepare the necessary tools: Gather the tools you will need for the assembly process, including a soldering iron, desoldering pump (if needed), solder, flux, and any specialized tools mentioned in the motherboard manual.
8. Review the documentation: Take the time to read through any assembly instructions or documentation provided by the manufacturer. Familiarize yourself with any specific requirements related to soldering techniques or component placement.
By preparing the circuit board and setting up a safe working environment, you are one step closer to building your own motherboard. Taking the time to ensure a clean and organized workspace, understanding the layout of the board, and following proper precautions will contribute to a smooth and successful assembly process.
Now that the circuit board is ready, we can proceed to the next step – soldering the components. This is where the exciting part of building your own custom motherboard truly begins!
Step 3: Soldering the components
Once you have prepared the circuit board, it’s time to move on to the next critical step in building your own motherboard – soldering the components. Soldering involves creating strong and reliable electrical connections between the various components and the circuit board. Here’s a guide on how to approach soldering:
1. Familiarize yourself with the soldering process: If you are new to soldering, take the time to familiarize yourself with the process. Understand the basic principles of soldering, such as heating the joint, applying solder, and achieving a clean and solid connection.
2. Gather the necessary tools and materials: Ensure you have all the required soldering tools and materials, including a soldering iron, solder, flux, desoldering pump (in case of mistakes), and a soldering stand. Use a soldering iron with an appropriate wattage for your specific components and follow safety precautions.
3. Begin with the smaller components: Start by soldering the smaller components first, such as resistors, capacitors, and diodes. These components are usually surface-mounted and require precise placement and soldering techniques. Refer to the motherboard manual or documentation for specific instructions regarding component placement.
4. Apply flux: Before soldering, apply a small amount of flux onto the joints. Flux helps to improve solder flow and creates a cleaner and more reliable electrical connection. Use flux sparingly, as excess flux can cause residue build-up and compromise the functionality of the motherboard.
5. Heat the joint and apply solder: Heat the joint using the soldering iron until it reaches the melting point of the solder. Once the joint is heated, gently touch the solder wire to the joint, allowing it to flow and create a solid connection. Avoid excessive solder or overheating, as this can lead to solder bridges or damage to the component or circuit board.
6. Inspect and clean solder joints: After soldering each component, visually inspect the joints for proper connection and any signs of poor soldering, such as cold joints or solder blobs. Use a magnifying glass if needed to ensure high-quality connections. Remove any excess solder or flux residue using a clean soldering iron tip and desoldering pump if required.
7. Proceed to larger components: Once the smaller components are soldered and inspected, move on to larger components like IC chips and connectors. These components require additional care during placement and soldering. Ensure proper alignment and follow the manufacturer’s guidelines for soldering large components.
8. Take your time and practice: Soldering can be a skill that improves with practice. Take your time and focus on each individual component to ensure accurate positioning and optimal soldering. If you make a mistake, use a desoldering pump to remove excess solder and start again.
By following proper soldering techniques and taking the time to ensure quality connections, you will create a solid foundation for your custom-built motherboard. Remember to double-check your solder joints and inspect for any errors before moving to the next step.
In the next step, we will explore how to test the connections and ensure the functionality of your custom-built motherboard.
Step 4: Testing the connections
After soldering the components onto the circuit board, it is crucial to test the connections to ensure that everything is in proper working order. This step is essential to avoid any potential issues and to confirm the functionality of your custom-built motherboard. Here are the steps to test the connections:
1. Visual inspection: Begin by visually inspecting the solder joints and components on the circuit board. Check for any visible soldering defects, such as cold joints, solder bridges, or incomplete connections. Ensure that all components are securely soldered onto the board.
2. Test power connections: Connect the power supply to the appropriate connectors on the motherboard. Ensure that all power connections, such as the main ATX power connector and the CPU power connector, are properly seated and provide a secure connection. Double-check the orientation of each connector to avoid any potential damage.
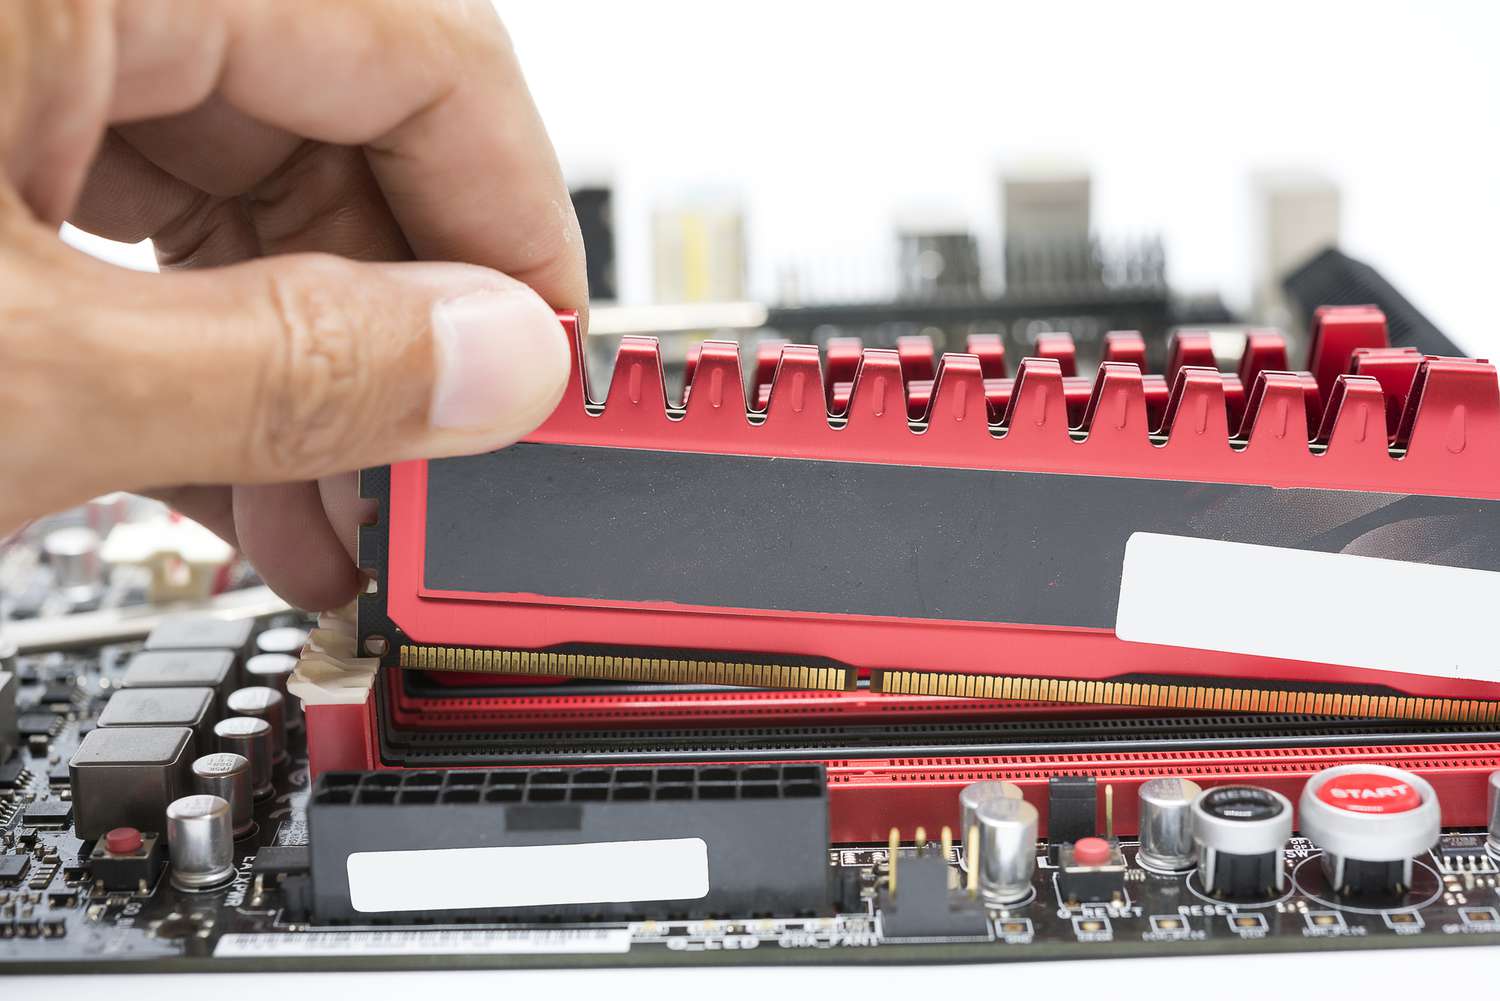
3. Test memory slots: Install the RAM modules into the appropriate memory slots on the motherboard. Ensure that they are seated correctly and securely. Some motherboards may have a specific order or configuration requirement for memory installation, so consult the motherboard manual for guidance.
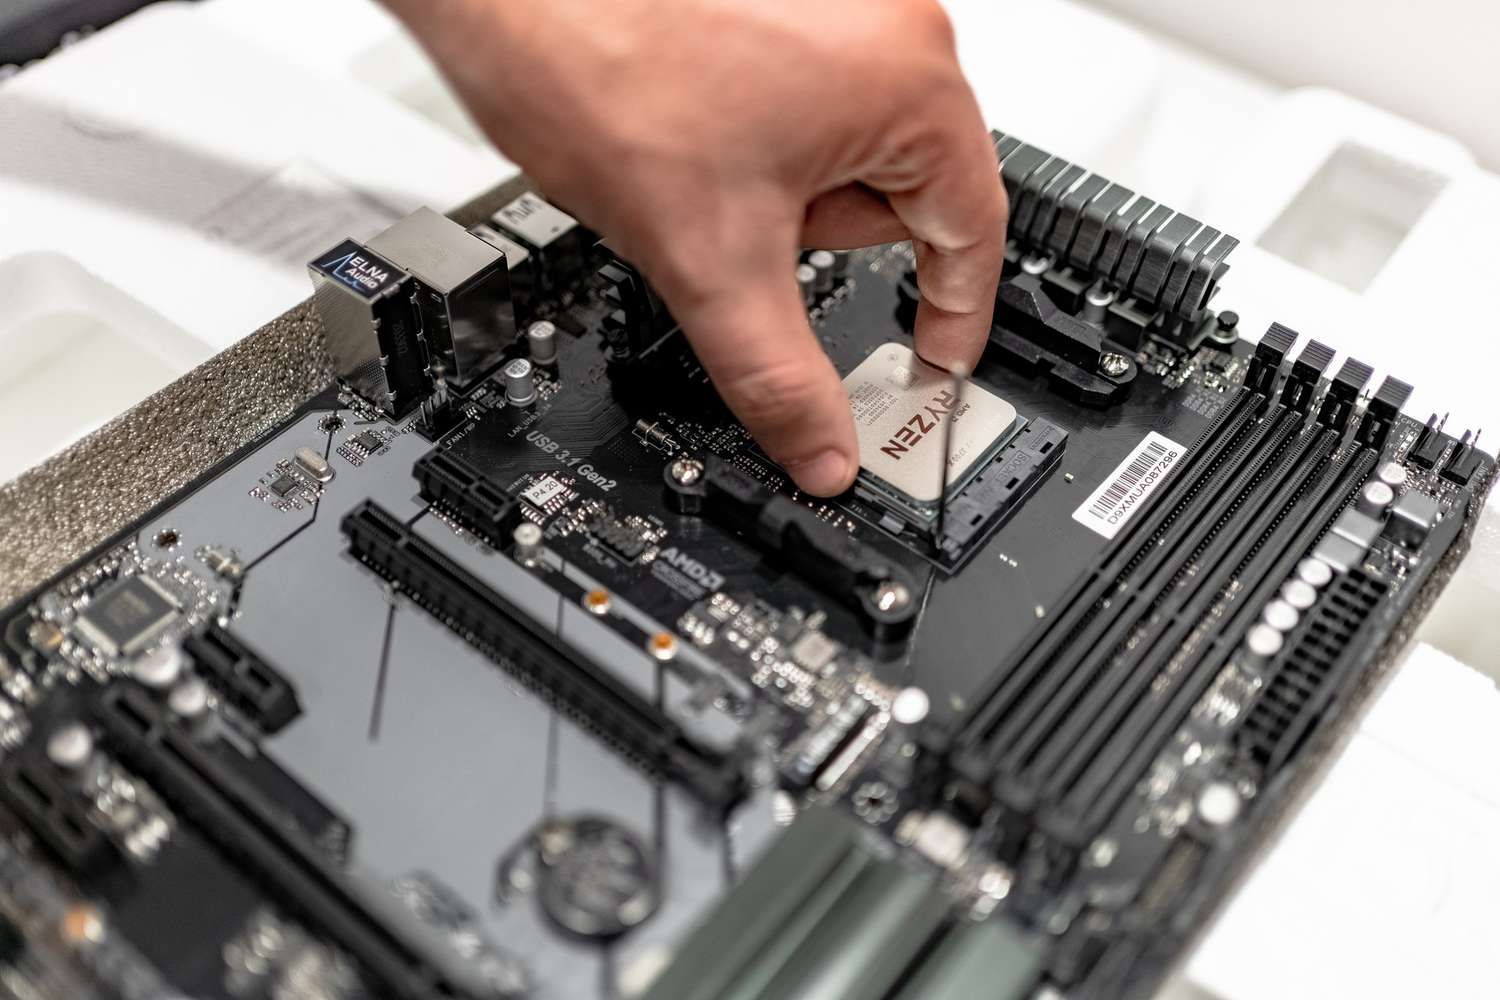
4. CPU installation: Install the CPU into the CPU socket as per the manufacturer’s instructions. Ensure that the CPU is aligned correctly and that any necessary locking mechanisms are engaged. Take care not to apply excessive force while installing the CPU.
5. External connections: Connect external peripherals, such as a monitor, keyboard, and mouse, to their respective ports on the motherboard. This will allow you to test the functionality of these connections and ensure that they are working properly.
6. Power on and enter BIOS/UEFI: Power on the system and watch for any error messages or unusual behavior during the boot process. Enter the BIOS/UEFI by pressing the designated key (usually Del, F2, or F10) during startup. Verify that all connected components, such as the CPU, RAM, and storage devices, are recognized and detected properly by the BIOS/UEFI.
7. Running diagnostic tests: Use diagnostic software or built-in motherboard utilities to perform comprehensive tests on the system’s components. This will help identify any potential issues such as faulty RAM, CPU, or storage devices. Consult the motherboard manual for specific instructions on performing diagnostic tests.
8. Monitor system temperature: Keep an eye on the system temperature while running diagnostic tests or performing intensive tasks. Ensure that the cooling system is functioning correctly and that the temperature levels are within acceptable limits.
By meticulously testing the connections and verifying the functionality of the components on your custom-built motherboard, you can spot any issues early on and take appropriate measures to rectify them. This step ensures a stable and reliable system for your computer build.
If any issues arise during testing, consult the motherboard manual, manufacturer resources, or professional assistance to troubleshoot and resolve them accordingly. Once you are satisfied that everything is functioning as intended, you can proceed to the next step – installing the motherboard into a computer case.
Step 5: Applying power and testing functionality
Once you have tested the connections on your custom-built motherboard, it’s time to apply power and put the motherboard to the ultimate test. This step involves ensuring that the motherboard functions correctly and that all the components work together seamlessly. Follow these steps to apply power and test the functionality of your motherboard:
1. Connect the power supply: Ensure that the power supply unit (PSU) is properly connected to the motherboard. Attach the necessary power cables to the appropriate connectors, including the ATX power connector and the CPU power connector. Double-check the connections to ensure a secure fit.
2. Power on the system: Press the power button on your computer case to turn on the system. Listen for any audible sounds such as fans spinning or beeps, which can indicate that the system is booting up properly. Monitor the lights and indicators on the motherboard and other components to ensure they are functioning as intended.
3. Check startup screen and BIOS: As the system boots up, pay attention to the startup screen. Ensure that the BIOS (Basic Input/Output System) or UEFI (Unified Extensible Firmware Interface) screen appears and that there are no error messages or unusual behavior. Take note of any prompts or options that may require your input.
4. Test hardware functionality: Once the system has powered on and entered the BIOS/UEFI, test the functionality of each hardware component. Verify that the CPU temperature is within acceptable limits and that all the fans are spinning properly. Check if the RAM capacity and speed are detected accurately. Test the storage devices to ensure they are recognized by the system and functioning correctly.
5. Test external peripherals: Connect your monitor, keyboard, mouse, and other external devices to the appropriate ports on the motherboard. Verify that each peripheral is detected and functions correctly. Test the audio jacks and USB ports to ensure proper connectivity.
6. Perform stress tests: Use benchmarking or stress-testing software to put the system under load and evaluate its stability and performance. Run tasks that simulate heavy usage, such as gaming or rendering, to see if the system can handle the workload without any issues. Monitor the system temperature and ensure it remains within acceptable limits.
7. Troubleshoot any issues: If you encounter any problems or errors during the testing phase, refer to the motherboard’s manual or consult online resources for troubleshooting advice. Check for BIOS/UEFI firmware updates, driver updates, or other software-related solutions that can address any compatibility issues or performance concerns.
By applying power and thoroughly testing the functionality of your custom-built motherboard, you can ensure that all the components are working harmoniously. This step allows you to address any potential hardware or software issues before moving forward with the final step of installing the motherboard into a computer case.
If any issues persist or if you need further assistance, do not hesitate to seek professional help or consult the manufacturer’s support resources. It’s better to address any concerns at this stage to ensure a stable and reliable system for your computer build.
Step 6: Installing the motherboard in a computer case
After thoroughly testing the functionality of your custom-built motherboard, it’s time to move on to the final step – installing the motherboard into a computer case. This step involves carefully securing the motherboard in its designated place within the case and connecting the necessary cables. Follow these steps to ensure a proper installation:
1. Choose a suitable computer case: Select a computer case that is compatible with your motherboard’s form factor. Ensure that it has sufficient space, mounting holes, and cable management options to accommodate the motherboard and other components.
2. Prepare the computer case: Remove the side panel(s) of the computer case to access the interior. Clean the case to remove any dust or debris that may have accumulated.
3. Install standoffs: Locate the mounting holes in the computer case that correspond with the motherboard’s mounting points. Install standoffs in these holes to elevate the motherboard and prevent it from touching the metal surface of the case directly. Ensure that the standoffs align with the mounting holes on the motherboard.
4. Carefully position the motherboard: Gently place the motherboard onto the standoffs, ensuring that the I/O ports align correctly with the corresponding openings on the back of the case. Press the motherboard down firmly to ensure a secure fit.
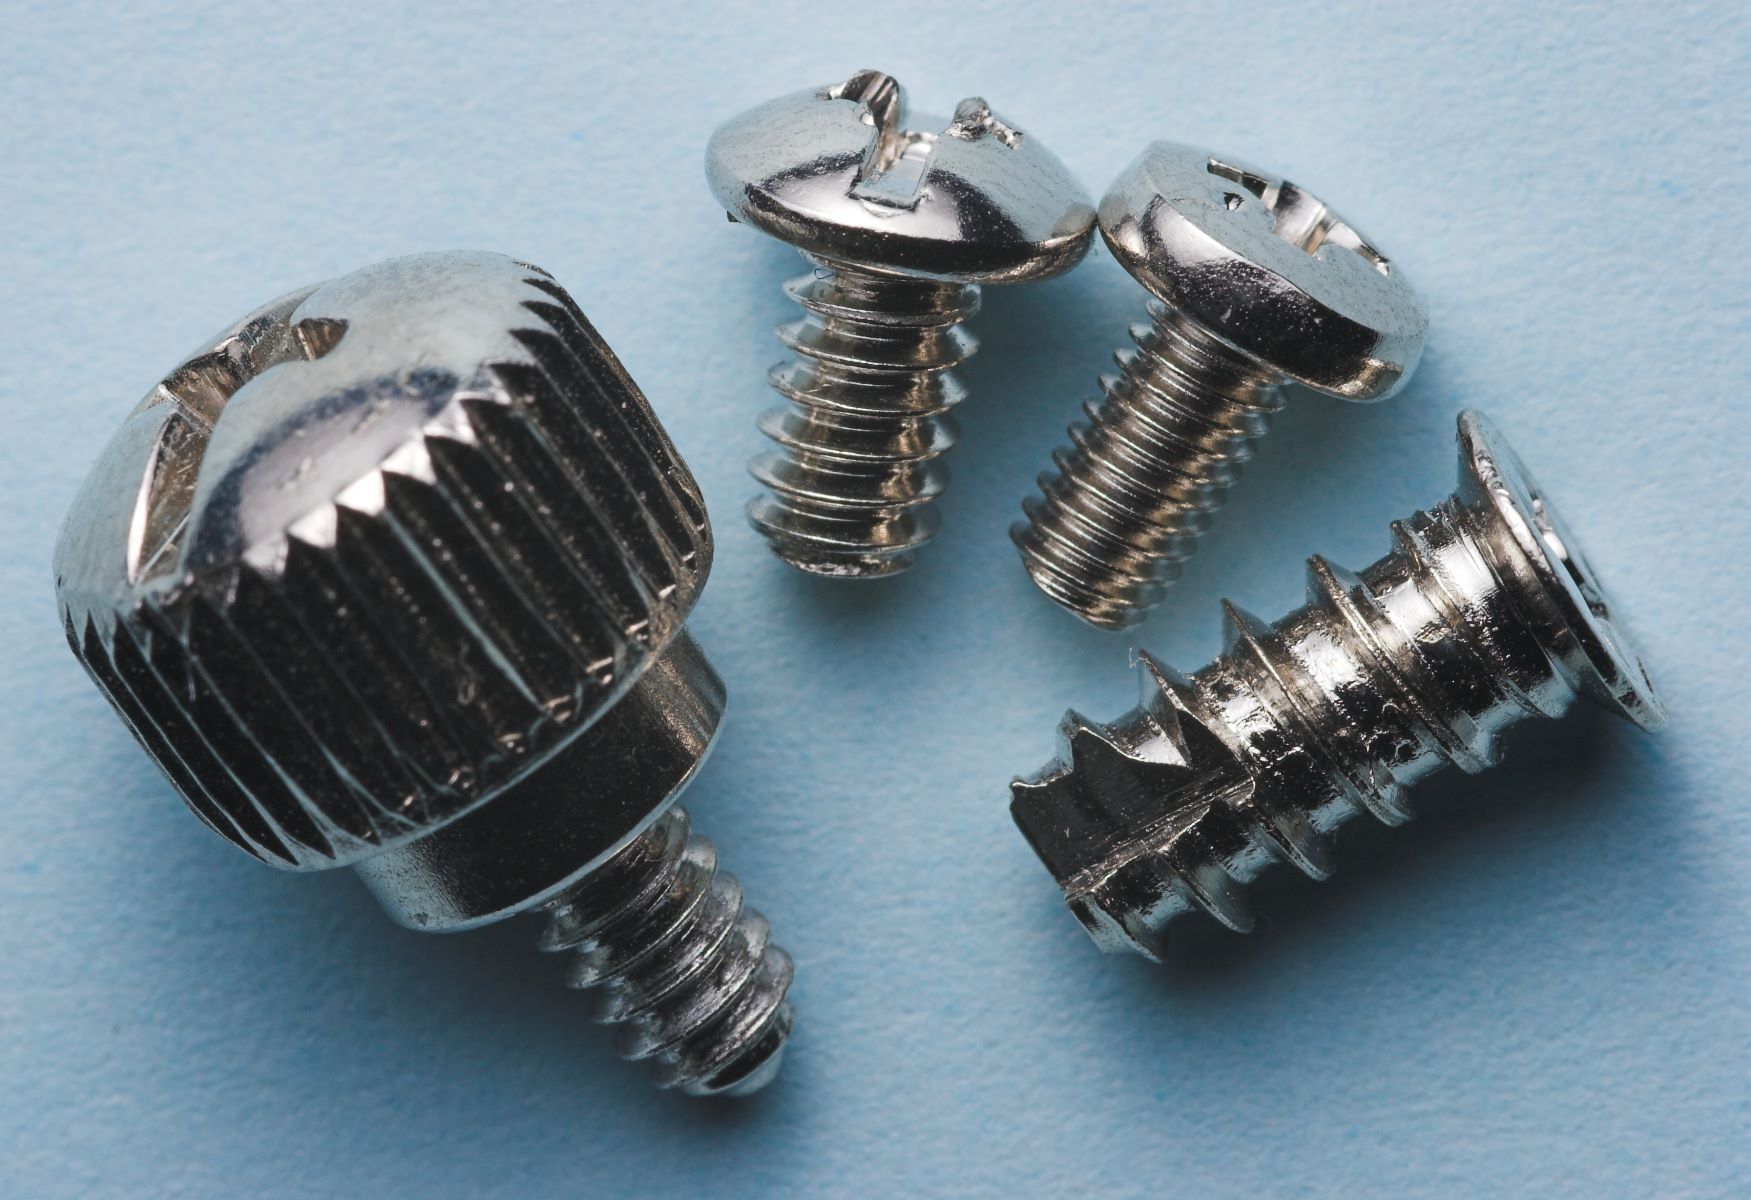
5. Attach the motherboard to the case: Use screws to secure the motherboard to the standoffs. Start with one screw in each corner of the motherboard and then proceed to secure the remaining screws. Ensure that the motherboard is securely fastened but avoid overtightening the screws, which can damage the motherboard or strip the threads.
6. Connect internal cables: Depending on your configuration and the peripherals you have, connect the necessary internal cables. These may include the power cables from the power supply, SATA cables for storage devices, front panel connectors, and any other required cables according to the motherboard and case instructions.
7. Organize cables and ensure proper airflow: Arrange the cables neatly and use cable management options provided by the case to ensure good airflow and an organized appearance. Avoid obstructing airflow or placing excessive strain on cables or connectors.
8. Reattach the case panels: Once all connections are made and the cables are organized, reattach the side panel(s) of the computer case. Ensure that the panel(s) are securely fastened and that there are no loose cables or objects touching the motherboard that could potentially cause damage.
By correctly installing the motherboard in the computer case, you ensure optimal performance, stability, and proper functionality of your custom-built computer system. A secure and well-organized installation contributes to better airflow, reduced cable clutter, and easier maintenance and upgrades in the future.
With the motherboard successfully installed, you can now move on to installing the remaining components, such as the CPU cooler, RAM, graphics card, and storage devices. Finally, connect the necessary cables and power on your system to enjoy the fruits of your labor.
Conclusion
Congratulations on completing the journey of building your own motherboard! By following the step-by-step process outlined in this guide, you have gained valuable knowledge and gained the satisfaction of creating a custom-built motherboard tailored to your specific needs and preferences.
Throughout this process, we explored the essential steps involved in building a motherboard, starting from choosing the right components to testing the functionality and installing it in a computer case. Each step provided valuable insights and guidance to ensure a successful build.
Building your own motherboard allows you to have greater control over your computer system, whether it’s for gaming, professional work, or any other specific requirements. It also offers the flexibility to upgrade and customize your system based on future needs.
However, it’s important to note that building a motherboard from scratch is an advanced project that requires a good understanding of electronics, soldering skills, and attention to detail. If you’re a beginner or unfamiliar with these aspects, it’s recommended to start with smaller projects and gain experience before attempting such a complex task.
Remember to consult the motherboard manual and other manufacturer resources for specific instructions and guidelines that apply to your particular motherboard model. This ensures that you follow the recommended practices and avoid any potential pitfalls.
Building a motherboard is not only a technical endeavor but also a rewarding experience that allows you to delve into the intricacies of computer hardware. It provides a deeper understanding of how the different components come together and work in harmony to create a functioning computer system.
As technology continues to advance, motherboards will evolve with new features, connectivity options, and performance capabilities. Stay updated with the latest trends and developments in motherboard technology to ensure you stay ahead in the ever-changing world of computing.
Now that you have completed your custom-built motherboard, you’re ready to embark on the exciting journey of exploring the possibilities and maximizing the potential of your personalized computer system. Enjoy the fruits of your labor and the satisfaction of owning a truly unique and powerful machine!