Introduction
Welcome to the world of computer hardware! If you’ve recently purchased new RAM modules for your computer, you might be wondering where exactly to install them. The placement of RAM in the correct slots on your motherboard is crucial for optimal performance. In this article, we will explore the basics of RAM slots and help answer the all-important question: “Which slots do I put my RAM in?
RAM, short for Random Access Memory, is an essential component of any computer system. It acts as temporary storage that allows the processor to access data quickly, providing fast and efficient computing capabilities. Without enough RAM, your computer may experience slowdowns and struggle to handle multiple tasks or run intensive applications such as video editing software or games.
Understanding how RAM slots work is vital to ensure that your modules are installed correctly. Most motherboards have multiple RAM slots, typically two or four, although this can vary depending on the specific motherboard model. These slots are usually labeled and color-coded, making it easier to determine the correct placement.
Before delving into the specific slot placement, it’s essential to understand the concept of single-channel and dual-channel memory. Single-channel memory configuration utilizes one memory module, while dual-channel memory takes advantage of two identical modules working together to increase bandwidth and improve performance. Knowing which memory configuration your motherboard supports is crucial for maximizing your system’s capabilities.
Now that we have covered the basics of RAM and the significance of RAM slots, let’s dive deeper into the topic. In the next sections, we will discuss the various factors to consider when determining which slots to place your RAM modules in. We will explore guidelines from motherboard documentation, differences in motherboard types, and common RAM slot layouts. We will also address any troubleshooting issues that may arise during the installation process.
What is RAM?
RAM, or Random Access Memory, is a vital component of any computing system. It serves as temporary storage for data that the processor needs to access quickly. Unlike the long-term storage provided by a hard drive or solid-state drive (SSD), RAM allows for fast and random access to data, enabling efficient and speedy computing.
RAM plays a crucial role in multitasking and running memory-intensive applications. When you open a program or file, it gets loaded into RAM, allowing the processor to quickly access and manipulate the data. The more RAM you have, the more programs and data your computer can handle simultaneously without experiencing a performance hit.
RAM is measured in gigabytes (GB) and is available in various speeds, such as DDR4 or DDR3. The speed of the RAM determines how quickly data can be read from or written to the memory module. It is essential to note that the speed of RAM is limited by the motherboard’s capabilities. Using higher-speed RAM on a motherboard that only supports lower speeds will result in the RAM running at the motherboard’s maximum supported speed.
RAM is a volatile form of memory, which means that its data is lost when the computer is turned off. It is essential to save your work regularly to a non-volatile storage device, such as a hard drive or SSD, to prevent data loss.
When choosing RAM for your system, it is essential to consider factors such as the type of RAM supported by your motherboard and the amount of RAM required by your operating system and applications. Most modern operating systems and applications recommend a minimum amount of RAM for optimal performance. However, adding more RAM than the minimum requirements can provide additional headroom for multitasking and running memory-hungry applications.
In summary, RAM is the temporary storage that allows the processor to quickly access and manipulate data. It is crucial for multitasking, running memory-intensive applications, and ensuring smooth system performance. By understanding the role and importance of RAM, you can make informed decisions when upgrading or configuring your system for optimal performance.
Why is RAM important?
RAM, or Random Access Memory, is a vital component of a computer system and plays a significant role in its overall performance. There are several reasons why RAM is crucial for a smooth and efficient computing experience.
Firstly, RAM affects the system’s ability to multitask. When you run multiple programs simultaneously, each program requires a portion of RAM to store its data. The more RAM you have, the more programs you can run simultaneously without experiencing a slowdown in performance. Insufficient RAM can lead to sluggishness, as the system may need to constantly swap data between RAM and the slower hard drive, causing delays and reducing overall efficiency.
Secondly, RAM is essential for running memory-intensive applications. Programs such as video editing software, computer-aided design (CAD) applications, and virtualization software require a considerable amount of RAM to handle the large data sets and complex calculations involved. Insufficient RAM in these scenarios can result in slow rendering, choppy playback, and crashes. Allocating more RAM to these applications improves their performance and prevents bottlenecks.
Furthermore, RAM plays a crucial role in gaming. Modern games require a significant amount of RAM to load assets, textures, and game world data. Inadequate RAM can result in longer loading times, stuttering gameplay, and reduced graphics performance. Gaming enthusiasts often opt for higher amounts of RAM to ensure a smooth gaming experience, especially when playing graphics-intensive titles.
RAM also has a significant impact on web browsing. With the proliferation of multimedia-rich websites and browser extensions, having sufficient RAM ensures smooth browsing performance. Each open tab and active extension consumes some amount of RAM, and insufficient RAM can lead to slow page loading, unresponsive tabs, and overall sluggish browsing experience.
In addition to these performance benefits, having ample RAM can also enhance productivity. When you have more RAM, you can open and switch between applications faster, making multitasking smoother and more efficient. It allows for quicker data access and manipulation, reducing waiting times and boosting overall productivity.
In summary, RAM is essential for multitasking, running memory-intensive applications, gaming, and smooth web browsing. It directly impacts a computer’s performance and can significantly enhance productivity. Upgrading or maximizing your RAM can provide a noticeable improvement in system responsiveness and overall user experience.
Understanding RAM slots
RAM slots, also known as memory slots, are where you install your RAM modules on the motherboard. These slots provide the physical connection between the RAM modules and the rest of the computer system. Understanding how RAM slots work is essential for correctly installing and configuring your RAM.
Most motherboards have multiple RAM slots, typically two or four, although some high-end and server motherboards may have more. The number of RAM slots can vary depending on the specific motherboard model and the form factor of the motherboard, such as ATX or microATX.
RAM slots are usually labeled and color-coded to assist with installation. Each slot is typically marked with a number or a letter, such as DIMM1, DIMM2, or A1, A2, B1, B2. The labeling helps identify the slots, especially in situations where there are different capacities or speeds of RAM being installed.
It is essential to understand the concept of single-channel and dual-channel memory when installing RAM modules. Single-channel memory configuration uses just one memory module, while dual-channel memory configuration requires two identical modules installed in specific slots. Dual-channel memory boosts memory performance by allowing the modules to work together and increase memory bandwidth. Consult your motherboard’s documentation to determine the specifics of dual-channel memory configuration and the recommended slot placement.
When installing RAM modules, it is crucial to match the module to the correct type of slot. Most modern motherboards use DDR4 memory, but older systems may use DDR3 or even DDR2. DDR4 modules are not compatible with DDR3 or DDR2 slots, and vice versa. Placing the wrong type of RAM in a slot can lead to compatibility issues or not being recognized by the system.
The location of the RAM slots on a motherboard can vary depending on the motherboard’s layout and form factor. For example, ATX motherboards generally have the RAM slots arranged in a line or a simple pattern, while microATX and Mini-ITX motherboards may have a more compact layout that places the slots closer together. Larger motherboards often have the RAM slots closer to the CPU socket, while smaller motherboards may have them towards the board’s edge.
In summary, RAM slots are where you install your RAM modules on the motherboard. Understanding the number and labeling of RAM slots, as well as the concept of single-channel and dual-channel memory, is essential for proper installation and configuration of your RAM. Consulting the motherboard’s documentation and following any manufacturer’s recommendations will ensure that your RAM is installed correctly for optimal system performance.
Single-channel vs. dual-channel memory
When it comes to memory performance, understanding the difference between single-channel and dual-channel memory is important. The configuration you choose can have a significant impact on your computer’s overall performance, especially when it comes to tasks that require high memory bandwidth.
In a single-channel memory configuration, the RAM modules are installed in any available RAM slots without regard to their placement. This means that each RAM module is accessed independently by the system’s memory controller. Single-channel memory configuration is the simplest and most common setup, and it is suitable for normal day-to-day computing tasks.
In contrast, dual-channel memory configuration requires the installation of two identical RAM modules in specific slots on the motherboard. These slots are typically color-coded or labeled to indicate their pairing for dual-channel operation. The purpose of dual-channel memory is to increase the memory bandwidth by allowing the modules to work together, resulting in improved performance for memory-intensive tasks.
Dual-channel memory configuration doubles the data transfer rate between the RAM modules and the memory controller. This occurs because the memory controller can access data simultaneously from both modules, effectively doubling the memory bandwidth. Dual-channel memory is particularly beneficial for tasks that involve large data transfers, such as multimedia editing, 3D rendering, and gaming.
To configure dual-channel memory, you need to install the RAM modules in specific slots. The exact configuration may vary depending on the motherboard, so it’s essential to consult the motherboard’s documentation or refer to the manufacturer’s recommendations. In most cases, the paired slots are labeled with matching colors or numbers, such as DIMM A1 and DIMM B1. Installing the modules in the correct slots ensures that the system recognizes and utilizes the dual-channel configuration.
It is important to note that for dual-channel memory to work effectively, both RAM modules must be identical in terms of capacity, speed, and timings. Mismatched modules may result in compatibility issues or prevent the system from running in dual-channel mode. It is recommended to purchase a dual-channel memory kit that contains two identical RAM modules to ensure compatibility and optimal performance.
In summary, single-channel memory provides a straightforward and common configuration for RAM installation. Dual-channel memory, on the other hand, offers improved memory bandwidth and performance by utilizing two identical modules installed in specific slots. Dual-channel memory is advantageous for memory-intensive tasks that require higher data transfer rates. Understanding the differences between single-channel and dual-channel memory can help you make informed decisions when configuring your computer’s memory for optimal performance.
Which slots do I put my RAM in?
When it comes to installing your RAM modules, the placement of the modules in the correct slots is essential for optimal performance. The specific slots to use can vary depending on factors such as the motherboard’s design, the number of RAM slots available, and whether you are configuring single-channel or dual-channel memory.
The first step is to consult the motherboard’s documentation or check the manufacturer’s recommendations to determine the recommended slot configuration. The documentation will provide clear instructions on which slots to use for single-channel or dual-channel memory setups.
In a single-channel memory configuration, you can install your RAM modules in any of the available RAM slots. This is the simplest setup, and as long as the modules are compatible and properly installed, the system will recognize and utilize the installed RAM.
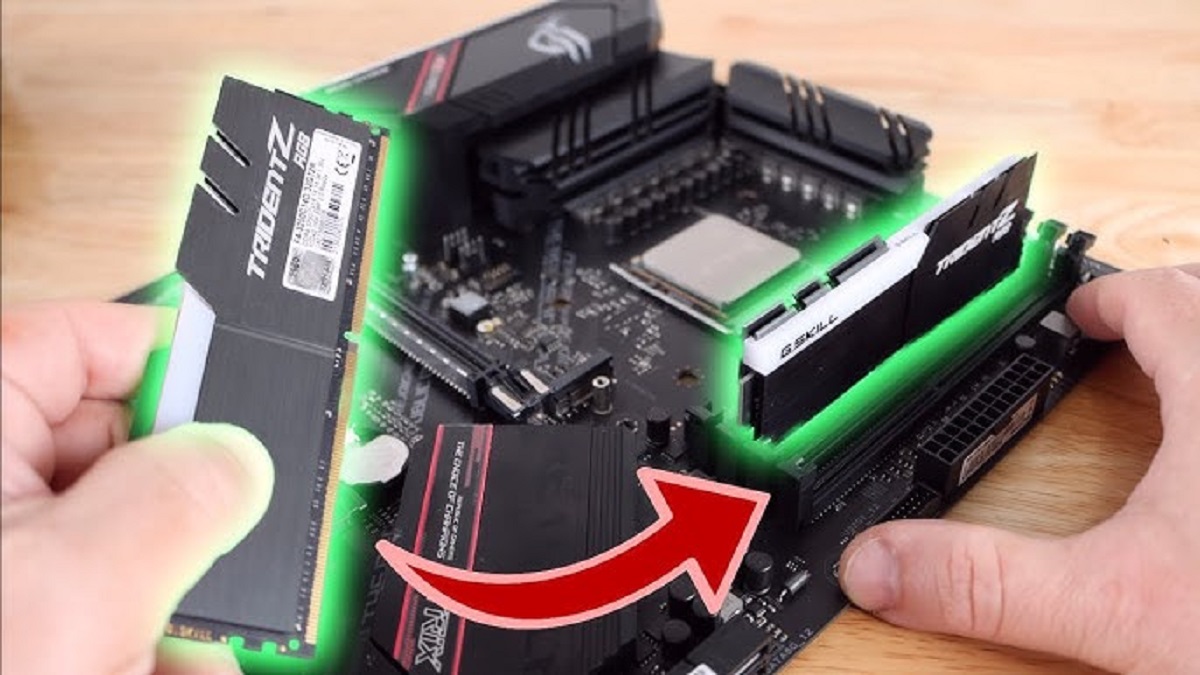
For a dual-channel memory configuration, you need to install two identical RAM modules in specific slots. These slots are usually color-coded or labeled to indicate their pairing for dual-channel operation. The motherboard’s documentation will specify which slots to use, such as DIMM A1 and DIMM B1 or similar designations. Installing the RAM modules in the correct slots ensures that the system recognizes and enables the dual-channel configuration, providing improved memory performance.
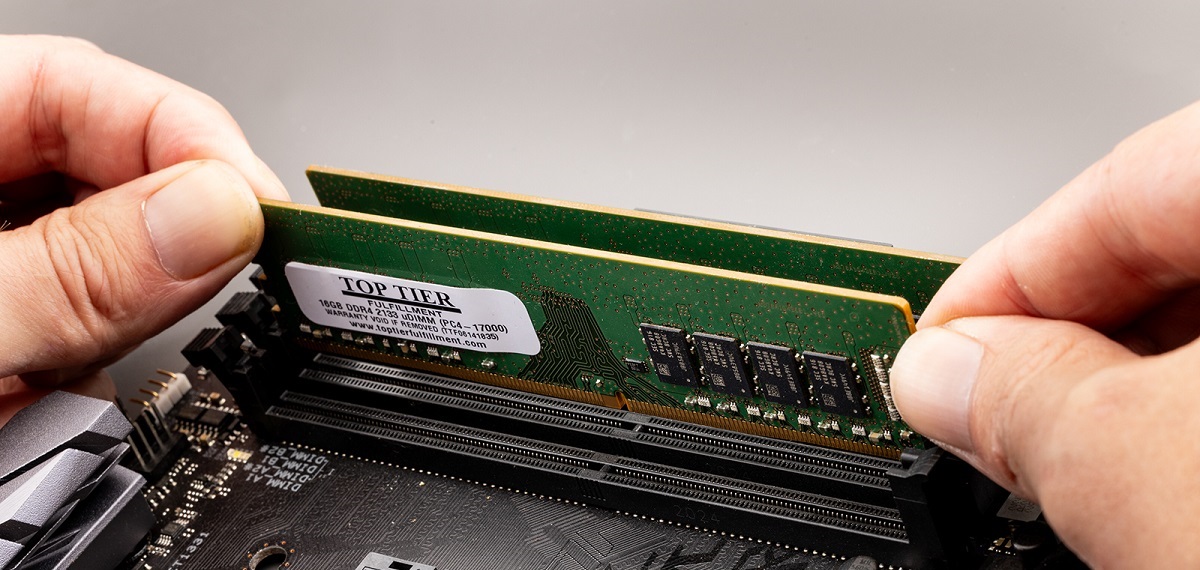
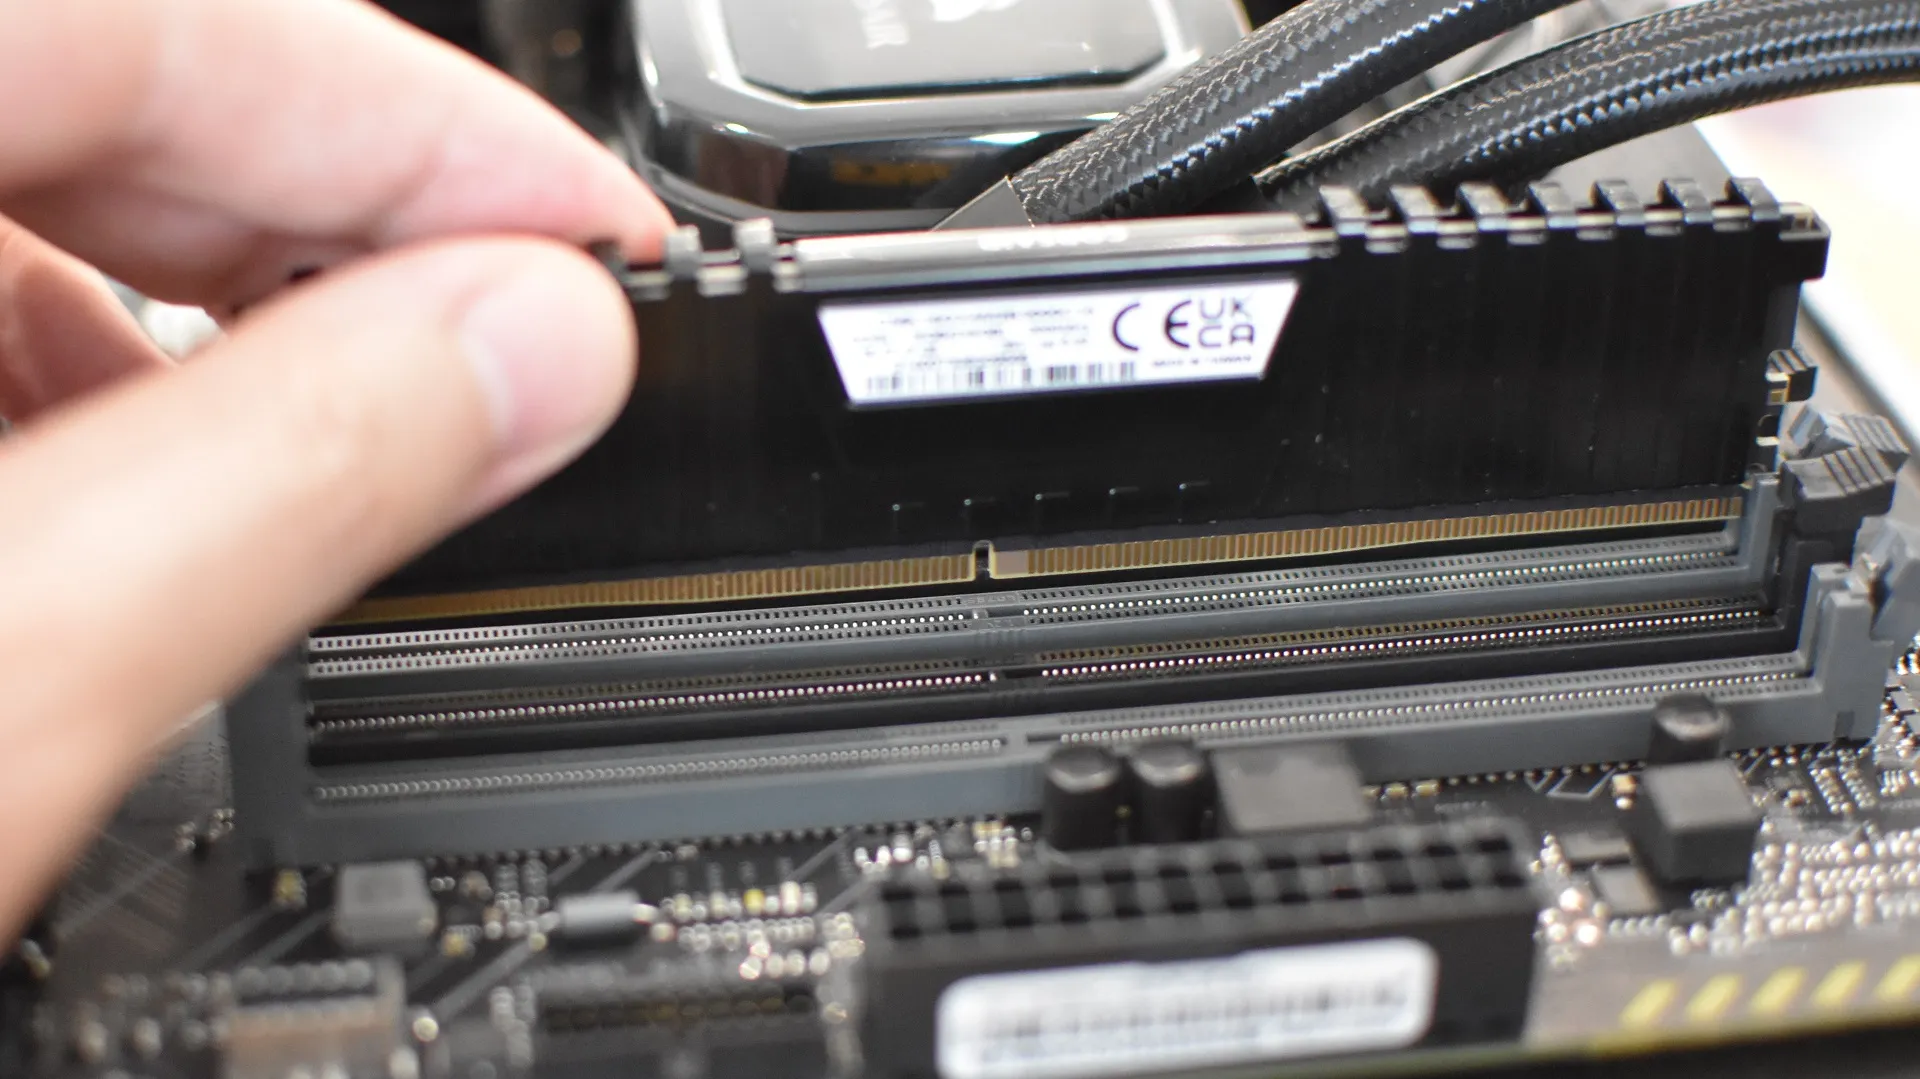
It’s crucial to ensure that the RAM modules are seated properly in the slots. Align the notch on the module with the corresponding ridge in the slot and firmly press down until the module clicks into place. The clips on the sides of the slot should automatically secure the module in place.
Moreover, when installing multiple RAM modules, make sure that they are identical in terms of capacity, speed, and timings. Mismatched modules may result in compatibility issues or prevent the system from running in dual-channel mode. Purchasing a dual-channel memory kit that contains two identical RAM modules is the recommended approach to ensure compatibility and optimal performance.
It’s important to note that if you’re adding RAM to an existing setup, it’s generally advised to install the new RAM modules in empty slots rather than removing existing modules. This helps avoid any potential compatibility issues or disruptions to the system’s current memory configuration.
In summary, the specific slots to place your RAM modules depend on factors such as the motherboard’s design, the number of RAM slots available, and whether you’re configuring single-channel or dual-channel memory. Referring to the motherboard’s documentation or manufacturer’s recommendations is essential for determining the correct slot placement. Whether you’re setting up single-channel or dual-channel memory, ensuring identical RAM modules and proper seating in the slots will help maximize your system’s memory performance.
Motherboard documentation and manufacturer’s recommendations
When it comes to determining the specific slots to install your RAM modules, the motherboard’s documentation and manufacturer’s recommendations are valuable resources. They provide the necessary guidelines and instructions for optimal RAM configuration and ensure compatibility with your system.
The first step is to consult the motherboard’s documentation, which typically comes in the form of a user manual or an online guide. The documentation will provide detailed information about the motherboard’s features, specifications, and recommended RAM configurations. It will indicate the number of RAM slots available, the supported RAM types (such as DDR4 or DDR3), and the maximum memory capacity the motherboard can handle.
The motherboard’s documentation will also specify the recommended slot placement for single-channel and dual-channel memory configurations. It will often use labels such as DIMM A1, DIMM A2, DIMM B1, DIMM B2, or similar designations to indicate the pairing of slots for dual-channel operation. Following these recommendations will ensure that the system recognizes and optimizes the RAM modules’ performance.
In addition to the motherboard’s documentation, it is beneficial to check the manufacturer’s website for any updated information or FAQs related to RAM installation. With technology constantly evolving, manufacturers may release firmware updates or provide specific recommendations for compatibility and performance optimizations.
Some motherboard manufacturers also offer specialized software utilities that can aid in RAM installation and configuration. These utilities can automatically detect the RAM modules and assist in identifying the optimal slot placement and configuration for maximum performance. It is worth exploring such utilities, as they can provide additional guidance and streamline the process.
When purchasing RAM modules, it is also advisable to check the manufacturer’s compatibility list, which specifies the tested and verified RAM modules that work best with a specific motherboard model. This list ensures that the RAM modules you choose are compatible and have been tested for stability and performance with your motherboard.
Following the motherboard documentation and manufacturer’s recommendations are vital for successful RAM installation. They provide the necessary information and guidelines to ensure that you choose the correct RAM modules, install them in the appropriate slots, and benefit from optimal performance and stability.
In summary, the motherboard’s documentation and the manufacturer’s recommendations provide crucial information about RAM installation and configuration. They outline the number of RAM slots, supported RAM types, maximum memory capacity, and recommended slot placement for single-channel and dual-channel memory configurations. Consulting these resources ensures compatibility, stability, and optimal performance for your RAM modules.
Differences between motherboard types (ATX, microATX, etc.)
When it comes to choosing a motherboard for your computer, there are different form factors available, including ATX (Advanced Technology eXtended), microATX (mATX), and mini-ITX. Understanding the differences between these motherboard types is essential as it affects various aspects of your system’s configuration, including the number and layout of RAM slots.
The ATX form factor is the most common and widely used motherboard type. ATX motherboards offer a larger layout with more expansion slots and ports. With their increased size, they typically feature more RAM slots, ranging from four to eight slots, allowing for greater memory expansion and flexibility. This makes ATX motherboards a popular choice for power users, gamers, and enthusiasts who require higher performance and capacity.
MicroATX (mATX) is a smaller form factor compared to ATX but still retains a good level of expandability. MicroATX motherboards are shorter in length and width, making them suitable for smaller computer cases or environments with limited space. Although microATX motherboards have a reduced physical footprint, they typically feature two to four RAM slots, allowing for ample memory capacity. These motherboards are a popular choice for budget-conscious users who require a balance of performance and compactness.
Mini-ITX is the smallest form factor among the three and is designed for ultra-compact systems. Mini-ITX motherboards are highly compact, often measuring just 6.7 x 6.7 inches. Due to their small size, mini-ITX motherboards generally feature only two RAM slots. Despite their limited expansion capabilities, mini-ITX motherboards are favored by users building small form factor (SFF) PCs or home theater systems where space is limited.
It’s important to note that the number of RAM slots on these motherboard types may vary depending on the specific model and manufacturer. While the general trend is more slots on larger form factor motherboards, there are exceptions, and some microATX motherboards may offer more RAM slots than certain ATX models.
When selecting a motherboard, it’s necessary to consider the form factor that best suits your needs. ATX motherboards provide greater expansion possibilities, including more RAM slots, while microATX and mini-ITX cater to users looking for more compact solutions. Determining the desired number of RAM slots will depend on the memory requirements of your workload and the ability to expand in the future.
In summary, the differences between motherboard types (such as ATX, microATX, and mini-ITX) lie in their size, form factor, and the number of available RAM slots. ATX motherboards generally offer the most expansion options and RAM slots, microATX provides a balance between expandability and compactness, and mini-ITX offers ultra-compact solutions. Understanding these differences is crucial when selecting a motherboard that meets your specific needs and ensures compatibility for your RAM modules.
Common RAM slot layouts
RAM slot layouts can vary depending on the motherboard model and manufacturer, but there are common slot configurations that you are likely to encounter. Understanding these common layouts can help you correctly identify and install your RAM modules.
The most straightforward RAM slot layout is found on ATX motherboards. In this layout, the RAM slots are typically arranged in a line parallel to the motherboard’s edge. The number of RAM slots can vary, with four or eight slots being common on ATX motherboards. Each slot is usually labeled or color-coded to indicate its pairing for dual-channel memory configurations.
On microATX motherboards, the RAM slots are often placed closer together due to the smaller size of the motherboard. Despite the compact layout, microATX motherboards typically provide two or four RAM slots, maintaining the capacity for adequate memory expansion.
Mini-ITX motherboards, being even smaller, offer the most compact RAM slot layouts. In most cases, you will find two RAM slots on a mini-ITX motherboard. The tight spacing between these slots is necessary to fit within the motherboard’s limited dimensions.
When it comes to the physical arrangement of the RAM slots, they are usually positioned near the CPU socket. Placing the RAM slots close to the CPU minimizes the electrical distance between the processor and the RAM modules, resulting in faster and more efficient communication.
It’s important to read the motherboard’s manual or consult the manufacturer’s documentation to determine the exact slot layout on your specific motherboard model. These resources will provide detailed diagrams and illustrations that highlight the positioning and labeling of the RAM slots.
While the physical layout of RAM slots is typically standardized based on the motherboard’s form factor, it’s still essential to confirm the specific slot configuration for your motherboard. Some motherboards may have unique layouts, particularly on specialty or enthusiast-grade models, to accommodate additional features or larger heatsinks.
It’s worth noting that as technology advances and new motherboard designs emerge, RAM slot layouts may evolve. Manufacturers may experiment with different positioning or arrangements to optimize performance, improve heat dissipation, or accommodate new features. Staying updated with the latest motherboard documentation or manufacturer’s recommendations will ensure that you are aware of any changes or specific considerations for your RAM slot layout.
In summary, common RAM slot layouts include a parallel line arrangement on ATX motherboards, a closer spacing on microATX boards, and a compact layout on mini-ITX motherboards. The number of RAM slots can vary, with four or eight slots being common on ATX motherboards, two or four on microATX motherboards, and two on mini-ITX motherboards. Checking the motherboard’s documentation or manufacturer’s recommendations is essential to determine the specific slot layout and ensure correct installation of your RAM modules.
Troubleshooting common RAM installation issues
While installing RAM modules is generally a straightforward process, there are some common issues that can occur. Understanding and troubleshooting these issues can help ensure successful RAM installation and optimal system performance.
One of the most common issues is improper seating of the RAM modules. If the modules are not inserted fully and securely into the RAM slots, they may not be recognized by the system. Make sure the modules are aligned with the slot and firmly press down until you hear a click and the retaining clips on the sides snap into place. If the modules are not seated properly, remove them, clean the contacts if necessary, and reseat them firmly. This can often resolve recognition issues.
Compatibility is another important consideration. Ensure that the RAM modules are compatible with your motherboard. Refer to the motherboard’s documentation or manufacturer’s recommendations for the supported types, speeds, and capacities of RAM. Mismatched or incompatible RAM can cause system instability or prevent the RAM from functioning properly. Double-check that the RAM modules meet the required specifications for your motherboard.
If you are experiencing system crashes or random restarts after installing new RAM, it could indicate an issue with the memory frequency or timings. Enter your computer’s BIOS/UEFI settings and check that the frequency and timings of the RAM match the specifications provided by the manufacturer. Adjusting these settings to the correct values can help restore stability and eliminate crashes. However, be cautious when changing BIOS settings, as incorrect adjustments can potentially cause further issues.
In some cases, there may be compatibility issues between different RAM modules. This can occur when mixing different brands, speeds, or generations of RAM. To avoid these issues, it is recommended to install RAM modules that are identical in terms of capacity, speed, and timings. If you are encountering compatibility issues, consider removing and testing the RAM modules individually or in different configurations to determine the problematic module or combination.
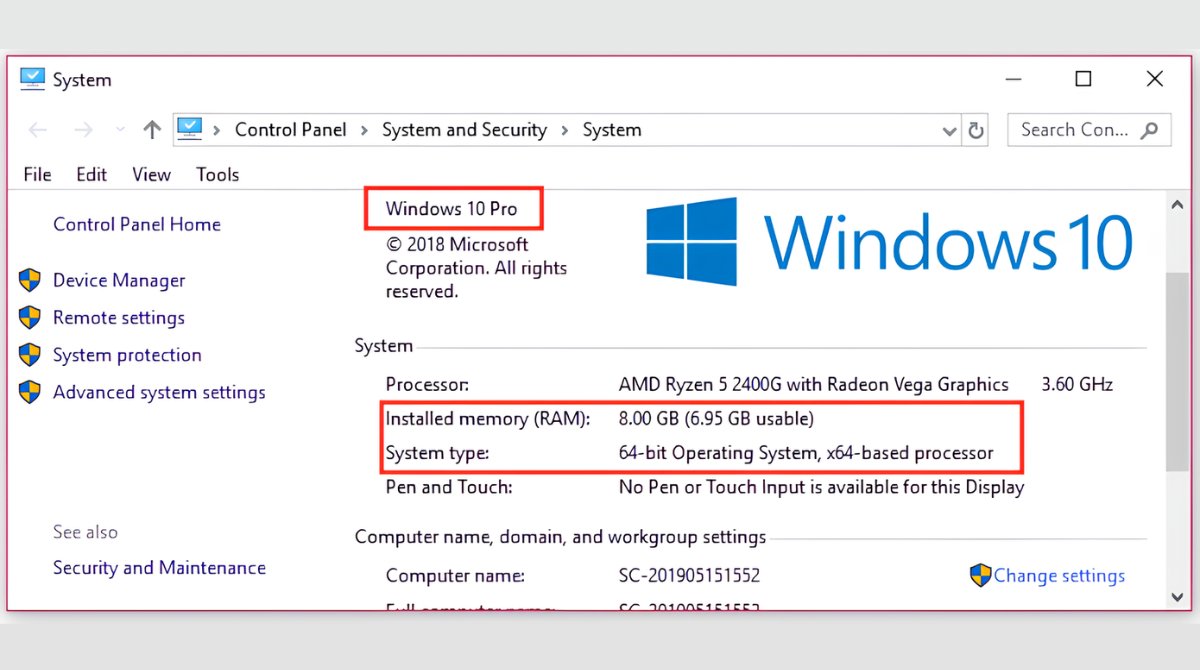
If your system is not recognizing the full capacity of the installed RAM, it could be due to a variety of reasons. Start by ensuring that your operating system is 64-bit, as a 32-bit OS has limitations on the maximum amount of RAM it can utilize. Additionally, some motherboards may have BIOS/UEFI limitations that restrict the maximum amount of RAM supported. Check the manufacturer’s documentation or website for any BIOS updates or settings that can unlock the full capacity of the RAM.
Finally, if you are unable to resolve any issues or if you suspect a defective RAM module, try testing the RAM on another system or consider contacting the manufacturer for assistance or a replacement. RAM modules can occasionally be found to be faulty, and troubleshooting steps can help identify the underlying cause.
In summary, common RAM installation issues include improper seating, compatibility problems, frequency and timing conflicts, incompatible RAM modules, and unrecognized RAM capacity. Troubleshooting these issues involves ensuring secure installation, verifying compatibility, adjusting BIOS settings, testing individual modules, and considering potential defects. By addressing these common issues, you can successfully install and configure your RAM modules for optimal system performance.
Conclusion
Installing RAM modules correctly is crucial for optimal performance and system stability. By understanding RAM slots, single-channel and dual-channel memory, and following motherboard documentation and manufacturer’s recommendations, you can ensure a successful RAM installation.
RAM plays a vital role in multitasking, running memory-intensive applications, gaming, and overall system responsiveness. It allows for quick data access and manipulation, reducing waiting times and enhancing productivity.
When deciding which slots to put your RAM in, consult the motherboard’s documentation or manufacturer’s recommendations. In single-channel memory configurations, you can install RAM modules in any available slot. For dual-channel memory, follow the specified slot pairings to enable improved memory performance.
It is important to seat the RAM modules properly in the slots, ensuring they are aligned and firmly pressed down to establish a secure connection. Checking RAM compatibility with your motherboard and adjusting settings such as frequency and timings can help prevent system crashes or instability.
Understanding the differences between motherboard types, such as ATX, microATX, and mini-ITX, helps determine the number of available RAM slots and the overall layout of the motherboard.
If you encounter any issues during RAM installation, troubleshooting steps such as reseating the modules, verifying compatibility, adjusting BIOS settings, or testing individual modules can help resolve the problem. In some cases, contacting the manufacturer for assistance or replacement may be necessary.
By following these guidelines and troubleshooting common issues, you can successfully install and configure your RAM modules, ensuring optimal performance and a smooth computing experience.