Introduction
Upgrading the RAM on your Dell Inspiron 15 5000 Series laptop can significantly improve its performance, allowing you to run more programs simultaneously and handle tasks more efficiently. Whether you’re a power user or simply want to enhance your laptop’s capabilities, this step-by-step guide will walk you through the process of upgrading the RAM.
Before diving into the process, it’s essential to understand that increasing your laptop’s RAM can breathe new life into it, especially if you frequently use resource-intensive applications like video editing software or play graphics-intensive games. With a RAM upgrade, you can experience faster multitasking, smoother performance, and fewer slowdowns.
In this guide, we will provide detailed instructions on how to upgrade the RAM on your Dell Inspiron 15 5000 Series laptop, ensuring that you have the necessary tools and knowledge to complete the process successfully. Whether you’re a seasoned techie or a novice with little technical expertise, there’s no need to worry. The steps are straightforward and can be easily followed by anyone.
Please note that while the steps outlined here are specific to the Dell Inspiron 15 5000 Series, the general process of upgrading the RAM is similar for most laptop models. However, it’s always a good idea to consult the user manual for your specific laptop or check Dell’s support website for any model-specific instructions or requirements.
Now that we have covered the basic introduction let’s move on to the first step: gathering the necessary tools and parts for the RAM upgrade.
Before You Begin
Before you start the RAM upgrade process, it’s important to take a few precautions and gather the necessary tools. Here are some important things to consider before diving in:
- Back up your data: It’s always a good practice to back up your important files and data before making any hardware changes. While the RAM upgrade process itself is unlikely to cause data loss, it’s better to be safe than sorry.
- Shut down your laptop: Ensure that your laptop is completely powered off and disconnect any power sources, such as the charger or any external devices, before starting the RAM upgrade process. This will prevent any accidental damage to your laptop or the new RAM.
- Work on a static-free surface: Static electricity can damage sensitive electronic components. To avoid this, work on a clean and static-free surface, such as an anti-static mat or a wooden table. You can also use an anti-static wrist strap to ground yourself, providing an extra layer of protection.
- Identify the type of RAM: Before purchasing the new RAM module, ensure that you know the correct type and specifications of RAM that your laptop supports. Check the laptop’s user manual or visit Dell’s support website for this information. It’s essential to match the type, speed, and capacity of the existing RAM module with the new one to ensure compatibility.
- Check the number of RAM slots: Knowing the number of available RAM slots will help you determine whether you need to replace the existing RAM module or add another one to increase the overall capacity. Most laptops have two RAM slots, but it’s always a good idea to double-check in the user manual or Dell’s support website.
By familiarizing yourself with these precautions and gathering the necessary tools, you’ll be well-prepared to proceed with the RAM upgrade process. Now that you’re ready, let’s move on to the first step: gathering the tools and parts that you’ll need for the upgrade.
Step 1: Gather the Tools and Parts
Before you begin upgrading the RAM on your Dell Inspiron 15 5000 Series laptop, make sure you have the necessary tools and parts at hand. Here’s what you’ll need for a successful RAM upgrade:
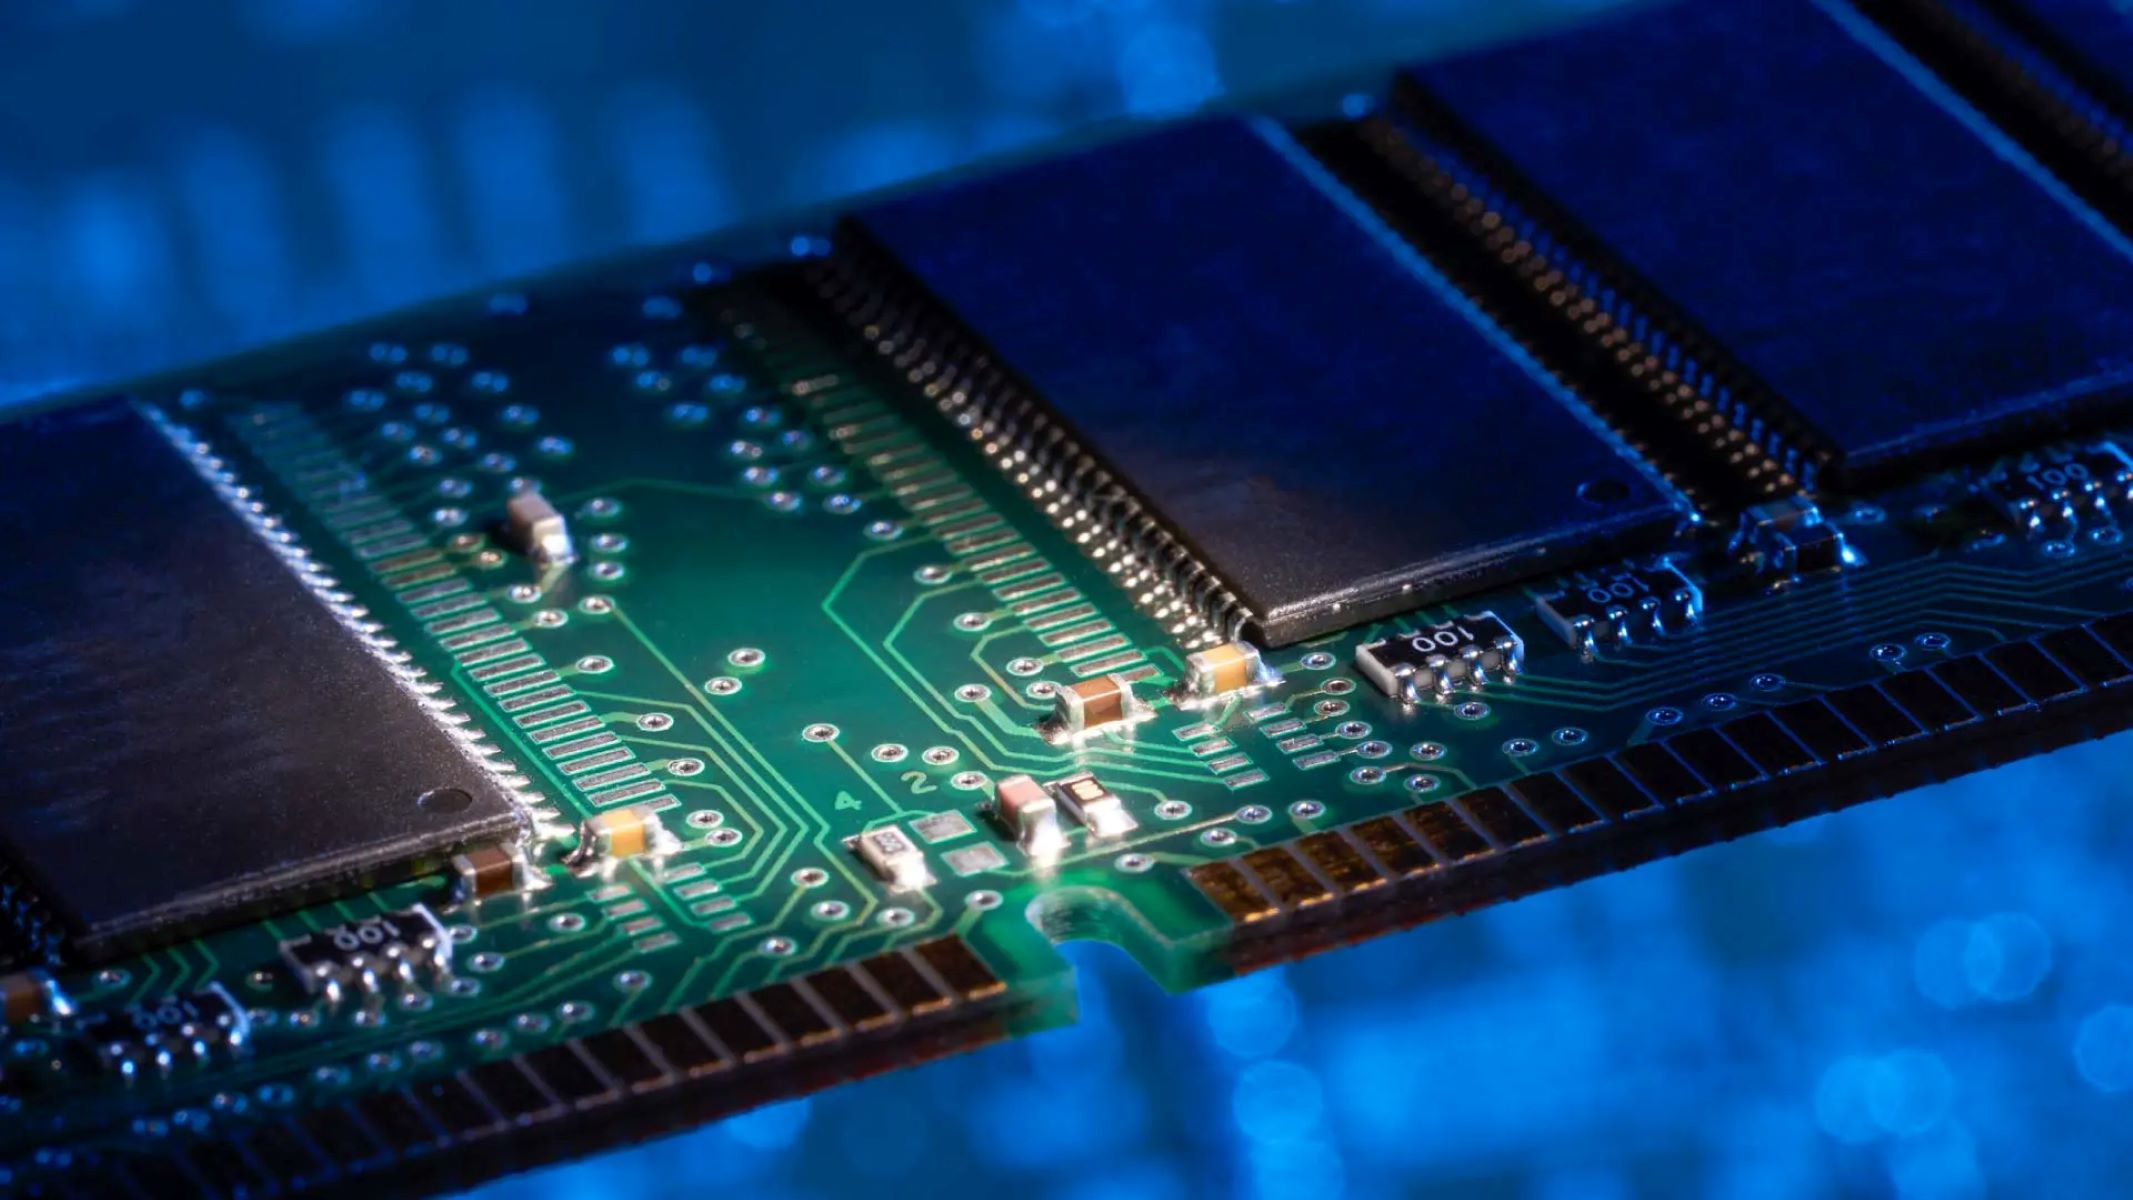
- Compatible RAM module: Purchase a RAM module that is compatible with your Dell Inspiron 15 5000 Series laptop. Check the laptop’s user manual or Dell’s support website for the specific RAM type and specifications it supports. Most laptops use DDR3 or DDR4 RAM modules.
- Screwdriver set: You’ll need a small screwdriver set (Phillips-head) to remove the screws that secure the laptop’s back cover.
- Anti-static wrist strap: While not mandatory, using an anti-static wrist strap can prevent electrostatic discharge during the installation process, protecting your laptop’s components from potential damage.
- Clean cloth or compressed air: Before installing the new RAM module, it’s a good idea to clean any dust or debris from the RAM slots using a clean, lint-free cloth or compressed air canister.
- Work surface: Choose a clean and well-lit workspace with plenty of room to spread out and keep track of small parts.
- User manual or online resources: Refer to your Dell Inspiron 15 5000 Series laptop’s user manual or visit Dell’s support website for specific instructions and diagrams related to RAM installation. This will ensure that you follow the correct steps and avoid any unnecessary risks.
Having these tools and parts ready will streamline the RAM upgrade process and ensure a smooth installation. Now that you have everything you need, let’s move on to the next step: preparing your laptop for the RAM upgrade.
Step 2: Prepare Your Laptop
Before diving into the RAM upgrade process, it’s important to prepare your Dell Inspiron 15 5000 Series laptop to ensure a successful installation. Follow these steps to get your laptop ready:
- Power off your laptop: Make sure your laptop is completely powered off and disconnect any external power sources, such as the charger or any peripherals.
- Ground yourself: To prevent any static electricity discharge that could potentially damage the internal components, it’s recommended to ground yourself. You can do this by using an anti-static wrist strap or by touching a grounded metal object before handling any internal components.
- Find a suitable workspace: Choose a clean and well-lit area to work on your laptop. Make sure you have enough space to lay out the necessary tools and components.
- Remove the back cover: Most laptops have a removable back cover that gives you access to the internal components. Consult your Dell Inspiron 15 5000 Series laptop’s user manual or check Dell’s support website for specific instructions on how to remove the back cover. Use a small Phillips-head screwdriver to remove the screws securing the back cover and carefully lift it off.
- Locate the RAM slots: Once the back cover is removed, locate the RAM slots on your laptop’s motherboard. They are usually small, rectangular slots next to each other. Refer to the user manual or online resources to identify the exact location of the RAM slots.
- Ground yourself again: After exposing the internal components, it’s important to ground yourself again to discharge any static electricity that may have built up. This extra precaution will help protect the delicate electronic components from potential damage.
By following these steps, you’ll prepare your laptop for the RAM upgrade process. The next step is to find the RAM slot where you’ll be installing the new RAM module. We’ll cover that in the next section.
Step 3: Find the RAM Slot
In this step, you’ll locate the RAM slot on your Dell Inspiron 15 5000 Series laptop. Follow these instructions to find the RAM slot:
- Refer to the user manual or online resources: Consult your laptop’s user manual or visit Dell’s support website for detailed information on locating the RAM slot. Different laptop models may have slightly different configurations, so it’s important to follow the specific instructions for your Dell Inspiron 15 5000 Series model.
- Identify the RAM slots: On most laptops, the RAM slots are located near the center or towards the back of the motherboard. Look for small, rectangular slots with metal contacts inside. You may see one or two slots, depending on your laptop’s configuration.
- Observe any clips or brackets: Take note of any clips or brackets that secure the RAM module in place. Some laptops have clips on the sides of the RAM slot that need to be released before removing or inserting the RAM module.
- Take a photo for reference: To make reassembly easier later, you may want to take a photo of the inside of your laptop before proceeding. This way, you can refer back to it if you need guidance during the reassembly process.
Taking the time to identify the RAM slot will ensure that you locate it correctly and are ready for the next step of removing the old RAM module. Before proceeding, double-check that you have followed the instructions specific to your Dell Inspiron 15 5000 Series laptop model. Now, let’s move on to the next step: removing the old RAM module.
Step 4: Remove the Old RAM
Now that you’ve located the RAM slot, it’s time to remove the old RAM module from your Dell Inspiron 15 5000 Series laptop. Follow these steps carefully:
- Release the clips or brackets: If your laptop has clips or brackets securing the RAM module in place, gently push them away from the module to release it. You may need to use your fingers or a small flat-head screwdriver for this step. Be careful not to apply too much force, as you could damage the clips or the module itself.
- Safely remove the old RAM module: Once the clips or brackets are released, the old RAM module should pop up at an angle. Hold it by the edges and carefully remove it from the RAM slot. Avoid touching the gold contacts on the bottom of the module, as excessive handling may cause damage.
- Set aside the old RAM module: Place the old RAM module on an anti-static surface or in an anti-static bag. Even though it’s no longer in use, it’s a good idea to store it safely in case you need it in the future or wish to sell or donate it.
- Inspect the RAM slot: Take a moment to visually inspect the RAM slot for any dust or debris. If necessary, use a clean, lint-free cloth or compressed air canister to gently clean the slot. This will help ensure a clean connection for the new RAM module.
By following these steps, you’ll remove the old RAM module from your laptop, making way for the new one. Keep in mind that the handling of computer components requires care and precision. If at any point you encounter resistance or are unsure about a step, consult the user manual or Dell’s support website for guidance specific to your Dell Inspiron 15 5000 Series model. Now, let’s move on to the exciting part: installing the new RAM module!
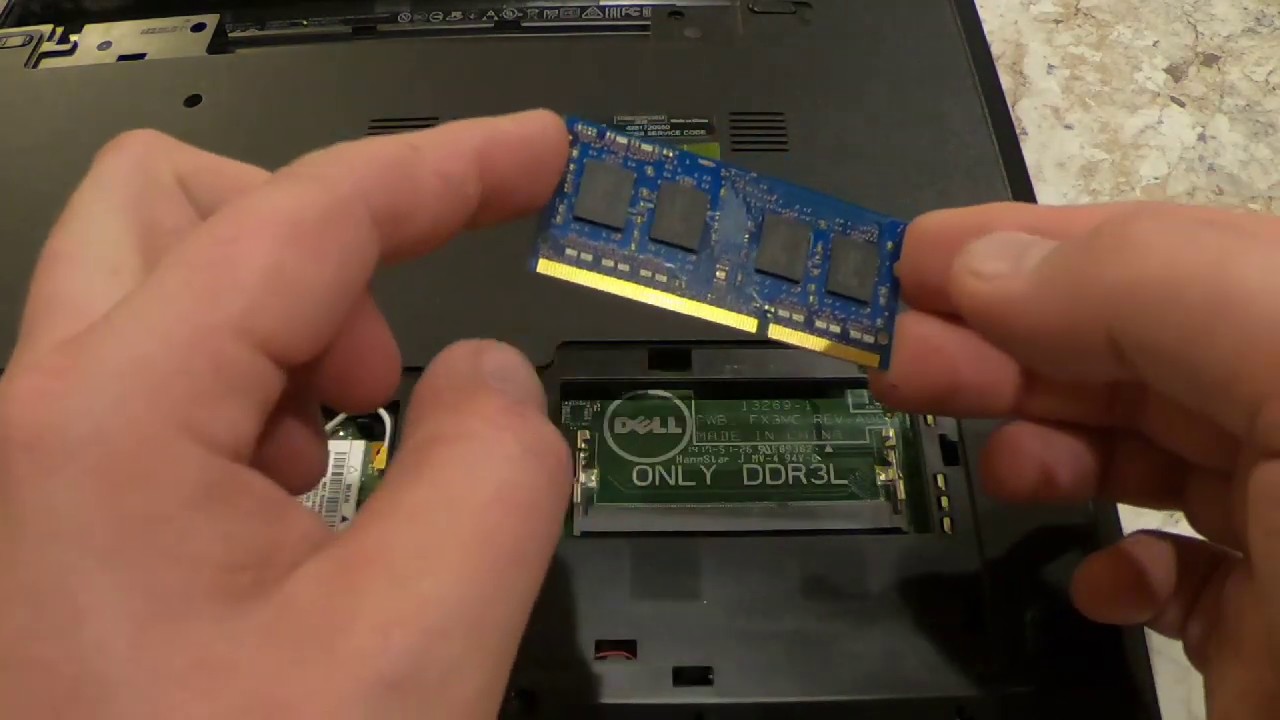
Step 5: Insert the New RAM
With the old RAM module removed, it’s time to insert the new RAM module into the RAM slot of your Dell Inspiron 15 5000 Series laptop. Follow these steps carefully to ensure a successful installation:
- Align the pins: Take the new RAM module and align the pins on its bottom with the slot in the RAM slot. Make sure the notch on the module matches the protrusion in the slot.
- Insert the RAM module: Holding the new RAM module by its edges, gently but firmly push it into the slot at a slight angle. Use equal pressure on both ends until the module is fully seated in the slot.
- Ensure proper seating: Once the RAM module is fully inserted, you should feel a slight click or snap sound indicating that it is securely seated. Check that the module is level and parallel to the motherboard.
- Secure the clips or brackets (if applicable): If your laptop has clips or brackets to secure the RAM module, carefully push them back into place until they click or snap into position, holding the module firmly in place.
Remember to handle the new RAM module with care, avoiding touching the gold contacts on the bottom. If you accidentally touch them, gently wipe them with a clean, lint-free cloth to remove any fingerprints or residue.
It’s important to note that if you’re adding a second RAM module to increase the overall capacity, repeat the steps above to insert the second module into the available slot. This will allow your laptop to utilize the additional RAM for improved performance.
By following these steps, you’ll successfully insert the new RAM module into your laptop. Now, let’s move on to the next step: testing the new RAM to ensure everything is functioning correctly.
Step 6: Test the New RAM
Now that you’ve installed the new RAM module in your Dell Inspiron 15 5000 Series laptop, it’s crucial to test it to ensure it’s functioning correctly. Follow these steps to perform a quick test of the new RAM:
- Reassemble your laptop: Carefully reattach the back cover of your laptop, making sure it is properly aligned and the screws are securely fastened. This step is necessary to ensure all components are in place for the testing process.
- Power on your laptop: Connect your laptop to the power source and turn it on.
- Check the system information: Once your laptop is booted up, go to the Start menu (or press the Windows key) and search for “System Information.” Open the System Information app, and it should display important details about your laptop, including the installed RAM.
- Verify the new RAM: In the System Information app, find the “Installed Physical Memory” or “Total Physical Memory” section. It should show the increased capacity of the new RAM module(s). This indicates that the new RAM has been recognized and is functioning correctly.
- Perform a stress test (optional): If you want to further ensure the stability of the new RAM, you can run a stress test using specialized software. This will put a heavy load on your laptop’s RAM and check for any potential issues. There are various stress-testing programs available, such as MemTest86 or PassMark MemTest.
If, during the testing process, you encounter any errors or issues with the new RAM module, double-check that it is properly seated in the slot and securely fastened. If the problems persist, you may need to seek assistance from Dell’s customer support or consider replacing the new RAM module.
By following these steps, you can ensure that the new RAM module is functioning correctly and providing the expected performance boost to your Dell Inspiron 15 5000 Series laptop. Now, let’s move on to the final step: reassembling your laptop to complete the RAM upgrade process.
Step 7: Reassemble Your Laptop
After successfully testing the new RAM module, it’s time to reassemble your Dell Inspiron 15 5000 Series laptop. Follow these steps to put everything back together:
- Turn off your laptop: If your laptop is still powered on, shut it down properly and disconnect any power sources.
- Attach the back cover: Carefully position the back cover over the laptop’s rear and align it with the screw holes. Gently press it down until it snaps into place.
- Tighten the screws: Use a small Phillips-head screwdriver to secure the screws in their respective holes. Be cautious not to overtighten them to avoid damaging the laptop’s casing.
- Double-check all connections: Ensure that all cables, wires, and connectors are properly reattached and secured. This includes the battery (if it was removed), any external devices, and any other components that were disconnected during the RAM upgrade process.
- Power on your laptop: Connect your laptop to a power source and turn it on to ensure that it boots up correctly.
- Test the overall performance: Once your laptop is back up and running, take some time to assess its overall performance. Open multiple applications and perform tasks that previously caused your laptop to slow down. If you notice a significant improvement in speed and responsiveness, it means the RAM upgrade was successful.
Congratulations! You have now completed the RAM upgrade on your Dell Inspiron 15 5000 Series laptop. Enjoy the enhanced performance and improved multitasking capabilities that the additional RAM provides.
If you encounter any issues or errors during or after the reassembly process, double-check all connections and ensure that all components are properly seated and secured. If the problems persist, it may be necessary to seek further assistance from Dell’s customer support team.
Thank you for following this step-by-step guide. We hope that you found it helpful and that it has empowered you to successfully upgrade the RAM on your Dell Inspiron 15 5000 Series laptop.
Conclusion
Congratulations on successfully upgrading the RAM on your Dell Inspiron 15 5000 Series laptop! By following this step-by-step guide, you have unlocked the potential for improved performance, multitasking, and overall efficiency. Adding more RAM can make a significant difference, especially if you regularly use resource-intensive applications or engage in memory-intensive tasks.
Remember, before starting the RAM upgrade process, it’s crucial to gather the necessary tools, back up your data, and familiarize yourself with the specific instructions for your Dell Inspiron 15 5000 Series model. Take your time, follow each step carefully, and exercise caution when handling delicate electronic components.
Throughout this guide, you have learned how to prepare your laptop, find and remove the old RAM module, insert the new RAM module, test its functionality, and finally, reassemble your laptop. By doing so, you have optimized your Dell Inspiron 15 5000 Series laptop for better performance and increased efficiency.
If you encountered any challenges or have questions during the RAM upgrade process, it is always recommended to consult your laptop’s user manual or Dell’s support website for model-specific instructions and guidance. Dell’s customer support team is also available to assist you with any concerns or issues you may have.
Now that you have successfully completed the RAM upgrade, take some time to enjoy the enhanced performance and improved capabilities of your Dell Inspiron 15 5000 Series laptop. Whether it’s running demanding software, engaging in multimedia tasks, or simply multitasking with ease, your upgraded RAM will help you accomplish more efficiently.
Thank you for choosing this guide to upgrade the RAM on your Dell Inspiron 15 5000 Series laptop. We hope you found it informative and helpful throughout the process. Happy computing!