Introduction
Welcome to our guide on how to insert RAM in a laptop! If you feel like your laptop’s performance is sluggish, upgrading the RAM can be a cost-effective way to boost its speed and overall performance. Adding more RAM, or Random Access Memory, allows your laptop to handle multiple tasks simultaneously and improves overall system responsiveness.
Before we get started, it’s important to note that not all laptops are designed to be upgraded or have easily accessible RAM slots. So, make sure to check your laptop’s specifications and user manual to ensure that it supports RAM upgrades and to familiarize yourself with its internal components.
In this guide, we’ll walk you through the step-by-step process of inserting RAM into your laptop. We’ll cover everything from safely powering off your laptop to selecting and installing the appropriate RAM module. By the end of this guide, you’ll have the knowledge and confidence to upgrade your laptop’s RAM and enjoy a faster, more efficient computing experience.
Before we dive into the steps, let’s take a moment to discuss the tools and materials you’ll need for this process.
Tools and Materials Needed
Before you begin upgrading the RAM in your laptop, gather the following tools and materials:
- A small Phillips screwdriver: This will be used to open the laptop’s case, if necessary.
- The laptop’s user manual: This will provide specific instructions and details about the internal components of your laptop.
- New RAM module: Choose a RAM module that is compatible with your laptop’s specifications. Check your laptop’s user manual or online specifications to determine the type and maximum capacity of RAM it supports.
- An antistatic wrist strap (optional): Using this strap can prevent electrostatic discharge (ESD) and protect your laptop’s components from damage. If you don’t have a wrist strap, make sure to touch a grounded metal object before handling any internal components.
It’s essential to use compatible RAM modules to ensure optimal performance and compatibility with your laptop. If you’re unsure about which type of RAM to purchase, consult with the manufacturer or a reputable computer hardware retailer.
Having gathered the necessary tools and materials, you’re now ready to proceed with upgrading the RAM in your laptop. In the next section, we’ll guide you through the process of safely powering off and disconnecting your laptop.
Step 1: Power Off and Disconnect
The first step in safely upgrading the RAM in your laptop is to power it off and disconnect any external power sources. Follow these steps:
- Save any open files and close all running programs on your laptop.
- Shut down your laptop by clicking on the “Start” menu and selecting “Shut Down.” Wait for the laptop to completely power off.
- Once your laptop is powered off, unplug the AC adapter from the laptop and remove any other connected peripherals, such as USB devices or external monitors.
By ensuring that your laptop is powered off and disconnected from any power sources, you minimize the risk of electrical shock and protect the internal components from damage during the RAM installation process.
Next, we’ll move on to locating the RAM slot in your laptop. This will vary depending on the laptop model, so it’s crucial to consult your laptop’s user manual or online resources to identify the correct location.
Step 2: Locate the RAM Slot
Locating the RAM slot in your laptop is an important step before proceeding with the RAM upgrade. Follow these guidelines to find the RAM slot:
- Refer to your laptop’s user manual: The user manual typically provides detailed information about the internal components and their locations. Check the manual for specific instructions on locating the RAM slot.
- Inspect the laptop’s bottom panel: In some cases, the RAM slot is accessible by removing a small panel on the bottom of the laptop. Look for panels with symbols indicating memory or RAM.
- Check under the keyboard or palm rest: In certain laptop models, the RAM slot may be located beneath the keyboard or palm rest. To access the RAM slot, you’ll need to remove the keyboard or palm rest, following the instructions in your user manual.
- Consult online resources: If you don’t have the user manual or if you’re still unsure about the RAM slot’s location, you can search online for your specific laptop model and additional tutorials or guides.
Keep in mind that the location of the RAM slot may differ depending on your laptop’s make and model. Take your time to identify the correct location to avoid any damage to other components during the RAM installation process.
Once you have located the RAM slot, you’re ready to move on to the next step, which is opening the laptop’s case. But before doing so, make sure to power off your laptop and disconnect any power sources, as discussed in step 1.
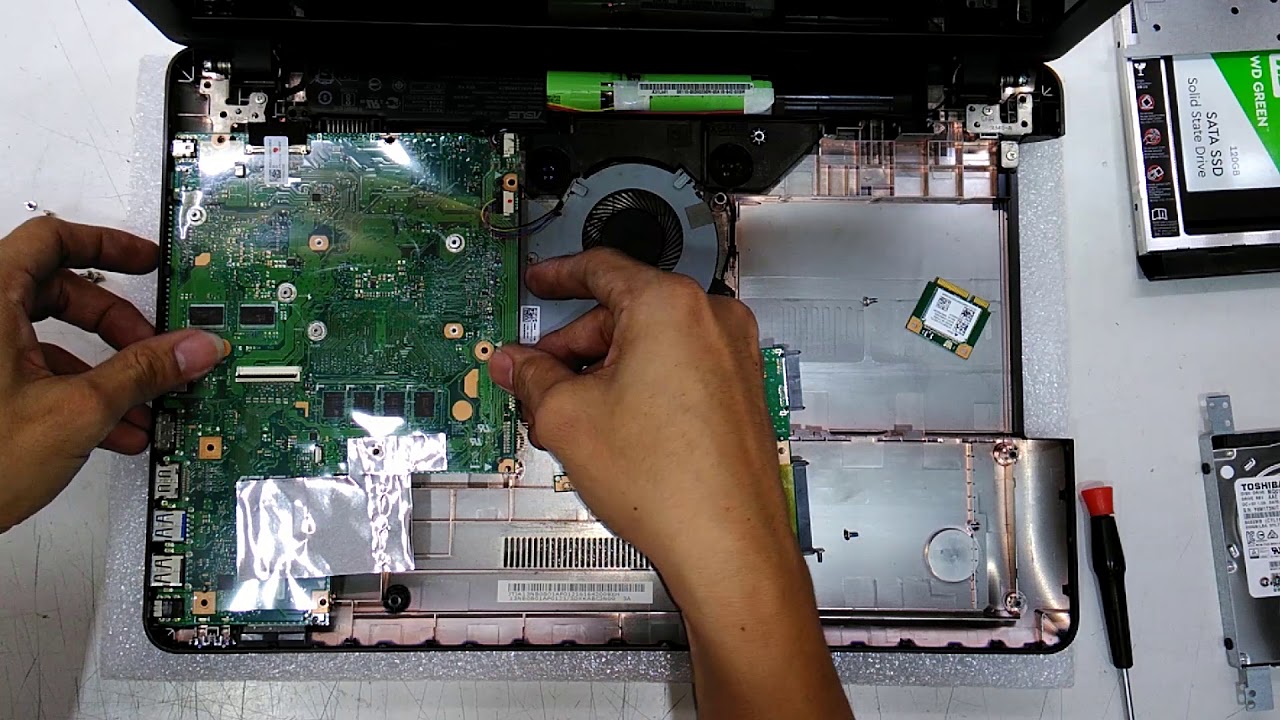
Step 3: Open the Laptop’s Case
To access the RAM slot and install the new RAM module, you’ll need to open your laptop’s case. Follow these steps to open the case:
- Refer to the laptop’s user manual: The user manual will provide specific instructions on how to open the case for your particular laptop model. It may involve removing screws or sliding a latch to unlock the case.
- Use a small Phillips screwdriver: If your laptop’s case requires screws to be removed, use a small Phillips screwdriver to carefully unscrew and set aside any screws securing the case.
- Gently pry open the case: Once the screws have been removed, use your fingers or a plastic pry tool to carefully pry open the case. Start from one corner and work your way around the edges, applying gentle pressure to pop the case open.
- Be mindful of cables and connectors: As you open the case, be cautious of any cables or connectors that may still be attached. Take note of their positions and gently disconnect them if necessary. Remember to handle cables and connectors with care to avoid any damage.
- Set aside the case: Once the case is fully open and any cables or connectors are safely disconnected, set the case aside in a secure location. This will give you easy access to the internal components, including the RAM slot.
Take your time when opening the laptop’s case, as excessive force or improper handling can cause damage to the internal components. If you encounter any difficulties or are unsure about the process, it’s best to consult your laptop’s user manual or seek assistance from a professional.
With the laptop’s case opened, you’re now ready to move on to the next step, which is locating the empty RAM slot. This step is crucial to ensure that the RAM is installed correctly and functions optimally. We will discuss this in the following section.
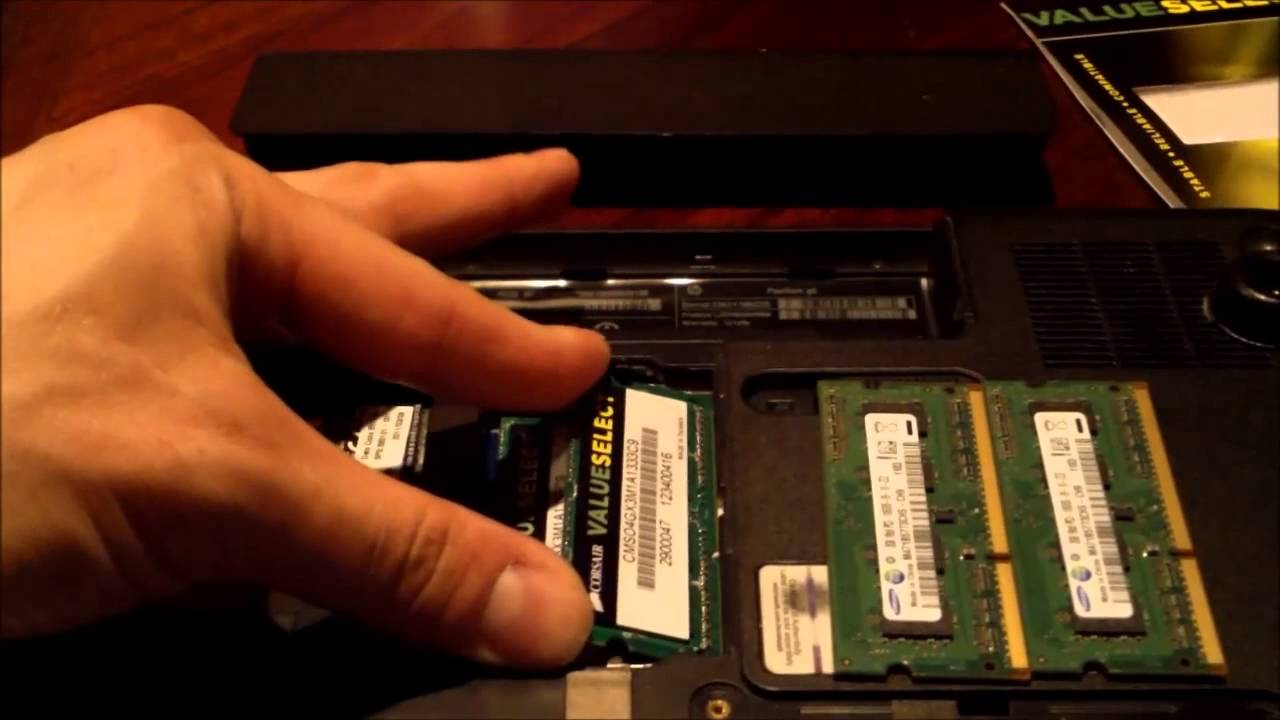
Step 4: Find the Empty RAM Slot
Once you have opened your laptop’s case, the next step is to locate the empty RAM slot. Follow these steps to find the empty RAM slot:
- Inspect the existing RAM modules: If your laptop already has RAM installed, carefully observe the modules to identify any empty slots. The RAM modules are small rectangular components that are typically held in place by clips on either side. If you see any empty slots next to the existing RAM modules, those are the slots where you can install the new RAM module.
- Refer to the laptop’s user manual or online resources: If you’re unable to determine the empty slot by visually inspecting the existing modules, consult your laptop’s user manual for the RAM slot layout and configuration. Some laptops may have more than one RAM slot, while others may have a single slot.
- Look for markings or indicators: Some laptops have markings or indicators next to the RAM slots, such as numbers or symbols, to help identify the empty slot. Look for any markings that suggest an available slot and refer to your user manual to confirm.
- Take note of the orientation: As you locate the empty RAM slot, observe the orientation of the existing RAM modules. Take note of the notches or keys on the bottom of the RAM module, as the new RAM module should be inserted in the same orientation.
Locating the empty RAM slot is crucial to ensure that you install the new RAM module correctly. By following these steps and consulting your user manual or online resources, you can easily identify the empty slot and proceed with the RAM upgrade confidently.
Once you have found the empty RAM slot, we will move on to the next step, which is removing the new RAM module from its packaging. This will be discussed in the following section.
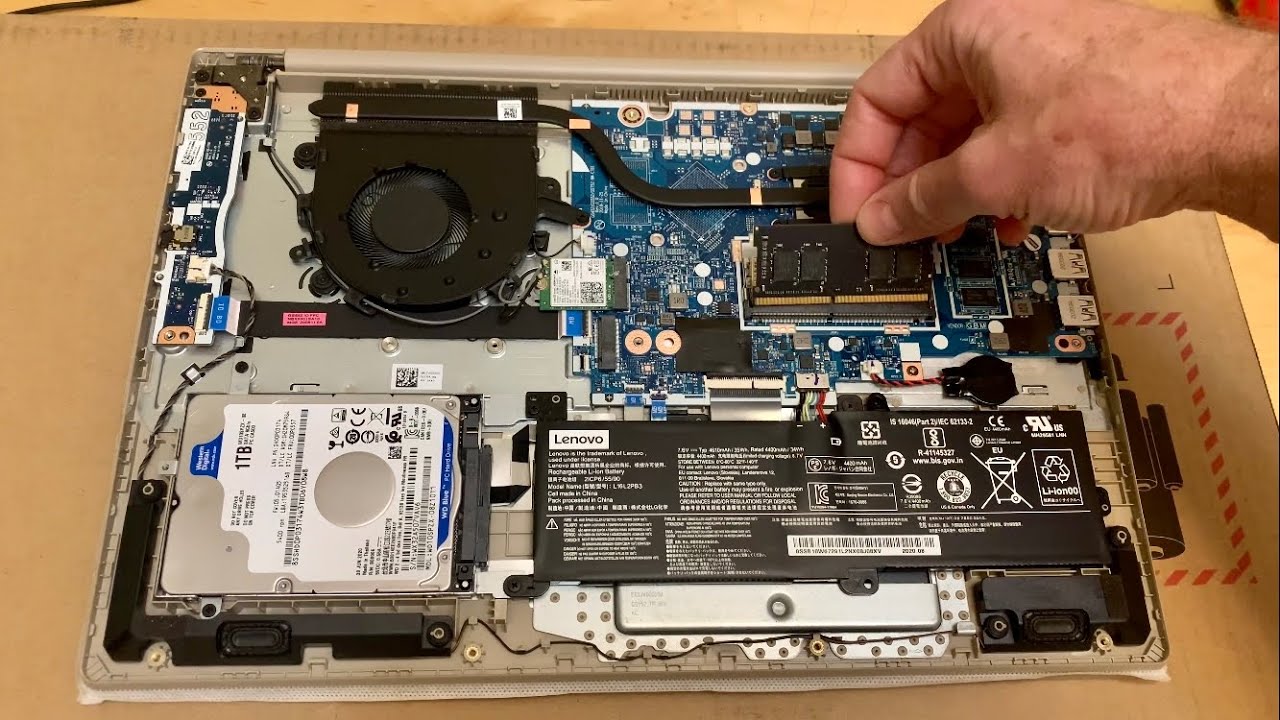
Step 5: Remove the RAM from the Packaging
Now that you have located the empty RAM slot in your laptop, it’s time to remove the new RAM module from its packaging. Follow these steps to safely remove the RAM module:
- Prepare a clean and static-free work area: Find a clean and static-free surface to work on, such as an anti-static mat or a non-metallic table. This will minimize the risk of electrostatic discharge (ESD) that could potentially damage the RAM module.
- Take the new RAM module out of its packaging: Carefully open the packaging of the new RAM module, avoiding any sharp edges or excessive force. Handle the RAM module by the edges to prevent any fingerprint or dirt transfer onto the contacts.
- Inspect the RAM module: Before inserting the RAM module into the laptop, take a moment to inspect it for any physical damages or abnormalities. Check for any bent pins, cracks, or visible defects. If you notice any issues, contact the retailer or manufacturer for assistance.
It’s important to handle the RAM module with care and avoid touching the gold contacts or any sensitive components. Any damage to the RAM module can potentially render it unusable or impact its performance.
With the new RAM module in hand and inspected, you are now ready to proceed to the next step, which is inserting the RAM into the empty slot. This will be discussed in the following section.
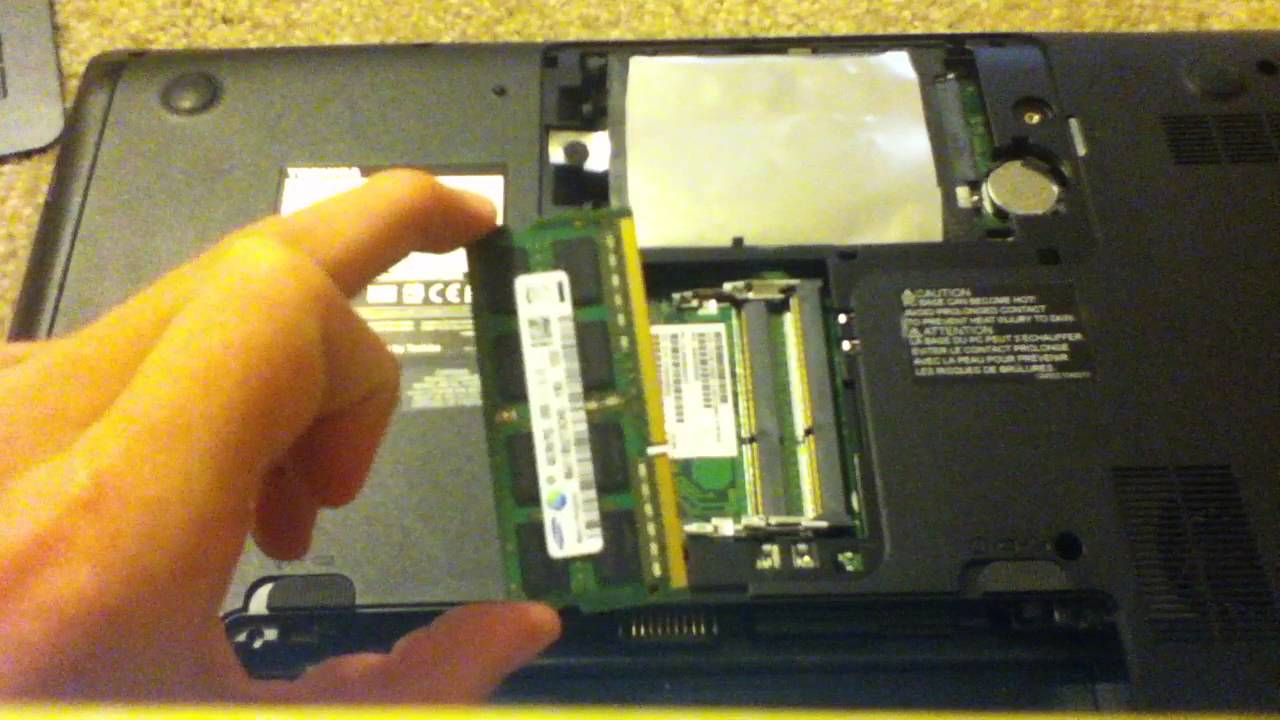
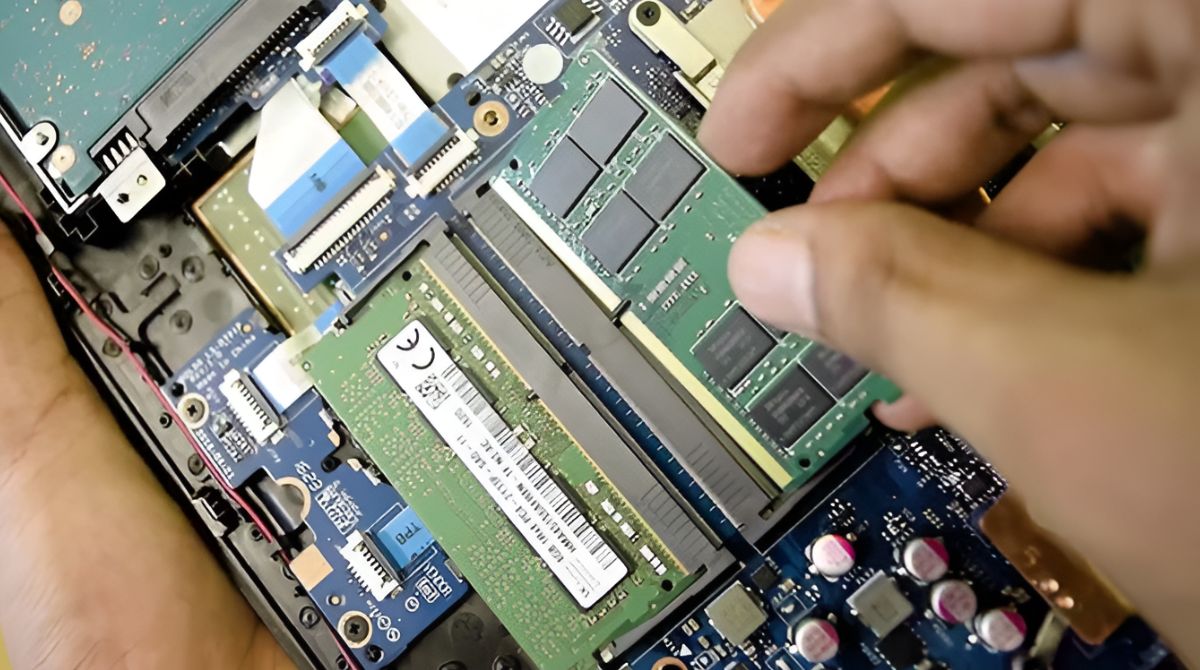
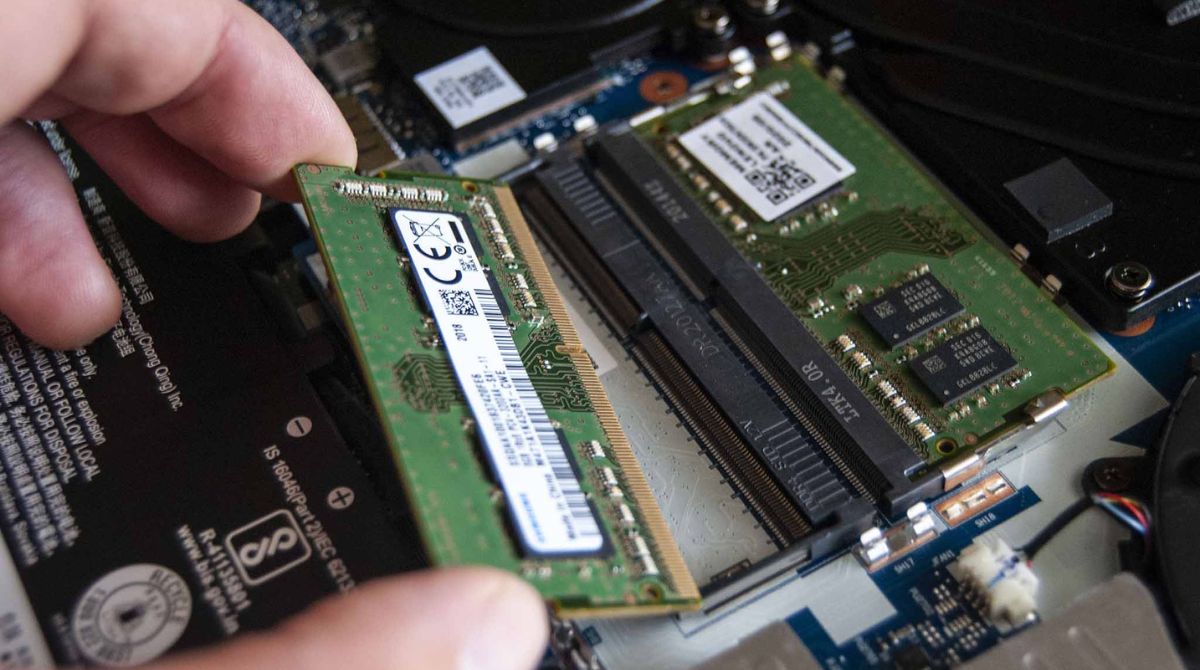
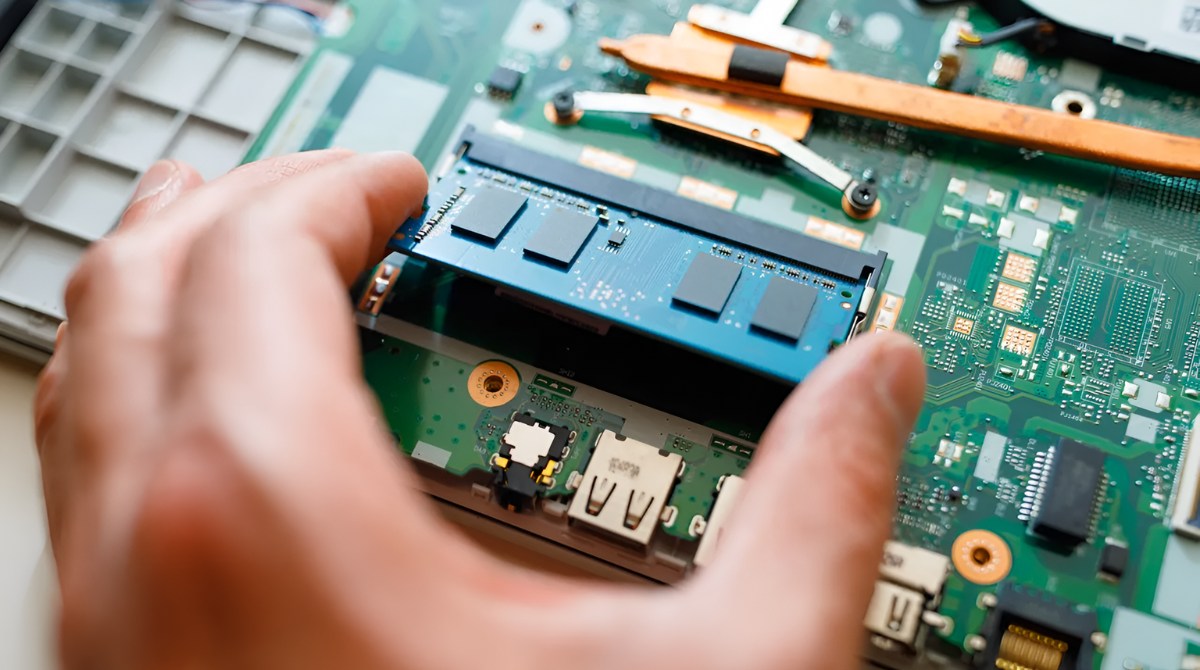
Step 6: Insert the RAM into the Slot
With the new RAM module in hand and the empty slot located, it’s time to insert the RAM into the slot. Follow these steps to ensure proper installation:
- Hold the RAM module by the edges: Avoid touching the gold contacts as it can cause damage or interference. Hold the RAM module by its edges to maintain a firm grip and prevent any ESD.
- Align the RAM module with the empty slot: Look for the notches or keys on the bottom of the RAM module and align them with the corresponding tabs inside the empty RAM slot. Make sure the notch is properly aligned to avoid inserting the RAM module in the wrong orientation.
- Insert the RAM module at a 45-degree angle: Gently insert the RAM module into the slot at a slight angle (around 45 degrees). Apply even pressure and make sure it is fully seated in the slot.
- Press down until the module clicks into place: Once the RAM module is properly inserted at a 45-degree angle, press it downward until it clicks into place. Ensure it is secured by the clips or locking mechanisms on either side of the slot.
It’s important to note that different laptop models may have slightly different mechanisms for securing the RAM module in place. Refer to your laptop’s user manual or online resources for specific instructions related to your laptop model.
After inserting the RAM module, take a moment to inspect it and make sure it is fully seated and secured in the slot. Any loose or improperly inserted RAM modules can cause performance issues or even system errors.
With the RAM module successfully inserted into the slot, we will move on to the next step, which is securing the RAM in place. This will ensure that the RAM remains firmly in position during use and prevents any accidental dislodgement. Let’s discuss this in the following section.
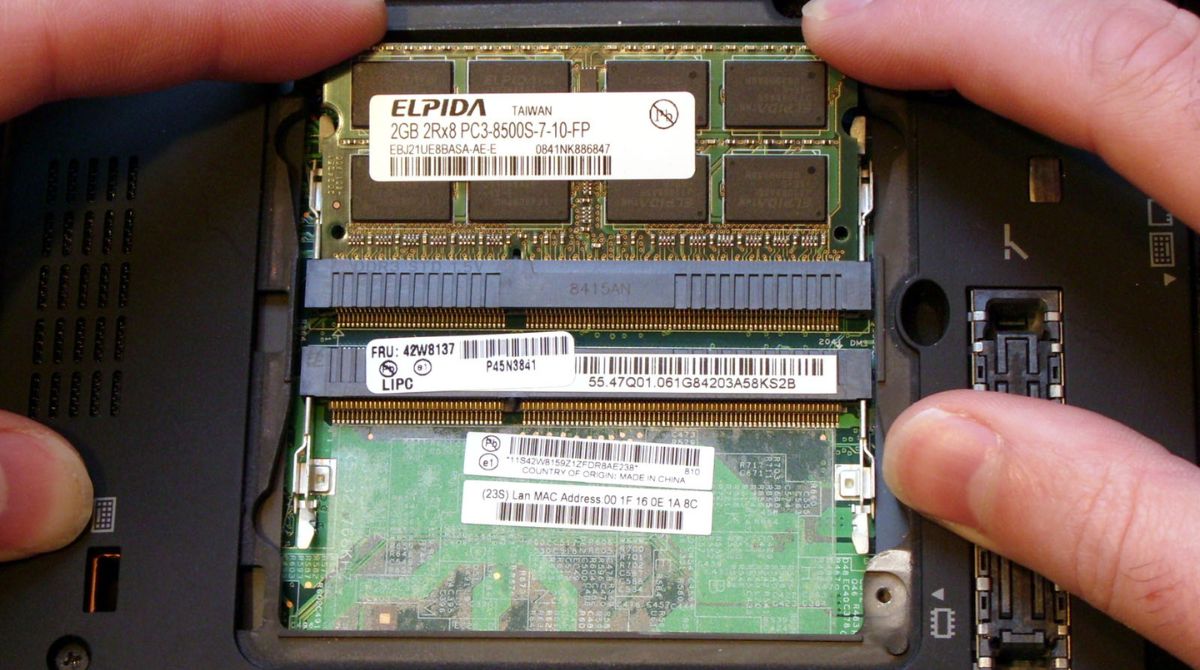
Step 7: Secure the RAM in Place
After inserting the RAM module into the slot, the next step is to secure it in place. This ensures that the RAM remains firmly seated and prevents any accidental dislodgement during use. Follow these steps to secure the RAM:
- Check the clips or locking mechanisms: Take a look at the clips or locking mechanisms on either side of the RAM slot. These are designed to hold the RAM module securely in place.
- If applicable, gently push the clips or mechanisms: Some laptops have clips that need to be pushed down or mechanisms that need to be locked in place to secure the RAM. Use your fingers to press down or lock these clips or mechanisms against the sides of the RAM module.
- Feel for the RAM module’s stability: After securing the clips or mechanisms, lightly wiggle the RAM module back and forth. It should feel stable and not move or come loose. If the RAM module feels loose, check the clips or mechanisms again and ensure they are properly engaged.
Securing the RAM module is an essential step to ensure its stability and prevent any connectivity issues that can arise from loose connections. Properly securing the RAM module helps maintain a reliable connection and optimal performance.
Once you have confirmed that the RAM module is securely in place, you can proceed to the next step, which involves closing the laptop’s case. This will protect the internal components and complete the RAM upgrade process. Let’s move on to the following section to learn more.
Step 8: Close the Laptop’s Case
Now that you have successfully installed and secured the new RAM module in your laptop, it’s time to close the laptop’s case. Follow these steps to ensure proper closure:
- Check for any cables or connectors: Before closing the laptop’s case, double-check that all cables and connectors are properly attached and positioned. Make sure they are not hindering the closure of the case.
- Align the case properly: Align the edges of the laptop’s case carefully, ensuring that all the sides are properly matched. Take your time to align the case perfectly to avoid any unnecessary force or pressure.
- Gently press the case closed: Once the case is properly aligned, apply gentle pressure to close the laptop’s case. Start from one corner and work your way around the edges, pressing down until the case clicks into place. Avoid using excessive force, as it can damage the case or other internal components.
- Check for any gaps or misalignment: After closing the laptop’s case, inspect it for any gaps or misalignment. The case should be flush and properly sealed, with no visible openings. If you notice any gaps, try adjusting the case to ensure proper closure.
- If applicable, tighten any screws: If your laptop’s case was held together by screws, use a small Phillips screwdriver to carefully tighten them. Be mindful not to overtighten, as it can cause damage to the case or the threads.
Ensure that the laptop’s case is securely closed to provide protection to the internal components and maintain the aesthetic integrity of the laptop. A proper closure not only safeguards the RAM module but also ensures the overall stability and safety of the laptop.
With the laptop’s case closed, you’re almost done! The final step is to power on the laptop and test the RAM upgrade. We will cover this in the next section, so let’s proceed.
Step 9: Power On and Test the Laptop
Congratulations on successfully installing the new RAM module in your laptop! Now, it’s time to power on your laptop and test the RAM upgrade. Follow these steps to ensure everything is working correctly:
- Ensure the laptop is still disconnected from any external power sources.
- Reconnect the AC adapter to the laptop and plug it into a power source.
- Press the power button to turn on the laptop.
- Wait for the laptop to boot up and log in to your operating system.
- Once you’re logged in, observe the laptop’s performance. Notice if the laptop is running smoother and if tasks are being handled more efficiently. If you notice a significant improvement in performance, then the RAM upgrade was successful.
- Check the new RAM’s capacity: To confirm that your laptop recognizes and is utilizing the new RAM properly, go to your computer’s “System Settings” or “System Information” and look for the RAM specifications. Verify that the new RAM’s capacity matches what you installed.
If, after testing, you experience any issues such as system crashes, error messages, or instability, it’s possible that the RAM module may not be compatible with your laptop or there may be an installation problem. In such cases, double-check the RAM specifications, ensure it is properly inserted, and consult with the manufacturer or a professional for further assistance.
With the laptop powered on and the RAM upgrade confirmed to be successful, you can now enjoy an enhanced computing experience with improved performance and multitasking capabilities.
Remember to properly shut down your laptop before unplugging or disconnecting any power sources. Avoid excessive physical impact or rough handling, as it can cause damage to the internal components, including the RAM module.
Congratulations once again on completing the RAM upgrade in your laptop! Enjoy the enhanced performance and capabilities it brings to your computing experience.
Conclusion
Upgrading the RAM in your laptop can significantly improve its performance and multitasking capabilities. In this guide, we have walked you through the step-by-step process of inserting RAM into a laptop. We began by powering off and disconnecting the laptop, then located the RAM slot and opened the laptop’s case. We then found the empty RAM slot, removed the new RAM module from its packaging, and inserted it correctly. The RAM module was secured in place, and the laptop’s case was closed, ensuring the internal components were protected. Finally, we powered on the laptop, tested the RAM upgrade, and confirmed its successful installation.
It’s essential to follow these steps carefully, consult your laptop’s user manual, and ensure that the RAM module you purchase is compatible with your laptop’s specifications. Take precautions to avoid ESD, handle the RAM module with care, and properly close the laptop’s case to protect the internal components.
With the RAM upgrade complete, you can enjoy improved performance, smoother multitasking, and faster response times on your laptop. Whether you’re a student, professional, or casual user, upgrading the RAM can breathe new life into your laptop and enhance your computing experience.
If you encounter any difficulties during the RAM installation process or if you have any concerns, it’s always recommended to consult the laptop’s user manual, reach out to the manufacturer’s support team, or seek assistance from a professional technician.
Thank you for following this guide, and we hope that it has been helpful in successfully upgrading the RAM in your laptop. Harness the power of your upgraded RAM and enjoy a faster and more efficient laptop for all your computing needs!