Introduction
The performance of a laptop can often be improved by upgrading its RAM (Random Access Memory). If you own a Toshiba Satellite laptop and find that it’s running slow or struggling to handle demanding tasks, adding more RAM can provide a noticeable boost in performance. Fortunately, upgrading the RAM on a Toshiba Satellite is a straightforward process that can be completed with a few simple steps.
Before you start, it’s important to determine the compatible RAM for your Toshiba Satellite model. Each laptop has a specific RAM capacity and type that it supports. This information can usually be found in the laptop’s user manual or on the manufacturer’s website. Upgrading to a higher capacity RAM module or a faster RAM speed can greatly improve your laptop’s multitasking capabilities and overall speed.
In this guide, we will walk you through the process of adding RAM to your Toshiba Satellite laptop, ensuring that you have the necessary tools and knowledge to successfully complete the upgrade. By following these steps, you can enjoy a smoother and more efficient computing experience.
Step 1: Determine the Compatible RAM
The first step in adding RAM to your Toshiba Satellite laptop is to determine the compatible RAM for your specific model. This information is crucial as using the wrong type of RAM can result in compatibility issues and may potentially damage your laptop.
To find the compatible RAM for your Toshiba Satellite, you can refer to the user manual that came with your laptop or visit the manufacturer’s website. Look for the specifications section, where you will find details about the maximum supported RAM capacity, RAM type (DDR3, DDR4, etc.), and the number of RAM slots available.
Once you have this information, you can decide on the RAM upgrade option that suits your needs. If your laptop has multiple RAM slots, you can either replace the existing RAM modules with higher capacity ones or add additional RAM modules to the empty slots. If there is only one RAM slot available, you will need to replace the existing RAM module with a higher capacity one.
It is important to note that RAM modules come in varying speeds (measured in MHz) and timings (CAS latency). While higher speed RAM can provide faster data transfer, it is recommended to use RAM modules that match the existing RAM speeds in your laptop. Mixing different speed RAM modules may result in the RAM running at the speed of the slowest module.
Additionally, check if there are any limitations or recommendations from Toshiba regarding the maximum RAM capacity that your specific model can support. Some older models may have limitations on the maximum RAM capacity, so it’s essential to be aware of these restrictions before purchasing new RAM modules.
By determining the compatible RAM for your Toshiba Satellite laptop, you ensure a smooth and hassle-free RAM upgrade process. With this vital information in hand, you’re now ready to proceed to the next step: powering off the laptop and removing the battery.
Step 2: Power off the Laptop and Remove the Battery
Before you begin installing the new RAM module on your Toshiba Satellite laptop, it is important to power off the laptop completely and remove the battery. This step ensures your safety and prevents any potential damage to the laptop or the components inside.
To power off your laptop, close all open programs and save your work. Click on the “Start” button in the bottom left corner of your screen and select “Shut Down” from the menu. Wait for the laptop to completely shut down and ensure that all lights and fan noises have ceased.
Once the laptop is switched off, you can proceed to remove the battery. Most Toshiba Satellite laptops have a removable battery that can be easily detached from the bottom of the laptop. Locate the battery release latch or switch and slide or press it to unlock the battery. Gently lift the battery up and out of its compartment.
If your laptop has an integrated or non-removable battery, you can skip this step and proceed to the next one. It’s important to note that removing the battery is a safety precaution to prevent any electrical discharge during the RAM installation process.
By powering off your laptop and removing the battery, you ensure a safe environment for upgrading the RAM in your Toshiba Satellite. This step prepares you for the next phase: locating the RAM compartment on your laptop.
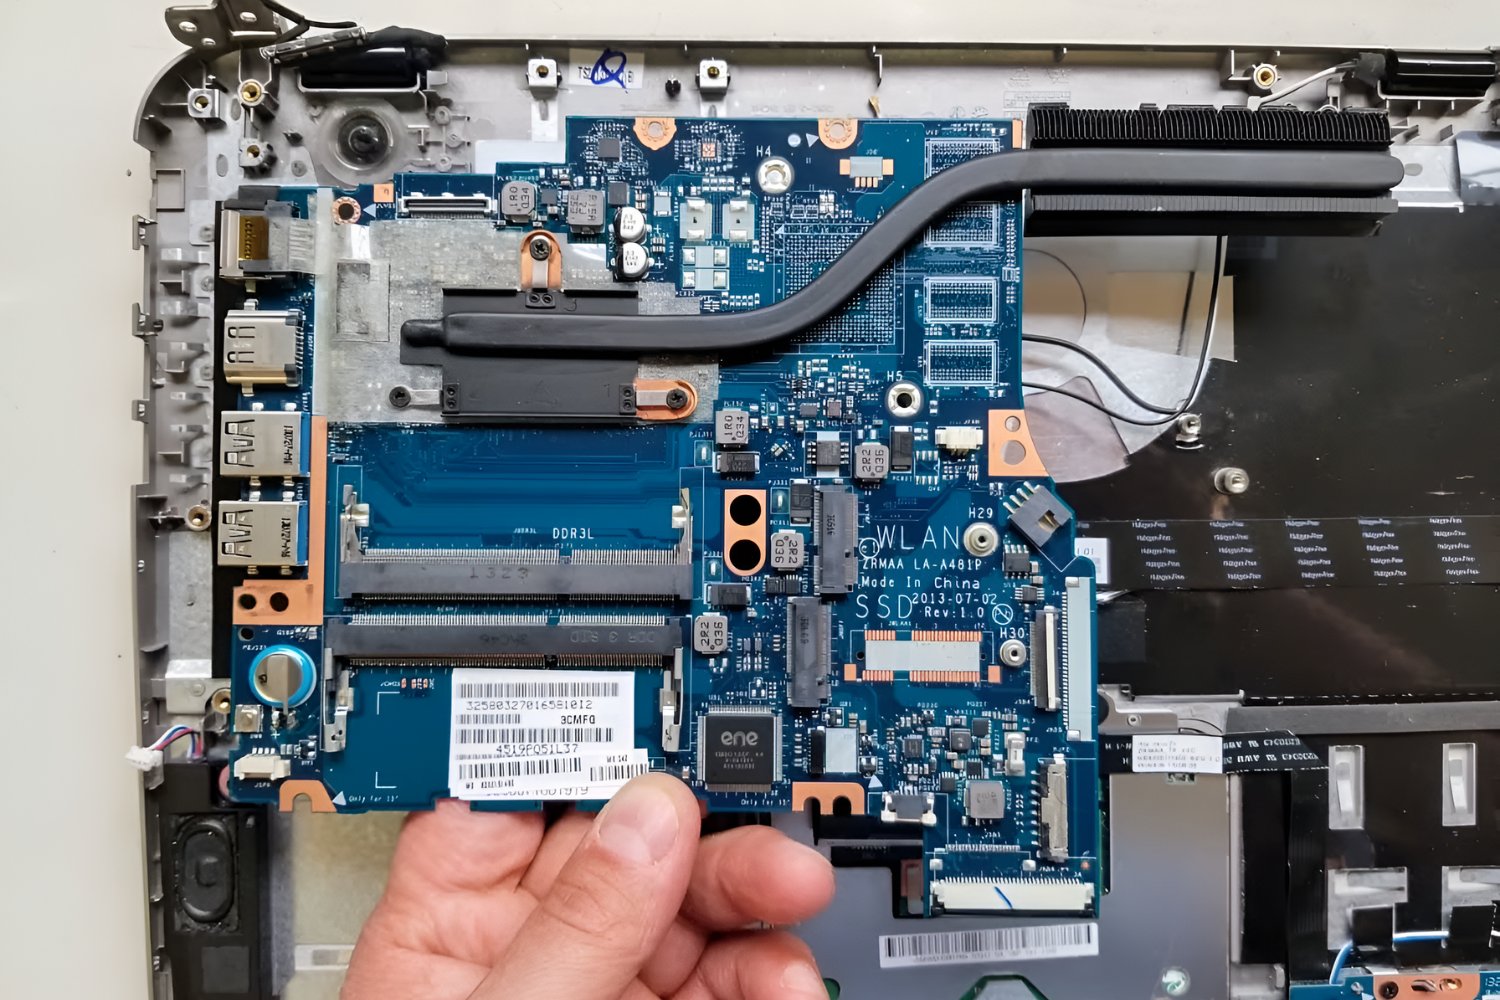
Step 3: Locate the RAM Compartment
After turning off your Toshiba Satellite laptop and removing the battery, the next step in adding RAM is to locate the RAM compartment. The RAM compartment is where the existing RAM modules are installed, and it is where you will insert the new RAM module.
To find the RAM compartment, you will need to flip the laptop over and examine the bottom panel. Look for a small, rectangular cover or panel that is secured with screws. The number of screws and their locations may vary depending on the specific model of your Toshiba Satellite laptop.
Once you locate the RAM compartment cover, use a screwdriver to carefully remove the screws holding it in place. Set the screws aside in a safe place to avoid losing them. Gently lift off the RAM compartment cover and set it aside.
In some models, the RAM compartment may be labeled or have a diagram indicating its location. If that’s the case, refer to the labeled section to identify the RAM compartment easily.
If you’re having difficulty locating the RAM compartment, it may be helpful to consult the user manual or visit the manufacturer’s website for detailed instructions specific to your model.
Locating the RAM compartment is a crucial step in the RAM upgrading process. Once you have successfully located the compartment, you’re ready to move on to the next step: opening the RAM compartment and preparing for the RAM module installation.
Step 4: Open the RAM Compartment
With the RAM compartment located on your Toshiba Satellite laptop, it’s time to open it and prepare for the installation of the new RAM module. Opening the compartment will provide access to the existing RAM modules and allow you to replace or add RAM as needed.
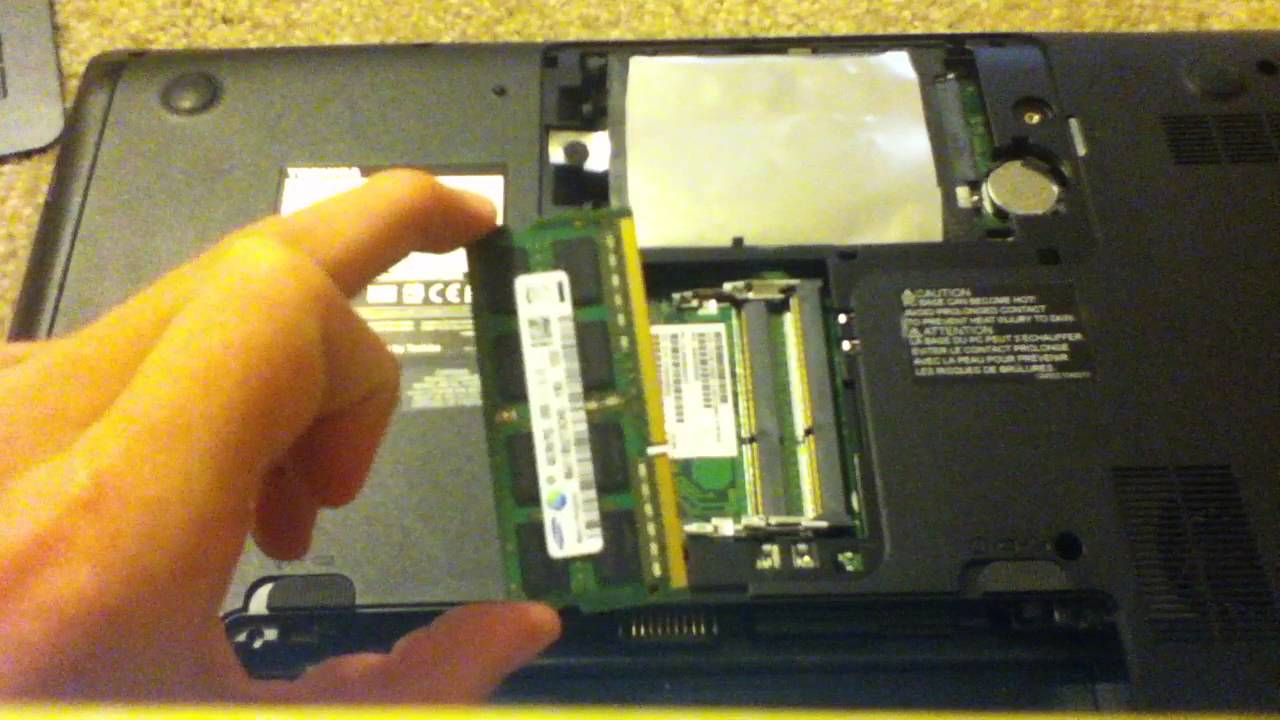
To open the RAM compartment, carefully remove any additional screws securing the RAM modules in place. Keep these screws safe, as you will need them later to secure the new RAM module. Once all the screws are removed, gently lift up the retention clips or tabs on either side of the existing RAM modules. These clips or tabs will release the RAM modules, allowing them to slightly pop up from their slots.
Now, you can carefully remove the existing RAM module(s) by gently pulling them out at a 45-degree angle. Handle the RAM modules with care and avoid touching the gold contacts, as any damage could cause compatibility issues.
While removing the RAM modules, take note of the position of each module and the orientation of the notches on the sides. This will help you ensure correct installation of the new RAM module(s).
After removing the old RAM module(s), if you are not replacing all of them or if you have empty RAM slots available, it’s recommended to clean the slots using compressed air or a soft, clean cloth to remove any dust or debris.
Opening the RAM compartment is a crucial step in preparing your Toshiba Satellite laptop for the RAM upgrade. By following these instructions carefully, you can successfully open the compartment and remove the existing RAM module(s).
You’re now ready to move on to the next step: inserting the new RAM module(s) into the empty slots.
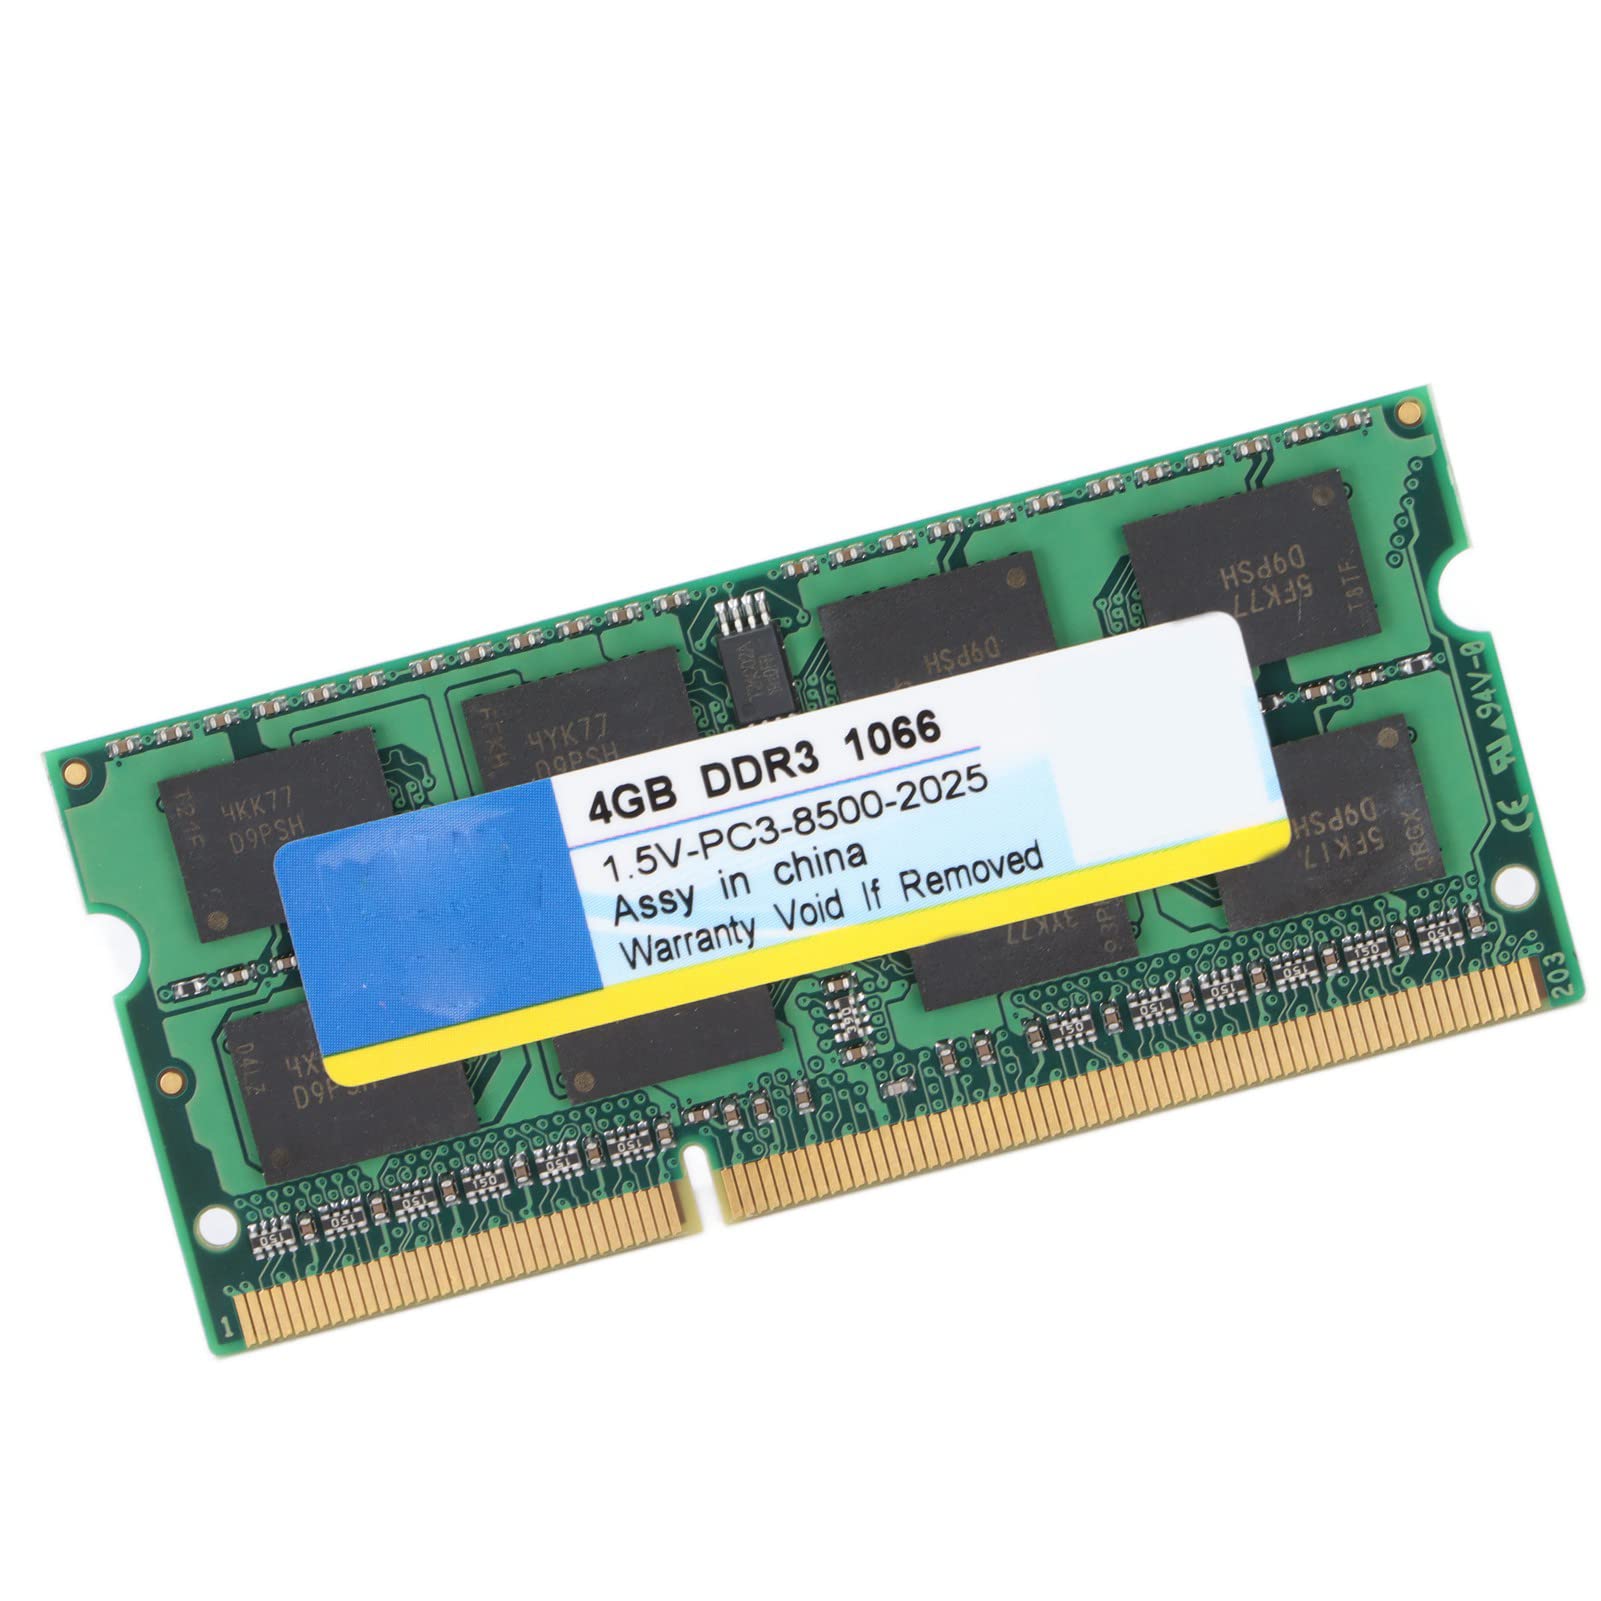
Step 5: Insert the New RAM Module
With the RAM compartment open and the old RAM module(s) removed from your Toshiba Satellite laptop, it’s time to insert the new RAM module(s). This step involves carefully aligning the new module(s) and securing them in the designated slots.
Begin by taking the new RAM module(s) out of their packaging, ensuring you handle them by the edges and avoiding touching the gold contacts. Align the notch on the bottom edge of the RAM module with the corresponding tab or notch in the RAM slot. Insert the module at a slight angle, about 45 degrees, and firmly press it down until it is completely seated in the slot. You should hear a clicking sound or feel a slight resistance indicating that the module is securely installed.
If you are adding multiple RAM modules, ensure that they are correctly aligned and inserted in their respective slots. It’s important to refer to the user manual or consult the manufacturer’s website to determine the optimal configuration for your laptop regarding RAM module placement.
Once all the new RAM module(s) are inserted, press down gently on the top of each module to ensure proper contact with the slot.
If you still have existing RAM module(s) in place and are adding more RAM, it’s important to remember that mixing different sizes or speeds of RAM modules may result in compatibility issues. It is generally recommended to use RAM modules that match in size, speed, and timings for optimal performance.
With the new RAM module(s) securely installed, you have successfully reached a significant milestone in upgrading the RAM on your Toshiba Satellite laptop.
In the next step, you will learn how to close the RAM compartment, taking care to properly secure the compartment cover.
Step 6: Close the RAM Compartment
After inserting the new RAM module(s) into your Toshiba Satellite laptop, it’s time to close the RAM compartment. This step ensures that the RAM module(s) are securely in place and protected from dust and other potential hazards.
Start by aligning the RAM compartment cover with the screw holes on the bottom of the laptop. Gently lower the cover onto the compartment, making sure it fits snugly into place. Using a screwdriver, reinsert and tighten the screws that were previously removed, securing the cover firmly.
As you tighten the screws, be careful not to overtighten them, as this could damage the screws or strip the screw holes. Ensure that the cover is securely in place but not overly tightened.
Once the cover is back in place, give it a gentle press to make sure it’s fully seated. You should not feel any movement or hear any clicking sounds.
Closing the RAM compartment is an important step in preventing any accidental dislodging of the newly installed RAM module(s). By securely fastening the compartment cover, you minimize the risk of any damage to the RAM module(s) or other components.
In the next step, you will learn how to reassemble your Toshiba Satellite laptop by reinserting the battery and powering it on.
Step 7: Reassemble the Laptop and Power It On
After closing the RAM compartment, it’s time to reassemble your Toshiba Satellite laptop and power it on. This final step ensures that the laptop is fully functional and ready to take advantage of the newly installed RAM module(s).
To reassemble the laptop, start by reinserting the battery into its compartment. Align the battery with the connectors and gently press it down until it clicks into place. If your laptop has a removable battery, make sure it locks securely using the release latch or switch.
Once the battery is securely in place, you can proceed to power on the laptop. To do this, locate the power button, usually located near the top of the keyboard or on the side of the laptop. Press and hold the power button for a few seconds until you see the Toshiba logo or the operating system’s loading screen.
If the laptop powers on successfully and you are able to access the operating system, it’s an indication that the RAM upgrade was completed successfully. You can verify the new RAM module(s) by checking the system properties or accessing the BIOS settings.
In some cases, your laptop may not power on or may display error messages on the screen after the RAM upgrade. If this happens, double-check that the RAM module(s) are correctly inserted, and the compartment cover is securely fastened. If the issue persists, consult the user manual or seek professional assistance.
Reassembling the laptop and powering it on mark the final steps in upgrading the RAM on your Toshiba Satellite laptop. By following these steps carefully, you have effectively improved the laptop’s performance and responsiveness through the addition of more RAM.
Congratulations! You have successfully completed the process of adding RAM to your Toshiba Satellite laptop. Enjoy the enhanced computing experience that your upgraded laptop now offers!
Conclusion
Adding and upgrading RAM in your Toshiba Satellite laptop can significantly improve its performance and multitasking capabilities. By following the step-by-step guide outlined above, you have learned how to determine compatible RAM, power off the laptop, locate the RAM compartment, open it, insert the new RAM module(s), close the compartment, and reassemble the laptop.
Remember to refer to your laptop’s user manual or the manufacturer’s website for specific instructions related to your model. It’s also important to handle the RAM modules with care, avoiding contact with the gold contacts to prevent any damage.
With the RAM upgrade complete, you should notice a noticeable improvement in your laptop’s speed and ability to handle demanding tasks such as running multiple applications simultaneously, editing multimedia files, or playing graphic-intensive games.
Upgrading the RAM is just one way to enhance the overall performance of your Toshiba Satellite laptop. Regularly updating your operating system, drivers, and software, as well as keeping your system free from unnecessary files and programs, will further optimize its efficiency.
Now that you have successfully upgraded your Toshiba Satellite laptop’s RAM, take full advantage of the enhanced performance and enjoy a smoother and more efficient computing experience.
So go ahead, power on your laptop and experience the benefits of the RAM upgrade you have completed. Happy computing!