Introduction
Upgrading the RAM (Random Access Memory) in your laptop can significantly improve its performance, allowing for faster multitasking, smoother running of applications, and improved overall responsiveness. If you find your laptop struggling to keep up with demanding tasks or notice a slowdown in performance, upgrading the RAM is a cost-effective solution.
RAM is a crucial component of a computer system, responsible for temporarily storing data that the processor needs to access quickly. By increasing the amount of RAM in your laptop, you provide it with more memory space to handle multiple tasks simultaneously, reducing the need for data to be swapped out to the slower hard drive.
Before diving into the process of upgrading your laptop’s RAM, it is essential to determine whether your specific laptop model is upgradeable. While most modern laptops allow for RAM upgrades, some may have soldered RAM or limited upgrade options. Consult your laptop’s user manual or manufacturer’s website to verify the compatibility and upgradeability of your laptop.
In this guide, we will walk you through the step-by-step process of upgrading the RAM in your laptop. We’ll cover everything from determining the compatibility of your laptop’s RAM to safely installing the new RAM module(s). By following these instructions carefully and using the right tools, you can successfully upgrade your laptop’s RAM and enjoy a noticeable performance boost without breaking the bank.
Step 1: Determine the compatibility of your laptop’s RAM
Before embarking on the RAM upgrade, it is essential to ensure that the new RAM module(s) you purchase are compatible with your laptop. Upgrading to incompatible RAM can cause compatibility issues and may be incompatible with your system.
The first step is to identify the type and speed of the RAM currently installed in your laptop. This information can be found in your laptop’s user manual or by visiting the manufacturer’s website. Alternatively, you can use system information tools like CPU-Z or Speccy to gather this information.
Once you have determined the type and speed of the existing RAM, you need to know the maximum supported RAM capacity of your laptop. Again, this information can be found in your laptop’s user manual or on the manufacturer’s website. It is important to note that some laptops have a maximum RAM limit, and exceeding it may not provide any additional benefits.
Next, you need to determine the number of RAM slots available in your laptop. This information will help you plan whether to add new RAM modules or replace the existing ones. Some laptops have additional RAM slots for expansion, while others have limited slots, requiring you to remove the existing RAM modules.
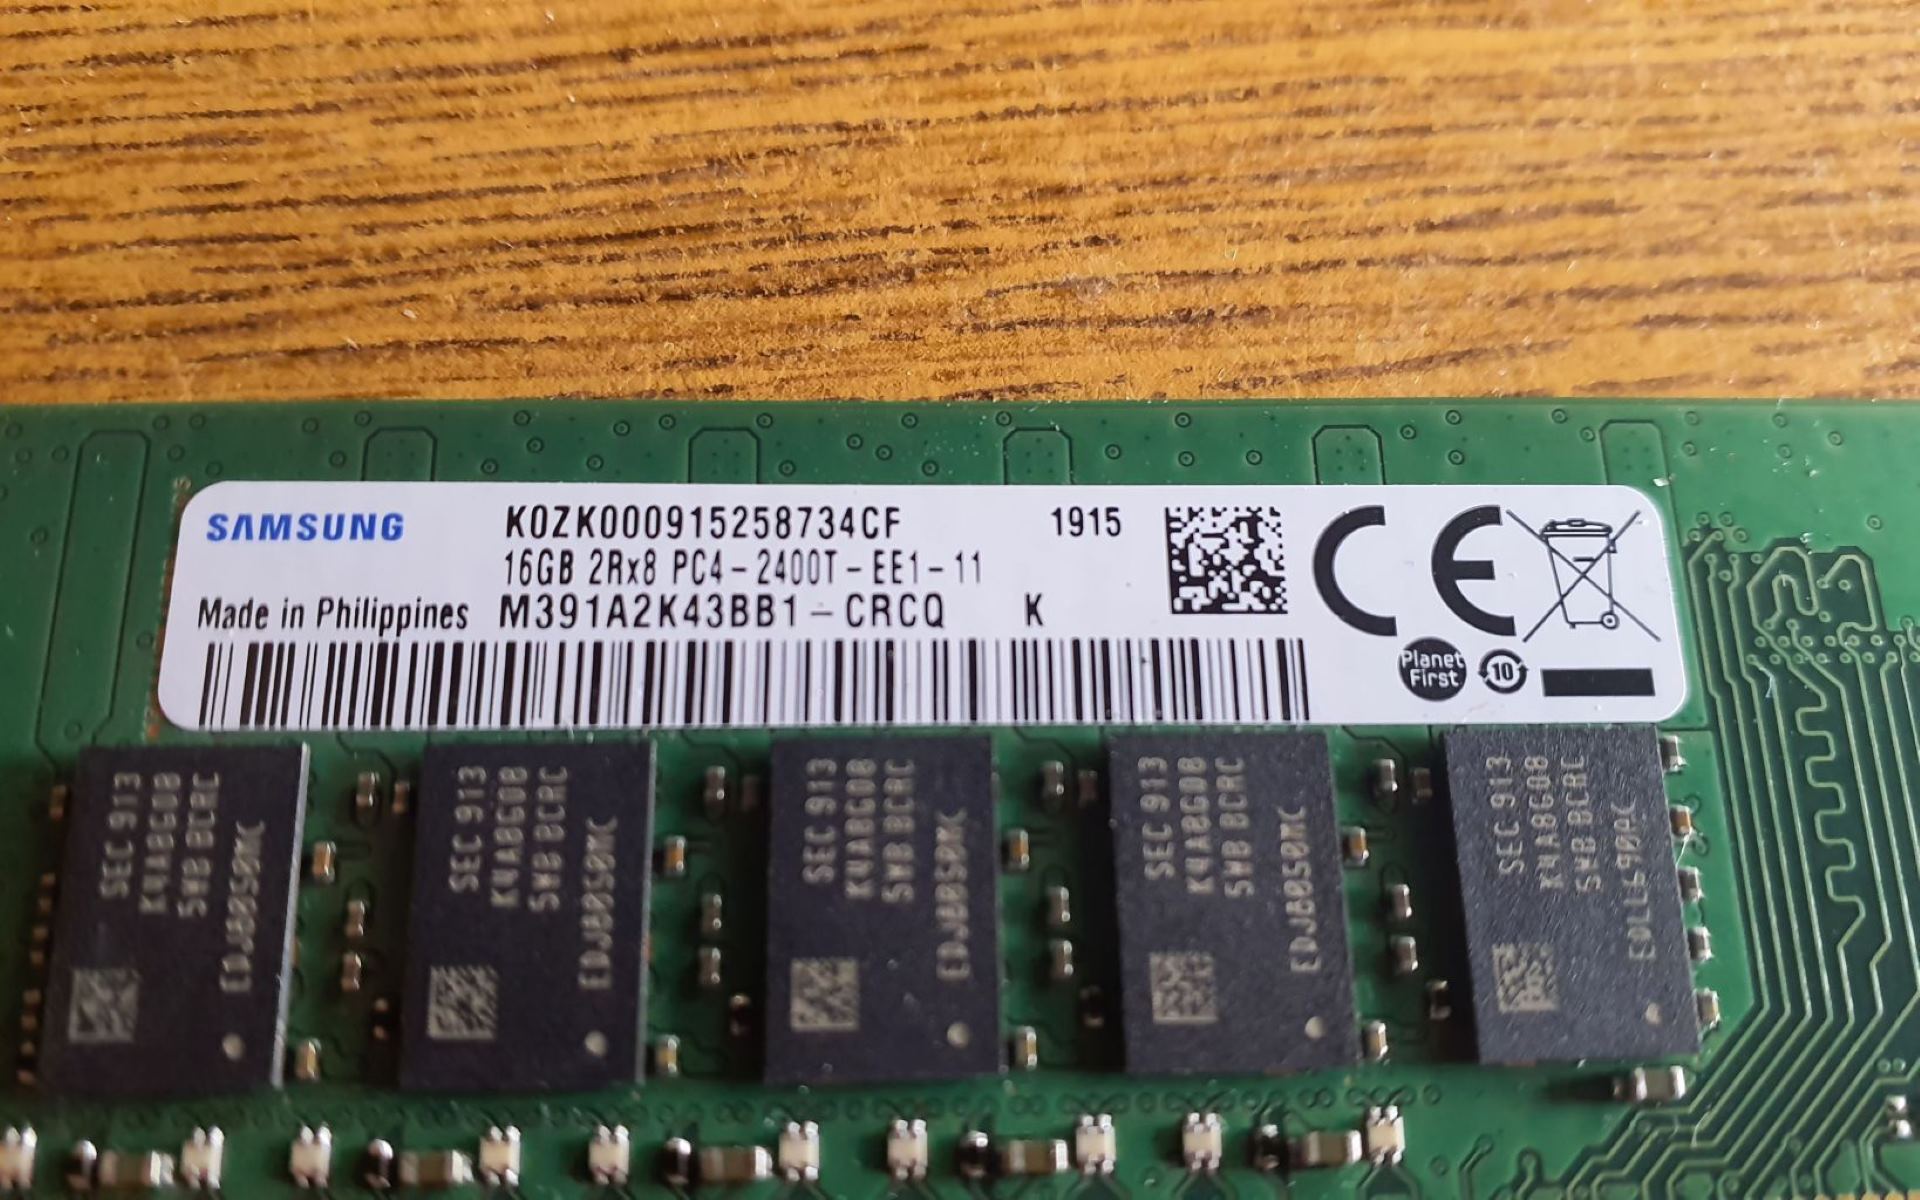
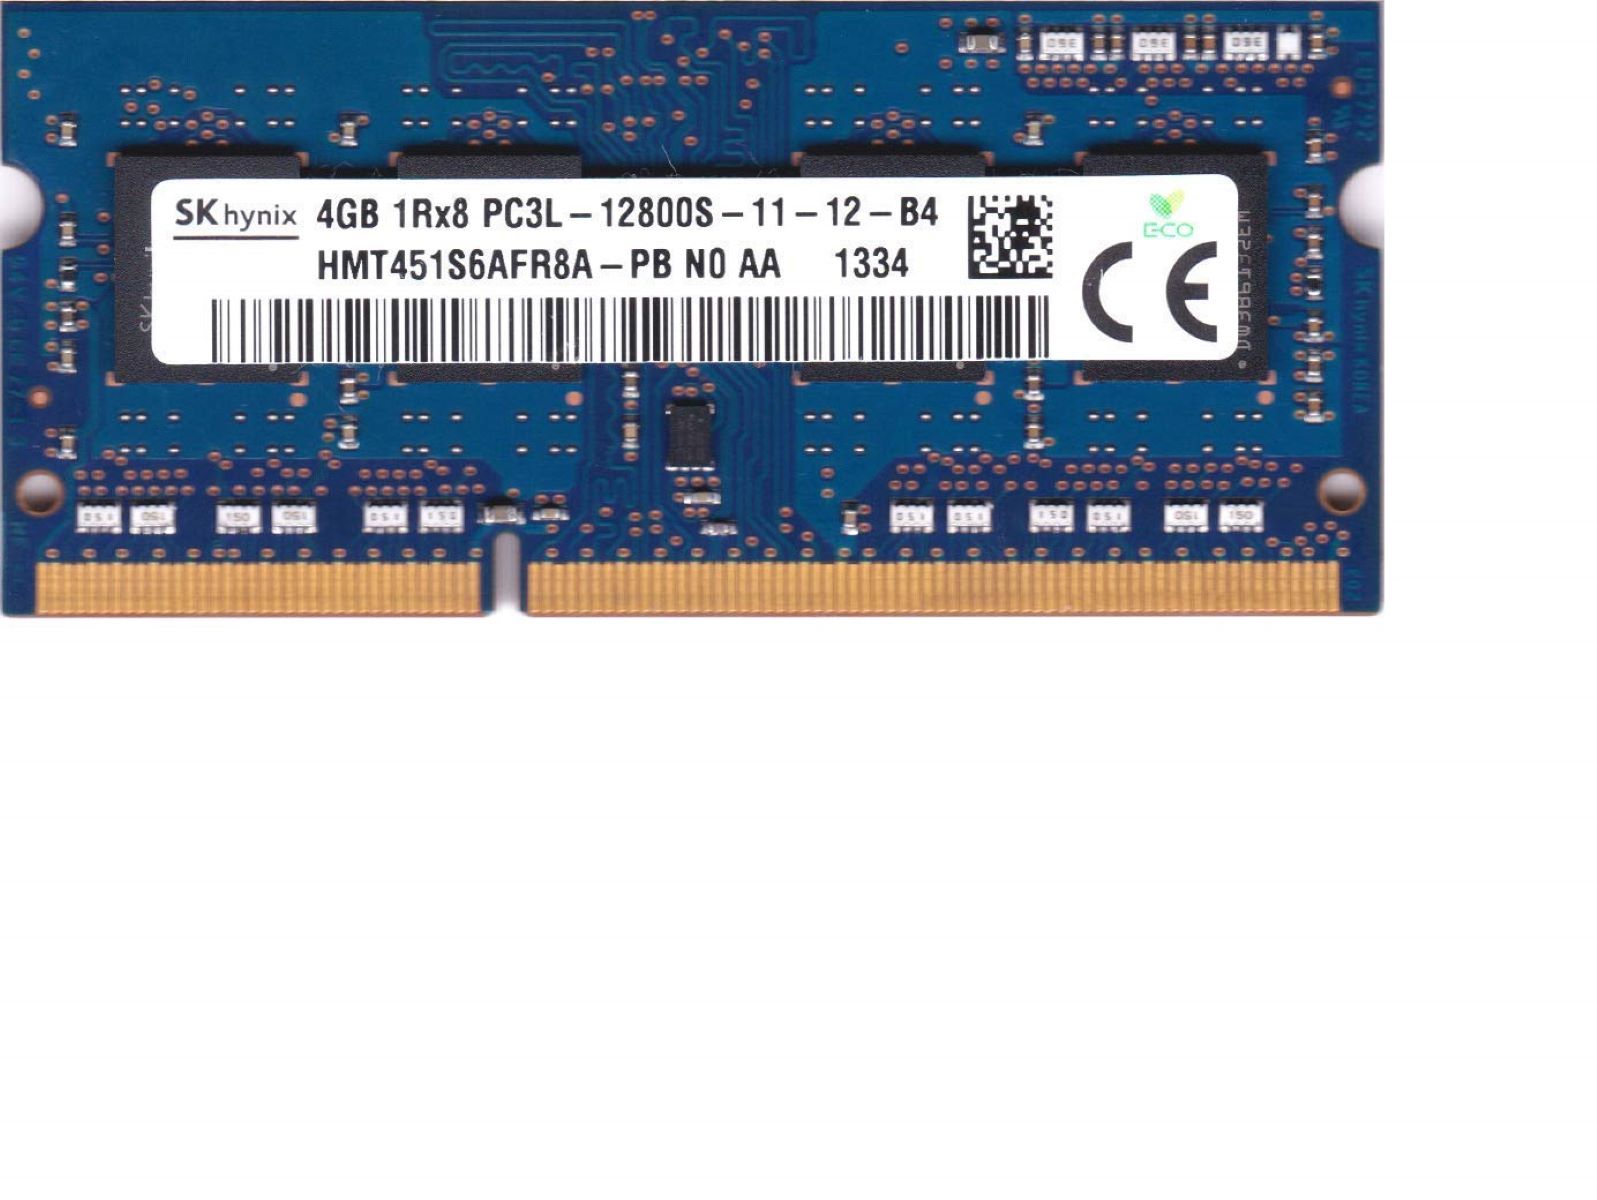
Once you have gathered all the necessary information, you can proceed to find compatible RAM modules. There are various online retailers and computer stores that offer an extensive range of RAM modules. Make sure to check for compatibility with your laptop’s make and model before making a purchase.
It is also worth considering the RAM capacity you wish to upgrade to. Depending on your laptop’s specifications and your usage requirements, you can select a suitable RAM capacity. Common capacities range from 4GB to 16GB, but higher capacities are also available for more demanding tasks.
By taking the time to determine the compatibility of your laptop’s RAM, you can ensure a smooth and successful RAM upgrade without any compatibility issues. Once you have gathered all the necessary information and acquired compatible RAM modules, you can proceed to the next step of the upgrade process.
Step 2: Gather the necessary tools
Before you begin the RAM upgrade process, it is important to gather the necessary tools to ensure a smooth and successful installation. Here are the essential tools you will need:
1. Screwdriver: Most laptops require a Phillips screwdriver to remove the screws that secure the RAM compartment cover. Check your laptop’s user manual or manufacturer’s website to determine the specific screwdriver size needed.
2. Anti-static wrist strap: To protect your laptop’s sensitive components from electrostatic discharge, wearing an anti-static wrist strap is highly recommended. This helps prevent any potential damage caused by static electricity during the upgrade process.
3. Compressed air or a soft brush: Before installing the new RAM module(s), it is advisable to clean the RAM compartment and surrounding areas to remove any dust or debris. You can use compressed air or a soft brush to gently clean the area.
4. Packaging material or an anti-static bag: It is essential to handle the new RAM module(s) with care to prevent any damage from static electricity. Keep the new RAM module(s) in the packaging material or an anti-static bag until you are ready to install them.
5. Replacement thermal paste (optional): If you plan to remove the heat sink during the RAM upgrade, you may need to apply new thermal paste to ensure proper heat dissipation once the laptop is reassembled. Consult your laptop’s documentation or manufacturer’s website for guidance on thermal paste application.
6. User manual or manufacturer’s documentation: It is always recommended to have your laptop’s user manual or relevant documentation readily available during the upgrade process. This will help you locate the RAM compartment and provide any specific guidelines or precautions provided by the manufacturer.
By gathering these essential tools before beginning the RAM upgrade, you can ensure a smooth and hassle-free process. Having everything you need at hand will help you complete the upgrade efficiently and reduce the likelihood of any accidental damage to your laptop or its components.
Step 3: Power off and disconnect your laptop
Before you start working on your laptop’s RAM upgrade, it is crucial to power off the laptop and disconnect it from any power sources. This step ensures your safety and prevents any accidental damage to the laptop or its components.
To perform this step:
1. Save and close any open files and applications on your laptop. Ensure that everything is properly saved so that you don’t lose any unsaved work.
2. Shut down your laptop by selecting the “Shut Down” option from the operating system’s menu. Wait for the laptop to completely power off before proceeding.
3. Unplug the power adapter from the laptop. This disconnects the laptop from the mains power supply and eliminates the risk of electric shock during the upgrade process.
4. If your laptop has a removable battery, carefully remove it from the laptop. Refer to your laptop’s user manual or manufacturer’s documentation for the correct battery removal procedure. If your laptop has a built-in (non-removable) battery, skip this step.
5. Press and hold the power button for a few seconds. This helps discharge any remaining electrical charge in the laptop’s components.
By following these steps, you ensure that your laptop is completely powered off and disconnected from any power sources. Disconnecting the power supply and removing the battery (if applicable) reduce the risk of electrical shock and protect both you and the laptop from any potential harm during the RAM upgrade process.
Remember to handle your laptop with care during this step and throughout the entire RAM upgrade process. Avoid applying excessive force or dropping the laptop, as it can cause damage to the delicate internal components.
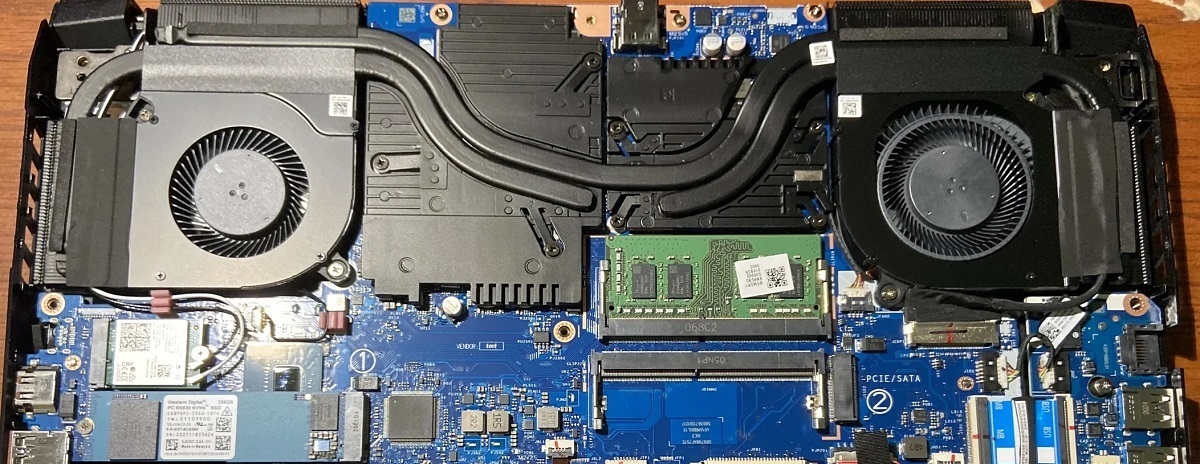
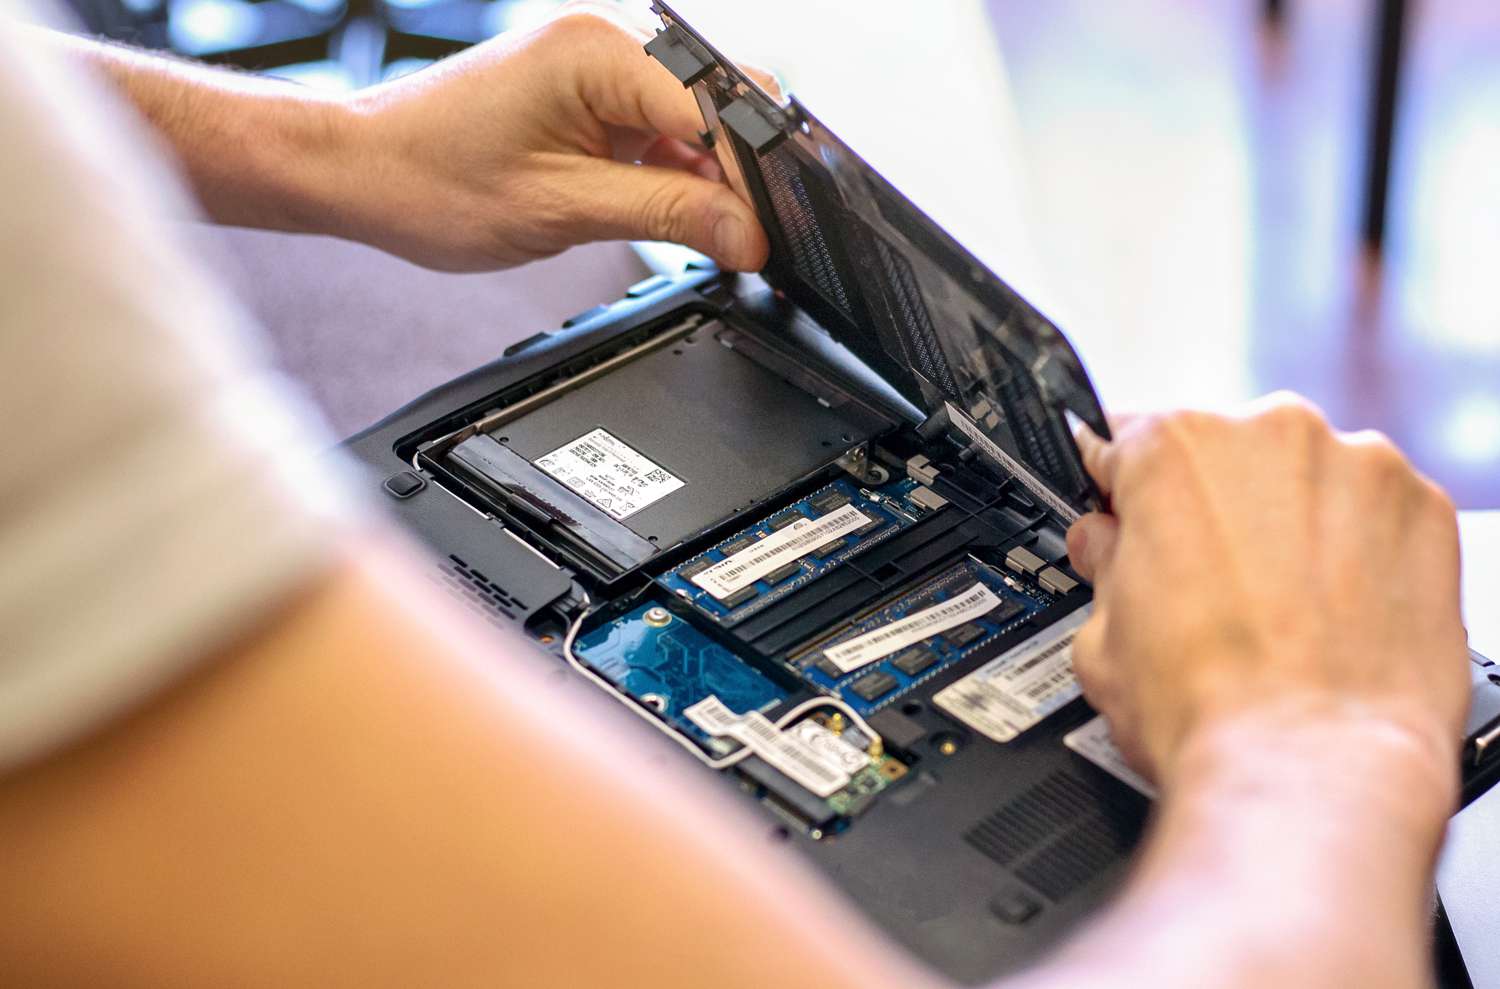
Step 4: Locate and access the RAM compartment
Once your laptop is powered off and disconnected, you can proceed to locate and access the RAM compartment. The exact location of the RAM compartment may vary for different laptop models, so it’s important to consult your laptop’s user manual or manufacturer’s documentation for specific instructions. Here are some general guidelines to help you find the RAM compartment:
1. Look for access panels on the bottom or sides of your laptop. These panels are usually secured with screws or clips and can be easily removed to access the internal components.
2. Check for any labels or indicators near the access panels that indicate the presence of RAM or depict a RAM symbol.
3. If you’re unable to locate the RAM compartment, search online for your laptop’s make and model along with the phrase “RAM upgrade” to find specific instructions or tutorial videos.
4. Once you have identified the RAM compartment, use the appropriate screwdriver to remove the screws or release the clips securing the access panel. Set the screws aside in a safe place to avoid losing them.
5. Gently remove the access panel to reveal the RAM slots and other internal components. Take care not to apply excessive force, as you don’t want to damage any delicate components inside the laptop.
Note that some laptops may have multiple compartments for different components, so be sure to identify the one specifically for RAM. It’s essential to handle the access panel and other components with care to avoid any damage.
By following these general guidelines and referring to your laptop’s specific instructions, you will be able to locate and access the RAM compartment. Once you have successfully reached the RAM compartment, you are ready to proceed with the actual RAM removal and installation in the next steps of the upgrade process.
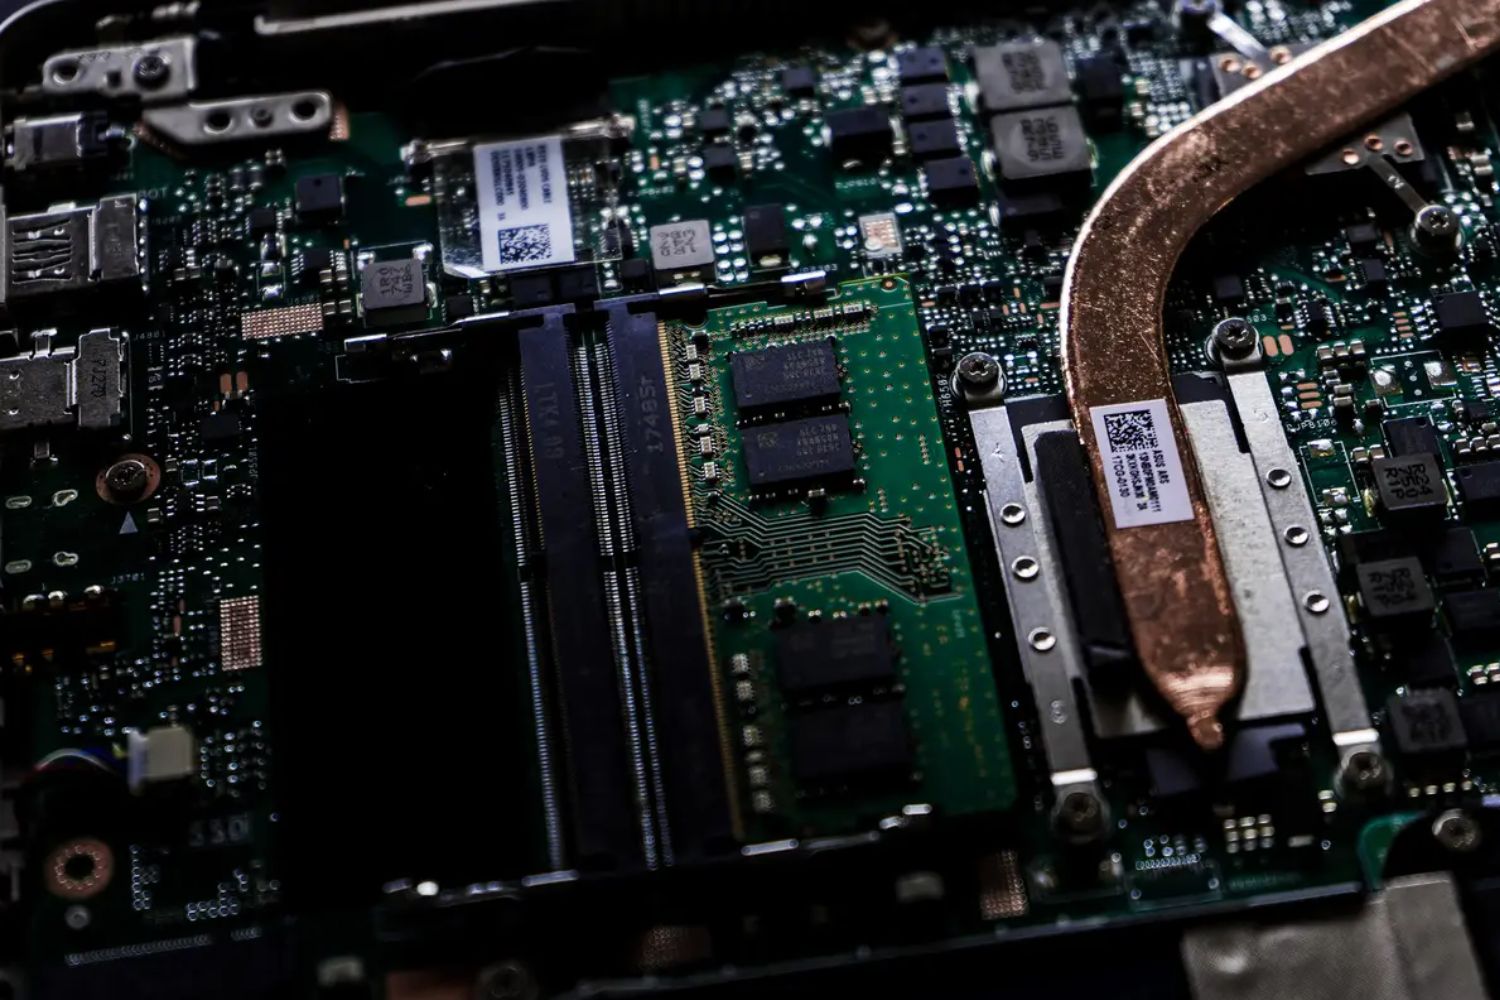
Step 5: Remove the old RAM module(s)
With the RAM compartment accessed, it’s time to remove the old RAM module(s) to make way for the new ones. Here’s how you can remove the old RAM:
1. Take a close look at the existing RAM module(s) and find the retention arms or clips on each side. Gently push these arms outward until the old module(s) pop up at a slight angle.
2. Carefully hold the module(s) by the edges and pull them out of the RAM slot(s). Be sure to grip the module(s) firmly but avoid touching the gold connectors or any exposed circuitry.
3. Set the removed RAM module(s) aside in a safe place. If you plan to keep them as backups or for other purposes, handle them with caution to prevent any damage.
4. Inspect the RAM slot(s) to ensure they are clean and free from any dust or debris. You can use compressed air or a soft brush to gently clean the slots if necessary. Be careful not to apply excessive force or damage any of the delicate pins or connectors.
5. If you are upgrading or replacing multiple RAM modules, repeat the above steps for each module.
It’s important to note that some laptops may have different configurations, such as having one accessible slot while others are hidden or soldered RAM modules. In such cases, you may need to consult your laptop’s user manual or manufacturer’s documentation for specific instructions on RAM removal.
Throughout the process, avoid touching any exposed components inside your laptop, as static electricity from your hands can damage sensitive circuitry. If you accidentally touch any components, discharge any static electricity from your body by touching a grounded metal object before continuing.
By following these steps, you will be able to safely remove the old RAM module(s) from your laptop. With the old RAM removed, you are now ready to proceed to the next step of installing the new RAM module(s).
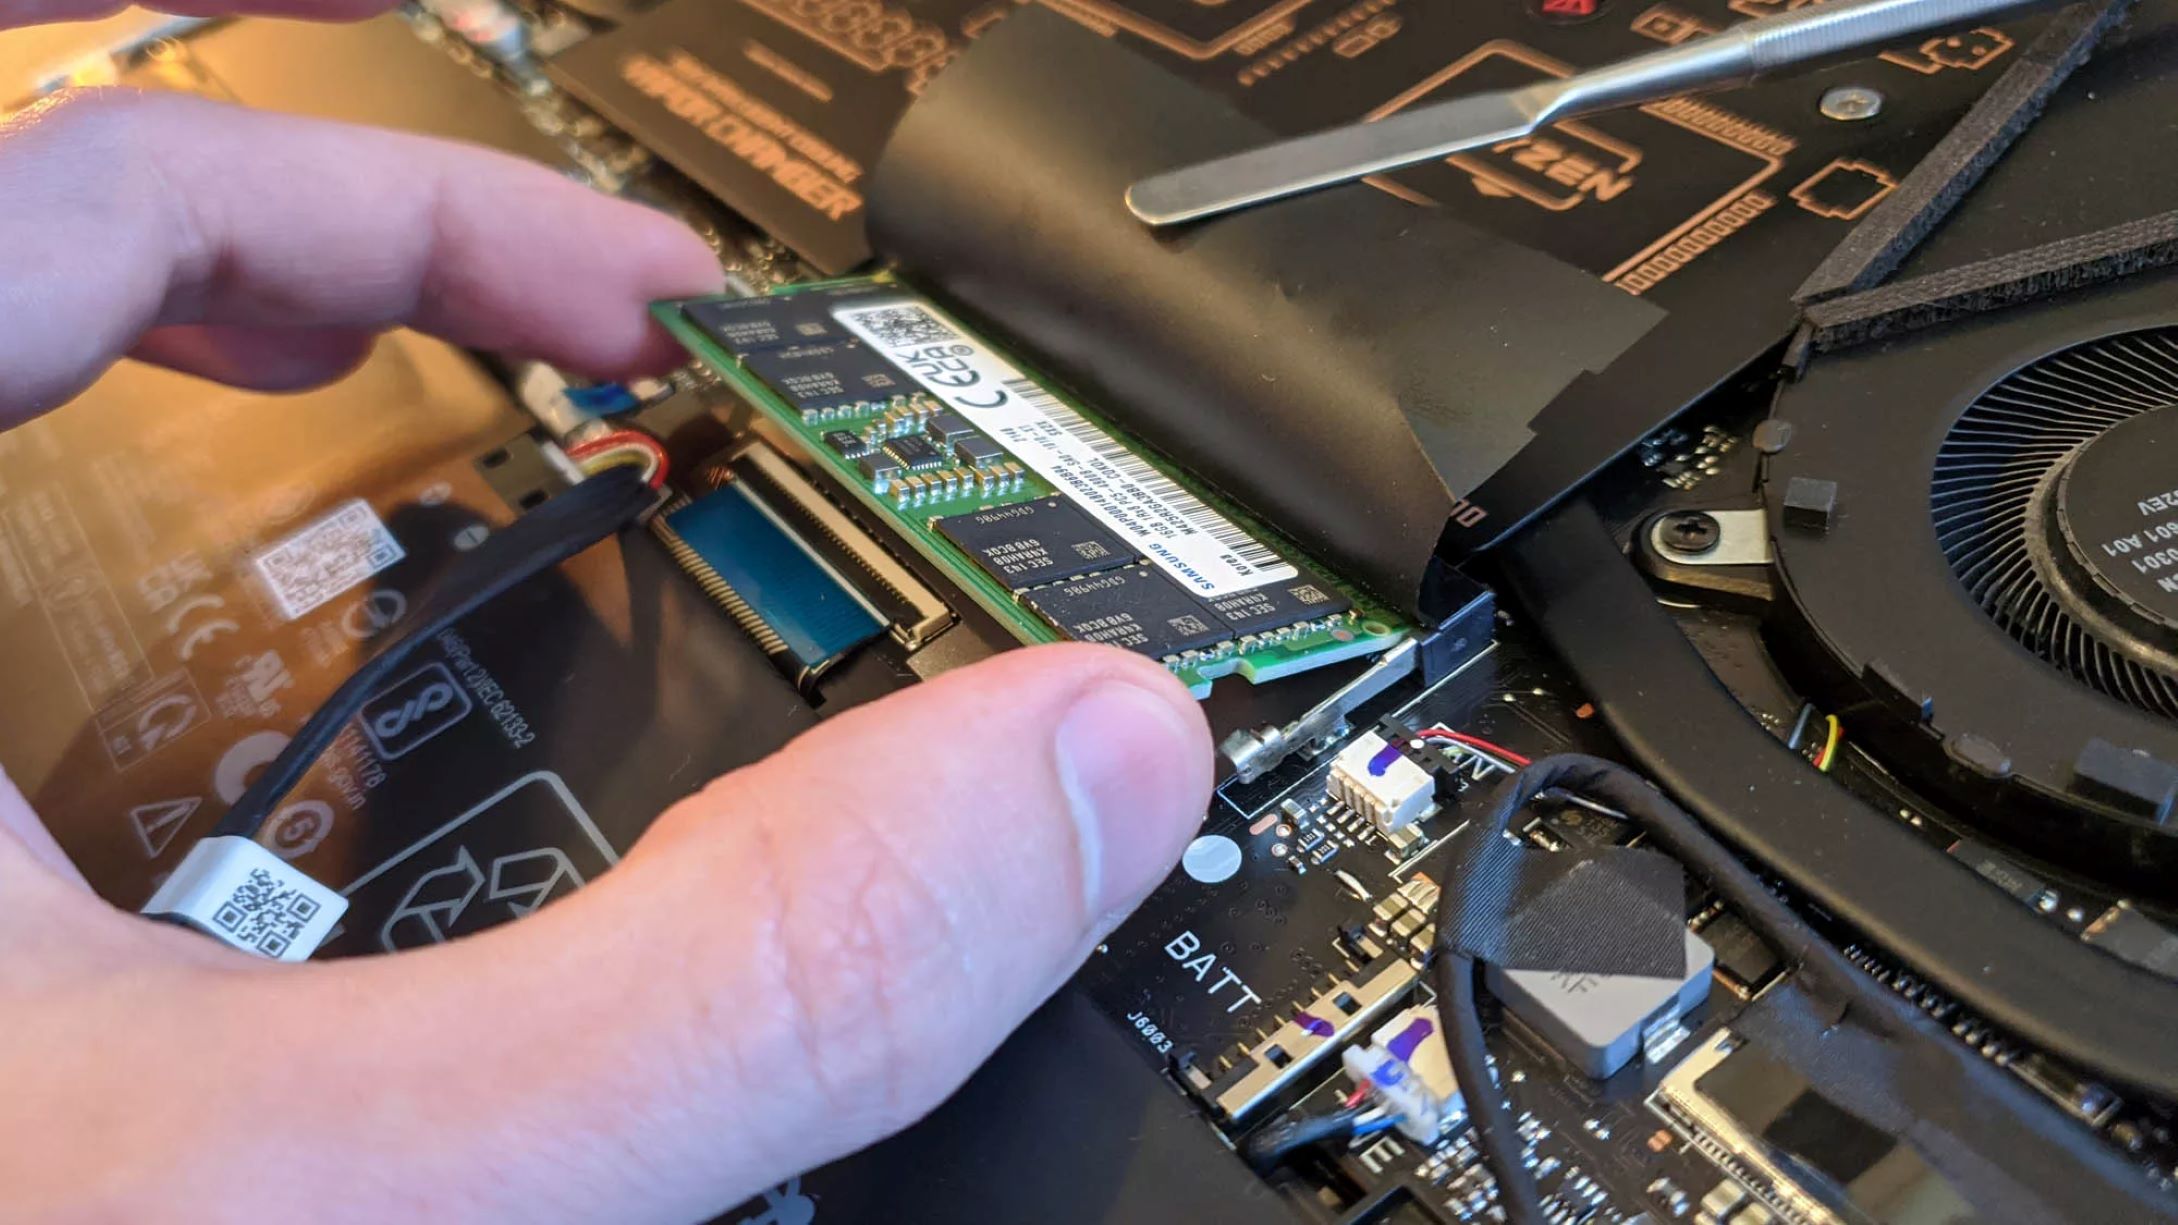
Step 6: Insert the new RAM module(s)
Now that you have removed the old RAM module(s), it’s time to insert the new RAM module(s) into the available slot(s). Follow these steps for a successful installation:
1. Take the new RAM module(s) out of its packaging or anti-static bag. Hold the module(s) by the edges, avoiding touching the gold connectors or any exposed circuitry.
2. Align the notch on the bottom edge of the RAM module(s) with the key in the RAM slot. This ensures that the module(s) can only be inserted in the correct orientation. It’s important to note that the notch position may vary depending on the RAM type.
3. Gently insert the RAM module(s) into the RAM slot(s) at a slight angle. Ensure that the module(s) is fully seated in the slot(s) and that the retention arms or clips on each side firmly snap into place.
4. Apply gentle pressure using your thumbs or fingers to push down evenly on the module(s) until it is fully seated and the retention arms or clips have securely locked it in position.
5. If you are installing multiple RAM modules, repeat the above steps for each module, ensuring they are placed in the correct slots and firmly seated.
6. Double-check that all RAM modules are properly installed and secure. Ensure that the retention arms or clips on each module are fully locked in place.
It’s important to handle the new RAM module(s) with care and avoid exerting excessive force during the installation. If the module(s) do not fit easily into the slot(s), do not try to force them. Check the orientation and alignment of the module(s) to ensure they are correctly positioned before proceeding.
Once the new RAM module(s) are securely installed, you can proceed to the next step of closing and securing the RAM compartment.
Step 7: Close and secure the RAM compartment
With the new RAM module(s) installed, it’s time to close and secure the RAM compartment to ensure everything is properly sealed. Follow these steps to complete this process:
1. Align the cover or access panel with the screw holes on the laptop chassis. Make sure the cover fits snugly into place before proceeding further.
2. Use the screwdriver to carefully insert and tighten the screws that secure the cover or access panel. Start with one corner and work your way around evenly, tightening each screw gradually. Avoid over-tightening the screws, as this may lead to damage or misalignment.
3. Once all screws are tightened, give the cover or access panel a gentle press to ensure it is securely closed and flush with the laptop chassis.
4. Ensure that all edges of the cover or access panel are aligned and free from any gaps or unevenness. This will help maintain a secure and uniform seal.
By properly closing and securing the RAM compartment, you ensure that the new RAM module(s) are protected and properly installed. It prevents any accidental dislodging of the modules and helps maintain a stable connection for optimal performance.
Before moving on to the next step, take a moment to double-check that all screws are securely tightened, the cover is snugly closed, and everything appears to be in place. This attention to detail will help ensure the stability and longevity of your RAM upgrade.
Finally, you’re ready to power on your laptop and verify the successful RAM upgrade. Powering on the laptop will allow you to check if the system recognizes the new RAM and if the upgrade has indeed improved its performance.
Step 8: Power on and verify the RAM upgrade
After closing and securing the RAM compartment, it’s time to power on your laptop and ensure that the RAM upgrade has been successful. Here’s what you need to do:
1. Connect your laptop to the power source and plugin the power adapter. If you removed the battery earlier, reinsert it following the manufacturer’s instructions.
2. Press the power button to turn on your laptop. Wait for the operating system to boot up and log in to your user account.
3. Once your laptop is fully booted, access the “System” or “About” settings. This can usually be found in the Control Panel or by right-clicking on the “My Computer” or “This PC” icon and selecting “Properties”.
4. In the system settings, you should be able to see the updated RAM capacity listed. It should reflect the new RAM module(s) you installed.
5. To further verify the RAM upgrade, you can open resource-intensive applications or run memory-intensive tasks. Observe if your laptop’s performance has improved, with smoother multitasking, faster loading times, and improved responsiveness.
6. Additionally, you can use system monitoring tools like Task Manager or Resource Monitor to observe the RAM usage. It should show a higher total available memory reflecting the upgraded RAM capacity.
If everything appears to be functioning correctly and your laptop’s performance has improved, congratulations! You have successfully upgraded your laptop’s RAM. Enjoy the benefits of enhanced multitasking and improved system performance.
However, if you encounter any issues or your laptop does not recognize the new RAM module(s), double-check that they are properly seated and secure in the RAM slots. If necessary, repeat the installation process, ensuring correct alignment and firm insertion.
It’s also important to note that some laptops may require a BIOS update to properly recognize and utilize the new RAM. Check your laptop’s user manual or the manufacturer’s website for any recommended BIOS updates or settings adjustments.
By following these steps and verifying the RAM upgrade, you can confirm the successful installation of the new RAM module(s) and enjoy the increased performance and capabilities of your upgraded laptop.
Conclusion
Upgrading the RAM in your laptop can be a rewarding and cost-effective solution to boost its performance. By following the step-by-step guide outlined in this article, you can successfully upgrade your laptop’s RAM and enjoy the benefits of improved multitasking, faster application loading, and increased overall responsiveness.
Throughout the process, it is crucial to ensure the compatibility of the new RAM module(s) with your laptop. Take the time to gather the necessary tools, carefully power off and disconnect your laptop, and locate the RAM compartment. Removing the old RAM module(s) and inserting the new ones should be done with caution, taking care not to damage any components.
Once the new RAM is installed, securely close the RAM compartment and power on your laptop to verify the successful upgrade. Check the system settings to confirm the increased RAM capacity and observe the improved performance during everyday tasks and resource-intensive activities.
Remember to consult your laptop’s user manual or manufacturer’s documentation for specific instructions and any BIOS updates that may be required.
By performing a RAM upgrade, you can extend the lifespan of your laptop and ensure it meets your productivity needs. The increased RAM capacity will enable smoother multitasking, improved application performance, and an overall faster and more efficient computing experience.
Whether you are a student, professional, or casual user, upgrading your laptop’s RAM can bring noticeable benefits to your productivity and enjoyment of using your laptop.
Take the leap and enhance your laptop’s performance by upgrading its RAM. Unlock its full potential and enjoy a faster, more responsive computing experience that will help you achieve more efficiently and effectively.