Introduction
When your computer starts running slow or becomes unresponsive, one possible solution is to upgrade your Random Access Memory (RAM). RAM is an essential component of your computer that affects its performance and speed. Upgrading the RAM can greatly improve your computer’s ability to handle multiple tasks simultaneously, making it faster and more efficient.
In this article, we will guide you through the process of taking out RAM from your computer. Whether you are replacing it with new RAM sticks or simply reseating the existing ones, following these steps will ensure a smooth and safe removal process.
Before getting started, it is important to note that handling computer components requires caution. Make sure to power off your device and take necessary precautions to prevent any static electricity discharge that could potentially damage your hardware.
So, gather your tools, prepare yourself, and let’s dive into the step-by-step process of taking out your RAM!
Tools Needed
Before you begin the process of taking out your RAM, it is important to gather the necessary tools to ensure a smooth removal process. Here are the tools you will need:
- Screwdriver: Depending on your computer’s make and model, you may need either a Phillips or a flathead screwdriver to remove the side panel.
- Anti-static wrist strap: This is a safety precaution that helps prevent any static electricity discharge from damaging your computer components. It is highly recommended to wear an anti-static wrist strap during the removal process.
- Compressed air: This will come in handy for cleaning any dirt or dust that may have accumulated around the RAM slots or inside your computer.
Having these tools readily available will make the process easier and more efficient. Now that you have all the necessary tools, let’s move on to the next step of locating the RAM slots in your computer.
Step 1: Power off the device
The first step in taking out your RAM is to ensure that your computer is powered off completely. This is an essential safety measure to prevent any electrical accidents or damage to your hardware during the removal process.
To power off your device, follow these steps:
- Save and close any open files or applications you have running.
- Click on the “Start” menu in the bottom-left corner of your screen.
- Select “Power” or “Shut Down” from the options.
- Wait for your computer to shut down completely. You may see a message indicating that it is safe to turn off your device.
- Once your computer is powered off, it is important to unplug it from the power source. This further ensures your safety and prevents any accidental electrical discharge.
Now that your computer is powered off and unplugged, you can proceed to the next step of locating the RAM slots in your computer.
Step 2: Locate the RAM slots
The next step in taking out your RAM is to locate the RAM slots in your computer. The RAM slots are usually found on the motherboard and are easily identifiable.
Here’s how you can locate the RAM slots:
- Consult your computer’s user manual: If you have the user manual that came with your computer, it will provide detailed information about the location of the RAM slots.
- Check the motherboard: If you don’t have the user manual or can’t find it, you can open up your computer case and check the motherboard directly. Look for long, rectangular slots that are typically arranged in pairs. These slots are where the RAM sticks are inserted.
Once you have located the RAM slots, you are ready to move on to the next step, which is removing the side panel of the computer to access the RAM sticks.
Step 3: Remove the side panel of the computer
In order to access the RAM sticks, you will need to remove the side panel of your computer case. This will provide you with easy access to the internal components, including the RAM slots.
Follow these steps to remove the side panel:
- Before proceeding, make sure your computer is still powered off and unplugged from the power source.
- Locate the screws or latches securing the side panel. These are often found on the back or side of the computer case.
- Using a screwdriver or your hand, remove the screws or release the latches, depending on the design of your computer case.
- Gently slide off or open the side panel to reveal the internal components of your computer.
Once the side panel is removed, be cautious of sharp edges inside the case and ensure that you handle the components with care.
You have now successfully removed the side panel of your computer, giving you access to the RAM slots. The next step is to take precautions to ground yourself and prevent any static electricity discharge that could potentially damage your hardware.
Step 4: Ground yourself
Before you handle any computer components, including the RAM sticks, it is essential to ground yourself. This helps to discharge any static electricity that can potentially damage the sensitive electronic parts.
Follow these steps to ground yourself:
- Locate a grounded surface: Find a metal surface that is grounded, such as a metal table leg or a radiator.
- Touch the grounded surface: Touch the chosen grounded surface with your hand. This action helps to equalize the electrical potential between your body and the computer components.
- Repeat the process: Repeat the grounding process multiple times during the removal process, especially before handling important components like the RAM sticks.
- Consider using an anti-static wrist strap: If you have one available, it is highly recommended to wear an anti-static wrist strap. This strap helps to continuously discharge any static electricity as you work.
By grounding yourself, you minimize the risk of damaging your computer components with static electricity. Once you have grounded yourself, you are ready to move on to the next step of identifying and removing the RAM sticks.
Step 5: Identify the RAM sticks
Before removing the RAM sticks, it is important to identify them accurately. This will help you avoid removing the wrong component and ensure a smooth removal process.
Follow these steps to identify the RAM sticks:
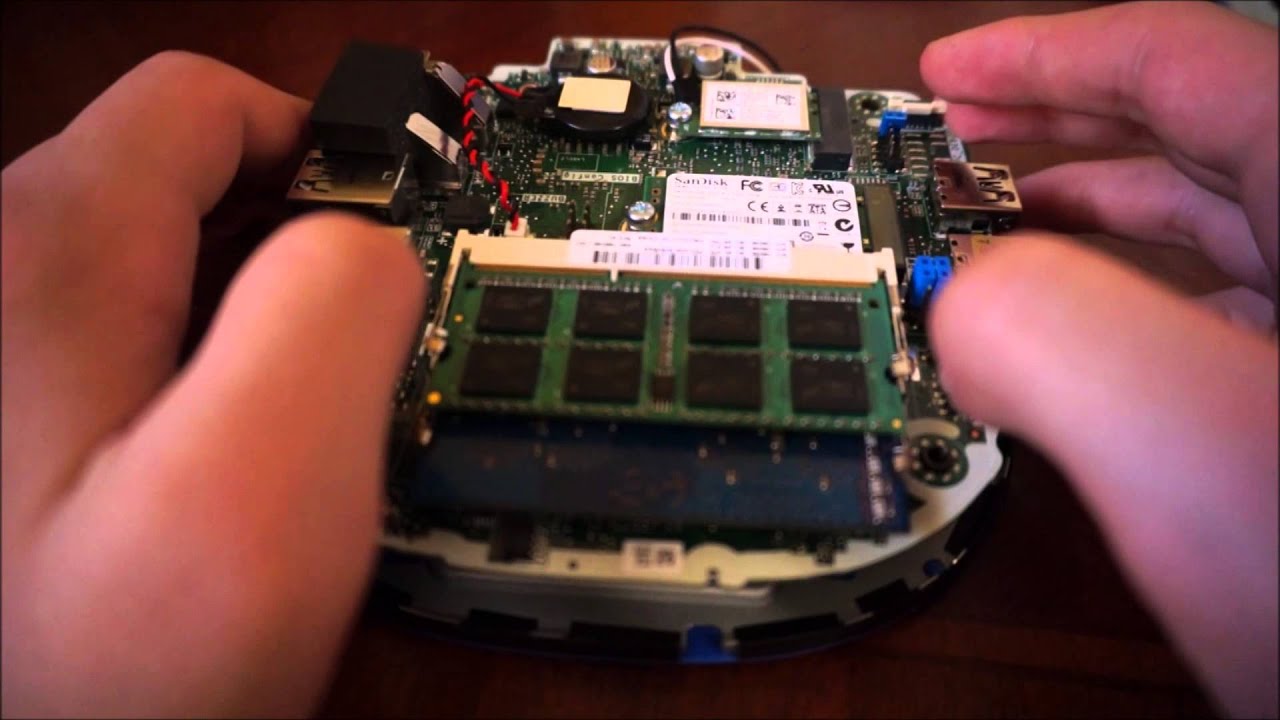
- Locate the RAM slots: As mentioned earlier, the RAM slots are long, rectangular slots usually found on the motherboard. These slots hold the RAM sticks.
- Examine the RAM sticks: Each RAM stick is a small rectangular circuit board with chips on it. They are typically labeled with specifications like capacity and speed.
- Take note of the number and configuration: Identify the number of RAM sticks you have installed in your computer. You may have one or multiple sticks, depending on your configuration.
- Check the characteristics: Take note of the capacity and speed of each RAM stick. This information can be used when upgrading or replacing the RAM sticks.
By identifying the RAM sticks, you will have a clear understanding of what you are working with and can proceed with the removal process confidently. The next step is to release the tabs or clips that secure the RAM sticks in place.
Step 6: Release the tabs or clips
Once you have identified the RAM sticks, the next step is to release the tabs or clips that secure them in place. These tabs or clips hold the RAM sticks firmly in the slots to ensure a secure connection.
Follow these steps to release the tabs or clips:
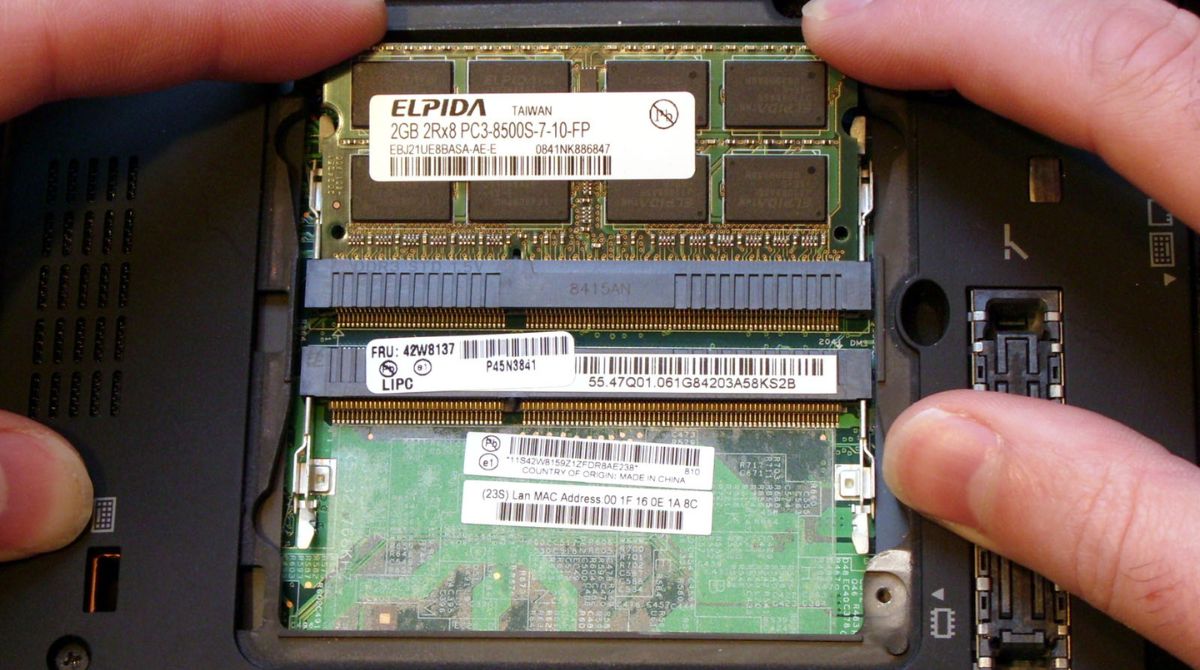
- Locate the tabs or clips: Each RAM stick will have tabs or clips on either side that hold it in place. These tabs or clips may be plastic or metal, depending on the design of your motherboard.
- Identify the locking mechanism: Take a close look at the tabs or clips and determine the type of locking mechanism they use. Some may have a small latch that needs to be lifted, while others may have tabs that need to be pushed outward.
- Release the tabs or clips: Using your fingers or a small tool, carefully release the tabs or clips on both sides of the RAM stick simultaneously. Apply gentle pressure in the necessary direction as identified in the previous step.
- Ensure the tabs or clips are fully released: Once released, ensure that the tabs or clips are fully disengaged from the RAM stick. This will allow it to be pulled out of the slot easily.
By following these steps, you will release the tabs or clips holding the RAM sticks securely. With the tabs or clips released, you can now proceed to the next step of removing the RAM stick from the slot.
Step 7: Remove the RAM stick
Now that you have released the tabs or clips, you can proceed to remove the RAM stick from its slot. Removing the RAM stick requires gentle handling to avoid any damage to the stick or the slot.
Follow these steps to safely remove the RAM stick:
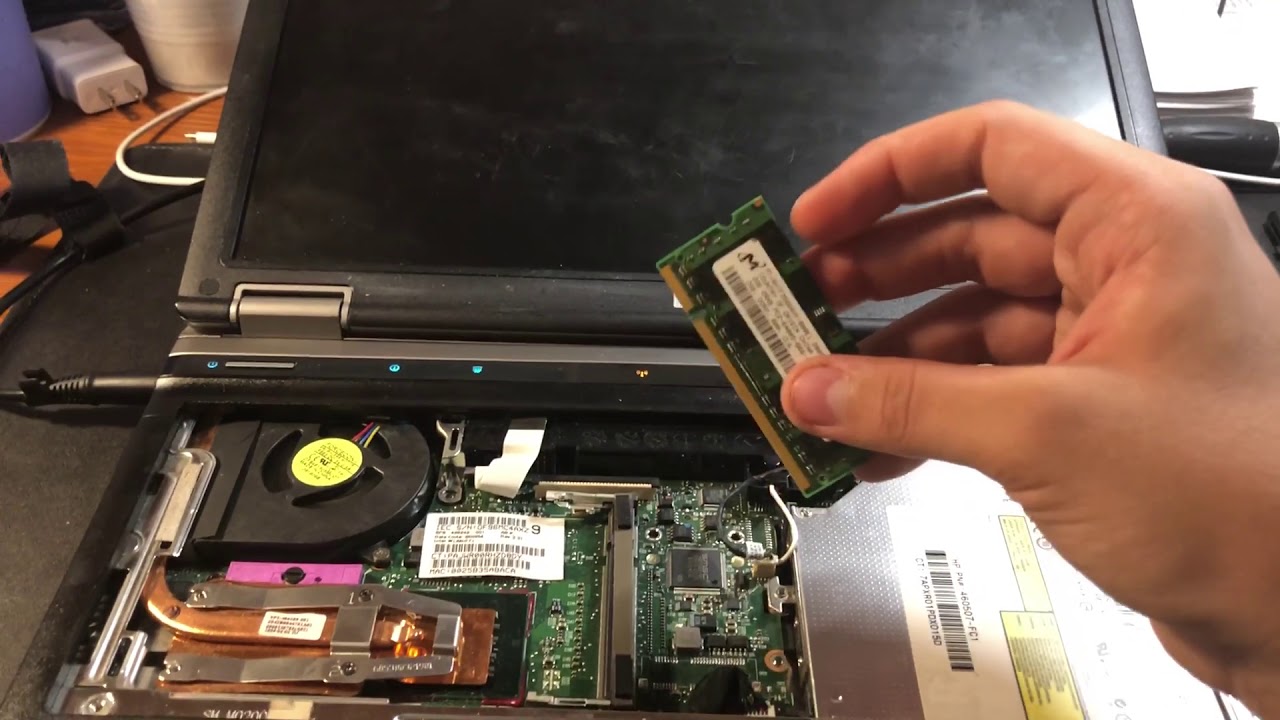
- Gently hold the RAM stick by its sides: Avoid touching the golden connectors or the circuitry on the bottom of the stick. Handle it by its sides to prevent any static electricity discharge.
- Slowly pull the RAM stick out: With a firm yet gentle grip, pull the RAM stick straight out of the slot. Avoid any sideways movements that may cause damage to the slot or the stick.
- Keep the removed RAM stick safe: Once you have removed the RAM stick, place it in an anti-static bag or on an anti-static surface to protect it from any potential damage.
Remember to handle the RAM stick with care throughout the removal process. By following these steps, you have successfully removed a RAM stick from its slot.
If you have multiple RAM sticks installed, repeat these steps for each additional stick that you want to remove. With the RAM stick(s) safely removed, you can proceed to install new RAM sticks or reseat the ones you just removed, depending on your specific needs.
Step 8: Repeat for additional RAM sticks (if applicable)
If you have multiple RAM sticks installed in your computer, you will need to repeat the process of removing them following the previous steps. Each RAM stick should be handled individually to ensure a smooth removal process.
Here’s how to repeat the removal process for additional RAM sticks:
- Ensure the computer is powered off and unplugged, and that you are grounded to prevent any static electricity discharge.
- Identify the next RAM stick you want to remove based on its location and characteristics.
- Release the tabs or clips on both sides of the RAM stick, carefully disengaging them from the slot.
- Gently hold the RAM stick by its sides and pull it straight out of the slot.
- Place the removed RAM stick in a safe and anti-static location.
Repeat these steps for each additional RAM stick you want to remove. Remember to handle each stick with care and avoid any unnecessary force or rough movements.
If you have completed the removal of all the desired RAM sticks, you can proceed to the next step, which involves installing new RAM sticks (if applicable) or reseating the ones you just removed.
Step 9: Install new RAM (optional)
If you are not just removing the RAM sticks but also upgrading or replacing them, you can proceed to install new RAM sticks. This step is optional and should only be performed if you have new RAM sticks ready for installation.
Follow these steps to install new RAM sticks:
- Ensure the computer is still powered off and unplugged, and that you are grounded to prevent any static electricity discharge.
- Take the new RAM stick(s) out of their packaging, being careful to handle them by the sides to avoid damaging the connectors or circuitry.
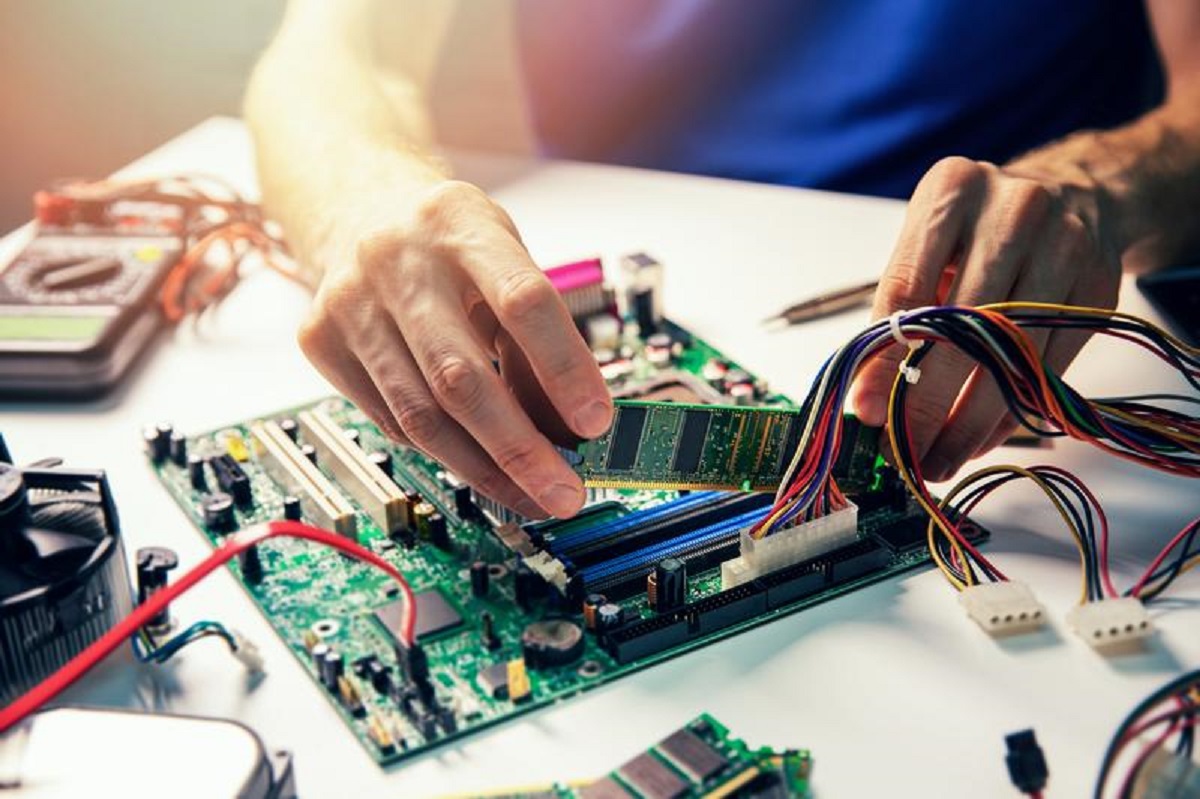
- Align the notch on the bottom of the RAM stick with the notch in the RAM slot. This ensures that you are inserting it correctly.
- Hold the RAM stick at a slight angle and gently insert it into the slot. Apply even pressure, making sure it is fully seated in the slot.
- Once inserted, press down on the top of the RAM stick until the tabs or clips lock into place, securing the stick in the slot.
Make sure to follow any specific instructions provided by the manufacturer regarding the installation of the new RAM sticks. Double-check that the sticks are fully inserted and secured in the slots.
With the new RAM sticks successfully installed, you can proceed to replace the side panel of your computer and power it on.
Step 10: Replace the side panel of the computer
After removing or installing the RAM sticks, it is time to replace the side panel of your computer. This step is crucial as it ensures the internal components are securely protected and the computer functions properly.
To replace the side panel, follow these steps:
- Check for any cables or wires: Before replacing the side panel, make sure there are no cables or wires obstructing its alignment. Gently move them away from the edges to ensure a proper fit.
- Align the side panel: Line up the side panel with the case so that it fits snugly into place. Make sure the screw holes, latches, or tabs align with the corresponding slots on the case.
- Slide or close the side panel: Depending on your computer case design, either slide the side panel back into place or close it by reattaching the screws or engaging the latches or tabs.
- Ensure a secure fit: Give the side panel a slight push to ensure it is securely in place. It should fit flush with the case without any gaps or loose fittings.
It is important to ensure that the side panel is properly secured to prevent dust or debris from entering the computer and to ensure efficient airflow for cooling purposes.
Once the side panel is replaced, you are ready to move on to the final step of powering on your computer.
Step 11: Power on the device
With the RAM sticks installed and the side panel securely in place, it is time to power on your computer. This final step ensures that your computer recognizes the new RAM configuration and is ready to be used.
To power on the device, follow these steps:
- Double-check all connections: Before powering on, ensure that all cables and wires are properly connected and no components are loose.
- Plug in and turn on the computer: Reconnect the power cable to your computer and plug it back into the power source. Press the power button to turn on the device.
- Monitor the startup process: Watch your computer’s screen as it starts up. You may see a message indicating that the RAM configuration has changed or that the computer is detecting new hardware.
- Enter BIOS (optional): If prompted, you can press a specific key (usually F2, F10, or Delete) to enter the BIOS or UEFI settings. Here, you can verify that the new RAM is recognized and adjust any necessary settings.
- Check system information: Once your computer has finished starting up, you can check the system information to confirm that the new RAM sticks are recognized and functioning properly.
If everything appears to be working correctly and the system recognizes the new RAM configuration, congratulations! You have successfully taken out and/or installed new RAM sticks in your computer.
At this point, you can now enjoy the benefits of upgraded RAM, such as improved performance and a faster computing experience.
Conclusion
Taking out RAM from your computer can be a simple yet effective way to improve its performance. Whether you are replacing old RAM sticks or reseating existing ones, following the step-by-step process outlined in this article ensures a smooth and safe removal process.
We started by powering off the device and locating the RAM slots. Then, we removed the side panel to access the internal components. Grounding ourselves and identifying the RAM sticks were the crucial steps that followed.
Releasing the tabs or clips and gently removing the RAM stick came next. For those who have multiple RAM sticks, the process was repeated for each one. For those installing new RAM, we provided optional steps for their guidance.
Replacing the side panel and powering on the device were the final steps in the process. By following these steps, you can upgrade your computer’s RAM or resolve any issues related to the RAM’s performance.
Remember to handle the RAM sticks with care, be grounded to prevent static electricity discharge, and ensure that the side panel is securely in place to protect the internal components.
Keep in mind that upgrading your computer’s RAM is not the only solution to improve its performance. It is also important to regularly maintain your system, keep your software updated, and consider other hardware upgrades if necessary.
By following these guidelines, you can enhance the overall performance of your computer and ensure its smooth operation for years to come.