Introduction
Welcome to the world of cryptocurrency, where digital assets are held securely and transactions are conducted with complete anonymity. As the popularity of cryptocurrencies continues to soar, it becomes crucial to safeguard your investments and ensure the protection of your digital wealth. One of the most effective ways to achieve this is by transferring your crypto to a hardware wallet.
A hardware wallet is a physical device that enables you to store your cryptocurrencies offline, providing an extra layer of security against online threats such as hacking and malware. Unlike software wallets, which are vulnerable to cyberattacks, hardware wallets keep your private keys secure in a device that is not directly connected to the internet.
Using a hardware wallet offers numerous benefits beyond security. It allows you to have full control over your crypto assets, eliminating the need for third-party custodians. Furthermore, it enables you to securely manage multiple cryptocurrencies without the hassle of maintaining separate wallets for each digital currency.
In this comprehensive guide, we will walk you through the process of transferring your crypto to a hardware wallet. Whether you are a beginner looking to dip your toes into the world of cryptocurrency or a seasoned investor wanting to enhance the security of your digital assets, this guide will provide you with the necessary steps to successfully transfer your crypto to a hardware wallet.
What is a Hardware Wallet
A hardware wallet is a physical device specifically designed to securely store cryptocurrencies. It acts as a cold storage solution, keeping your private keys offline and away from potential online threats. Simply put, a hardware wallet is like a vault for your digital assets.
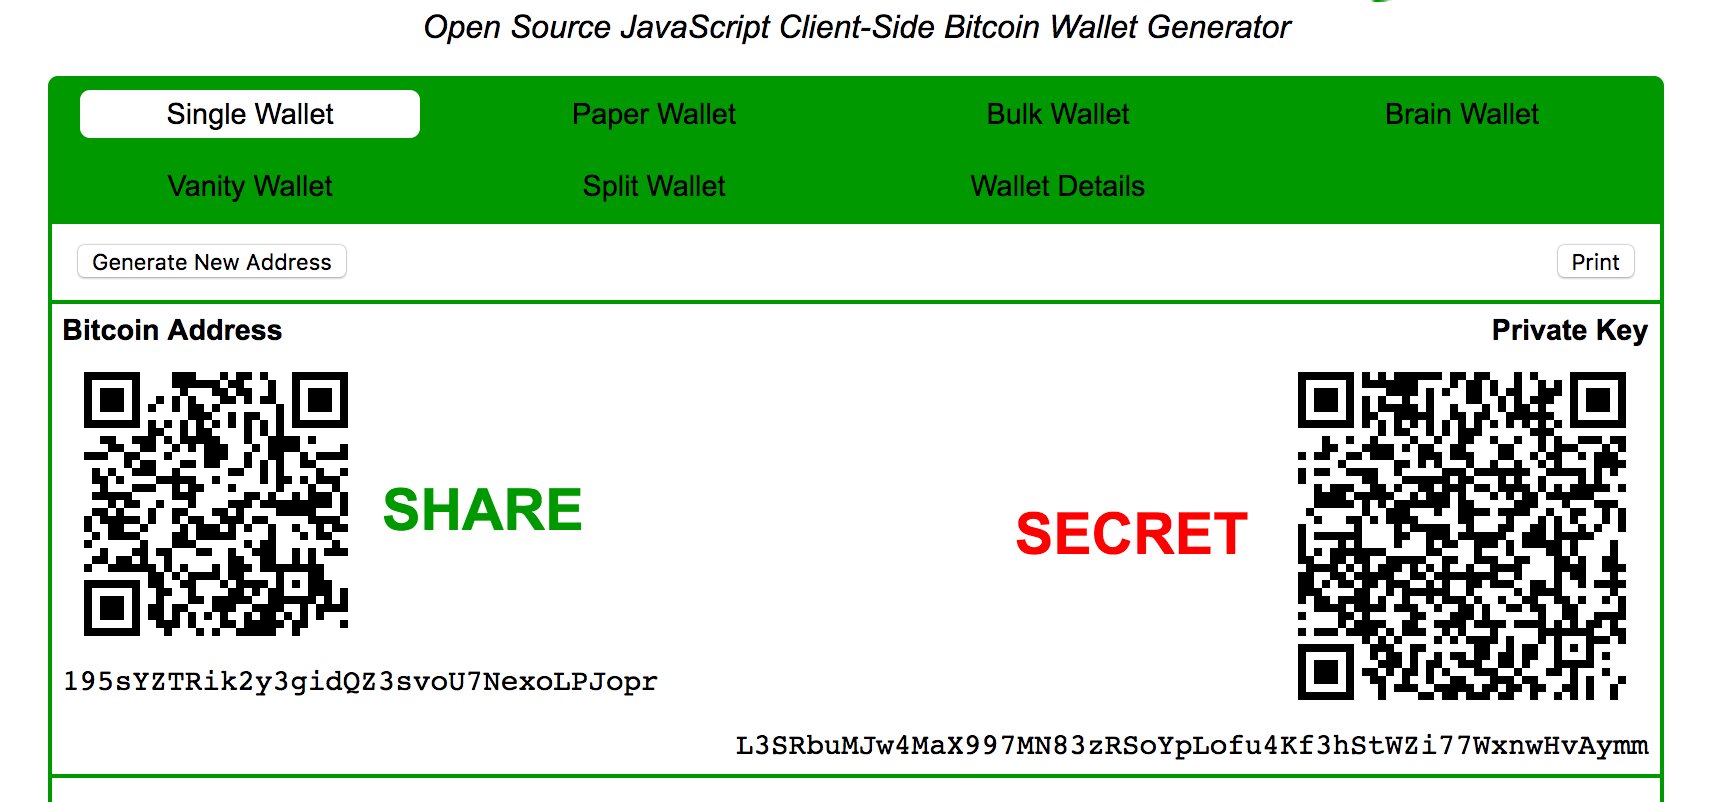
Unlike software wallets, which store private keys on a computer or mobile device, hardware wallets store private keys offline on a secure chip within the device. This ensures that your private keys are never exposed to the internet, significantly reducing the risk of theft or unauthorized access.
Hardware wallets are typically small, portable devices with a USB connection for easy connectivity with your computer or mobile device. They come with built-in safety measures such as PIN codes, encryption, and backup options to safeguard your crypto holdings. Many hardware wallets also incorporate a second-factor authentication feature, which adds an extra layer of security.
One of the key advantages of using a hardware wallet is its compatibility with multiple cryptocurrencies. Most popular hardware wallets support a wide range of digital currencies, including Bitcoin, Ethereum, Litecoin, and more. This allows you to conveniently manage and store different cryptocurrencies in a single device.
Additionally, hardware wallets offer a user-friendly interface, making it easy even for beginners to navigate and operate the device. They often come with compatible software applications that provide step-by-step instructions for setting up the wallet and accessing your cryptocurrencies.
With their offline storage and robust security features, hardware wallets provide a highly secure solution for managing your digital assets. Whether you are an individual investor or a business owner, a hardware wallet is an essential tool to protect your crypto investments from potential cyber threats.
Why Use a Hardware Wallet
With the increasing popularity of cryptocurrencies, it has become essential to prioritize the security of your digital assets. One of the most effective ways to achieve this is by utilizing a hardware wallet to store and manage your cryptocurrencies. Here are several compelling reasons why you should consider using a hardware wallet:
1. Enhanced Security:
Hardware wallets provide the highest level of security for your cryptocurrencies. By storing your private keys offline and away from the internet, hardware wallets significantly reduce the risk of hacking, malware, and other cyber threats. This ensures that your digital assets remain safe and protected.
2. Protection Against Phishing Attacks:
Hardware wallets are immune to phishing attacks, one of the most common methods used by hackers to steal cryptocurrencies. Since hardware wallets require physical interaction and verification, they provide an added layer of protection by preventing unauthorized access to your private keys.
3. Convenient and Easy to Use:
Despite their advanced security features, hardware wallets are designed to be user-friendly and accessible even for those new to cryptocurrencies. They typically come with clear instructions and intuitive interfaces, making it easy to set up, manage, and transfer your cryptocurrencies.
4. Compatibility with Multiple Cryptocurrencies:
Hardware wallets often support a wide range of cryptocurrencies, allowing you to store and manage different digital assets in a single device. This eliminates the need for multiple wallets and simplifies the management of your diverse crypto portfolio.
5. Backup and Recovery Options:
Most hardware wallets provide backup and recovery options to ensure that you can always access your cryptocurrencies, even if the device is lost, damaged, or stolen. These features typically include seed phrases or recovery seeds that can be used to restore your wallet on a new device.
6. Enhanced Control and Ownership:
By using a hardware wallet, you have complete control over your cryptocurrencies. You are not reliant on third-party custodians or exchanges to store and secure your digital assets. This gives you full ownership of your funds and eliminates the risk of losing access to your cryptocurrencies due to the actions of a centralized entity.
With their unmatched security, user-friendly interfaces, and compatibility with multiple cryptocurrencies, hardware wallets offer a robust and reliable solution for protecting and managing your digital assets. Investing in a hardware wallet is a crucial step towards ensuring the long-term security and integrity of your cryptocurrencies.
Types of Hardware Wallets
When it comes to hardware wallets, there are several options available in the market. Each type offers its own unique features and benefits. Let’s take a closer look at the different types of hardware wallets:
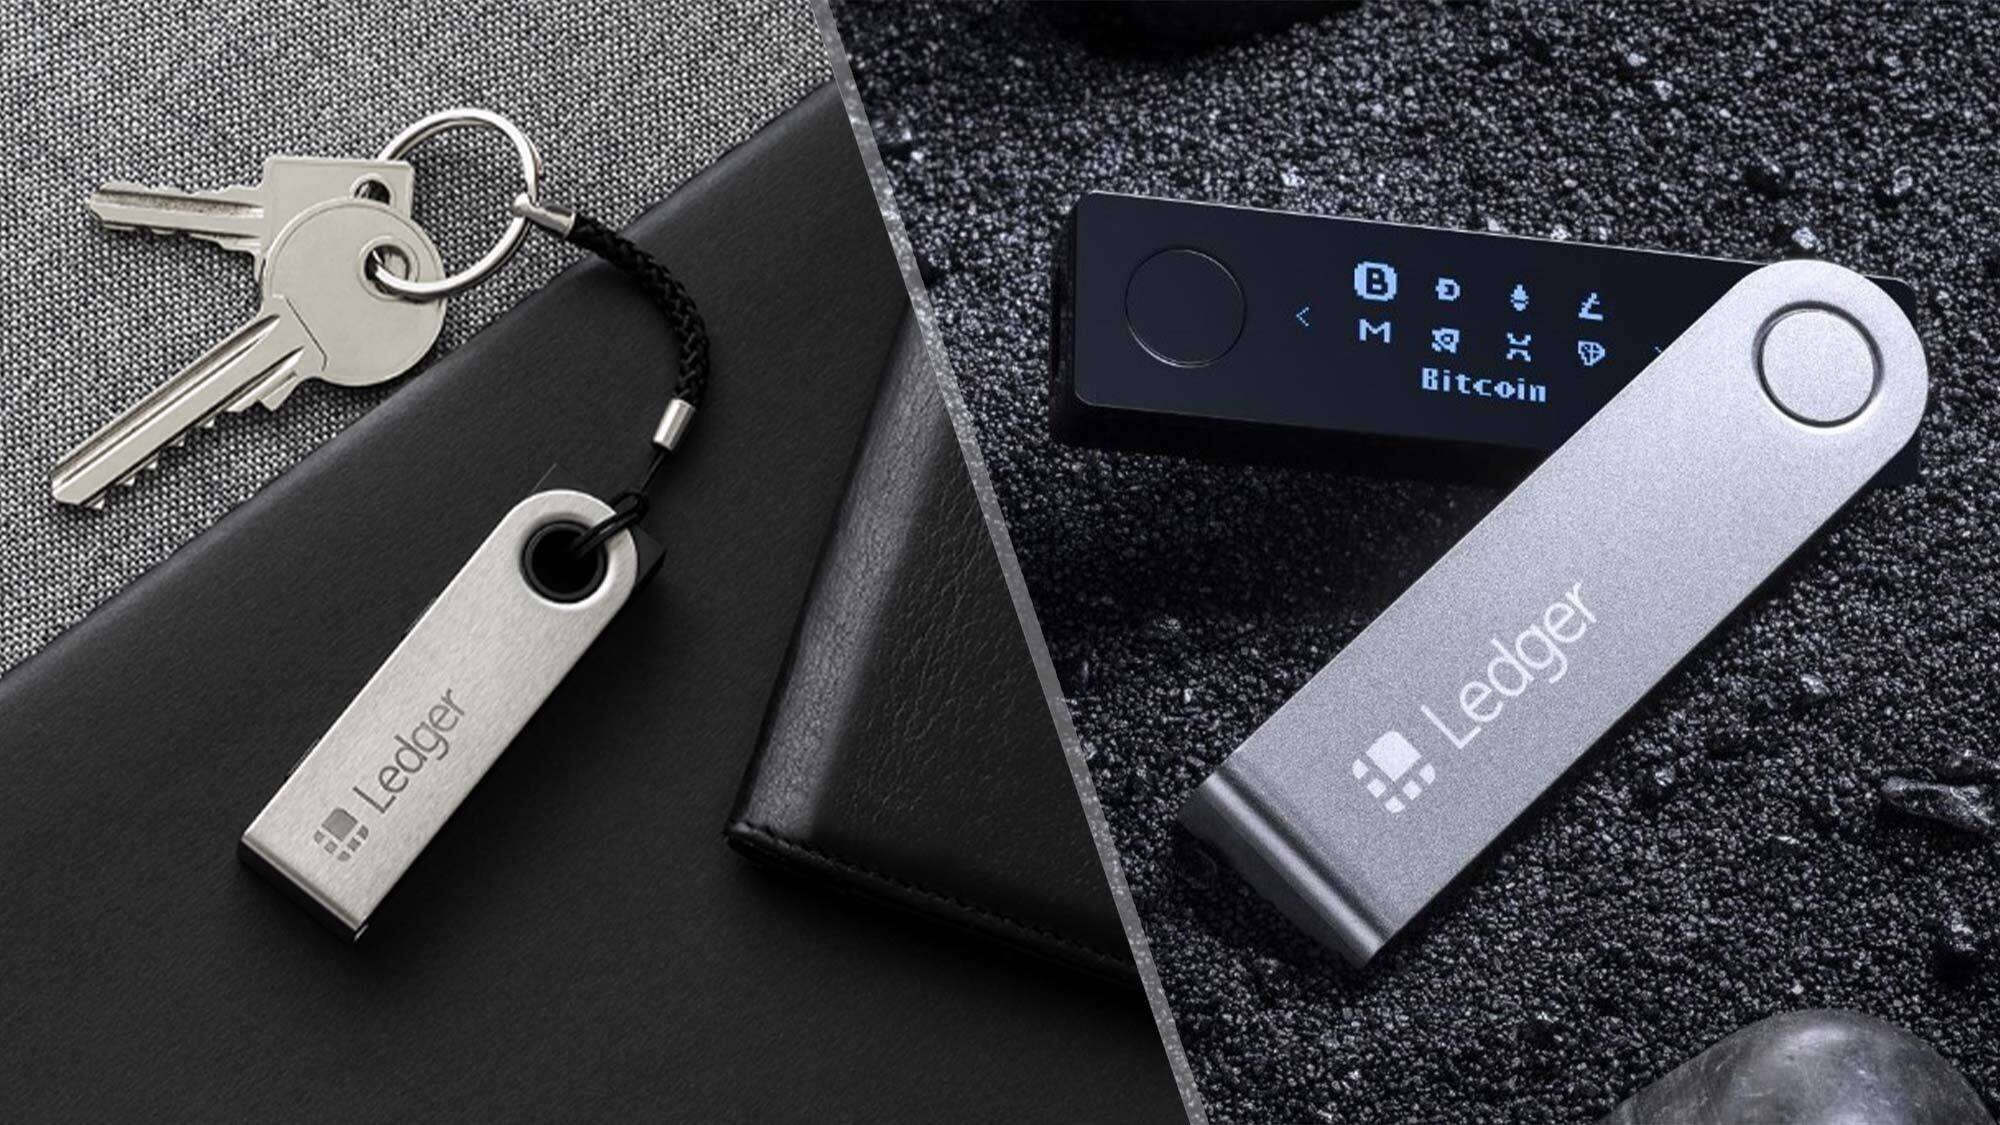
1. USB-Based Hardware Wallets:
USB-based hardware wallets are the most common type of hardware wallets available. They are small, portable devices that connect to your computer or mobile device via USB. These wallets utilize secure elements to store private keys and offer compatibility with a wide range of cryptocurrencies.
2. Smartcard Hardware Wallets:
Smartcard hardware wallets are based on smartcard technology. They come in the form of a card or a small USB device that you can plug into your computer. Smartcard hardware wallets offer high security and often require a PIN code to access your private keys.
3. QR Code Hardware Wallets:
QR code hardware wallets are designed to work with mobile devices. They generate QR codes that represent your wallet address and private keys. To make a transaction, you scan the QR code with your mobile wallet application. These wallets are compact and convenient for on-the-go crypto management.
4. Air-Gapped Hardware Wallets:
Air-gapped hardware wallets, also known as offline wallets, are designed for maximum security. They have no internet connectivity, ensuring that your private keys are never exposed to online threats. Air-gapped wallets often require manual input and verification of transactions, providing an extra layer of protection against hacking and malware.
5. Multisignature Hardware Wallets:
As the name suggests, multisignature hardware wallets require multiple signatures to authorize transactions. This adds an extra layer of security, as multiple parties have to approve a transaction before it can be executed. Multisignature wallets are often used by businesses and organizations that require shared control over crypto assets.
Each type of hardware wallet offers varying levels of security and functionality. It’s important to consider your specific needs and preferences when choosing a hardware wallet for your crypto assets. Regardless of the type you choose, hardware wallets provide an excellent solution to keep your cryptocurrencies safe and secure.
Step 1: Choosing the Right Hardware Wallet
Choosing the right hardware wallet is a crucial first step in securing your cryptocurrencies. With so many options available, it’s important to consider certain factors before making a decision. Here’s a simple guide to help you choose the right hardware wallet:
1. Security Features:
Look for hardware wallets that offer robust security features. This includes secure elements, encryption, PIN code protection, and backup options. Ensure that the wallet has a strong reputation for security and has undergone extensive audits and testing.
2. Cryptocurrency Support:
Check if the hardware wallet supports the cryptocurrencies you plan to store. Most popular hardware wallets support a wide range of digital currencies, but it’s always important to double-check before making a purchase.
3. User Experience:
Consider the user experience and ease of use offered by the hardware wallet. Look for wallets with intuitive interfaces and clear instructions for setup and operation. You want a wallet that is user-friendly, even if you are a beginner in the world of cryptocurrencies.
4. Device Compatibility:
Check if the hardware wallet is compatible with your computer or mobile device. Most wallets work with major operating systems like Windows, macOS, Linux, iOS, and Android. Ensure that you can easily connect the wallet to your preferred device.
5. Reputation and Reviews:
Do thorough research and read reviews about the hardware wallet you are considering. Look for feedback and opinions from other users to gauge their experiences. Consider wallets that have a good reputation and positive reviews from the cryptocurrency community.
6. Price:
Consider the price of the hardware wallet and whether it fits within your budget. While it’s important not to compromise on security, you can find hardware wallets at different price points to suit your needs.
By evaluating these factors, you can make an informed decision and choose a hardware wallet that meets your requirements. Remember, the security of your cryptocurrencies depends on the quality and reliability of the hardware wallet you select.
Step 2: Setting Up Your Hardware Wallet
Once you’ve chosen the right hardware wallet for your needs, the next step is to set it up. Setting up your hardware wallet involves a few key steps to ensure that it is properly configured and ready for use. Here’s a step-by-step guide to setting up your hardware wallet:
1. Unboxing and Inspection:
Begin by unboxing your hardware wallet and inspecting it for any signs of damage or tampering. Ensure that all the necessary components are included and in good condition.
2. Connect to a Secure Device:
Connect your hardware wallet to a secure and malware-free computer or mobile device. Avoid using public or shared devices, as they may pose a security risk.
3. Install the Wallet Software:
Visit the official website of the hardware wallet manufacturer and download the recommended wallet software for your device. Follow the instructions to install the software.
4. Create a New Wallet:
Launch the wallet software and select the option to create a new wallet. You will be prompted to set a strong and unique password for your wallet. Make sure to choose a password that is memorable and secure.
5. Backup Your Seed Phrase:
During the wallet setup process, you will be given a seed phrase, also known as a recovery phrase or mnemonic phrase. Write down this phrase on a piece of paper and store it in a safe and secure location. This phrase is essential for recovering your wallet in case it is lost, stolen, or damaged.
6. Verify and Confirm:
After backing up your seed phrase, the wallet software will prompt you to verify and confirm it. This step ensures that you have correctly recorded the phrase and can use it for recovery purposes.
7. Secure Authentication:
Set up an additional layer of security by enabling features such as two-factor authentication (2FA) or biometric authentication (if available). This will further protect your wallet from unauthorized access.
By following these steps, you will have successfully set up your hardware wallet and created a secure and protected environment for your cryptocurrencies. You are now ready to access and transfer your digital assets using your hardware wallet.
Step 3: Accessing Your Crypto Wallet
Once you have set up your hardware wallet, the next step is to access your crypto wallet and view your account balance. Here’s a step-by-step guide on how to access your crypto wallet using a hardware wallet:
1. Connect Your Hardware Wallet:
Connect your hardware wallet to your computer or mobile device using the provided USB cable or wireless connection. Ensure that the hardware wallet is securely connected and recognized by the wallet software.
2. Open the Wallet Software:
Launch the wallet software that you previously installed during the setup process. It should automatically detect the connected hardware wallet and display a prompt to enter your PIN code or use any other authentication method you have set up.
3. Enter Your PIN Code:
Enter the PIN code on the hardware wallet’s display keypad or through the wallet software interface, following the instructions provided. This step is crucial in verifying your ownership of the wallet and allowing access to your crypto funds.
4. Access Your Accounts:
After successfully entering your PIN code, the wallet software will display a menu or dashboard that shows your cryptocurrency accounts. Select the desired account to view its balance and transaction history.
5. View your Account Balance:
You should now see the balance of your selected cryptocurrency account on the wallet software interface. This balance represents the amount of cryptocurrency you currently hold in that specific wallet address.
6. Explore Wallet Features:
Take some time to familiarize yourself with the additional features offered by your wallet software, such as sending and receiving cryptocurrencies, transaction history, and security settings. Read the user manual or explore the wallet software’s documentation for detailed instructions.
7. Keep Your Hardware Wallet Secure:
When you are done accessing your crypto wallet, make sure to disconnect your hardware wallet from the computer or mobile device. Store it in a safe and secure location, protecting it from physical damage or theft.
By following these steps, you can easily access and view your crypto wallet using a hardware wallet. Remember to always follow best security practices and keep your hardware wallet and access information secure to protect your cryptocurrencies from unauthorized access or loss.
Step 4: Transferring Crypto to Your Hardware Wallet
Now that you have accessed your hardware wallet, it’s time to transfer your cryptocurrencies to it for enhanced security and control. Here’s a step-by-step guide on how to transfer your crypto to your hardware wallet:
1. Open Your Existing Wallet:
If you were storing your cryptocurrencies in a software wallet or exchange, open that wallet or exchange platform on your device. Make sure to login securely with your credentials.
2. Locate the “Send” or “Withdraw” Option:
In your existing wallet or exchange, find the option to send or withdraw your cryptocurrencies. This can usually be found in the account settings or on the main dashboard of the platform.
3. Enter the Hardware Wallet Address:
In your existing wallet software or exchange platform, enter the public address of your hardware wallet as the destination for your crypto transfer. This address is generated by your hardware wallet and can usually be found in the wallet software or on the hardware wallet’s display.
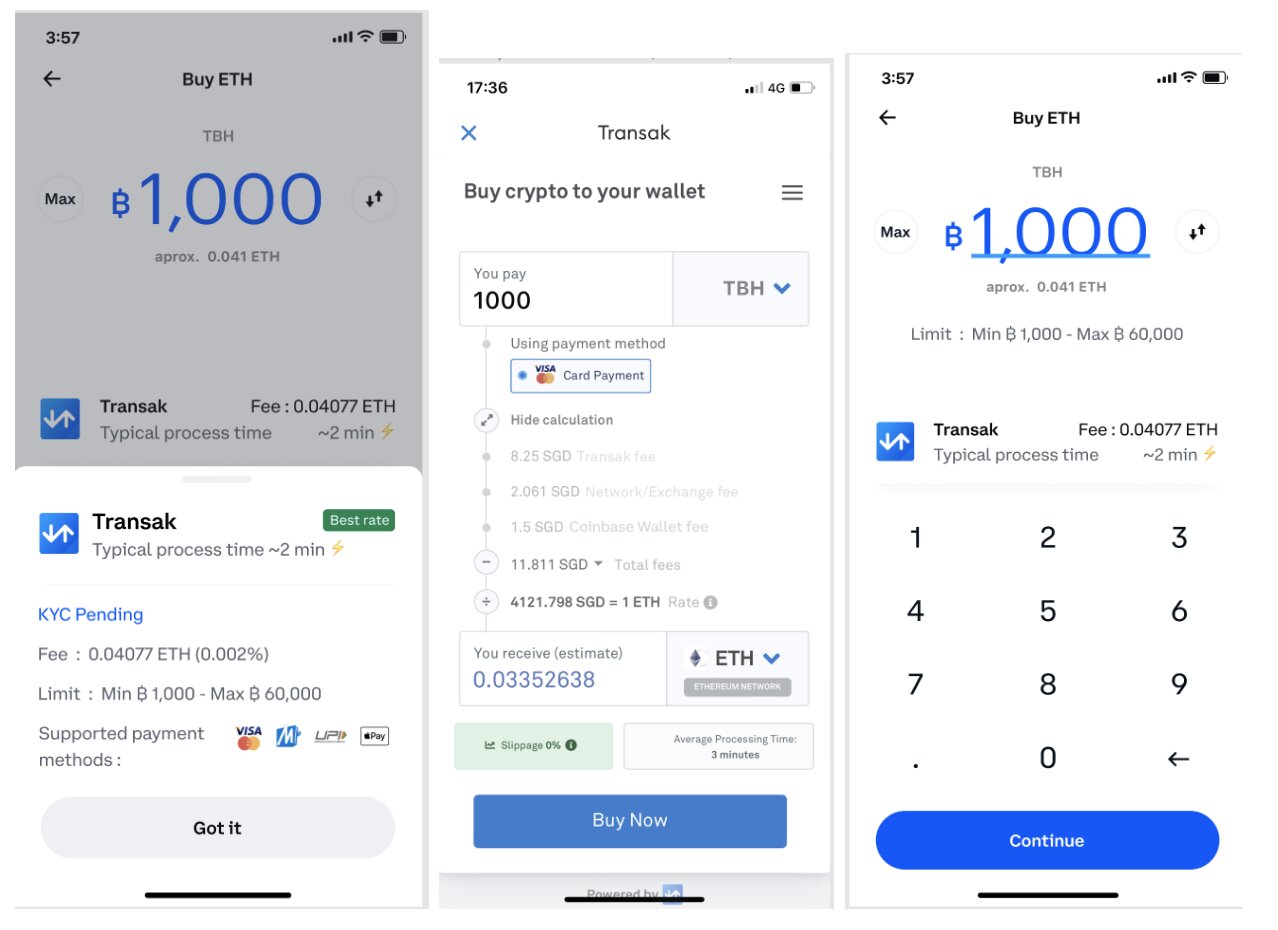
4. Specify the Transfer Amount:
Choose the amount of cryptocurrency you want to transfer to your hardware wallet. Double-check the amount and make sure it is accurate before proceeding.
5. Confirm the Transaction:
Review the details of the transaction on your existing wallet or exchange platform, including the recipient address and the transfer amount. Confirm that all the information is correct, and initiate the transfer.
6. Verify the Transfer on your Hardware Wallet:
After initiating the transfer from your existing wallet or exchange, your hardware wallet’s display may prompt you to confirm the transaction. Verify the transaction details on the hardware wallet’s screen and follow any additional instructions.
7. Wait for Confirmation:
Wait for the transfer to be confirmed on the blockchain network. This process may take some time, depending on the network congestion and the specific cryptocurrency being transferred. You can track the progress of the transfer using a blockchain explorer.
By following these steps, you can successfully transfer your cryptocurrencies from your existing software wallet or exchange to your hardware wallet. Once the transfer is confirmed on the blockchain, your crypto holdings will be securely stored in your hardware wallet, under your complete control and ownership.
Step 5: Confirming the Transaction
After transferring your cryptocurrencies to your hardware wallet, it’s important to confirm that the transaction was successful and that your funds are securely stored. Here’s a step-by-step guide on how to confirm the transaction:
1. Check the Transaction Status:
Open your hardware wallet software or connect your hardware wallet to a compatible wallet application. Look for the transaction history or transaction details section to check the status of the transfer.
2. Verify the Transaction Details:
Review the details of the transaction, including the sender’s address, the recipient’s address (your hardware wallet address), the transfer amount, and any associated transaction fees. Make sure all the information is correct and matches the transfer you initiated.
3. Confirm the Blockchain Confirmation:
Check the number of confirmations the transaction has received on the blockchain. Confirmations represent the number of blocks that have been added to the blockchain since the transaction was initiated. A higher number of confirmations indicates a more secure and finalized transaction. Depending on the cryptocurrency and network congestion, it may take several minutes to several hours for confirmations to accumulate.
4. Verify the Balance in your Hardware Wallet:
Once the transaction is confirmed, verify that the balance of the transferred cryptocurrency is now reflected in your hardware wallet. Check the account balance or transaction history within your hardware wallet software to ensure that it matches the expected amount.
5. Double-Check the Public Address:
Review the public address of your hardware wallet to ensure that it matches the one you provided during the transfer. This is important to confirm that the funds were indeed transferred to the intended wallet.
6. Keep a Record:
Maintain a record of the transaction details, including the transaction ID, date, and amount transferred. This record can serve as a reference for future audits, tax purposes, or any other necessary documentation.
7. Store your Hardware Wallet Securely:
Once you have confirmed the transaction and verified the balance in your hardware wallet, ensure that you store your hardware wallet in a safe and secure location. Keep it away from potential physical damage, loss, or theft.
By following these steps, you can confirm the successful transfer of your cryptocurrencies to your hardware wallet. Confirming the transaction ensures that your funds are securely stored and under your full control, giving you peace of mind and confidence in the security of your digital assets.
Step 6: Safely Storing Your Hardware Wallet
After transferring your cryptocurrencies to your hardware wallet, it’s crucial to store the wallet securely to ensure the safety of your digital assets. Here are some important steps to follow for safely storing your hardware wallet:
1. Choose a Secure Location:
Select a safe and secure location to store your hardware wallet. It should be a place where it is less likely to be subject to physical damage, loss, or theft. Consider using a secure lockbox, safe, or even a safety deposit box at a bank.
2. Protect from Environmental Factors:
Avoid exposing your hardware wallet to extreme temperatures, humidity, water, or direct sunlight. These factors can potentially damage the device or its components. Store it in a cool, dry place to ensure its longevity.
3. Keep it Secret:
Keep your hardware wallet and its access information secret. Do not disclose the location, PIN code, or recovery seed phrase to anyone who does not need to know. This helps prevent unauthorized access to your cryptocurrencies.
4. Backup Your Recovery Seed:
The recovery seed phrase is a crucial component for restoring your wallet in case of loss, theft, or damage. Make multiple copies of the recovery seed on durable materials, such as metal or fireproof paper. Store these backups in separate secure locations to minimize the risk of losing access to your funds.
5. Regularly Update Firmware:
Keep your hardware wallet’s firmware and software up to date. Manufacturers often release updates to address security vulnerabilities and enhance the device’s performance. Check for firmware updates regularly and follow the instructions provided by the manufacturer to install them securely.
6. Test Recovery Process:
Periodically test the recovery process using your backup seed phrase. This ensures that you have a reliable backup and can restore your wallet successfully if the need arises. Follow the instructions provided by your hardware wallet manufacturer to perform a test recovery safely.
7. Stay Informed about Security:
Stay up to date with the latest security practices and developments in the cryptocurrency industry. Follow reputable sources, participate in community forums, and educate yourself on best practices for securely storing and managing your digital assets.
By following these steps and taking the necessary precautions, you can ensure the safe storage of your hardware wallet and protect your cryptocurrencies from potential risks and threats. Safely storing your hardware wallet is essential for maintaining the security and accessibility of your digital assets over the long term.
Conclusion
Transferring your cryptocurrencies to a hardware wallet is a vital step in securing your digital assets and maintaining control over your investments. By following the steps outlined in this guide, you can safely store your cryptocurrencies and reduce the risk of theft or unauthorized access.
We started by introducing the concept of hardware wallets, explaining their enhanced security features compared to software wallets. We then explored the various types of hardware wallets available in the market, each offering different features and functionalities to cater to diverse user needs.
The guide then covered the essential steps involved in transferring your cryptocurrencies to a hardware wallet. We discussed how to choose the right hardware wallet based on factors like security features, compatibility, user experience, and reputation. We also provided step-by-step instructions on setting up the hardware wallet, accessing your crypto wallet, transferring cryptocurrencies, and confirming the transaction.
Furthermore, we emphasized the importance of securely storing your hardware wallet to protect against physical damage, loss, or theft. Highlighting the significance of choosing a secure location, protecting your access information, backing up your recovery seed, and staying informed about security best practices.
Remember, while hardware wallets greatly enhance security, no method is 100% foolproof. It is always recommended to stay vigilant and updated on the latest security practices in the cryptocurrency domain.
By following the steps outlined in this guide, you can confidently safeguard your cryptocurrencies and enjoy the benefits of enhanced security and full control over your digital assets. Protecting your investments is paramount in the world of cryptocurrencies, and a hardware wallet is a crucial tool to achieve this.