Introduction
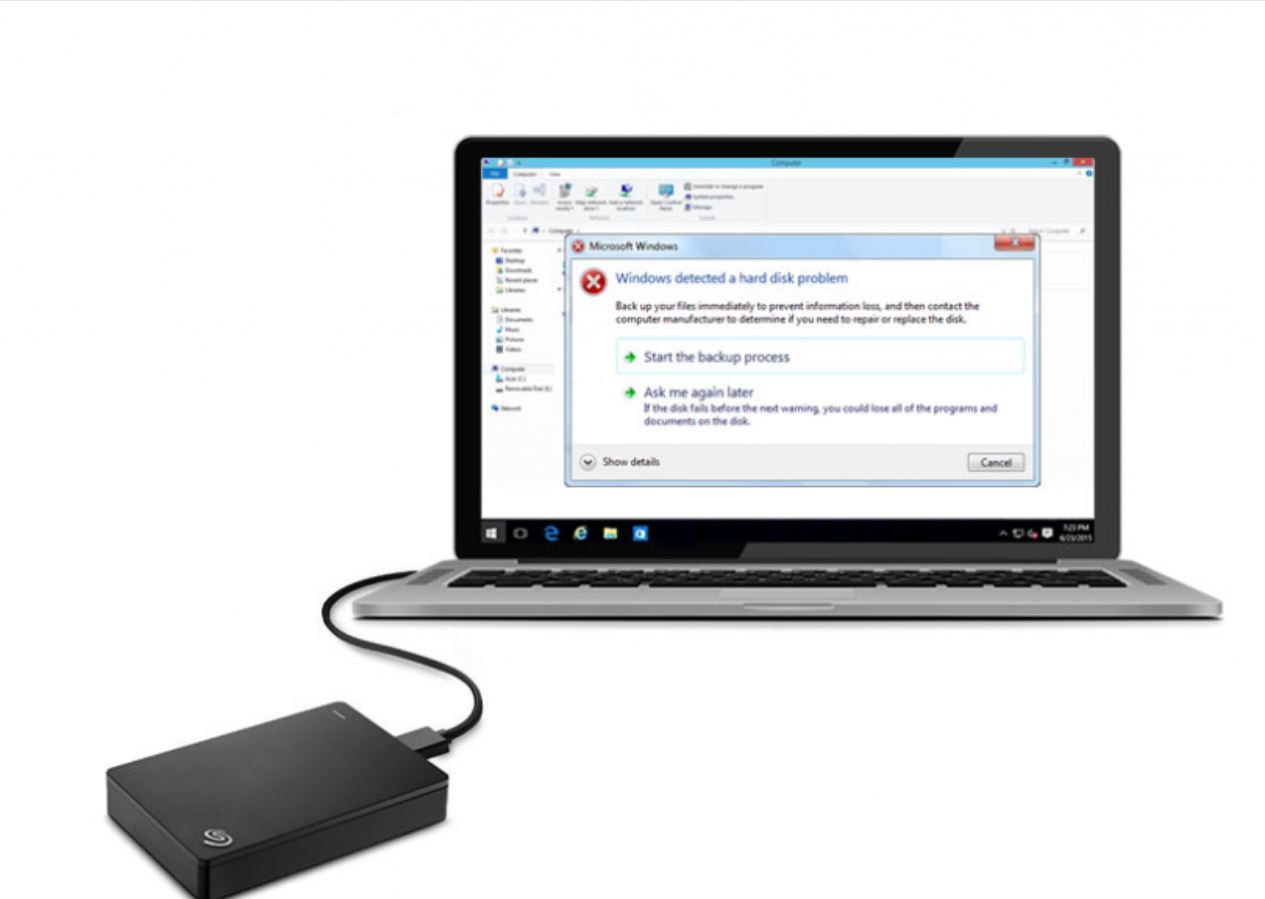
An external hard drive is an essential tool for storing and backing up your important files and data. However, there may come a time when you encounter issues with your external hard drive, and it suddenly stops working. This can be incredibly frustrating, as it may result in the loss of valuable data or inhibit your ability to access critical information.
In this article, we will explore the common reasons why an external hard drive may stop working and provide you with practical solutions to fix the issue. Whether your external hard drive is not recognized by your computer, unable to transfer files, or showing signs of physical damage, understanding the underlying causes can help you troubleshoot the problem effectively.
It’s worth noting that external hard drive issues can be caused by a variety of factors, ranging from physical damage to software-related problems. By familiarizing yourself with the possible causes and implementing the appropriate solutions, you can potentially resolve the issue and regain access to your valuable data.
We will delve into the most common reasons why external hard drives stop working, including physical damage, connection issues, driver problems, power-related issues, file system errors, corrupted data, and virus or malware attacks. Each of these factors requires a different approach for resolution, so we will provide you with step-by-step instructions to rectify the problem.
It is important to note that before attempting any troubleshooting steps, it is recommended to back up your data if possible. This helps to avoid any potential data loss during the troubleshooting process.
Now let’s dive into the various reasons why your external hard drive may not be working correctly and explore the solutions to fix the issue.
Common Reasons for External Hard Drive Not Working
When your external hard drive stops working, it can be attributed to several common reasons. Understanding these factors can help you diagnose the issue and take the necessary steps to fix it. Let’s explore the most frequent causes of external hard drive malfunctions:
- Physical Damage: Dropping or mishandling the external hard drive can lead to physical damage, such as a broken USB port or a malfunctioning disk. Physical damage can prevent the drive from being recognized or accessed by your computer.
- Connection Issues: Loose or faulty connections between your external hard drive and the computer can cause it to stop working. This can occur if the USB cable is damaged, the port on the computer is faulty, or there is a problem with the power supply.
- Driver Problems: Outdated, corrupted, or incompatible drivers can prevent your computer from recognizing and communicating with the external hard drive. This can result in the drive not being detected or not functioning correctly.
- Power Issues: Insufficient power supply or a faulty power adapter can cause the external hard drive to malfunction. If the drive is not receiving enough power or if there is a problem with the power source, it may not work properly.
- File System Errors: Errors or corruption within the file system of the external hard drive can cause it to become unresponsive. This can happen due to improper ejection, sudden power loss, or system crashes.
- Corrupted Data: If the data stored on the external hard drive gets corrupted, it can lead to issues with accessing or transferring files. Data corruption can occur due to various reasons, such as software errors, malware infections, or improper handling of the drive.
- Virus or Malware Attack: External hard drives are susceptible to virus or malware infections, especially if they are connected to multiple computers or unprotected devices. A virus or malware attack can disrupt the functioning of the drive and render it unusable.
These are the common reasons behind external hard drives not working. In the next sections, we will provide you with practical solutions to address each of these issues and get your external hard drive up and running again.
Physical Damage
One of the most common reasons for an external hard drive not working is physical damage. External hard drives are delicate devices that can be easily damaged if mishandled or subjected to impact. Here are some potential signs of physical damage and steps you can take to address them:
1. Broken USB Port: If the USB port on your external hard drive is damaged or broken, it can prevent proper connectivity with your computer. In such cases, you can attempt to repair the USB port if you have the necessary skills. Alternatively, you can transfer the internal disk to a new external enclosure to regain access to your data.
2. Malfunctioning Disk: Physical shock or impact can cause the hard disk inside the external hard drive to malfunction. Signs of a malfunctioning disk include strange noises (such as clicking or grinding) or the drive not spinning up when powered on. In such cases, it is best to consult a professional data recovery service to retrieve your data and assess the damage to the disk.
3. Damaged Cable: A damaged or faulty USB cable can prevent the proper connection between the external hard drive and your computer. Try using a different USB cable to rule out any issues with the cable itself. If replacing the cable does not resolve the issue, it’s important to inspect the USB ports on both the drive and the computer for any bent pins or debris that may inhibit proper connection.
4. Water Damage: If your external hard drive has been exposed to water or any other liquid, it can cause damage to the electronic components. In such cases, it is crucial to disconnect the drive from power and avoid powering it on. Instead, let it dry completely by leaving it in a well-ventilated area for several days. Consulting a professional data recovery service is recommended to assess and recover the data if the drive is not functioning properly after drying.
5. Overheating: Continuous usage and inadequate ventilation can cause an external hard drive to overheat, leading to potential damage. Ensure that the drive is placed on a flat surface and has proper airflow around it. If the drive feels excessively hot to the touch or shuts down unexpectedly due to overheating, give it time to cool down before attempting to use it again.
Detecting physical damage early on is crucial to prevent further complications and potential data loss. If you suspect physical damage to your external hard drive, it is always recommended to seek professional assistance to minimize the risk of causing irreparable harm to the device and to maximize the chances of data recovery.
Connection Issues
Connection issues are a common culprit behind external hard drives not working. Any problems with the connection between the external hard drive and your computer can lead to the drive being unrecognized or unresponsive. Here are some potential connection-related issues and steps you can take to troubleshoot them:
1. Check the USB Cable: The USB cable connecting your external hard drive to your computer may be faulty or damaged. Try using a different USB cable to see if the issue is resolved. If the drive is detected with a different cable, it means the original cable is faulty and needs to be replaced.
2. USB Port Problems: The USB port on your computer or the external hard drive may be causing the connection issues. Ensure that the USB port on your computer is functioning properly by connecting other USB devices. If the port is faulty, you can try using a different USB port or consider using a USB hub with multiple ports. If the USB port on the external hard drive is malfunctioning, you may need to consult a professional to repair or replace it.
3. Power Supply: Insufficient power supply can also cause connection issues with your external hard drive. Make sure the drive is receiving power by checking the indicator light or listening for any spinning noise. Try connecting the drive to a different power outlet or use a powered USB hub to ensure it is receiving adequate power.
4. Drive Recognition: Sometimes, the drive may not be recognized by your computer due to incorrect drive letter assignment or conflicts with other connected devices. You can manually assign a drive letter to the external hard drive in the Disk Management tool on Windows or using the Disk Utility on macOS. Additionally, disconnecting other USB devices temporarily can help resolve any conflicts.
5. Driver Issues: Outdated or corrupted drivers can cause connection problems with your external hard drive. To resolve this, you can try updating the drivers for the USB ports on your computer through the Device Manager (Windows) or System Information (macOS). Alternatively, uninstalling and reinstalling the drivers for the external hard drive can also help in resolving any driver-related issues.
By carefully examining and addressing any connection-related issues, you can often restore the proper functionality of your external hard drive. However, if the problem persists, it is recommended to seek professional assistance or contact the manufacturer for further guidance.
Driver Problems
Driver problems can be a common cause of external hard drives not working properly. Outdated, corrupted, or incompatible drivers can prevent your computer from recognizing and communicating with the external hard drive. Here are some steps you can take to troubleshoot and fix driver-related issues:
1. Update the Drivers: Start by checking if there are any driver updates available for your external hard drive. Visit the manufacturer’s website and search for the latest drivers for your specific model. Download and install the updated drivers, following the provided instructions. This can often resolve compatibility issues and ensure proper communication between the drive and your computer.
2. Reinstall the Drivers: If updating the drivers does not seem to fix the issue, try uninstalling the existing drivers for the external hard drive and then reinstalling them. To do this, go to the Device Manager (Windows) or System Information (macOS) and locate the external hard drive under the “Disk drives” or “USB devices” section. Right-click on it and select “Uninstall” or “Remove.” Once the drivers are uninstalled, restart your computer and connect the external hard drive again to automatically reinstall the drivers.
3. Compatibility Mode: If you are using an older external hard drive or have recently upgraded your operating system, you may encounter compatibility issues. In such cases, you can try running the drivers in compatibility mode. Right-click on the driver installation file, select “Properties,” go to the “Compatibility” tab, and check the box that says “Run this program in compatibility mode for.” Select the appropriate operating system from the dropdown menu and proceed with the installation.
4. System Updates: Keeping your operating system up to date is essential for ensuring compatibility with external devices. Check for any available system updates and install them on your computer. These updates may include bug fixes and compatibility improvements that can help resolve driver issues.
5. Automatic Driver Update Tools: If manually updating or reinstalling drivers seems too complicated, you can consider using automatic driver update tools. These tools scan your computer, identify outdated or incompatible drivers, and automatically download and install the latest versions. Some popular options include Driver Booster, Driver Easy, and Snappy Driver Installer.
By updating or reinstalling the drivers for your external hard drive, you can often resolve driver-related problems and ensure proper communication between the drive and your computer. However, if the issue persists, it may be necessary to seek further assistance from the manufacturer or consult a professional.
Power Issues
Power issues can be a common reason why an external hard drive is not working as expected. Insufficient power supply or problems with the power source can cause the drive to malfunction or be unrecognized. Here are some steps to troubleshoot power-related problems with your external hard drive:
1. Check the Power Supply: Ensure that the external hard drive is receiving power by checking the indicator light on the drive. If the drive does not have an indicator light, listen for any spinning noise when it is powered on. If there is no sign of power, check the power cable and the wall outlet to ensure they are properly connected and functioning. Try using a different power cable and wall outlet to rule out any issues with the power supply.
2. Use a Powered USB Hub: If your external hard drive is not getting enough power from your computer’s USB port, consider using a powered USB hub. A powered USB hub has its own power supply and can provide a stable power source for the drive. Connect the external hard drive to the powered USB hub and then connect the hub to your computer.
3. Avoid Overloading USB Ports: USB ports on your computer have a limited power output. If you have multiple devices connected to the USB ports, they may be drawing too much power, causing the external hard drive to receive insufficient power. Disconnect any unnecessary USB devices and try connecting only the external hard drive to a USB port directly on your computer.
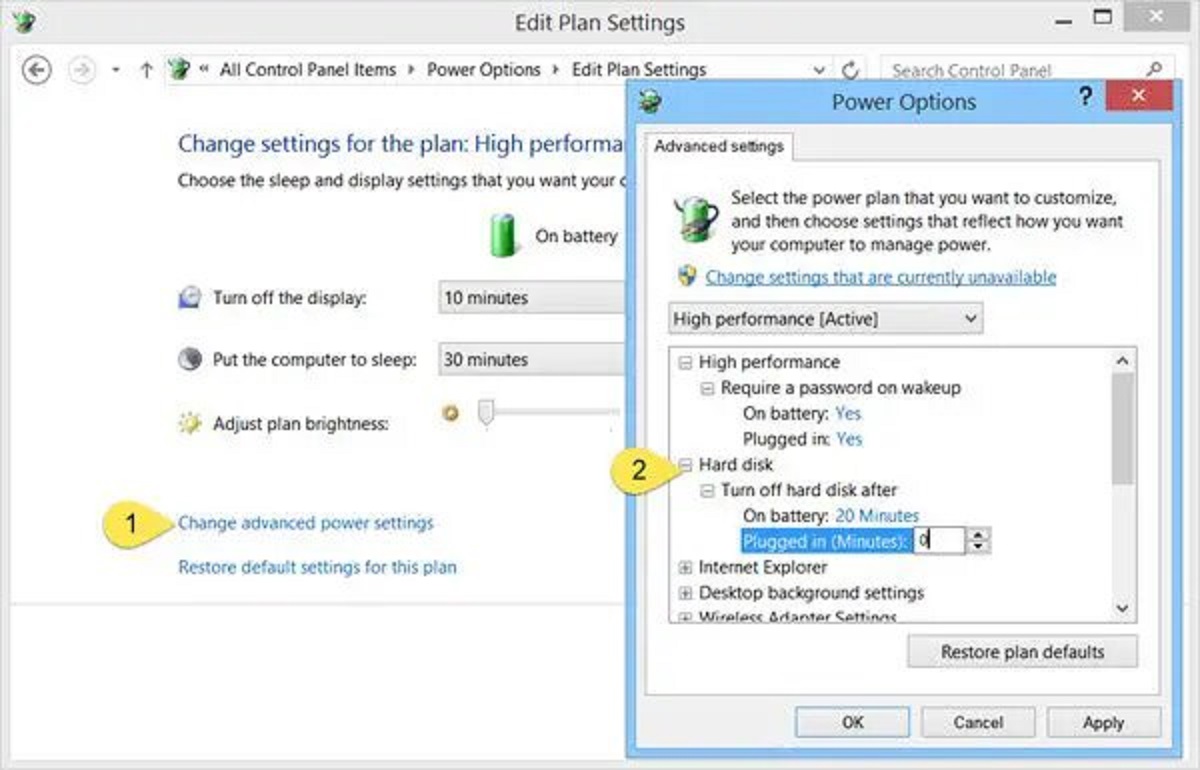
4. Check for Power-saving Settings: Some computers have power-saving settings that can shut down or put USB ports to sleep to save energy. This can lead to power issues with your external hard drive. Go to the power settings on your computer and adjust any settings that may affect USB power supply to ensure continuous power to the drive.
5. Upgrade the Power Adapter: If your external hard drive uses an external power adapter, it is possible that the adapter is not supplying enough power or it may be faulty. Contact the manufacturer to inquire about a compatible and higher-powered adapter that can provide adequate power to your drive.
By addressing power-related issues, you can restore proper functionality to your external hard drive. If the power problems persist, it may be necessary to seek further assistance from the manufacturer or consult a professional technician to diagnose and fix the issue.
File System Errors
File system errors can cause an external hard drive to stop working correctly or become unresponsive. These errors can occur due to improper ejection of the drive, sudden power loss, or system crashes. When file system errors occur, it can prevent the drive from being recognized or accessing files. Here are some steps you can take to address file system errors:
1. Run Disk Error Checking (Windows): In Windows, you can use the built-in Disk Error Checking tool to scan and fix file system errors on your external hard drive. Open File Explorer, right-click on the drive, select “Properties,” go to the “Tools” tab, and click on “Check” under the “Error checking” section. Follow the on-screen instructions to scan and fix any file system errors.
2. Use First Aid (macOS): On macOS, you can use the built-in First Aid tool in Disk Utility to verify and repair file system errors. Open Disk Utility, select the external hard drive from the sidebar, and click on the “First Aid” button. Follow the instructions to run First Aid and address any file system errors detected.
3. Use Third-Party Disk Repair Tools: If the built-in disk repair tools do not resolve the file system errors, you can consider using third-party disk repair tools that specialize in fixing file system issues. Some popular options include EaseUS Partition Master, MiniTool Partition Wizard, and TestDisk. Make sure to carefully follow the instructions provided by the tool and create a backup of your data before attempting any repairs.
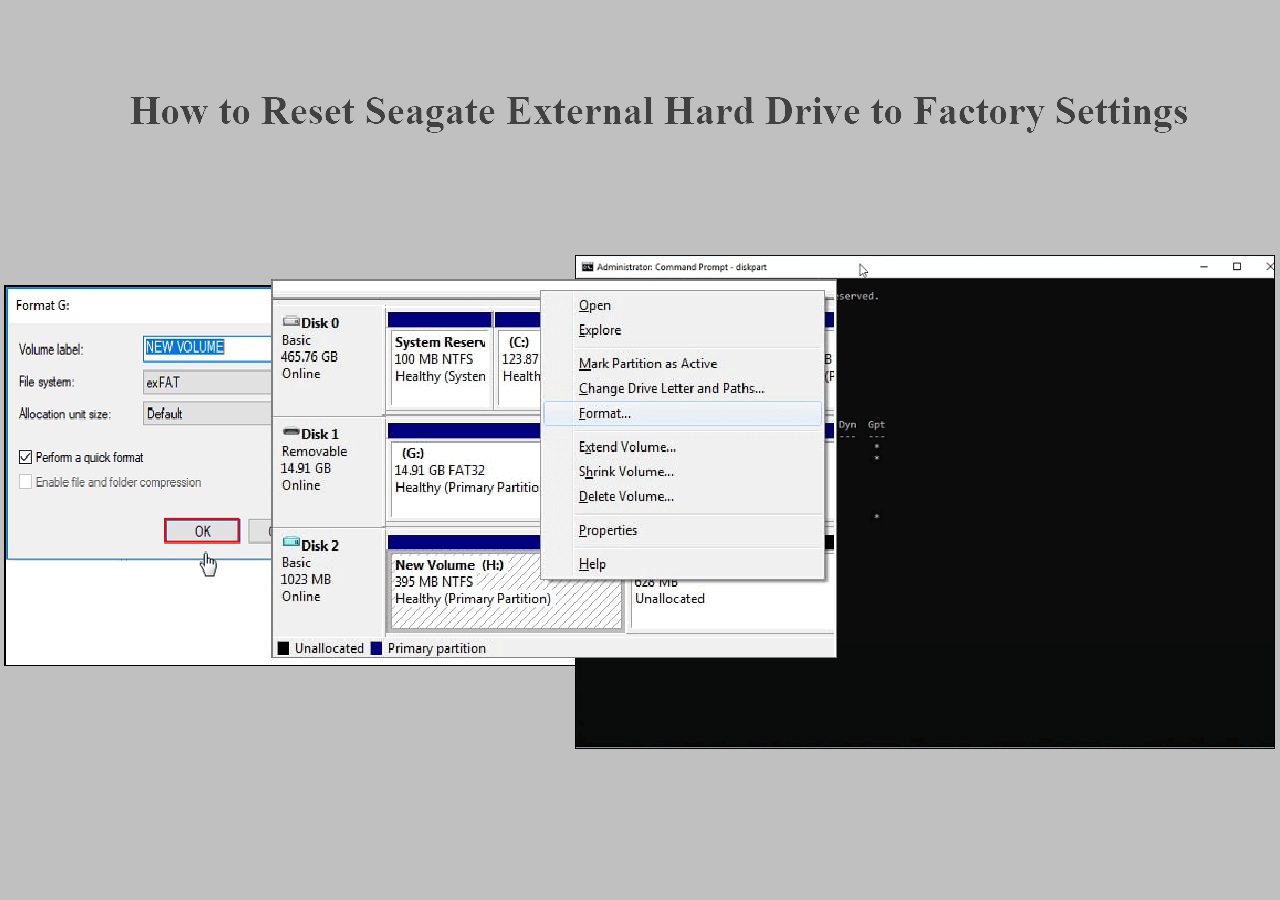
4. Backup and Format the Drive: If the file system errors persist, and you have a backup of your data, consider formatting the external hard drive. Formatting erases all data on the drive and creates a new file system, resolving any underlying file system errors. Make sure to carefully select the correct file system format (such as NTFS, exFAT, or FAT32) and follow the formatting instructions provided by your operating system.
5. Seek Professional Data Recovery: If the file system errors cannot be resolved using the above methods or if you have valuable data that you cannot afford to lose, it may be necessary to seek professional data recovery services. A professional data recovery specialist can assess the drive and attempt to retrieve your data using specialized tools and techniques.
Addressing file system errors promptly can help restore the functionality of your external hard drive and prevent further data loss. However, it’s crucial to note that formatting the drive will erase all data, so it’s important to have a backup of your important files before attempting any repairs or formatting.
Corrupted Data
Corrupted data can lead to an external hard drive not functioning correctly or causing errors when accessing files. Data corruption can occur due to various reasons, such as software errors, malware infections, or improper handling of the drive. When dealing with corrupted data on an external hard drive, here are some steps you can take to address the issue:
1. Scan for Viruses or Malware: Run a comprehensive antivirus or antimalware scan on your computer to check for any potential infections. Viruses or malware can corrupt files on your external hard drive and hinder its proper functioning. Make sure to update your antivirus software and perform a deep scan on both your computer and the external hard drive to eliminate any malicious threats.
2. Use Data Recovery Software: There are various data recovery software programs available that can help retrieve files from a corrupted external hard drive. These tools can scan the drive for recoverable data and attempt to restore them. Some popular data recovery software options include Recuva, EaseUS Data Recovery Wizard, and MiniTool Power Data Recovery. Follow the instructions provided by the software and avoid saving any recovered files directly onto the same drive.
3. Check Disk Errors: Running disk error checking or disk repair tools, as mentioned in the “File System Errors” section, can also help detect and fix corrupted files on your external hard drive. These tools can scan the drive for errors and attempt to repair or recover any damaged files. Make sure to create a backup of your data before performing any repairs to avoid further data loss.
4. Restore from Backup: If you have a recent backup of your important files, consider restoring them from the backup onto a different drive. This can help bypass the issue of corrupted data on the external hard drive and ensure that you have access to clean and uncorrupted files.
5. Professional Data Recovery Services: If the above methods do not work or if you have critical data that needs to be recovered, it may be necessary to seek professional data recovery services. Professional data recovery specialists have advanced tools and techniques to recover data from corrupted drives. However, keep in mind that professional data recovery services can be quite costly.
Dealing with corrupted data on an external hard drive can be challenging, but taking the right steps can increase the chances of recovering your files. It is essential to act promptly and avoid further damage to the drive to maximize the possibility of data recovery.
Virus or Malware Attack
Virus or malware attacks can significantly impact the functionality of an external hard drive. If your external hard drive has been infected, it may not work correctly, and your data may be at risk. Here are some steps to address a virus or malware attack on your external hard drive:
1. Disconnect the Drive: If you suspect that your external hard drive is infected with a virus or malware, disconnect it from your computer immediately. This will prevent the infection from spreading to other connected devices or your computer’s operating system.
2. Run Antivirus or Antimalware Scans: Use a reputable antivirus or antimalware program to scan both your computer and the external hard drive for any malware or viruses. Make sure that your antivirus software is up to date, as new threats are constantly emerging. Allow the software to quarantine or remove any identified threats.
3. Perform a Full System Scan: In addition to scanning the external hard drive itself, perform a full system scan on your computer. This will help identify any other potential malware or viruses that may have caused the infection on the external hard drive.
4. Format the External Hard Drive: If the virus or malware infection is severe and cannot be eradicated with antivirus scans, you may need to consider formatting the external hard drive. Formatting will erase all data on the drive, including the infection, and provide a clean slate. However, keep in mind that this will result in the loss of all data, so ensure that you have a backup of any important files before proceeding with the formatting process.
5. Restore from Backup: If you have a recent backup of your files, restore them onto a clean external hard drive or your computer’s internal storage. Ensure that the backup is from a trusted and secure source to avoid reintroducing any malware or viruses into your system.
6. Prevent Future Infections: To prevent future virus or malware attacks on your external hard drive, take proactive measures such as regularly updating your antivirus software, installing a firewall, avoiding suspicious websites and downloads, and scanning any external devices before connecting them to your computer.
A virus or malware attack can be a serious threat to the functionality and security of your external hard drive. Taking swift action to address the issue, including running thorough scans and considering formatting, can help mitigate the impact of the attack and protect your valuable data.
Solutions to Fix an External Hard Drive Not Working
When your external hard drive is not working, it can be a frustrating experience. Fortunately, there are several solutions you can try to resolve the issue and get your external hard drive functioning again. Here are some practical solutions to fix an external hard drive that is not working:
1. Check the Connection and Power Supply: Ensure that the USB or other cable connecting your external hard drive to your computer is secure and undamaged. Also, verify that the power supply is functioning correctly and providing enough power to the drive. Try using a different cable or connecting to a different port to rule out any connection issues.
2. Run Hardware Troubleshooter: Use the built-in hardware troubleshooter on your computer’s operating system to automatically detect and fix any hardware-related issues. This can help identify and resolve common problems that may be causing your external hard drive to malfunction.
3. Update or Reinstall Drivers: Outdated or corrupted drivers can prevent your computer from recognizing and communicating with the external hard drive. Check for driver updates from the manufacturer’s website and install them. If that doesn’t work, uninstall and reinstall the drivers for the external hard drive.
4. Scan for Viruses or Malware: Run a thorough scan of your external hard drive using antivirus or antimalware software to check for any infections. Viruses or malware can cause the drive to malfunction or become inaccessible. Remove any detected threats and ensure that both your computer and the external hard drive are protected with up-to-date security software.
5. Run Disk Error Checking: Use the built-in disk error checking tools on your operating system to scan and fix any file system errors on the external hard drive. This can help resolve issues related to corrupted files or improper file system configuration.
6. Format the Drive: If all else fails and you have a backup of your data, consider formatting the external hard drive. Formatting will erase all data on the drive and create a new file system, potentially resolving any underlying issues. However, note that formatting will result in permanent data loss, so use this option as a last resort.
7. Recover Data from the Drive: If your external hard drive is not working and you have important files that are not backed up, it may be necessary to recover the data before attempting any troubleshooting steps. Consult a professional data recovery service to safely extract your data from the drive.
By following these solutions, you can increase the chances of fixing your external hard drive and recovering your data. However, if the problem persists, it may be necessary to consult the manufacturer or seek professional assistance for further guidance.
Check the Connection and Power Supply
One of the first steps to take when your external hard drive is not working is to check the connection and power supply. Connection issues or insufficient power can cause the drive to be unrecognized or not function properly. Here are some steps to troubleshoot the connection and power supply:
1. Verify the Cables: Ensure that the cables connecting your external hard drive to your computer are securely plugged in at both ends. Sometimes, a loose or improperly connected cable can prevent the drive from being recognized. If the cables are damaged or frayed, try using a different cable to rule out any cable-related issues.
2. Check the USB Port: Inspect the USB port on both your computer and the external hard drive for any physical damage, bent pins, or debris. Clean out any dust or debris using a compressed air canister. If the USB port is damaged, it may require professional repair or replacement.
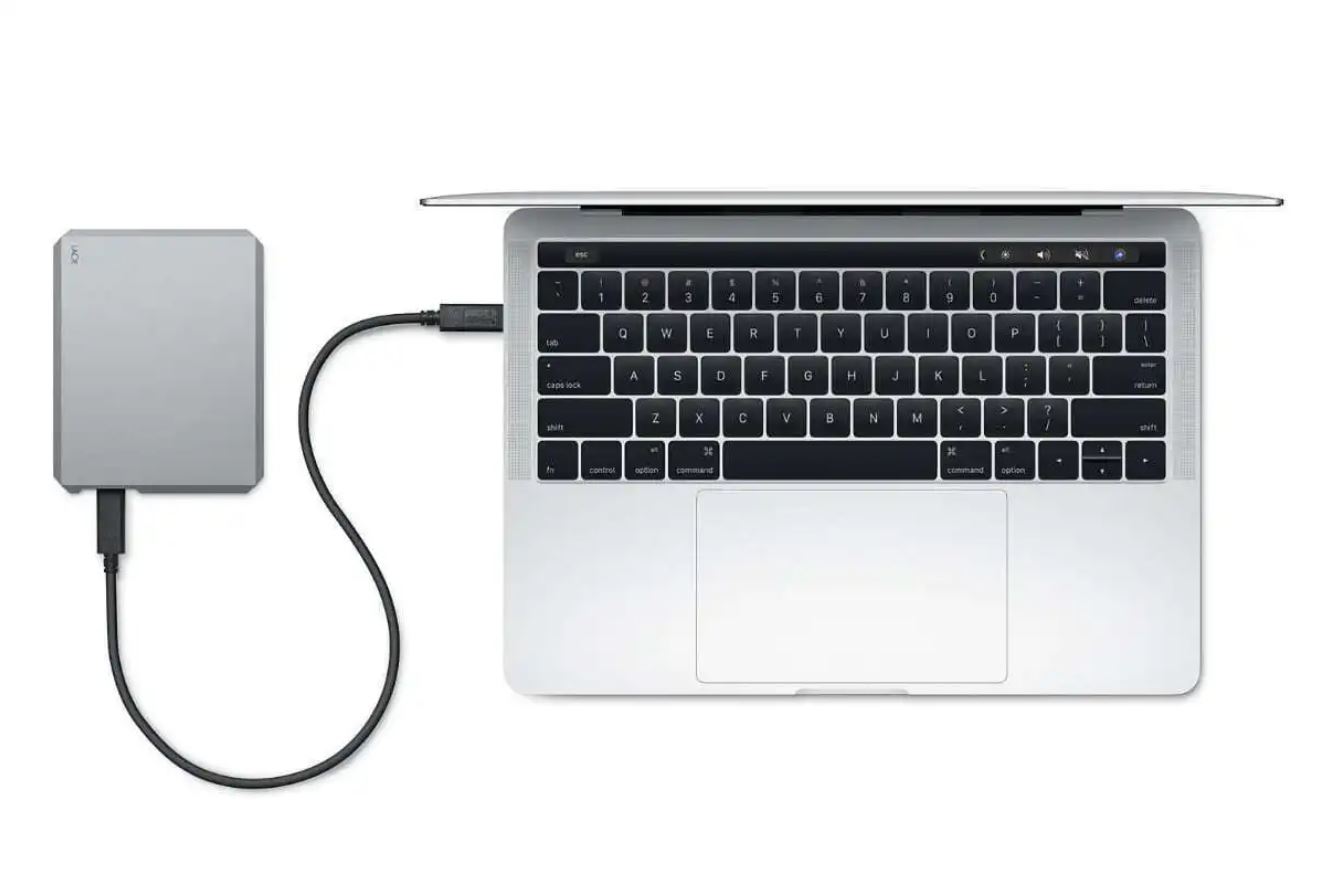
3. Test Different Connections and Ports: Try connecting your external hard drive to a different USB port on your computer to eliminate the possibility of a faulty port. If available, try using a different cable or interface (e.g., USB-A, USB-C, FireWire) to connect the drive. This will help determine if the issue is related to a specific port or connection type.
4. Verify the Power Supply: If your external hard drive requires an external power adapter, ensure that it is properly plugged in and providing sufficient power. Check for any damage to the power adapter or cable. If possible, try using a different power outlet or a different power adapter that matches the specifications of your external hard drive.
5. Check for External Power Switch: Some external hard drives have an external power switch or button that needs to be turned on for the drive to receive power. Make sure the power switch is in the correct position, as indicated by the manufacturer’s instructions or labeling.
6. Test on a Different Computer: Connect your external hard drive to a different computer to determine if the issue is specific to your computer or the drive itself. If the drive works on another computer, it indicates that the problem lies with your computer’s settings or drivers. In this case, refer to the appropriate sections mentioned earlier to troubleshoot further.
7. Use a Powered USB Hub: If your external hard drive is not receiving enough power from your computer’s USB port, consider using a powered USB hub. A powered USB hub has its own power supply and can provide a stable power source to the drive, ensuring proper functionality.
By carefully checking the connection and power supply, you can often resolve issues with your external hard drive. However, if the problem persists, it may be necessary to explore other potential causes or seek professional assistance.
Run Hardware Troubleshooter
If your external hard drive is not working, running the hardware troubleshooter can help identify and resolve any hardware-related issues. The hardware troubleshooter is a built-in tool in most operating systems that can automatically detect and fix common problems. Here’s how to run the hardware troubleshooter:
For Windows:
- Open the Control Panel on your Windows computer by searching for it in the Start menu.
- In the Control Panel, navigate to the “System and Security” section and select “Troubleshoot common computer problems.”
- Click on the “Hardware and Sound” option, and then select “Hardware and Devices.”
- Click on the “Next” button to start the hardware troubleshooting process.
- Follow the on-screen prompts and instructions provided by the troubleshooter. It will scan for any hardware issues and attempt to fix them automatically.
For macOS:
- Click on the Apple menu in the top-left corner of the screen and select “System Preferences.”
- In System Preferences, click on “Hardware” or “System” to find the “Hardware Troubleshooting” option. Note that the exact name and location may vary depending on the version of macOS.
- Click on the “Troubleshoot” or “Diagnostic” button to launch the hardware troubleshooter.
- Follow the on-screen instructions to complete the hardware troubleshooting process. The tool will scan for any hardware issues and provide recommendations or potential fixes.
The hardware troubleshooter will examine various hardware components of your computer, including the USB ports and devices connected to them, which includes your external hard drive. It will attempt to identify any issues that may be causing the malfunction and suggest solutions to resolve them.
If the hardware troubleshooter detects and fixes any issues with your external hard drive, try reconnecting it to your computer and see if it now works. If it doesn’t, you may need to explore other potential causes or try additional troubleshooting steps.
Keep in mind that while the hardware troubleshooter is a helpful tool, it may not be able to resolve all problems. If the issue persists, it’s advisable to consult the manufacturer’s support documentation or seek professional assistance to further diagnose and address the problem with your external hard drive.
Update or Reinstall Drivers
Outdated or corrupted drivers can often be a cause of external hard drive issues. If your external hard drive is not working properly, updating or reinstalling the drivers can help resolve compatibility and communication problems. Here’s how you can update or reinstall drivers for your external hard drive:
1. Update Drivers:
- Start by visiting the manufacturer’s website for your external hard drive.
- Look for the “Support” or “Downloads” section of the website.
- Enter the model number or select your specific external hard drive model.
- Find the latest drivers available for your operating system.
- Download and install the drivers by following the provided instructions.
- After installation, restart your computer and connect the external hard drive to see if it is recognized and functioning properly.
2. Reinstall Drivers:
- Open the Device Manager on your Windows computer by right-clicking on the “Start” button and selecting “Device Manager.”
- In the Device Manager, expand the “Disk Drives” or “USB devices” category to find your external hard drive.
- Right-click on the external hard drive and select “Uninstall Device” or “Uninstall.”
- Disconnect the external hard drive from your computer.
- Restart your computer.
- Reconnect the external hard drive, and Windows will automatically reinstall the drivers.
- After the drivers are reinstalled, check if the external hard drive is recognized and functioning correctly.
If updating or reinstalling the drivers for your external hard drive does not resolve the issue, you can also try updating the chipset or USB controller drivers on your computer. These drivers are responsible for the communication between your computer and the external hard drive. Visit your computer manufacturer’s website or the chipset manufacturer’s website to find the latest drivers and install them accordingly.
It’s important to ensure that you download drivers from trusted sources and that they are compatible with your operating system. Installing incorrect or incompatible drivers can cause more issues, so it’s always a good practice to create a backup of your important data before making any changes to your system.
If the updating or reinstalling of drivers does not solve the problem, it may be necessary to contact the manufacturer’s support or seek professional assistance for further troubleshooting and guidance.
Scan for Viruses or Malware
Virus or malware infections can often be the cause of external hard drive issues. If your external hard drive is not working properly, it’s essential to scan it for viruses or malware to ensure the security and functionality of the drive. Here’s how you can scan for viruses or malware on your external hard drive:
1. Update Antivirus or Antimalware Software:
- Ensure that your antivirus or antimalware software is up to date with the latest virus definitions.
- If you don’t have any antivirus software installed, consider installing a reputable and up-to-date antivirus program.
2. Connect and Scan:
- Connect your external hard drive to your computer using the appropriate cable or interface.
- Run a full system scan with your antivirus or antimalware software.
- Configure the scan settings to include scanning the external hard drive.
- Allow the software to scan your computer and the connected external hard drive thoroughly.
- If any viruses or malware are detected, follow the instructions provided by the software to quarantine or remove the threats.
3. Use Online Scanners:
- In addition to your installed antivirus software, you can also consider using online virus scanners to check your external hard drive for any infections.
- Online virus scanners, such as VirusTotal or ESET Online Scanner, allow you to upload specific files or scan your entire external hard drive for malware without the need for installing any additional software.
- Follow the instructions provided by the online scanner to initiate the scan and review the results.
- Take appropriate actions, if necessary, to remove or quarantine any detected threats.
4. Repeat Periodically:
- Make it a habit to periodically scan your external hard drive for viruses or malware, especially if you frequently connect it to different computers or share files with others.
- Regular scanning helps to ensure continuous protection and minimize the risk of virus or malware infections on your external hard drive.
Scanning your external hard drive for viruses or malware is a crucial step in ensuring the security and proper functioning of your drive. By taking these proactive measures, you can protect your data and mitigate the risk of spreading infections to other devices or computer systems.
If the scan reveals any persistent issues or threats that cannot be resolved by your antivirus software, it may be necessary to seek professional assistance from an IT professional or a specialized data recovery service to address the problem and safeguard your data.
Run Disk Error Checking
If your external hard drive is not working correctly, running disk error checking can help identify and fix any file system errors that may be causing the issue. File system errors can occur due to improper ejection of the drive, sudden power loss, or system crashes. Here’s how you can run disk error checking on your external hard drive:
For Windows:
- Open File Explorer by pressing the Windows key + E on your keyboard.
- Locate your external hard drive in the list of drives and right-click on it.
- Select “Properties” from the right-click menu.
- In the Properties window, go to the “Tools” tab.
- Under the “Error checking” section, click on the “Check” button.
- A dialog box will appear asking if you want to check the drive. Click on “Scan drive” or “Scan and repair drive” to start the error checking process.
- Allow the disk error checking tool to scan and fix any file system errors found on your external hard drive.
- Once the process is complete, safely eject your external hard drive and reconnect it to see if it is working properly.
For macOS:
- Open Disk Utility by pressing Command + Spacebar, typing “Disk Utility” in the Spotlight search, and selecting the Disk Utility application.
- In Disk Utility, locate your external hard drive in the sidebar and select it.
- Click on the “First Aid” button at the top of the Disk Utility window.
- Click on the “Run” button to start the disk error checking process.
- Allow Disk Utility to scan and repair any file system errors on your external hard drive.
- Once the process is complete, safely eject your external hard drive and reconnect it to see if it is working properly.
Running disk error checking on your external hard drive can help detect and fix any file system errors that may be causing issues. It’s important to note that the error checking process might take some time, depending on the size and condition of the drive.
If disk error checking doesn’t resolve the issue and your external hard drive is still not working properly, you may need to explore other potential causes or consider seeking professional assistance to further diagnose and address the problem.
Format the Drive
If all the previous troubleshooting steps have failed to resolve the issues with your external hard drive, formatting the drive can be a last resort. Formatting erases all data on the drive and creates a new file system, potentially fixing any underlying problems. However, be aware that formatting will result in permanent data loss. Here’s how you can format the drive:
1. Data Backup:
- Before proceeding with formatting, ensure that you have a backup of any important files on the external hard drive. This is crucial, as formatting will erase all data on the drive.
- Copy or move the data to another storage device, such as another external hard drive, computer, or cloud storage. Make sure to double-check that the backup is complete and accessible before proceeding.
2. Determine the Format:
- Decide on the file system format for the external hard drive. The choice may depend on the intended usage, compatibility with your operating system, and any specific requirements.
- For Windows, common file system formats are NTFS and exFAT. For macOS, the default format is usually macOS Extended (Journaled).
3. Formatting on Windows:
- Connect the external hard drive to your Windows computer.
- Open File Explorer by pressing the Windows key + E on your keyboard.
- Locate your external hard drive in the list of drives and right-click on it.
- From the right-click menu, select “Format.”
- In the Format window, select the desired file system format.
- Give a new name to the external hard drive and adjust any additional formatting options, such as allocation unit size.
- Click on the “Start” button to initiate the formatting process.
- Follow the on-screen prompts and wait for the format to complete.
4. Formatting on macOS:
- Connect the external hard drive to your Mac computer.
- Open Disk Utility by pressing Command + Spacebar, typing “Disk Utility” in the Spotlight search, and selecting the Disk Utility application.
- In Disk Utility, locate your external hard drive in the sidebar and select it.
- Click on the “Erase” tab at the top of the Disk Utility window.
- Choose the desired file system format from the Format dropdown menu.
- Give a new name to the external hard drive and adjust any additional formatting options, such as scheme or partition layout.
- Click on the “Erase” button to start the formatting process.
- Wait for the formatting to complete, and your external hard drive will be ready to use.
Formatting the drive can help resolve certain software-related issues with your external hard drive. However, remember that it permanently erases all data, so ensure that you have a backup of any important files before proceeding. After formatting, you can try reconnecting the drive and verify if it is recognized and functioning correctly.
If formatting does not resolve the issue or if the drive continues to have problems, it may be necessary to consult the manufacturer’s support or seek professional assistance to further diagnose and address the problem.
Recover Data from the Drive
If your external hard drive is not working and you haven’t made a backup of your files, it may be necessary to recover the data from the drive. Data recovery is a process of retrieving lost, deleted, or inaccessible files from a storage device. Here are some steps you can take to recover data from your external hard drive:
1. Stop Using the Drive:
- As soon as you realize that your external hard drive is not working properly, stop using it immediately. Continued use of the drive can potentially overwrite the data and make it more difficult to recover.
- Disconnect the drive from your computer and set it aside until you’re ready to proceed with the data recovery process.
2. Consult Professional Data Recovery Services:
- Consider seeking the assistance of professional data recovery services. Data recovery specialists have specialized tools and techniques to recover data from malfunctioning or damaged storage devices.
- Research reputable data recovery services and choose one that has experience with external hard drive recovery.
- Contact the data recovery service to discuss the issue and inquire about their process, pricing, and success rates.
- Follow their instructions to safely ship the drive to the data recovery facility for evaluation and recovery attempts.
3. DIY Data Recovery Software:
- If you prefer to attempt data recovery on your own, you can consider using data recovery software tools.
- There are various data recovery software programs available, such as Recuva, EaseUS Data Recovery Wizard, and MiniTool Power Data Recovery.
- Download and install a reputable data recovery software tool on a different computer than the one the drive was connected to.
- Connect your external hard drive to the computer and launch the data recovery software.
- Follow the software’s instructions to scan the drive for recoverable files and select the files you want to recover.
- Choose a safe location to save the recovered files, preferably on a different storage device to avoid overwriting any data.
4. Data Recovery Precautions:
- When attempting DIY data recovery, handle the external hard drive with care and follow all instructions provided by the data recovery software.
- Avoid writing any new data to the drive and refrain from modifying the drive’s partition or file system during the recovery process.
- Be aware that data recovery success rates can vary depending on the severity of the drive’s issue and the integrity of the data.
Recovering data from a malfunctioning external hard drive can be a complex process. It is essential to weigh the importance of the data against the potential risks and costs associated with the recovery process. If the data is highly valuable or irreplaceable, it’s generally recommended to seek the assistance of professional data recovery services for the best possible recovery outcome.
Conclusion
Dealing with an external hard drive that is not working can be a frustrating experience. However, by understanding the common causes and implementing the appropriate solutions, you can potentially resolve the issue and regain access to your valuable data.
In this article, we explored the common reasons why an external hard drive may stop working, including physical damage, connection issues, driver problems, power issues, file system errors, corrupted data, and virus or malware attacks. We provided step-by-step instructions on how to troubleshoot and fix each of these issues to restore the functionality of your external hard drive.
It’s important to keep in mind that data backup is crucial to prevent data loss in case of any issues with your external hard drive. Regularly backing up your important files and data to another storage device or cloud storage ensures that you have a secure copy in the event of any unforeseen problems.
If the troubleshooting steps outlined in this article did not resolve the issue with your external hard drive, it may be necessary to consult the manufacturer’s support documentation, seek professional assistance, or consider data recovery services. Professional help can provide specialized expertise and increase the chances of successfully recovering your data.
Remember to always handle your external hard drive with care, avoid abrupt power loss, and practice safe data storage practices to minimize the risk of encountering issues in the future.
By following the guidelines provided in this article, you can optimize the functionality and longevity of your external hard drive and keep your valuable data secure.


