Introduction
Welcome to this guide on how to stream in Discord! Discord is a versatile communication platform that allows users to chat, voice call, and even stream their games or applications. Streaming in Discord can be a valuable tool for gamers, content creators, and professionals alike, as it enables you to share your screen and broadcast your activities with others.
Whether you want to stream a live gaming session, host a virtual workshop, or simply show a presentation to your friends or colleagues, Discord has you covered. By following the steps outlined in this guide, you’ll be able to set up and start streaming in Discord in no time.
Streaming in Discord offers various benefits. It allows you to connect with like-minded individuals, collaborate on projects, receive instant feedback, and create engaging content. Whether you’re streaming a game, a tutorial, or a live event, Discord provides a platform where you can interact with your audience and build a community around your content.
Before we dive into the step-by-step process of streaming in Discord, make sure you have the latest version of the Discord application installed on your device. You should also have a stable internet connection and a microphone if you plan on using voice chat during the stream.
In the next sections, I will guide you through the necessary steps to get started with streaming in Discord. We’ll cover everything from setting up your audio settings to sharing your screen and initiating a stream. So, grab your headset, buckle up, and let’s get started!
Step 1: Set Up Audio Settings
Before you start streaming in Discord, it’s crucial to ensure that your audio settings are properly configured. This step is essential to ensure that your audience can hear you clearly during the stream. Follow these steps to set up your audio settings:
- Launch the Discord application on your device and log in to your account.
- Click on the gear icon located at the bottom left corner of the Discord window. This will open the User Settings menu.
- In the User Settings menu, navigate to the “Voice & Video” tab on the left sidebar.
- Under the “Voice Settings” section, select your input and output devices. These devices will determine your microphone and speakers or headset that Discord will use for audio during the stream. It’s important to choose the correct devices here to ensure optimal audio quality.
- Adjust the input volume slider to set the desired microphone sensitivity. You can test your microphone by speaking into it and observing the input bar to ensure that your voice is being picked up adequately.
- Next, adjust the output volume slider to set the desired audio level for your speakers or headset. This will determine how loud your audience hears your voice during the stream.
- Once you’ve configured your audio settings, click on the “Save Changes” button at the bottom right corner of the User Settings menu to apply the changes.
It’s worth noting that Discord offers advanced audio settings for more customization. You can access these settings by enabling the “Advanced” toggle switch under the “Voice & Video” tab in the User Settings menu. Here, you can fine-tune options such as noise reduction, echo cancellation, and automatic gain control to enhance the audio quality further.
Now that you have set up your audio settings, you’re one step closer to streaming in Discord. In the next step, we’ll look at granting Discord the necessary permissions to stream your screen and share your audio.
Step 2: Grant Discord the Required Permissions
Before you can start streaming your screen and sharing your audio in Discord, you need to grant Discord the necessary permissions. These permissions allow Discord to capture your screen, access your audio, and transmit the stream to other participants. Follow these steps to grant Discord the required permissions:
- Ensure that Discord is running on your device and that you are logged in to your account.
- Click on the gear icon located at the bottom left corner of the Discord window to open the User Settings menu.
- In the User Settings menu, navigate to the “Voice & Video” tab on the left sidebar.
- Scroll down to the “Video Settings” section and toggle on the “Enable Screen Share” option.
- Next, navigate to the “App Settings” tab on the left sidebar.
- Under the “App Settings” tab, click on the “Permissions” option.
- In the Permissions menu, make sure the “Microphone” and “Camera” options are set to “Allow” for Discord. This ensures that Discord can access your audio and video devices.
- If you plan on streaming a game, make sure the “Overlay” option is also set to “Enabled.” This allows Discord to display an in-game overlay while you’re streaming.
- Once you have granted Discord the necessary permissions, click on the “X” button at the top right corner of the settings window to close it.
It’s important to note that granting the necessary permissions may vary depending on your operating system and Discord version. If you encounter any difficulties or need more specific instructions, refer to the Discord documentation or seek assistance from the Discord support community.
Now that you have granted Discord the required permissions, you’re ready to move on to the next step, where we’ll explore how to start a voice call or join a server in Discord.
Step 3: Start a Voice Call or Join a Server
Now that you have configured the necessary audio settings and granted Discord the required permissions, it’s time to start a voice call or join a server in Discord. This step is essential to establish a connection with other participants and begin your streaming session. Follow these steps to start a voice call or join a server in Discord:
- Launch the Discord application on your device and log in to your account if you haven’t already.
- If you want to start a voice call with specific individuals, locate them in your friends list on the left side of the Discord window. You can either double-click their name to start a private call or create a group direct message by clicking the “+” icon at the bottom of the friends list and selecting the participants.
- If you prefer to join a server and stream to a larger audience, search for or navigate to the server you want to join in the left sidebar. Click on the server’s name to enter it.
- Once you are in a voice call or server, you will see a list of participants on the right side of the Discord window. To initiate your stream, proceed to the next step.
If you are joining a server, it’s worth noting that some servers may have specific rules or guidelines for streaming. Make sure to familiarize yourself with any server-specific requirements or restrictions before you start your stream.
Starting a voice call or joining a server will establish the necessary communication channel for your stream. In the next step, we will explore how to share your screen in Discord to begin streaming your content.
Step 4: Share your Screen
Now that you’re in a voice call or have joined a server in Discord, it’s time to share your screen. Sharing your screen allows participants to see what you’re doing on your computer, whether you’re playing a game, presenting a slideshow, or demonstrating a software application. Follow these steps to share your screen in Discord:
- Ensure that you are in a voice call or have joined a server in Discord.
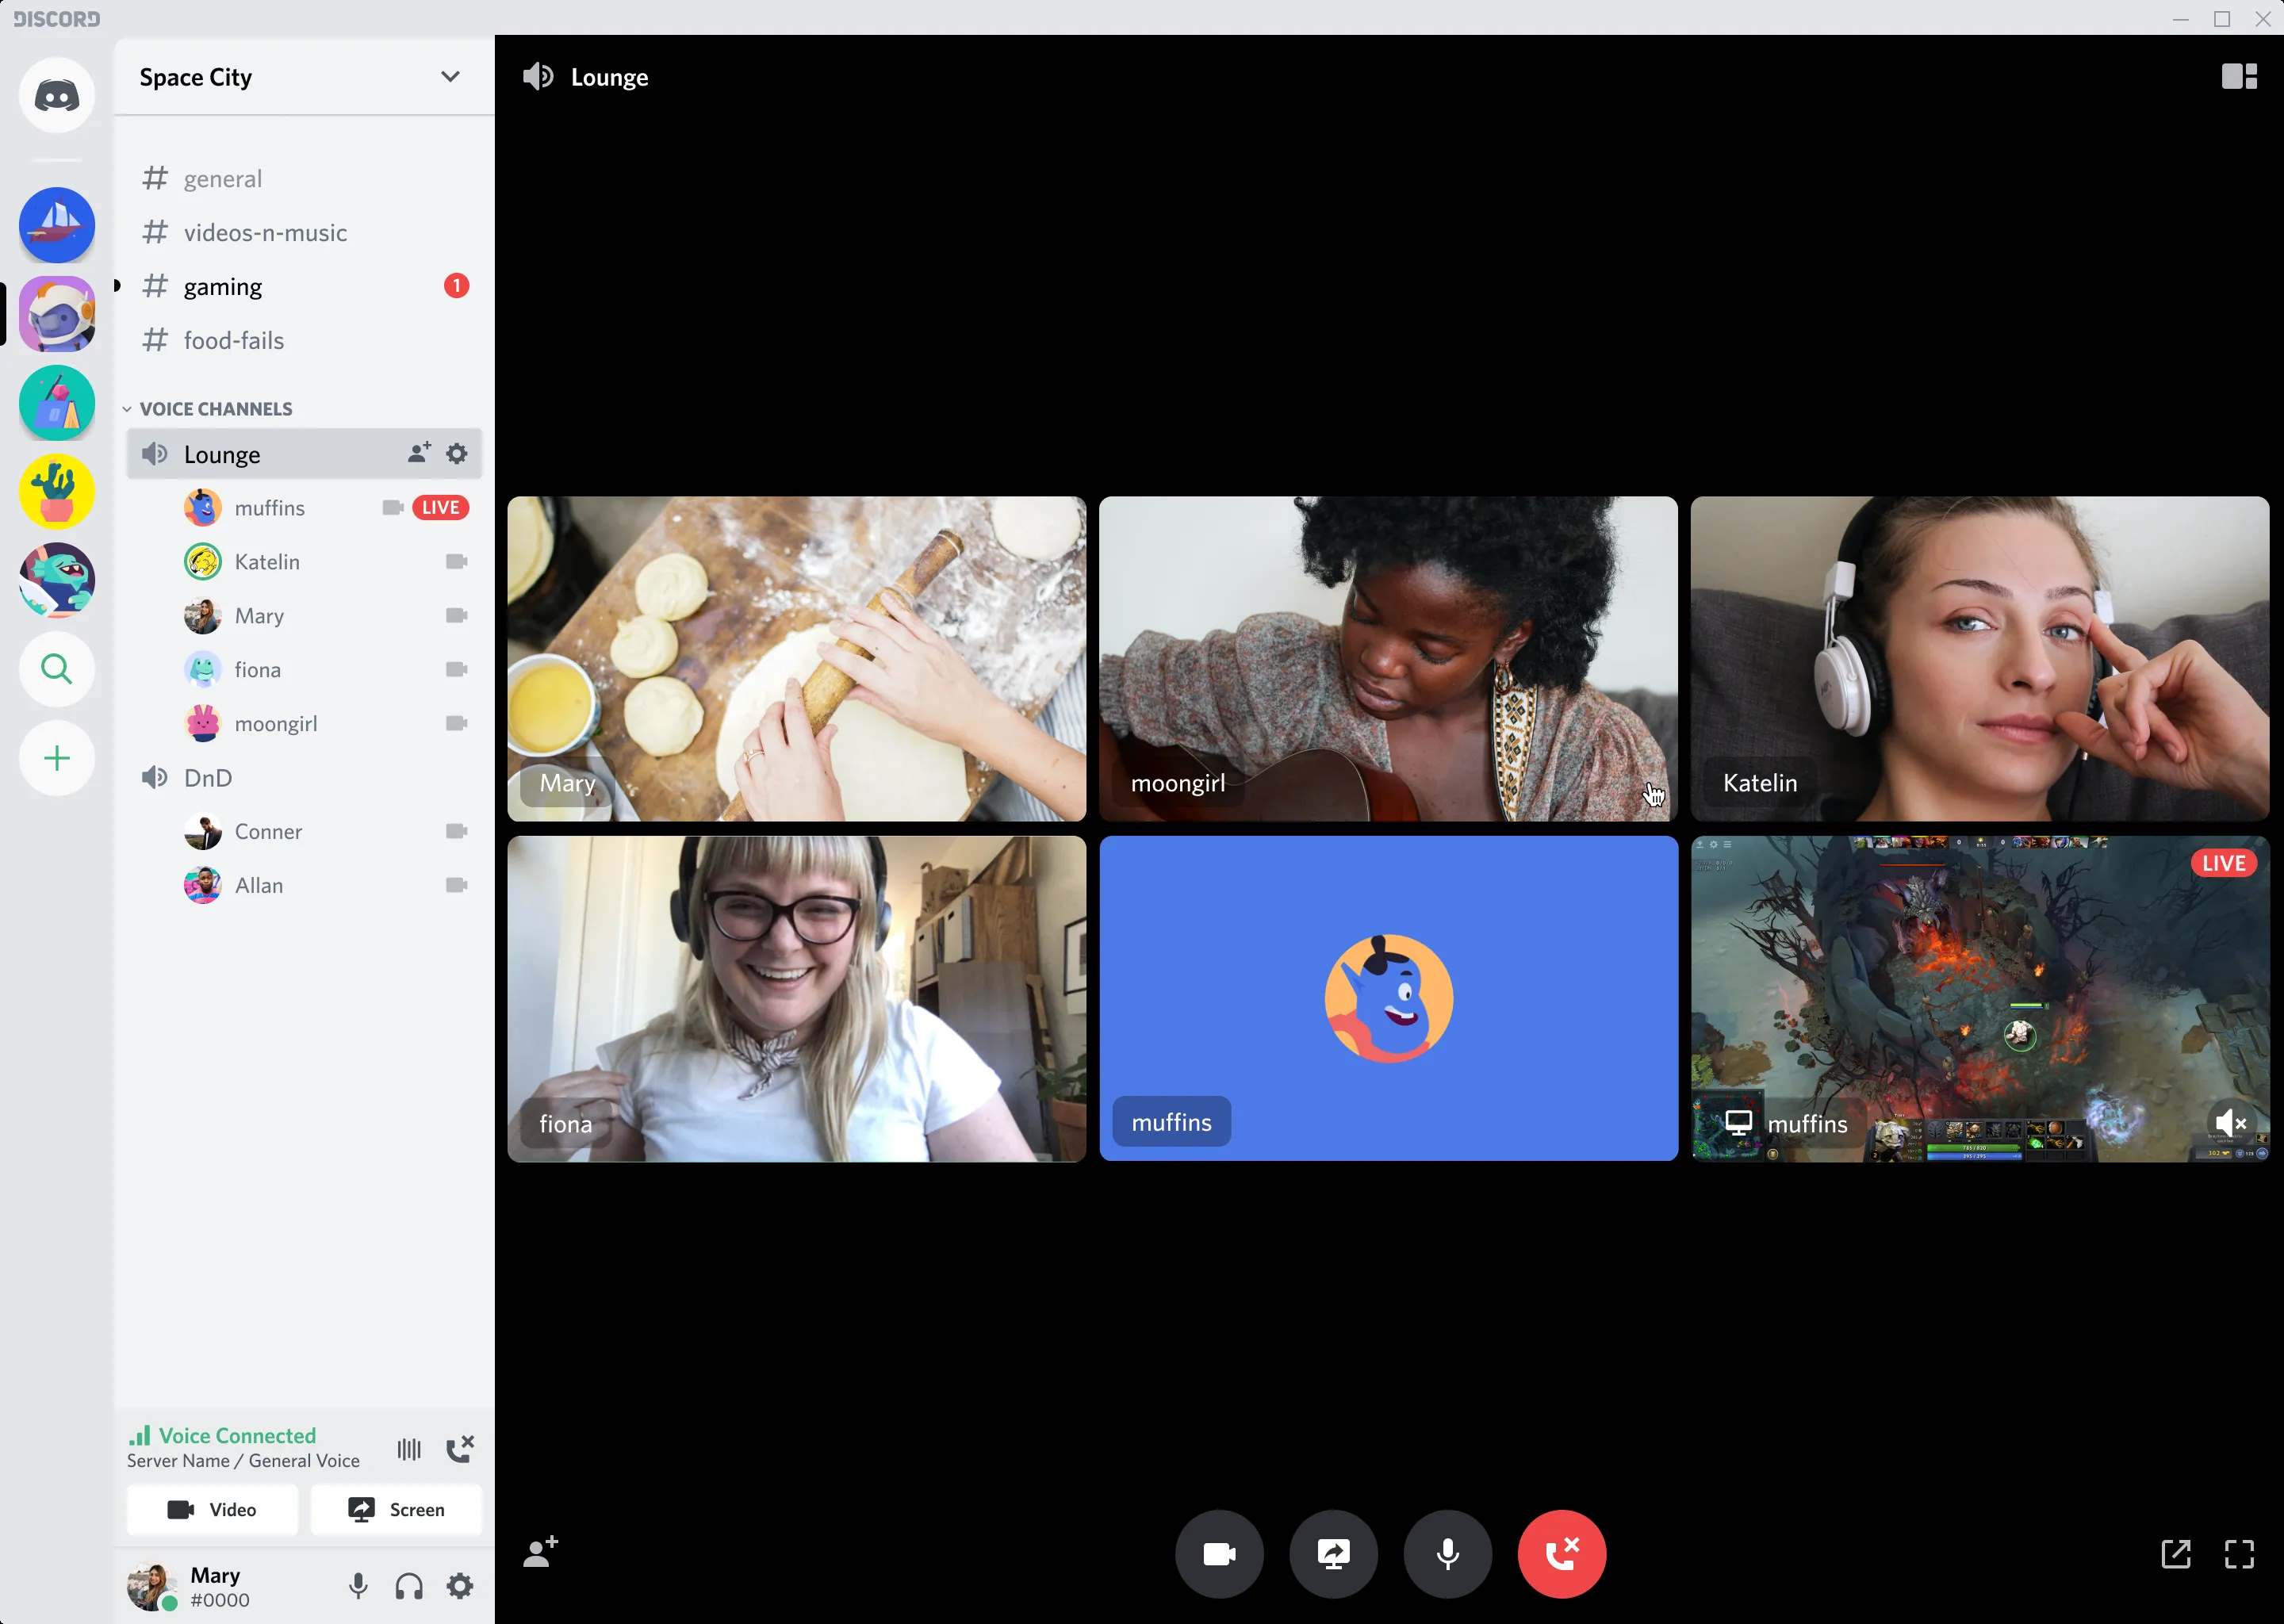
- Look for the “Screen” icon located at the bottom of the Discord window, next to the icons for voice and video.
- Click on the “Screen” icon, and a pop-up window will appear, displaying the screens available for sharing.
- Select the screen or application window that you want to share with other participants. You can choose to share your entire screen or a specific application window.
- Once you have made your selection, click on the “Go Live” button to start streaming your screen.
While sharing your screen, you have the option to include audio from your computer as well. By toggling on the “Include Computer Audio” option in the screen sharing window, other participants will be able to hear the audio from your screen, whether it’s music, game sounds, or other application audio.
During the screen sharing session, other participants will be able to see everything on your screen or the specific application window you are sharing. You can interact with your content as usual, and your actions will be visible to the participants in real-time.
It’s important to note that screen sharing may affect your computer’s performance, especially if you’re sharing resource-intensive applications or games. If you experience any lag or performance issues during the stream, consider closing unnecessary applications or adjusting your screen sharing settings for optimal performance.
Now that you have successfully shared your screen, it’s time to move on to the final step where we’ll explore how to begin the streaming session in Discord.
Step 5: Begin Streaming
With your screen shared in Discord, it’s time to begin the streaming session. Now that other participants can see your screen, they can follow along with your activities, whether it’s watching you play a game, viewing your presentation, or observing your software demonstration. Follow these steps to start streaming in Discord:
- Ensure that you have successfully shared your screen, as mentioned in the previous step.
- Communicate with the other participants in the voice call or server to inform them that you are about to start streaming.
- Once you are ready to start streaming, you can initiate your stream by clicking on the “Go Live” button located at the bottom right corner of the Discord window.
- A confirmation dialog box will appear, asking you to confirm that you want to start streaming. Review the information and click on the “Go Live” button to proceed.
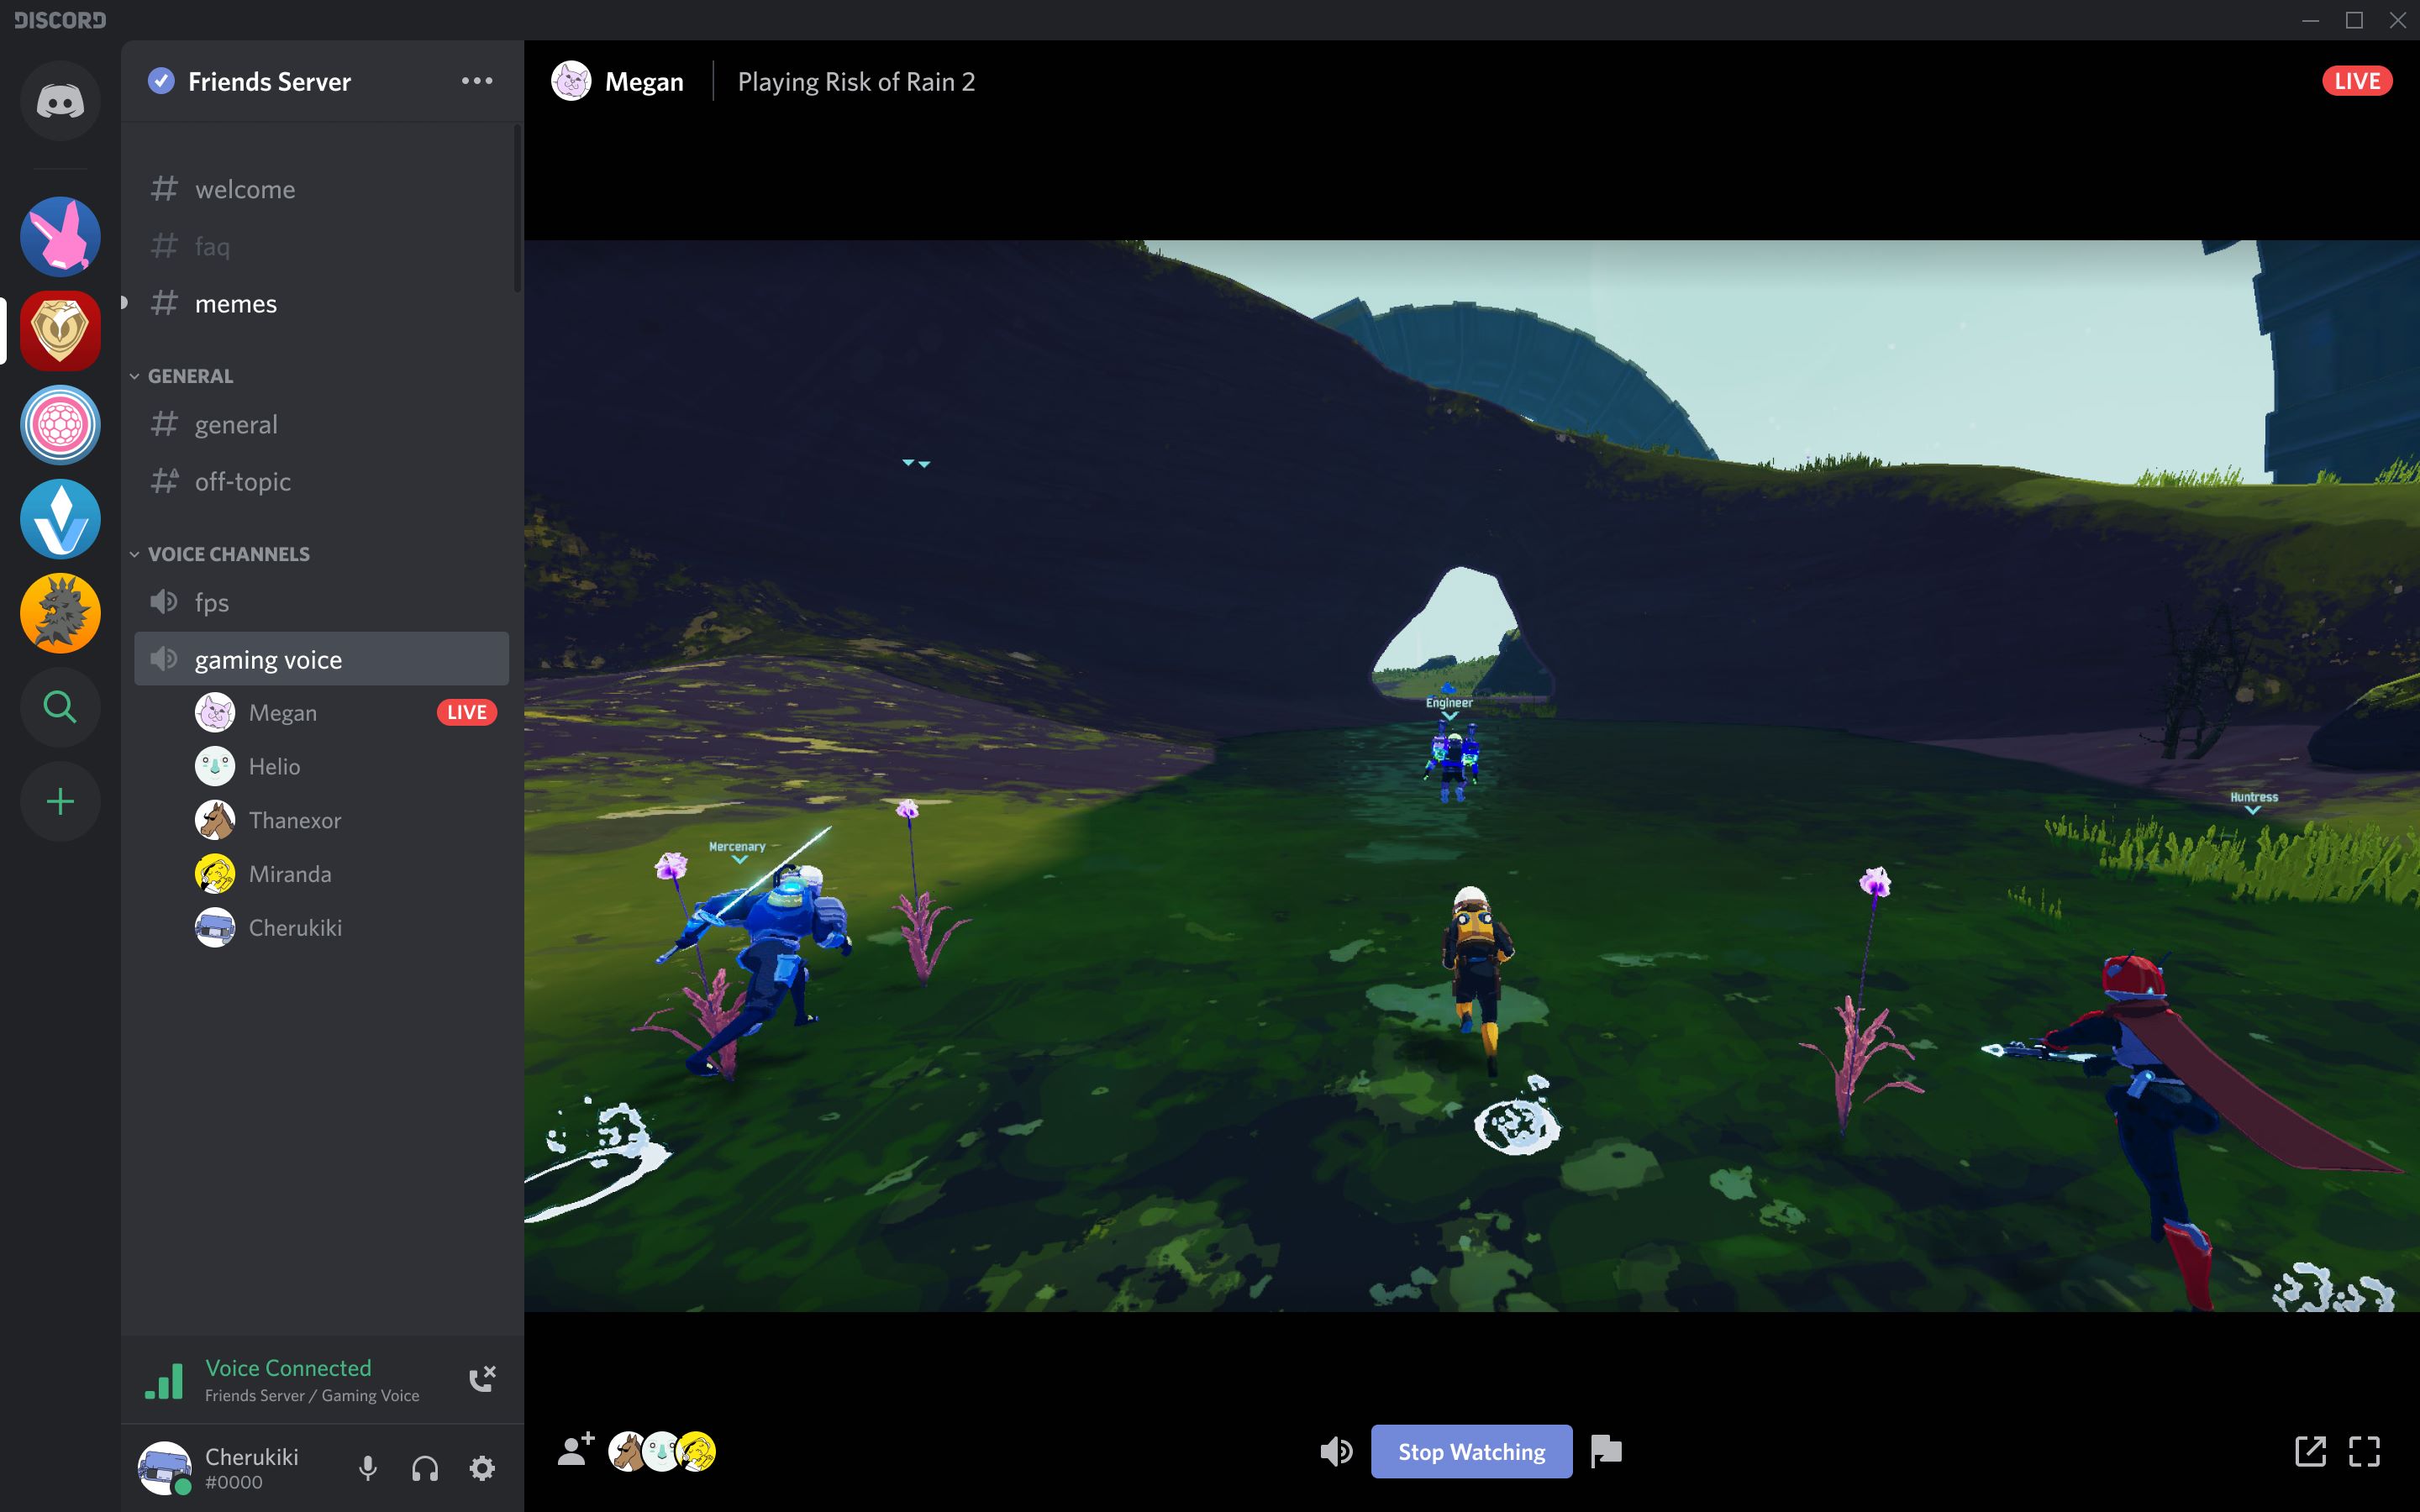
- Discord will start streaming your screen, and other participants in the voice call or server will be able to see your stream in real-time.
While streaming, you can continue to interact with your content, chat with participants, and answer any questions or comments they may have. Discord also provides options to customize your stream, such as overlay settings, stream title, and game activity information, to enhance the viewer experience.
It’s important to be mindful of the content you’re streaming in compliance with Discord’s community guidelines and any server-specific rules. Creating a positive and engaging streaming experience will help foster a vibrant and interactive community around your content.
Once you have finished your stream, you can stop streaming by clicking on the “Stop Streaming” button located at the bottom right corner of the Discord window. This will end the streaming session, and your screen will no longer be visible to other participants.
Congratulations! You have successfully started a streaming session in Discord. Whether you’re gaming, presenting, or demonstrating, Discord provides a powerful platform for sharing your screen and connecting with your audience. Now, it’s up to you to create engaging content and build a community around your streams!
Tips and Troubleshooting
Streaming in Discord can be an exciting and rewarding experience. To make the most out of your streaming sessions, consider the following tips and troubleshooting advice:
- Test your setup: Before you begin a stream, it’s a good practice to test your setup. Check your audio and video quality, ensure that your screen sharing is working correctly, and run a trial stream with a friend to iron out any potential issues.
- Communicate with your audience: Engage with your viewers during your stream. Respond to their questions, address their comments, and make them feel involved. Building a connection with your audience enhances the streaming experience for everyone involved.
- Use a stable internet connection: A stable and reliable internet connection is crucial for a smooth streaming experience. Make sure you are connected to a network with a strong signal to avoid any disruptions or lag during your stream.
- Consider your background: Pay attention to your surroundings and choose a clean and uncluttered background. This helps maintain a professional appearance and prevents distractions for your viewers.
- Manage your resources: Streaming can be resource-intensive, particularly if you are sharing screen-intensive applications or playing high-resolution games. Close any unnecessary programs or background applications to free up system resources and ensure optimal performance.
- Observe Discord’s guidelines: Familiarize yourself with Discord’s community guidelines and follow them during your streams. This helps maintain a positive and inclusive environment for your viewers and avoids potential issues or violations.
- Check for software updates: Periodically check for Discord software updates to ensure you have the latest features and bug fixes. Keeping your software up to date can help prevent compatibility issues and improve performance.
- Seek assistance if needed: If you encounter any difficulties or technical issues during your streaming sessions, don’t hesitate to reach out to the Discord support community or consult the Discord documentation. They can provide valuable insights and troubleshooting steps to resolve any problems you may encounter.
By following these tips and troubleshooting recommendations, you can ensure a smooth and enjoyable streaming experience in Discord. Experiment, have fun, and continue to improve your streaming skills to create captivating and engaging content for your audience.
Conclusion
Streaming in Discord opens up a world of possibilities for gamers, content creators, and professionals alike. By following the step-by-step guide outlined in this article, you can easily set up and start streaming in Discord, sharing your screen and audio with others. Whether you’re looking to share your gaming experiences, host virtual workshops, or demonstrate software applications, Discord provides a user-friendly platform for you to connect with your audience and build a community around your content.
We began by setting up the audio settings, ensuring that your microphone and speakers or headset are properly configured. Then, we covered the crucial step of granting Discord the necessary permissions to access your screen and audio. After that, we explored how to start a voice call or join a server in Discord to establish the communication channel for your stream.
Once you’re ready, we showed you how to share your screen, allowing other participants to see what you’re doing on your computer. Finally, we went over the process of initiating the streaming session in Discord, enabling your audience to follow along with your activities in real-time.
Remember to engage with your audience, test your setup, and follow Discord’s guidelines to create a positive and interactive streaming experience. Additionally, be mindful of your internet connection, manage your resources, and seek assistance if you encounter any technical issues.
Streaming in Discord has become a popular way to connect with others, share your passions, and create engaging content. So, grab your headset, fire up Discord, and start streaming today to showcase your skills, entertain your viewers, and build a community around your content!


