Introduction
Welcome to the world of Discord, an online communication platform popular among gamers, communities, and various interest groups. With its voice, video, and text chat features, Discord offers a dynamic and interactive experience for users to connect and collaborate with others.
Discord is known for its flexibility and extensibility, offering a wide range of customization options and integrations. One of its most exciting features is the ability to create and add bots to your Discord server. Discord bots are automated programs that can perform various tasks and functions, enhancing the overall user experience and automating repetitive actions.
Creating a bot on Discord may seem like a daunting task, especially if you’re not familiar with programming or web development. However, with the right guidance, you can create a bot that brings unique functionality and fun to your Discord server.
In this guide, we will walk you through the process of creating a bot on Discord, from setting up your server to coding and deploying your very own bot. Whether you’re a seasoned developer or a beginner, we’ll provide step-by-step instructions and explanations to help you along the way.
Before diving into the technical aspects, it’s important to note that creating a bot requires some basic programming knowledge. While we will provide code snippets and examples, having a basic understanding of JavaScript and HTML will be helpful.
By the end of this guide, you’ll have the knowledge and tools to create your own bot on Discord, opening up a world of possibilities for your server and its members. So, without further ado, let’s get started on your journey to becoming a bot creator!
What is Discord?
Discord is a free, feature-rich communication platform designed for communities, gamers, and individuals to connect and collaborate in real-time. Initially developed as a chat app for gamers, Discord has evolved into a versatile platform used by millions of people around the world.
With Discord, you can create or join servers, which are virtual spaces where you can chat with other members, either through text, voice, or video channels. Servers can be public or private, allowing you to create a community around a common interest, such as gaming, art, music, or any other topic.
Discord offers a user-friendly interface with a range of features that make communication and collaboration seamless. These features include:
- Text Channels: Channels dedicated to text-based conversations on specific topics or interests.
- Voice Channels: Channels where members can join and have real-time voice conversations, ideal for gaming or group discussions.
- Video Calls: The ability to have face-to-face video calls with other members.
- Screen Sharing: Share your screen with others during a voice or video call, making it easier to collaborate or demonstrate something.
- Roles and Permissions: Assign roles to members within your server, granting them different levels of access and permissions.
- Bots and Integrations: Extend the functionality of your server by adding bots and integrating external services.
- Emojis and Reactions: Express yourself using a wide range of emojis and react to messages with custom reactions.
Discord is available as a desktop application, a browser-based client, and mobile apps for iOS and Android, ensuring accessibility across multiple devices.
Whether you’re a gamer looking for a platform to connect with fellow players, a community manager seeking an organized space for discussions, or an individual wanting a versatile communication tool, Discord offers a feature-rich and intuitive solution for all your communication needs.
What is a Discord Bot?
A Discord bot is an automated program that interacts with users on a Discord server, performing various tasks and functions. Think of it as a virtual assistant that can help manage your server, provide information, entertain users, and perform other useful actions.
Discord bots are created using programming languages like JavaScript and interact with the Discord API (Application Programming Interface) to send and receive messages, access server information, and perform actions on behalf of users.
Discord bots can be highly versatile and serve different purposes based on their functionalities. Here are some common use cases of Discord bots:
- Moderation: Bots can help manage your server by automatically enforcing rules, detecting and removing spam, and moderating user behavior.
- Automated Tasks: Bots can perform repetitive tasks such as welcoming new members, assigning roles, or scheduling events.
- Information Retrieval: Bots can provide information on various topics, including weather forecasts, game stats, or even fetching data from external APIs.
- Entertainment: Bots can entertain users with games, quizzes, mini-games, or even by playing music in voice channels.
- Custom Commands: Bots can be programmed to respond to custom commands, allowing users to access specific information or trigger certain actions.
By adding a bot to your Discord server, you can enhance the user experience, automate tasks, and add new functionalities that improve engagement and interaction among your community members.
Creating a Discord bot requires some programming knowledge and familiarity with the Discord API. However, there are libraries and frameworks available, like Discord.js, that simplify the development process and provide a higher-level interface for interacting with the Discord API.
Discord bots are not only for advanced developers. With some basic programming skills and the right resources, anyone can create and customize a bot to suit their server’s needs.
Now that we have a basic understanding of what Discord bots are and their potential use cases, let’s dive into the process of creating and setting up a bot for your Discord server.
Getting Started
Before you can create a bot on Discord, there are a few initial steps you need to take to set up your server and create a developer application. Let’s walk through the process together:
Setting up a Discord Server
If you don’t already have a Discord server, start by creating one. Launch the Discord application or visit the Discord website and sign in with your account. Once logged in, click on the plus sign (+) button on the left-hand side of the screen to create a new server. Give your server a name, select a region, and customize its appearance and settings as desired.
Creating a Discord Application
To create a bot on Discord, you need to create a developer application. Visit the Discord Developer Portal and sign in with your Discord account. Once logged in, click on the “New Application” button, give your application a name, and save it. On the left-hand side, navigate to the “Bot” tab and click on “Add Bot” to create a bot for your application. Customize your bot’s name and image if desired.
Adding a Bot to Your Server
Next, you need to invite your bot to your server. On the Discord Developer Portal, go to the “OAuth2” tab. Under the “Scopes” section, select “bot” and under the “Bot Permissions” section, choose the permissions your bot will require. Once you’ve selected the permissions, a generated URL will appear. Copy this URL and paste it into your browser. Choose the server you want to invite your bot to and click “Authorize”.
Great! You’ve successfully set up your server and created a bot on Discord. In the next sections, we’ll explore how to code your bot and add functionality to it. So, grab your favorite code editor and let’s get coding!
Setting up a Discord Server
Before you can create and add a bot to your Discord server, you’ll need to set up the server itself. Here’s how you can do it:
1. Create a Server: Launch the Discord application or visit the Discord website and sign in with your account. Once logged in, click on the plus sign (+) button on the left-hand side of the screen to create a new server. Give your server a name that represents your community or aligns with the purpose of the server. You can also select a region for optimized voice chat performance.
2. Customize the Server: After creating the server, you can customize its appearance, settings, and permissions. Click on the server name on the left-hand sidebar to access the server settings. Here, you can upload a server icon, create channels for different topics or purposes, specify roles and permissions for different members, and set up moderation rules.
3. Invite Members: Once you’ve set up your server, you can invite people to join. You can either manually add members by clicking on the user icon at the top-right corner and entering their username and discriminator, or you can generate an invite link to share with others. Depending on your server’s settings, you can choose to make the server public or private, and manage member permissions accordingly.
4. Organize Channels: Discord allows you to create different types of channels, including text channels and voice channels. Text channels are for textual conversations and can have various topics, such as general discussions, specific games, or announcements. Voice channels, on the other hand, enable members to join and have real-time voice conversations. You can set different permissions for channels and customize their names, order, and visibility.
5. Enhance the Server: Discord offers a range of features and integrations that can enhance your server’s functionality. You can explore and add bots from the Discord Bot List or create your own bot, customize server roles and permissions to manage member access, and utilize other features like emojis, reactions, and server-wide announcements to engage with your community.
Setting up a Discord server is a crucial step before adding a bot. It provides the foundation for your community and sets the tone for the interactions and activities that will take place. Take the time to create a server that aligns with your vision and fosters a welcoming and inclusive environment for your members.
Creating a Discord Application
In order to create a bot on Discord, you first need to create a Discord application. The application acts as a container for your bot and allows you to customize its settings and permissions. Here’s how you can create a Discord application:
1. Visit the Discord Developer Portal: Go to the Discord Developer Portal and sign in using your Discord account. If you don’t have an account, you’ll need to create one.
2. Create a New Application: Once you’re logged in, click on the “New Application” button located on the top-right corner of the page. Give your application a name that represents your bot. This name will be seen by users when your bot interacts with them.
3. Customize Your Application: After creating the application, you’ll be redirected to the application settings page. Here, you can customize various aspects of your application, including its icon, description, and other metadata. You can also enable or disable certain features like the Public Bot option, which allows other users to invite your bot to their servers.
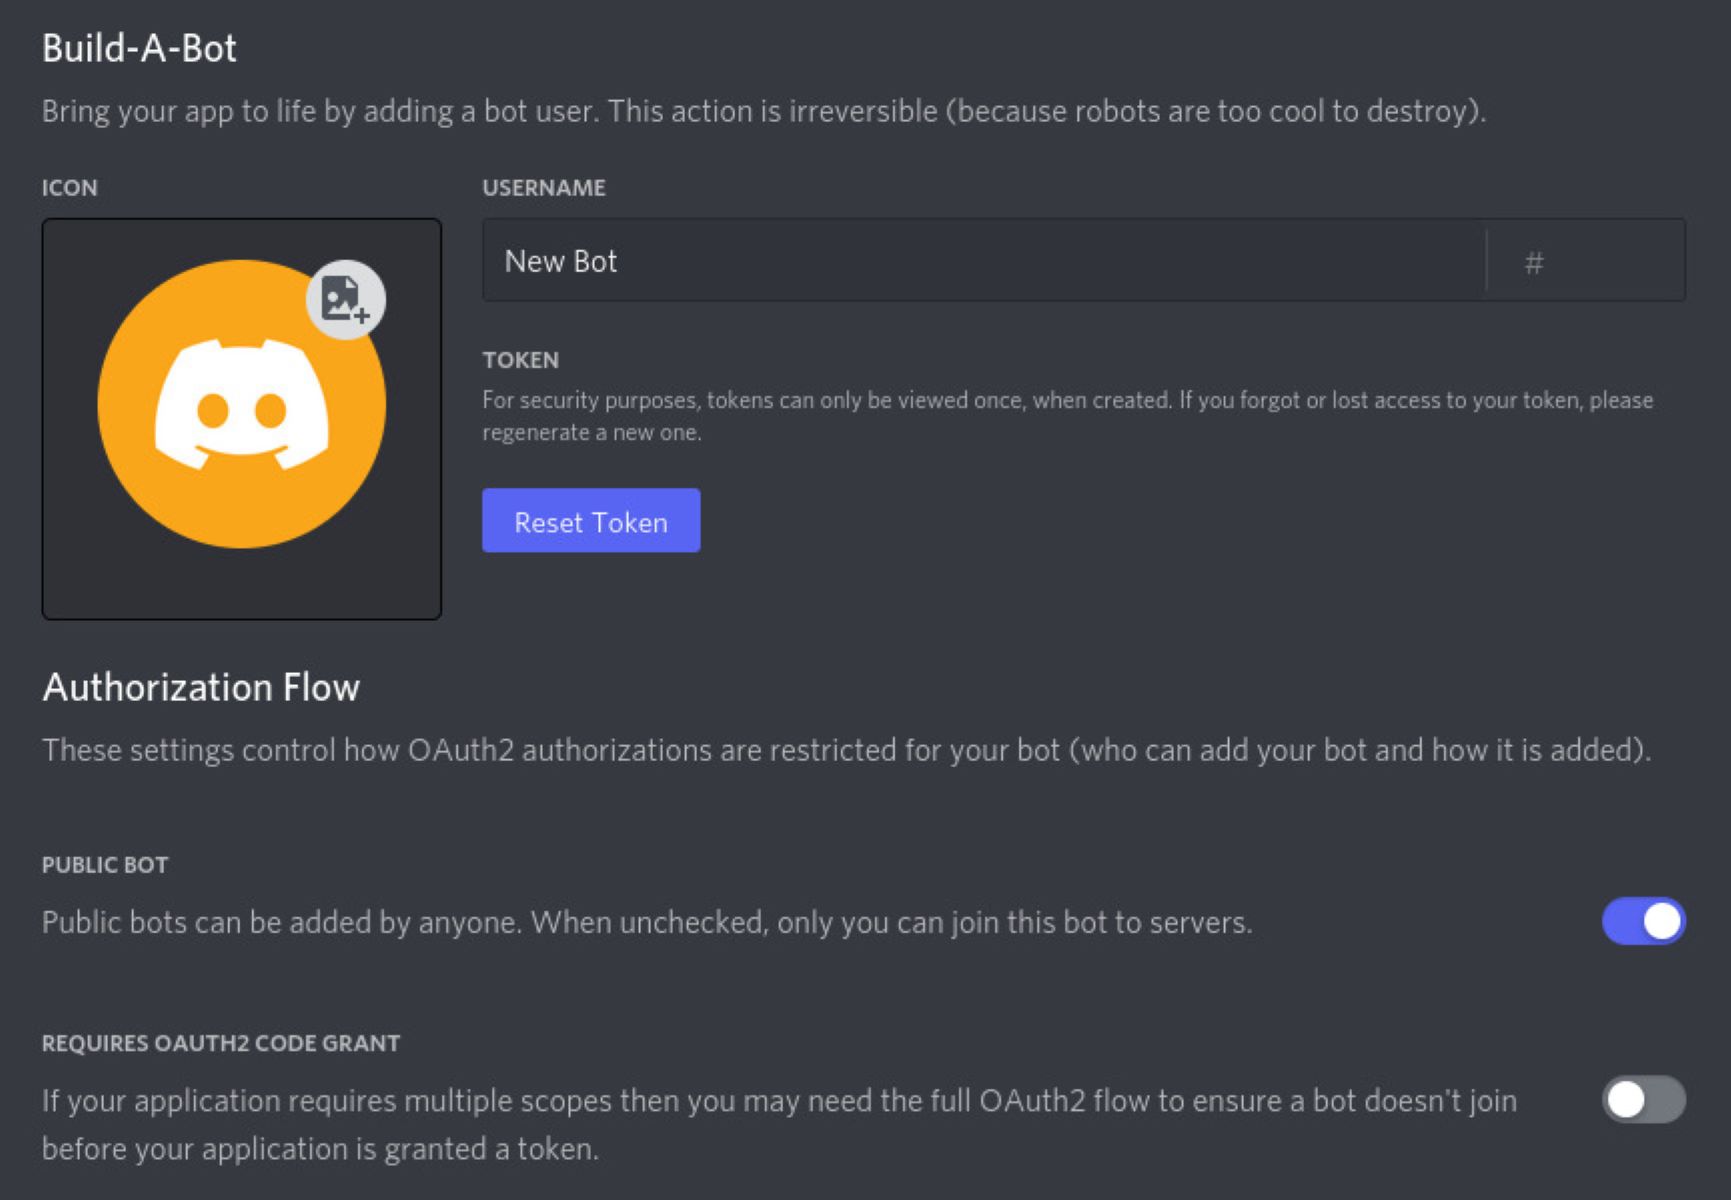
4. Add a Bot: To turn your application into a bot, navigate to the “Bot” tab on the left-hand side of the application settings page. Click on the “Add Bot” button to enable the bot functionality for your application. This will generate a token that you’ll use to authenticate and interact with the Discord API.
5. Customize Bot Settings: Once your bot is created, you can customize its name and profile picture under the “Bot” section. You can also control additional settings like whether your bot is publicly listed on the Discord Bot List, or if it can be invited to other servers.
6. Retrieve Token: The bot token is like a secret key that allows your bot to authenticate and communicate with the Discord API. It’s important to keep this token secure as it grants access to your bot. Under the “Token” section of the bot page, click on the “Copy” button to copy your bot token.
Creating a Discord application is the first step in building your bot. The application serves as the foundation for your bot, giving you control over its settings, permissions, and appearance. In the next sections, we’ll explore how to code the bot and add exciting functionality to it.
Adding a Bot to Your Server
Now that you have created a bot application on the Discord Developer Portal, it’s time to add the bot to your server. Adding a bot to your server allows it to join and interact with members. Here’s how you can add a bot to your server:
1. Access Your Bot’s Application Page: Go back to the Discord Developer Portal and navigate to the “OAuth2” tab for your bot’s application. This section allows you to generate an invite link for your bot.
2. Choose Permissions: Under the “Scopes” section, select the “bot” checkbox. This indicates that you want to generate an invite link for a bot. Then, scroll down to the “Bot Permissions” section and choose the permissions your bot will require. These permissions determine what actions your bot can perform on your server. Make sure to consider your bot’s intended functionalities when selecting permissions.
3. Generate the Invite Link: As you select the desired permissions, a URL will be automatically generated in the “Scopes” section. This URL represents the invite link for your bot. It will be used to invite the bot to your server.
4. Authorize the Bot: Copy the generated URL and paste it into your web browser. You will be presented with a page that allows you to select the server where you want to add the bot. Choose the desired server from the dropdown menu and click “Authorize” to grant your bot access to your server.
5. Verify the Bot’s Presence: Once the bot has been successfully added to your server, you should see it listed in the member list on the right-hand side. The bot will have the same name and profile picture that you set during the application creation process.
Congratulations! You have successfully added a bot to your Discord server. The bot is now ready to receive commands and interact with your server’s members. In the next sections, we will explore how to code the bot using JavaScript and add functionality to make it more useful and engaging.
Coding the Bot
Now that you have set up your Discord server and added a bot to it, it’s time to start coding! In this section, we will walk through the process of setting up the development environment, installing the required libraries, and creating a basic bot script using JavaScript and the Discord.js library.
Setting up the Development Environment
To code your bot, you will need a text editor or an integrated development environment (IDE). Popular choices include Visual Studio Code, Sublime Text, or Atom. Choose the one that you are most comfortable with.
Installing the Discord.js Library
Discord.js is a powerful JavaScript library that provides an interface to interact with the Discord API. It simplifies the process of creating and managing a bot. To install the Discord.js library, open your terminal or command prompt and navigate to your bot’s project directory. Run the following command:
bash
npm install discord.js
This command will install the necessary dependencies for building your Discord bot.
Creating a Basic Bot Script
Now that we have our development environment set up and the Discord.js library installed, let’s create a basic bot script. In your preferred text editor or IDE, create a new JavaScript file, such as “bot.js”.
Start by requiring the Discord.js library and creating a new instance of the Discord Client:
javascript
const Discord = require(‘discord.js’);
const client = new Discord.Client();
Next, use the bot token obtained from the Discord Developer Portal to authenticate the bot:
javascript
const token = ‘YOUR_BOT_TOKEN’;
client.login(token);
Replace ‘YOUR_BOT_TOKEN’ with the actual token you copied from the Discord Developer Portal.
Connecting the Bot to Your Server
To connect your bot to your Discord server, add the following code to your script:
javascript
client.on(‘ready’, () => {
console.log(`Bot is logged in as ${client.user.tag}`);
});
This code listens for the ‘ready’ event, which is triggered when the bot has successfully logged in. The console.log statement will display the bot’s username and tag in the console.
Now that you have a basic bot script set up, it’s time to provide it with functionality by responding to user commands, performing actions, and handling events. In the next sections, we will explore how to add more features and interactivity to your bot.
Setting up the Development Environment
Before you can start coding your Discord bot, you’ll need to set up your development environment. This involves choosing a text editor or integrated development environment (IDE) and making sure you have the necessary tools installed. Here’s a step-by-step guide to setting up your development environment:
1. Choose a Text Editor or IDE
One of the first decisions you’ll need to make is which text editor or IDE you want to use for coding your bot. Popular choices among developers include Visual Studio Code, Sublime Text, Atom, or JetBrains WebStorm. Choose the one that you feel most comfortable with and suits your needs.
2. Install Node.js
Discord bots are typically built using JavaScript and run on the Node.js runtime. So, to ensure you can run and test your bot locally, you’ll need to have Node.js installed on your machine. You can download the latest version of Node.js from the official Node.js website and follow the installation instructions for your operating system.
3. Create a New Project Directory
Start by creating a new project directory where you’ll store all your bot-related files. Open your command line or terminal, navigate to the desired location, and use the following command to create a new directory:
bash
mkdir my-discord-bot
cd my-discord-bot
4. Initialize a Node.js Project
Once inside your project directory, you need to initialize a new Node.js project. Run the following command:
bash
npm init -y
This command will create a new `package.json` file that holds information about your project and its dependencies.
5. Install Discord.js Library
The Discord.js library provides a powerful and straightforward interface for interacting with the Discord API. Install it by running the command:
bash
npm install discord.js
This command will download and install the Discord.js library and its dependencies into your project directory.
With your development environment set up, you are ready to start coding your Discord bot. Open your preferred text editor or IDE and create a new JavaScript file to begin writing your bot script. In the next sections, we will cover the process of coding your bot, including handling events, adding functionality, and deploying the bot to a server.
Installing the Discord.js Library
In order to interact with the Discord API and build your bot, you’ll need to install the Discord.js library. Discord.js provides a simple and efficient way to create and manage bots on the Discord platform. Here’s how you can install the Discord.js library:
1. Initialize a Node.js Project
Before you can install any libraries, you need to create a new Node.js project. Open your command line or terminal, navigate to your project directory, and run the following command:
bash
npm init -y
Executing this command will generate a `package.json` file that keeps track of your project’s dependencies.
2. Install the Discord.js Library
With your Node.js project set up, you can now install the Discord.js library. In your command line or terminal, run the following command:
bash
npm install discord.js
This command will download the Discord.js library and its dependencies from the npm (Node Package Manager) registry and add them to your project.
3. Verify the Installation
Once the installation process is complete, you can verify that the Discord.js library was installed correctly. Open your text editor or IDE and create a new JavaScript file. Add the following code to verify the installation:
javascript
const Discord = require(‘discord.js’);
console.log(`Discord.js version: ${Discord.version}`);
Save the file and then run it using Node.js by entering the following command in your command line or terminal:
bash
node your-filename.js
If the installation was successful, you should see the Discord.js version number printed to the console.
With the Discord.js library successfully installed, you can now begin coding your Discord bot. You’re one step closer to bringing your bot to life and adding functionality to your Discord server. In the next sections, we will cover how to create a basic bot script, connect it to your server, and start responding to commands and events.
Creating a Basic Bot Script
Now that you have the Discord.js library installed, it’s time to start coding your Discord bot! In this section, we will walk through the process of creating a basic bot script that connects to your server and responds to commands. Let’s get started:
1. Require the Discord.js Library
Open your text editor or IDE and create a new JavaScript file for your bot. Start by requiring the Discord.js library:
javascript
const Discord = require(‘discord.js’);
2. Create a New Client
Next, create a new instance of the Discord Client:
javascript
const client = new Discord.Client();
3. Listen for the ready Event
The ready event is triggered when the bot has successfully logged in and is ready to start interacting with the server. Add the following code to listen for the ready event:
javascript
client.on(‘ready’, () => {
console.log(`Logged in as ${client.user.tag}`);
});
When the bot logs in, the ready event will be fired, and the callback function will be executed. In this example, we simply log the bot’s username and tag to the console, but you can add additional code to perform other actions when the bot is ready.
4. Log in Your Bot
To log in your bot, you’ll need to provide your bot token. Add the following code at the end of your script:
javascript
const token = ‘YOUR_BOT_TOKEN’;
client.login(token);
Replace `’YOUR_BOT_TOKEN’` with the actual token you obtained from the Discord Developer Portal. Make sure to keep your token secure and never share it publicly.
5. Run Your Bot
Save the file and open your command line or terminal. Navigate to the directory where your bot script is located, and run the following command:
bash
node your-filename.js
If everything is set up correctly, your bot will log in and you should see the bot’s username and tag printed to the console.
You now have a basic bot script that connects to the Discord server. In the next sections, we will explore how to add more functionality to your bot, such as responding to commands, handling events, and interacting with users on your server.
Connecting the Bot to Your Server
Now that you have a basic bot script set up, it’s time to connect your bot to your Discord server. Connecting the bot allows it to join the server and start interacting with the members. Here’s how you can connect your bot to your server:
1. Listen for the ‘ready’ Event
In your bot script, you should already have code that listens for the ‘ready’ event. This event is triggered when the bot has successfully logged in and is ready to start interacting with the server. Inside the ‘ready’ event callback function, you can add any initial actions or messages that you want your bot to perform when it is ready.
2. Fetch Your Server
Once the bot is ready, you can fetch your server information using the `client.guilds.cache` property. This property gives you access to a collection of guilds (servers) that the bot is a member of. You can use methods like `client.guilds.cache.get(‘serverID’)` or `client.guilds.cache.find(guild => guild.name === ‘serverName’)` to retrieve a specific server by its ID or name.
3. Join Your Server
To join a server, you can use the `guild` object obtained from fetching your server. Use the `fetch()` method to retrieve the server’s `me` property which represents the bot’s member information in that server. This will ensure that the bot joins the server if it is not already a member:
javascript
const server = client.guilds.cache.get(‘serverID’);
server.members.fetch().then(() => {
console.log(‘Bot joined the server successfully!’);
}).catch(console.error);
Replace `’serverID’` with the actual ID of your server. The `fetch()` method retrieves all the members of the server, ensuring that you have the updated list in case your bot joins a new server or there are any changes.
4. Interact with Server Members
With your bot connected to your server, you can now start interacting with the members by listening to events and responding to commands. You can use the `client.on()` method to listen for various events, such as message events, member join events, or reaction events. Inside the event callbacks, you can add logic to respond or perform actions based on the event trigger.
For example, to listen for messages sent in your server’s text channels, you would use the following code:
javascript
client.on(‘message’, (message) => {
if (message.content === ‘ping’) {
message.reply(‘Pong!’);
}
});
In this example, the bot listens for messages and if the content of the message is ‘ping’, it responds with ‘Pong!’. You can customize the bot’s responses and add other commands or actions based on your requirements.
By connecting your bot to your server, you unleash its potential to interact with members, respond to commands, and perform various actions. In the next sections, we will explore how to add more functionalities to your bot, such as handling events and adding additional commands.
Responding to Commands
When building a Discord bot, one of the key functionalities is the ability to respond to user commands. By listening for specific commands and providing appropriate responses, you can create an interactive and engaging experience for your bot users. Here’s how you can implement command handling and response in your bot script:
1. Listen for the ‘message’ Event
In your bot script, you should already have code that listens for the ‘message’ event. This event is triggered whenever a user sends a message in a server your bot is a part of. Inside the ‘message’ event callback function, you can access the message content and other information to determine how your bot should respond.
2. Parse the Command
To handle commands, you need to determine if a message is a command and if so, extract the command and any arguments. The most common way to structure commands in Discord is by using a prefix, such as ‘!’. Check if the message starts with your chosen prefix:
javascript
const prefix = ‘!’;
if (message.content.startsWith(prefix)) {
// handle the command
}
3. Handle the Command
Once you identify a command, you can extract the command name and any arguments using string manipulation methods. Split the message content into an array and separate the command from the arguments:
javascript
const args = message.content.slice(prefix.length).trim().split(/ +/);
const command = args.shift().toLowerCase();
The `args` array will contain the arguments provided after the command, and the `command` variable will hold the name of the command in lowercase.
4. Respond to the Command
Based on the command received, you can now add logic to respond accordingly. You can use conditional statements or a switch case to handle different commands and provide appropriate responses:
javascript
switch (command) {
case ‘ping’:
message.reply(‘Pong!’);
break;
case ‘hello’:
message.channel.send(‘Hello, nice to meet you!’);
break;
default:
message.channel.send(‘Invalid command. Please try again.’);
break;
}
In this example, the bot responds with ‘Pong!’ when the command is ‘ping’ and greets the user when the command is ‘hello’. If an invalid command is entered, the bot sends a default response.
By implementing command handling and response, your bot can interact with users and provide meaningful interactions. You can expand the functionality by adding more commands, implementing command aliases, or even incorporating complex command structures like command categories or options.
In the next sections, we will explore how to add more robust functionalities to your bot, such as handling events, adding custom commands, and integrating external APIs.
Adding Functionality
When building a Discord bot, adding functionality is key to creating a valuable and engaging user experience. By extending your bot’s capabilities, you can enhance its usefulness and offer a wide range of features to your server members. Here are some ways you can add functionality to your Discord bot:
1. Handling Events
Discord bots can listen for various events and perform actions based on them. Some common events include member join/leave events, message events, reaction events, and voice state events. By handling these events, you can perform actions such as welcoming new members, tracking message activity, assigning roles, or reacting to certain user actions.
2. Adding Custom Commands
Custom commands allow users to interact with your bot and perform specific actions by triggering a command. You can create custom commands for different purposes, such as displaying information, performing calculations, retrieving data from external sources, or even playing games. Custom commands provide an interactive and personalized experience for your server members.
3. Integrating External APIs
You can enhance your bot’s functionality by integrating with external APIs. This allows you to retrieve data from external sources and provide real-time information to your server members. For example, you can integrate a weather API to provide weather forecasts, a news API to deliver the latest news, or a music API to play music in voice channels.
4. Moderation and Anti-Spam
Moderation features help maintain a healthy and safe community environment. You can add functionality to automatically moderate content, detect and filter spam or offensive language, and enforce server rules. By implementing moderation features, you can manage your server effectively and ensure a positive experience for all members.
5. Logging and Analytics
Keeping track of important events and activities in your server is crucial. You can add logging and analytics functionality to your bot to log events, such as member joins, message deletions, or channel creations. This data can be used to analyze server activity, identify trends, and provide insights into your server’s performance.
These are just a few examples of the functionality you can add to your Discord bot. The possibilities are endless, and you can customize your bot to suit your specific server’s needs and the preferences of your community members. Remember to experiment, listen to feedback, and continuously iterate to improve your bot’s functionality over time.
In the next sections, we will cover practical examples and provide code snippets to help you incorporate some of these functionalities into your Discord bot.
Handling Events
Handling events is an essential aspect of building a Discord bot. Events allow your bot to respond to various actions and interactions that occur within your server. By listening for and handling events, you can create dynamic and interactive experiences for your users. Here are some common events you can handle in your Discord bot:
1. Message Events
Message events occur when a user sends a message in a server your bot is a part of. You can listen for these events to trigger certain actions or provide responses. For example, you might want your bot to respond to specific commands, filter out certain words, or log messages for moderation purposes.
2. Member Join/Leave Events
When a member joins or leaves your server, you can listen for these events to initiate various actions. For example, you might want to send a welcome message or assign a default role to new members. Similarly, you can track when a member leaves and perform cleanup or other related tasks.
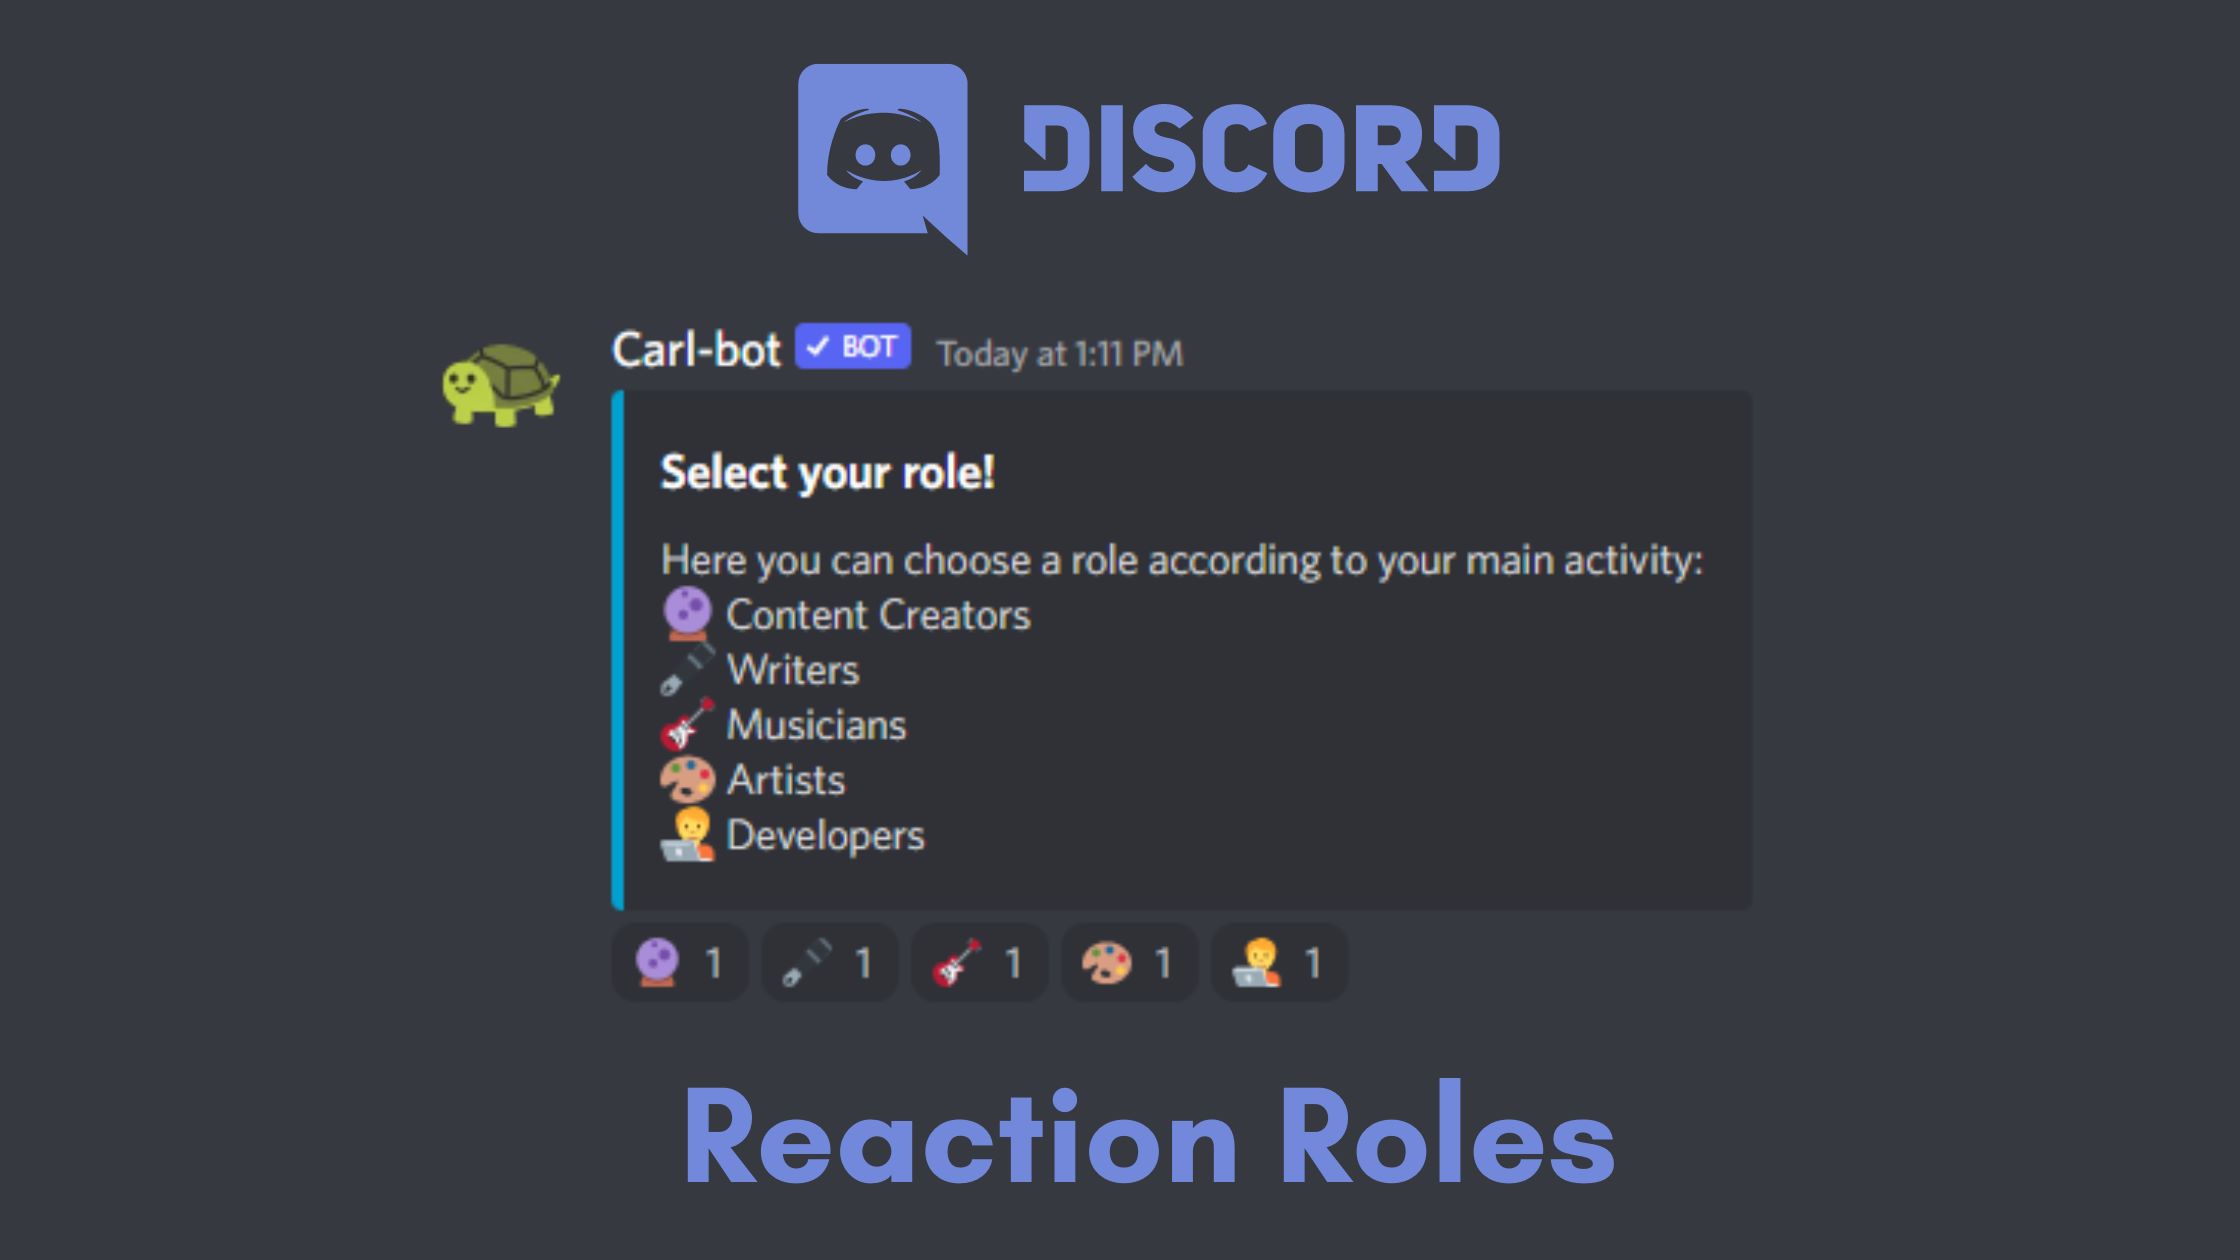
3. Reaction Events
Reaction events occur when a user reacts to a message with an emoji. You can handle these events to perform actions based on specific reactions. For instance, you might want to grant a user a role when they react with a specific emoji or remove a role when the reaction is removed.
4. Voice State Events
These events allow you to track and respond to changes in voice channel states. You can listen for events when a user joins or leaves a voice channel, mutes or unmutes their microphone, or moves between voice channels. With these events, you can build features such as voice channel management or automatic role assignment for voice users.
5. Channel Events
Channel events such as channel creation, deletion, or updates can be handled to provide specific functionality. For instance, you might want to log these events, restrict certain actions within channels, or send automated announcements when channels are created or modified.
When handling events, you can use the Discord.js library’s event listeners to respond to the different event triggers. By providing logic within these event handlers, you can define how your bot should behave and what actions it should take in response to each event.
Handling events allows you to create interactive and dynamic experiences for your users, making your Discord bot more engaging and useful. In the next sections, we will provide code examples and practical implementations for handling some of these events to give you a better understanding of how to incorporate event-driven functionality into your bot.
Adding Additional Commands
Expanding the number of commands your Discord bot can handle adds versatility and functionality to your bot. By implementing additional commands, you can provide more interactive and specific actions for your server members. Here’s how you can incorporate additional commands into your Discord bot:
1. Determine Command Structure
Decide on the structure and syntax for your commands. For example, you might use a prefix followed by the command name and any arguments. Consider using a system that allows for flexibility and ease of use, such as using command aliases or creating categories for related commands.
2. Handle Commands
In your bot script, listen for the ‘message’ event and handle commands by checking the message content for the specified prefix or command structure. Extract the command and any arguments, and use conditional statements or a switch case to handle different commands.
3. Implement Command Functions
Create separate functions for each command and associate them with the corresponding commands. These functions will contain the logic and actions to be executed when a command is called. You can perform actions such as sending messages, retrieving data, executing code, or interacting with external APIs.
4. Provide Command Help
Include a command to provide users with information about the available commands and their usage. This can be helpful for users to understand the purpose of each command and the correct syntax to use. This command can display an embedded message or a simple text response with a list of available commands and their descriptions.
5. Error Handling
Implement error handling to provide appropriate responses when users enter invalid commands or encounter errors. You can send error messages, display usage instructions, or suggest alternative commands if a command is not found.
By adding additional commands, you can extend the functionality of your Discord bot and enhance the user experience. You can create commands for managing server settings, retrieving information, generating random responses, or any other actions that align with the purpose of your bot. Remember to regularly update and iterate on your commands based on user feedback and the evolving needs of your server community.
In the next sections, we will provide examples and code snippets to help you add specific commands to your Discord bot, giving you practical implementations and ideas for customizing your bot’s functionality.
Finalizing and Testing the Bot
Before deploying your Discord bot to a server and making it available to your community members, it’s essential to finalize and test your bot to ensure it functions correctly. Here are some key steps to take when finalizing and testing your bot:
1. Double-Check Command Functionality
Review the functionality of each command to ensure it works as intended. Test all commands and their variations to verify that they provide the expected responses and perform the desired actions. Check for any logic errors, typos, or potential issues that may impact the user experience.
2. Optimize Performance
Optimize your bot’s code to ensure it runs efficiently. Avoid unnecessary or redundant operations, implement proper error handling, and optimize algorithms or data structures when possible. This will help your bot respond quickly and reliably to users’ commands, providing a smooth and seamless experience.
3. Test in a Controlled Environment
Create a controlled testing environment where you can simulate user interactions and evaluate the bot’s responses. Test various scenarios, boundary cases, and edge cases to identify and address any potential issues or unexpected behavior. Use test accounts or private servers to conduct these tests without affecting your live community.
4. Solicit Feedback
Share your bot with a small group of trusted users or beta testers to gather feedback. Encourage them to test the bot, provide insights, and report any bugs or suggestions. Feedback from real users can help you identify areas for improvement, discover overlooked issues, and gather valuable suggestions for enhancing your bot’s functionality.
5. Iterate and Improve
Based on the feedback and testing, make necessary adjustments and improvements to your bot. Address reported issues, optimize performance, and consider implementing suggested enhancements. Continue iterating on your bot to refine its functionality, responsiveness, and user experience.
By finalizing and testing your bot thoroughly, you can ensure its reliability, functionality, and user-friendliness. Taking the time to refine your bot before deployment will help create a positive and engaging experience for your server members.
Once you are confident in your bot’s performance and stability, you can move forward with deploying it to a live server and sharing it with your community. However, remember that bot development is an ongoing process, and you should be prepared to maintain and update your bot regularly to meet the evolving needs and expectations of your server members.
Deploying the Bot
After finalizing and thoroughly testing your Discord bot, it’s time to deploy it to a live server and make it available for your server members and the wider community. Here are the steps to successfully deploy your bot:
1. Choose a Hosting Platform
Select a hosting platform that will keep your bot running and accessible 24/7. Popular choices include cloud-based platforms like Heroku, DigitalOcean, or services like Amazon Web Services (AWS) or Google Cloud Platform (GCP). Evaluate their features, pricing, and ease of use to determine the best fit for your requirements.
2. Create a Server or Service
Set up an instance or server on your chosen hosting platform. This will provide an environment where your bot can run continuously. Follow the hosting platform’s documentation or tutorials to create and configure the server according to the recommended specifications.
3. Deploy Your Bot Code
Upload the code of your Discord bot to the server or service you created. Depending on the hosting platform, you may need to set up a repository, clone an existing one, or manually upload the bot files. Ensure that all required dependencies, such as Discord.js and other libraries, are properly installed.
4. Set Up Environment Variables
Configure any necessary environment variables, such as the Discord bot token, API keys, or other sensitive information. Make sure to follow security best practices and avoid hardcoding any sensitive data in your code. Using environment variables will help keep sensitive information secure and allow for easy configuration changes in the future.
5. Start and Monitor your Bot
Start your bot by running the necessary commands or scripts provided by the hosting platform. Monitor the bot’s logs and ensure that it starts up successfully without any errors or issues. Set up logging or monitoring services to track and analyze the bot’s performance and uptime.
6. Test the Live Bot
Once your bot is deployed and running, invite it to your Discord server and perform live tests to verify its functionality. Test the commands, verify its responsiveness, and ensure that it interacts correctly with users on your server. Making live tests will help you catch any potential issues that may have been missed during the development and testing stages.
Deploying your bot to a live server marks an exciting milestone in your bot development journey. It allows you to share your creation with others, gather real-time feedback, and provide a valuable service to your Discord community.
Remember to stay vigilant and regularly update and maintain your bot as needed. Periodically review logs, monitor performance, and address any reported issues or bugs promptly to keep your bot running smoothly and deliver an excellent user experience.
Congratulations on successfully deploying your Discord bot! Now, sit back, watch it in action, and enjoy the interactions and positive impact it brings to your community.
Conclusion
Congratulations on completing your journey to create a bot on Discord! Throughout this guide, we have explored various key aspects of bot development, from setting up a Discord server to coding and deploying your bot. By now, you should have a solid understanding of what Discord is, the concept of Discord bots, and how to create one from scratch.
We began by introducing Discord and its features, highlighting its significance as a popular communication platform. Then, we delved into the concept of Discord bots and their benefits in enhancing server functionality and user experience. With this foundation, we moved on to the practical steps of getting started, including setting up a Discord server and creating a Discord application.
Once the initial setup was complete, we explored the process of coding the bot using JavaScript and the Discord.js library. We covered key components such as connecting the bot to the server, responding to commands, and adding additional functionality through event handling and custom commands.
With the core functionality in place, we discussed finalizing and testing the bot to ensure its reliability and performance. We explored features like handling events, adding commands, and integrating external APIs. These steps allowed us to provide a stable and engaging bot that met the needs of the Discord server community.
Lastly, we covered deploying the bot to a live server and making it available for server members and the wider community. We discussed the steps involved in choosing a hosting platform, setting up the server, and monitoring the bot’s performance.
Now, armed with the knowledge and experience gained throughout this journey, you have the power to create and customize your own Discord bots. Whether it’s for moderation, automation, information retrieval, or entertainment, Discord bots offer endless possibilities for enhancing the Discord experience for you and your server members.
Remember to continue learning, exploring new functionalities, and refining your bot based on user feedback and evolving community needs. With dedication and creativity, you can create bots that make a lasting impact and leave a positive impression on your Discord community.