Introduction
Welcome to this guide on how to link Discord to FiveM! Discord is a popular messaging and communication platform, while FiveM is a modification framework for the popular game Grand Theft Auto V. By linking Discord to FiveM, you can create a seamless and integrated experience for your gaming community.
Discord offers a wide range of features that can enhance your FiveM server, such as real-time voice and text communication, server channels, and the ability to create a vibrant community hub. By integrating Discord with FiveM, you can streamline administrative tasks, improve communication among players, and create an immersive gaming experience.
In this guide, we will walk you through the step-by-step process of linking Discord to FiveM. We will cover everything from creating a Discord server to configuring a Discord bot and installing the necessary plugins. By the end of this guide, you will have a fully operational Discord integration for your FiveM server.
Whether you are a server owner, an administrator, or just a passionate gamer looking to enhance your gaming experience, this guide is for you. No prior knowledge of Discord or FiveM is required, as we will explain each step in detail and provide helpful tips along the way.
So let’s dive in and get started on linking Discord to FiveM!
Step 1: Creating a Discord Server
The first step in linking Discord to FiveM is to create a Discord server. A Discord server acts as a hub for your gaming community, allowing players to connect, communicate, and coordinate activities. Creating a server is easy and can be done in a few simple steps:
- Open Discord and log in to your account. If you don’t have an account, you can create one for free.
- Click on the plus icon (+) on the left-hand side of the Discord homepage. This will open a new window where you can create your server.
- Choose a name for your server. This could be the name of your FiveM server or a name that represents your gaming community.
- Optional: You can also choose a region for your server. This determines the server’s geographical location and can affect latency. Choose a region that is closest to the majority of your players for optimal performance.
- Click on the Create button to create your server. Congratulations, you now have a Discord server!
Once your server is created, you can customize it by adding channels, roles, and permissions. Channels are where you can organize discussions and activities, while roles and permissions allow you to control access and privileges within your server.
Consider creating channels for different purposes, such as general chat, voice communication, announcements, and specific game-related discussions. This will help keep your server organized and make it easier for players to find the information they need.
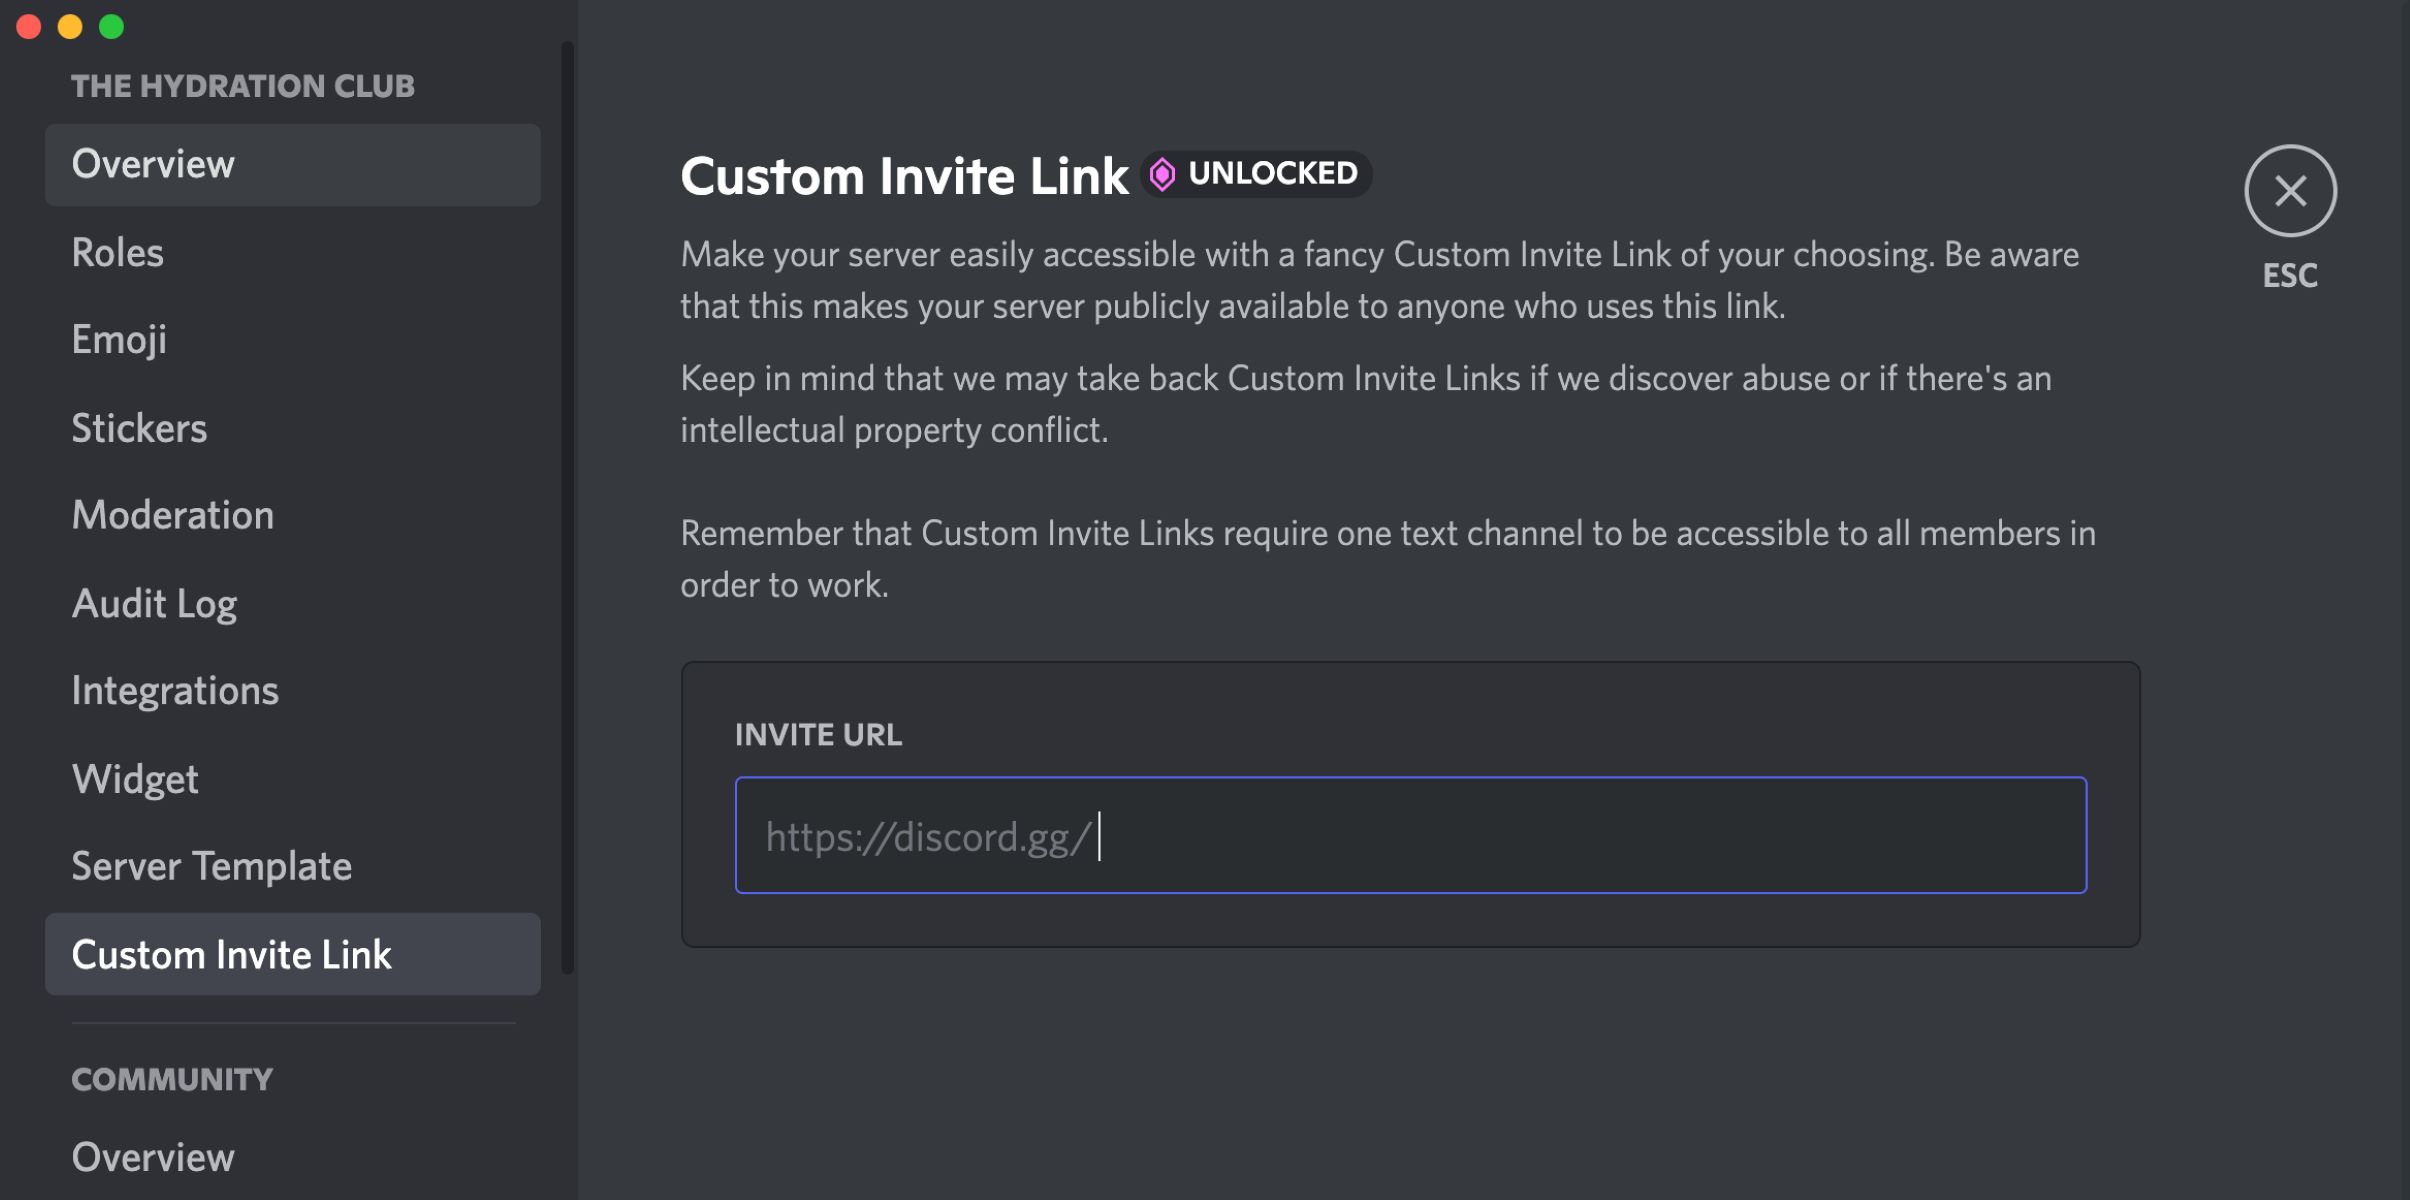
You can also invite players to join your Discord server by generating an invite link. Copy the link and share it with your community members via social media, forums, or other communication channels. Encourage players to join and participate in the community.
Creating a Discord server is the first step towards linking Discord to FiveM. In the next step, we will configure a Discord bot that will enable seamless communication between Discord and FiveM.
Step 2: Configuring the Discord Bot
In order to link Discord to FiveM, we need to configure a Discord bot. A Discord bot is an automated user that can perform various tasks on your server. By configuring a bot, we can enable communication between Discord and FiveM, allowing players to interact with the game through Discord.
Follow these steps to configure a Discord bot:
- Go to the Discord Developer Portal and log in using your Discord account. If you don’t have an account, you can create one for free.
- Click on the “New Application” button to create a new application.
- Enter a name for your application. This could be the name of your FiveM server or a name that represents your gaming community.
- Optional: You can customize the application further by adding an icon or description.
- Navigate to the “Bot” tab on the left-hand side of the page.
- Click on the “Add Bot” button to create a bot for your application.
- Under the bot settings, you can customize the bot’s username and profile picture.
- Toggle the “Public Bot” option if you want the bot to be publicly available for other servers.
- Take note of the bot token. This token is used to authenticate the bot and establish a connection between Discord and FiveM. Keep this token private and do not share it with anyone.
Now that we have configured the Discord bot, we can proceed to the next step, which is installing the FiveM Discord bot plugin.
It’s important to mention that during the configuration process, you may explore other features and options available in the Discord Developer Portal. However, for the purpose of this guide, the steps outlined above are sufficient to connect Discord to FiveM.
Step 3: Installing the FiveM Discord Bot Plugin
Now that we have configured the Discord bot, the next step is to install the FiveM Discord bot plugin. This plugin acts as a bridge between FiveM and Discord, allowing the two platforms to communicate seamlessly.
Follow these steps to install the FiveM Discord bot plugin:
- Open your FiveM server resources folder. This is where you can find all the server-side scripts and plugins.
- Create a new folder called “discord_bot” (or any other name you prefer) in the resources folder.
- Inside the “discord_bot” folder, create a new file called “__resource.lua”. This file is used to define the resource properties.
- Edit the “__resource.lua” file and add the following code:
lua
description ‘Discord Bot’
server_script ‘bot.lua’
- Save the “__resource.lua” file.
- Create a new file called “bot.lua” in the “discord_bot” folder.
- Edit the “bot.lua” file and add the code required to establish a connection between FiveM and Discord. You can find example code and documentation in the Discord.js documentation.
- Save the “bot.lua” file.
Once you have completed these steps, the FiveM Discord bot plugin is installed and ready to be used. This plugin will handle the communication between your FiveM server and the Discord bot.
Now, let’s move on to the next step, which is setting up the necessary permissions for the bot.
Step 4: Setting up Bot Permissions
After installing the FiveM Discord bot plugin, we need to set up the necessary permissions for the bot to function properly within your Discord server. By configuring the permissions, you can control what actions the bot can perform and how it interacts with your community.
Follow these steps to set up bot permissions:
- Go back to the Discord Developer Portal and navigate to your application.
- Click on the “OAuth2” tab on the left-hand side of the page.
- Under the “Scopes” section, select the “bot” checkbox.
- Scroll down and you will see a generated URL under the “Scopes” section. Click on the “Copy” button to copy the URL.
- Open a new tab in your web browser and paste the copied URL.
- Select the Discord server where you want to add the bot and click on the “Authorize” button.
- Complete any verification steps that may be required.
- Once the bot is added to your server, go to the server settings and navigate to the “Roles” tab.
- Create a new role specifically for the bot or use an existing role.
- Customize the role’s permissions to allow the necessary actions for the bot, such as sending messages, managing channels, and assigning roles.
- Assign the role to the bot in the server settings.
By configuring the bot’s permissions, you can ensure that it has the necessary access to perform its functions within your Discord server. However, it’s important to be cautious and only grant the bot permissions that are necessary for it to operate effectively and securely.
Now that the bot has been added to your server and its permissions are set up, we can move on to the next step, which is linking the Discord bot to FiveM.
Step 5: Linking the Discord Bot to FiveM
Now that we have created a Discord server, configured the Discord bot, installed the FiveM Discord bot plugin, and set up the necessary permissions, it’s time to link the Discord bot to FiveM. This final step will establish a connection between the two platforms, enabling seamless integration and communication.
Follow these steps to link the Discord bot to FiveM:
- Open the “bot.lua” file that you created in the “discord_bot” folder.
- Add the necessary code to establish a connection between the Discord bot and your FiveM server.
- Configure the bot to listen for specific events or commands from Discord and perform corresponding actions in FiveM.
- Save the changes to the “bot.lua” file.
- Start or restart your FiveM server to apply the changes.
Once your FiveM server is running, the Discord bot should be connected and ready to interact with your community. Players can use Discord to send commands, receive notifications, and participate in various server activities.
Make sure to test the integration by sending some test commands or triggering events in Discord to ensure that the communication between Discord and FiveM is working as expected. This will help you identify and resolve any issues before fully utilizing the integration.
Remember to provide clear instructions to your community members on how to use the Discord bot and take advantage of the integration. This could include commands, guidelines, and any specific rules or limitations.
Congratulations! You have successfully linked Discord to FiveM. The seamless integration between the two platforms will enhance your gaming community’s communication and coordination, creating a more immersive and enjoyable gaming experience.
Now, it’s time to start utilizing the Discord integration and explore the endless possibilities it offers for enhancing your FiveM server.
Step 6: Testing the Discord Integration
After linking Discord to FiveM and configuring the necessary settings, it’s crucial to test the Discord integration to ensure that everything is working as expected. Testing allows you to identify any issues or potential improvements in the integration, ensuring a smooth and seamless experience for your gaming community.
Follow these steps to properly test the Discord integration:
- Invite a few trusted members of your gaming community to assist with the testing process.
- Ensure that each tester has the necessary permissions to use the Discord bot commands and access restricted features.
- Communicate with the testers and provide them with specific instructions on what actions to perform within Discord and observe the corresponding results in FiveM.
- Encourage the testers to send commands, engage in conversations, and participate in activities to thoroughly assess the integration’s functionality and usability.
- Monitor and document any issues or unexpected behavior encountered during the testing phase.
- Based on the feedback and insights gathered from the testers, make any necessary adjustments or improvements to enhance the integration.
- Perform additional rounds of testing, focusing on specific functionalities or scenarios.
- Continuously communicate with your testing team and gather feedback to ensure that the issues are resolved and the integration is functioning smoothly.
Testing the Discord integration not only helps you identify and address any glitches or malfunctions but also provides an opportunity to gather feedback from your community members. Their input can be invaluable in improving the integration and tailoring it to better meet their needs and preferences.
Remember to keep an open line of communication with your community during the testing process. Inform them of any updates or changes made based on their feedback and thank them for their participation in refining the Discord integration.
By thoroughly testing the Discord integration, you can ensure a seamless connection between Discord and FiveM, creating a more engaging and immersive experience for your gaming community.
With the testing phase complete, you can now confidently leverage the power of Discord to enhance communication, coordination, and engagement within your FiveM server.
Conclusion
Linking Discord to FiveM is a powerful way to enhance your gaming community and create a seamless and immersive experience for your players. By integrating Discord with FiveM, you can streamline communication, coordinate activities, and engage with your community in exciting new ways.
In this guide, we discussed the step-by-step process of linking Discord to FiveM. We started by creating a Discord server, followed by configuring the Discord bot and installing the FiveM Discord bot plugin. We then set up the necessary permissions for the bot and finally linked the Discord bot to FiveM.
Throughout the process, we emphasized the importance of testing the Discord integration to ensure that everything is working smoothly. By testing the integration, you can identify any issues or potential improvements, making sure that the integration meets the needs and expectations of your gaming community.
Now that your Discord and FiveM platforms are linked, it’s time to take full advantage of the integrated features and functionalities. Encourage your community members to utilize Discord for communication, coordination, and engagement within your FiveM server.
Remember to continue monitoring and maintaining the integration, paying attention to any updates or changes that may enhance the functionality and performance. Stay open to feedback from your community and be proactive in addressing any concerns or suggestions they may have.
Enjoy the benefits of the Discord integration and leverage it to create a thriving and connected gaming community. The seamless communication and coordination provided by the integration will enhance the overall experience for your players and contribute to the success of your FiveM server.
Thank you for following this guide on how to link Discord to FiveM. We hope that it has provided you with the knowledge and tools to successfully integrate these platforms and create an exceptional gaming experience for your community.