Introduction
Discord has become a popular platform for online communities to connect, communicate, and collaborate. Whether you are a gamer, a hobbyist, or a professional, creating a public Discord server can help you build a thriving community around your interests or brand. By making your Discord server public, you can attract like-minded individuals and expand your reach beyond your immediate circle of friends. However, setting up and promoting a public Discord server requires careful planning and execution.
In this article, we will guide you through the step-by-step process of making your Discord server public. We will cover everything from the initial setup to customizing server settings, creating channels, setting up roles and permissions, adding bots and integrations, and promoting your server effectively. By following these steps, you’ll be well on your way to creating a vibrant and engaging community on Discord.
Whether you’re an experienced Discord user or just starting out, this guide is designed to provide you with all the information you need to successfully launch and manage a public Discord server. So, let’s dive in and get started on making your Discord server a bustling hub of activity!
Step 1: Set Up Your Discord Server
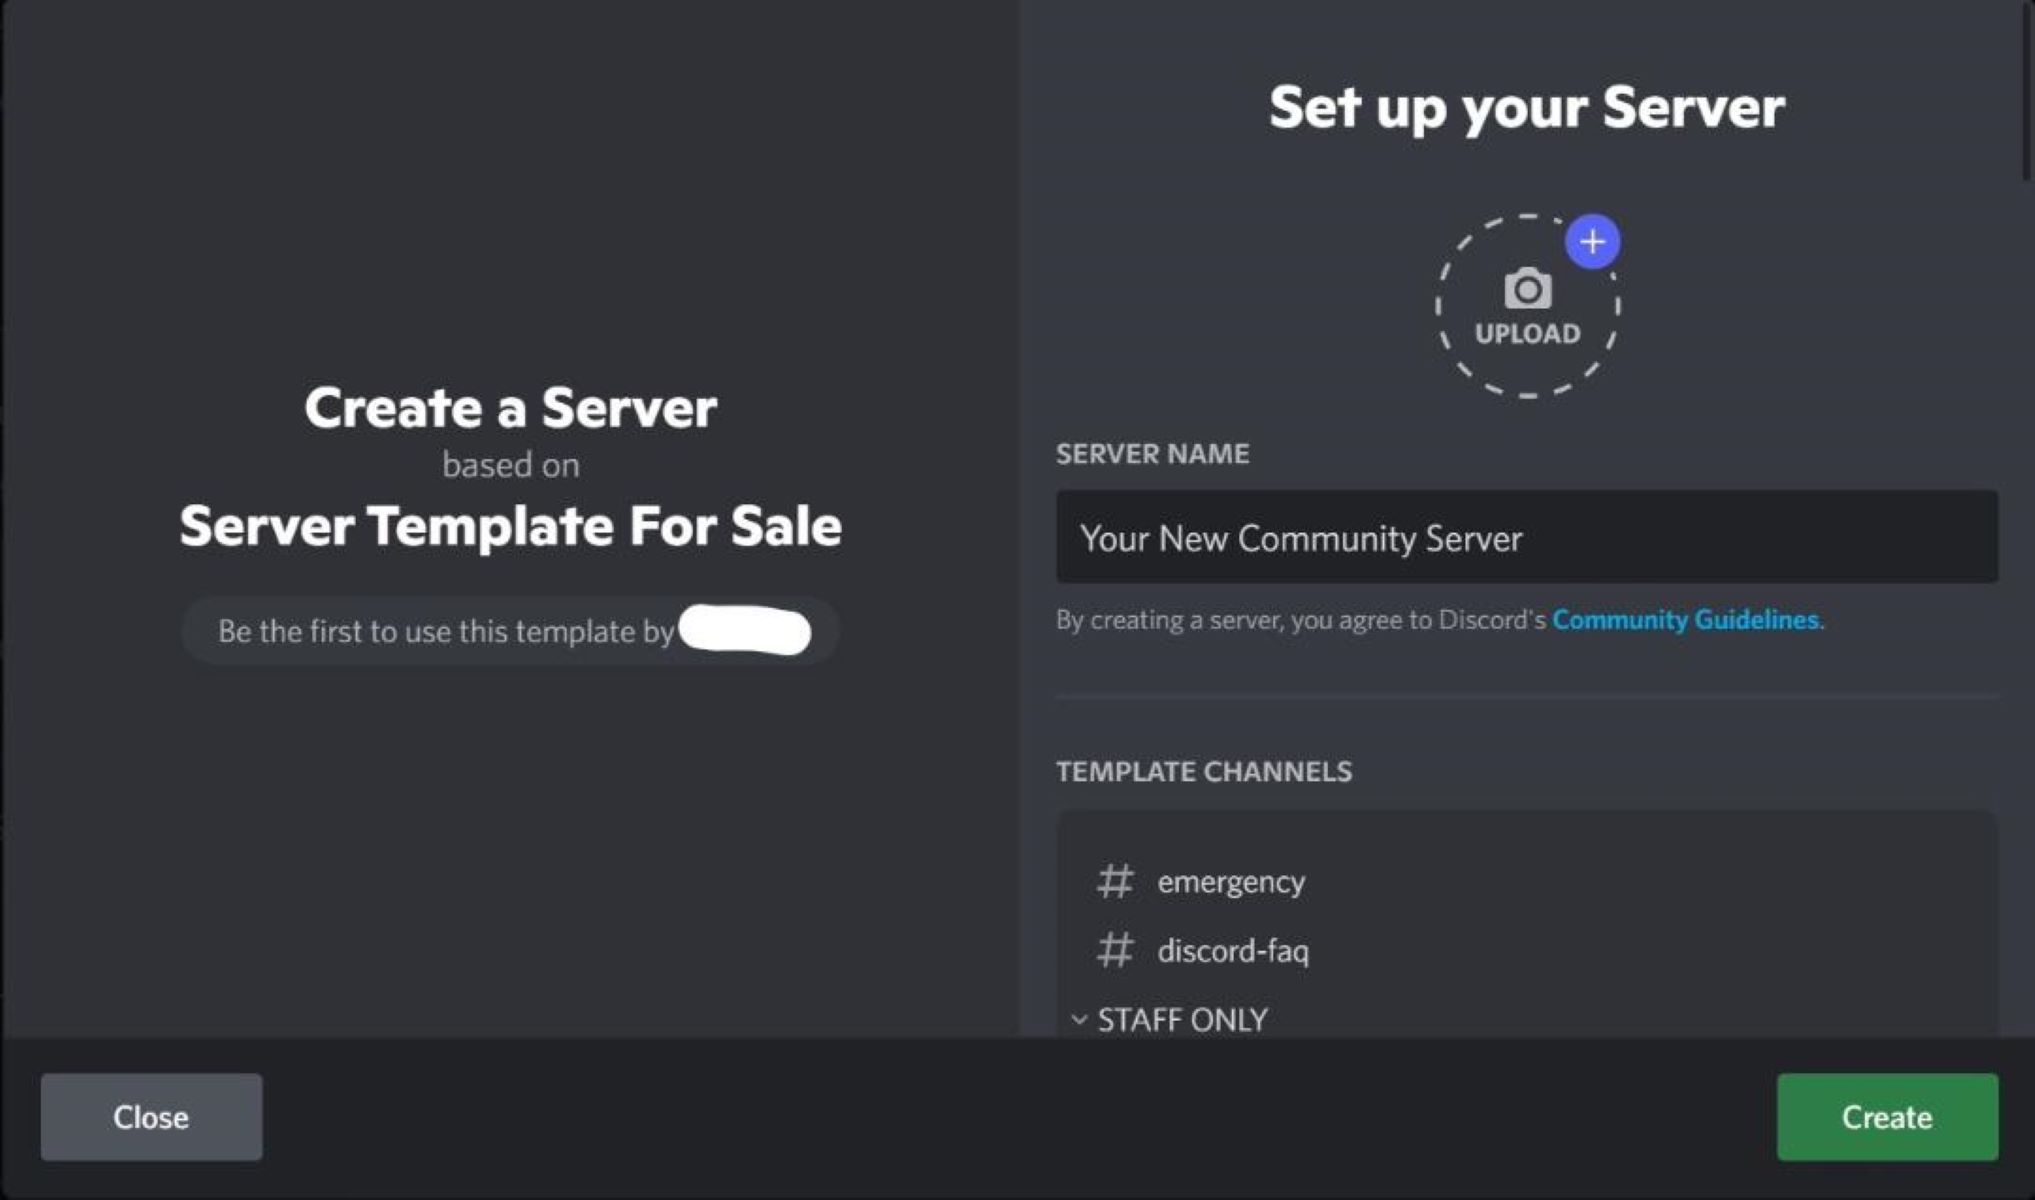
The first step in making your Discord server public is to set it up properly. If you don’t have a server yet, start by clicking on the “+” icon on the left sidebar of Discord and select “Create a Server.” Give your server a name and choose a region that is closest to your location for better connectivity.
Once your server is created, click on the server name at the top-left corner of the screen to access the server settings. Here, you can customize various aspects of your server, such as the server name, icon, and banner. Adding a catchy server icon and banner can help attract users and make your server stand out.
Next, navigate to the “Overview” tab in the server settings. Here, you can add a description for your server. Use this section to provide a brief summary of your server’s purpose, rules, and any relevant information. A well-written and informative description will entice users to join your server.
To further customize your server, you can also set a vanity URL. This allows you to have a personalized invite link that is easy to remember and share with others. To set a vanity URL, go to the “Invites” tab in the server settings and click on the “+ Create Instant Invite” button. Then, click on the “Settings” dropdown, and under “vanity URL,” choose a unique and memorable URL for your server.
Lastly, it’s essential to establish clear rules and guidelines for your server. This will help maintain a positive and inclusive community environment. Create a dedicated text channel, such as “rules” or “guidelines,” and outline the server rules there. Be specific about what behavior is expected and consequences for violating the rules.
By following these steps, you’ll have a well-structured and inviting Discord server ready to welcome members. In the next steps, we’ll explore how to create channels, set up roles and permissions, add bots and integrations, and promote your public Discord server effectively.
Step 2: Customize the Server Settings
Once you’ve set up your Discord server, it’s time to customize the server settings to enhance the user experience and optimize the server’s functionality.
Start by navigating to the server settings menu by clicking on the server name, then selecting “Server Settings.” Here, you’ll find several tabs that allow you to customize different aspects of your server.
Overview: In the “Overview” tab, you can update the server name, icon, and banner. A visually appealing and relevant icon and banner can leave a strong impression on potential members and make your server more engaging.
Roles: The “Roles” tab allows you to create and manage different roles for your server. Roles help you organize and assign permissions to various members. Create roles that reflect different responsibilities or levels of access within the community. For example, you can have roles like “Admin,” “Moderator,” or “Member.” Assign the appropriate permissions to each role to ensure smooth operation and moderation of the server.
Membership Screening: Discord offers a membership screening feature that allows you to set up questions that potential members must answer before joining the server. This can help filter out trolls, bots, or individuals who may not align with the server’s purpose or guidelines. Enable this feature by going to the “Membership Screening” tab and creating custom questions.
Server Boost: Discord offers a server boost feature that provides additional perks and benefits to the server and its members. By reaching certain boost levels, you can unlock features like improved audio quality, custom server banners, and more. Encourage members to boost the server in exchange for exclusive roles or privileges.
Integration: The “Integration” tab allows you to connect external services to your server, providing additional functionality. Some popular integrations include Twitch, YouTube, Spotify, and various bots that can enhance moderation, auto-moderation, and entertainment within the server. Explore the available options and choose integrations that align with your server’s goals and interests.
By customizing these server settings, you can create a unique and tailored experience for your server members. Next, we’ll explore how to create channels within your server to facilitate organized communication and engagement.
Step 3: Create Channels
Channels are a vital component of a well-structured Discord server. They help organize discussions, announcements, and different topics within your community. By creating channels, you can facilitate smooth communication and improve the overall user experience.
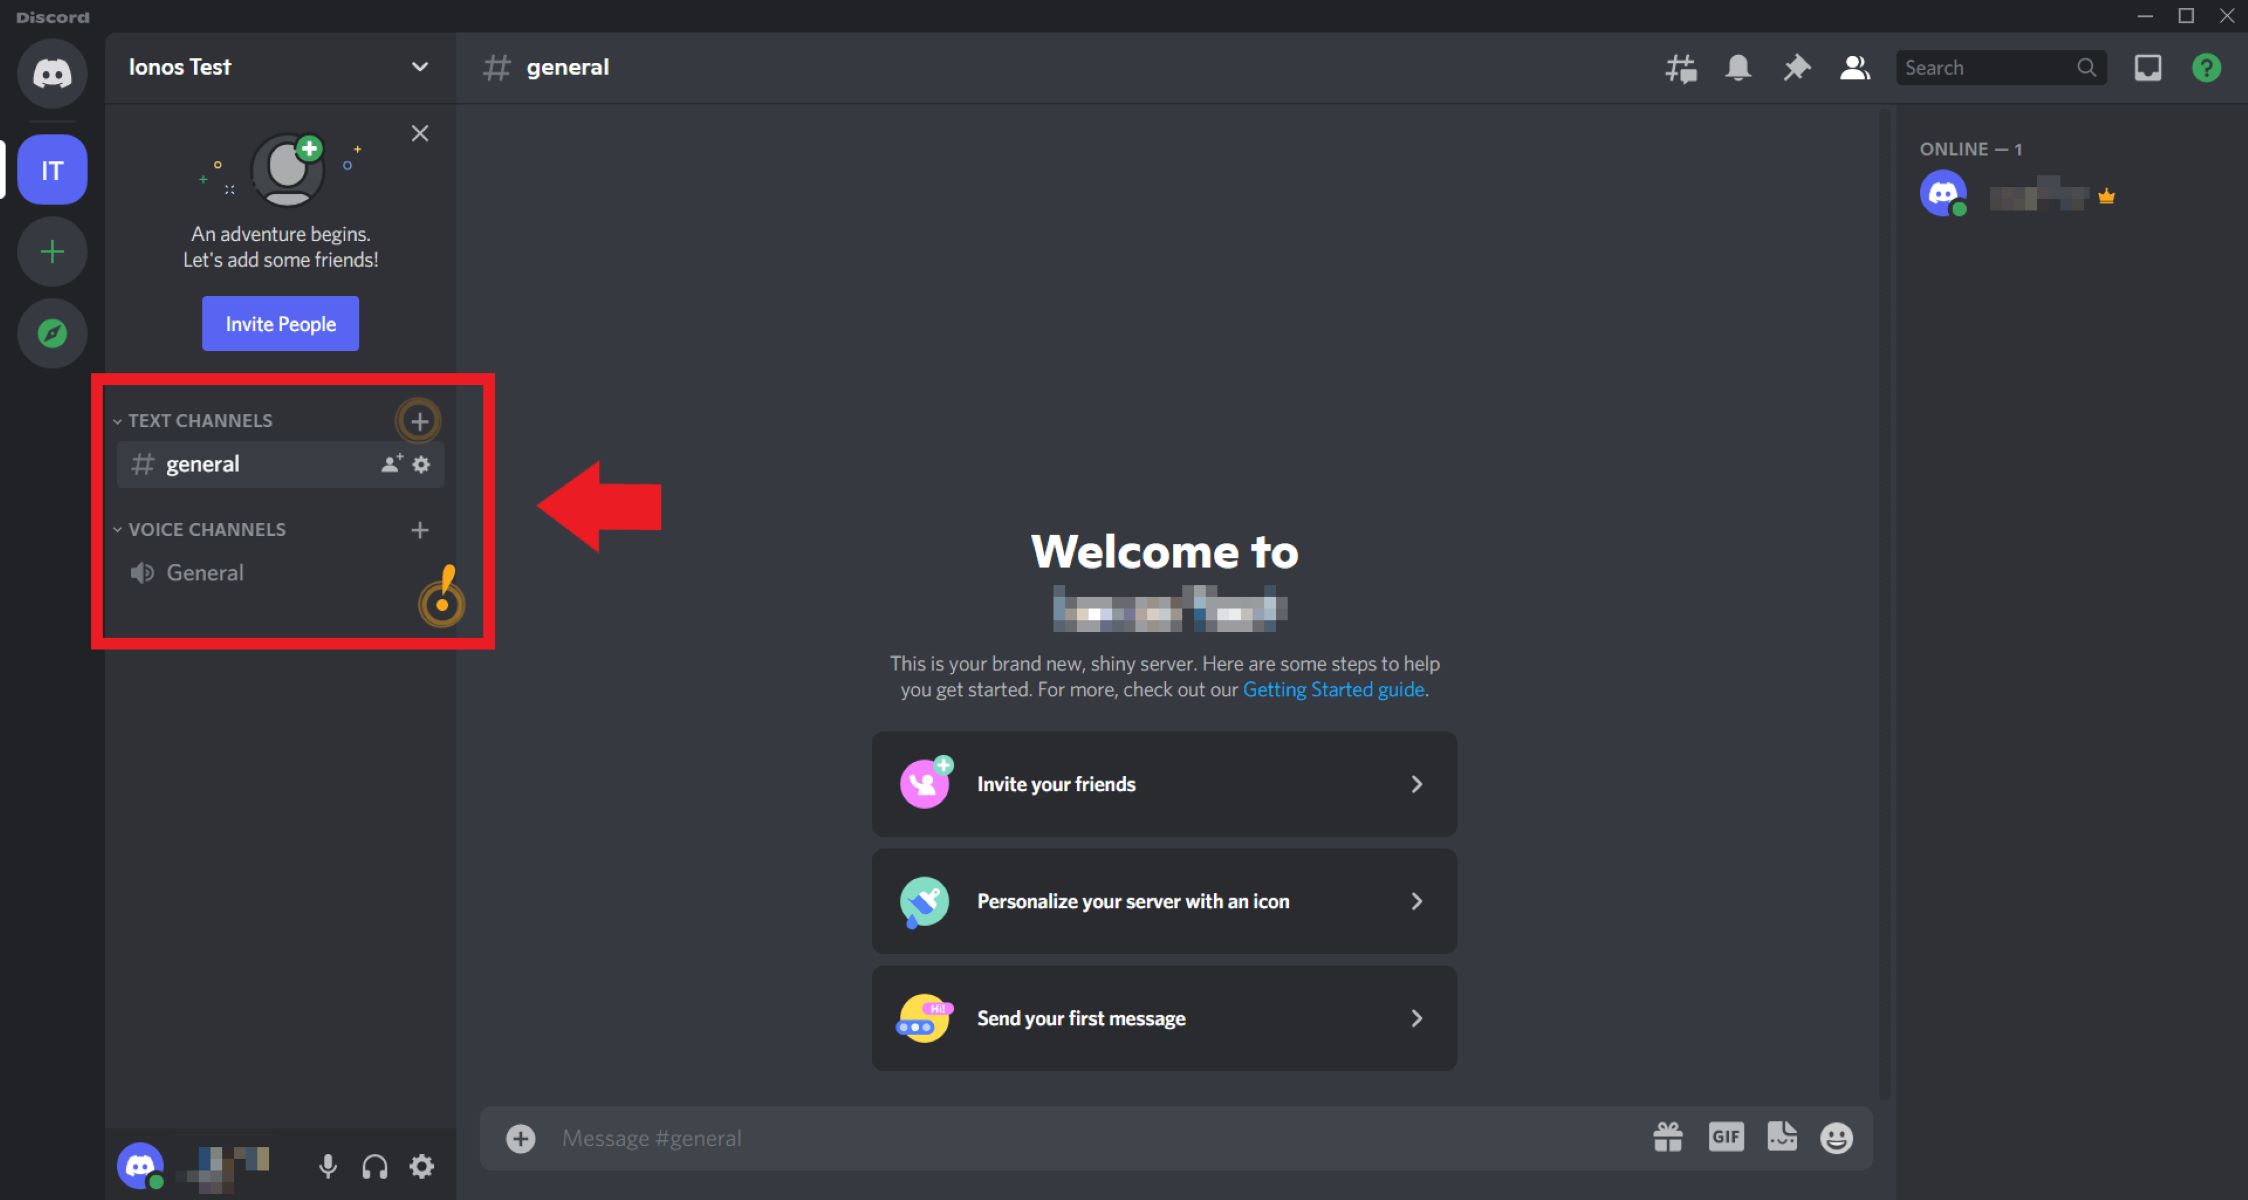
To create channels, go to the server settings menu and click on the “Channels” tab. Here, you’ll find options to create different types of channels, such as text channels and voice channels.
Text Channels: Text channels are where members can engage in written conversations. Start by creating channels that align with the main topics or interests of your server. For example, you can have channels for general chat, specific game discussions, or specialization within a hobby. Create channels that encourage interaction and cater to the needs of your community. You can also create announcement channels for important updates or news.
Voice Channels: Voice channels enable real-time voice communication within your server. Create voice channels for different purposes, such as multiplayer game sessions, study groups, or casual hangouts. Members can join these voice channels to have live conversations and collaborate. Consider creating channel categories to organize the voice channels by theme or purpose, making it easier for members to find the right channel to join.
Channel Permissions: It’s important to set up channel permissions to control who can access and interact within each channel. By configuring permissions, you can ensure that only authorized members or specific roles can view and participate in certain channels. This adds an extra layer of security and helps maintain a safe and inclusive environment within your server.
Channel Organization: As your server grows, it’s important to regularly review and organize your channels. Remove or archive inactive channels to keep your server clutter-free and ensure that members can easily find relevant discussions. Consider creating a “Welcome” or “Information” channel to provide new members with essential information about your server, such as rules, guidelines, and FAQs.
By creating channels and organizing them effectively, you can create a well-structured and engaging community environment within your Discord server. In the next step, we’ll delve into setting up roles and permissions to manage user access and moderation within the server.
Step 4: Set Up Roles and Permissions
Roles and permissions play a crucial role in managing user access and moderating your Discord server. By setting up roles and assigning appropriate permissions, you can ensure the smooth operation and maintain a safe and organized community for your members.
To set up roles, navigate to the server settings menu and click on the “Roles” tab. Here, you can create custom roles by clicking on the “+” button. Give each role a descriptive name that reflects its purpose or responsibility within the server.
Once you’ve created the roles, you can assign them specific permissions. Discord offers a wide range of permissions that can be granted or denied for different actions or features. Some common permissions include managing channels, sending messages, kicking or banning members, and more. Take the time to carefully consider the permissions you assign to each role to ensure the smooth functioning and security of your server.
It’s also possible to assign multiple roles to a single user. This allows you to grant different levels of access or responsibilities within the server. For example, you might have a “Moderator” role that can manage channels and kick or ban members, as well as a “Member” role that has regular user permissions. By layering roles, you can create a hierarchical structure that aligns with your server’s needs.
Consider creating a separate role for server administrators or owners. These roles should have full control and access to all server settings and permissions. Restrict this role to trusted individuals who can effectively manage and maintain the server.
To assign roles, go to the member’s list in the server settings menu. Click on a member’s name and select the roles you want to assign to them. This allows you to tailor the experience and access for each individual based on their role within the community.
Regularly review and update roles and permissions as your server evolves. Remove or adjust roles for inactive or departed members, and ensure that new members receive the appropriate roles to participate effectively in the community.
By setting up roles and permissions thoughtfully, you can effectively manage user access, delegate responsibilities, and create a well-moderated and organized Discord server. In the next step, we’ll explore how to add bots and integrations to enhance the functionality and engagement within your server.
Step 5: Add Bots and Integrations
Bots and integrations can greatly enhance the functionality and engagement within your Discord server. They provide automated features, moderation tools, and entertainment options that make your server more interactive and enjoyable for members. Adding bots and integrations is simple and can be done through the Discord website or various bot listing platforms.
To add bots to your server, start by finding a bot that suits your server’s needs. There are numerous bot listing platforms available, such as top.gg or Discord Bot List, where you can discover and browse a variety of bots. Look for bots related to moderation, music, games, or any other specific features you want to include in your server.
Once you’ve found a bot you want to add, make sure to check its user reviews, features, and reliability. Ensure that the bot has a good track record and is regularly updated by its developer.
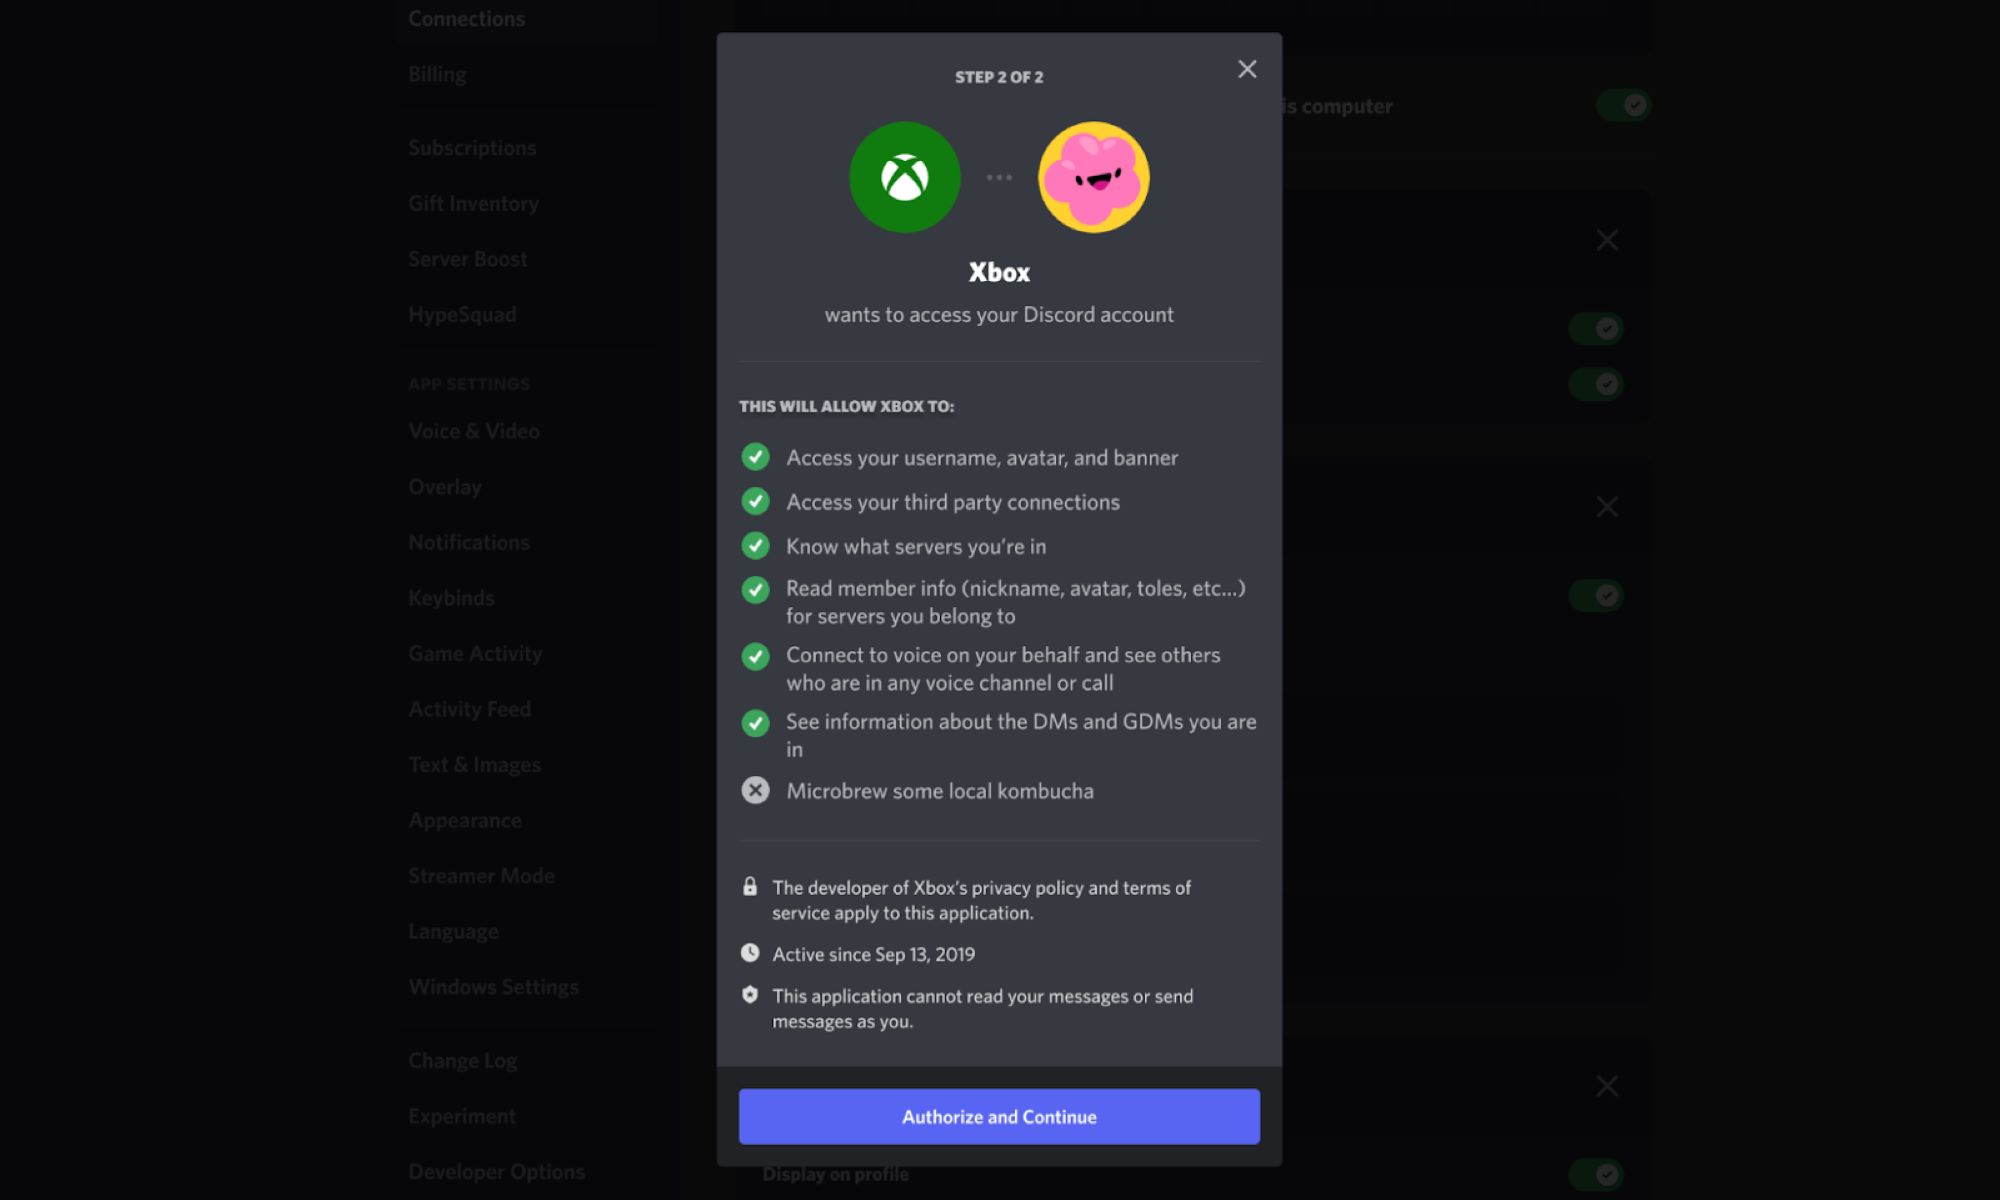
To add a bot to your server, visit the bot’s page and look for an “Add to Server” or “Invite” button. Click on it, select the server you want to add the bot to, and follow the authorization process. You can also customize the permissions the bot will have within your server, depending on its intended functionality.
After adding a bot, it will appear in your server’s member list with a special bot tag. Some bots may require additional setup or configuration before they can be fully functional. Read the bot’s documentation or follow any provided instructions to set it up according to your preferences.
Apart from bots, you can also integrate external services, such as Twitch, YouTube, Spotify, or other platforms, into your Discord server. Integrations allow you to automatically broadcast live streams, share music, or display updates from various sources. These integrations can be added by authorized server members through the server settings menu, under the “Integration” tab.
When adding bots and integrations, be mindful of the permissions you grant them. Make sure to review and restrict their access to only what is necessary for their intended purpose. Regularly monitor the bot’s performance and reliability. If a bot becomes inactive or causes issues, consider removing it or finding alternatives.
By adding bots and integrations, you can provide your server members with a wide range of features and interactions that enrich their experience. In the next step, we’ll discuss how to effectively promote your public Discord server to attract more members and build a thriving community.
Step 6: Promote Your Public Discord Server
Promoting your public Discord server is crucial to attract new members and build a thriving community. Here are some effective strategies to promote your Discord server and increase its visibility:
1. Share it on social media: Utilize platforms like Twitter, Instagram, Facebook, or Reddit to share announcements, updates, and invite links to your Discord server. Engage with communities relevant to your server’s niche and join discussions to spread the word about your server.
2. Collaborate with influencers: Reach out to influencers or content creators in your niche who have a large following. Collaborate with them to cross-promote each other’s platforms, including your Discord server. Their endorsement can significantly increase your server’s exposure and attract new members.
3. Utilize Discord server listing platforms: Submit your server to popular Discord server listing platforms like Discord.me, Discordservers.com, or Disboard.org. These platforms categorize servers based on their topic or community, making it easier for users to discover and join servers of interest.
4. Engage with your community: Actively participate in your server’s discussions and foster a welcoming environment. Encourage your members to invite their friends and provide incentives, like exclusive roles or giveaways, for inviting new members. Host events, contests, or special activities within your server to keep members engaged and encourage them to invite others.
5. Guest appearances and collaborations: Collaborate or make guest appearances on other Discord servers or communities related to your server’s niche. Participate in discussions, provide valuable insights, and mention your server when appropriate. This can attract members who share similar interests and are more likely to engage with your community.
6. Create engaging content: Produce high-quality and valuable content related to your server’s niche, such as videos, articles, or livestreams. Share this content on platforms like YouTube, Twitch, or Medium, and include links to your Discord server in the description or bio. Captivating content can attract like-minded individuals and pique their interest in joining your community.
Remember, promoting your Discord server is an ongoing effort. Be consistent in your promotional activities, adapt your strategies based on the feedback and needs of your community, and always provide a welcoming environment for new members. By actively promoting and maintaining your server, you can grow a thriving and engaged community over time.
Conclusion
Creating and managing a public Discord server requires careful planning, customization, and active promotion. By following the steps outlined in this guide, you can set up a well-structured server, customize its settings, create channels, set up roles and permissions, add bots and integrations, and effectively promote your server to attract new members.
Remember to continuously engage with your community, listen to feedback, and adapt your strategies to meet the needs of your members. Provide a welcoming and inclusive environment, enforce clear rules, and foster a sense of belonging for all participants.
Building a thriving Discord community takes time and effort, but with the right approach, it has the potential to grow into a vibrant and active space where like-minded individuals can connect, collaborate, and enjoy shared experiences.
So, what are you waiting for? Start implementing these steps and create the public Discord server of your dreams!