Introduction
Welcome to the world of Discord, a popular communication platform for gamers, communities, and friends. With its versatile features and user-friendly interface, Discord allows you to create your own servers and connect with like-minded individuals. Whether you’re looking to build a tight-knit community, organize a gaming team, or host a private discussion group, Discord has you covered.
One of the key aspects of managing a Discord server is ensuring its privacy. While some servers are meant to be open and accessible to the public, others require a more intimate setting. In this article, we will guide you through the process of making your Discord server private, safeguarding your conversations and community from unwanted intrusion.
Creating a private Discord server provides you with control over who can access and participate in your server. This allows you to maintain a tightly-knit community where members feel comfortable sharing their thoughts and engaging in discussions without the worry of outside interference.
By following a few simple steps, you can easily set up your private Discord server and customize its privacy settings according to your preferences. From adjusting server settings to managing roles and permissions, we’ll cover all the necessary steps to ensure your server remains private and secure.
So, let’s dive in and explore how you can make your Discord server private, creating an exclusive space where your members can connect, collaborate, and enjoy their shared interests without any disruptions.
Step 1: Creating a Discord Server
Before you can make your Discord server private, you must first create a server. If you already have a server set up, you can skip this step and proceed to the next section.
To create a Discord server, follow these simple steps:
- Open Discord and log in to your account. If you don’t have an account, you can sign up for free.
- Once you’re logged in, you’ll be greeted with the Discord app interface. Look for the “+” icon on the left sidebar and click on it. This will prompt a drop-down menu to appear.
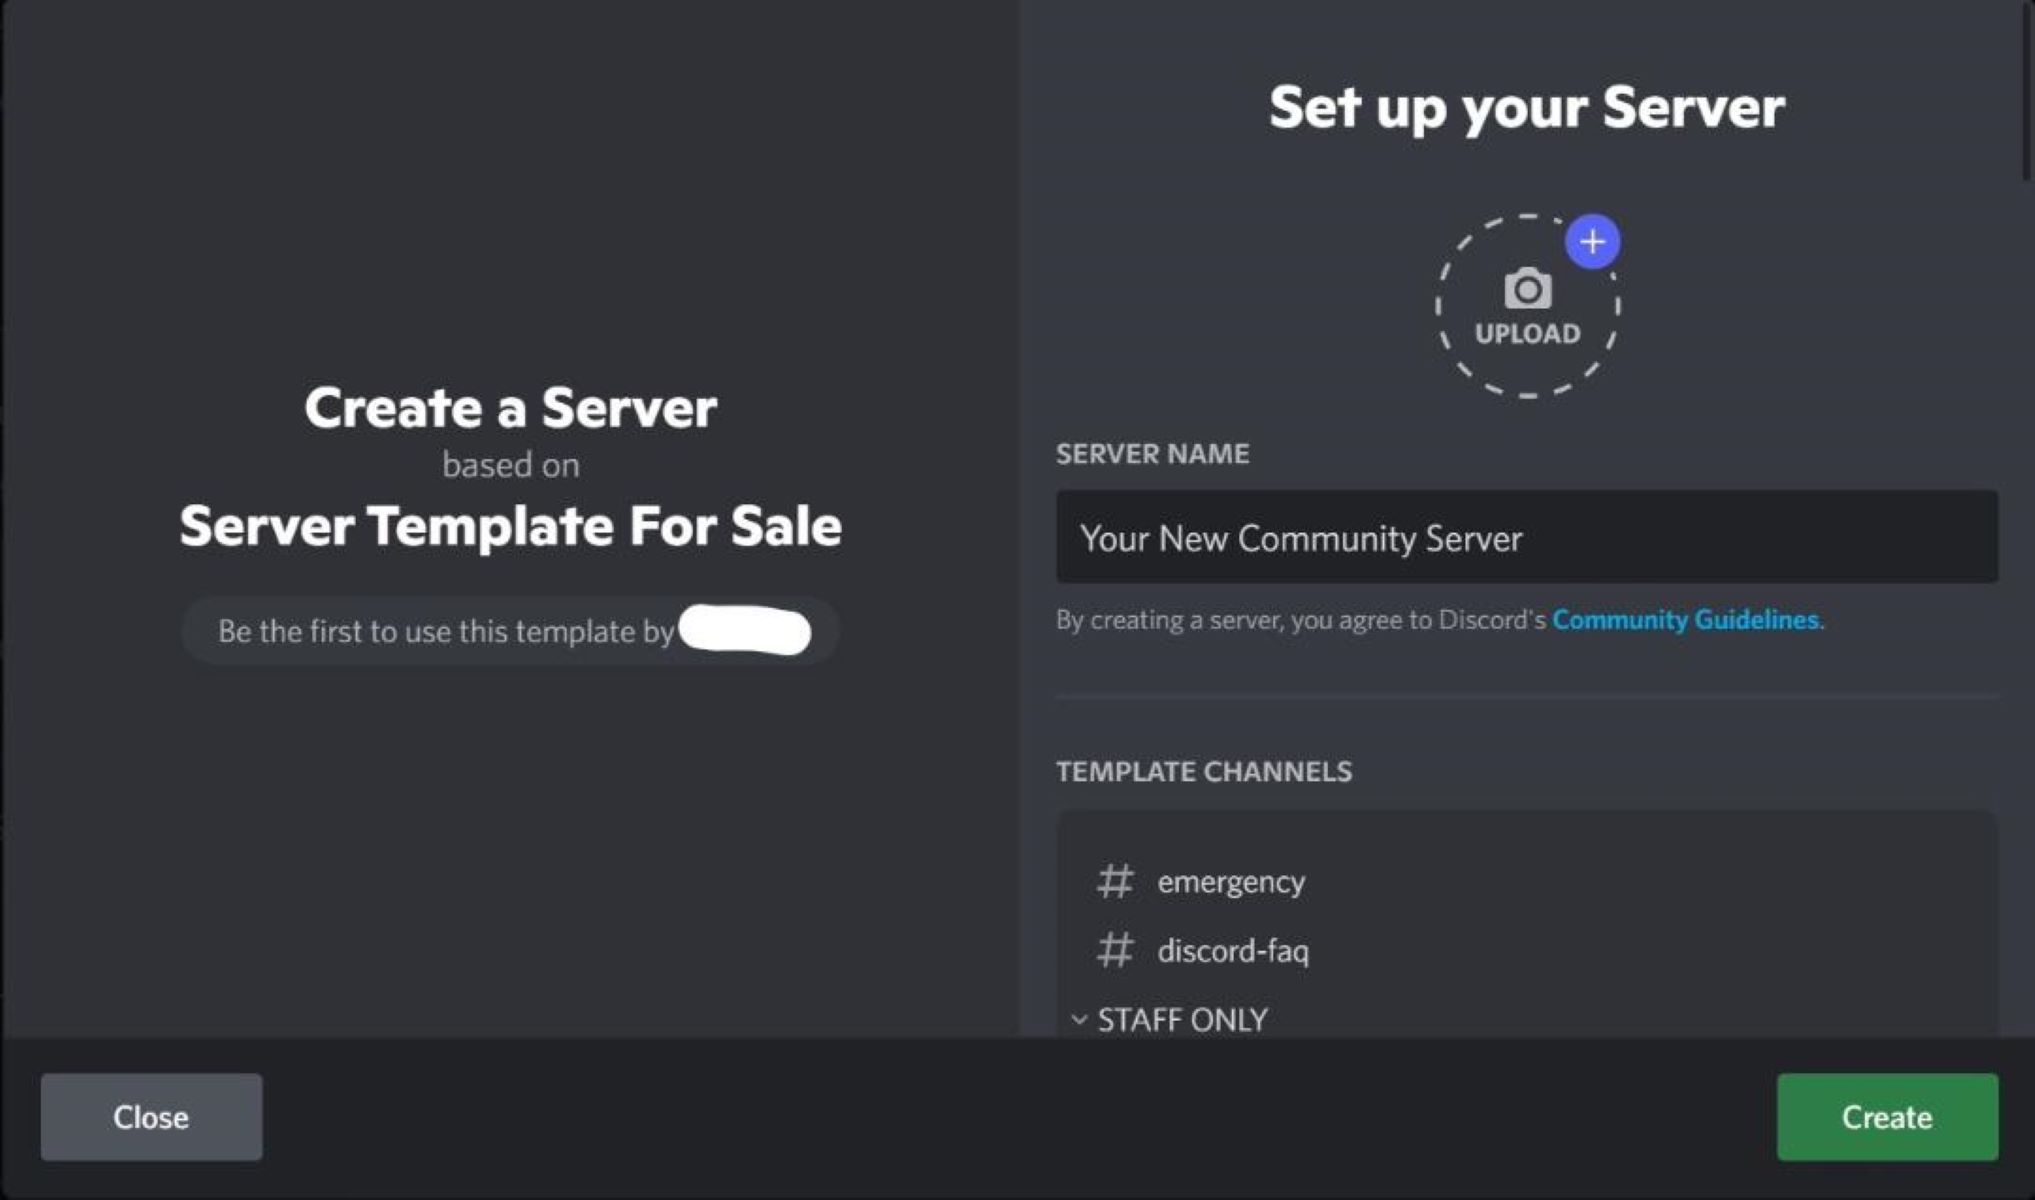
- In the drop-down menu, select “Create a Server.” A new window will open, allowing you to customize your server settings.
- Enter a name for your server. This can be anything you like, but it’s recommended to choose a name that reflects the purpose or theme of your server.
- You can also add an optional server icon by clicking on the circular area next to the server name. This can be an image or logo that represents your server.
- Once you’ve set the server name and icon, choose a region closest to your location from the server region options. This helps ensure a stable connection for users joining your server.
- Finally, click on the “Create” button to complete the server creation process. Congratulations, you now have your own Discord server!
With your new server in place, you’re ready to proceed to the next step and begin customizing the privacy settings to make your server private.
Step 2: Accessing Server Settings
Once you have created your Discord server, the next step is to access the server settings. This is where you’ll find all the options to customize your server, including privacy settings.
To access the server settings in Discord, follow these steps:
- First, make sure you are logged in to your Discord account and have the Discord app open.
- On the left sidebar, locate your server’s name and click on it. This will open up your server’s main conversation channel.
- In the top-left corner, you’ll see the server name again, along with a small downward-facing arrow. Click on this arrow to reveal a drop-down menu.
- In the drop-down menu, select “Server Settings.” This will open the server settings window, where you can customize various aspects of your server.
Alternatively, you can also access the server settings by right-clicking on the server’s name in the left sidebar and selecting “Server Settings” from the context menu that appears.
Once you’ve accessed the server settings, you’ll be able to modify different aspects of your server, including channels, roles, and permissions. But for now, let’s focus on adjusting the privacy settings to make your server private and exclusive to invited members only.
Now that you’re familiar with accessing server settings, let’s move on to the next step and explore how to adjust the privacy settings of your Discord server.
Step 3: Adjusting Privacy Settings
Adjusting the privacy settings of your Discord server is crucial to make it private and ensure that only invited members can access and participate in conversations. By customizing these settings, you can create a secure and exclusive environment for your community. Let’s explore how you can adjust the privacy settings:
- Go to the server settings by following the steps outlined in the previous section.
- In the server settings window, click on the “Privacy Settings” tab located on the left sidebar. This will display the privacy options for your server.
- Under the “Privacy Settings” tab, you’ll find three main options:
- Server Privacy: This option allows you to choose the level of privacy for your server. By default, servers are set to “Public,” which means anyone can join. To make your server private, select the “Invite Only” option. This ensures that only members who have received an invite link can join your server.
- Read Message History: This option determines who can view past messages in your server’s channels. If you want to make your server more private, you can choose to restrict this option to only members with specific roles.
- Hide Server: Enabling this option makes your server invisible to the public server list. This adds an extra layer of privacy, preventing random users from discovering and joining your server.
By adjusting these privacy settings to your desired level of exclusivity, you can create a private Discord server that is only accessible to invited individuals. This ensures that your community remains secure and protected from unwanted intrusions.
With the privacy settings adjusted, your Discord server is now well-protected. However, to further manage the access and permissions of your members, it’s essential to customize the roles and permissions. Let’s proceed to the next step to learn how to do that.
Step 4: Customizing Roles and Permissions
Customizing roles and permissions in your Discord server is an important step in ensuring proper moderation and organization. By setting up roles and assigning specific permissions, you can control what each member can do within the server. Let’s explore how you can customize roles and permissions:
- Access the server settings by following the steps mentioned in the previous sections.
- In the server settings window, click on the “Roles” tab located on the left sidebar. This will display the existing roles in your server.
- To create a new role, click on the “+” button located next to the roles list.
- Enter a name for the new role and customize its permissions. You can choose from a variety of permissions, such as managing channels, sending messages, or kicking members.
- Once you have created the new role, you can assign it to specific members by going back to the main server settings window and clicking on the “Members” tab on the left sidebar.
- Click on the “+” button located next to the member list and select the member you want to assign the role to.
- From the roles list, check the box next to the role you want to assign to the member.
- Repeat these steps for each role and member you want to customize.
By customizing roles and permissions, you have more control over the actions and functionalities of each member in your private Discord server. This allows you to manage moderators, administrators, and other specific roles with ease and ensure that your community runs smoothly.
Now that you’ve customized roles and permissions to your liking, it’s time to invite members to your private server. Let’s move on to the next step and learn how you can do that.
Step 5: Inviting Members to Your Private Server
With your Discord server set to private and roles and permissions customized, it’s time to invite members to join your exclusive community. By sending invite links, you can control who can join your server and ensure that only invited individuals can access your private discussions. Let’s explore how you can invite members to your private server:
- Access the server settings by following the steps mentioned in the previous sections.
- In the server settings window, click on the “Invite People” tab located on the left sidebar. This will open the invite settings.
- Click on the “Create a New Invite” button to generate a new invite link.
- Set the expiration duration for the invite link. You can choose from options such as 24 hours, 7 days, or never.
- Specify the number of uses for the invite link. This determines how many times the link can be used before it becomes invalid.
- Once you have configured the invite settings, click on the “Generate” button to create the invite link.
- Copy the invite link and share it with the individuals you want to invite to your private server.
When someone clicks on the invite link and joins your server, they will be automatically assigned the default role or the role you have specified for new members. This allows you to control their access and permissions from the start.
Remember to only share the invite link with trusted individuals and ensure that it doesn’t fall into the wrong hands. You can always generate new invite links and revoke old ones if needed.
By inviting members to your private Discord server, you can create a close-knit community where conversations are exclusive to invited individuals. This fosters a sense of security, trust, and intimacy within your server.
With members invited and your private server up and running, you have successfully created a private and secure space for your community to connect, collaborate, and enjoy their shared interests.
Now that you’ve completed all the steps, you are ready to manage your private Discord server and foster a thriving community! Remember to regularly monitor the server, adjust settings as needed, and engage with your members to create a vibrant and welcoming environment.
Conclusion
Congratulations! You have successfully learned how to make your Discord server private, ensuring that only invited members can access and participate in your server. By following the steps outlined in this guide, you have taken important measures to safeguard your community and create a secure environment for discussions.
Creating a private Discord server allows you to foster a sense of exclusivity and intimacy within your community. It ensures that your members feel comfortable sharing their thoughts and engaging in discussions without the worry of unwanted interference.
Remember to regularly review and adjust your server’s privacy settings to align with your community’s needs. By customizing roles and permissions, you can further enhance the management and organization of your server, assigning specific responsibilities to different members.
Inviting members to your private server allows you to control who can join and be part of your community. By sharing invite links with trusted individuals, you can ensure that your server remains a safe and welcoming space for everyone involved.
As you continue to manage and grow your private Discord server, don’t forget to engage with your members, encourage discussions, and host activities that bring everyone together. Building a strong and vibrant community takes time and effort, but the rewards are immeasurable.
Enjoy the journey of managing your private Discord server, and may your community thrive and flourish as you create a space for like-minded individuals to connect and share their passions.